
18
Visiting .NET MAUI
So far, we have talked about Blazor WebAssembly and Blazor Server, but what about the third option?
In this chapter, we will visit .NET MAUI, Microsoft’s new cross-platform development platform.
This chapter will not be a deep dive into .NET MAUI, since that can be a book all in itself.
In this chapter, we will cover the following:
- What is .NET MAUI?
- Creating a new project
- Looking at the template
- Developing for Android
- Developing for iOS
- Developing for macOS
- Developing for Windows
- Developing for Tizen
The idea for this chapter is for you to use it as a reference, so that you will be able to implement a new project on your own.
Technical requirements
This chapter is a reference chapter and is not connected in any way with the book’s other chapters.
You can find the source code for this chapter at https://github.com/PacktPublishing/Web-Development-with-Blazor-Second-Edition/tree/main/Chapter18.
What is .NET MAUI?
We’ll start with a bit of history.
Xamarin is a software company founded in May 2011 by the engineers who created Mono, a free and open-source version of .NET Framework. Microsoft acquired the company in 2016 and it is now a vital part of the .NET development platform, providing tools and services for building native cross-platform mobile apps using C# and .NET. Xamarin’s technology allows developers to write native iOS, Android, and Windows apps using a single shared code base, making it easier to develop and maintain apps for multiple platforms.
.NET MAUI (Multi-Platform App UI) is the new framework from Microsoft, which is an evolution of Xamarin.Forms.
This is a way to create one UI, deploy it to many different platforms, and get native controls on each platform. .NET MAUI can also host Blazor, which is called Blazor Hybrid. We will not get native controls when we use Blazor Hybrid. It will render web content.
Many years ago, I sat in a meeting with a bunch of consultants. The company I was working for wanted to invest in an app, and we turned to one of the big consultancy firms in Sweden to get some help on how we should proceed.
After a week, we had another meeting where they presented their findings. Their recommendation was to build natively and not use any of the cross-platform frameworks.
They had a bunch of arguments, but two that really stuck with me are as follows:
- Native apps look better and give the user a “real” device experience.
- Shared code (between platforms) means that if one platform has a bug, the same bug is now in all platforms.
Since .NET MAUI (formerly Xamarin.Forms) uses native controls, there is no way for the users to know the difference between developing a native app and developing using .NET MAUI. In the end it will look and feel like a native app. This is not true for Blazor Hybrid, which uses web controls. So there are some valid arguments for the first point. Now, we must ask ourselves, how important is that native look and feel? Looking at the apps on my iPhone, not many apps look the same, so I would argue it is not that important as long as you uphold a good UX. The second argument made me so angry. Were they trying to convince us that sharing code was terrible? Yes, they were. Sharing code between platforms is fantastic; you only need to write the code once, fix a bug once, and fix it on all platforms.
.NET MAUI gives us both options. We can use native UI with C# code or use Blazor Hybrid to get web controls.
Creating a new project
To develop cross-platform applications, we must install cross-platform tools in Visual Studio.
If you haven’t done that, please open the Visual Studio installer and select the .NET Multi-Platform App UI development workflow.
.NET MAUI has a couple of templates: .NET MAUI App, .NET MAUI Blazor App, and .NET MAUI Class Library.
.NET MAUI App
The .NET MAUI template uses XAML to create applications.
XAML is also used for WPF (Windows Presentation Foundation) and UWP (Universal Windows Platform). Every XAML version differs just a bit but if you have worked with WPF or UWP before, they should feel familiar.
The XAML is converted into native elements. This way, if our app runs on Windows, it will have the look and feel of a Windows application. If we run it on an iOS device, it will look and feel like a native iOS app.
This is probably our best option if we want to use our C# skills to create a cross-platform application. Using this approach, we will get the native feel without the need to write native code in Kotlin or Swift.
.NET MAUI Class Library
.NET MAUI Class Library is used to share content, classes, and functionality between applications.
.NET MAUI Blazor App
Since this is a book about Blazor, we will focus on the .NET MAUI Blazor App template. This is a template that embeds a Blazor application inside of a native shell.
For the .NET MAUI Blazor App project, we need at least:
- Android 7.0 (API 24) or higher
- iOS 14 or higher
- macOS 11 or higher, using Mac Catalyst
The .NET MAUI Blazor App project uses BlazorWebView to render the Blazor content. It is not the same as Blazor Server and does not run WebAssembly; it is simply the third option we have for hosting Blazor applications.
Let’s start a new project and dig a bit deeper:
- In Visual Studio, create a new .NET MAUI Blazor App project.
- Name the project
BlazorHybridApp, and make sure you select .NET 7. - At the top of Visual Studio, select Windows Machine and run the project.
That’s it. We now have our first cross-platform Blazor Hybrid app!

Figure 18.1: .NET MAUI app running on Windows
Great! We now have a project. In the next section, we will take a look at what the template looks like.
Looking at the template
When running the project, we should recognize the UI. It is the same Hello, world! page, the same counter, and the same weather forecast.
If we take a look in the Pages folder, we’ll find the Razor components, and if we open the Counter.razor file, we will find a familiar component that looks like this:
@page "/counter"
<h1>Counter</h1>
<p role="status">Current count: @currentCount</p>
<button class="btn btn-primary" @onclick="IncrementCount">Click me</button>
@code {
    private int currentCount = 0;
    private void IncrementCount()
    {
        currentCount++;
    }
}
To create a Blazor Hybrid app, adding components like this is what you need to know to get started, but let’s dig a bit deeper. The template is .NET MAUI App with some added Blazor startup code.
To understand what is happening, we will start in the Platforms folder. In the platforms folder, we will find different a folder for each platform we can develop for Android, iOS, Mac Catalyst, Tizen, and Windows.
This is the starting point for each platform, and they have a bit of a different implementation, but in the end, they all point to the file MauiProgram located at the project’s root.
The MauiProgram class sets everything up, like fonts, dependency injection, etc.
namespace BlazorHybridApp;
public static class MauiProgram
{
    public static MauiApp CreateMauiApp()
    {
        var builder = MauiApp.CreateBuilder();
        builder
            .UseMauiApp<App>()
            .ConfigureFonts(fonts =>
            {
                fonts.AddFont("OpenSans-Regular.ttf", "OpenSansRegular");
            });
        builder.Services.AddMauiBlazorWebView();
#if DEBUG
        builder.Services.AddBlazorWebViewDeveloperTools();
        builder.Logging.AddDebug();
#endif
        builder.Services.AddSingleton<WeatherForecastService>();
        return builder.Build();
    }
}
The essential thing in the file is UseMauiApp<App>, which gives us a clue about what is happening next. The next step is to load the App.xaml.
The App.xaml file has a bunch of resources for styling. The Blazor magic starts to happen in App.xaml.cs:
namespace BlazorHybridApp;
public partial class App : Application
{
    public App()
    {
        InitializeComponent();
        MainPage = new MainPage();
    }
}
It sets the application MainPage to an instance of the class MainPage. In MainPage.xaml, we have reached the first Blazor reference in the app, the BlazorWebView:
<BlazorWebView x:Name="blazorWebView" HostPage="wwwroot/index.html">
    <BlazorWebView.RootComponents>
        <RootComponent Selector="#app" ComponentType="{x:Type local:Main}" />
    </BlazorWebView.RootComponents>
</BlazorWebView>
In this case, we are referring to index.html, located in the wwwroot folder, and also set up the root component (similar to what we do in Program.cs in Blazor Server and Blazor WebAssembly).
Here, we can also add XAML components, which makes it possible to mix XAML and Blazor components. Even though the implementation looks different, we should be familiar with the concepts.
The index.html is almost the same as in Blazor WebAssembly:
<!DOCTYPE html>
<html lang="en">
<head>
<meta charset="utf-8" />
<meta name="viewport" content="width=device-width, initial-scale=1.0, maximum-scale=1.0, user-scalable=no, viewport-fit=cover" />
<title>BlazorHybridApp</title>
<base href="/" />
<link rel="stylesheet" href="css/bootstrap/bootstrap.min.css" />
<link href="css/app.css" rel="stylesheet" />
<link href="BlazorHybridApp.styles.css" rel="stylesheet" />
</head>
<body>
<div class="status-bar-safe-area"></div>
<div id="app">Loading...</div>
<div id="blazor-error-ui">
An unhandled error has occurred.
<a href="" class="reload">Reload</a>
<a class="dismiss"> </a>
</div>
<script src="_framework/blazor.webview.js" autostart="false"></script>
</body>
</html>
</a>
</div>
<script src="_framework/blazor.webview.js" autostart="false"></script>
</body>
</html>
The only difference worth mentioning is the JavaScript that differs from the others (Blazor Server and Blazor WebAssembly implementations). From this point, the application is now running pure Blazor.
As we can see in the MainPage.xaml, we are loading a Razor file called Main. The same file in Blazor Server and Blazor WebAssembly is called App.razor. The Main.razor file should also feel familiar:
<Router AppAssembly="@typeof(Main).Assembly">
    <Found Context="routeData">
        <RouteView RouteData="@routeData" DefaultLayout="@typeof(MainLayout)" />
        <FocusOnNavigate RouteData="@routeData" Selector="h1" />
    </Found>
    <NotFound>
        <LayoutView Layout="@typeof(MainLayout)">
            <p role="alert">Sorry, there's nothing at this address.</p>
        </LayoutView>
    </NotFound>
</Router>
This is where we find the router, where we configure where to find the Razor components, and handle the requests that are not found.
We will not go deeper into the Blazor parts because everything past our router is the same as any other Blazor hosting model (Blazor Server and Blazor WebAssembly). There is a MainLayout, NavMenu, and component for each function (Hello, world!, Counter, and Weather).
With Blazor Server and Blazor WebAssembly, we need to make JavaScript calls to access local resources like Bluetooth, a battery, and a flashlight, to name a few. Blazor Hybrid adds the ability to write code that directly accesses local resources. We can access the flashlight (because we all love things that light up) by using this code:
try
{
    if (FlashlightSwitch.IsToggled)
        await Flashlight.Default.TurnOnAsync();
    else
        await Flashlight.Default.TurnOffAsync();
}
catch (FeatureNotSupportedException ex)
{
    // Handle not supported on device exception
}
catch (PermissionException ex)
{
    // Handle permission exception
}
catch (Exception ex)
{
    // Unable to turn on/off flashlight
}
This code will not work if we run a Blazor Server or Blazor WebAssembly app.
Next, we will get our amazing app to run on Android.
Developing for Android
There are two options when it comes to developing for Android. We can run our application in an emulator or on a physical device.
To publish our application we need to have a Google Developer license, but for development and testing we don’t need one.
Running in an emulator
We first need to install an emulator to run our app on an Android emulator:
- In Visual Studio, open the menu Tools | Android | Android Device Manager.
- Press the New button, and configure a new device (the default settings should be OK):

Figure 18.2: Android device configuration
- Click Create to download a device image and configure it.
- Select the newly created emulator at the top of Visual Studio and run the project. Starting the emulator will take a couple of minutes. When developing, make sure not to close the emulator for a faster deployment time.
To get the emulator to run fast, we can enable hardware acceleration, depending on the processor we use.
To enable hardware acceleration, please refer to the official documentation: https://learn.microsoft.com/en-us/xamarin/android/get-started/installation/android-emulator/hardware-acceleration?pivots=windows
Great, we now have our app running inside an Android emulator:

Figure 18.3: App running inside an Android emulator
Next, we will run the application on a physical device.
Running on a physical device
If we want to try our application on a physical device, we need to do a few things on our Android device. This may differ from device to device.
First, we need to make sure the phone is developer-unlocked:
- Go to the Settings screen.
- Select About phone.
- Tap Build Number seven times until You are now a developer! is visible.
Second, we need to enable USB debugging:
- Go to the Settings screen.
- Select Developer options.
- Turn on the USB debugging option.
- Some devices also need to enable Install via USB.
We are now all set to try our app on a physical device.
- In the menu at the top of Visual Studio, click the arrow under Android local devices and select your device.
- Press Run, and Visual Studio will deploy the application to the device.
We should now have our application running on our device.
It is an extraordinary feeling to run code on another device. Over the years, I have developed over 100 applications for Windows 8 and Windows Phone. However, to this day, it still gives me the same feeling to see my application deploy to another physical device.
Next, we will look at what options we have for developing iOS.
Developing for iOS
Apple does not allow iOS code to be compiled on something that is not an Apple computer. There are also cloud options like MacinCloud and MacStadium, but we won’t go into those options in this book.
This means we must own a Mac (to use the simulator) or have an Apple Developer license (to use hot restart).
Hot restart
To test our application on a physical device, we can use hot restart. The hot restart feature is only designed for us to test our application while we are developing it, and we will not be able to publish the application.
First, we need to have iTunes installed. If you don’t have iTunes, you can install that from the Windows store.
In the top menu in Visual Studio, if we select iOS Local Device, we will get a nice wizard telling us precisely what we need to do. The first steps are informative and let us install iTunes.
Next, it’s time to enter our App Store Connect API key information. To be able to supply that information, we need to have an Apple Developer account. At the time of writing, it costs $99.
There are excellent instructions on where to find that information.
You will be prompted with this screen:

Figure 18.4: Apple Connect API Key information screen
- You can create a new key by going to https://appstoreconnect.apple.com/access/api.
- Click Request API key and then Generate API Key.
- Enter the name
Visual Studioand select Access Developer. - Copy the different values to Visual Studio, download the API key, and select the file as the Private key path.
- Next, select a team, and we are all set.
- Run the application and see it run on your iPhone:

Figure 18.5: Application running on an iPhone
Next, we will look at how to set up a simulator.
Simulator
A simulator runs the app on a Mac but shows the result on a PC. A simulator differs from an emulator. An emulator runs the code on the machine (in our case, a PC). A simulator runs on top of the native OS (macOS), mimicking an iPad or an iPhone.
To get simulators to work, we need to have an Apple computer on the same network. Visual Studio will help us along the way to set everything up. We must install two things on the Apple computer, Xcode and Visual Studio for Mac or Mono. I went for Xcode and Visual Studio for Mac:
- On your Mac, install Xcode from the App Store.
- Install Visual Studio for Mac. You will find the installation files here: https://visualstudio.microsoft.com/vs/mac/.
We also need to open remote access to the Mac. We can do that by doing the following:
- On the Mac, invoke Spotlight by pressing cmd + space, searching for
remote login, and then opening the Sharing System Preferences. - Enable the Remote Login option to allow Visual Studio to connect to the Mac.
- Set access for Only these users and ensure your machine user is included in the list or group.
We now have everything prepared on the Mac. In Visual Studio on the PC, we can now pair our Mac.
- Select Tools | iOS | Pair to Mac.
- Follow the instructions in the wizard (same as above).
- Select the Mac from the list, and click Connect. Visual Studio can now help you install any versions of Mono you may need.
- In the dropdown at the top of Visual Studio, we can select iOS Simulators, and then choose a device to run our app.

Figure 18.6: Device selection in Visual Studio
- Run the app and the simulator will start. This is what the app would look like if we run it on an iPad Mini:

Figure 18.7: App running in iPad simulator
We now have two ways of running and testing on iOS devices. We can also connect an iPhone directly to the Mac and run the application over Wi-Fi. There is more information on debugging over Wi-Fi in the official docs: https://learn.microsoft.com/en-us/xamarin/ios/deploy-test/wireless-deployment.
Next, we will build an app for macOS.
Developing for macOS
We don’t have an option for macOS to run or deploy from a Windows machine. To run our application on the Mac, follow these steps:
- On the Mac, open our project in Visual Studio for Mac.
- Run the project, and our app will show up:
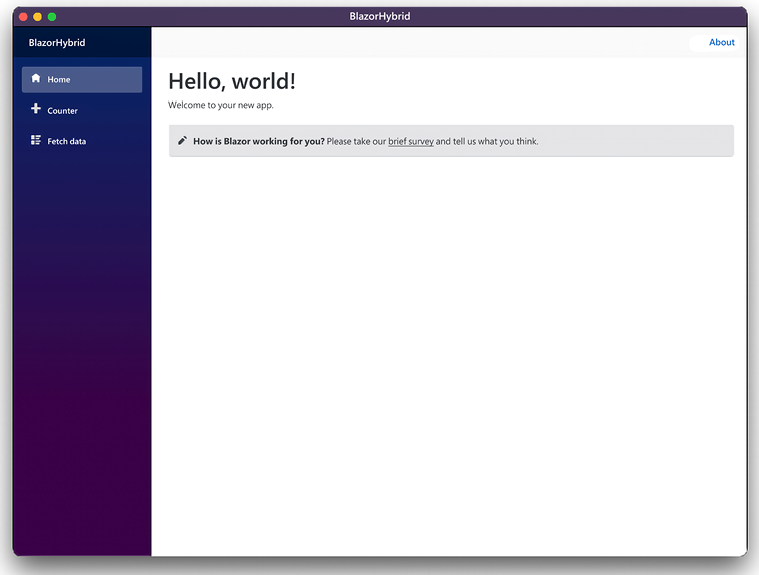
Figure 18.8: App running on macOS
In this case, we are running the application on the same platform, with no emulators or simulators, which is much less complicated than running it on a separate device.
Next, we will run our application on Windows.
Developing for Windows
Running the application on Windows is what we did in step 3 of the .NET MAUI Blazor App section. To reiterate, perform the following step:
- Change the dropdown to Windows Machine and run the project. We can see the result in Figure 18.1 at the beginning of the chapter.
As with macOS, we run the application on the same platform, with no emulators or simulators, which is much less complicated than running it on a separate device.
Next, we will take a look at Tizen.
Developing for Tizen
Tizen is an operating system mainly for TVs and watches. My Samsung Gear S3 runs Tizen. Samsung manages Tizen and not Microsoft. This ability for other manufacturers to hook into the platform just shows how great the .NET MAUI platform is.
At the time of writing, the Tizen experience lags a bit. Since this is not an official platform and because of the state of the tooling, I have decided not to include a guide.
But Tizen is working on the tooling, so if you want to transfer your app to TVs running Tizen, you should look into it.
Summary
In this chapter, we looked at cross-platform development with Blazor Hybrid. I mentioned this before in this chapter, but it is worth mentioning again that running code on a phone or a device that is not a computer is such a fun thing to do. You can’t beat that feeling. Even if you don’t intend to develop for mobile devices, give it a try.
With .NET MAUI, we can leverage our existing C# knowledge and, perhaps more importantly, our Blazor knowledge to create mobile applications.