
A. Settings and Preferences
InDesign’s many options are worth exploring. After you get to know them all, you’ll discover that some are helpful time-savers and others are simply a matter of preference.
The Preferences dialog box contains some of the most powerful options in InDesign. You can access the dialog box under the InDesign menu (Mac) or the Edit menu (Win). The Preferences panel listing on the left of the dialog box gives you one-click access to options for screen display, measurement units, text handling, spell-check options, display performance, and much more. This chapter examines all the controls in each Preference panel so that you can start applying them to your InDesign workflow.
Choosing InDesign Preferences
To use the Preferences dialog box, click one of the items on the left to display that panel and then choose your preferred settings. As soon as you click OK, your new settings are implemented and will remain the default until you decide to change them.
General Preferences
The General Preferences panel is the first to display when you access the Preferences dialog box from the InDesign (Mac) or Edit (Win) menu. It contains options for displaying document page numbering, object editing, and options for font downloading and embedding (see Figure A.1). It also contains a warning dialog box reset button.
Figure A.1. The General Preferences panel.

The options on the General Preferences panel include
• Page Numbering View: Choose either Section Numbering (which is defined in the Numbering & Section Options dialog box found in the Layout menu) or Absolute Numbering (results in consecutive numbering starting with the first page of the document).
• Font Downloading and Embedding: Enter a number of glyph characters to trigger font subsetting, which makes the file size smaller when printing or exporting the document.
• Prevent Selection of Locked Objects: By default, you can select locked objects in a layout; however, if you check this preference, you will no longer be able to—a nice alternative to having to place objects on a separate locked layer.
• When Scaling—Apply to Content/Adjust Scaling Percentage: By choosing Apply to Content, InDesign resets the scale values in the percentage fields of the Transform panel (or Control panel) to 100% after you scale the object. By choosing Adjust Scaling Percentage, InDesign always displays the actual scale values in the panels.
• Reset All Warning Dialogs: Enable this preference to allow all warning dialog boxes that have been turned off to reappear.
Interface Preferences
Preferences that are specific to InDesign’s interface appearance and behavior are located in the Interface panel. Choose Preferences from the InDesign (Mac) or Edit (Win) menu, and then click Interface in the list on the left side (see Figure A.2). Included here are options for displaying ToolTips, panels, documents, and the floating Tools panel. There are also some screen redraw options for scrolling with the Hand tool.
Figure A.2. The Interface Preferences panel.

The following list describes the options in the Interface Preferences panel:
• Tool Tips: Choose Normal or Fast display speed, or turn off ToolTip display by choosing None.
• Show Thumbnails on Place: Enable this preference to allow the Place cursor to display an image thumbnail when an image is being placed in a document.
• Show Transformation Values: Enable this preference to allow InDesign to display related values next to the cursor when applying object transformations, such as scaling, moving, or rotating.
• Floating Tools Panel: Choose Double Column, Single Column, or Single Row Tools panel display (see Working with the Tools Panel in Chapter 2, “Managing Windows and Panels”).
• Auto-Collapse Icon Panels: By enabling this preference, any expanded panels that are docked in the side wells are reduced to icon display after you click anywhere else in the interface. If preserving screen space is your number one priority, keep this preference turned on.
• Auto-Show Hidden Panels: Enable this preference to allow hidden panels to automatically appear when placing the cursor over either side well.
• Open Documents as Tabs: Enable this preference to open documents in a tabbed window; disable to open documents in individual floating windows.
• Enable Floating Document Window Docking: Enable this preference to allow floating window documents to be docked into tabbed windows.
• Hand Tool Scrolling: Click and drag the slider to the left or right to adjust how InDesign handles display performance when scrolling with the Hand tool. Lower settings can mean faster scrolling.
• Live Screen Drawing: Enable this preference to see selected content (placed graphics) as you drag. In previous versions of InDesign, you had to click and pause before dragging to see content. Disable this preference to use the previous behavior.
• Enable Multi-Touch Gestures: Enable this preference to allow hardware-dependent gestures (such as zooming, rotating, and flick/swipe on a MacBook Pro Multi-touch track pad) to work in InDesign.
Type Preferences
The Type Preferences panel contains various options for working with type, editing text with drag and drop, and using smart text reflow. Choose Preferences from the InDesign (Mac) or Edit (Win) menu, and then click Type in the list on the left (see Figure A.3).
Figure A.3. The Type Preferences panel.

The Type Preferences panel includes the following options:
• Use Typographer’s Quotes: Enable this preference to allow quotes to display as typographer’s quotation marks (curled), in contrast to displaying as inch marks (straight).
• Type Tool Converts Frames to Text Frames: Enable this preference to convert any frame (including shapes created with the Shape tool or Pen tool) into a text frame by clicking it with the Type tool. By doing so, you can create special effects by displaying a body of text in an unusual shape.
• Automatically Use Correct Optical Size: Enable this preference to allow InDesign to automatically use the correct optical size when displaying multiple master fonts that contain a defined optical size axis. Enabling this option can improve the overall appearance of these types of multiple master fonts by matching the optical size axis to the point size of the text. When this option is disabled, InDesign uses the defined optical size axis, which might not display as well.
• Triple Click to Select A Line: Enable this preference to allow a triple mouse click with the Type tool to select a whole line of text rather than the whole paragraph.
• Apply Leading to Entire Paragraphs: Enable this preference to allow leading values to apply to an entire paragraph rather than to text within a paragraph.
• Adjust Spacing Automatically When Cutting and Pasting Words: Enable this preference to automatically add or remove appropriate word spacing when cutting, pasting, deleting, or replacing text.
• Font Preview Size: Enable this preference to allow the Type menu’s Font submenu to display a preview of the fonts at the size you choose. Options include Small, Medium, or Large.
• Drag and Drop Text Editing—Enable In Layout View/Story Editor: Enable either preference to turn on the drag-and-drop text edit feature in Layout View and/or the Story Editor. With this option enabled, you can copy/paste text by highlighting it with the Type tool and dragging it to another place in the story—no need to use key commands (see “Editing Text Using the Story Editor” in Chapter 6, “Working with Text”).
• Smart Text Reflow—Add Pages To: Enable this preference to allow InDesign to add or remove pages when you’re typing or editing text. Doing so can prevent overset text and empty text frames from appearing in your layouts. You can choose where pages are added to a layout by selecting an option from the Add Pages To drop-down list. Options include End of Story, End of Section, and End of Document.
• Limit to Master Text Frames: Keep this preference disabled if you would like to use Smart Text Reflow for text frames placed on document pages, rather than master pages. Note that Smart Text Reflow will take effect only if the text frame you are editing is threaded to at least one other text frame on a different page. With this option disabled, added pages always contain full-page, single-column text frames, no matter what attributes are applied to the text frame you are threading from.
• Preserve Facing-Page Spreads: Enabling this preference allows InDesign to add a new two-page spread when reflowing text; disabling it allows InDesign to add a single page when reflowing text, and shuffle all pages that follow.
• Delete Empty Pages: Enable this preference to allow InDesign to delete pages when editing text. Note that a page is deleted only when the emptied text frame is the only object on the page.
Advanced Type Preferences
The Advanced Type Preferences panel provides character settings for Superscript, Subscript, and Small Caps. It also contains an inline input option for Non-Latin text. Choose Preferences from the InDesign (Mac) or Edit (Win) menu, and then click Advanced Type in the list on the left (see Figure A.4).
Figure A.4. The Advanced Type Preferences panel.

The Advanced Type Preferences panel includes the following options:
• Superscript/Subscript Character Settings: Enter default size and position values to be used for superscript and subscript type styles. Chosen percentages are applied based on current font size and leading
• Small Cap Character Settings: Enter a default percentage to be used for the small cap type style. The chosen setting is applied based on current font size (see “Changing Case” in Chapter 6).
• Use Inline Input for Non-Latin Text: Enable this preference to allow system input (if available) for 2-byte and 4-byte non-Latin characters.
Composition Preferences
The Composition Preferences panel contains various highlight and text wrap options. Choose Preferences from the InDesign (Mac) or Edit (Win) menu, and then click Composition in the list on the left (see Figure A.5).
Figure A.5. The Composition Preferences panel.

InDesign places assigned colored boxes over the items you choose in the Highlight section. This is a great way to flag subtle items in a document, such as paragraph breaks and custom tracking and kerning, that you may want to adjust before outputting the file.
The Composition Preference panel includes the following options:
• Highlight Keep Violations: Enable this preference to place a yellow highlight over items that violate settings in the Keep Options dialog box. To access Keep Options press Opt-Cmd-K (Mac) or Alt+Ctrl+K (Win) (see “Applying Keep Options” in Chapter 7, “Formatting Text”).
• Highlight H&J Violations: Enable this preference to place a yellow highlight over items that violate settings chosen in the Hyphenation Settings and Justification dialog box boxes (both accessible via the Paragraph panel menu). The darkest of three shades highlights the most serious violations (see “Choosing Hyphenation/Justification Settings” in Chapter 7).
• Highlight Custom Tracking/Kerning: Enable this preference to place a green highlight over items that have been manually kerned or tracked (see “Adjusting Kerning and Tracking” in Chapter 7).
• Highlight Substituted Fonts: Enable this preference to place a pink highlight over any missing fonts (see “Working with Fonts” in Chapter 6).
• Highlight Substituted Glyphs: Enable this preference to place a yellow highlight over any alternate glyphs used in a document.
• Text Wrap Justify Text Next to an Object: Enable this preference to justify any text placed next to an object that has a text wrap applied to it.
• Text Wrap Skip by Leading: Enable this preference to force any wrapped text to apply the next available leading increment below a text-wrapped object, allowing the lines of text to line up evenly. Keeping this option off may cause lines of text to jump down below a wrapped object and not line up with neighboring columns or text frames.
• Text Wrap Only Affects Text: Beneath Enable this preference to allow a text frame to ignore a text wrap by bringing it to the front of the stacking order.
Units & Increments Preferences
The Units & Increment Preferences panel contains various options for ruler units, point/pica size, and keyboard increments. Choose Preferences from the InDesign (Mac) or Edit (Win) menu, and then click Units & Increments in the list on the left (see Figure A.6).
Figure A.6. The Units & Increments Preferences panel.

You can apply different measurement units to the horizontal and vertical rulers, specify a ruler origin point, apply PostScript or traditional points per inch, and choose default increments for keyboard shortcuts.
The Units & Increments Preference panel includes the following options:
• Ruler Units Origin: Choose an origin point for the document rulers: Spread, Page, or Spine.
• Horizontal/Vertical Ruler Units: Choose preferred measurement units for horizontal and vertical rulers. When choosing Custom, enter a point value in the respective data field to indicate where large tick marks should be placed.
• Other Units Text Size/Stroke: Choose preferred measurement units for text size and stroke weight.
• Points/Inch: Choose whether to use PostScript points (72 points/inch), traditional printer points (72.27 points/inch), or two other values: 72.23 and 72.3.
• Cursor Key Increment: Enter a default distance amount to use when nudging selected objects with the arrow keys. The default value (0p1) only moves objects a very short distance.
• Size/Leading and Baseline Shift Increments: Enter a default value for increasing/decreasing text size, leading, and baseline shift with keyboard shortcuts (see Chapter 7).
• Kerning/Tracking Increment: Enter a default value (in thousandths of an em) to use when manually kerning with keyboard shortcuts (see “Adjusting Kerning and Tracking” in Chapter 7).
Grids Preferences
The Grids Preferences panel provides options for both the baseline and document grids. Choose Preferences from the InDesign (Mac) or Edit (Win) menu, and then click Grid in the list on the left (see Figure A.7).
Figure A.7. The Grids Preferences panel.

When it appears, the baseline grid displays a series of horizontal lines on the page that should reflect the chosen document leading amount. Alternatively, the document grid displays a series of both vertical and horizontal lines on the page, resulting in what looks like transparent graph paper placed over the top of your layout. You can use both grids as a visual guide to help line up text columns and images evenly. You can also snap objects to the grids whether they are visible or hidden.
In this panel you can specify various grid display options, including color and view threshold. You can also specify preferred gridline start points, as well as increment and subdivision amounts.
The Grids Preferences panel includes the following options:
• Baseline Grid/Color: If the default baseline grid display color conflicts with your layout and is too difficult to see, you can choose a different baseline grid color here. You can also choose Custom (located at the very bottom of the menu list) to create, save, and apply a custom color.
• Baseline Grid/Start: Enter a value in the data field indicating the distance the first line of the baseline grid should be placed relative to the top of the page or margin.
• Baseline Grid/Relative To: Choose Top of Page or Top of Margin. The Relative To option affects where the grid line start point falls (see above).
• Baseline Grid/Increment: Every Enter a value in the data field indicating the uniform distance to place between grid lines. Generally, the default document leading amount should be entered here.
• Baseline Grid/View Threshold: Enter a value in the data field indicating the necessary view magnification amount for the baseline grid to appear in the document window.
• Document Grid/Color: If the default document grid display color conflicts with your layout and is too difficult to see, you can choose a different document grid color here. You can also choose Custom (located at the very bottom of the menu list) to create, save, and apply a custom color.
• Document Grid/Gridline Every: Enter a value in the data field indicating the uniform distance to place between horizontal and vertical document grid lines.
• Document Grid/Subdivisions: Enter the number of subdivisions to set between each grid line. Enter 1 if you don’t want to subdivide the grid.
• Grids In Back: Enable this preference to position grids behind all objects on the page.
Guides & Pasteboard Preferences
Choose Preferences from the InDesign (Mac) or Edit (Win) menu, and then click Guides & Pasteboard in the list on the left (see Figure A.8).
Figure A.8. The Guides & Pasteboard Preferences panel.

The options in the Guides & Pasteboard Preferences panel allow you to choose display colors for margin and column guides, bleed and slug areas, and the preview background. You can also specify a Snap to Zone distance for guides and horizontal and vertical margins for the Pasteboard.
The Guides & Pasteboard Preference panel includes the following options:
• Color: Choose display colors for margin and column guides, bleed and slug areas, and the preview background. You can also choose Custom (located at the very bottom of each menu list) to create, save, and apply a custom color.
• Guide Options Snap to Zone: Enter a pixel amount in the data field to set as the default distance for objects to snap to guides.
• Guides In Back: Enable this preference to position the guides behind all objects on the page.
• Align Object to Center: Enable this preference to allow smart guides to automatically snap objects to page item centers.
• Align to Object Edges: Enable this preference to allow smart guides to automatically snap objects to page item edges.
• Smart Dimensions: Enable this preference to allow InDesign’s smart dimensions feature to automatically snap object dimensions and rotation values to match adjacent objects as you create them.
• Smart Spacing: Enable this preference to allow InDesign to display temporary guides that indicate when the spacing between objects is even.
• Pasteboard Options—Horizontal/Vertical Margins: Enter specific values to determine the horizontal and vertical margins for the Pasteboard (the area surrounding the pages in the document).
Dictionary Preferences
Choose Preferences from the InDesign (Mac) or Edit (Win) menu, and then click Dictionary in the list on the left (see Figure A.9). The Dictionary Preferences panel allows you to choose, create, and load user dictionaries from anywhere on your system, and to apply hyphen and spelling exception lists in various ways. In addition, you can choose custom characters to use as double and single quotes.
Figure A.9. The Dictionary Preferences panel.

The Dictionary Preferences panel includes the following options:
• Language: Choose a default language to use for InDesign’s Dictionary.
• Available User Dictionaries: Displays a list of available user dictionaries by system location. Click to select a dictionary from the list.
• Relink User Dictionary: Click to relink a selected user dictionary (.udc file) to its current location on your system.
• New User Dictionary: Click to create a new user dictionary. A second dialog box opens, prompting you to choose a name and system location for the new .udc file.
• Add User Dictionary: Click to load a user dictionary (.udc file) from anywhere on your system.
• Remove User Dictionary: Click to remove a selected user dictionary from the list.
• Hyphenation/Spelling: The standard version of InDesign CS5 includes only “Proximity” dictionaries. Alternative versions of InDesign and dictionary components created by companies other than Adobe may feature different languages and other hyphenation and spelling options to choose from.
• Double/Single Quotes: Enter the characters you’d like to use as double and single quotes, or choose a set from the drop-down lists.
• Hyphenation Exceptions—Compose Using: Choose a list of dictionary “exceptions” to use (i.e., words and hyphenation points added to the dictionary). Choose from the current user dictionary exceptions, the list stored in the document, or both.
• Merge User Dictionary into Document: Enable this preference to apply the user dictionary list of hyphenation and spelling exceptions to any document you open.
• Recompose All Stories When Modified: Enable this preference to recompose all stories (unlinked text frames) in a document when the user dictionary or Compose Using option has been changed. This can be a lengthy process depending on how much text a document contains.
Spelling Preferences
Choose Preferences from the InDesign (Mac) or Edit (Win) menu, and then click Spelling in the list on the left (see Figure A.10). The Spelling Preferences panel contains options for locating misspelled words, repeated words, uncapitalized words, or uncapitalized sentences in a document. You can also enable the Dynamic Spelling feature, allowing InDesign to underline spell-check errors in assigned colors.
Figure A.10. The Spelling Preferences panel.

The Spelling Preferences panel includes the following options:
• Find: Check the corresponding boxes to allow the Spelling feature to locate misspelled words, repeated words, uncapitalized words, or uncapitalized sentences.
• Enable Dynamic Spelling: Enable this preference to turn on the Dynamic Spelling feature. Enabling this option allows InDesign to underline spell-check errors in assigned colors.
• Underline Color: Choose an underline color for dynamic spell-check items. You can also choose Custom (located at the very bottom of each menu list) to create, save, and apply a custom color using the operating system’s Color Picker.
Autocorrect Preferences
Choose Preferences from the InDesign (Mac) or Edit (Win) menu, and then click Autocorrect in the list on the left (see Figure A.11). When enabled, the Autocorrect feature can fix spell-check errors as you type. The Autocorrect Preferences panel not only lets you to turn on the feature, but it also allows you to indicate which words are to be corrected. Note that Autocorrect fixes only misspelled words that are included in the Autocorrect list.
Figure A.11. The Autocorrect Preferences panel.

The Autocorrect Preference panel includes the following options:
• Enable Autocorrect: Enable this preference to turn on the Autocorrect feature.
• Autocorrect Capitalization: Errors Enable this preference to allow Autocorrect to fix capitalization errors as you type.
• Language: Choose a default language for Autocorrect to use.
• Misspelled Word/Correction: Displays a list of misspelled words for Autocorrect to identify and fix as you type. You must enable Autocorrect and add words and their corrections to the default list before typing if you are going to rely on Autocorrect to fix them.
• Add: Click to add a misspelled word and its correction to the Autocorrect list.
• Edit: Click to edit misspelled word or its correction from the Preferences list.
• Remove: Click to remove a misspelled word and its correction from the Autocorrect list.
Notes Preferences
InDesign includes a Notes feature that enables designers and editors in your workflow to communicate with each other directly in a layout. This is done by inserting notes inside text frames, and it can be used in a workflow that also includes the Adobe InCopy layout editing application. User notes are identified by color codes that you can choose in the Notes preferences panel. Choose Preferences from the InDesign (Mac) or Edit (Win) menu, and then click Notes in the list on the left (see Figure A.12).
Figure A.12. The Notes Preferences panel.

The Notes Preferences panel includes the following options:
• Note Color: Choose a color to apply to Note anchors and bookends from the Note Color drop-down list. Choose [User Color] to apply the color that is specified in the User dialog box (found under the File menu by choosing User).
• Show Note ToolTips: Enable this preference to display notes inside of a ToolTip when hovering the mouse over a note anchor in Layout view or a note bookend in the Story Editor.
• Story Editor—Include Note Content When Checking Spelling: Enable this preference to allow InDesign to scan through note text as well as layout text when applying the Check Spelling command in the Story Editor.
• Story Editor—Include Note Content in Find/Change Operations: Enable this preference to allow InDesign to scan through note text as well as layout text when using the Find/Change feature in the Story Editor.
• Story Editor—Inline Background Color: To specify the background color to use for inline notes when viewing in the Story Editor, choose [None] or [Note Color] from the drop-down list.
Track Changes Preferences
Choose Preferences from the InDesign (Mac) or Edit (Win) menu, and then click Track Changes in the list on the left (see Figure A.13). InDesign also includes a Track Changes feature that enables designers and editors in your workflow to see what changes have been made to the layout text. Previously, the track changes feature could be applied and viewed only in the Adobe InCopy layout editing application, but thankfully, it can now also be used in the InDesign Story Editor. User changes are identified by color codes that can be chosen in the Track Changes Preferences panel (see “Tracking Text Changes with the Story Editor” in Chapter 6).
Figure A.13. The Track Changes Preferences panel.

The Track Changes Preferences panel includes the following options:
• Show: Select the types of changes you would like to track, including Added Text, Deleted Text, and Moved Text
• Text/Background Color: Choose a color from the Text and Background drop-down lists to apply to all tracked changes.
• Marking: Choose an option from the Marking drop-down lists to apply to all tracked changes. Options include: Strikethrough, Underline, Outline, and None.
• Prevent Duplicate User Colors: Enable this preference to force all user changes to be identified using unique coloring.
• Change Bars: Enable this preference to display a color bar next to each line that contains changes.
• Change Bar Color: Choose the color you’d like to use for change bars from the Change Bar Color drop-down list.
• Location: From the Location drop down list, choose whether to display change bars in the left or right margins of the Story Editor window.
• Include Deleted Text When Spellchecking: Enable this preference to allow InDesign to scan through deleted text as well as layout text when applying the Check Spelling command.
Story Editor Display Preferences
Choose Preferences from the InDesign (Mac) or Edit (Win) menu, and then click Story Editor Display in the list on the left (see Figure A.14). The Story Editor Display Preferences panel lets you specify various display options, including font, text size, line spacing, text/background color, and cursor type. You can also choose a preset “theme” display, such as Terminal (green text on a black background) or the more traditional Ink On Paper. InDesign also offers a choice of anti-aliasing options for Story Editor Display, including one that is optimized for LCD monitors (see “Editing Text Using the Story Editor” in Chapter 6).
Figure A.14. The Story Editor Display Preferences panel.

The Story Editor Display Preferences panel includes the following options:
• Text Display Font: Enter the font you’d like to use in the Story Editor, or choose a font from the menu.
• Text Display Size: Enter the type size you’d like to use, or choose a size from the menu.
• Text Display Line Spacing: Enter a preferred line spacing value, or choose one from the menu.
• Text Display Color: Choose a text display color. Unlike grids, guides, and dynamic spelling underlines, you cannot apply a custom color.
• Text Display Background: Choose a text display background color. You cannot apply a custom color.
• Text Display Theme: Choose a preset Story Editor theme. Available color combinations include Ink On Paper, Amber Monochrome, Classic System, and Terminal. Applying a theme overrides any previously chosen Story Editor text display and background colors.
• Text Display Preview: Displays a preview of the chosen Story Editor font, text color, and background color, or theme. Font size and line spacing do not preview.
• Enable Anti-aliasing: Enable this preference to smooth out text edges in the Story Editor display.
• Anti-aliasing Type: Choose an anti-aliasing type. Available options include Default, LCD Optimized, and Soft.
• Cursor Options: Click the options button to choose Standard, Barbell, Thick, or Block cursor display.
• Blink: Enable this preference to allow the chosen Story Editor cursor to blink.
Display Performance Preferences
Choose Preferences from the InDesign (Mac) or Edit (Win) menu, and then click Display Performance in the list on the left (see Figure A.15). The Display Performance Preferences panel allows you to choose a default view and adjust the parameters for each view setting. You can decide how you’d like to display raster images, vector graphics, and transparencies in all your documents.
Figure A.15. The Display Performance Preferences panel.

The Display Performance Preferences panel includes the following options:
• Default View: Choose High Quality, Typical, or Fast as the default view. Applying the High Quality Display setting can give you the best preview, but can also slow down your computer. If it does, you might want to consider keeping the document setting to the default Typical Display, which is less taxing on your system. Choosing Fast display hides all placed graphics in the document to improve system performance.
• Preserve Object-Level Display Settings: Enable this preference to save all document display settings when closing and reopening. Note that saving high-quality display settings can slow down the reopening process.
• Adjust View Settings: Choose the view setting you’d like to adjust (High Quality, Typical, or Fast).
• Raster Images: Click and drag the slider left or right to adjust the screen display of imported bitmap images (such as TIFF, JPEG, and GIF).
• Vector Graphics: Click and drag the slider left or right to adjust the screen display of imported vector graphics (such as EPS, DCS, and PDF).
• Transparency: Click and drag the slider left or right to adjust the screen display of transparent objects.
• Enable Anti-aliasing: Enable this preference to smooth out object edges.
• Use Defaults: Click to reset the default view settings.
Appearance of Black Preferences
Choose Preferences from the InDesign (Mac) or Edit (Win) menu, and then click Appearance of Black in the list on the left (see Figure A.16). The Appearance of Black Preferences panel allows you to choose how you’d like to view, print, and export blacks in a document. You can choose to view, print, and export blacks accurately (100% black) or as rich black (a CMYK build).
Figure A.16. The Appearance of Black Preferences panel.
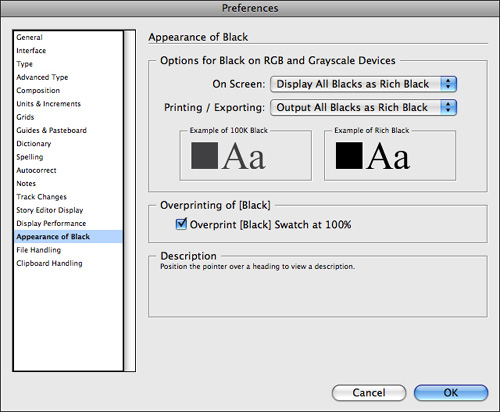
The Appearance of Black Preferences panel includes the following options:
• On Screen: Choose whether all blacks in the document should display accurately (100% black) or as rich black (CMYK build).
• Printing/Exporting: Choose whether all blacks in the document should print/export accurately (100% black) or as rich black (CMYK build).
• Example of 100K Black/Rich Black: Displays examples of 100K black and rich black.
• Overprinting of [Black] Swatch at 100%: Enable this preference to overprint any use of the default [Black] swatch at 100%.
• Description: Displays a description for each available option in the Appearance of Black Preferences panel. Position the pointer over a heading to view the description.
File Handling Preferences
Choose Preferences from the InDesign (Mac) or Edit (Win) menu, and then click File Handling in the list on the left (see Figure A.17). The File Handling Preferences panel allows you to choose a document recovery data location. There are also options for saving preview images with documents, positioning imported snippets, and working with links.
Figure A.17. The File Handling Preferences panel.

The File Handling Preferences panel includes the following options:
• Document Recovery Data Location: Displays the current location for InDesign’s temporary data files. To save disk space or improve system performance, you can choose a new location (for example, a faster external drive), by clicking Choose (Mac) or Browse (Win).
• Always Save Preview Images with Documents: Enable this preference to allow a preview image to be saved with a document file. Note that saved previews can slightly increase document file sizes.
• Pages: From the Pages drop-down list, choose which pages to include in the preview image. Options include: First Page, First 2 Pages, First 5 Pages, First 10 Pages, and All Pages.
• Preview Size: Choose a preferred image size to apply when Always Save Preview Images with Documents is enabled (see above).
• Snippet Import: Choose whether to position an imported snippet wherever you click with the loaded cursor, or use its X and Y coordinates from the original document where it was saved.
• Check Links Before Opening Document: When this preference is enabled, InDesign checks for modified or missing links whenever you open a document; when it is disabled, InDesign opens the document immediately and link statuses remain pending (see “Updating Missing and Modified Links” in Chapter 9, “Working with Graphic Links”).
• Find Missing Links Before Opening Document: When the preceding preference is enabled, you have the option to enable this preference, which allows InDesign to resolve missing links when opening a document (see “Updating Missing and Modified Links” in Chapter 9).
• Create Links When Placing Text and Spreadsheet Files: Enable this preference to allow placed text and spreadsheet documents (such as Word and Excel files) to be treated as links (see “Importing Text” in Chapter 6).
• Preserve Image Dimensions When Relinking: Enable this preference to make the new image you are relinking to display at the same size as the image it is replacing (see “Updating Missing and Modified Links” in Chapter 9).
• Default Relink Folder: When resolving missing links, choose whether to default to the most recent relink folder or the original relink folder (see “Updating Missing and Modified Links” in Chapter 9).
Clipboard Handling Preferences
Choose Preferences from the InDesign (Mac) or Edit (Win) menu, and then click Clipboard Handling in the list on the left (see Figure A.18). The Clipboard Handling preferences panel contains options for copy/pasting data to and from the Clipboard.
Figure A.18. The Clipboard Handling Preferences panel.

The Clipboard Handling Preferences panel includes the following options:
• Prefer PDF When Pasting: Disable this preference to allow copied PDF data (such as editable paths copied from Illustrator) to be pasted into InDesign.
• Copy PDF To Clipboard: Enable this preference to copy editable objects as PDF data (such as editable paths created in InDesign).
• Preserve PDF Data At Quit: Enable this preference to preserve PDF data that has been copied to the Clipboard even after quitting InDesign.
• When Pasting Text and Tables from Other Applications: Choose whether to include all information (such as index markers, swatches, and styles), or text only (see “Importing Text” in Chapter 6).
Customizing Shortcuts and Menus
InDesign is so flexible that it even allows you to hide and show menu commands. Being able to customize your workspace like this ensures that you’ll always be working in a comfortable, uncluttered environment. InDesign also allows you to customize keyboard shortcuts, which can make remembering them a whole lot easier, but can also make life much harder for designers working in a collaborative environment and sharing computers—unless of course, everyone on the design team agrees on using the same new shortcuts.
Editing Keyboard Shortcuts
InDesign enables you to change any of the keyboard shortcuts in the default set. To do so, choose Edit, Keyboard Shortcuts. In the Keyboard Shortcuts dialog box, choose a set of commands from the Product Area drop-down list (see Figure A.19). InDesign displays the commands directly underneath.
Figure A.19. Creating a custom keyboard shortcut.

To change or assign a shortcut, click in the New Shortcut field and then type the shortcut. Any conflicting shortcuts appear in a warning directly below the New Shortcut field. Click the Assign button to remove the conflicting shortcut (if any) from its former command and apply it to the currently selected command.
When you select a command from the list, the existing shortcut is displayed in the Current Shortcuts box. If no shortcut is displayed, this indicates that none are currently assigned to the selected command.
To change or assign a shortcut, click in the New Shortcut field, and then type the shortcut. Any conflicting shortcuts appear in a warning directly below the New Shortcut field. Click the Assign button to remove the conflicting shortcut (if any) from its former command and apply it to the currently selected command.
If you have not already created a new set, InDesign displays a warning dialog box that prompts you to do so before assigning the shortcut. Click Yes to create a new set and enter a name for it in the New Set dialog box that appears. Click OK to create the set. You can always return to the default shortcut set (which you cannot edit) by choosing [Default] from the Set drop-down list.
Editing Menus
To customize InDesign’s menu commands, choose Edit, Menus. Unless you’ve changed it, the set currently displayed in the Menu Customization dialog box should be InDesign Defaults (see Figure A.20). Choose which menu type (application or context & panel) that you’d like to edit from the Category drop-down list. Toggle the triangle next to each menu name to view the various commands.
Figure A.20. Creating a custom menu display.

You can hide or show menu commands in any of the default sets by clicking in the Visibility column. You can also add or change the highlight colors for the menu commands by clicking in the Color column and choosing a color from the pop-up menu. When you’ve finished editing the menus, click OK to exit the dialog box.
InDesign automatically adds the Show All Menu Items command to the bottom of any menu list that contains hidden items. Choose this command to see everything that’s been hidden.