
 Composition
How to Arrange Things for More Compelling Photos
There is so much talk about the importance of composing your image in-camera, but of course, with our high-megapixel cameras these days, we can easily recompose our shots after the fact in Photoshop or Lightroom, or whatever. Anyway, with all this talk about composing and recomposing, one often overlooked topic by photographers, one we seem to avoid for reasons I can’t seem to grasp, is the art of decomposing. I know this topic is kind of a dead end, but I feel like many photographers could make a grave mistake by not digging this topic up. It kills me to even talk about it, but working in a darkroom is probably a dying profession. Anyway, before we dig down too deep into a hole, I think it’s important that we realize that some of the aspects of discussing decomposing are a dead giveaway, but every good story (and person, as well) needs a good plot. Some of these ideas have obviously expired, but some are still a dead ringer. Okay, at this point I’ve totally run out of decomposing puns as they relate (in some vague way) to photography, but since this is supposed to be a mental break anyway, let’s wrap up with some stupid one-liners that’ll help put the “fun” back in “funeral.” Here goes: Why do they put a fence around a cemetery? Because people are dying to get in (ba doomp, crash!). Or how about this one: Cremation is my only hope of having a smoking hot body! (Bazinga!) Or how about: Why do ghosts ride elevators? To lift their spirits! (I’m here all week, folks. Don’t forget to tip your bartenders.) Okay, that last one was kind of a Halloween joke, but the problem is, as you’ve already learned, there just aren’t enough death and decomposing jokes. Well, there are more, but if you can believe it, they’re actually worse than the ones I just shared, which were not exactly hall of famers. Hey, look over there! Is that Beyoncé? (Hey, it worked before.)
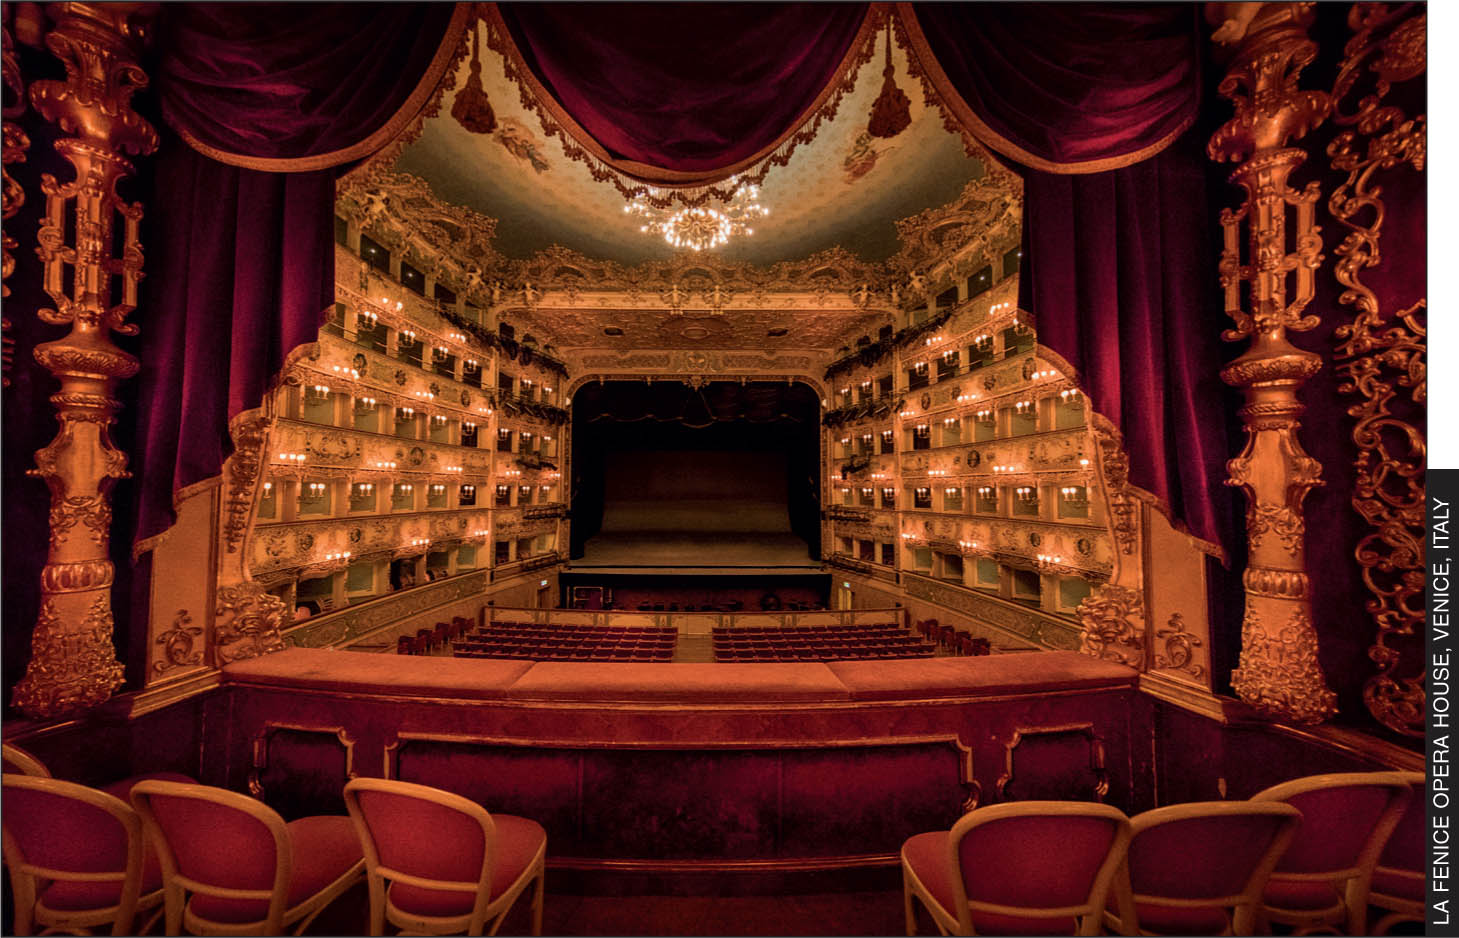
Don’t Forget to Shoot Details

When you’re standing in front of a beautiful opera house, or a palace, or a cathedral, your first inclination is to try to capture a photo of the entire building. Depending on the location of the building, this can be really tricky because a lot of the time there are distracting things around it, like signs for businesses, or billboards, or posters. There may be power lines, or vendor carts, or even distracting directional signs, like a large sign pointing toward the ticket office. That’s why I feel it’s so important to shoot detail shots that don’t show the entire building, but give you an up-close glimpse of its beauty. Maybe it’s an intricate pattern on the ceiling, or a statute along the roof line, or any one of the building embellishments that you miss with a wider shot, but can really enjoy with a tight, zoomed-in detail shot. This doesn’t just go for buildings, of course—I always include detail shots wherever I go, whether it’s just an ornament on a gondola in Venice (as seen above), or an interesting door handle on the entrance of an old building. These detail shots are wonderful for helping tell your story, and for giving your viewers a different view of a place they, perhaps, had seen before or maybe even visited themselves. Add detail shots to your trip, and you’ll love the different, close-up view it delivers.
Getting the Most from Your Wide-Angle Lens

If you wind up shooting a lot of wide-angle shots, especially in places like palaces or libraries, old hotels, cathedrals, etc., there’s a technique you can use to help add more depth and interest to your photos. The trick when using a wide-angle lens (in my case, it would either be the 24mm end of my 24–240mm, or if I brought a second lens and I’m doing the “two-lens tango,” then it’s my 14mm) is to put something near you right in the foreground. This helps to add depth to the image, so you have a foreground, a middle ground, and a background (most new photographers just have a middle ground and background, so their shots don’t have nearly the depth). Another technique is to get down low with that wide-angle and shoot from a low perspective (see page 188 for a great way to do this). Couple that wide-angle lens low-shooting angle with placing some object of interest in the foreground, and you’re going to have a shot with lots of depth and an epic feel.
Capturing the Moment vs. Composition

We all want to make great compositions when we’re out shooting, but there’s one time when worrying about composition kind of goes out the window, and that’s when you’re right there when something interesting/fascinating/funny or unusual happens. That’s when the composition part goes out the window and the most important thing is to capture that moment (and, of course, try to capture it so it’s nice and in focus). We can re-crop the photo later in Lightroom or Photoshop, or whatever, to make the composition look the way we want, but there’s no filter or feature in any of those that recreates a special moment. Capture the moment—that’s the goal—then worry about the composition later.
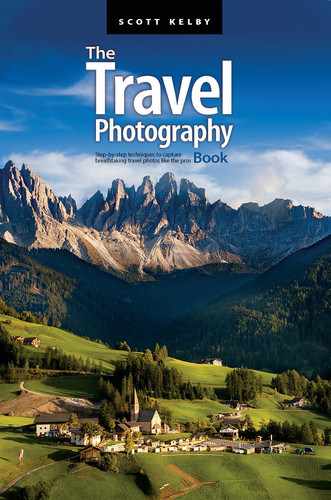
Shooting Skyscrapers
It’s harder than you’d think to make a compelling shot of a skyscraper, or a soaring cityscape of tall buildings, and there are a couple of reasons for this, but I think one of the biggest is that most of the images we see of skyscrapers are taken from the same vantage point we always see them: from the street level looking up at them. You’re not showing the viewer anything new, it’s just kind of “Yup, that’s what it looks like.” That’s why you can get much more interesting photos of tall buildings by shooting from another tall building. It’s why photographers love shooting from the Top of the Rock (the observatory on top of 30 Rockefeller Plaza in New York City). You can shoot some of the most iconic buildings in the world from there, like the Empire State Building and the Chrysler Building, along with lots of very modern buildings, and you’re showing all of this from a different view than the standard street level. If you don’t have access to a high building to shoot from, one street-level technique you can use is to get very close to the building, preferably at a corner or edge, and shoot straight up alongside it. It creates a soaring feeling, and since most folks step out on the street corner, or across the street to shoot the skyscraper, you’ll be bringing a very different and much more dynamic view. If you have some reasonably fast-moving clouds in the sky, you can take things up a notch by shooting a long exposure (with an ND filter; see page 115), so you get wonderful streaky clouds stretching across the sky. Try to position yourself so the clouds are either heading in your direction, or moving away from you for the best results, and of course, if you’re doing a long exposure like this, it helps if you’re on a tripod. One last tip: once you’ve got your shot, and you’re post-processing, try converting your image to black and white. Architectural shots can really take on a whole new feel, so it’s worth giving it a quick try. You can always undo.
Where to Put the Horizon Line

If you’re shooting in a situation where you can see the horizon line, we have a simple, but powerful compositional rule we use to determine where the horizon line should go in our image (spoiler alert: it never goes in the middle. Dull. Boring. Predictable. Meh). Here’s the rule: If the sky is really interesting (you have great clouds that day), then show more of the sky by putting your horizon line in the lower 1/3 of the image. That way, you see more sky (more of the most interesting part) and less of the foreground. However, if you have a boring, cloudless sky (like I do here, in my shot above), then we hide most of the boring part (in this case, the sky) by putting the horizon line up near the top 1/3 of the frame, so you don’t see that much sky at all. Depending on the image, you might even get away with just showing 1/4 of the sky by moving your horizon line up even higher. To sum it up: Hide the boring 1/3 and show the more interesting 2/3. If the sky looks best, we show more of it (by putting the horizon line down low). If the sky is boring (like you see above), we show more foreground by putting the horizon line up higher. Easy enough.
Shooting Level Matters

If you shoot a crooked photo where your horizon line isn’t straight, or your buildings are tilted left or right (like in the image above), or the table in the restaurant looks like the plates are about to go sliding off onto the floor, you can definitely straighten your image later in Lightroom, Photoshop, or whatever. But, when you do that, it will require you to recrop the image because when you rotate your photo, it will leave little white gaps in all the corners. This changes your original composition, which is fine if you didn’t particularly like your original composition, but you won’t have to go through any of these annoying things if you just get a straight, level shot in the first place. It’s not that hard anymore because nearly all new cameras have a built-in level feature that shows you if your camera is straight. Also, there are now many ballheads and/or tripods that have a built-in level (though the ones on tripods are somewhat less useful because your tripod can be perfectly level, but then your ballhead can be tilted and your photos winds up tilted. So, I usually ignore the one on my tripod). For travel photography, I have a Vello Low Profile Bubble Level that works great. It’s small, super-lightweight, and inexpensive, and you don’t have to take it off/put it on—it just stays in place. Pretty brilliant. It doesn’t matter which method you use, but I can tell you this is one of those things that is better to fix in-camera when you’re shooting than to try to fix later in post.
You Don’t Have to Show the Scene as It Is

An important part of our job as a travel photographer (heck, as any kind of photographer) is deciding what story we want to tell with our image, and that essentially means we make a decision about what goes in our frame (in our image) and what we leave out. This is a very intentional decision—a creative one—and what you decide to include or leave out is literally what tells the story. So, there’s something I want you to consider when you’re doing all this: you don’t have to show the scene as it is. If we’re not on assignment for a news agency, then we can use our camera to be selective about what we show and what we don’t show. For example, let’s say you and your spouse are having a romantic dinner in a quaint restaurant, which could make a lovely image, but there are only the two of you and two other couples in the restaurant. You could choose to show the mostly empty restaurant in your image, which tells one story (maybe you picked the wrong place to eat?), or you can frame the shot so you see the other couples in the shot, so it looks like the restaurant is busy, which tells a more romantic story—one of a bustling restaurant full of life. Maybe you choose to only show you and the waiter, and it’s assumed that it’s a bustling place. The important thing to keep in mind: you get to choose what appears in the frame, so use this power to tell the story you want to tell. You don’t have to show reality, with all its bumps and bruises (or empty tables). You’re an artist, so go create your art.
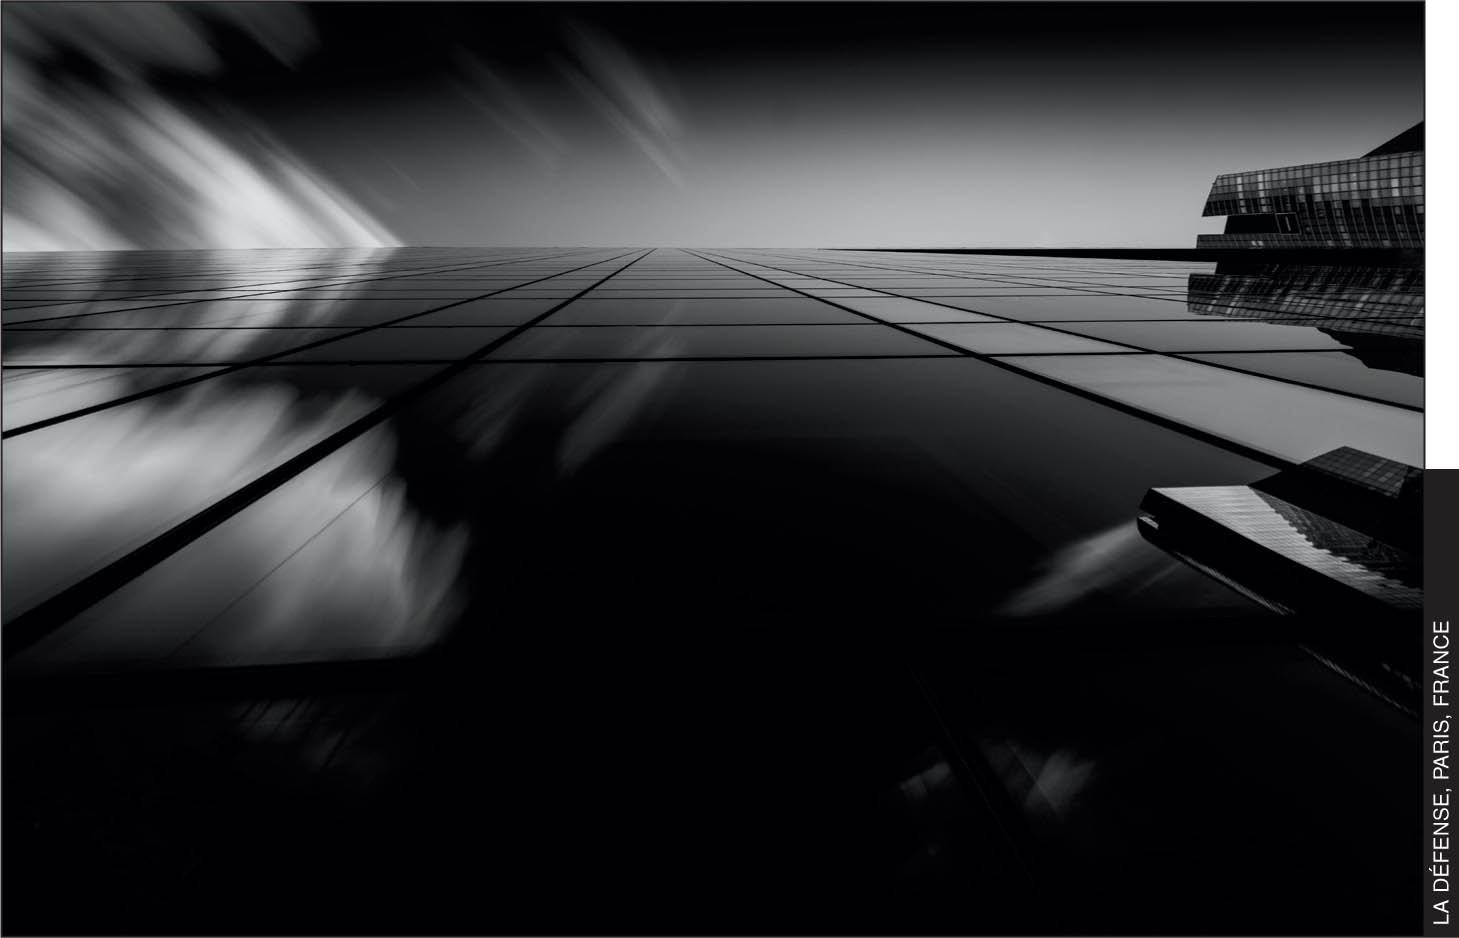
Leading Lines (and How to Use Them)
One thing we generally try to do with our composition is to lead people into our image—to draw them in and lead them where we visually want them to go in the photo. That’s why the compositional technique called “leading lines” is pretty popular because it leads the viewer’s eyes right to the area you want them to find in your photo. A leading line can be anything that leads the viewer’s eye, from a picket fence to a road winding around a hillside, to a row of sheep, to a railroad track leading their eye off into the horizon. When you’re taking your shot, and you see something you might be able to use as a leading line, like perhaps a row of streetlights or a row of bushes, you have to position yourself so these things in the scene lead the viewer’s eye into your scene (this is actually more fun than it sounds—finding that leading line and using it to your advantage). In the image above, taken at the Sheikh Zayed Grand Mosque in Abu Dhabi, I used the roof line of this side of the mosque to lead the viewer from the left of my image straight down to the right corner. Now, every image won’t have a leading line opportunity in it, but be prepared when you do see one to use it to make your composition even stronger.
Changing Your Perspective

Think for a moment about how an amateur photographer photographs anything—they walk up to whatever it is they want to take a photo of and they take the photo. All of their shots would be, with a rare exception I imagine, taken at eye level. There’s nothing wrong with eye-level shots; we all take them, right? But, there’s nothing particularly exciting or intriguing about them either. It’s the viewpoint most of the world’s photos are taken from, so it’s a very routine view. Want to take your photos up a notch really quickly without spending a dime? Change your perspective, and suddenly, even regular things become much more interesting because the person viewing your image is seeing things from a different view, a different perspective. This means getting down low, or even very, very low, or it can mean shooting from up high (or way up high) to show the view down on a scene. Think about food photography—the “shooting straight down” on food shot has become popular these days because it’s a different view than we’ve seen for most of our lives. It’s the same food we always see, but just changing the perspective (showing it from directly above) makes the scene more interesting. Shoot from a staircase or balcony down on a scene, or put your camera in a spot where you normally wouldn’t put a camera and use your self-timer to take the shot, and you’ll show someone a view they’re not used to seeing, and they’ll love you for it.
Working the Scene

I’ll bet you’ve had this experience dozens of times: You walk in a city and come across a scene and stop to take a few shots. You look at them on the back of your camera and they look pretty boring, so you take another shot or two and then move on. Here’s what you’re missing: if something made you stop there, that means something there caught your eye. There’s a shot there—you just didn’t stick around long enough to find it. You didn’t stay and “work the scene” long enough to find out where that certain something that called out to you was, so you didn’t get it. When you put your camera up to your eye, it doesn’t automatically snap to the thing that made you stop. You have to seek it out. Working the scene like this is so critical because there is a particular angle, a particular view, a particular composition where everything comes together—the light, the angle, the structure—to make a great shot. But, if you just walk away from a scene that called out to you, you’ll never find it. The secret is staying with it and “working the scene.” Your job is to stick with it, try different angles, different perspectives, try zooming in tight, going out wide, shooting from different viewpoints, until you uncover that frame that called out to your artistic subconscious. It may take 10 minutes, it may take 30, or you could get lucky and all it takes is 2 more minutes, and yet sometimes, you’ll still come away empty-handed, but that doesn’t mean it was time wasted or that we shouldn’t try. The image above was taken in the workshop of a gift shop in Morocco. The light was really nice, but it was just a big mess of tools and wood and…well, it was a mess, but something was drawing me there, so I stuck with it for like 15 minutes. I have a lot of really bad photos from that little shop, but I really like this simple one—its shapes and the softness of the light. Working the scene is a key technique and the more you try it, the more you’ll uncover a hidden gem in a sea of what seemed like nothing.
Avoid Junk around Your Edges

One of the most common compositional mistakes is one of the easiest to avoid because all you really have to do is be aware of it, and that is not letting things you don’t want in your image to creep in from the sides of it. A tree branch, a sign, some weeds, an ugly bush, a telephone pole—there are a host of things that can sneak in and become a distraction if you’re not looking out for them. One reason we get burned by this so often is that we’re focused on the subject when we’re taking the shot. Let’s say it’s a stream, and we’re using an ND filter to make the water all nice and silky, so that’s what we’re focusing on—the stream and whether it’s silky. We’re not paying attention to the things along the edges that sneak in to ruin our shot. Start keeping an eye on the edges of your photos, so you can change your shooting position—sometimes just an inch or two will do the trick—to keep things from sneaking in and messing up your image (or at the very least, making you spend a bunch of time trying to remove them in Photoshop. You want to spend your time in Photoshop being creative and having fun, not fixing stuff you should have caught while you were shooting). Just add keeping an eye on the edges to your composition list and it will pay off for you.
Simplify the Scene

Of all the compositional techniques in this chapter, if I had to choose which one is the most important, it would be to work hard to keep your scene simple. To limit what you include in your framing, so your message, your story, is strong and clear. Don’t make the mistake I did in looking through my viewfinder, not liking what I saw, and thinking the answer was to add more to my image, to include more to make the image more interesting, when the exact opposite was what I should have been doing. I needed to look through the viewfinder and ask myself if each element in that photo was making the image stronger or taking way from the image. When I learned to look for simplicity and clarity, not busy scenes with so much going on that the viewer didn’t know where to look first, it was a turning point in my photography. When I’m composing a shot today, I’m trying to figure out what I can leave out. Is there a way I can zoom in/out, move left/right, tilt up/down to simplify the image I’m creating, which would help make my visual story that much clearer? This is definitely a case of less is more. Give this one a try. I think you’ll dig it.
Odd Numbers Work Best

This is one of those tried-and-true techniques, and it’s based on the psychological concept that people like things better when there are odd numbers (people are weird. I know. I’m one of them. Have been for a while). For example, if you’re taking a photo on a bridge and you can include three or four lampposts along that bridge, always go with three. If there are lamps hanging in a restaurant, include three or five, but don’t choose four. By the way, I know I just used two lamp examples, but it really has nothing to do with lamps, so don’t let that get you (or me) off track. It’s any object in your image. There’s a row of shot glasses on the bar? Show one or three, or five or seven, but skip showing two or six. There…I broke the lamp curse.;-)
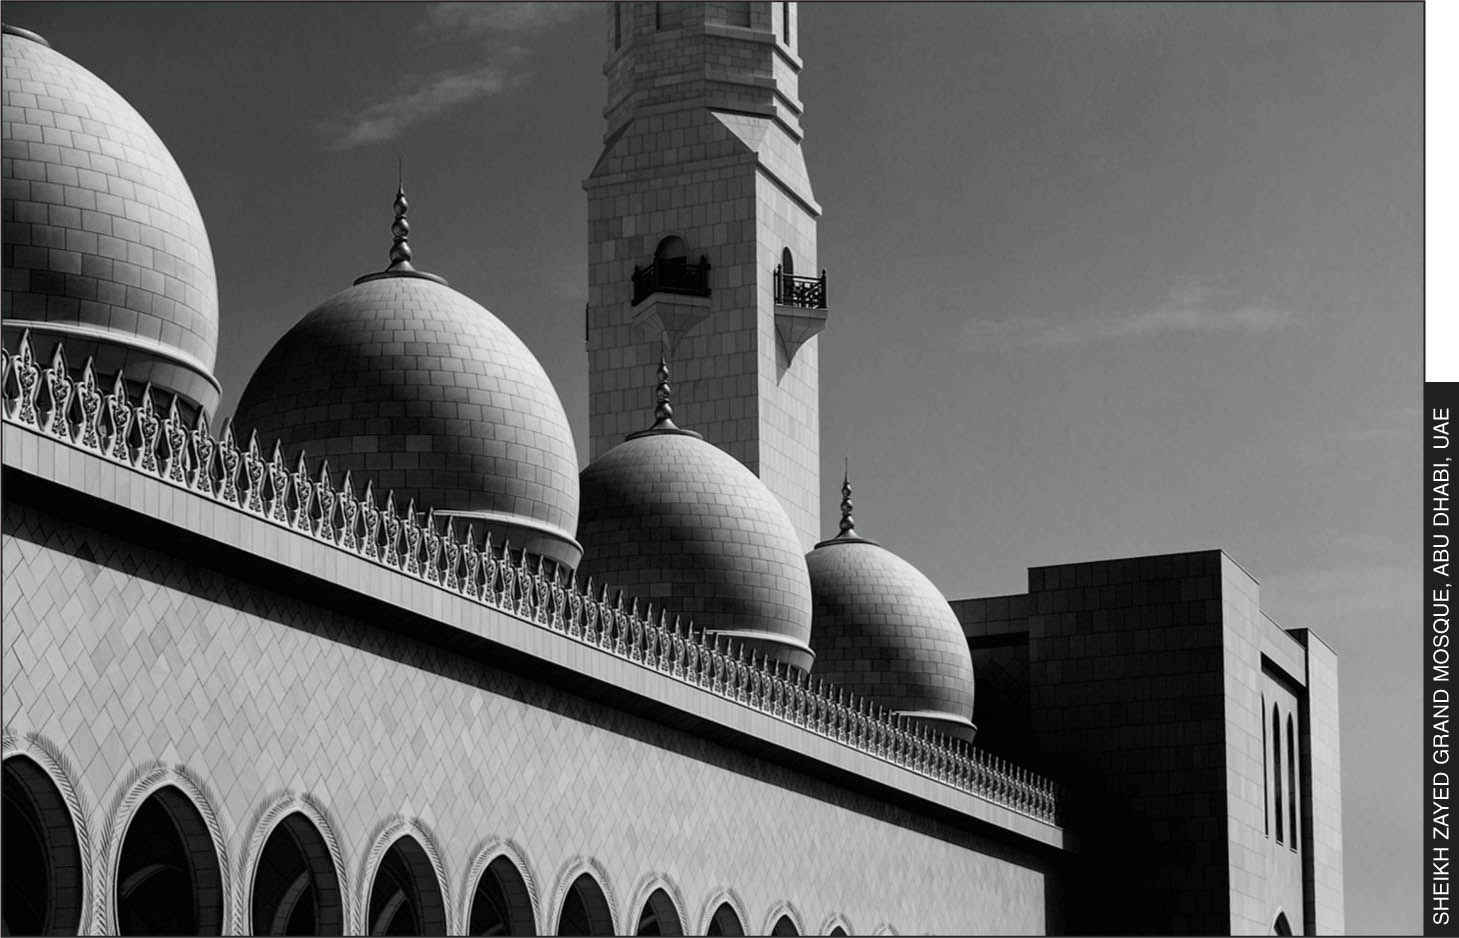
The Power of Negative Space
One of my favorite compositional techniques is called “negative space,” and that simply just means leaving a large area of your image empty (or without anything important), so it immediately draws the viewer’s eye to your subject. Negative space can be a solid color (like a wall), or a cloudless part of the sky (like you see here), or anything where there’s nothing (so it’s kind of empty), which brings strength and energy to your subject. This is an easy compositional technique to pull off. You just have to keep an eye out for negative space opportunities—situations where you can literally have your subject stand alone—and compose the shot so your subject is surrounded by nothing. It’s a more powerful technique than it sounds. Give this one a try.
Shooting Patterns

Humans love patterns. I have no idea how aliens feel about them, but speaking as a human (and an unofficial ambassador for this planet), I can tell you we love patterns. They’re everywhere in our lives, from tile patterns in our kitchens and bathrooms, to repeating patterns in the carpets beneath our feet, to the repeating patterns in ceilings, and buildings, and pretty much everywhere. So, since we love patterns so much, why not show folks something in your photography you know they already love: patterns. It’s a little trickier than it sounds because just a straight pattern of stuff can actually make for a fairly boring image, so to take things up a notch we do something I learned from legendary photographer Jay Maisel, who said (I’m paraphrasing here): patterns are interesting, but a pattern interrupted is even more interesting. He is so on the money! If you see a row of yellow umbrellas lining a sandy beach, that can be interesting. But, if just one of those umbrellas is a different color—maybe one of them is blue or red, interrupting the pattern—that takes it to a whole new level. Keep an eye out for patterns while you’re traveling, and keep shooting them and finding interesting ways to show them. You might even get lucky and have that pattern interrupted, and if you don’t have an interruption, well…there’s always Photoshop, which will take one of those umbrellas and change its color in two seconds.
Using Frames in Your Composition
What do people do when they have a photo they really like? They frame it. They frame it and put it on their desk or hang it on the wall. We love putting frames around things. That’s probably why “framing” a shot in-camera, where you’re shooting through a doorway or a window or an arch (or, in this case, a set of curtains), and including those elements in your shot is so pleasing to people. I wasn’t a big fan of this technique until I tried it a few times and saw the reactions of people who saw those framed-style shots. It’s like they’re drawn to them. So, if you want to create images people are drawn to, add this one to your bag of compositional tricks.
Symmetry: Why We Love It
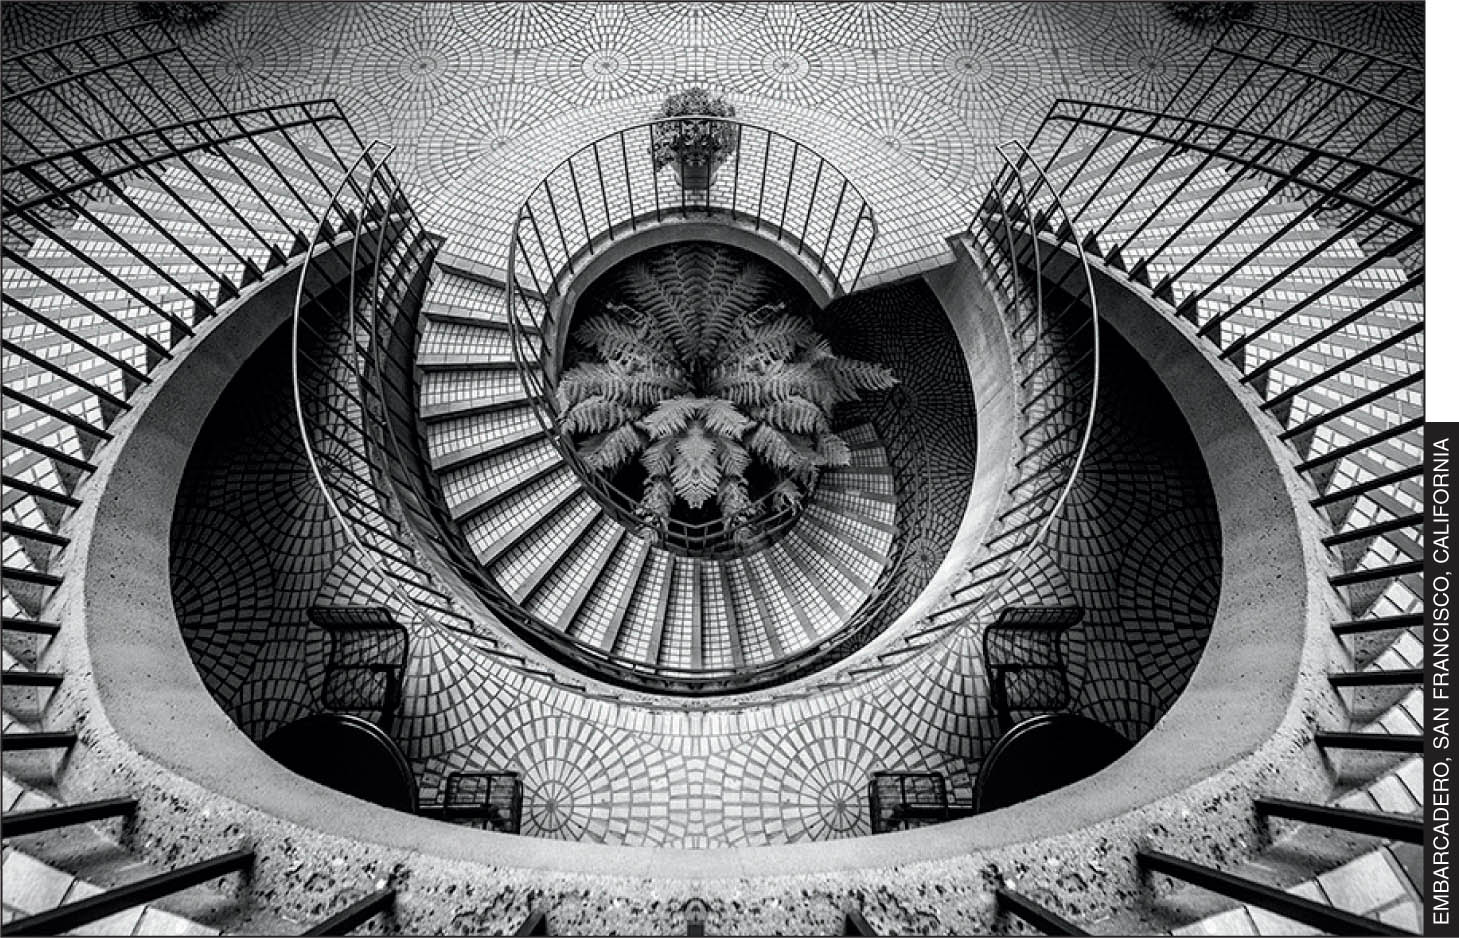
This is another one of those things that people seem to just love in photographs. We love symmetry in real life (they’ve even done studies that show that babies are drawn to adults and teens whose facial features are the most symmetrical—their eyes are perfectly aligned with each other, their smile extends the exact same amount on each side, their ears are perfectly aligned with one another, and so on). This is just something to be on the lookout for as you move through a city. But, in some cases, you can create symmetry artificially in Photoshop by selecting half of your image, putting it up on its own separate layer above the original image, and then using Photoshop’s Free Transform feature to horizontally flip the copied half of your image, and—boom—you have symmetry (not sure why I said “boom,” but I can’t take it out. I get paid by the word). Anyway, this is something else to keep an eye out for, but I have one additional tip: when you’re standing in front of something that’s perfectly symmetrical, like the Taj Mahal or the Eiffel Tower, or a group of buildings downtown, take an extra moment to make sure you’re shooting from the center of the object. If you’re off by a foot or two in either direction, it throws everything off just enough to look not quite right. It’s worth the extra few seconds to really make sure you’re centered before you shoot.
The Rule of Thirds

This is probably the most popular of all the compositional techniques. It was first created back in 1797, and not only do we still use it to this day, it’s so popular that most cameras (along with the camera in your cellphone) have a feature built in to help you use it when you shoot. The rule of thirds starts with the idea that putting things in the center of your image is boring, and that you can create an image with greater strength and depth by applying this compositional rule (“rule” is actually a bad name for it because it’s not a rule or a law. It should just be called the “rule-of-thirds tool” or something like that. It’s a helper. Not written in stone). To use the “rule,” you mentally divide what you’re seeing through your viewfinder into thirds (as I just mentioned, most cameras allow you to put a visible rule-of-thirds grid over your scene in the viewfinder, like you see above, so you can use it while you’re framing up your shot). Once you see the grid (either onscreen or in your mind), the idea is that the strongest place to put your subject is where the horizontal and vertical lines intersect. Any of those four places would add more dimension to your shot, versus putting your subject in the center (though, the reason this isn’t a law is that sometimes the exact right place to put your subject is in the center. Just depends on the image, right?). There is also a rule-of-thirds rule for horizon lines (which is covered on page 98), but that’s pretty much all there is to it. Put important elements where those lines intersect, and you’ll have stronger, more interesting images.