Chapter 16: Kubernetes Clusters on Microsoft Azure with Azure Kubernetes Service
The last of the three public cloud Kubernetes services we are going to look at is Azure Kubernetes Service (AKS), which is hosted on what most people consider to be one of the "big three" public cloud providers, Microsoft Azure.
By the end of this chapter, you will have configured your local environment with the tools needed to interact with your Microsoft Azure account and launch your AKS cluster. From there we will launch the same workload we launched in the previous two chapters, and then explore the level of integration that your AKS cluster has with the Microsoft Azure portal.
To do this, we will be covering the following topics:
- What are Microsoft Azure and AKS?
- Preparing your local environment
- Launching your AKS cluster
- Deploying a workload and interacting with your cluster
- Deleting your AKS cluster
Technical requirements
To following along with this chapter, you will need a Microsoft Azure account with a valid payment method attached to it.
Following the instructions in this chapter will incur a cost and it is important that you terminate any resources you launch once you have finished with them to avoid unwanted expenses.
All prices quoted in this chapter are correct at the time of print and we recommend that you review the current costs before you launch any resources.
What are Microsoft Azure and AKS?
Before we start to look at installing the supporting tools, let's quickly discuss the origins of the services we'll be looking at, starting with Microsoft Azure.
Microsoft Azure
In 2008, Microsoft announced a new service called Windows Azure, which it had been working on since 2004. This service was part of a project known internally as Project Red Dog. This project focused on delivering data center services using core Windows components. The five core components that Microsoft announced at their 2008 developer conference were as follows:
- Microsoft SQL Data Services: This was a cloud version of the Microsoft SQL Database service running as a Platform as a Service (PaaS), which aimed to remove the complexity of hosting your own SQL services.
- Microsoft .NET Services: Another PaaS service that allowed developers to deploy their .NET-based applications into a Microsoft-managed .NET runtime.
- Microsoft SharePoint: A Software as a Service (SaaS) version of the popular intranet product.
- Microsoft Dynamics: A SaaS version of Microsoft's CRM product.
- Windows Azure: An Infrastructure as a Service (IaaS) offering similar to other cloud providers that allowed users to spin up virtual machines, storage, and the networking services needed to support their compute workloads.
All of the services that Microsoft announced were built on top of the Red Dog operating system, which was a specialized operating system with a cloud layer built in.
In 2014, Windows Azure was renamed Microsoft Azure, which reflected both the name of the underlying operating system powering the cloud services and also the fact that Azure was running a large number of Linux-based workloads – in fact, in 2020, it was revealed that more than 50% of VM cores are running Linux workloads, as well as 60% of the Azure Marketplace images now being Linux-based.
This is largely due to Microsoft embracing both Linux and open source projects such as Kubernetes.
AKS
Microsoft provided its own container-based service called Azure Container Service (ACS). This allowed you to deploy container workloads backed by three different orchestrators: Docker Swarm, DC/OS, and Kubernetes.
It soon became apparent that Kubernetes was the most popular of the three orchestrators, so ACS was gradually replaced by AKS, which was a CNCF-compliant, purely Kubernetes-based service. The transition took about 2 years, with AKS becoming generally available in 2018 and ACS being retired in early 2020.
The AKS service is closely integrated with Azure Active Directory, Policies, and other key Microsoft Azure services.
Alongside AKS, Microsoft also offer a pure container service called Azure Container Instances (ACI) as well as the ability to launch container workloads in Azure App Services.
Rather than carrying on discussing the background of the services, I have always found it much easier to roll up your sleeves and get hands-on with a service, so without further delay, let's look at getting the tools installed we will need to launch and manage our AKS cluster.
Preparing your local environment
Before we look at launching our cluster, there are a few tasks we need to complete. First of all, if you don't already have one, you will need to sign up for an Azure account.
If you don't already have an account, then you can head to https://azure.microsoft.com/free/. You will be taken to the following page where you can sign up for a free account:

Figure 16.1 – Creating your Azure free account
At the time of writing, your free account includes 12 months of popular services, $200 of credit that can be used to explore and test the different Azure services, and access to over 25 services that will always be free.
Click on the Start for free button and follow the onscreen instructions. The sign-up process will take about 15 minutes and you will need to provide valid credit or debit card information to complete the process and gain access to your free account.
Once you have access to your account, the next step is to install the Azure CLI.
The Azure CLI
Microsoft provides a powerful cross-platform command-line tool for managing your Microsoft Azure resources. Installing it on the three main operating systems couldn't be simpler.
Installing on macOS
If you have been following along with the previous two chapters, then you may have already guessed that we will be using Homebrew to install the Azure CLI on macOS. To do this, simply run the following command:
$ brew install azure-cli
Once installed, run the following command:
$ az –version
This should return something similar to the following screenshot:

Figure 16.2 – Checking the Azure CLI version on macOS
Once installed, you can move on to the Configuring the Azure CLI section of this chapter.
Installing on Windows
There are few ways you can install the Azure CLI on Windows:
- The first is to download a copy of the installer from https://aka.ms/installazurecliwindows and then execute it by double-clicking on it.
- The next option is to use the following PowerShell command, which will download the installer from the preceding URL and install it:
$ Invoke-WebRequest -Uri https://aka.ms/installazurecliwindows -OutFile .AzureCLI.msi; Start-Process msiexec.exe -Wait -ArgumentList '/I AzureCLI.msi /quiet'; rm .AzureCLI.msi
- The third option is to use the Chocolatey package manager and run the following command:
$ choco install azure-cli
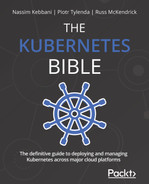
Whichever way you choose to install the package, run the following command once it has been installed to find out the version number:
$ az –version
You should see something like the following screen:
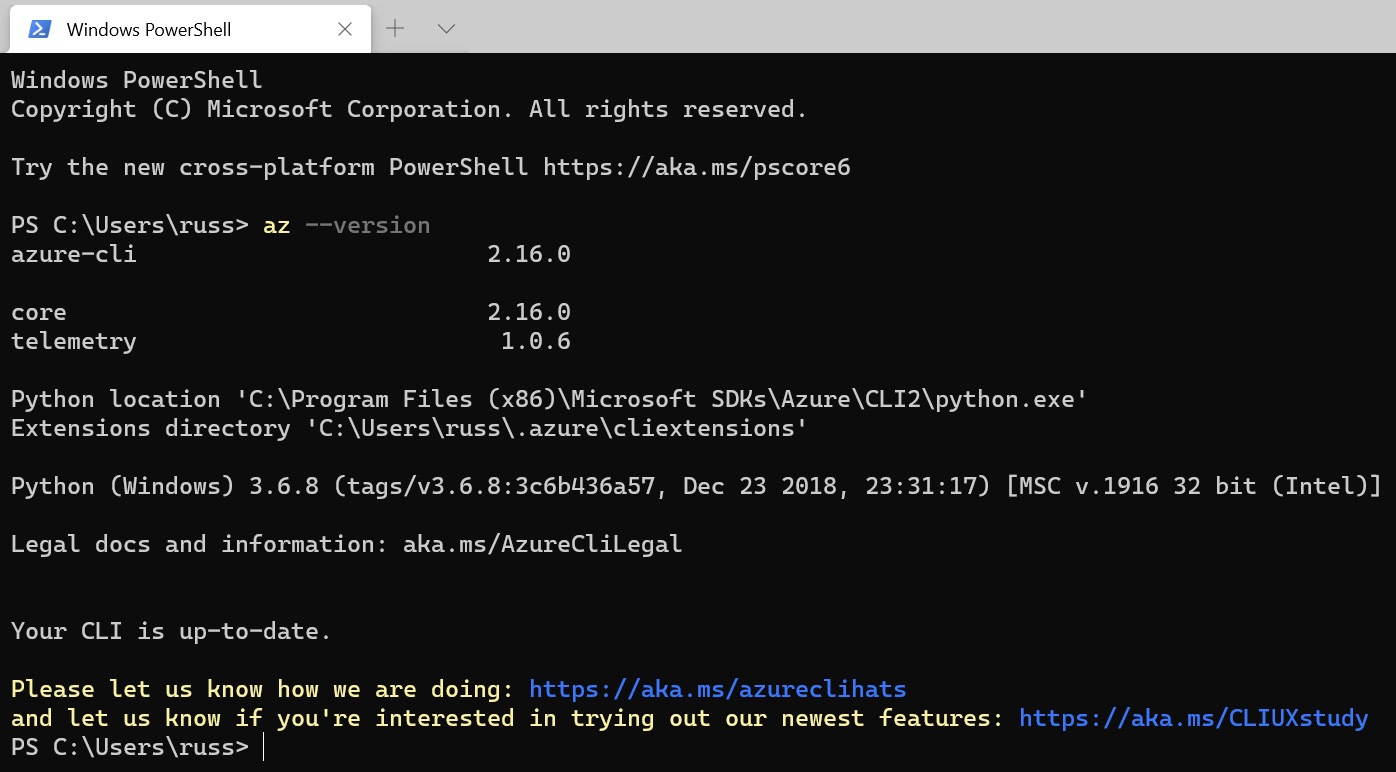
Figure 16.3 – Checking the Azure CLI version on Windows
Once installed, you can move on to the Configuring the Azure CLI section.
Installing on Linux
Microsoft provides an installation script that covers the most common Linux distributions. To run the script, use the following command:
$ curl -L https://aka.ms/InstallAzureCli | bash
Once installed, you will need to restart your session. You can do this by logging out and then back in, or on some distributions by running the following command:
$ source ~/.profile
Once you have restarted your session, run the following command:
$ az –version
This will return information on the version of the Azure CLI installed:

Figure 16.4 – Checking the Azure CLI version on Linux
Now we have the Azure CLI installed, we can configure it.
Configuring the Azure CLI
Configuring the Azure CLI is a really straightforward process; you just need to run the following command:
$ az login
This will open up your default browser where you will be asked to log in. If you are having problems or running a command-line-only installation of the Azure CLI (on a remote Linux server for example), then running the following command will give you a URL and unique sign-in code to use:
$ az login –use-device-code
Once logged in, your command-line session should return some information on your Azure account. You can view this again by using the following command:
$ az account show
If, for any reason, you are not able to install the Azure CLI locally, all is not lost, as there is a web-based terminal with the Azure CLI you can use in the Azure portal. We are going to look at this next.
Accessing Azure Cloud Shell
To get access to Azure Cloud Shell, open https://portal.azure.com/ and log in with your credentials. Once logged in, you can click on the Cloud Shell icon in the menu bar, which can be found at the top of the page – it is the first icon next to the central search box.
If you have previously opened a Cloud Shell session, then it will launch straight away. If you receive a message saying You have no storage mounted, resolve this by making sure that your subscription is selected correctly from the drop-down box:

Figure 16.5 – Setting up Cloud Shell
Then, click on the Create storage button. After about a minute, your Cloud Shell should open, and you will be presented with a command prompt:

Figure 16.6 – Your Cloud Shell command prompt
Now that you have a command prompt, running the following command, as we did on the local Azure CLI installation, will give you information on the version of the Azure CLI installed:
$ az --version
You will not need to run the az login command as the Azure portal took care of that for you in the background when your Cloud Shell instance launched.
Now that you have access to a configured Azure CLI, in one form or another, we can look at launching our AKS cluster.
Launching your AKS cluster
Launching your AKS cluster requires two commands. The first command creates an Azure resource group:
$ az group create --name k8sforbeginners-rg --location eastus -o table
In the preceding command, we are creating a resource group called k8sforbeginners-rg in the eastus region and setting the output to be formatted as a table rather than JSON, which is the default output type for the Azure CLI.
Information
A resource group is a logical container used to group related Azure resources. Services launched within the resource group can inherit settings such as role-based access controls, locks, and even the location.
Once the resource group has been created, you should see something like the following output:

Figure 16.7 – Creating the resource group
Now that we have our resource group, we can launch our AKS cluster by running the following command:
$ az aks create --resource-group k8sforbeginners-rg --name k8sforbeginners-aks --node-count 2 --enable-addons monitoring --generate-ssh-keys -o yaml
Launching the cluster will take about 5 minutes, so while that is running I will work through the options we passed to the preceding az aks create command:
- --resource-group is the name of the resource group you want to launch your AKS cluster in. The cluster will inherit the resource group's location. In our example, we are using the k8sforbeginners-rg resource group we created in the command before last.
- --name is the name of the cluster you are launching. We are calling ours k8sforbeginners-aks.
- --node-count is the number of nodes you want to launch. We are launching 2. At the time of writing, the default instance type for nodes is Standard_DS2_v2, meaning that each node will have 2 vCPUs and 7 GB of RAM.
- --enable-addons is used to supply a list of add-ons to enable while the cluster is being launched – we are just enabling the monitoring add-on.
- --generate-ssh-keys will generate SSH public and private key files for the cluster.
- -o determines the output. At this time, we are outputting the results returned when we run the command as yaml because the output is more readable than both the JSON and table options.
Once your cluster has launched, you should see something like the following output:

Figure 16.8 – Viewing the output of the cluster launch
As you can see, there is a lot of information. We are not going to worry about any of this though, as we will be using the Azure CLI and portal to interact with the cluster.
Now that our cluster has launched, we need to configure our kubectl client so that it can interact with the cluster. To do this, run the following command:
$ az aks get-credentials --resource-group k8sforbeginners-rg --name k8sforbeginners-aks
Once run, you should see something like the following:

Figure 16.9 – Grabbing the credentials and configuring kubectl
This now means that you can start to interact with your cluster, for example, by running the following command:
$ kubectl get nodes
This will return the nodes within the cluster, as seen in the following screenshot:

Figure 16.10 – Viewing the nodes in the cluster
Now that we have our cluster launched and our local kubectl client configured with the cluster details and credentials, we can launch our test workload.
Deploying a workload and interacting with your cluster
We are going to be using the same workload we launched in Chapter 14, Kubernetes Clusters on Google Kubernetes Engine, and Chapter 15, Launching a Kubernetes Cluster on Amazon Web Services with Amazon Elastic Kubernetes Service, so I am not going to go into detail here other than to cover the commands.
Launching the workload
As per the previous chapters, there are three main steps to launching our workload:
- Create the Redis leader deployment and service:
$ kubectl apply -f https://raw.githubusercontent.com/GoogleCloudPlatform/kubernetes-engine-samples/master/guestbook/redis-leader-deployment.yaml
$ kubectl apply -f https://raw.githubusercontent.com/GoogleCloudPlatform/kubernetes-engine-samples/master/guestbook/redis-leader-service.yaml
- Create the Redis follower deployment and service:
$ kubectl apply -f https://raw.githubusercontent.com/GoogleCloudPlatform/kubernetes-engine-samples/master/guestbook/redis-follower-deployment.yaml
$ kubectl apply -f https://raw.githubusercontent.com/GoogleCloudPlatform/kubernetes-engine-samples/master/guestbook/redis-follower-service.yaml
- Create the Guestbook frontend deployment and service:
$ kubectl apply -f https://raw.githubusercontent.com/GoogleCloudPlatform/kubernetes-engine-samples/master/guestbook/frontend-deployment.yaml
$ kubectl apply -f https://raw.githubusercontent.com/GoogleCloudPlatform/kubernetes-engine-samples/master/guestbook/frontend-service.yaml
- The final command to run gets the address of the frontend service:
$ kubectl get service frontend

Figure 16.11 – Getting the external IP address of the frontend service
Direct your browser to the IP address and you should be greeted with the Guestbook application. As before, I have added a few test entries:

Figure 16.12 – Viewing the Guestbook application
Now that the workload is up and running, we can move to the Azure portal.
Exploring the Azure portal
If you haven't already, log in to the Azure portal found at https://portal.azure.com/. Once logged in, enter kube into the Search resources, services, and docs search box at the very top of the page.
Under the list of services, you will see Kubernetes services – click on this service and you will be be presented with a list of Kubernetes services you have launched within your subscription.

Figure 16.13 – Listing the Kubernetes services
Clicking on k8sforbeginners-aks will take you to an overview page. This will be our jumping-off point for viewing information about our workload and cluster.

Figure 16.14 – The cluster overview
Under the Kubernetes resources menu on the left, you will see several options. Let's work through them one by one:
- Namespaces: Here you will find all the namespaces active within the cluster. As we didn't define a namespace when we launched our workload, our deployments and services will be listed under the default namespace.
As well as the default namespace, there are also the ones deployed as part of the cluster, namely, kube-node-lease, kube-public, and kube-system. I would recommend leaving these alone.
If you were to click on the default namespace, you would be presented with the Overview page, where you can edit the YAML that defines the namespaces, along with an Events log.
- Workloads | Deployments: Here, as you may have already guessed, is where you can view information on your workloads. In the following screenshot, I have filtered the list to only show the workloads in the default namespace:
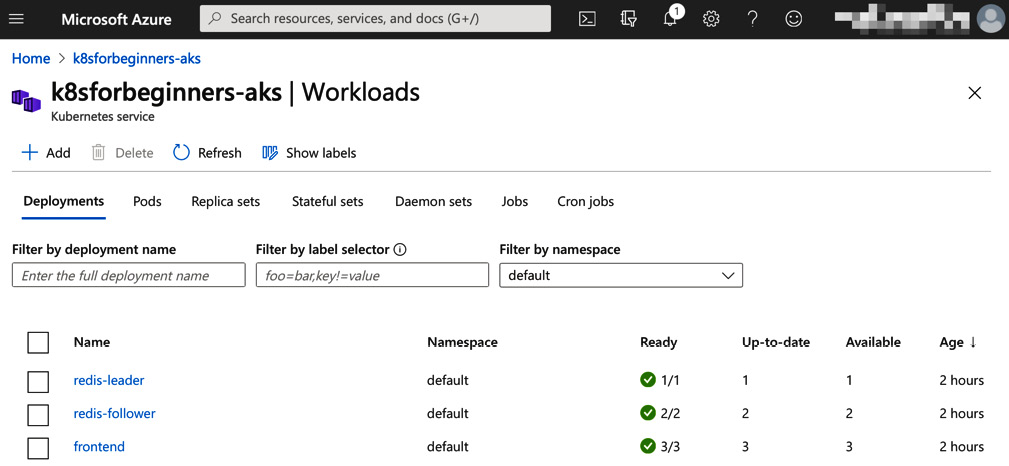
Figure 16.15 – Viewing the deployments
Clicking on one of the deployments will give you a more detailed view of the deployment. For example, selecting the frontend deployment shows the following:
Figure 16.16 – An overview of the frontend deployment
As you can see from the menu on the left, there are a few additions to the options: as well as YAML and Events, we also have the option to view Insights. We will take a closer look at this at the end of this section when we cover Insights in more detail.
The next option is Live Logs, which, at the time of writing, is in preview. Here, you can select one of the deployed pods and stream the logs in real time.

Figure 16.17 – Viewing the pod logs in real time
The Changelogs option displays any changelogs available as part of your deployment.
- Workloads | Pods: Here, you can view a list of the pods that make up your workload. The IP address along with the node the pod is active on are listed. This is a useful view to get a quick overview of all of your running pods.

Figure 16.18 – Viewing all of your pods
Clicking on one of the pods will give you an Overview, and show you the YAML and also any Events for the pod.
- Workloads | Replica sets is another useful view for getting an at-a-glance view of the replica sets deployed as part of your workload.

Figure 16.19 – Viewing the replica sets
Clicking on one of the replica sets gives you the now-familiar options of Overview, YAML, and Events.
- Workloads | Stateful sets: While we don't have any stateful sets deployed as part of our workload, clicking to view all of the namespaces will show the stateful sets deployed by Microsoft as part of the cluster. These are the Azure OMS Agent (omsagent) used for monitoring our cluster – there is one of these deployed per node at all times – and the Proxy service (kube-proxy).
- Workloads | Jobs and Cron jobs: Under these tabs, you will find details of any jobs and cron jobs you have deployed within the cluster.
- Services and ingresses: Here, you will be able to find a list of all of the services you have deployed in your cluster. As you can see from the following screenshot, you can get an overview of the Cluster IP used for the service along with any External IP you have configured:

Figure 16.20 – Viewing the services
Clicking on one of the services listed will provide the now-familiar view and allow you to drill deeper into the configuration of the services.
- Storage: If we had any persistent storage configured within the cluster, you would be able to view the details here.
- Configuration: The final option under the Kubernetes resources menu allows you to view and edit any Config maps or Secrets you have configured within the cluster. As we don't have any of these configured in our workload, the ones listed are for the cluster itself, so I wouldn't recommend making any changes to the items present.
As you can see, there is a wealth of options available to get information about all of the parts that make up your Kubernetes workload.
The next section in the left-hand menu covers the settings of the cluster itself. Here is a quick overview of what you can find:
- Node pools: Here you will find details of the node pool you have, along with the options to Upgrade the Kubernetes version running within the pool. This option is only available if you upgrade the version of Kubernetes running on the control plane.
You can also Scale the pool and have the option to Add a node pool. In the following screenshot, we can see what the scale option looks like:

Figure 16.21 – Node pool scale options
- Cluster configuration: In the last point, I mentioned that you can only upgrade the Kubernetes version running within your node pools if you upgrade the control plane, and this option is where you do that. The control plane is managed by Microsoft and is separate to your node pools. The Kubernetes control plane offers backward compatibility by up to three releases, so normally you would only be able to upgrade within three releases of the version you are currently running.
- Scale: While, at the time of writing, this option is still listed as its own option, the page does mention that the scale functions have been moved to the Node pool section and that this page will be removed at some point.
- Networking: Here you will find both information and configuration options for the networking of your cluster. This is quite a dense subject and I recommend following the link on the page for more information on the options available when it comes to networking and your AKS cluster.
- Dev Spaces: Like the Scale option, this has again been deprecated. Microsoft at one point offered an IDE based on Visual Studio Code called Dev Spaces, but this service is due to be retired and Microsoft are now recommending you use Bridge to Kubernetes in Visual Studio and Visual Studio Code.
- Deployment center: This service is still in preview, but here you can add and configure an Azure DevOps pipeline to deploy your application straight into your cluster.
- Policies: One of the big selling points of Microsoft Azure is the centralized means it offers for managing policies. Enabling this add-on will extend the Azure policy service into your AKS cluster, giving you a way to centrally manage and report on policies.
- Properties: This provides a quick overview of your AKS cluster.
- Locks: Here, you can add a resource lock that will protect your cluster from accidental deletion or from any configuration changes that may affect the running of your AKS cluster.
The last part of the Azure portal we are going to look at is the Insights option found under the Monitoring menu in the cluster view. As you may recall, when we deployed our cluster, we enabled the monitoring add-on using the --enable-addons monitoring flag.
What this did was enable the OMS Agent stateful set, which we saw when we looked at the Stateful set page under the Workloads section. The OMS Agent is the tool used by Microsoft to ship data from a resource to the Azure Log Analytics service. Once the data has been shipped to this service, Microsoft then presents this information back to you, most commonly as Insights. Most Azure services have an Insights option and the data here can be used by Azure Monitor to create and generate alerts.
Clicking on Insights will bring up a page similar to the following:

Figure 16.22 – Viewing some of the cluster insights
There are a few options under Insights – let's take a look:
- Cluster: This is shown in the preceding screenshot and gives you a quick view of the CPU and memory utilization across the whole cluster. It also shows both Node and pod counts.
- Reports: At the time of writing, this is in preview. Here you can find pre-written reports around Node monitoring (performance), Resource monitoring (availability), Billing, and also Networking. As the service matures, more reports will be added.
- Nodes: Here you can get an overview of your Nodes.
- Controllers: This is where you will find details on the controllers launched within your cluster – for example, the Replica and Daemon sets.
- Containers: Here you can find details of all the containers running on the pods you have deployed.
- Deployments: This option shows a list of your deployments.
Now you may think there is a lot of repetition in the preceding sections – and there is a little bit of that; however, if you need to see what is going on within your cluster quickly, you now have a way of getting that information without having to drill through a lot of pages to find it.
I recommend having a look around and clicking on as many options as you can to explore the level of integration of your cluster and the Azure portal. Once you have finished, it is time for us to remove the cluster.
Deleting your AKS cluster
The final thing we are going to look at is how to delete the cluster. Moving back to the Azure CLI, all we need to run to delete the cluster is the following command:
$ az aks delete --resource-group k8sforbeginners-rg --name k8sforbeginners-aks
You will be asked if you are sure – answering yes will proceed to delete the cluster.
The process takes about 5 minutes. The preceding command only deletes the cluster itself and not the resource group. To delete the latter, run the following command:
$ az group delete --name k8sforbeginners-rg
Again, you will be asked if you want to delete the group – just answer yes.
So how much would our cluster cost to run?
Unlike the other two cloud services we looked at in the previous two chapters, there is no charge for cluster management, and all that you need to pay for is the compute resource.
So, in our case, 2 x Standard_DS2_v2 instances in US East would cost around $213 per month. There are other options, such as new generations of instances that could give us a similar-sized cluster for less money. For example, we could launch a different cluster using the following commands:
$ az group create --name k8sforbeginners-rg --location eastus -o table
$ az aks create --resource-group k8sforbeginners-rg --name k8sforbeginners-aks --node-count 2 --enable-addons monitoring --generate-ssh-keys --node-vm-size standard_ds3_v2 -o yaml
This will give us a two-node cluster with a total of 4 vCPUs and 16 GB of RAM for around $140 per month.
Summary
In this chapter, we looked at how Microsoft Azure came to be, along with a little bit of the history behind some of the container services offered by Microsoft, and how they eventually settled on AKS.
We then signed up for an Azure account and installed and configured the Azure CLI before launching our own AKS cluster. Once launched, we deployed the same workload we deployed to our Google Kubernetes Engine and Amazon Elastic Kubernetes Service clusters.
Once the workload was deployed, we moved onto the Azure portal and looked at the options for gaining insights into our workload and cluster as well as some of the cluster management options.
We then finally deleted the resources we launched, and discussed how much the cluster would cost to run.
Out of the three public cloud services we have looked at over the last three chapters, I personally believe that Microsoft has come up with the most rounded and feature-rich offering.
I would put Google's offering, which we discussed in Chapter 14, Kubernetes Clusters on Google Kubernetes Engine, at a close second, as technically it is good, but their pricing makes it difficult to recommend. This leaves Amazon's service, covered in Chapter 15, Launching a Kubernetes Cluster on Amazon Web Services with Amazon Elastic Kubernetes Service. AWS comes in as my least recommend service – it simply doesn't feel as polished as the offerings by Microsoft and Google in that it should feel like you are launching a service to complement other services offered by the cloud provider, but instead it really feels like you just happen to be running a Kubernetes cluster in AWS.
Personal opinion aside, the key takeaway from having launched a Kubernetes cluster in three very different public cloud services is that once you have your cluster up and running, and your kubectl client configured to interact with it, the experience is pretty much the same and your workload really doesn't care where it is launched. You also don't have to take into consideration the differences between the three providers – only just a few years ago, this seemed like an unthinkable situation, and truly cloud-agnostic workloads were just a pipe dream.
In the next section of this book, we are going to look at some more advanced Kubernetes usage, starting with Helm charts – all of which can be applied to clusters launched in the public clouds we have discussed in this and the previous two chapters.
Further reading
Here are links to more information on some of the topics and tools covered in this chapter:
- Microsoft Azure: https://azure.microsoft.com/
- AKS: https://azure.microsoft.com/services/kubernetes-service/
- AKS official documentation: https://docs.microsoft.com/en-us/azure/aks/
- Azure DevOps: https://azure.microsoft.com/services/devops/
- Bridge to Kubernetes documentation: https://code.visualstudio.com/docs/containers/bridge-to-kubernetes
- Bridge to Kubernetes (Visual Studio): https://marketplace.visualstudio.com/items?itemName=ms-azuretools.mindaro
- Bridge to Kubernetes (Visual Studio Code): https://marketplace.visualstudio.com/items?itemName=mindaro.mindaro