Chapter 14: Kubernetes Clusters on Google Kubernetes Engine
In this chapter, we are going to look at launching our very own Kubernetes cluster in the first of the three public cloud providers that we will be covering in this title: Google Cloud Platform (GCP).
By the end of the chapter, we will have signed up to GCP and launched a Kubernetes workload using Google Kubernetes Engine (GKE), as well as having discussed some of the features that GKE has to offer.
We will be covering the following topics:
- What are GCP and GKE?
- Preparing your local environment
- Launching your first GKE cluster
- Deploying a workload and interacting with your cluster
- More about cluster nodes
Technical requirements
To follow along with this chapter, you will need a GCP account with a valid payment method attached to it.
Important note
Following the instructions in this chapter will incur a financial cost. It is therefore important that you terminate any resources you launch once you have finished using them.
All prices quoted in this chapter are correct at the time of writing this book, and we recommend that you review the current costs before you launch any resources.
What are GCP and GKE?
Before we roll up our sleeves and look at signing up for a GCP account and installing the tools, we will need to launch our GKE-powered cluster. We should also discuss GCP and how it came to be.
Google Cloud Platform
Of the big three public cloud providers, GCP is the newest. We will look at Amazon Web Services (AWS) and Microsoft Azure over the next two chapters.
Google's foray into public cloud technology started very differently from the other two providers. In April of 2008, Google launched the public preview of its Google App Engine, which was the first component of its cloud offering. Google App Engine, as a service, is still available to this day. The service allows developers to deploy their applications into Google-managed runtimes – these include PHP, Java, Ruby, Python, Node.js, and .NET, along with Google's own programming language, Go.
The next service under the GCP banner didn't arrive until May 2010, and this was Google Cloud Storage, followed by Google BigQuery and a preview version of its Prediction API. A year later, October 2011 saw the launch of Google Cloud SQL. Then, in June 2012, the Google Compute Engine preview was launched.
As you can see, 4 years had passed, and we then had what most would consider the core services that go into making a public cloud service. However, the majority of the services were still in preview – in fact, it wouldn't be until 2013 that a lot of these core services would move out of preview and into generally available (GA), which meant that it was possible to safely run production workloads at scale.
All of this was just a year before Google would launch Kubernetes. Towards the end of 2014, Google would bring out the first alpha of GKE.
Google Kubernetes Engine
Given that Kubernetes was developed at Google, and also given Google's vast experience of running container workloads at scale with the Borg project (as we discussed in Chapter 1, Kubernetes Fundamentals), it came as no surprise that Google was one of the first of the public cloud providers to offer its own Kubernetes offering in GKE.
In fact, after Kubernetes v1 came out and was then handed over to the Cloud Native Computing Foundation (CNCF) to maintain in July 2015, it was only a month later that the GKE service went GA.
The GKE service allows you to launch and manage a CNCF certified Kubernetes cluster powered by the compute, storage, and network services of GCP, and also allows for deep integration with the monitoring, identity, and access management functions of the platform.
Now that we know a little bit of the history behind the service, we can sign up and install some of the management tools we will be using to launch our cluster.
Preparing your environment
The first thing we need to do is get you access to GCP. To do this, you will either need to sign up for an account or log in to your existing one. Let's learn how.
Signing up for a GCP account
To sign up for a GCP account, you will need to visit https://cloud.google.com/. Here you should be greeted by a page that looks like the following:

Figure 14.1 – The GCP welcome page
If you are already using a Google service such as Gmail, YouTube, or have an Android phone, then you will possess a Google account. You can use this account to enroll for GCP. As you can see in Figure 14.1, I am already logged into my own Google account, as indicated by the avatar on the top right-hand side of the screenshot.
At the time of writing, Google is offering $300 of credits for you to use over 90 days.
Important note
If you choose to take advantage of the free credits, you will still need to enter a valid payment method. Google does this to ensure that it is not an automated bot signing up for the account to abuse the credits they are offering. Once the credits have been used or expired, you will be given the option to upgrade your account to a paid account.
If you want to take advantage of this, then click on the Get started for free button and follow the onscreen prompts, making sure you read the terms and conditions. Once you have enrolled, you will be taken to the GCP console.
If you already have a GCP account, then log in to the GCP console directly at the following URL: https://console.cloud.google.com/.
Now that we have an account in place, let's learn how to create a project using the platform.
Creating a project
GCP has a concept whereby resources are launched into projects. if you have just signed up for an account, then a project called My First Project will have been created for you as part of the enrollment process.
If you are using an existing account, then I would recommend creating a new project to launch your GKE cluster in. To do this, click on the Select menu, which can be found in the top bar next to the GCP logo.
This will display all of your projects, as well as giving you the option to create a new project. To do so, follow these steps:
- Click on NEW PROJECT.
- You will be asked to give your new project a name, select the billing account you would like to attach the project to, and finally select the organization or folder you would like to place the project in. Fill in the required details.
- Once these details have been entered, then you simply need to click on the CREATE button.
Important note
If you are using the automatically provided My First Project, you will need to make sure that the project is attached to a billing account before you proceed. To do this, click on the burger menu icon in the top left of the Google Cloud Console page, and select the Billing option. From here, follow the onscreen instructions to link the project to the billing account.
Now that we have a place to launch our resources, we can look at installing the GCP command-line tool.
Installing the GCP command-line interface
Here we are going to cover the GCP Command-Line Interface (CLI) on your local machine. Don't worry if you do not want to or are unable to install it, as there is a way that you can run the CLI in the cloud. But let's start with my operating system of choice, macOS.
Installing on macOS
If you are like me and you do a lot of work on macOS using Terminal, there is a high likelihood that you have installed and used Homebrew at some point.
Important note
Homebrew is a package manager for macOS that simplifies the installation of software on your machine. It works exclusively on the command line via the brew command.
If you don't have Homebrew installed, then you can install it by opening a Terminal session and running the following command:
$ /bin/bash -c "$(curl -fsSL https://raw.githubusercontent.com/Homebrew/install/master/install.sh)zz
Once installed, you will be able to install the GCP CLI using the following command:
$ brew cask install google-cloud-sdk
You can test the installation by running the following command:
If everything goes as planned, you should see something like the following output:
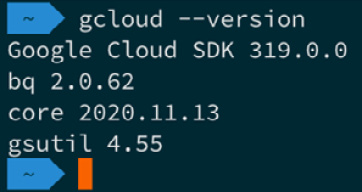
Figure 14.2 – Checking the version number on macOS
If you are having problems, you can check the documentation by running this code:
$ brew cask info google-cloud-sdk
Once Homebrew is installed and working, you can move onto the Initialization section of this chapter.
Installing on Windows
There are a few options to install the GCP CLI on Windows. The first is to open a PowerShell session and run the following command in order to install it using Chocolatey.
Important note
Like Homebrew on macOS, Chocolatey is a package manager that lets you easily and consistently install a wide variety of packages on Windows via PowerShell, using the same command syntax rather than having to worry about the numerous installation methods that exist on Windows.
If you don't have Chocolatey installed, then you can run the following command in a PowerShell session that has been launched with administrative privileges:
$ Set-ExecutionPolicy Bypass -Scope Process -Force; [System.Net.ServicePointManager]::SecurityProtocol = [System.Net.ServicePointManager]::SecurityProtocol -bor 3072; iex ((New-Object System.Net.WebClient).DownloadString('https://chocolatey.org/install.ps1'))
Once Chocolatey is installed, or if you already have it installed, simply run the following:
$ choco install --ignore-checksum gcloudsdk
The other way you can install it is to download the installer from the following URL: https://dl.google.com/dl/cloudsdk/channels/rapid/GoogleCloudSDKInstaller.exe.
Once downloaded, run the executable by double-clicking on it and following the onscreen prompts.
Once installed, open a new PowerShell window and run the following command:
$ gcloud --version
If everything goes as planned, you should see something like the following output:

Figure 14.3 – Checking the version number in PowerShell
Once installed and working, you can move onto the Initialization section of this chapter.
Installing on Linux
While the Google Cloud CLI packages are available for most distributions, we don't have the space to cover all of the various package managers here. Instead, we will use the install script provided by Google. To run this, you simply need to use the following commands:
$ curl https://sdk.cloud.google.com | bash
$ exec -l $SHELL
The script will ask you several questions during the installation. For most people, answering Yes will be fine. Once installed as per the macOS and Windows installations, you can run the following command:
$ gcloud –version
You should then see the following output:

Figure 14.4 – Checking the version number on Linux
The one thing you might have noticed from the three installations is that, while the install method differs, once the package has been installed, we are using the same gcloud command, and also getting the same results back. From here, it shouldn't matter which operating system you are running, as the commands will apply to all three.
Cloud Shell
Before we started installing the Google Cloud CLI, I did mention that there was a fourth option. That option is Google Cloud Shell, which is built into Google Cloud Console. To access this, click on the Shell icon, which can be found on the right of the top menu.
Once configured, you should see what looks to be a web-based terminal from which you can run the following:
$ gcloud –version
The output differs slightly here as Google has provided the full suite of supporting tools. However, you will notice from the following screen that the versions do match the ones we installed locally:

Figure 14.5 – Checking the version number in Google Cloud Shell
If you are using Google Cloud Shell, then you can skip the initialization step, as this has already been done for you.
Initialization
If you have chosen to install the client locally, then we will need to do one final step to link it to your GCP account. To do this, run the following command:
$ gcloud init
This will immediately run a quick network diagnostic to ensure that the client has the connectivity it needs to run. Once the diagnostic has passed, you will be prompted with the following question:
You must log in to continue. Would you like to log in (Y/n)?
Answering Y will open a browser window. If it doesn't, then copy and paste the provided URL into your browser where, once you have selected the account you wish to use, you will be presented with an overview of the permissions the client is requesting, as seen in the following figure:

Figure 14.6 – Reviewing the permissions
If you are happy to grant the permissions, then click the Allow button. Back on your terminal, you will get confirmation of the user you are logged in as. Then you will be asked to pick a cloud project to use. The list will only contain the unique ID of the project, and not the friendly name that you saw or set up in Google Cloud Console earlier. If you have more than one project, please make sure you pick the correct project.
Should you need to update the project the client is using at any point, you can run the following command:
$ gcloud config set project PROJECT_ID
Make sure you replace PROJECT_ID with the unique ID of the project you wish to switch to.
Now that you have installed the Google Cloud CLI and have configured your account, we are ready to launch your GKE cluster.
Launching your first GKE cluster
As it is going to take a few minutes to launch the cluster, let's run the command to initiate the process and then talk through in a little more detail what is happening while it launches.
Before we launch our cluster, we need to make sure that the container.googleapis.com service is enabled. To do this, run the following command:
$ gcloud services enable container.googleapis.com
Once the service has been enabled, the command to launch a two-node cluster called k8sforbeginners, which will be hosted in a single zone in the Central US region, is as follows:
$ gcloud container clusters create k8sforbeginners --num-nodes=2 --zone=us-central1-a
After about 5 minutes, you should see something that looks like the following output:

Figure 14.7 – Launching the cluster
Once the cluster has launched, you should be able to follow the URL in the output and view it in Google Cloud Console, as seen in the following figure:

Figure 14.8 – Viewing the cluster in Google Cloud Console
Now that we have our cluster up and running, we can look at deploying a workload, then take a look at Google Cloud Console in a little more detail.
Deploying a workload and interacting with your cluster
One of the things to note from the feedback when we launched our cluster is the following output:
kubeconfig entry generated for k8sforbeginners.
As you may have already guessed, this has downloaded and configured all of the necessary information to connect the kubectl instance that you used to launch the cluster. You can confirm this by running the following command:
$ kubectl get nodes
The output you get from the command should show two nodes with a prefix of gke, so should appear something like the following Terminal output:

Figure 14.9 – Using kubectl to list the nodes
If you saw the preceding output and you are happy to proceed with the kubectl instance you are using, then you can skip the next section of the chapter and move straight onto Launching an example workload.
You can also find a link to the official GKE documentation in the Further reading section at the end of this chapter.
Configuring your local client
Should you need to configure another kubectl instance to connect to your cluster, then the GCP CLI has a command to do just that.
Important note
Running the command that follows assumes you have the GCP CLI installed and configured. If you don't have this, then please follow the instructions from the Installing the Google Cloud Platform CLI section of this chapter.
The command you need to run to download the credentials and configure kubectl is as follows:
$ gcloud container clusters get-credentials k8sforbeginners --zone=us-central1-a
Should you need to switch to or from another configuration (or context as it is known), you can run the following commands. The first command lists the current context:
$ kubectl config current-context
The next command lists the names of all of the contexts that you have configured:
$ kubectl config get-contexts -o name
Once you know the name of the context that you need to use, you can run the following command, making sure to replace context_name with the name of the context that you change it to, as in the following:
$ kubectl config use-context context_name
So now that we have your kubectl control configured to talk to and interact with your GKE cluster, we can launch an example workload.
Launching an example workload
The example workload we are going to launch is the PHP / Redis Guestbook example, which is used throughout the official Kubernetes documentation:
- The first step in launching the workload is to create the Redis Leader deployment and service. To do this, we use the following commands:
$ kubectl apply -f https://raw.githubusercontent.com/GoogleCloudPlatform/kubernetes-engine-samples/master/guestbook/redis-leader-deployment.yaml
$ kubectl apply -f https://raw.githubusercontent.com/GoogleCloudPlatform/kubernetes-engine-samples/master/guestbook/redis-leader-service.yaml
- Next up, we need to repeat the process, but this time to launch the Redis Follower deployment and service, as shown here:
$ kubectl apply -f https://raw.githubusercontent.com/GoogleCloudPlatform/kubernetes-engine-samples/master/guestbook/redis-follower-deployment.yaml
$ kubectl apply -f https://raw.githubusercontent.com/GoogleCloudPlatform/kubernetes-engine-samples/master/guestbook/redis-follower-service.yaml
- Now that we have Redis up and running, it is time to launch the frontend deployment and service – this is the application itself:
$ kubectl apply -f https://raw.githubusercontent.com/GoogleCloudPlatform/kubernetes-engine-samples/master/guestbook/frontend-deployment.yaml
$ kubectl apply -f https://raw.githubusercontent.com/GoogleCloudPlatform/kubernetes-engine-samples/master/guestbook/frontend-service.yaml
- After a few minutes, you should be able to run the following command to get information on the service you have just launched:
$ kubectl get service frontend
The output of the command should give you an external IP address that looks like the following Terminal output:

Figure 14.10 – Getting information on the frontend service
Now that we have launched our application, copy the EXTERNAL-IP value and put the IP address into your browser. Here you should be presented with the Guestbook application. Try submitting a few messages, as shown in the following figure:

Figure 14.11 – The Guestbook application with a few test messages
So, now that we have our workload launched, let's return to and explore Google Cloud Console.
Exploring Google Cloud Console
We have already seen our cluster in Google Cloud Console, so next, click on the Workloads link, which can be found in the left-hand-side menu of the Kubernetes Engine section in Google Cloud Console.
Workloads
Once the page loads, you should see something that resembles the following screen:

Figure 14.12 – Viewing the workload in the console
As you can see from the preceding screen, the three deployments are listed along with confirmation of the namespace they are in, as well as the cluster that the workload belongs to.
If we had more than one cluster with multiple namespaces and deployments, we would be able to use the filter to drill down into our GKE workloads.
Clicking on the frontend deployment will let you view more information:

Figure 14.13 – Getting insights into a deployment
On this page, you will be able to drill further down into your deployment using the tabs below the deployment name, as follows:
- OVERVIEW: This view gives you, well, an overview of your deployment – as you can see from the previous screenshot, you can see the CPU, memory, and disk utilization, along with other information.
- DETAILS: This lists more details about the environment and deployment itself. Here, you can find out when it was created, annotations, labels (as well as details about the replicas), the update strategy, and pod information.
- REVISION HISTORY: Here, you will find a list of all of the revisions to the deployment. This is useful if your deployment is updated frequently and you need to keep track of when the deployment was updated.
- EVENTS: If you have any problems with your deployment, then this is the place you should look. All events – such as scaling, pod availability, and other errors – will be logged here.
- LOGS: This is a searchable list of the logs from all containers running the pod.
- YAML: This is an exportable YAML file containing the full deployment configuration.
This information is available for all deployments across all GKE clusters you have launched within the project.
Services & Ingress
In this section, we are going to look at the Services & Ingress section. As you may have already guessed, this lists all the services that are launched across all of your GKE clusters.
After clicking on Services & Ingress, you will be presented with a screen that looks similar to the following:

Figure 14.14 – Viewing the services in the console
As you can see, we have the three services we launched listed. However, the frontend service has a type of External load balancer and a public IP address listed, as opposed to the redis-leader and redis-follower services, which only have a Cluster IP. This is because, of the three services, we only want the frontend service to be accessible publicly as only our frontend service uses the two Redis ones.
When the external load balancer was launched (and as we are running our cluster in a public cloud provider), the Kubernetes scheduler knew to contact the Google Cloud API and launch a load balancer for use, and then configure it to talk back to our cluster nodes, exposing the deployment. This deployment is running on port 80 internally.
As before, clicking on one of the three running services will give you several bits of information:
- OVERVIEW: This view gives you a summary of the service configuration and utilization.
- DETAILS: Here you can find more detail on the service along with a link to view the load balancer resource that has been launched within our Google Cloud project.
- EVENTS: As before, here you can find any events that have affected the service. This is useful for troubleshooting.
- LOGS: This is a repeat of the logs shown in the Workloads section.
- YAML: Again, this is a way for you to export the full configuration for the service as a YAML file.
Although we are not going to use the other menu items, we should quickly discuss them.
Other menu options
There are five more options for us to discuss. So far, we haven't really launched a workload that would utilize them.
Applications
With no applications launched, this links you to a marketplace where you can choose and deploy pre-configured applications into your environment – at the time of writing, there are over 100 applications, which range from free and open source to commercial offerings:

Figure 14.15 – Just a couple of the hundreds of applications available
The applications are categorized. They cover everything from Blog and CMS, databases, and analytics, all the way through to development tools and stacks. The applications are based on the Application Custom Resource Definition, which is being worked on by the Kubernetes Application Special Interest Group.
Configuration
Here you can manage ConfigMaps, such as environment variables, as well as Secrets, and share them amongst your GKE clusters.
Storage
From this section, you can manage, monitor, and review your persistent volume claims as well as storage classes associated with your GKE clusters.
Object browser
This allows you to browse all of the objects running in your clusters using a graphical representation of the Kubernetes API. From here you can generate YAML for any part of your GKE cluster.
Migrate to containers
This is an interesting tool; it inspects your virtual machine workload (which could be running on either Linux or Windows) and then figures out the critical parts of the application. It then attempts to containerize it. In the end, you will be left with a Dockerfile, along with all of the necessary data files and configurations.
Deleting your cluster
Once you have finished with your cluster, you can remove it by running the following commands. The first removes the service we created and the second removes the cluster itself:
$ kubectl delete service frontend
$ gcloud container clusters delete k8sforbeginners --zone=us-central1-a
It will take a few minutes to remove the cluster.
Important note
This should also delete any services that were launched by your workloads, such as load balancers. However, I do recommend checking Google Cloud Console for any orphaned services, to ensure that you do not get any unexpected costs.
So far throughout this chapter, we have been using the --zone=us-central1-a zone. This has been launching our cluster in a single availability zone in the US Central region. Let's discuss what other cluster options are available.
More about cluster nodes
At the end of the previous section, I mentioned availability zones and regions. Before we discuss some of the cluster deployment options, we should get a bit of a better understanding of what we mean by availability zones and regions:
- Region: A region is made up of zones. Zones have great low-latency network connectivity to other zones within the same region. This gives you a way of deploying highly available always-on fault-tolerant workloads.
- Availablity zone: Think of availability zones as separate data centers within a region. The zones have diverse networks and power, meaning that, should a single zone have an issue and you are running your workload across multiple zones, then your workload shouldn't be impacted.
The one thing to note with zones is that you might find that not all machine types are available across all zones within a region. Therefore, please check before attempting to deploy your workload.
Google best practice recommends that, for optimum performance and availability, you should deploy your workload across the maximum number of zones within a single region. However, it is possible to split your workloads across multiple regions – all you have to do is take into account and allow for the increased latency between regions.
With that in mind, let's take a look at the command we used to launch the test cluster at the start of the chapter:
$ gcloud container clusters create k8sforbeginners --num-nodes=2 --zone=us-central1-a
As we know, it will launch two nodes, but only in a single zone, as we have only passed one using the --zone flag, which in our case was the us-central1 region and zone a.
Run the following command, but use the --region flag rather than the --zone one:
$ gcloud container clusters create k8sforbeginners --num-nodes=2 --region=us-central1
Once launched, run the following:
$ kubectl get nodes
This will produce something that looks like the following output:

Figure 14.16 – Viewing the nodes running in a region
As you can see, we have two nodes in each zone, giving us a total cluster size of six nodes. The reason for this is that when you define a region by default, your cluster is spread across three zones. You can override this behavior by using the --node-locations flag.
This makes our command look like the following:
$ gcloud container clusters create k8sforbeginners --num-nodes=2 --region=us-central1 --node-locations us-central1-a,us-central1-b,us-central1-c,us-central1-f
We are still using the us-central1 region, but deploying to the a,b,c, and f zones. Running the kubectl get nodes command now shows the following:

Figure 14.17 – Our cluster across four zones
As you can see, Google has made it straightforward to deploy your clusters across multiple zones. This means that you can deploy your workload across a fully redundant cluster with very little effort required.
To remove clusters deployed using the --region flag, you should use the following command:
$ gcloud container clusters delete k8sforbeginners --region=us-central1
At the time of writing, the simple two-node cluster we launched at the start of the chapter has a cost of around $49 per month, with the price increasing to around $270 per month for the eight-node cluster we have just launched. For more information on cost, see the link to the Google Cloud Pricing Calculator in the Further reading section.
That concludes our look at GKE. Before we move onto the next public cloud provider, let's summarize what we have covered.
Summary
In this chapter, we discussed the origins of GCP and the GKE service, before walking through how to sign up for an account and how to install and configure the Google Cloud command-line tool.
We then launched a simple two-node cluster using a single command, then deployed and interacted with a workload using both the kubectl command and Google Cloud Console.
Finally, and again only using a single command, we redeployed our cluster to take advantage of multiple availability zones, quickly scaling to a fully redundant and highly available eight-node cluster running across four availability zones.
I am sure you will agree that Google has done an excellent job in making deploying and maintaining what is a complex infrastructure configuration a relatively trivial and quick task.
Also, once your workloads are deployed, managing them is exactly the same as you would if your cluster was deployed elsewhere – we really haven't had to make any allowances for our cluster being run on GCP.
In the next chapter, we are going to be looking at deploying a Kubernetes cluster in Amazon Web Services using Amazon Elastic Kubernetes Service. This is Amazon's fully managed Kubernetes offering.
Further reading
Here are links to more information on some of the topics and tools that we have covered in this chapter:
- Google Kubernetes Engine: https://cloud.google.com/kubernetes-engine/
- Google Kubernetes Engine Documentation: https://cloud.google.com/kubernetes-engine/docs
- Google Cloud Pricing Calculator: https://cloud.google.com/products/calculator
- The Guestbook Sample Application: https://github.com/GoogleCloudPlatform/kubernetes-engine-samples/tree/master/guestbook
- Migrate your VM workloads to Kubernetes: https://cloud.google.com/migrate/anthos/docs/getting-started
- The Kubernetes Application SIG: https://github.com/kubernetes-sigs/application
- The Google Cloud Kubernetes comic: https://cloud.google.com/kubernetes-engine/kubernetes-comic