About the Book
C# is a powerful and versatile Object-Oriented Programming (OOP) language that can unlock a variety of career paths. But, as with any programming language, learning C# can be challenging. With a wide range of different resources available, it's difficult to know where to start.
That's where The C# Workshop comes in. Written and reviewed by industry experts, it provides a fast-paced, supportive learning experience that will quickly get you writing C# code and building applications. Unlike other software development books that focus on dry, technical explanations of the underlying theory, this workshop cuts through the noise and uses engaging examples to help you learn how each concept is applied in the real world.
As you work through the book, you'll tackle realistic exercises that simulate the types of problems software developers work on every day. These mini-projects include building a random-number guessing game, using the publisher-subscriber model to design a web file downloader, creating a to-do list using Razor Pages, generating images from the Fibonacci sequence using async/await tasks, and developing a temperature unit conversion app that you will then deploy to a production server.
By the end of this book, you'll have the knowledge, skills, and confidence required to advance your career and tackle your ambitious projects with C#.
Audience
This book is for aspiring C# developers. It is recommended that you have a basic knowledge of core programming concepts before you start. Prior experience with another programming language would be beneficial, though it is not absolutely necessary.
About the Authors
Jason Hales has been developing low-latency, real-time applications using various Microsoft technologies since the first release of C# in 2001. He is a keen advocate of design patterns, OO principles, and test-driven practices. When he's not dabbling with code, he likes to spend time with his wife, Ann, and their three daughters in Cambridgeshire, UK.
Almantas Karpavicius is a lead software engineer working in the information and technology company, TransUnion. He has been a professional programmer for over five years. On top of his full-time programming career, Almantas has spent three years teaching programming for free in his free time on Twitch.tv. He is a founder of a C# programming community called C# Inn that boasts over 7000 members and the creator of two free C# boot camps in which he has helped hundreds of people get a start in their careers. He has taken interviews with programming celebrities, such as Jon Skeet, Robert C. Martin (Uncle Bob), Mark Seemann, and was also a part-time Java teacher for a time. Almantas likes talking about software design, clean code, and architecture. He is also interested in Agile (Scrum, in particular) and is a big fan of automated tests, especially those done using BDD. He also holds a two-year Microsoft MVP (https://packt.link/2qUJp).
Mateus Viegas has been working in Software Engineering and Architecture for over a decade, dedicating the last few years to Leadership and Management roles. His main interests in technology are C#, Distributed Systems, and Product Development. A lover of the outdoors, when not working he likes to spend his time either exploring nature with his family, taking photographs, or running.
About the Chapters
Chapter 1, Hello C#, introduces the fundamental concepts of the language, such as variables, constants, loops, and arithmetic and logical operators.
Chapter 2, Building Quality Object-Oriented Code, covers the basics of Object-oriented programming and its four pillars, before introducing the five main principles of clean coding—SOLID. This chapter also covers the latest features in the C# language.
Chapter 3, Delegates, Events, and Lambdas, introduces delegates and events, which form the core mechanism for communicating between objects, and lambda syntax, which offers a way to clearly express the intent of code.
Chapter 4, Data Structures and LINQ, covers the common collection classes that are used to store multiple values and the integrated language LINQ which is designed for querying collections in memory.
Chapter 5, Concurrency: Multithreading Parallel and Async Code, provides an introduction to writing efficient code that is high performing across different scenarios and how to avoid common pitfalls and mistakes.
Chapter 6, Entity Framework with SQL Server, introduces database design and storage using SQL and C# and provides an in-depth look at object-relational mapping using Entity Framework. The chapter also teaches common design patterns for working with databases.
Note
For those who are interested in learning the basics of databases and how to work with PostgreSQL, a reference chapter has been included in the GitHub repository of this book. You can access it at https://packt.link/oLQsL.
Chapter 7, Creating Modern Web Applications with ASP.NET, looks at how to write simple ASP.NET applications and how to use approaches such as server-side rendering and single-page applications to create web applications.
Chapter 8, Creating and Using Web API Clients, introduces APIs and teaches you how to access and consume Web APIs from ASP.NET code.
Chapter 9, Creating API Services, continues with the topic of APIs and teaches you how to create your API services for consumption, and how to secure it. The chapter also introduces you to the concept of microservices.
Note
There are also two bonus chapters (Chapter 10, Automated Testing, and Chapter 11, Production-Ready C#: From Development to Deployment) which you can find at https://packt.link/44j2X and https://packt.link/39qQA, respectively.
You can also find solutions for all activities in this Workshop online at https://packt.link/qclbF.
This book has some conventions set to arrange content efficiently. Read about them in the next section.
Conventions
Block of Code
In the book, a block of code is set as follows:
using System;
namespace Exercise1_01
{
class Program
{
static void Main(string[] args)
{
Console.WriteLine("Hello World!");
}
}
}
In cases where inputting and executing some code gives an immediate output, this is shown as follows:
dotnet run
Hello World!
Good morning Mars!
Emphasis
Definitions, new terms, and important words are shown like this:
Multithreading is a form of concurrency whereby multiple threads are used to perform operations.
Technical Terms
Language commands within the body of the chapter are indicated in the following manner:
Here, the simplest Task constructor is passed an Action lambda statement, which is the actual target code that you want to execute. The target code writes the message Inside taskA to the console.
Added Information
Essential information is indicated in the following way:
Note
The term Factory is often used in software development to represent methods that help create objects.
Truncation
Long code snippets are truncated and the corresponding names of the code files on GitHub are placed at the top of the truncated code. Permalinks to the entire code are placed below the code snippet, as follows:
HashSetExamples.cs
using System;
using System.Collections.Generic;
namespace Chapter04.Examples
{
}
You can find the complete code here: http://packt.link/ZdNbS.
Before you dive into the power of the C# language, you will need to install the .NET runtime and the C# development and debugging tools.
Before You Begin
You can either install the full Visual Studio Integrated Development Environment (IDE), which offers a fully featured code editor (this is a costly license) or you can install Visual Studio Code (VS Code), Microsoft's lightweight cross-platform editor. The C# Workshop targets the VS Code editor as this does not require a license fee and works seamlessly across multiple platforms.
Installing VS Code
Visit the VS Code site at https://code.visualstudio.com and download it for Windows, macOS, or Linux, following the installation instructions for your preferred platform.
Note
It is better to check the Create a Desktop Icon checkbox for ease of use.
VS Code is free and open source. It supports multiple languages and needs to be configured for the C# language. Once VS Code is installed, you will need to add the C# for Visual Studio Code (powered by OmniSharp) extension to support C#. This can be found at https://marketplace.visualstudio.com/items?itemName=ms-dotnettools.csharp. To install the C# extension, follow the per-platform instructions:
- Open the Extension tab and type C#.
Note
If you do not want to directly install the C# extension from the website, install it from VS code itself.
- Select the first selection, that is, C# for Visual Studio Code (powered by OmniSharp).
- Click on the Install button.
- Restart VS Code:

Figure 0.1: Installing the C# extension for VS Code
You will see that the C# extension gets successfully installed on VS Code. You have now installed VS Code on your system.
The next section will cover how VS Code can be used as you move between the book chapters.
Moving Between Chapters in VS Code
To change the default project to build (whether it is an activity, exercise, or demo), you will need to point to these exercise files:
- tasks.json / tasks.args
- launch.json / configurations.program
There are two different patterns of exercise that you should be aware of. Some exercises have a project of their own. Others have a different main method. The main method of a single project per exercise can be configured like this (in this example for Chapter 3, Delegates, Events, and Lambdas, you are configuring Exercise02 to be the build and launch points):
launch.json
{
"version": "0.2.0",
"configurations": [
{
"name": ".NET Core Launch (console)",
"type": "coreclr",
"request": "launch",
"preLaunchTask": "build",
"program": "${workspaceFolder}/Exercises/ /Exercise02/bin/Debug/net6.0/Exercise02.exe",
"args": [],
"cwd": "${workspaceFolder}",
"stopAtEntry": false,
"console": "internalConsole"
}
]
}
tasks.json
{
"version": "2.0.0",
"tasks": [
{
"label": "build",
"command": "dotnet",
"type": "process",
"args": [
"build",
"${workspaceFolder}/Chapter05.csproj",
"/property:GenerateFullPaths=true",
"/consoleloggerparameters:NoSummary"
],
"problemMatcher": "$msCompile"
},
]
}
One project for each exercise (for example, Chapter05 Exercise02) can be configured like this:
launch.json
{
"version": "0.2.0",
"configurations": [
{
"name": ".NET Core Launch (console)",
"type": "coreclr",
"request": "launch",
"preLaunchTask": "build",
"program": "${workspaceFolder}/bin/Debug/net6.0/Chapter05.exe",
"args": [],
"cwd": "${workspaceFolder}",
"stopAtEntry": false,
"console": "internalConsole"
}
]
}
tasks.json
{
"version": "2.0.0",
"tasks": [
{
"label": "build",
"command": "dotnet",
"type": "process",
"args": [
"build",
"${workspaceFolder}/Chapter05.csproj",
"/property:GenerateFullPaths=true",
"/consoleloggerparameters:NoSummary",
"-p:StartupObject=Chapter05.Exercises.Exercise02.Program",
],
"problemMatcher": "$msCompile"
},
]
}
Now that you are aware of launch.json and tasks.json, you can proceed to the next section which details the installation of the .NET developer platform.
Installing the .NET Developer Platform
The .NET developer platform can be downloaded from https://dotnet.microsoft.com/download. There are variants for Windows, macOS, and Docker on Linux. The C# Workshop book uses .NET 6.0.
Follow the steps to install the .NET 6.0 platform on Windows:
- Select the Windows platform tab:

Figure 0.2: .NET 6.0 download window
- Click on the Download .NET SDK x64 option.
Note
The screen shown in Figure 0.2 may change depending on the latest release from Microsoft.
- Open and complete the installation according to the respective OS installed on your system.
- Restart the computer after the installation.
Follow the steps to install the .NET 6.0 platform on macOS:
- Select the macOS platform tab (Figure 0.2).
- Click on the Download .NET SDK x64 option.
After the download is complete, open the installer file. You should have a screen similar to Figure 0.3:

Figure 0.3: The macOS installation starting screen
- Click on the Continue button.
The following screen will confirm the amount of space that will be required for the installation:
- Click on the Install button to continue:

Figure 0.4: Window displaying the disk space required for installation
You will see a progress bar moving on the next screen:

Figure 0.5: Window showing the Installation progress
Soon after the installation is finalized, you'll have a success screen (Figure 0.6):
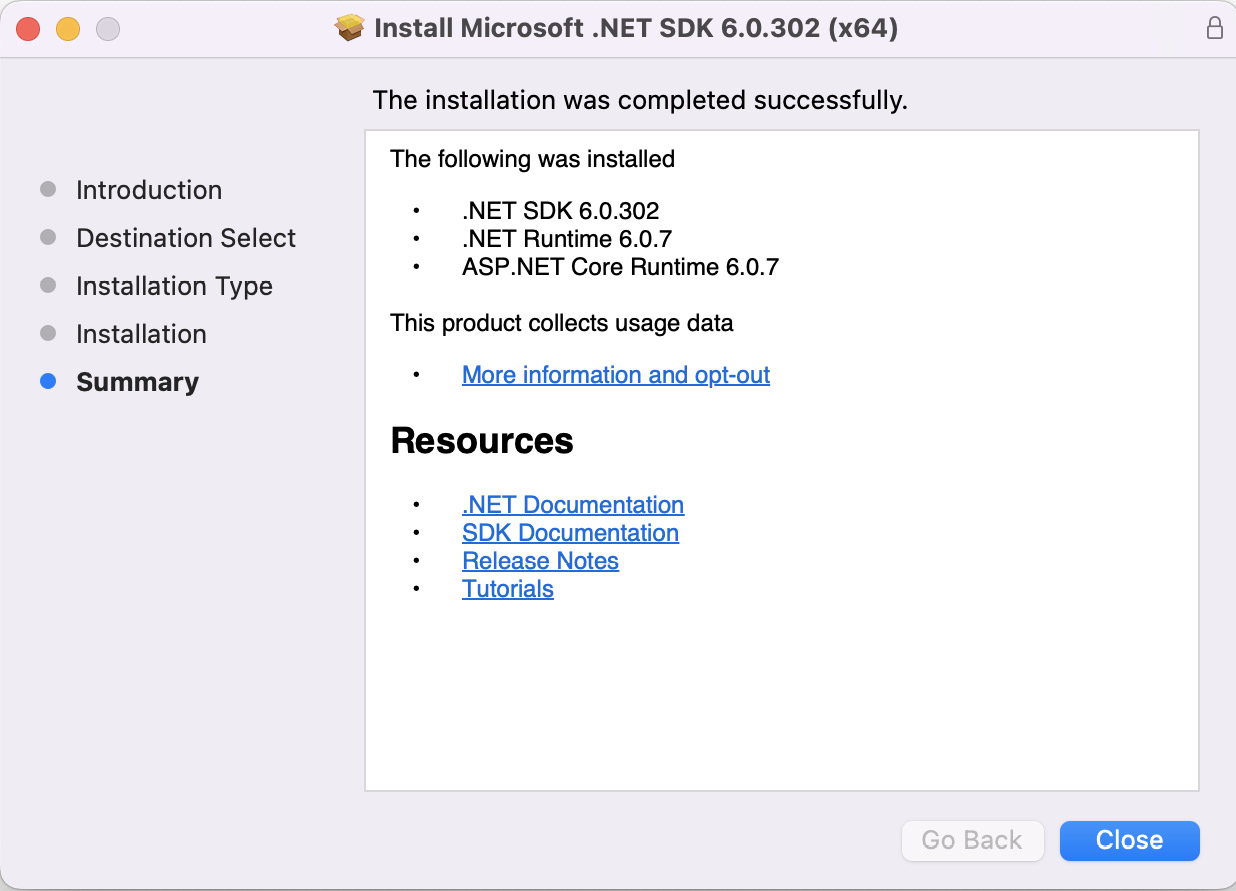
Figure 0.6: Window showing the installation as complete
- In order to check whether the installation was a success, open your Terminal app and type:
dotnet –list-sdks
This will check the version of .NET installed on your machine. Figure 0.7 shows the output where your installed SDKs will be listed:

Figure 0.7: Checking the installed .NET SDKs in Terminal
With these steps, you can install the .NET 6.0 SDK on your machine and check the installed version.
Note
Net 6.0 installation steps for Linux are not included as they are like Windows and macOS.
Before proceeding further, it is important to know about .NET 6.0 features.
The .NET 6.0 Features Found in Windows, macOS, and Linux
Windows
- .NET 6.0: This is the latest long-term support (LTS) version recommended for Windows. It can be used for building many different types of applications.
- .NET Framework 4.8: This is a Windows-only version for building any type of app to run on Windows only.
macOS
- .NET 6.0: This is the LTS version recommended for macOS. It can be used for building many different types of applications. Choose the version that is compatible with the processor of your Apple Computer—x64 for Intel chips and ARM64 for Apple chips.
Linux
- .NET 6.0: This is the LTS version recommended for Linux. It can be used for building many different types of applications.
Docker
- .NET images: This developer platform can be used for building different types of applications.
- .NET Core images: This offers lifetime support for building many types of applications.
- .NET framework images: These are Windows-only versions of .NET for building any type of app that runs on Windows.
With .NET 6.0 installed on your system, the next step is to configure projects using CLI.
.NET Command-Line Interface (CLI)
Once you have installed .NET, the CLI can be used to create and configure projects for use with VS Code. To launch the .NET CLI, run the following at the command prompt:
dotnet
If .NET is installed correctly, you will see the following message on your screen:
Usage: dotnet [options]
Usage: dotnet [path-to-application]
Once you have the CLI installed to configure projects with VS Code, you need to know about the powerful open source object-relational database system that uses and extends the SQL language that is, PostgreSQL.
Note
You will first go through the instructions to install PostgreSQL for Windows followed by macOS, and then by Linux.
PostgreSQL Installation for Windows
PostgreSQL has been used in Chapter 6, Entity Framework with SQL Server. Before you proceed with that chapter, you must install PostgreSQL on your system using the following steps:
- Go to https://www.enterprisedb.com/downloads/postgres-postgresql-downloads and download the latest version installer for Windows:

Figure 0.8: Latest PostgreSQL versions for each platform
Note
The screen shown in Figure 0.8 may change depending upon the latest release from the vendor.
- Open the downloaded interactive installer and click the Next button. The Setup PostgreSQL screen gets displayed:

Figure 0.9: Welcome screen for PostgreSQL upload
- Click on the Next button to move to the next screen which asks for the installation directory details:

Figure 0.10: PostgreSQL default installation directory
- Leave the default Installation Directory unchanged and click the Next button.
- Select the following from the list in Figure 0.11:
- PostgreSQL Server refers to the database.
- pgAdmin 4 is the database management tool.
- Stack Builder is the PostgreSQL environment builder (optional).
- Command Line Tools work with the database using a command line.

Figure 0.11: The PostgreSQL components selected to proceed
- Then click the Next button.
- In the next screen, the Data Directory screen asks you to enter the directory for storing your data. So, enter the data directory name:
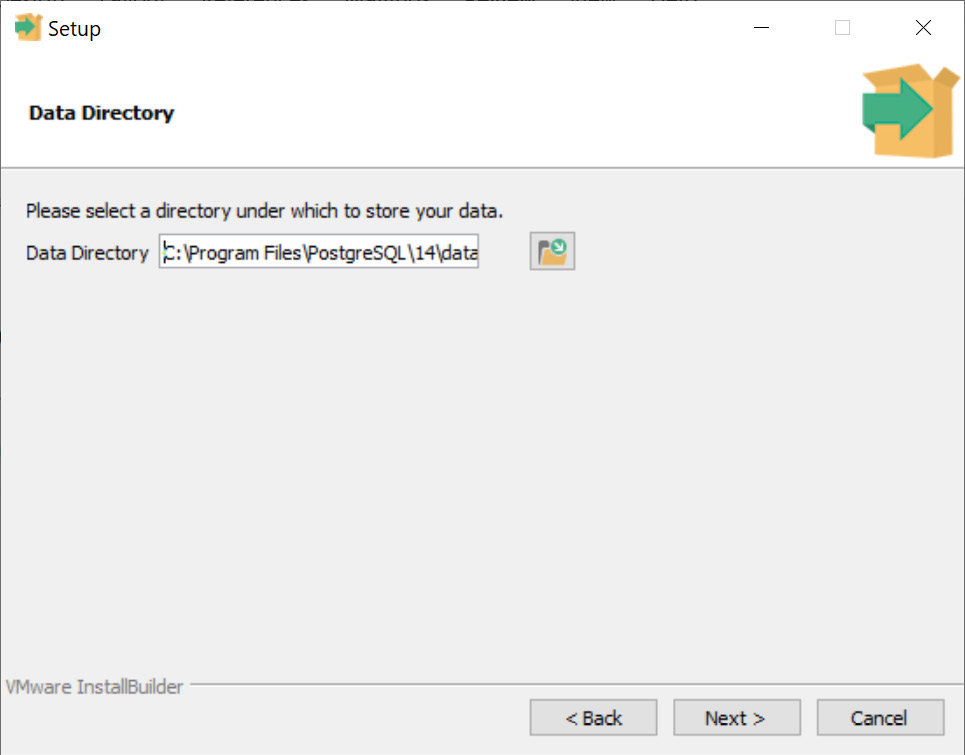
Figure 0.12: The directory for storing data
- Once you have entered the data directory, click on the Next button to continue. The next screen asks you to enter the password.
- Enter the new Password.
- Retype the password beside Retype password for the database superuser:

Figure 0.13: Providing password for database superuser
- Then click the Next button to continue.
- The next screen displays the Port as 5432. Use the default port—that is, 5432:

Figure 0.14: Selecting Port
- Click the Next button.
- The Advanced Options screen asks you to type the locale for the Database cluster. Leave it as [Default locale]:

Figure 0.15: Selecting the locale for the Database cluster
- Then click the Next button.
- When the Preinstallation Summary screen gets displayed, click the Next button to go ahead:

Figure 0.16: Setup window showing ready to install message
- Continue selecting the Next button (leaving the default settings unchanged) until the installation process begins.
- Wait for it to complete. On completion, the Completing the PostgreSQL Setup Wizard screen gets displayed.
- Uncheck the Launch Stack Builder at exit option:

Figure 0.17: Installation complete with Stack Builder unchecked
The Stack Builder is used to download and install additional tools. The default installation contains all tools needed for the exercises and activities.
- Finally, click the Finish button.
- Now open pgAdmin4 from Windows.
- Enter a master Password for connecting to any database inside PostgreSQL in the Set Master Password window:

Figure 0.18: Setting Master Password for connecting to a PostgreSQL server
Note
It is better to type a password that you can easily memorize as it will be used to manage all your other credentials.
- Next click the OK button.
- On the left side of the pgadmin window, expand the Server by clicking the arrow beside it.
- You will be asked to enter your PostgreSQL server password. Type the same password that you entered in Step 22.
- Do not click Save password for security reasons:
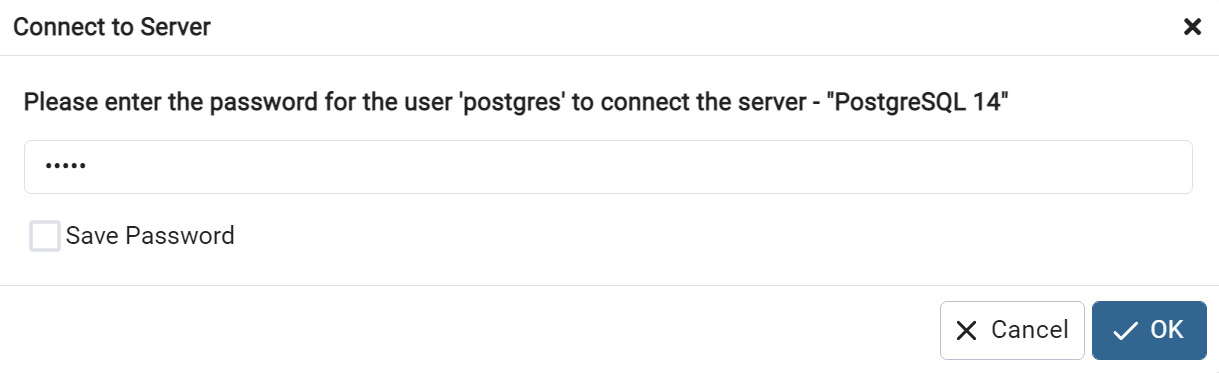
Figure 0.19: Setting the postgres user password for the PostgreSQL server
PostgreSQL server password is the password you will use when connecting to the PostgreSQL server and using the postgres user.
- Finally click the OK button. You will see the pgAdmin dashboard:

Figure 0.20: pgAdmin 4 dashboard window
In order to explore the pgAdmin dashboard, move to the Exploring pgAdmin Dashboard section.
PostgreSQL Installation for macOS
Install PostgreSQL on your macOS using the following steps:
- Visit the official site of the Postgres app to download and install PostgreSQL on your mac platform: https://www.enterprisedb.com/downloads/postgres-postgresql-downloads.
- Download the latest PostgreSQL for macOS:
Note
The following screenshots were taken for version 14.4 on macOS Monterey (version 12.2).

Figure 0.21: Installation page for PostgreSQL
- Once you have downloaded the installer file for macOS, double-click the installer file to launch the PostgreSQL Setup Wizard:

Figure 0.22: Launching the PostgreSQL setup wizard
- Select the location where you want PostgreSQL installed:

Figure 0.23: Selecting the installation directory
- Click on the Next button.
- In the next screen, select the following components for installation:
- PostgreSQL Server
- pgAdmin 4
- Command Line Tools
- Uncheck the Stack Builder component:

Figure 0.24: Selecting the components for installation
- Once you have selected the options, click on the Next button.
- Specify the data directory in which PostgreSQL will store the data:

Figure 0.25: Specifying the data directory
- Click on the Next button.
- Now set a Password for the Postgres database superuser:

Figure 0.26: Setting the password
Make sure to note down the password safely for logging in to the PostgreSQL database.
- Click on the Next button.
Set the port number where you want to run the PostgreSQL server. Here the default Port number is set as 5432:

Figure 0.27: Specifying the port number
- Click on the Next button.
- Select the locale to be used by PostgreSQL. Here, [Default locale] is the locale selected for macOS:

Figure 0.28: Selecting the locale specification
- Click on the Next button.
- In the next screen, check the installation details:
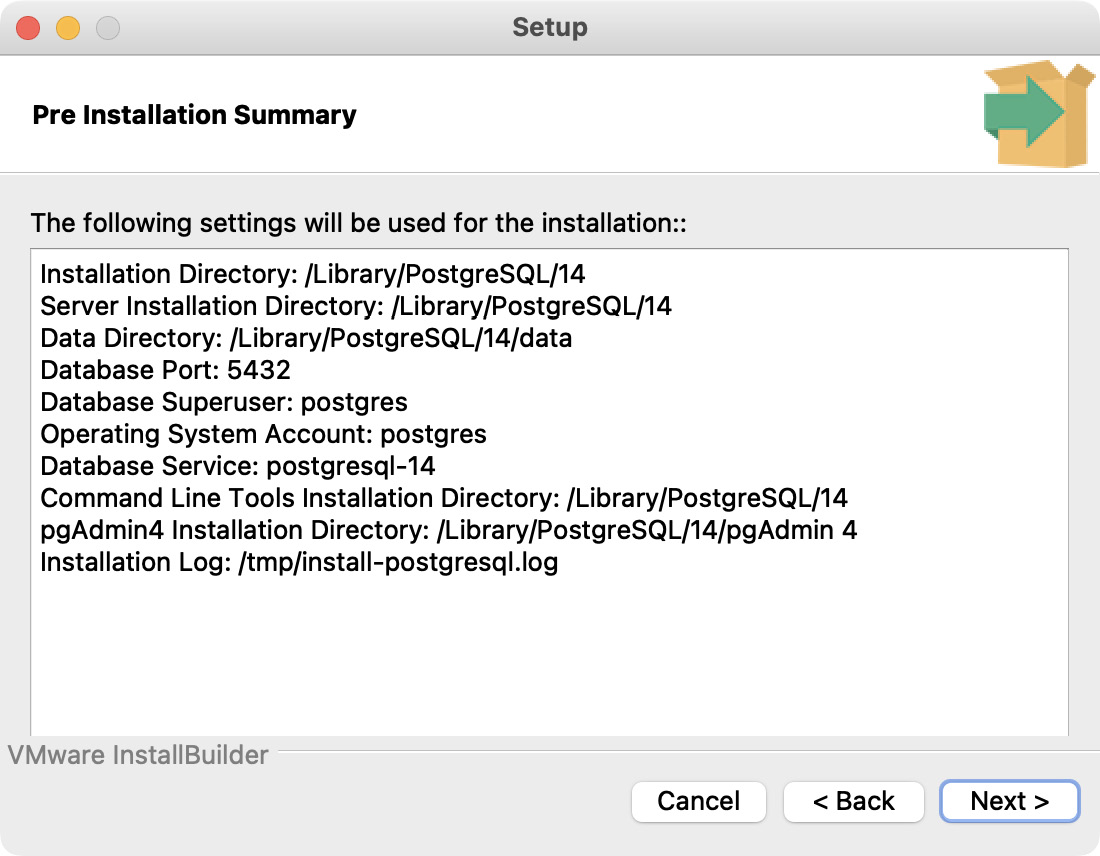
Figure 0.29: Pre Installation summary page
Finally, click on the Next button to start the installation process of the PostgreSQL database server on your system:

Figure 0.30: Ready to Install page before starting the installation process
- Wait for a few moments for the installation process to complete:

Figure 0.31: Setup Installation in progress
- When prompted, click the Next button. The next screen displays the message that the PostgreSQL installation is complete on your system:

Figure 0.32: Success message showing the setup as complete
- Click the Finish button once the installation gets complete.
- Now load the database in the PostgreSQL server.
- Double-click on the pgAdmin 4 icon to launch it from your Launchpad.
- Enter the password for the PostgreSQL user that you had set during the installation process.
- Then click the OK button. You will now see the pgAdmin dashboard.
This completes the installation of PostgreSQL for the macOS. The next section will familiarize you with the PostgreSQL interface.
Exploring pgAdmin Dashboard
Once you have installed PostgreSQL in Windows and macOS, follow these steps to grasp the interface better:
- Open pgAdmin4 from Windows/ macOS (in case pgAdmin is not open on your system).
- Click on the Servers option on the left:

Figure 0.33: Clicking on Servers to create a database
- Right-click on PostgreSQL 14.
- Then click on the Create option.
- Choose the Database… option to create a new database:

Figure 0.34: Creating a new database
This will open a Create – Database window.
- Enter the database name, as TestDatabase.
- Select the Owner of the database or leave it as default. For now, just use the Owner as postgres:

Figure 0.35: Selecting the owner of the database
- Then click on the Save button. This will create a database.
- Right-click on Databases and choose the Refresh button:

Figure 0.36: Clicking the Refresh… button after right-clicking Databases
A database with the name TestDatabase is now displayed within the dashboard:

Figure 0.37: TestDatabase ready for use
Now your database is ready to be used for Windows and Mac environments.
PostgreSQL Installation on Ubuntu
In this example, you are using Ubuntu 20.04 for installation. Perform the following steps to do so:
- In order to install PostgreSQL, open your Ubuntu terminal first.
- Make sure to update your repository using the following command:
$ sudo apt update
- Install the PostgreSQL software along with additional packages using the following command (recommended):
$ sudo apt install postgresql postgresql-contrib
Note
To install only PostgreSQL (not recommended without additional packages), use the command $ sudo apt install postgresql and then press Enter.
This installation process creates a user account called postgres that has the default Postgres role.
Accessing the postgres User Account with the postgres Role
There are two ways to start the PostgreSQL CLI using the postgres user account:
Option 1 is as follows:
- To log in as a postgres user, use the following command:
$ sudo -i -u postgres
- Access the CLI by using the following command:
$ psql
Note
Sometimes, while executing the preceding command, a psql error may be displayed as could not connect to server: No such file or directory. This is because of a port issue on your system. Due to this port blockage, the PostgreSQL application may not work. You can try the command again after some time.
- To quit the CLI, use the following command:
$ q
Option 2 is as follows:
- To log in as a postgres user, use the following command:
$ sudo -u postgres psql
- To quit the CLI, use the following command:
$ q
Verifying the postgres User Account as a postgres User Role
- To verify the user account, log in and use the conninfo command:
$ sudo -u postgres psql
$ conninfo
$ q
Using this command, you can ensure that you are connected to the postgres database as the postgres user via port 5432. If you don't want to use the default user, postgres, you can create a new user for you.
Accessing a New User and Database
- Create a new user by using the following command and pressing Enter:
$ sudo -u postgres createuser –interactive
The preceding command will ask the user to add the name of the role and its type.
- Enter the name of the role, for example, testUser.
- Next, enter y when prompted to set a new role to be a superuser:
Prompt:
Enter the name of the role to add: testUser
Shall the new role be a superuser? (y/n) y
This will create a new user with the name testUser.
- Create a new database with the name testdb using the following command:
$ sudo -u postgres createdb testdb
- Log in to the newly created user account using the following command:
$ sudo -u testUser psql -d testdb
- Use the following command to check the connection details:
$ conninfo
- To quit the CLI, use the following command:
$ q
Using this command, you can ensure that you are connected to the testdb database as the testUser user via port 5432.
With these steps, you have completed the PostgreSQL installation for Ubuntu.
Downloading the Code
Download the code from GitHub at https://packt.link/sezEm. Refer to these files for the complete code.
The high-quality color images used in this book can be found at https://packt.link/5XYmX.
If you have any issues or questions about installation, please email us at [email protected].