Sign In with Your Apple ID
Major digital firms—including Amazon, Facebook, Google, and Twitter—set up a way to reduce the number of accounts you needed to create across the internet by letting you proxy your account with them instead. Instead of creating a new account in an app or at a website, you would click a Connect with Facebook button or something similar.
Over the years, it’s become increasingly clear how much information gathering goes along with that third-party login, as each of these companies can collect more information about everything you do via your behavior at these unrelated sites.
Apple has staked out privacy as one of its tentpoles, and the new “Sign in with Apple” option lets you create accounts while limited exposure of personal data and behavior.
Apple said it will use the sign-in option across all its services, potentially easing the process of logging in with an Apple ID in all the many apps that require or allow a separate sign in.
In this chapter, I explain how Apple’s third-party sign-in works, and the options offered to let you be more or less identified.
How It Works
There’s no setup required to use Sign in with Apple. When you visit a site or use an app that offers the option, you see a standard button. It works across macOS, iOS, iPadOS, tvOS, and watchOS. Because it relies on standard browser technology, you should be able to sign in using any brand of browser, too.
The first time I used the feature, I received a large information screen with a lot of detail. I believe this only appears the first time you use Sign in with Apple (Figure 17). I was unable to get it to occur on subsequent uses.

When you click Sign in with Apple from a device with Touch ID or Face ID, you can authorize the usage with a fingerprint or your face. From a Mac or other device without a biometric option, you’ll be presented with a more typical Apple ID login request, including a 2FA entry.
Apple handles all this behind the scenes, so the party with which you’re interacting (if it’s other than Apple) never gains access to any of your Apple ID information at all. In this way, it’s identical to the other third-party login systems.
The site or app receives a token associated with your account and stores that in its systems. But it can also request a full name and email address. In that case, Apple presents an additional dialog into which you can choose what information to use.
Use Sign in with Apple
While Sign in with Apple is simple in practice, as with so many things we get used to, there’s an initial learning curve, as Apple presents a variety of screens with unique and fresh information.
I downloaded the Kayak app, used for that company’s price-tracking service, as I didn’t currently have it installed and don’t have an account I rely on with it.
On launching the app, I can select an option to create an account, which displays the Apple button front and center—and no others, which is an interesting choice, perhaps to court Apple promoting the app (Figure 18).

After you tap the “Sign in” button, Apple presents a sheet that offers you options to choose from (Figure 19). Apple prefills your name as it appears in your Apple ID account, but you can click the X  to remove and change it. It also offers you two choices: Share My Email and Hide My Email. Neither is selected—odd, because they’re using radio buttons—so you have to pick one.

Choose Share My Email, and Apple provides that to the app or site. Choose Hide My Email, and Apple creates a random email account name that passes through its relay servers. The party requesting your address never actually sees it.
Click Continue and the account is created.
In Kayak’s case, it then sent me an email to confirm my address (Figure 20). This is mildly problematic for two reasons. First, because Apple manages the sign in, Kayak should have full confidence the address was legitimately provided.
Second, the confirmation step could attempt to associate you with other information. I didn’t check if Kayak was using tracking images, but I set all my mail clients to not load images by default. If you’re concerned about privacy, do the same.

If you log out of the app, the association remains. The next time you log back in to it, iOS and iPadOS present a different login message (Figure 21). This one is troubling—it shows my Apple ID email, not the private relay one I opted to create. I tapped Continue, and only the private address was used. Apple should modify this screen to make it clear what’s being sent, however.

View and Remove Relay Addresses
If you use a “hidden” or relayed address, you can view it via the Apple ID web site. Log in as normal and you see an item labeled “Apps & Websites Using Apple ID.” Click Manage, and the site shows you all currently in use relay emails. Select one, and you’ll see a number of associated options (Figure 22).

Two of the options presented are actually a little complicated:
“Copy Email” obviously lets you copy the address to use for whatever purpose, such as logging into the website of the service without using Sign in with Apple, say from an older system or non-Apple device.
“Turn Off” disables forwarding, but allows the account connection to remain active.
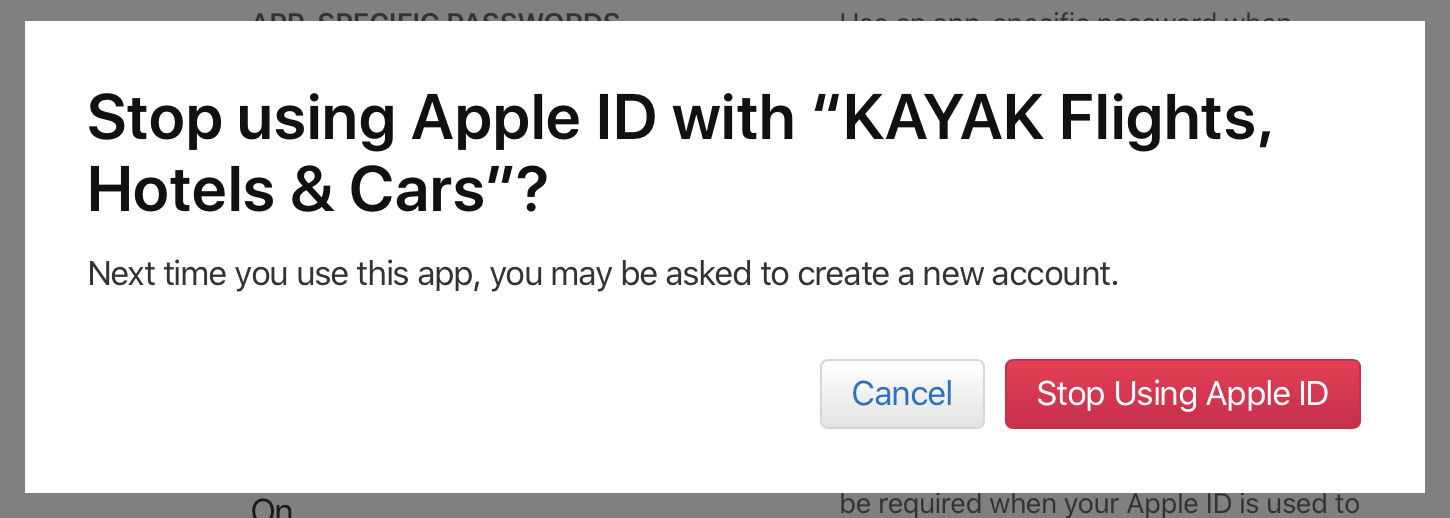
“Stop Using Apple ID” is the nuclear option, revoking the invisible token used while also deleting the email address for forwarding. (I used that with this test Kayak account, which is why I’m revealing my forwarding address in these screen captures.)
Because “Stop Using Apple ID” breaks account access, Apple gives you a chance to back out, presenting a dialog with “Cancel” and “Stop Using Apple ID” as your choices (Figure 23).