
Learn New Safari Tricks
Safari 14 ships with Big Sur, and is also available as an optional download for Catalina and Mojave. Although the basics of using Safari remain the same, and casual users may notice few if any differences, the app has become faster and more power-efficient while adding quite a few useful features—including significant enhancements to privacy.
There’s not much to say about behind-the-scenes improvements like faster browsing that doesn’t run down your battery as fast—or new tools for developers—but I do want to explore the new user-facing features that will change the way you browse the web.
Customize Your Start Page
When you open a new window or tab, Safari can display the homepage of your choice, an empty page (my personal preference), or the same page you were on before (if any). In earlier versions of Safari, two other options were Favorites (the sites you’ve designated as your personal favorites) and Top Sites (those Safari notices you’ve visited most often). Safari 14 combines Favorites and Top Sites into a new, much more customizable option called Start Page.
To display the Start Page at any time (regardless of your preferences), choose Bookmarks > Show Start Page. You’ll see something like Figure 39. If you want the Start Page to appear when you open a new window and/or tab, go to Safari > Preferences > General and choose Start Page from the “New windows open with” and/or “New tabs open with” pop-up menus.
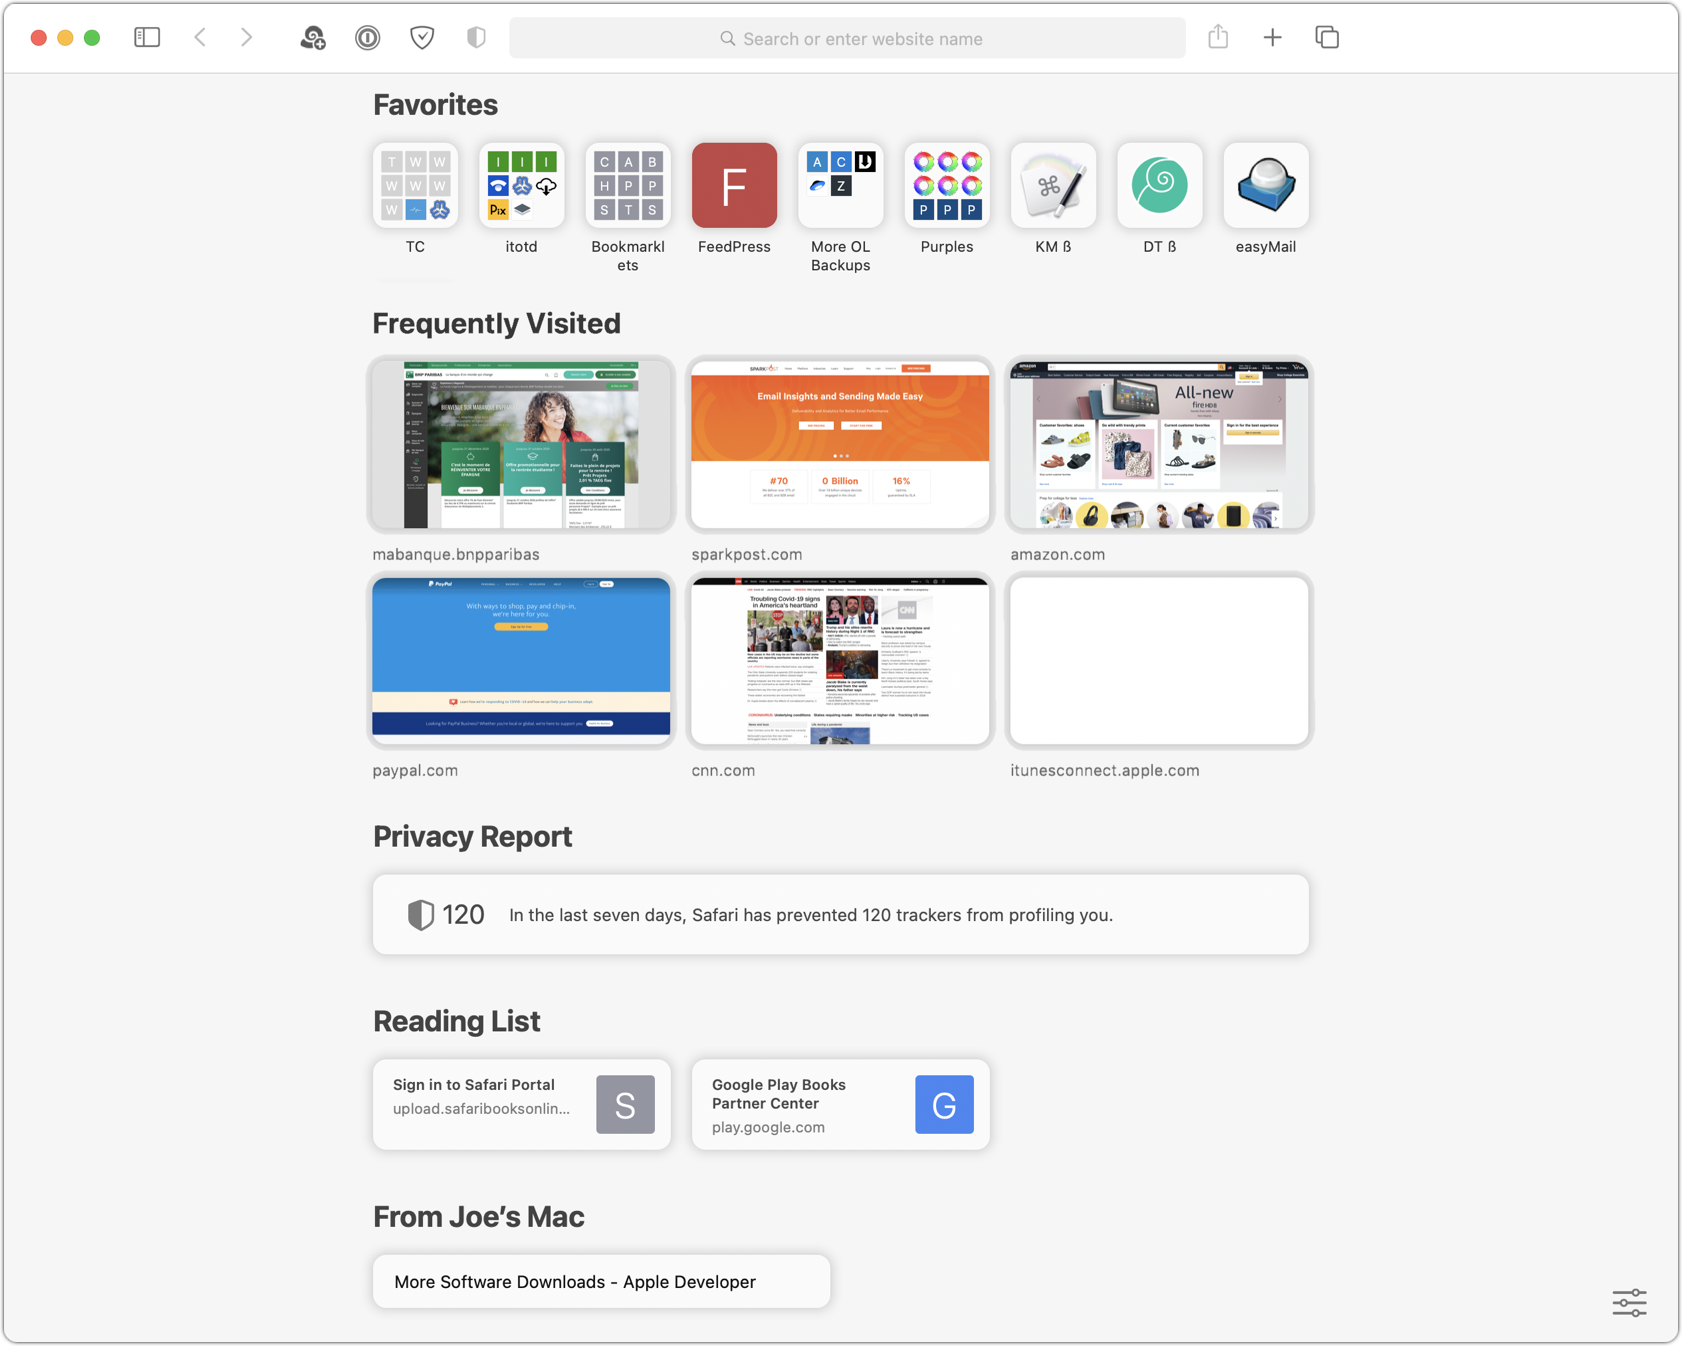
By default, your Favorites appear at the top, followed by Frequently Visited (similar to the Top Sites category in earlier versions of Safari). Several other sections follow, but you can customize exactly what appears on this page, in what order, and with what options.
To make changes to the page, click the settings ![]() icon in the lower-right corner of the window. A popover (Figure 40) appears. Check or uncheck an option to enable or disable it. (Although you can change which sections appear, you cannot reorder the sections.)
icon in the lower-right corner of the window. A popover (Figure 40) appears. Check or uncheck an option to enable or disable it. (Although you can change which sections appear, you cannot reorder the sections.)
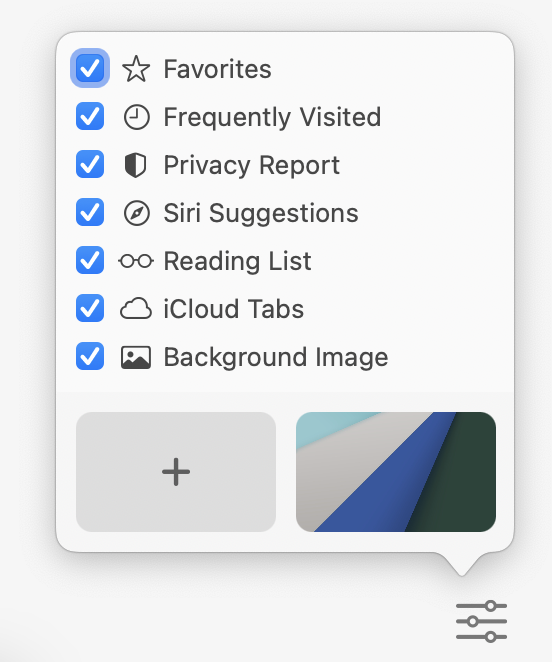
Your choices are:
Favorites: These are bookmarks (or folders of bookmarks) you’ve saved to the Favorites category, which can also appear across the top of the window, under the toolbar, if you choose View > Show Favorites Bar.
Frequently Visited: Safari keeps a count of sites you visit frequently and shows thumbnails here. If you hover over these thumbnails, you may see a Show More control appear; if so, you can click it to expand this display, or click Show Less to return to its original state. To delete a page, right-click (or Control-click) it and choose Delete from the contextual menu.
Privacy Report: This banner lists how many trackers Safari has blocked from following you within the past week. Click the banner to display the details. (I say more about this ahead, in Protect Your Privacy.)
Siri Suggestions: These are pages that, based on your browsing behavior, Siri thinks might match what you’re currently looking for. Apple has provided very little detail about how this works, and so far I have not found these suggestions helpful.
Reading List: Pages you’ve saved for offline reading using Bookmarks > Add to Reading List appear in this section.
iCloud Tabs: If you have one or more additional macOS, iOS, or iPadOS devices signed in to your iCloud account (with Safari syncing enabled), you can see one of those devices’ names at the bottom, listing its open tabs. To switch among multiple devices, hover over the device name and click the arrow
 control; then choose another device from the pop-up menu. As with Frequently Visited sites, you can hover over these thumbnails and click Show More to expand the display if necessary.
Background Image: If you’re not digging the plain gray background on your Start Page, you can scroll left or right in this bottom row to choose a different background; or click the plus
 icon to choose your own image.
Get More Out of Tabs
Tabs are a convenient way to have multiple webpages open at once without suffering window overload. It’s common, for example, to do a web search and then ⌘-click a bunch of links to pages that might contain the information you want, opening each of them in a separate background tab, which you can then review at your leisure. Safari 14 makes three noteworthy changes to tabs:
Favicons enabled by default: After a long absence, Safari 13 brought back the display of favicons, the little icons that help you identify a webpage, on individual tabs. However, that feature was disabled by default; you had to turn it on manually in Safari > Preferences > Tabs > “Show website icons in tabs.” Apparently, too few people noticed this, so Apple has enabled this setting by default now (though you can still turn it off if you prefer).
Better tab design: As the number of open tabs grows, Safari now shrinks them down more efficiently so it can show more of them at once. Indeed, if you add enough tabs in a narrow enough window, Safari shrinks them to show only the favicons (Figure 41). Of course, the downside is that you won’t see the page’s title on the tab, potentially making it harder to figure out what’s what. Luckily, the next new feature can help out there.

Figure 41: If you have a few tabs (top), Safari makes them wider, with more text. As you add more (bottom), they can shrink to the point that only the favicons appear. Tab previews: Regardless of how wide a tab is and whether it shows some or all of a title, you can now hover over a background tab to see a preview of that page (Figure 42). This gives you a quick way to identify which tab you’re looking for without manually cycling through them.

Translate Pages from Other Languages
A feature still in beta testing for the time being, and available only on Big Sur (even though Safari 14 also runs on earlier versions of macOS) is automatic translation of webpages from one language into another.
For reasons Apple does not specify, this feature is available only in the United States and Canada, at least for now. However, it handles not just English and French, but can also translate webpages to or from Spanish, German, Chinese, Russian, or Brazilian Portuguese.
To use this feature, start by visiting a webpage in one of the supported languages. Then choose View > Translation > Translate to English (or Translate to Other Language).
The first time you use this feature, an alert asks you to enable translation and points out that, if you do so, the page’s URL and contents will be sent to Apple. Thereafter, translation happens almost instantly.
Initially, the View > Translation menu may have only English listed, or another subset of the available languages. To add any of the other supported languages, choose View > Translation > Preferred Language, click the plus ![]() icon at the bottom of the list, and double-click an additional language. (Assuming you don’t also want to change the main language of your Mac’s interface, click Use English in the dialog that appears next.) The language you added then appears as another choice on the Translation menu.
icon at the bottom of the list, and double-click an additional language. (Assuming you don’t also want to change the main language of your Mac’s interface, click Use English in the dialog that appears next.) The language you added then appears as another choice on the Translation menu.
To go back to viewing the webpage in its original language, choose View > Translation > View Original.
Extend Safari
Over the past several major revisions of Safari, Apple has repeatedly changed the rules for how third-party extensions work. It seems as though Apple’s preference (for both security and control) would be to ban outside extensions completely, but because so many people need browser features that Safari doesn’t have natively, Safari users would revolt if extensions were disallowed. So the company does permit them, within rigidly defined guidelines—one of which is that only extensions downloaded from the Mac App Store can be installed.
Fortunately, quite a few developers have moved their extensions to the App Store, and there are two easy ways to find them there:
Go to the Safari Extensions story on the App Store. I’m not sure why Apple calls this a “story,” since it’s just a long list of extensions with a brief introductory paragraph.
In Safari, choose Safari > Safari Extensions. This takes you to an otherwise hard-to-find category within the App Store that lists extensions in a variety of categories, along with helpful articles at the top.
Although there’s a lot of overlap between these locations, some extensions appear only in one place or the other.
Apple’s marketing materials state that Safari in Big Sur will prompt users to explicitly allow extensions to access each website—either for a day or for all time. (Presumably, the interface for this will be similar to the one used for content blockers, in Safari > Preferences > Websites > Content Blockers.) As of publication time, I have yet to see this new feature in action.
Protect Your Privacy
Safari has developed a reputation as one of the more privacy-conscious browsers, and for several years now Apple has added features that give you ever greater privacy protections out of the box, plus additional capabilities you can optionally turn on. Safari 14 continues this trend.
Before I go on, I should mention a couple of important qualifications:
Safari’s privacy features, although better than they were before, and better than some other browsers, are not sufficient to protect your privacy at what I would consider an acceptable level.
Most ads can track your behavior across websites, but Safari can curtail the majority of that tracking. However, it does so without blocking the ads themselves. If you want to limit or eliminate ads for reasons other than tracking, you’ll have to find a third-party extension to help you with that.
View Your Privacy Report
Since 2017, Safari has had a feature called Intelligent Tracking Prevention (ITP), though you won’t see that term anywhere in the app. This feature is enabled if Safari > Preferences > Privacy > “Prevent cross-site tracking” is selected, so I recommend confirming that right now. ITP, by itself, doesn’t block all cookies; rather, it blocks third-party cookies (that is, cookies from sites other than the one you’re visiting) and limits how long cookies can last, which reduces their utility for tracking you across sites.
That aspect of Safari’s privacy capabilities isn’t new, but Safari 14 lets you see exactly how Safari has been protecting you. The new Privacy Report shows you, site by site and tracker by tracker, exactly who has been trying to follow you around the web and what attempts Safari has blocked.
Each site you visit has its own privacy report, and there’s also a combined report that shows everything Safari has blocked over the past 30 days.
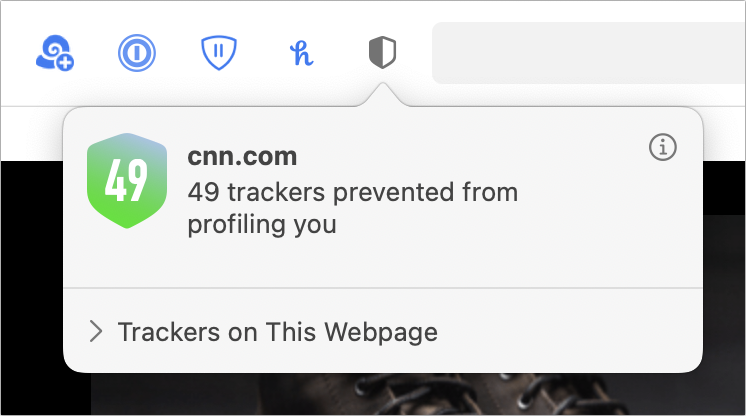
To view a report for the page you’re on, click the Privacy Report ![]() icon on the toolbar. A popover (Figure 43) appears, listing how many trackers were blocked on that site. To see each tracker in a scrolling list, click Trackers on This Webpage.
icon on the toolbar. A popover (Figure 43) appears, listing how many trackers were blocked on that site. To see each tracker in a scrolling list, click Trackers on This Webpage.
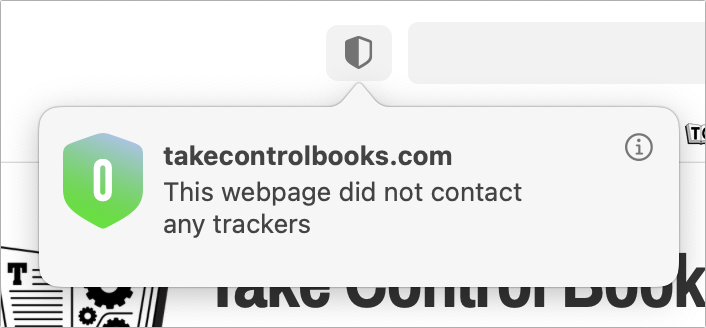
If a site has no trackers—and yes, those do exist, including cough the Take Control Books website—you’ll see something like Figure 44.
To view your full report for the last 30 days, click the Info ![]() icon on any per-page report, choose Safari > Privacy Report, or click the Privacy Report banner on the Start Page. A window like the one in Figure 45 appears.
icon on any per-page report, choose Safari > Privacy Report, or click the Privacy Report banner on the Start Page. A window like the one in Figure 45 appears.
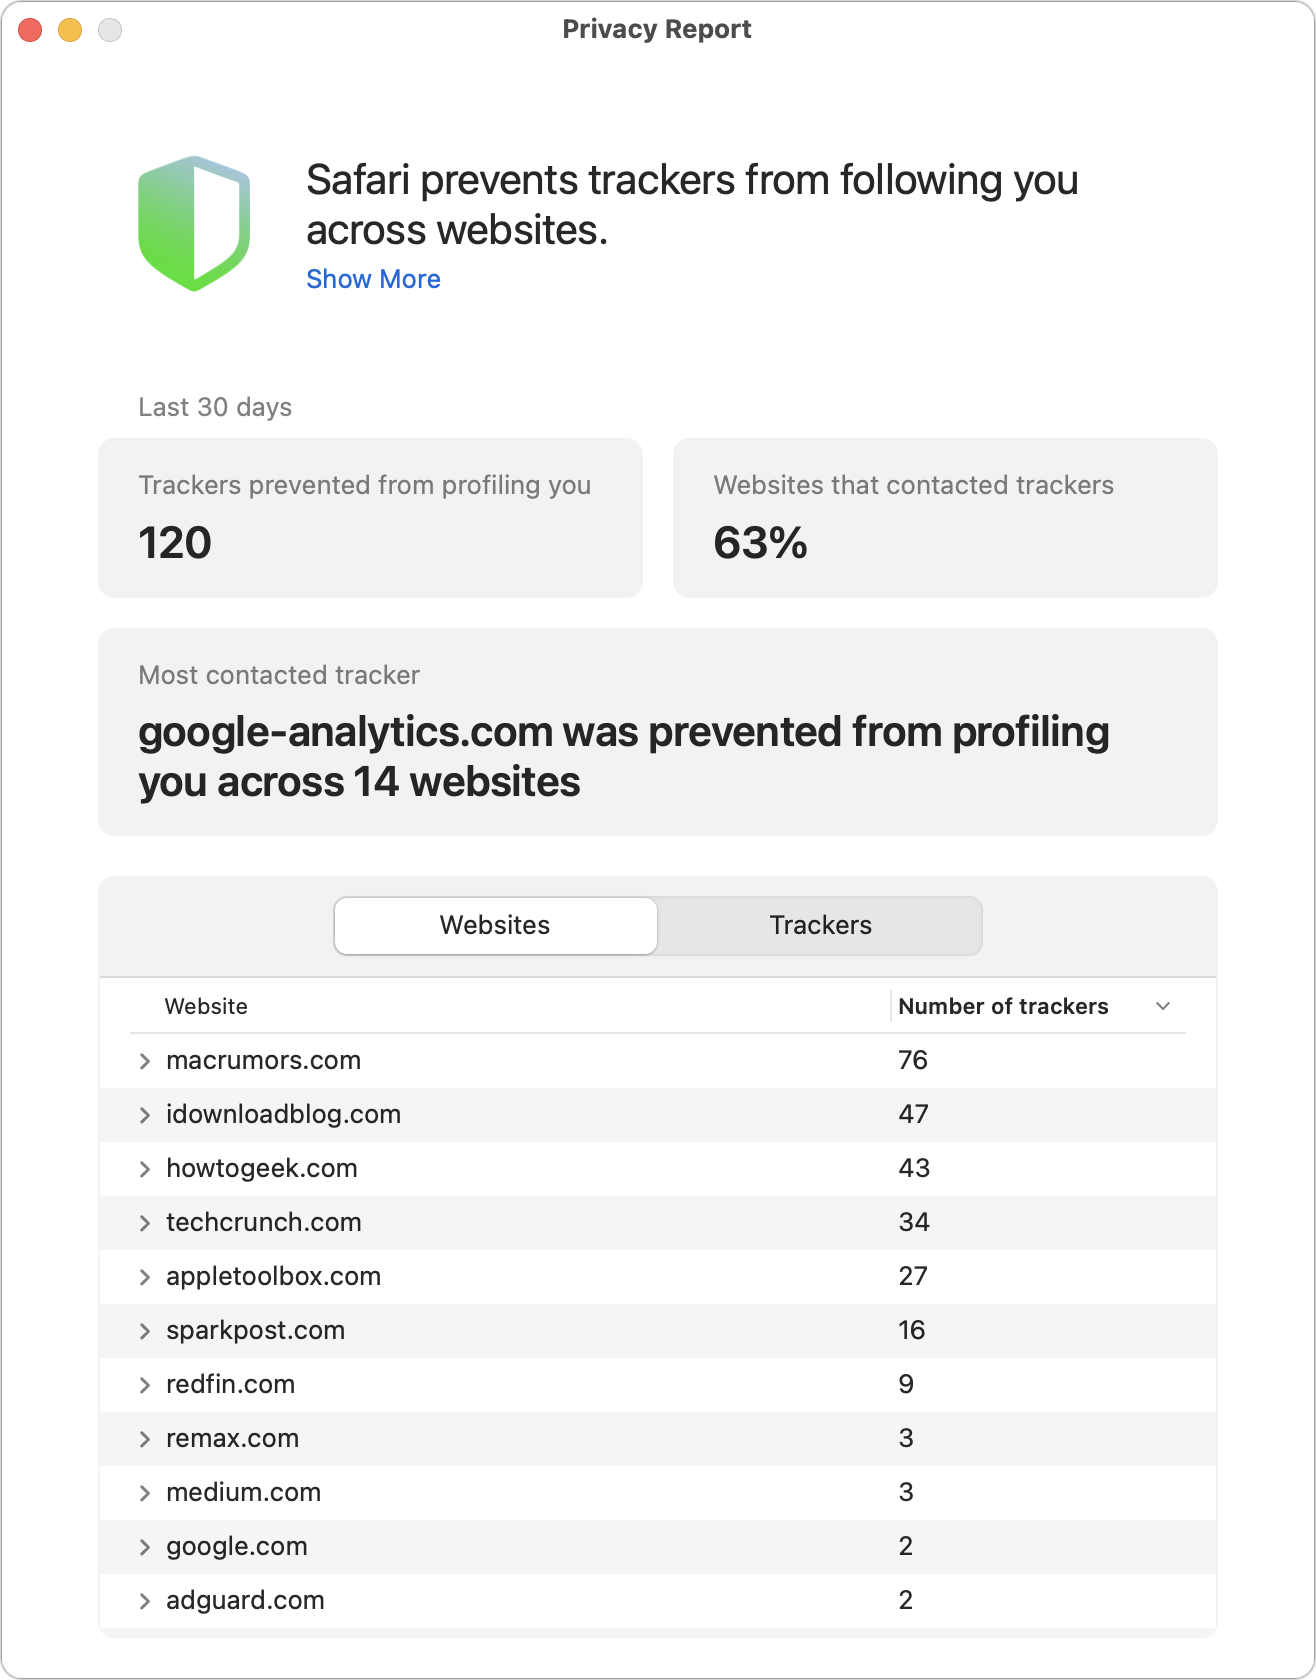
Here, you can click a disclosure ![]() arrow to expand the list of trackers for a given site, or click Trackers above the list to view the data the other way around, expanding each tracker to see which sites it was used on.
arrow to expand the list of trackers for a given site, or click Trackers above the list to view the data the other way around, expanding each tracker to see which sites it was used on.
Monitor Your Passwords
Data breaches are, sadly, a common occurrence these days. Whether through hacking, theft, incompetence, or simply an unknown software flaw, private credentials stored on websites often become public—sometimes by the millions.
Responsible companies inform their users when such a breach is discovered, often taking the preemptive step of forcing password resets on their next visit. But not all companies are that responsible. So Apple helps by informing you if any of the passwords you’ve saved in Safari have been found in a public data dump of breached passwords. (It does this securely, without Apple ever actually seeing your passwords.)
Other password managers, such as 1Password, have had similar features for a long time—and indeed, as I explain in my books Take Control of Your Passwords and Take Control of 1Password—I generally recommend against letting Safari store your passwords in the first place, relying instead on a third-party password manager.
Be that as it may, if you do store passwords in Safari, you’ll surely want to know if any of them have been compromised so you can change them. This feature is enabled by default; to confirm that it’s turned on for you, go to Safari > Preferences > Passwords, unlock it with your Mac’s user account password, and make sure “Detect passwords compromised by known data leaks” is selected.
With that selected, Safari alerts you if one of your passwords is discovered in a breach, walking you through the process of changing it (and automatically generating a suggested replacement password).
Import Data from Chrome
Finally, for users who have been using Google Chrome and want to transition to Safari as their main browser, Safari now makes it easier to import data from Chrome (including your browsing history, bookmarks, and passwords).
To do this, choose File > Import From > Google Chrome. Optionally deselect any category you don’t want to import. Then click Import. Click OK when the import is complete.