This chapter describes how to prepare information for publishing in your online shop created with TYPO3. Information can be images, text, and an item's categorization by size, color, products' campaigns, and so on.
In general, if you are running e-Commerce information you often need to summarize from different sources, and the information preparation format can be very different. We recommend storing information in CSV (Comma Separated Values) files where you can:
- Categorize information and store information like tables. This method of storing information provides easy viewing and may require sorting information in software like Microsoft Excel or Open Office Calc.
- Avoid text formatting. You don't need to remove the formatting for stored information using the RTE—Rich Text Editor—in TYPO3, which is similar to most of the available WYSIWYG editors.
If you are storing information in CSV files, information takes less space, is mobile, and is easy to distribute. CSV files provide accessibility on most of the computer platforms: Windows, Mac OS, and Linux systems.
If you configured your web page so that all the images through the GIFBUILDER are generated like jpeg files, we recommend adding images in the PNG format. Some general benefits of this format are:
- High image quality
- Smaller size
The easiest way to work with the CSV data format is to use a third-party extension, for example, wil_importcsv. You should note that this extension is in the Alpha state. This means that the extension is in the early stage of development. If you want to use that kind of extension, we recommend backing up the database in case of errors.
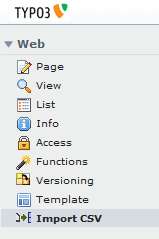
For using this extension, utilize the Extension manager module and download the extension to your TYPO3 installation. If the installation is successful you'll be able to choose the new backend module Import CSV, as seen in the following screenshot:
After the installation, this extension supports access to database tables and tt_content, but you should set up an extra configuration to provide extension supports to other tables—for example, tt_products.
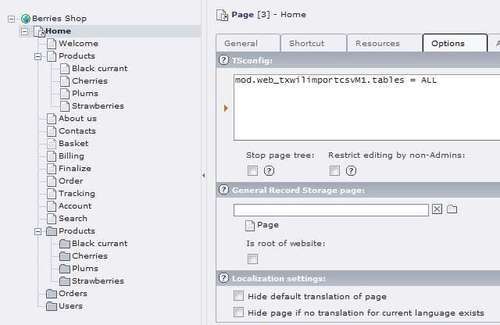
Go to the module Page and choose the first-level page from sitemap. In our example, this is the first-level page where page templates are stored. You should configure some of the options. Choose the section Options and add this line of code, as shown in the following screenshot:
mod.web_txwilimportcsvM1.tables = ALL
In this way you provide full access to all the tables for users who have administrator rights. If you want to use the extension wil_importcsv for some definite tables, separate the tables' names with commas:
mod.web_txwilimportcsvM1.tables = tt_products, tt_products_articles, tx_myextension
Save the entered TypoScript configuration and go to the backend module Import CSV as shown in the following screenshot:
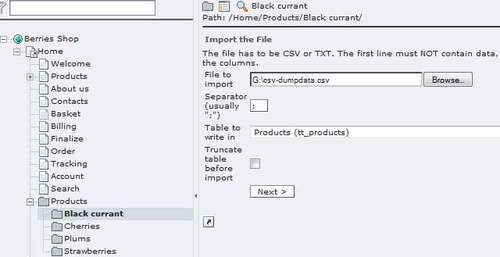
Choose the CSV file format from your PC, choose the table from where the data from the file will be added (table tt_products), and click on Next. Choose the associated fields from the CSV file that match the database table and click Preview:
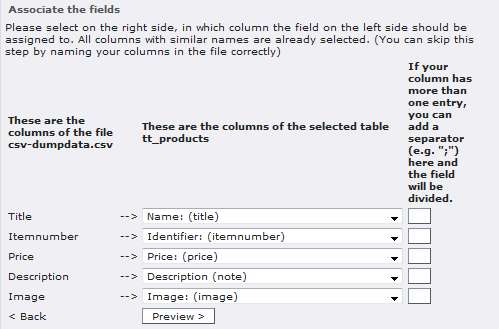
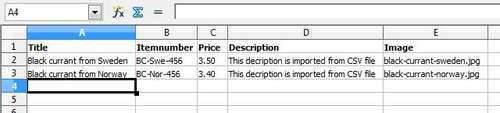
You can see a CSV file in the following screenshot. This file will be imported to the tt_products table. Remember that the first line should contain column names (not product data). You will use column names for CSV fields mapping:
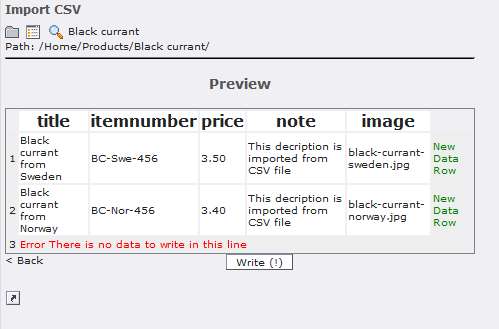
If all the marked fields are marked correctly, click on Write (!). Then, data from the CSV file will be added to the web page database.
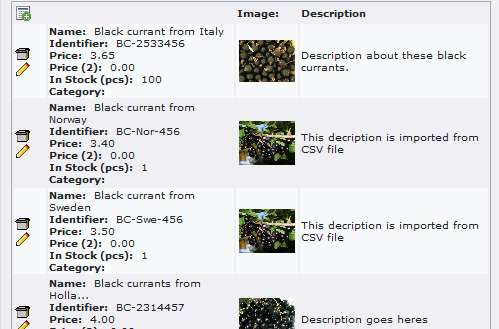
New data will be seen in the frontend and backend sections if the CSV field mappings are successful, as you can see in the following screenshot:
Images aren't stored in the database—there are stored references to the corresponding folders where images are uploaded instead. You should specify image filenames in the CSV dump file (not file embedding). If you use file embedding, the images will not be added to the records and you will have to attach the images manually. The extension tt_products by default reads images from the folder: /uploads/pics/.
So you need to upload the images using, for example, FTP. In our example we used a CSV file with some columns, but you can add and use other product fields: www, subtitle, inStock, and so on.