In the following section, we cover the installation of TYPO3 using the TYPO3 Install tool.
You can use the 1-2-3 Install tool, which has three simple steps, to install TYPO3 on your hosting server.
To access the TYPO3 Install tool, open your web page: http://[yoursitename.com]/index.php and you will be redirected to the TYPO3 1-2-3 install script that provides an easy setup of TYPO3.
The default password is joh316. It is recommended that you change this password after the installation is complete. The following is a screenshot of the installation start-up:

The TYPO3 1-2-3 Install tool allows you, in three simple steps, to connect to the MySQL database and import the default tables from the database dump file. You can choose to create a new database and add tables to the main database. There were 36 tables in our installation for version 4.2.8.
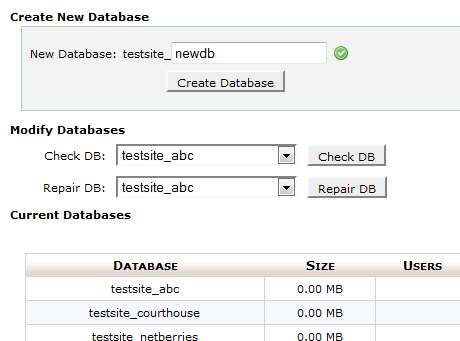
Using a hosting service can often lead to a situation where you need to create a database independently using the Control Panel tools. For example, if you use cPanel for creating a new database, you need to:
- Authorize in Control Panel.
- Go to the section Databases and select MySQL Databases.
- Enter the name of the new database.
- Click on the Create Database button.
If you create a database this way, you should add the previously created user account to this database. If you choose to create the database and user account together, you have to select the function MySQL Database Wizard from the section Databases. This wizard contains the following steps:
- Step 1: Create a Database (enter the database name).
- Step 2: Create Database user (enter username and password for user).
- Step 3: Add user to the Database (enable/disable user database privileges such as insert, edit, delete, and drop, among others). We recommend choosing All privileges in the checkbox for normal TYPO3 installation.
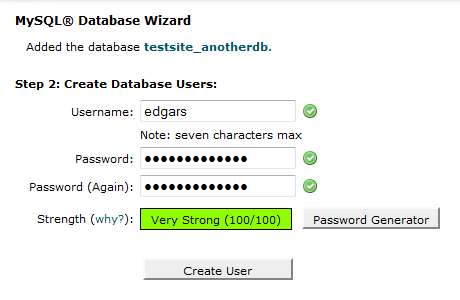
- Step 4: Complete the task. After these four steps, you can choose to return to the first page of admin tool, create another database, or create additional user accounts for the database.
This is Step 1 in the TYPO3 installation. Write the database access information in the respective fields—username and password. After this, approve the information and move onto the next step:
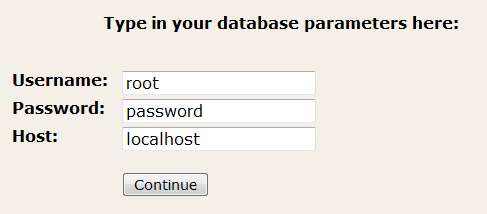
Here, enter the username and password to access your database:
- Username—given username
- Password—given password
- Host—often"localhost"
This is Step 2 in the installation of TYPO3. With this step, you can choose the existent database or create a new one (recommended). Usually, hosting service providers offer already created databases wherein you won't have permissions to create a new one.
It is different if you use a website hosting service that allows managing your web space or if you are the web server administrator; then, you may be able to create a new database through the TYPO3 Install script.

Select an existing database or create a new one for the TYPO3 installation.
This is Step 3 in the installation of TYPO3. Import the database SQL file by pressing the Import database button.
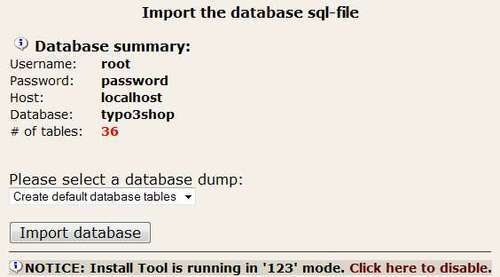
After these three steps, you are done with TYPO3's basic installation.
For a complete installation, you should continue with the configuration—also called Normal mode, which secures additional options for TYPO3's complete functionality. Here you can continue page configuration, providing the preferred page operations. Using the section Basic Configuration, you can activate and set up the following:
- ImageMagick or GraphicsMagick: for processing images (for TYPO3 image resizing, cropping, and special effects). If you choose ImageMagick, specify its location on the web server (in case ImageMagick is installed in the "non standard" folder and TYPO3 can't find it).
- GDLib: options for text processing and converting it to an image.
- TTF font size: 72 or 96 (look at the generated image—if it fits the box, you can leave it at size 72, or you can set it to 96).
- Format of image generation: take note that the
*.pngformat files are more qualitative than the*.giffiles. The maximum color scale of a*.giffile's is only 256 colors.