Before we can begin installing the libraries to a network of multiple Pi devices, we need to configure our Raspbian installation to make things a bit easier.
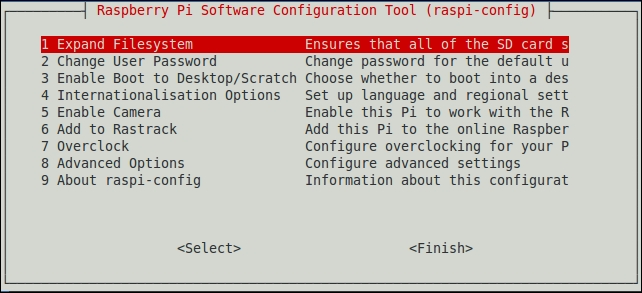
Boot up a Raspberry Pi and in the terminal, enter the following command:
sudo raspi-config
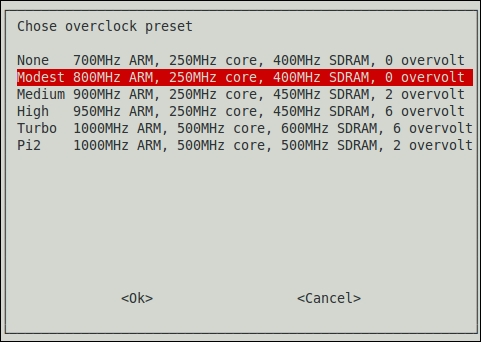
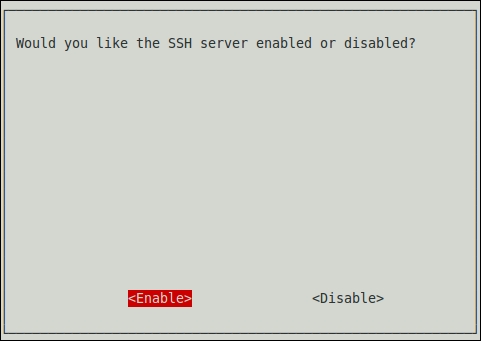
It is assumed that you have followed all the setup steps that are preferred on first starting up the Raspberry Pi. These are as follows:

We need to enable auto login so that we do not need to manually log in every Pi once we fire it up. Auto login is enabled by default in the latest versions of the Raspbian operating system, so we don't need to perform the following procedure on the latest version. To enable auto login, exit the configuration menu, but don't reboot yet. To set the auto login, open the inittab file with the following command:
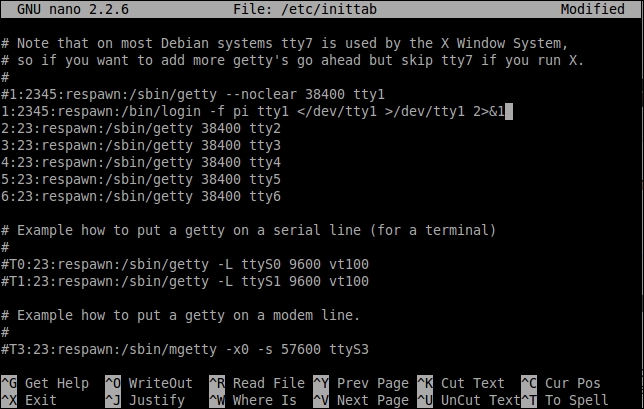
sudo nano /etc/inittab
Comment out the following line:
1:2345:respawn:/sbin/getty --noclear 38400 tty1
This is done so that it looks like this:
#1:2345:respawn:/sbin/getty --noclear 38400 tty1
Then, add the following line:
1:2345:respawn:/bin/login -f pi tty1 </dev/tty1 >/dev/tty1 2>&1
Save the file and reboot the Pi with sudo reboot. When it boots up, you should be auto-logged in.
We are now ready to proceed and begin installing the software that is required to run a cluster of computers.
MPICH is a freely available, easily portable, and widely used implementation of the MPI standard, which is a message parsing protocol for distributed memory applications used in parallel computing. Work on the first version of MPICH was started around 1992 and is currently in its third version. MPICH is one of the most popular implementations of the MPI standard due to the fact that it is used as a foundation for a vast majority of MPI implementations, including ones by IBM, Cray, Microsoft, and so on.
Note
To know more about the MPICH library, visit http://www.mpich.org/.
At the time of writing, the latest version of MPICH is 3.2. The installation instructions for this are presented. However, these should work on all the sub-versions of MPICH3 and most of the later versions of MPICH2.
To begin the installation, ensure that the Raspberry Pi has a valid Internet connection. Run the following commands in order to get a working installation of MPICH:
- Update your Raspbian distribution:
sudo apt-get update - Create a directory to store the MPICH files:
mkdir mpich
cd ~/mpich
- Get the MPICH tar file:
wget http://www.mpich.org/static/downloads/3.2/mpich-3.2.tar.gz - Extract the tar archive:
tar xfz mpich-3.2.tar.gz - This will contain the MPICH installation and build the following:
sudo mkdir /home/rpimpi/
sudo mkdir /home/rpimpi/mpi-install
mkdir /home/pi/mpi-build
cd /home/pi/mpi-build
- Fortran is a dependency for MPI:
sudo apt-get install gfortran
Now, since we created a build folder for the MPICH installation earlier, we need to configure the installation script and point it to the folder where we want the interface to be installed. We do this by running the configure script and setting the build prefix to the installation directory:
sudo /home/pi/mpich/mpich-3.2/configure -prefix=/home/rpimpi/mpi-install
Finally, we carry out the actual installation.
sudo make
sudo make install
Edit the bashrc file so that the path to the MPICH installation is loaded to the PATH variable every time we open a new terminal window. To do that, open the file in the terminal with the following command:
nano ~/.bashrc
Then, add the following line at the end:
PATH=$PATH:/home/rpimpi/mpi-install/bin
Save and exit the bashrc file by pressing Ctrl + X and then click on Return. We will now test the installation. For that, reboot the Pi:
sudo reboot
Then, run the following command:
mpiexec -n 1 hostname
If the preceding command returns Pi1, or whatever you set your hostname to be, then our MPICH installation is successful and we can proceed to the next step.
We will now look at a short C program that uses MPICH. This is given as follows:
#include "mpi.h"
#include <stdio.h>

void main(int argc, char *argv[]) {
    int rank, size
    MPI_Init(argc, argv);
    MPI_Comm_rank( MPI_COMM_WORLD, &rank);
    MPI_Comm_size( MPI_COMM_WORLD, &size);
    printf("I have %d rank and %d size
", rank, size);
    MPI_Finalize();
}
This program runs on a single node and discovers the total number of nodes in a network. It then communicates with the MPI processes on other nodes and finds out its own rank.
The MPI_Init()function initiates the MPICH process on our computer according to the given information about the IP addresses in a network. The MPI_Comm_rank() function and the MPI_Comm_size() function get the rank of the current process and the total size of the network and save them in rank and size variables, respectively. The MPI_Finalize() function is nothing but an exit routine that ends the MPI process cleanly.
On its own, MPICH can be run using C and Fortran languages. But that might be a hindrance for a lot of users. But fret not! We can use MPICH in Python by installing the Python API called MPI4PY.
The conventional way of installing the mpi4py module from a package manager such as apt-get or aptitude does not work because it tries to install the openMPI library along with it, which conflicts with the existing installation of MPICH.
So, we have to install it manually. We do this by first cloning the repository from BitBucket:
git clone https://bitbucket.org/mpi4py/mpi4py

Make sure that all the dependencies for the library are met. These are as follows:
- Python 2.6 or higher
- A functional MPICH installation
- Cython
The first two dependencies are already met. We can install Cython with the following command:
sudo apt-get install cython
The following commands will install mpi4py with the setup.py installation script:
cd mpi4py
python setup.py build
python setup.py install
Add the path to the installation of mpi4py to PYTHONPATH so that the Python environment knows where the installation files are located. This ensures that we are easily able to import mpi4py into our Python applications:
export PYTHONPATH=/home/pi/mpi4py
Finally, run a test script to test the installation:
python demo/helloworld.py
Now that we have completely set up the system to use MPICH, we need to do this for every Pi we wish to use. We can run all of the earlier commands in freshly installed SD cards, but the better option would be to copy the card we prepared earlier into blank SD cards. This saves us the hassle of completely setting up the system from scratch. But remember to change the hostname to our standard scheme (such as Pi01 and Pi02) after the fresh SD card has been set up in a new Raspberry Pi. For Windows, there is an easy-to-use tool called Win32 Disk Imager, which we can use to clone the card into an .img file and then copy it to another blank SD card. If you are using OS X or Linux, then the following procedure should be followed:
- Copy the OS from an existing card:
sudo dd bs=4M if=/dev/disk2 of=~/Desktop/raspi.img - Remove the card and insert a new card.
- Unmount the card.
- Format the SD card.
- Copy the OS to the SD card:
sudo dd bs=4M if=~/Desktop/raspi.img of=/dev/disk2
Note
To know more about the mpi4py library and to have a look at the various demos, you can visit the official Git repository on BitBucket at https://bitbucket.org/mpi4py/mpi4py.