Chapter 15. Server-Side Scripting
“Oh, What a Tangled Web We Weave”
This chapter is the fourth part of our look at Python Internet programming. In the last three chapters, we explored sockets and basic client-side programming interfaces such as FTP and email. In this chapter, our main focus will be on writing server-side scripts in Python—a type of program usually referred to as CGI scripts. Though something of a lowest common denominator for web development today, such scripts still provide a simple way to get started with implementing interactive websites in Python.
Server-side scripting and its derivatives are at the heart of much of the interaction that happens on the Web. This is true both when scripting manually with CGI and when using the higher-level frameworks that automate some of the work. Because of that, the fundamental web model we’ll explore here in the context of CGI scripting is prerequisite knowledge for programming the Web well, regardless of the tools you choose to deploy.
As we’ll see, Python is an ideal language for writing scripts to implement and customize websites, because of both its ease of use and its library support. In the following chapter, we will use the basics we learn in this chapter to implement a full-blown website. Here, our goal is to understand the fundamentals of server-side scripting, before exploring systems that deploy or build upon that basic model.
What’s a Server-Side CGI Script?
Simply put, CGI scripts implement much of the interaction you typically experience on the Web. They are a standard and widely used mechanism for programming web-based systems and website interaction, and they underlie most of the larger web development models.
There are other ways to add interactive behavior to websites with Python, both on the client and the server. We briefly met some such alternatives near the start of Chapter 12. For instance, client-side solutions include Jython applets, RIAs such as Silverlight and pyjamas, Active Scripting on Windows, and the emerging HTML 5 standard. On the server side, there are a variety of additional technologies that build on the basic CGI model, such as Python Server Pages, and web frameworks such as Django, App Engine, CherryPy, and Zope, many of which utilize the MVC programming model.
By and large, though, CGI server-side scripts are used to program much of the activity on the Web, whether it’s programmed directly or partly automated by frameworks and tools. CGI scripting is perhaps the most primitive approach to implementing websites, and it does not by itself offer the tools that are often built into larger frameworks such as state retention, database interfaces, and reply templating. CGI scripts, however, are in many ways the simplest technique for server-side scripting. As a result, they are an ideal way to get started with programming on the server side of the Web. Especially for simpler sites that do not require enterprise-level tools, CGI is sufficient, and it can be augmented with additional libraries as needed.
The Script Behind the Curtain
Formally speaking, CGI scripts are programs that run on a server machine and adhere to the Common Gateway Interface—a model for browser/server communications, from which CGI scripts take their name. CGI is an application protocol that web servers use to transfer input data and results between web browsers and other clients and server-side scripts. Perhaps a more useful way to understand CGI, though, is in terms of the interaction it implies.
Most people take this interaction for granted when browsing the Web and pressing buttons in web pages, but a lot is going on behind the scenes of every transaction on the Web. From the perspective of a user, it’s a fairly familiar and simple process:
- Submission
When you visit a website to search, purchase a product, or submit information online, you generally fill in a form in your web browser, press a button to submit your information, and begin waiting for a reply.
- Response
Assuming all is well with both your Internet connection and the computer you are contacting, you eventually get a reply in the form of a new web page. It may be a simple acknowledgment (e.g., “Thanks for your order”) or a new form that must be filled out and submitted again.
And, believe it or not, that simple model is what makes most of the Web hum. But internally, it’s a bit more complex. In fact, a subtle client/server socket-based architecture is at work—your web browser running on your computer is the client, and the computer you contact over the Web is the server. Let’s examine the interaction scenario again, with all the gory details that users usually never see:
- Submission
When you fill out a form page in a web browser and press a submission button, behind the scenes your web browser sends your information across the Internet to the server machine specified as its receiver. The server machine is usually a remote computer that lives somewhere else in both cyberspace and reality. It is named in the URL accessed—the Internet address string that appears at the top of your browser. The target server and file can be named in a URL you type explicitly, but more typically they are specified in the HTML that defines the submission page itself—either in a hyperlink or in the “action” tag of the input form’s HTML.
However the server is specified, the browser running on your computer ultimately sends your information to the server as bytes over a socket, using techniques we saw in the last three chapters. On the server machine, a program called an HTTP server runs perpetually, listening on a socket for incoming connection requests and data from browsers and other clients, usually on port number 80.
- Processing
When your information shows up at the server machine, the HTTP server program notices it first and decides how to handle the request. If the requested URL names a simple web page (e.g., a URL ending in .html), the HTTP server opens the named HTML file on the server machine and sends its text back to the browser over a socket. On the client, the browser reads the HTML and uses it to construct the next page you see.
But if the URL requested by the browser names an executable program instead (e.g., a URL ending in .cgi or .py), the HTTP server starts the named program on the server machine to process the request and redirects the incoming browser data to the spawned program’s
stdininput stream, environment variables, and command-line arguments. That program started by the server is usually a CGI script—a program run on the remote server machine somewhere in cyberspace, usually not on your computer. The CGI script is responsible for handling the request from this point on; it may store your information in a database, perform a search, charge your credit card, and so on.- Response
Ultimately, the CGI script prints HTML, along with a few header lines, to generate a new response page in your browser. When a CGI script is started, the HTTP server takes care to connect the script’s
stdoutstandard output stream to a socket that the browser is listening to. As a result, HTML code printed by the CGI script is sent over the Internet, back to your browser, to produce a new page. The HTML printed back by the CGI script works just as if it had been stored and read from an HTML file; it can define a simple response page or a brand-new form coded to collect additional information. Because it is generated by a script, it may include information dynamically determined per request.
In other words, CGI scripts are something like callback handlers for requests generated by web browsers that require a program to be run dynamically. They are automatically run on the server machine in response to actions in a browser. Although CGI scripts ultimately receive and send standard structured messages over sockets, CGI is more like a higher-level procedural convention for sending and receiving information between a browser and a server.
Writing CGI Scripts in Python
If all of this sounds complicated, relax—Python, as well as the resident HTTP server, automates most of the tricky bits. CGI scripts are written as fairly autonomous programs, and they assume that startup tasks have already been accomplished. The HTTP web server program, not the CGI script, implements the server side of the HTTP protocol itself. Moreover, Python’s library modules automatically dissect information sent up from the browser and give it to the CGI script in an easily digested form. The upshot is that CGI scripts may focus on application details like processing input data and producing a result page.
As mentioned earlier, in the context of CGI scripts,
the stdin and stdout streams are automatically tied to sockets connected to
the browser. In addition, the HTTP server passes some browser
information to the CGI script in the form of shell environment
variables, and possibly command-line arguments. To CGI programmers,
that means:
Input data sent from the browser to the server shows up as a stream of bytes in the
stdininput stream, along with shell environment variables.Output is sent back from the server to the client by simply printing properly formatted HTML to the
stdoutoutput stream.
The most complex parts of this scheme include parsing all the input information sent up from the browser and formatting information in the reply sent back. Happily, Python’s standard library largely automates both tasks:
- Input
With the Python
cgimodule, input typed into a web browser form or appended to a URL string shows up as values in a dictionary-like object in Python CGI scripts. Python parses the data itself and gives us an object with onekey:valuepair per input sent by the browser that is fully independent of transmission style (roughly, by fill-in form or by direct URL).- Output
The
cgimodule also has tools for automatically escaping strings so that they are legal to use in HTML (e.g., replacing embedded<,>, and&characters with HTML escape codes). Moduleurllib.parseprovides additional tools for formatting text inserted into generated URL strings (e.g., adding%XXand+escapes).
We’ll study both of these interfaces in detail later in this chapter. For now, keep in mind that although any language can be used to write CGI scripts, Python’s standard modules and language attributes make it a snap.
Perhaps less happily, CGI scripts are also intimately tied to the syntax of HTML, since they must generate it to create a reply page. In fact, it can be said that Python CGI scripts embed HTML, which is an entirely distinct language in its own right.[57] As we’ll also see, the fact that CGI scripts create a user interface by printing HTML syntax means that we have to take special care with the text we insert into a web page’s code (e.g., escaping HTML operators). Worse, CGI scripts require at least a cursory knowledge of HTML forms, since that is where the inputs and target script’s address are typically specified.
This book won’t teach HTML in depth; if you find yourself puzzled by some of the arcane syntax of the HTML generated by scripts here, you should glance at an HTML introduction, such as HTML & XHTML: The Definitive Guide. Also keep in mind that higher-level tools and frameworks can sometimes hide the details of HTML generation from Python programmers, albeit at the cost of any new complexity inherent in the framework itself. With HTMLgen and similar packages, for instance, it’s possible to deal in Python objects, not HTML syntax, though you must learn this system’s API as well.
Running Server-Side Examples
Like GUIs, web-based systems are highly interactive, and the best way to get a feel for some of these examples is to test-drive them live. Before we get into some code, let’s get set up to run the examples we’re going to see.
Running CGI-based programs requires three pieces of software:
The client, to submit requests: a browser or script
The web server that receives the request
The CGI script, which is run by the server to process the request
We’ll be writing CGI scripts as we move along, and any web
browser can be used as a client (e.g., Firefox, Safari, Chrome, or
Internet Explorer). As we’ll see later, Python’s urllib.request module can also serve as a web client in scripts we
write. The only missing piece here is the intermediate web
server.
Web Server Options
There are a variety of approaches to running web servers. For
example, the open source Apache system provides a complete,
production-grade web server, and its mod_python
extension discussed later runs Python scripts quickly. Provided you
are willing to install and configure it, it is a complete solution,
which you can run on a machine of your own. Apache usage is beyond
our present scope here, though.
If you have access to an account on a web server machine that runs Python 3.X, you can also install the HTML and script files we’ll see there. For the second edition of this book, for instance, all the web examples were uploaded to an account I had on the “starship” Python server, and were accessed with URLs of this form:
http://starship.python.net/~lutz/PyInternetDemos.html
If you go this route, replace starship.python.net/~lutz with the names
of your own server and account directory path. The downside of using
a remote server account is that changing code is more involved—you
will have to either work on the server machine itself or transfer
code back and forth on changes. Moreover, you need access to such a
server in the first place, and server configuration details can vary
widely. On the starship machine, for example, Python CGI scripts
were required to have a .cgi filename
extension, executable permission, and the Unix #! line at the top to point the shell to
Python.
Finding a server that supports Python 3.X used by this book’s examples might prove a stumbling block for some time to come as well; neither of my own ISPs had it installed when I wrote this chapter in mid-2010, though it’s possible to find commercial ISPs today that do. Naturally, this may change over time.
Running a Local Web Server
To keep things simple, this edition is taking a different approach. All the examples will be run using a simple web server coded in Python itself. Moreover, the web server will be run on the same local machine as the web browser client. This way, all you have to do to run the server-side examples is start the web server script and use “localhost” as the server name in all the URLs you will submit or code (see Chapter 12 if you’ve forgotten why this name means the local machine). For example, to view a web page, use a URL of this form in the address field of your web browser:
http://localhost/tutor0.html
This also avoids some of the complexity of per-server differences, and it makes changing the code simple—it can be edited on the local machine directly.
For this book’s examples, we’ll use the web server in Example 15-1. This is essentially the same script introduced in Chapter 1, augmented slightly to allow the working directory and port number to be passed in as command-line arguments (we’ll also run this in the root directory of a larger example in the next chapter). We won’t go into details on all the modules and classes Example 15-1 uses here; see the Python library manual. But as described in Chapter 1, this script implements an HTTP web server, which:
Listens for incoming socket requests from clients on the machine it is run on and the
portnumber specified in the script or command line (which defaults to 80, that standard HTTP port)Serves up HTML pages from the webdir directory specified in the script or command line (which defaults to the directory it is launched from)
Runs Python CGI scripts that are located in the cgi-bin (or htbin) subdirectory of the webdir directory, with a .py filename extension
See Chapter 1 for additional background on this web server’s operation.
"""
Implement an HTTP web server in Python which knows how to serve HTML
pages and run server-side CGI scripts coded in Python;  this is not
a production-grade server (e.g., no HTTPS, slow script launch/run on
some platforms), but suffices for testing, especially on localhost;

Serves files and scripts from the current working dir and port 80 by
default, unless these options are specified in command-line arguments;
Python CGI scripts must be stored in webdircgi-bin or webdirhtbin;
more than one of this server may be running on the same machine to serve
from different directories, as long as they listen on different ports;
"""

import os, sys
from http.server import HTTPServer, CGIHTTPRequestHandler

webdir = '.'   # where your HTML files and cgi-bin script directory live
port   = 80    # http://servername/ if 80, else use http://servername:xxxx/

if len(sys.argv) > 1: webdir = sys.argv[1]             # command-line args
if len(sys.argv) > 2: port   = int(sys.argv[2])        # else default ., 80
print('webdir "%s", port %s' % (webdir, port))

os.chdir(webdir)                                       # run in HTML root dir
srvraddr = ('', port)                                  # my hostname, portnumber
srvrobj  = HTTPServer(srvraddr, CGIHTTPRequestHandler)
srvrobj.serve_forever()                                # serve clients till exit
To start the server to run this chapter’s examples, simply run this script from the directory the script’s file is located in, with no command-line arguments. For instance, from a DOS command line:
C:...PP4EInternetWeb> webserver.py
webdir ".", port 80
On Windows, you can simply click its icon and keep the console window open, or launch it from a DOS command prompt. On Unix it can be run from a command line in the background, or in its own terminal window. Some platforms may also require you to have administrator privileges to run servers on reserved ports, such as the Web’s port 80; if this includes your machine, either run the server with the required permissions, or run on an alternate port number (more on port numbers later in this chapter).
By default, while running locally this way, the script serves
up HTML pages requested on “localhost” from the directory it lives
in or is launched from, and runs Python CGI scripts from the
cgi-bin subdirectory located there; change its
webdir variable or pass in a
command-line argument to point it to a different directory. Because
of this structure, in the examples distribution HTML files are in
the same directory as the web server script and CGI scripts are
located in the cgi-bin subdirectory. In other
words, to visit web pages and run scripts, we’ll be using URLs of
these forms, respectively:
http://localhost/somepage.html
http://localhost/cgi-bin/somescript.py
Both map to the directory that contains the web server script (PP4EInternetWeb) by default. Again, to run the examples on a different server machine of your own, simply replace the “localhost” and “localhost/cgi-bin” parts of these addresses with your server name and directory path details (more on URLs later in this chapter); with this address change the examples work the same, but requests are routed across a network to the server, instead of being routed between programs running on the same local machine.
The server in Example 15-1 is by no means a production-grade web server, but it can be used to experiment with this book’s examples and is viable as a way to test your CGI scripts locally with server name “localhost” before deploying them on a real remote server. If you wish to install and run the examples under a different web server, you’ll want to extrapolate the examples for your context. Things like server names and pathnames in URLs, as well as CGI script filename extensions and other conventions, can vary widely; consult your server’s documentation for more details. For this chapter and the next, we’ll assume that you have the webserver.py script running locally.
The Server-Side Examples Root Page
To confirm that you are set up to run the examples, start the web server script in Example 15-1 and type the following URL in the address field at the top of your web browser:
http://localhost/PyInternetDemos.html
This address loads a launcher page with links to this chapter’s example files (see the examples distribution for this page’s HTML source code, which is not listed in this book). The launcher page itself appears as in Figure 15-1, shown displayed in the Internet Explorer web browser on Windows 7 (it looks similar on other browsers and platforms). Each major example has a link on this page, which runs when clicked.

It’s possible to open some of the examples by clicking on their HTML file directly in your system’s file explorer GUI. However, the CGI scripts ultimately invoked by some of the example links must be run by a web server. If you click to browse such pages directly, your browser will likely display the scripts’ source code, instead of running it. To run scripts, too, be sure to open the HTML pages by typing their “localhost” URL address into your browser’s address field.
Eventually, you probably will want to start using a more powerful web server, so we will study additional CGI installation details later in this chapter. You may also wish to review our prior exploration of custom server options in Chapter 12 (Apache and mod_python are a popular option). Such details can be safely skipped or skimmed if you will not be installing on another server right away. For now, we’ll run locally.
Viewing Server-Side Examples and Output
The source code of examples in this part of the book is listed in the text and included in the book’s examples distribution package. In all cases, if you wish to view the source code of an HTML file, or the HTML generated by a Python CGI script, you can also simply select your browser’s View Source menu option while the corresponding web page is displayed.
Keep in mind, though, that your browser’s View Source option lets you see the output of a server-side script after it has run, but not the source code of the script itself. There is no automatic way to view the Python source code of the CGI scripts themselves, short of finding them in this book or in its examples distribution.
To address this issue, later in this chapter we’ll also write
a CGI-based program called getfile, which
allows the source code of any file on this book’s website (HTML, CGI
script, and so on) to be downloaded and viewed. Simply type the
desired file’s name into a web page form referenced by the
getfile.html link on the Internet demos
launcher page of Figure 15-1, or add it to the end
of an explicitly typed URL as a parameter like the following;
replace tutor5.py at the end with
the name of the script whose code you wish to view, and omit the
cgi-bin component at the end to view HTML files
instead:
http://localhost/cgi-bin/getfile.py?filename=cgi-bin utor5.py
In response, the server will ship back the text of the named file to your browser. This process requires explicit interface steps, though, and much more knowledge of URLs than we’ve gained thus far; to learn how and why this magic line works, let’s move on to the next section.
Climbing the CGI Learning Curve
Now that we’ve looked at setup issues, it’s time to get into concrete programming details. This section is a tutorial that introduces CGI coding one step at a time—from simple, noninteractive scripts to larger programs that utilize all the common web page user input devices (what we called widgets in the tkinter GUI chapters in Part III).
Along the way, we’ll also explore the core ideas behind server-side scripting. We’ll move slowly at first, to learn all the basics; the next chapter will use the ideas presented here to build up larger and more realistic website examples. For now, let’s work through a simple CGI tutorial, with just enough HTML thrown in to write basic server-side scripts.
A First Web Page
As mentioned, CGI scripts are intimately bound up with HTML, so let’s start with a simple HTML page. The file tutor0.html, shown in Example 15-2, defines a bona fide, fully functional web page—a text file containing HTML code, which specifies the structure and contents of a simple web page.
<HTML>
<TITLE>HTML 101</TITLE>
<BODY>
<H1>A First HTML Page</H1>
<P>Hello, HTML World!</P>
</BODY></HTML>
If you point your favorite web browser to the Internet address of this file, you should see a page like that shown in Figure 15-2. This figure shows the Internet Explorer browser at work on the address http://localhost/tutor0.html (type this into your browser’s address field), and it assumes that the local web server described in the prior section is running; other browsers render the page similarly. Since this is a static HTML file, you’ll get the same result if you simply click on the file’s icon on most platforms, though its text won’t be delivered by the web server in this mode.

To truly understand how this little file does its work, you need to know something about HTML syntax, Internet addresses, and file permission rules. Let’s take a quick first look at each of these topics before we move on to the next example.
HTML basics
I promised that I wouldn’t teach much HTML in this book, but you need to know
enough to make sense of examples. In short, HTML is a descriptive
markup language, based on tags— items
enclosed in <> pairs.
Some tags stand alone (e.g., <HR> specifies a horizontal rule).
Others appear in begin/end pairs in which the end tag includes an
extra slash.
For instance, to specify the text of a level-one header
line, we write HTML code of the form <H1>
text </H1>; the text between the tags
shows up on the web page. Some tags also allow us to specify
options (sometimes called attributes). For example, a tag pair
like <A href="
address ">text</A> specifies a hyperlink: pressing the
link’s text in the page directs the browser to access the Internet
address (URL) listed in the href option.
It’s important to keep in mind that HTML is used only to
describe pages: your web browser reads it and translates its
description to a web page with headers, paragraphs, links, and the
like. Notably absent are both layout
information—the browser is responsible for arranging
components on the page—and syntax for programming
logic—there are
no if statements, loops, and so
on. Also, Python code is nowhere to be found in Example 15-2; raw HTML is
strictly for defining pages, not for coding programs or specifying
all user interface details.
HTML’s lack of user interface control and programmability is both a strength and a weakness. It’s well suited to describing pages and simple user interfaces at a high level. The browser, not you, handles physically laying out the page on your screen. On the other hand, HTML by itself does not directly support full-blown GUIs and requires us to introduce CGI scripts (or other technologies such as RIAs) to websites in order to add dynamic programmability to otherwise static HTML.
Internet addresses (URLs)
Once you write an HTML file, you need to put it somewhere a web browser can reference it. If you are using the locally running Python web server described earlier, this becomes trivial: use a URL of the form http://localhost/file.html to access web pages, and http://localhost/cgi-bin/file.py to name CGI scripts. This is implied by the fact that the web server script by default serves pages and scripts from the directory in which it is run.
On other servers, URLs may be more complex. Like all HTML files, tutor0.html must be stored in a directory on the server machine, from which the resident web server program allows browsers to fetch pages. For example, on the server used for the second edition of this book, the page’s file must be stored in or below the public_html directory of my personal home directory—that is, somewhere in the directory tree rooted at /home/lutz/public_html. The complete Unix pathname of this file on the server is:
/home/lutz/public_html/tutor0.html
This path is different from its PP4EInternetWeb location in the book’s examples distribution, as given in the example file listing’s title. When referencing this file on the client, though, you must specify its Internet address, sometimes called a URL, instead of a directory path name. The following URL was used to load the remote page from the server:
http://starship.python.net/~lutz/tutor0.html
The remote server maps this URL to the Unix pathname automatically, in much the same way that the http://localhost resolves to the examples directory containing the web server script for our locally-running server. In general, URL strings like the one just listed are composed as the concatenation of multiple parts:
- Protocol name: http
The protocol part of this URL tells the browser to communicate with the HTTP (i.e., web) server program on the server machine, using the HTTP message protocol. URLs used in browsers can also name different protocols—for example, ftp:// to reference a file managed by the FTP protocol and server, file:// to reference a file on the local machine, telnet to start a Telnet client session, and so on.
- Server machine name and port: starship.python.net
A URL also names the target server machine’s domain name or Internet Protocol (IP) address following the protocol type. Here, we list the domain name of the server machine where the examples are installed; the machine name listed is used to open a socket to talk to the server. As usual, a machine name of localhost (or the equivalent IP address 127.0.0.1) here means the server is running on the same machine as the client.
Optionally, this part of the URL may also explicitly give the socket port on which the server is listening for connections, following a colon (e.g., starship.python.net:8000, or 127.0.0.1:80). For HTTP, the socket is usually connected to port number 80, so this is the default if the port is omitted. See Chapter 12 if you need a refresher on machine names and ports.
- File path:
~lutz/tutor0.html Finally, the URL gives the path to the desired file on the remote machine. The HTTP web server automatically translates the URL’s file path to the file’s true pathname: on the starship server,
~lutzis automatically translated to the public_html directory in my home directory. When using the Python-coded web server script in Example 15-1, files are mapped to the server’s current working directory instead. URLs typically map to such files, but they can reference other sorts of items as well, and as we’ll see in a few moments may name an executable CGI script to be run when accessed.- Query parameters (used in later examples)
URLs may also be followed by additional input parameters for CGI programs. When used, they are introduced by a
?and are typically separated by&characters. For instance, a string of the form?name=bob&job=hackerat the end of a URL passes parameters namednameandjobto the CGI script named earlier in the URL, with valuesbobandhacker, respectively. As we’ll discuss later in this chapter when we explore escaping rules, the parameters may sometimes be separated by;characters instead, as in?name=bob;job=hacker, though this form is less common.These values are sometimes called URL query string parameters and are treated the same as form inputs by scripts. Technically speaking, query parameters may have other structures (e.g., unnamed values separated by
+), but we will ignore additional options in this text; more on both parameters and input forms later in this tutorial.
To make sure we have a handle on URL syntax, let’s pick apart another example that we will be using later in this chapter. In the following HTTP protocol URL:
http://localhost:80/cgi-bin/languages.py?language=All
the components uniquely identify a server script to be run as follows:
The server name
localhostmeans the web server is running on the same machine as the client; as explained earlier, this is the configuration we’re using for our examples.Port number 80 gives the socket port on which the web server is listening for connections (port 80 is the default if this part is omitted, so we will usually omit it).
The file path
cgi-bin/languages.pygives the location of the file to be run on the server machine, within the directory where the server looks for referenced files.The query string
?language=Allprovides an input parameter to the referenced scriptlanguages.py, as an alternative to user input in form fields (described later).
Although this covers most URLs you’re likely to encounter in the wild, the full format of URLs is slightly richer:
protocol://networklocation/path;parameters?querystring#fragment
For instance, the fragment part may name a section within
a page (e.g., #part1).
Moreover, each part can have formats of its own, and some are not
used in all protocols. The ;parameters part is omitted for HTTP,
for instance (it gives an explicit file type for FTP), and the
networklocation part may also
specify optional user login parameters for some protocol schemes
(its full format is user:password@host:port for FTP and
Telnet, but just host:port for
HTTP). We used a complex FTP URL in Chapter 13, for example, which included a
username and password, as well as a binary file type (the server
may guess if no type is given):
ftp://lutz:[email protected]/filename;type=i
We’ll ignore additional URL formatting rules here. If you’re
interested in more details, you might start by reading the
urllib.parse module’s entry in Python’s library manual, as well
as its source code in the Python standard library. You may also
notice that a URL you type to access a page looks a bit different
after the page is fetched (spaces become + characters, % characters are added, and so on). This
is simply because browsers must also generally follow URL escaping
(i.e., translation) conventions, which we’ll explore later in this
chapter.
Using minimal URLs
Because browsers remember the prior page’s Internet address, URLs embedded in HTML files can often omit the protocol and server names, as well as the file’s directory path. If missing, the browser simply uses these components’ values from the last page’s address. This minimal syntax works for URLs embedded in hyperlinks and for form actions (we’ll meet forms later in this tutorial). For example, within a page that was fetched from the directory dirpath on the server http://www.server.com, minimal hyperlinks and form actions such as:
<A HREF="more.html">
<FORM ACTION="next.py"  ...>
are treated exactly as if we had specified a complete URL with explicit server and path components, like the following:
<A HREF="http://www.server.com/dirpath/more.html">
<FORM ACTION="http://www.server.com/dirpath/next.py"  ...>
The first minimal URL refers to the file
more.html on the same server and in the same
directory from which the page containing this hyperlink was
fetched; it is expanded to a complete URL within the browser. URLs
can also employ Unix-style relative path syntax in the file path
component. A hyperlink tag like <A
HREF="../spam.gif">, for instance, names a GIF file
on the server machine and parent directory of the file that
contains this link’s URL.
Why all the fuss about shorter URLs? Besides extending the life of your keyboard and eyesight, the main advantage of such minimal URLs is that they don’t need to be changed if you ever move your pages to a new directory or server—the server and path are inferred when the page is used; they are not hardcoded into its HTML. The flipside of this can be fairly painful: examples that do include explicit site names and pathnames in URLs embedded within HTML code cannot be copied to other servers without source code changes. Scripts and special HTML tags can help here, but editing source code can be error-prone.
The downside of minimal URLs is that they don’t trigger automatic Internet connections when followed offline. This becomes apparent only when you load pages from local files on your computer. For example, we can generally open HTML pages without connecting to the Internet at all by pointing a web browser to a page’s file that lives on the local machine (e.g., by clicking on its file icon). When browsing a page locally like this, following a fully specified URL makes the browser automatically connect to the Internet to fetch the referenced page or script. Minimal URLs, though, are opened on the local machine again; usually, the browser simply displays the referenced page or script’s source code.
The net effect is that minimal URLs are more portable, but they tend to work better when running all pages live on the Internet (or served up by a locally running web server). To make them easier to work with, the examples in this book will often omit the server and path components in URLs they contain. In this book, to derive a page or script’s true URL from a minimal URL, imagine that the string:
http://localhost/
appears before the filename given by the URL. Your browser will, even if you don’t.
HTML file permission constraints
One install pointer before we move on: if you want to use a different server and machine, it may be necessary on some platforms to grant web page files and their directories world-readable permission. That’s because they are loaded by arbitrary people over the Web (often by someone named “nobody,” who we’ll introduce in a moment).
An appropriate chmod
command can be used to change permissions on Unix-like
machines. For instance, a chmod
755 filename shell command
usually suffices; it makes filename
readable and executable by everyone, and writable by you
only.[58] These directory and file permission details are
typical, but they can vary from server to server. Be sure to find
out about the local server’s conventions if you upload HTML files
to a remote site.
A First CGI Script
The HTML file we saw in the prior section is just that—an HTML file, not a CGI script. When referenced by a browser, the remote web server simply sends back the file’s text to produce a new page in the browser. To illustrate the nature of CGI scripts, let’s recode the example as a Python CGI program, as shown in Example 15-3.
#!/usr/bin/python
"""
runs on the server, prints HTML to create a new page;
url=http://localhost/cgi-bin/tutor0.py
"""
print('Content-type: text/html
')
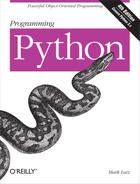
print('<TITLE>CGI 101</TITLE>')
print('<H1>A First CGI Script</H1>')
print('<P>Hello, CGI World!</P>')This file, tutor0.py, makes the same sort
of page as Example 15-2 if
you point your browser at it—simply replace .html with .py in the URL, and add the
cgi-bin subdirectory name to the path to yield
its address to enter in your browser’s address field,
http://localhost/cgi-bin/tutor0.py.
But this time it’s a very different kind of animal—it is an executable program that is run on the server in response to your access request. It’s also a completely legal Python program, in which the page’s HTML is printed dynamically, instead of being precoded in a static file. In fact, little is CGI-specific about this Python program; if run from the system command line, it simply prints HTML instead of generating a browser page:
C:...PP4EInternetWebcgi-bin> python tutor0.py
Content-type: text/html
<TITLE>CGI 101</TITLE>
<H1>A First CGI Script</H1>
<P>Hello, CGI World!</P>When run by the HTTP server program on a web server machine, however, the standard output stream is tied to a socket read by the browser on the client machine. In this context, all the output is sent across the Internet to your web browser. As such, it must be formatted per the browser’s expectations.
In particular, when the script’s output reaches your browser, the first printed line is interpreted as a header, describing the text that follows. There can be more than one header line in the printed response, but there must always be a blank line between the headers and the start of the HTML code (or other data). As we’ll see later, “cookie” state retention directives show up in the header area as well, prior to the blank line.
In this script, the first header line tells the browser that
the rest of the transmission is HTML text (text/html), and the newline character
(
) at the end of the first
print call statement generates an
extra line feed in addition to the one that the print generates itself. The net effect is
to insert a blank line after the header line. The rest of this
program’s output is standard HTML and is used by the browser to
generate a web page on a client, exactly as if the HTML lived in a
static HTML file on the server.[59]
CGI scripts are accessed just like HTML files: you either type the full URL of this script into your browser’s address field or click on the tutor0.py link line in the examples root page of Figure 15-1 (which follows a minimal hyperlink that resolves to the script’s full URL). Figure 15-3 shows the result page generated if you point your browser at this script.
Installing CGI scripts
If you are running the local web server described at the start of this chapter, no extra installation steps are required to make this example work, and you can safely skip most of this section. If you want to put CGI scripts on another server, though, there are a few pragmatic details you may need to know about. This section provides a brief overview of common CGI configuration details for reference.
Like HTML files, CGI scripts are simple text files that you can either create on your local machine and upload to the server by FTP or write with a text editor running directly on the server machine (perhaps using a Telnet or SSH client). However, because CGI scripts are run as programs, they have some unique installation requirements that differ from simple HTML files. In particular, they usually must be stored and named specially, and they must be configured as programs that are executable by arbitrary users. Depending on your needs, CGI scripts also may require help finding imported modules and may need to be converted to the server platform’s text file format after being uploaded. Let’s look at each install constraint in more depth:
- Directory and filename conventions
First, CGI scripts need to be placed in a directory that your web server recognizes as a program directory, and they need to be given a name that your server recognizes as a CGI script. In the local web server we’re using in this chapter, scripts need to be placed in a special cgi-bin subdirectory and be named with a .py extension. On the server used for this book’s second edition, CGI scripts instead were stored in the user’s public_html directory just like HTML files, but they required a filename ending in a .cgi, not a .py. Some servers may allow other suffixes and program directories; this varies widely and can sometimes be configured per server or per user.
- Execution conventions
Because they must be executed by the web server on behalf of arbitrary users on the Web, CGI script files may also need to be given executable file permissions to mark them as programs and be made executable by others. Again, a shell command
chmod 0755filenamedoes the trick on most servers.Under some servers, CGI scripts also need the special
#!line at the top, to identify the Python interpreter that runs the file’s code. The text after the#!in the first line simply gives the directory path to the Python executable on your server machine. See Chapter 3 for more details on this special first line, and be sure to check your server’s conventions for more details on non-Unix platforms.Some servers may expect this line, even outside Unix. Most of the CGI scripts in this book include the
#!line just in case they will ever be run on Unix-like platforms; under our locally running web server on Windows, this first line is simply ignored as a Python comment.One subtlety worth noting: as we saw earlier in the book, the special first line in executable text files can normally contain either a hardcoded path to the Python interpreter (e.g., #!/usr/bin/python) or an invocation of the
envprogram (e.g., #!/usr/bin/env python), which deduces where Python lives from environment variable settings (i.e., your$PATH). Theenvtrick is less useful in CGI scripts, though, because their environment settings may be those of the user “nobody” (not your own), as explained in the next paragraph.- Module search path configuration (optional)
Some HTTP servers may run CGI scripts with the username “nobody” for security reasons (this limits the user’s access to the server machine). That’s why files you publish on the Web must have special permission settings that make them accessible to other users. It also means that some CGI scripts can’t rely on the Python module search path to be configured in any particular way. As you’ve learned by now, the module path is normally initialized from the user’s
PYTHONPATHsetting and .pth files, plus defaults which normally include the current working directory. But because CGI scripts are run by the user “nobody,”PYTHONPATHmay be arbitrary when a CGI script runs.Before you puzzle over this too hard, you should know that this is often not a concern in practice. Because Python usually searches the current directory for imported modules by default, this is not an issue if all of your scripts and any modules and packages they use are stored in your web directory, and your web server launches CGI scripts in the directory in which they reside. But if the module lives elsewhere, you may need to modify the
sys.pathlist in your scripts to adjust the search path manually before imports—for instance, withsys.path.append(dirname)calls, index assignments, and so on.- End-of-line conventions (optional)
On some Unix (and Linux) servers, you might also have to make sure that your script text files follow the Unix end-of-line convention (
- Unbuffered output streams (optional)
Under some servers, the
printcall statement may buffer its output. If you have a long-running CGI script, to avoid making the user wait to see results, you may wish to manually flush your printed text (callsys.stdout.flush()) or run your Python scripts in unbuffered mode. Recall from Chapter 5 that you can make streams unbuffered by running with the-ucommand-line flag or by setting yourPYTHONUNBUFFEREDenvironment variable to a nonempty value.To use
-uin the CGI world, try using a first line on Unix-like platforms like#!/usr/bin/python -u. In typical usage, output buffering is not usually a factor. On some servers and clients, though, this may be a resolution for empty reply pages, or premature end-of-script header errors—the client may time out before the buffered output stream is sent (though more commonly, these cases reflect genuine program errors in your script).
This installation process may sound a bit complex at first glance, but much of it is server-dependent, and it’s not bad once you’ve worked through it on your own. It’s only a concern at install time and can usually be automated to some extent with Python scripts run on the server. To summarize, most Python CGI scripts are text files of Python code, which:
Are named according to your web server’s conventions (e.g., file.py)
Are stored in a directory recognized by your web server (e.g., cgi-bin/)
Are given executable file permissions if required (e.g.,
chmod 755 file.py)May require the special
#!pythonpathline at the top for some serversConfigure
sys.pathonly if needed to see modules in other directoriesUse Unix end-of-line conventions if your server rejects DOS format
Flush output buffers if required, or to send portions of the reply periodically
Even if you must use a server machine configured by someone else, most of the machine’s conventions should be easy to root out during a normal debugging cycle. As usual, you should consult the conventions for any machine to which you plan to copy these example files.
Finding Python on remote servers
One last install pointer: even though Python doesn’t have to be installed on any clients in the context of a server-side web application, it does have to exist on the server machine where your CGI scripts are expected to run. If you’re running your own server with either the webserver.py script we met earlier or an open source server such as Apache, this is a nonissue.
But if you are using a web server that you did not configure
yourself, you must be sure that Python lives on that machine.
Moreover, you need to find where it is on that machine so that you
can specify its path in the #!
line at the top of your script. If you are not sure if or where
Python lives on your server machine, here are some tips:
Especially on Unix systems, you should first assume that Python lives in a standard place (e.g., /usr/local/bin/python): type
python(orwhich python) in a shell window and see if it works. Chances are that Python already lives on such machines. If you have Telnet or SSH access on your server, a Unixfindcommand starting at /usr may help.If your server runs Linux, you’re probably set to go. Python ships as a standard part of Linux distributions these days, and many websites and Internet Service Providers (ISPs) run the Linux operating system; at such sites, Python probably already lives at /usr/bin/python.
In other environments where you cannot control the server machine yourself, it may be harder to obtain access to an already installed Python. If so, you can relocate your site to a server that does have Python installed, talk your ISP into installing Python on the machine you’re trying to use, or install Python on the server machine yourself.
If your ISP is unsympathetic to your need for Python and you are willing to relocate your site to one that is, you can find lists of Python-friendly ISPs by searching the Web. And if you choose to install Python on your server machine yourself, be sure to check out the Python world’s support for frozen binaries—with it, you can create a single executable program file that contains the entire Python interpreter, as well as all the standard library modules. Assuming compatible machines, such a frozen interpreter might be uploaded to your web account by FTP in a single step, and it won’t require a full-blown Python installation on the server. The public domain PyInstaller and Py2Exe systems can produce a frozen Python binary.
Finally, to run this book’s examples, make sure the Python you find or install is Python 3.X, not Python 2.X. As mentioned earlier, many commercial ISPs support the latter but not the former as I’m writing this fourth edition, but this is expected to change over time. If you do locate a commercial ISP with 3.X support, you should be able to upload your files by FTP and work by SSH or Telnet. You may also be able to run this chapter’s webserver.py script on the remote machine, though you may need to avoid using the standard port 80, depending on how much control your account affords.
Adding Pictures and Generating Tables
Let’s get back to writing server-side code. As anyone who’s ever
surfed the Web knows, web pages usually consist of more than simple
text. Example 15-4 is a
Python CGI script that prints an <IMG> HTML tag in its output to
produce a graphic image in the client browser. This example isn’t
very Python-specific, but note that just as for simple HTML files,
the image file (ppsmall.gif, one level up from
the script file) lives on and is downloaded from the server machine
when the browser interprets the output of this script to render the
reply page (even if the server’s machine is the same as the
client’s).
#!/usr/bin/python

text = """Content-type: text/html

<TITLE>CGI 101</TITLE>
<H1>A Second CGI Script</H1>
<HR>
<P>Hello, CGI World!</P>
<IMG src="../ppsmall.gif" BORDER=1 ALT=[image]>
<HR>
"""

print(text)
Notice the use of the triple-quoted string block here; the
entire HTML string is sent to the browser in one fell swoop, with
the print call statement at the
end. Be sure that the blank line between the Content-type header and
the first HTML is truly blank in the string (it may fail in some
browsers if you have any spaces or tabs on that line). If both
client and server are functional, a page that looks like Figure 15-4 will be
generated when this script is referenced and run.
So far, our CGI scripts have been putting out canned HTML that could have just as easily been stored in an HTML file. But because CGI scripts are executable programs, they can also be used to generate HTML on the fly, dynamically—even, possibly, in response to a particular set of user inputs sent to the script. That’s the whole purpose of CGI scripts, after all. Let’s start using this to better advantage now, and write a Python script that builds up response HTML programmatically, listed in Example 15-5.

#!/usr/bin/python

print("""Content-type: text/html

<TITLE>CGI 101</TITLE>
<H1>A Third CGI Script</H1>
<HR>
<P>Hello, CGI World!</P>

<table border=1>
""")

for i in range(5):
    print('<tr>')
    for j in range(4):
        print('<td>%d.%d</td>' % (i, j))
    print('</tr>')

print("""
</table>
<HR>
""")
Despite all the tags, this really is Python code—the
tutor2.py script uses triple-quoted strings to
embed blocks of HTML again. But this time, the script also uses
nested Python for loops to
dynamically generate part of the HTML that is sent to the browser.
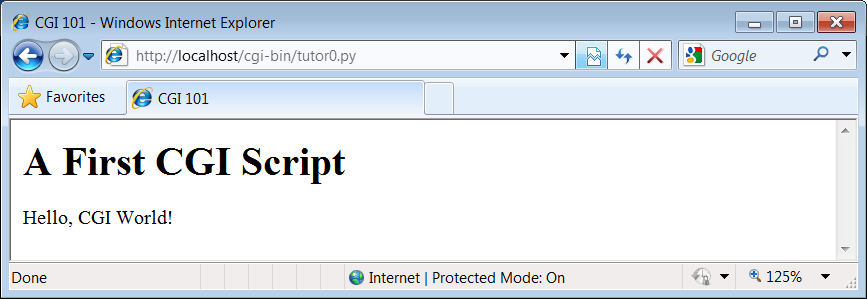
Specifically, it emits HTML to lay out a two-dimensional table in
the middle of a page, as shown in Figure 15-5.
Each row in the table displays a “row.column” pair, as
generated by the executing Python script. If you’re curious how the
generated HTML looks, select your browser’s View Source option after
you’ve accessed this page. It’s a single HTML page composed of the
HTML generated by the first print
in the script, then the for
loops, and finally the last print. In other words, the concatenation
of this script’s output is an HTML document with headers.
Table tags
The script in Example 15-5 generates HTML
table tags. Again, we’re not out to learn HTML here, but we’ll
take a quick look just so that you can make sense of this book’s
examples. Tables are declared by the text between <table> and </table> tags in HTML. Typically,
a table’s text in turn declares the contents of each table row
between <tr> and </tr> tags and each column within
a row between <td> and
</td> tags. The loops in
our script build up HTML to declare five rows of four columns each
by printing the appropriate tags, with the current row and column
number as column values.
For instance, here is part of the script’s output, defining the first two rows (to see the full output, run the script standalone from a system command line, or select your browser’s View Source option):
<table border=1>
<tr>
<td>0.0</td>
<td>0.1</td>
<td>0.2</td>
<td>0.3</td>
</tr>
<tr>
<td>1.0</td>
<td>1.1</td>
<td>1.2</td>
<td>1.3</td>
</tr>
. . .
</table>
Other table tags and options let us specify a row title
(<th>), lay out borders,
and so on. We’ll use more table syntax to lay out forms in a
uniform fashion later in this tutorial.
Adding User Interaction
CGI scripts are great at generating HTML on the fly like this, but they are also commonly used to implement interaction with a user typing at a web browser. As described earlier in this chapter, web interactions usually involve a two-step process and two distinct web pages: you fill out an input form page and press Submit, and a reply page eventually comes back. In between, a CGI script processes the form input.
Submission page
That description sounds simple enough, but the process of collecting
user inputs requires an understanding of a special HTML tag,
<form>. Let’s look at the
implementation of a simple web interaction to see forms at work.
First, we need to define a form page for the user to fill out, as
shown in Example 15-6.
<html>
<title>CGI 101</title>
<body>
<H1>A first user interaction: forms</H1>
<hr>
<form method=POST action="http://localhost/cgi-bin/tutor3.py">
    <P><B>Enter your name:</B>
    <P><input type=text name=user>
    <P><input type=submit>
</form>
</body></html>
tutor3.html is a simple HTML file, not
a CGI script (though its contents could be printed from a script
as well). When this file is accessed, all the text between its
<form> and </form> tags
generates the input fields and Submit button shown in Figure 15-6.

More on form tags
We won’t go into all the details behind coding HTML forms, but a few highlights are worth underscoring. The following occurs within a form’s HTML code:
- Form handler action
The form’s
actionoption gives the URL of a CGI script that will be invoked to process submitted form data. This is the link from a form to its handler program—in this case, a program called tutor3.py in the cgi-bin subdirectory of the locally running server’s working directory. Theactionoption is the equivalent ofcommandoptions in tkinter buttons—it’s where a callback handler (here, a remote handler script) is registered to the browser and server.- Input fields
Input controls are specified with nested
<input>tags. In this example, input tags have two key options. Thetypeoption accepts values such astextfor text fields andsubmitfor a Submit button (which sends data to the server and is labeled “Submit Query” by default). Thenameoption is the hook used to identify the entered value by key, once all the form data reaches the server. For instance, the server-side CGI script we’ll see in a moment uses the stringuseras a key to get the data typed into this form’s text field.As we’ll see in later examples, other input tag options can specify initial values (
value=X), display-only mode (readonly), and so on. As we’ll also see later, other inputtypeoption values may transmit hidden data that embeds state information in pages (type=hidden), reinitializes fields (type=reset), or makes multiple-choice buttons (type=checkbox).- Submission method:
getandpost Forms also include a
methodoption to specify the encoding style to be used to send data over a socket to the target server machine. Here, we use thepoststyle, which contacts the server and then ships it a stream of user input data in a separate transmission over the socket.An alternative
getstyle ships input information to the server in a single transmission step by appending user inputs to the query string at the end of the URL used to invoke the script, usually after a?character. Query parameters were introduced earlier when we met URLs; we will put them to use later in this section.With
get, inputs typically show up on the server in environment variables or as arguments in the command line used to start the script. Withpost, they must be read from standard input and decoded. Because thegetmethod appends inputs to URLs, it allows users to bookmark actions with parameters for later submission (e.g., a link to a retail site, together with the name of a particular item);postis very generally meant for sending data that is to be submitted once (e.g., comment text).The
getmethod is usually considered more efficient, but it may be subject to length limits in the operating system and is less secure (parameters may be recorded in server logs, for instance).postcan handle larger inputs and may be more secure in some scenarios, but it requires an extra transmission. Luckily, Python’scgimodule transparently handles either encoding style, so our CGI scripts don’t normally need to know or care which is used.
Notice that the action
URL in this example’s form spells out the full address for
illustration. Because the browser remembers where the enclosing
HTML page came from, it works the same with just the script’s
filename, as shown in Example 15-7.
<html>
<title>CGI 101</title>
<body>
<H1>A first user interaction: forms</H1>
<hr>
<form method=POST action="cgi-bin/tutor3.py">
    <P><B>Enter your name:</B>
    <P><input type=text name=user>
    <P><input type=submit>
</form>
</body></html>
It may help to remember that URLs embedded in form action tags and hyperlinks are directions to the browser first, not to the script. The tutor3.py script itself doesn’t care which URL form is used to trigger it—minimal or complete. In fact, all parts of a URL through the script filename (and up to URL query parameters) are used in the conversation between browser and HTTP server, before a CGI script is ever spawned. As long as the browser knows which server to contact, the URL will work.
On the other hand, URLs submitted outside of a page (e.g.,
typed into a browser’s address field or sent to the Python
urllib.request module we’ll
revisit later) usually must be completely specified, because there
is no notion of a prior page.
Response script
So far, we’ve created only a static page with an input field. But
the Submit button on this page is loaded to work magic. When
pressed, it triggers the possibly remote program whose URL is
listed in the form’s action
option, and passes this program the input data typed by the user,
according to the form’s method
encoding style option. On the server, a Python script is started
to handle the form’s input data while the user waits for a reply
on the client; that script is shown in Example 15-8.
#!/usr/bin/python
"""
runs on the server, reads form input, prints HTML;
url=http://server-name/cgi-bin/tutor3.py
"""
import cgi
form = cgi.FieldStorage() # parse form data
print('Content-type: text/html') # plus blank line
html = """
<TITLE>tutor3.py</TITLE>
<H1>Greetings</H1>
<HR>
<P>%s</P>
<HR>"""
if not 'user' in form:
print(html % 'Who are you?')
else:
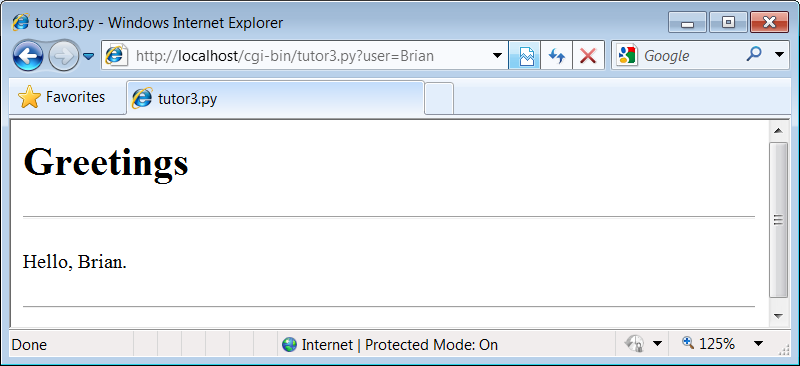
print(html % ('Hello, %s.' % form['user'].value))As before, this Python CGI script prints HTML to generate a
response page in the client’s browser. But this script does a bit
more: it also uses the standard cgi module to parse the input data
entered by the user on the prior web page (see Figure 15-6).
Luckily, this is automatic in Python: a call to the standard
library cgi module’s FieldStorage
class does all the work of extracting form data from the input
stream and environment variables, regardless of how that data was
passed—in a post style stream
or in get style parameters
appended to the URL. Inputs sent in both styles look the same to
Python scripts.
Scripts should call cgi.FieldStorage only once and before
accessing any field values. When it is called, we get back an
object that looks like a dictionary—user input fields from the
form (or URL) show up as values of keys in this object. For
example, in the script, form['user'] is an object whose value attribute is a string containing
the text typed into the form’s text field. If you flip back to the
form page’s HTML, you’ll notice that the input field’s name option was user—the name in the form’s HTML has
become a key we use to fetch the input’s value from a dictionary.
The object returned by FieldStorage supports other dictionary
operations, too—for instance, the in expression may be used to check
whether a field is present in the input data.
Before exiting, this script prints HTML to produce a result
page that echoes back what the user typed into the form. Two
string-formatting expressions (%) are used to insert the input text
into a reply string, and the reply string into the triple-quoted
HTML string block. The body of the script’s output looks like
this:
<TITLE>tutor3.py</TITLE>
<H1>Greetings</H1>
<HR>
<P>Hello, King Arthur.</P>
<HR>
In a browser, the output is rendered into a page like the one in Figure 15-7.

Passing parameters in URLs
Notice that the URL address of the script that generated this page shows
up at the top of the browser. We didn’t type this URL itself—it
came from the action tag of the
prior page’s form HTML.
However, nothing is stopping us from typing the script’s URL
explicitly in our browser’s address field to invoke the script,
just as we did for our earlier CGI script and HTML file
examples.
But there’s a catch here: where does the input field’s value
come from if there is no form page? That is, if we type the CGI
script’s URL ourselves, how does the input field get filled in?
Earlier, when we talked about URL formats, I mentioned that the
get encoding scheme tacks input
parameters onto the end of URLs. When we type script addresses
explicitly, we can also append input values on the end of URLs,
where they serve the same purpose as <input> fields in forms. Moreover,
the Python cgi module makes URL
and form inputs look identical to scripts.
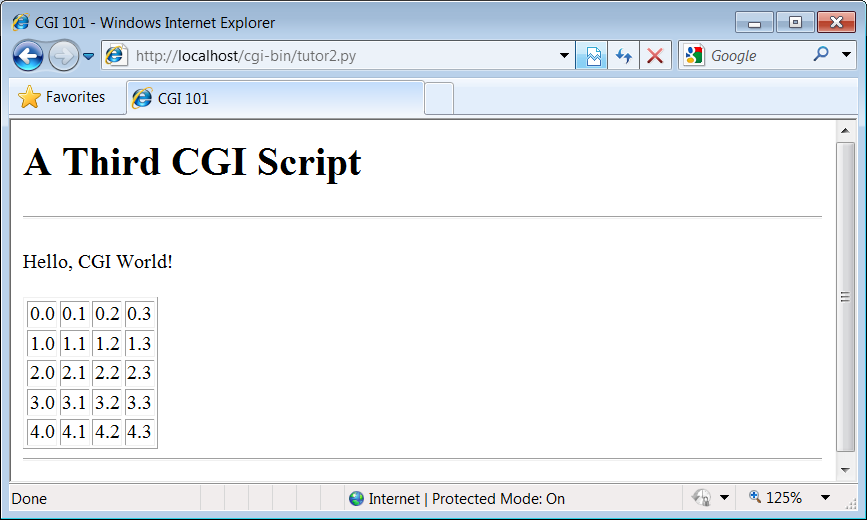
For instance, we can skip filling out the input form page completely and directly invoke our tutor3.py script by visiting a URL of this form (type this in your browser’s address field):
http://localhost/cgi-bin/tutor3.py?user=Brian
In this URL, a value for the input named user is specified explicitly, as if the
user had filled out the input page. When called this way, the only
constraint is that the parameter name user must match the name expected by the
script (and hardcoded in the form’s HTML). We use just one
parameter here, but in general, URL parameters are typically
introduced with a ? and are
followed by one or more name=value assignments, separated by
& characters if there is
more than one. Figure 15-8 shows the
response page we get after typing a URL with explicit
inputs.
In fact, HTML forms that specify the get encoding style also cause inputs to
be added to URLs this way. Try changing Example 15-6 to use method=GET, and submit the form—the name input in the form
shows up as a query parameter in the reply page address field,
just like the URL we manually entered in Figure 15-8. Forms can
use the post or get style. Manually typed URLs with
parameters use get.
Generally, any CGI script can be invoked either by filling out and submitting a form page or by passing inputs at the end of a URL. Although hand-coding parameters in URLs can become difficult for scripts that expect many complex parameters, other programs can automate the construction process.
When CGI scripts are invoked with explicit input parameters this way, it’s not too difficult to see their similarity to functions, albeit ones that live remotely on the Net. Passing data to scripts in URLs is similar to keyword arguments in Python functions, both operationally and syntactically. In fact, some advanced web frameworks such as Zope make the relationship between URLs and Python function calls even more literal: URLs become more direct calls to Python functions.
Incidentally, if you clear out the name input field in the
form input page (i.e., make it empty) and press Submit, the
user name field becomes empty.
More accurately, the browser may not send this field along with
the form data at all, even though it is listed in the form layout
HTML. The CGI script detects such a missing field with the
dictionary in expression and
produces the page captured in Figure 15-9 in
response.

In general, CGI scripts must check to see whether any inputs
are missing, partly because they might not be typed by a user in
the form, but also because there may be no form at all—input
fields might not be tacked onto the end of an explicitly typed or
constructed get-style URL. For
instance, if we type the script’s URL without any parameters at
all—by omitting the text from the ? and beyond, and visiting
http://localhost/cgi-bin/tutor3.py with an
explicitly entered URL—we get this same error response page. Since
we can invoke any CGI through a form or URL, scripts must
anticipate both scenarios.
Testing outside browsers with the module urllib.request
Once we understand how to send inputs to forms as query string
parameters at the end of URLs like this, the Python urllib.request module we met in Chapters
1
and 13 becomes even more useful.
Recall that this module allows us to fetch the reply generated for
any URL address. When the URL names a simple HTML file, we simply
download its contents. But when it names a CGI script, the effect
is to run the remote script and fetch its output. This notion
opens the door to web services, which
generate useful XML in response to input parameters; in simpler
roles, this allows us to test remote
scripts.
For example, we can trigger the script in Example 15-8 directly, without either going through the tutor3.html web page or typing a URL in a browser’s address field:
C:...PP4EInternetWeb>python>>>from urllib.request import urlopen>>>reply = urlopen('http://localhost/cgi-bin/tutor3.py?user=Brian').read()>>>replyb'<TITLE>tutor3.py</TITLE> <H1>Greetings</H1> <HR> <P>Hello, Brian.</P> <HR> ' >>>print(reply.decode())<TITLE>tutor3.py</TITLE> <H1>Greetings</H1> <HR> <P>Hello, Brian.</P> <HR> >>>url = 'http://localhost/cgi-bin/tutor3.py'>>>conn = urlopen(url)>>>reply = conn.read()>>>print(reply.decode())<TITLE>tutor3.py</TITLE> <H1>Greetings</H1> <HR> <P>Who are you?</P> <HR>
Recall from Chapter 13 that
urllib.request.urlopen
gives us a file object connected to the generated
reply stream. Reading this file’s output returns the HTML that
would normally be intercepted by a web browser and rendered into a
reply page. The reply comes off of the underlying socket as
bytes in 3.X, but can be
decoded to str strings as
needed.
When fetched directly this way, the HTML reply can be parsed
with Python text processing tools, including string methods like
split and find, the re pattern-matching module, or the
html.parser HTML parsing
module—all tools we’ll explore in Chapter 19. Extracting text from the reply
like this is sometimes informally called screen scraping—a way to use
website content in other programs. Screen scraping is an
alternative to more complex web services frameworks, though a
brittle one: small changes in the page’s format can often break
scrapers that rely on it. The reply text can also be simply
inspected—urllib.request allows
us to test CGI scripts from the Python interactive prompt or other
scripts, instead of a browser.
More generally, this technique allows us to use a
server-side script as a sort of function call. For instance, a
client-side GUI can call the CGI script and parse the generated
reply page. Similarly, a CGI script that updates a database may be
invoked programmatically with urllib.request, outside the context of
an input form page. This also opens the door to automated
regression testing of CGI scripts—we can invoke scripts on any
remote machine, and compare their reply text to the expected
output.[60] We’ll see urllib.request in action again in later
examples.
Before we move on, here are a few advanced urllib.request usage notes. First, this
module also supports proxies, alternative transmission modes, the
client side of secure HTTPS, cookies, redirections, and more. For
instance, proxies are supported transparently with environment
variables or system settings, or by using ProxyHandler objects in this module (see its
documentation for details and examples).
Moreover, although it normally doesn’t make a difference to
Python scripts, it is possible to send parameters in both the
get and the put submission modes described earlier
with urllib.request. The get mode, with parameters in the query
string at the end of a URL as shown in the prior listing, is used
by default. To invoke post,
pass parameters in as a separate argument:
>>>from urllib.request import urlopen>>>from urllib.parse import urlencode>>>params = urlencode({'user': 'Brian'})>>>params'user=Brian' >>> >>>print(urlopen('http://localhost/cgi-bin/tutor3.py', params).read().decode())<TITLE>tutor3.py</TITLE> <H1>Greetings</H1> <HR> <P>Hello, Brian.</P> <HR>
Finally, if your web application depends on client-side
cookies (discussed later) these are supported by urllib.request automatically, using
Python’s standard library cookie support to store cookies locally,
and later return them to the server. It also supports redirection,
authentication, and more; the client side of secure HTTP
transmissions (HTTPS) is supported if your computer has secure
sockets support available (most do). See the Python library manual
for details. We’ll explore both cookies later in this chapter, and
introduce secure HTTPS in the next.
Using Tables to Lay Out Forms
Now let’s move on to something a bit more realistic. In most CGI applications, input pages are composed of multiple fields. When there is more than one, input labels and fields are typically laid out in a table, to give the form a well-structured appearance. The HTML file in Example 15-9 defines a form with two input fields.
<html>
<title>CGI 101</title>
<body>
<H1>A second user interaction: tables
</H1>
<hr>
<form method=POST action="cgi-bin/tutor4.py">
  <table>
    <TR>
      <TH align=right>Enter your name:
      <TD><input type=text name=user>
    <TR>
      <TH align=right>Enter your age:
      <TD><input type=text name=age>
    <TR>
      <TD colspan=2 align=center>
      <input type=submit value="Send">
  </table>
</form>
</body></html>
The <TH> tag defines
a column like <TD>, but
also tags it as a header column, which generally means it is
rendered in a bold font. By placing the input fields and labels in a
table like this, we get an input page like that shown in Figure 15-10. Labels and inputs are
automatically lined up vertically in columns, much as they were by
the tkinter GUI geometry managers we met earlier in this
book.

When this form’s Submit button (labeled “Send” by the page’s HTML) is pressed, it causes the script in Example 15-10 to be executed on the server machine, with the inputs typed by the user.
#!/usr/bin/python
"""
runs on the server, reads form input, prints HTML;
URL http://server-name/cgi-bin/tutor4.py
"""

import cgi, sys
sys.stderr = sys.stdout              # errors to browser
form = cgi.FieldStorage()            # parse form data
print('Content-type: text/html
')   # plus blank line

# class dummy:
#     def __init__(self, s): self.value = s
# form = {'user': dummy('bob'), 'age':dummy('10')}

html = """
<TITLE>tutor4.py</TITLE>
<H1>Greetings</H1>
<HR>
<H4>%s</H4>
<H4>%s</H4>
<H4>%s</H4>
<HR>"""

if not 'user' in form:
    line1 = 'Who are you?'
else:
    line1 = 'Hello, %s.' % form['user'].value

line2 = "You're talking to a %s server." % sys.platform

line3 = ""
if 'age' in form:
    try:
        line3 = "Your age squared is %d!" % (int(form['age'].value) ** 2)
    except:
        line3 = "Sorry, I can't compute %s ** 2." % form['age'].value

print(html % (line1, line2, line3))
The table layout comes from the HTML file, not from this Python CGI script. In fact, this script doesn’t do much new—it uses string formatting to plug input values into the response page’s HTML triple-quoted template string as before, this time with one line per input field. When this script is run by submitting the input form page, its output produces the new reply page shown in Figure 15-11.

As usual, we can pass parameters to this CGI script at the end
of a URL, too. Figure 15-12 shows the page
we get when passing a user and
age explicitly in this
URL:
http://localhost/cgi-bin/tutor4.py?user=Joe+Blow&age=30

Notice that we have two parameters after the ? this time; we separate them with
&. Also note that we’ve
specified a blank space in the user value with +. This is a common URL encoding
convention. On the server side, the + is automatically replaced with a space
again. It’s also part of the standard escape rule for URL strings,
which we’ll revisit later.
Although Example 15-10 doesn’t introduce much that is new about CGI itself, it does highlight a few new coding tricks worth noting, especially regarding CGI script debugging and security. Let’s take a quick look.
Converting strings in CGI scripts
Just for fun, the script echoes back the name of the server platform
by fetching sys.platform along with the square of
the age input field. Notice
that the age input’s value must
be converted to an integer with the built-in int function; in the CGI world, all
inputs arrive as strings. We could also convert to an integer with
the built-in eval function.
Conversion (and other) errors are trapped gracefully in a try statement to yield an error line,
instead of letting our script die.
Warning
But you should never use eval to convert strings that were sent
over the Internet, like the age field in this example, unless you
can be absolutely sure that the string does not contain even
potentially malicious code. For instance, if this example were
available on the general Internet, it’s not impossible that
someone could type a value into the age field (or append an age parameter to the URL) with a value
that invokes a system shell command. Given the appropriate
context and process permissions, when passed to eval, such a string might delete all
the files in your server script directory, or worse!
Unless you run CGI scripts in processes with limited
permissions and machine access, strings read off the Web can be
dangerous to run as code in CGI scripting. You should never pass
them to dynamic coding tools like eval and exec, or to tools that run arbitrary
shell commands such as os.popen and os.system, unless you can be sure that
they are safe. Always use simpler tools for numeric conversion
like int and float, which recognize only numbers,
not arbitrary Python code.
Debugging CGI scripts
Errors happen, even in the brave new world of the Internet. Generally speaking, debugging CGI scripts can be much more difficult than debugging programs that run on your local machine. Not only do errors occur on a remote machine, but scripts generally won’t run without the context implied by the CGI model. The script in Example 15-10 demonstrates the following two common debugging tricks:
- Error message trapping
This script assigns
sys.stderrtosys.stdoutso that Python error messages wind up being displayed in the response page in the browser. Normally, Python error messages are written tostderr, which generally causes them to show up in the web server’s console window or logfile. To route them to the browser, we must makestderrreference the same file object asstdout(which is connected to the browser in CGI scripts). If we don’t do this assignment, Python errors, including program errors in our script, never show up in the browser.- Test case mock-up
The
dummyclass definition, commented out in this final version, was used to debug the script before it was installed on the Net. Besides not seeingstderrmessages by default, CGI scripts also assume an enclosing context that does not exist if they are tested outside the CGI environment. For instance, if run from the system command line, this script has no form input data. Uncomment this code to test from the system command line. Thedummyclass masquerades as a parsed form field object, andformis assigned a dictionary containing two form field objects. The net effect is thatformwill be plug-and-play compatible with the result of acgi.FieldStoragecall. As usual in Python, object interfaces, not datatypes, are all we must adhere to.
Here are a few general tips for debugging your server-side CGI scripts:
- Run the script from the command line
It probably won’t generate HTML as is, but running it standalone will detect any syntax errors in your code. Recall that a Python command line can run source code files regardless of their extension: for example,
python somescript.cgiworks fine.- Assign
sys.stderrtosys.stdoutas early as possible in your script This will generally make the text of Python error messages and stack dumps appear in your client browser when accessing the script, instead of the web server’s console window or logs. Short of wading through server logs or manual exception handling, this may be the only way to see the text of error messages after your script aborts.
- Mock up inputs to simulate the enclosing CGI context
For instance, define classes that mimic the CGI inputs interface (as done with the
dummyclass in this script) to view the script’s output for various test cases by running it from the system command line.[61] Setting environment variables to mimic form or URL inputs sometimes helps, too (we’ll see how later in this chapter).- Call utilities to display CGI context in the browser
The CGI module includes utility functions that send a formatted dump of CGI environment variables and input values to the browser, to view in a reply page. For instance,
cgi.print_form(form)prints all the input parameters sent from the client, andcgi.test()prints environment variables, the form, the directory, and more. Sometimes this is enough to resolve connection or input problems. We’ll use some of these in the webmail case study in the next chapter.- Show exceptions you catch, print tracebacks
If you catch an exception that Python raises, the Python error message won’t be printed to
stderr(that is normal behavior). In such cases, it’s up to your script to display the exception’s name and value in the response page; exception details are available in the built-insysmodule, fromsys.exc_info(). In addition, Python’stracebackmodule can be used to manually generate stack traces on your reply page for errors; tracebacks show source-code lines active when an exception occurred. We’ll use this later in the error page in PyMailCGI (Chapter 16).- Add debugging prints
You can always insert tracing
printstatements in your code, just as in normal Python programs. Be sure you print the content-type header line first, though, or your prints may not show up on the reply page. In the worst case, you can also generate debugging and trace messages by opening and writing to a local text file on the server; provided you access that file later, this avoids having to format the trace messages according to HTML reply stream conventions.- Run it live
Of course, once your script is at least half working, your best bet is likely to start running it live on the server, with real inputs coming from a browser. Running a server locally on your machine, as we’re doing in this chapter, can help by making changes go faster as you test.
Adding Common Input Devices
So far, we’ve been typing inputs into text fields. HTML forms support a handful of input controls (what we’d call widgets in the traditional GUI world) for collecting user inputs. Let’s look at a CGI program that shows all the common input controls at once. As usual, we define both an HTML file to lay out the form page and a Python CGI script to process its inputs and generate a response. The HTML file is presented in Example 15-11.
<HTML><TITLE>CGI 101</TITLE>
<BODY>
<H1>Common input devices</H1>
<HR>
<FORM method=POST action="cgi-bin/tutor5.py">
  <H3>Please complete the following form and click Send</H3>
  <P><TABLE>
    <TR>
      <TH align=right>Name:
      <TD><input type=text name=name>
    <TR>
      <TH align=right>Shoe size:
      <TD><table>
      <td><input type=radio name=shoesize value=small>Small
      <td><input type=radio name=shoesize value=medium>Medium
      <td><input type=radio name=shoesize value=large>Large
      </table>
    <TR>
      <TH align=right>Occupation:
      <TD><select name=job>
        <option>Developer
        <option>Manager
        <option>Student
        <option>Evangelist
        <option>Other
      </select>
    <TR>
      <TH align=right>Political affiliations:
      <TD><table>
      <td><input type=checkbox name=language value=Python>Pythonista
      <td><input type=checkbox name=language value=Perl>Perlmonger
      <td><input type=checkbox name=language value=Tcl>Tcler
      </table>
    <TR>
      <TH align=right>Comments:
      <TD><textarea name=comment cols=30 rows=2>Enter text here</textarea>
    <TR>
      <TD colspan=2 align=center>
      <input type=submit value="Send">
  </TABLE>
</FORM>
<HR>
</BODY></HTML>
When rendered by a browser, the page in Figure 15-13 appears.

This page contains a simple text field as before, but it also
has radio buttons, a pull-down selection list, a set of
multiple-choice check buttons, and a multiple-line text input area.
All have a name option in the
HTML file, which identifies their selected value in the data sent
from client to server. When we fill out this form and click the Send
submit button, the script in Example 15-12 runs on the server
to process all the input data typed or selected in the form.
#!/usr/bin/python
"""
runs on the server, reads form input, prints HTML
"""

import cgi, sys
form = cgi.FieldStorage()            # parse form data
print("Content-type: text/html")     # plus blank line

html = """
<TITLE>tutor5.py</TITLE>
<H1>Greetings</H1>
<HR>
<H4>Your name is %(name)s</H4>
<H4>You wear rather %(shoesize)s shoes</H4>
<H4>Your current job: %(job)s</H4>
<H4>You program in %(language)s</H4>
<H4>You also said:</H4>
<P>%(comment)s</P>
<HR>"""

data = {}
for field in ('name', 'shoesize', 'job', 'language', 'comment'):
    if not field in form:
        data[field] = '(unknown)'
    else:
        if not isinstance(form[field], list):
            data[field] = form[field].value
        else:
            values = [x.value for x in form[field]]
            data[field] = ' and '.join(values)
print(html % data)
This Python script doesn’t do much; it mostly just copies form
field information into a dictionary called data so that it can be easily inserted
into the triple-quoted response template string. A few of its
techniques merit explanation:
- Field validation
As usual, we need to check all expected fields to see whether they really are present in the input data, using the dictionary
inexpression. Any or all of the input fields may be missing if they weren’t entered on the form or appended to an explicit URL.- String formatting
We’re using dictionary key references in the format string this time—recall that
%(name)smeans pull out the value for the keynamein the data dictionary and perform a to-string conversion on its value.- Multiple-choice fields
We’re also testing the type of all the expected fields’ values to see whether they arrive as a list rather than the usual string. Values of multiple-choice input controls, like the
languagechoice field in this input page, are returned fromcgi.FieldStorageas a list of objects withvalueattributes, rather than a simple single object with avalue.This script copies simple field values to the dictionary verbatim, but it uses a list comprehension to collect the value fields of multiple-choice selections, and the string
joinmethod to construct a single string with anandinserted between each selection value (e.g.,Python and Tcl). The script’s list comprehension is equivalent to the callmap(lambda x: x.value, form[field]).
Not shown here, the FieldStorage object’s alternative methods
getfirst and getlist can also be used to treat fields
as single and multiple items, whether they were sent that way or not
(see Python’s library manuals). And as we’ll see later, besides
simple strings and lists, a third type of form
input object is returned for fields that specify file uploads. To be
robust, the script should really also escape the echoed text
inserted into the HTML reply, lest it contain HTML operators; we
will discuss escapes in detail later.
When the form page is filled out and submitted, the script creates the response shown in Figure 15-14—essentially just a formatted echo of what was sent.
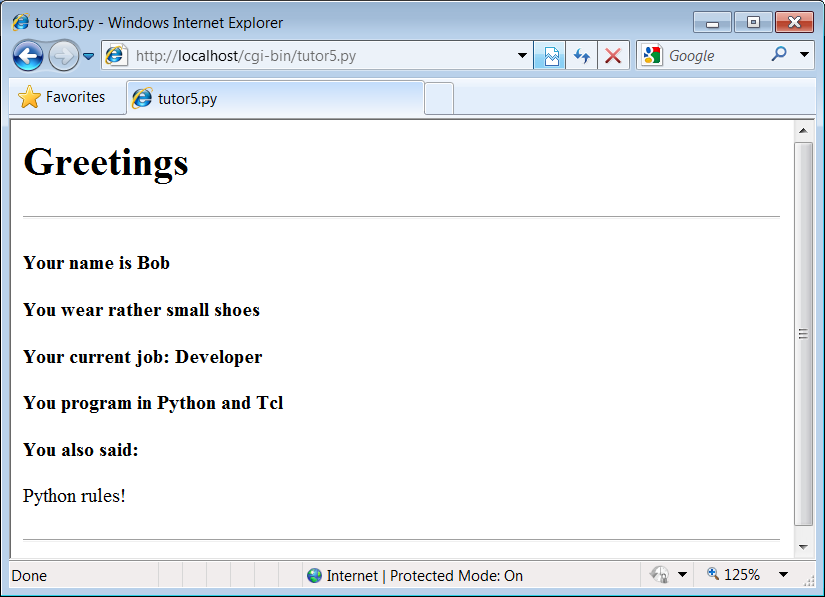
Changing Input Layouts
Suppose that you’ve written a system like that in the prior section, and your users, clients, and significant other start complaining that the input form is difficult to read. Don’t worry. Because the CGI model naturally separates the user interface (the HTML input page definition) from the processing logic (the CGI script), it’s completely painless to change the form’s layout. Simply modify the HTML file; there’s no need to change the CGI code at all. For instance, Example 15-13 contains a new definition of the input that uses tables a bit differently to provide a nicer layout with borders.
<HTML><TITLE>CGI 101</TITLE>
<BODY>
<H1>Common input devices: alternative layout</H1>
<P>Use the same tutor5.py server side script, but change the
layout of the form itself.  Notice the separation of user interface
and processing logic here; the CGI script is independent of the
HTML used to interact with the user/client.</P><HR>

<FORM method=POST action="cgi-bin/tutor5.py">
  <H3>Please complete the following form and click Submit</H3>
  <P><TABLE border cellpadding=3>
    <TR>
      <TH align=right>Name:
      <TD><input type=text name=name>
    <TR>
      <TH align=right>Shoe size:
      <TD><input type=radio name=shoesize value=small>Small
          <input type=radio name=shoesize value=medium>Medium
          <input type=radio name=shoesize value=large>Large
    <TR>
      <TH align=right>Occupation:
      <TD><select name=job>
        <option>Developer
        <option>Manager
        <option>Student
        <option>Evangelist
        <option>Other
      </select>
    <TR>
      <TH align=right>Political affiliations:
      <TD><P><input type=checkbox name=language value=Python>Pythonista
          <P><input type=checkbox name=language value=Perl>Perlmonger
          <P><input type=checkbox name=language value=Tcl>Tcler
    <TR>
      <TH align=right>Comments:
      <TD><textarea name=comment cols=30 rows=2>Enter spam here</textarea>
    <TR>
      <TD colspan=2 align=center>
      <input type=submit value="Submit">
      <input type=reset  value="Reset">
  </TABLE>
</FORM>
</BODY></HTML>
When we visit this alternative page with a browser, we get the interface shown in Figure 15-15.
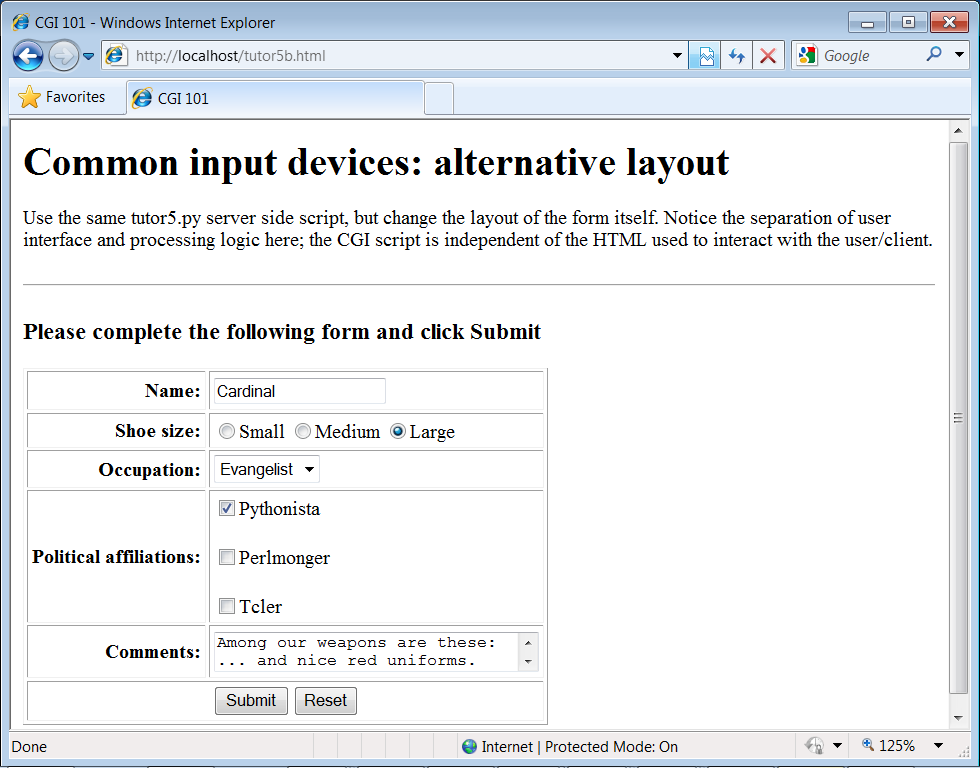
Now, before you go blind trying to detect the differences in
this and the prior HTML file, I should note that the HTML
differences that produce this page are much less important for this
book than the fact that the action fields in these two pages’ forms
reference identical URLs. Pressing this version’s Submit button
triggers the exact same and totally unchanged Python CGI script
again, tutor5.py (Example 15-12).
That is, scripts are completely independent of both the transmission mode (URL query parameters of form fields) and the layout of the user interface used to send them information. Changes in the response page require changing the script, of course, because the HTML of the reply page is still embedded in the CGI script. But we can change the input page’s HTML as much as we like without affecting the server-side Python code. Figure 15-16 shows the response page produced by the script this time around.

Keeping display and logic separate
In fact, this illustrates an important point in the design of larger websites: if we are careful to keep the HTML and script code separate, we get a useful division of display and logic—each part can be worked on independently, by people with different skill sets. Web page designers, for example, can work on the display layout, while programmers can code business logic.
Although this section’s example is fairly small, it already
benefits from this separation for the input page. In some cases,
the separation is harder to accomplish, because our example
scripts embed the HTML of reply pages. With just a little more
work, though, we can usually split the reply HTML off into
separate files that can also be developed independently of the
script’s logic. The html string
in tutor5.py (Example 15-12), for instance,
might be stored in a text file and loaded by the script when
run.
In larger systems, tools such as server-side HTML templating languages help make the division of display and logic even easier to achieve. The Python Server Pages system and frameworks such as Zope and Django, for instance, promote the separation of display and logic by providing reply page description languages that are expanded to include portions generated by separate Python program logic. In a sense, server-side templating languages embed Python in HTML—the opposite of CGI scripts that embed HTML in Python—and may provide a cleaner division of labor, provided the Python code is separate components. Search the Web for more details. Similar techniques can be used for separation of layout and login in the GUIs we studied earlier in this book, but they also usually require larger frameworks or models to achieve.
Passing Parameters in Hardcoded URLs
Earlier, we passed parameters to CGI scripts by listing them at
the end of a URL typed into the browser’s address field—in the query
string parameters part of the URL, after the ?. But there’s nothing sacred about the
browser’s address field. In particular, nothing is stopping us from
using the same URL syntax in hyperlinks that we hardcode or generate in web page
definitions.
For example, the web page from Example 15-14 defines three
hyperlinks (the text between the <A> and </A> tags), which trigger our
original tutor5.py script again (Example 15-12), but with three
different precoded sets of parameters.
<HTML><TITLE>CGI 101</TITLE>
<BODY>
<H1>Common input devices: URL parameters</H1>

<P>This demo invokes the tutor5.py server-side script again,
but hardcodes input data to the end of the script's URL,
within a simple hyperlink (instead of packaging up a form's
inputs).  Click your browser's "show page source" button
to view the links associated with each list item below.

<P>This is really more about CGI than Python, but notice that
Python's cgi module handles both this form of input (which is
also produced by GET form actions), as well as POST-ed forms;
they look the same to the Python CGI script.  In other words,
cgi module users are independent of the method used to submit
data.

<P>Also notice that URLs with appended input values like this
can be generated as part of the page output by another CGI script,
to direct a next user click to the right place and context; together
with type 'hidden' input fields, they provide one way to
save state between clicks.
</P><HR>

<UL>
<LI><A href="cgi-bin/tutor5.py?name=Bob&shoesize=small">Send Bob, small</A>
<LI><A href="cgi-bin/tutor5.py?name=Tom&language=Python">Send Tom, Python</A>

<LI><A href="http://localhost/cgi-bin/tutor5.py?job=Evangelist&comment=spam">
Send Evangelist, spam</A>
</UL>

<HR></BODY></HTML>
This static HTML file defines three hyperlinks—the first two are minimal and the third is fully specified, but all work similarly (again, the target script doesn’t care). When we visit this file’s URL, we see the page shown in Figure 15-17. It’s mostly just a page for launching canned calls to the CGI script. (I’ve reduced the text font size here to fit in this book: run this live if you have trouble reading it here.)
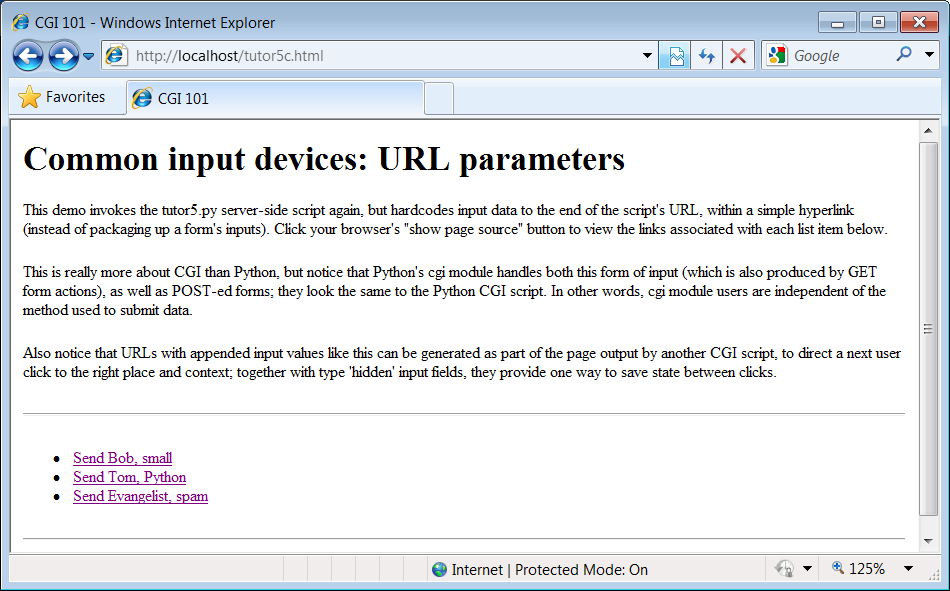
Clicking on this page’s second link creates the response page
in Figure 15-18. This link
invokes the CGI script, with the name parameter set to “Tom” and the
language parameter set to
“Python,” simply because those parameters and values are hardcoded
in the URL listed in the HTML for the second hyperlink. As such,
hyperlinks with parameters like this are sometimes known as
stateful links—they automatically direct the
next script’s operation. The net effect is exactly as if we had
manually typed the line shown at the top of the browser in Figure 15-18.

Notice that many fields are missing here; the
tutor5.py script is smart enough to detect and
handle missing fields and generate an unknown message in the reply page. It’s
also worth pointing out that we’re reusing the Python CGI script
again. The script itself is completely independent of both the user
interface format of the submission page, as well as the technique
used to invoke it—from a submitted form or a hardcoded URL with
query parameters. By separating such user interface details from
processing logic, CGI scripts become reusable software components,
at least within the context of the CGI environment.
The query parameters in the URLs embedded in Example 15-14 were hardcoded in the page’s HTML. But such URLs can also be generated automatically by a CGI script as part of a reply page in order to provide inputs to the script that implements a next step in user interaction. They are a simple way for web-based applications to “remember” things for the duration of a session. Hidden form fields, up next, serve some of the same purposes.
Passing Parameters in Hidden Form Fields
Similar in spirit to the prior section, inputs for scripts can also be hardcoded in a page’s HTML as hidden input fields. Such fields are not displayed in the page, but are transmitted back to the server when the form is submitted. Example 15-15, for instance, allows a job field to be entered, but fills in name and language parameters automatically as hidden input fields.
<HTML><TITLE>CGI 101</TITLE>
<BODY>
<H1>Common input devices: hidden form fields</H1>

<P>This demo invokes the tutor5.py server-side script again,
but hardcodes input data in the form itself as hidden input
fields, instead of as parameters at the end of URL hyperlinks.
As before, the text of this form, including the hidden fields,
can be generated as part of the page output by another CGI
script, to pass data on to the next script on submit; hidden
form fields provide another way to save state between pages.
</P><HR><p>

<form method=post action="cgi-bin/tutor5.py">
    <input type=hidden name=name     value=Sue>
    <input type=hidden name=language value=Python>
    <input type=text   name=job      value="Enter job">
    <input type=submit value="Submit Sue">
</form>
</p><HR></BODY></HTML>
When Example 15-15 is opened in a browser, we get the input page in Figure 15-19.

When submitting, we trigger our original tutor5.py script once again (Example 15-12), but some of the inputs have been provided for us as hidden fields. The reply page is captured in Figure 15-20.

Much like the query parameters of the prior section, here again we’ve hardcoded and embedded the next page’s inputs in the input page’s HTML itself. Unlike query parameters, hidden input fields don’t show up in the next page’s address. Like query parameters, such input fields can also be generated on the fly as part of the reply from a CGI script. When they are, they serve as inputs for the next page, and so are a sort of memory—session state passed from one script to the next. To fully understand how and why this is necessary, we need to next take a short diversion into state retention alternatives.
Saving State Information in CGI Scripts
One of the most unusual aspects of the basic CGI model, and one of its starkest contrasts to the GUI programming techniques we studied in the prior part of this book, is that CGI scripts are stateless—each is a standalone program, normally run autonomously, with no knowledge of any other scripts that may run before or after. There is no notion of things such as global variables or objects that outlive a single step of interaction and retain context. Each script begins from scratch, with no memory of where the prior left off.
This makes web servers simple and robust—a buggy CGI script won’t interfere with the server process. In fact, a flaw in a CGI script generally affects only the single page it implements, not the entire web-based application. But this is a very different model from callback-handler functions in a single process GUI, and it requires extra work to remember things longer than a single script’s execution.
Lack of state retention hasn’t mattered in our simple examples so far, but larger systems are usually composed of multiple user interaction steps and many scripts, and they need a way to keep track of information gathered along the way. As suggested in the last two sections, generating query parameters on URL links and hidden form fields in input pages sent as replies are two simple ways for a CGI script to pass data to the next script in the application. When clicked or submitted, such parameters send preprogrammed selection or session information back to another server-side handler script. In a sense, the content of the generated reply page itself becomes the memory space of the application.
For example, a site that lets you read your email may present you with a list of viewable email messages, implemented in HTML as a list of hyperlinks generated by another script. Each hyperlink might include the name of the message viewer script, along with parameters identifying the selected message number, email server name, and so on—as much data as is needed to fetch the message associated with a particular link. A retail site may instead serve up a generated list of product links, each of which triggers a hardcoded hyperlink containing the product number, its price, and so on. Alternatively, the purchase page at a retail site may embed the product selected in a prior page as hidden form fields.
In fact, one of the main reasons for showing the techniques in the last two sections is that we’re going to use them extensively in the larger case study in the next chapter. For instance, we’ll use generated stateful URLs with query parameters to implement lists of dynamically generated selections that “know” what to do when clicked. Hidden form fields will also be deployed to pass user login data to the next page’s script. From a more general perspective, both techniques are ways to retain state information between pages—they can be used to direct the action of the next script to be run.
Generating URL parameters and hidden form fields works well for retaining state information across pages during a single session of interaction. Some scenarios require more, though. For instance, what if we want to remember a user’s login name from session to session? Or what if we need to keep track of pages at our site visited by a user in the past? Because such information must be longer lived than the pages of a single session of interaction, query parameters and hidden form fields won’t suffice. In some cases, the required state information might also be too large to embed in a reply page’s HTML.
In general, there are a variety of ways to pass or retain state information between CGI script executions and across sessions of interaction:
- URL query parameters
Session state embedded in generated reply pages
- Hidden form fields
Session state embedded in generated reply pages
- Cookies
Smaller information stored on the client that may span sessions
- Server-side databases
Larger information that might span sessions
- CGI model extensions
Persistent processes, session management, and so on
We’ll explore most of these in later examples, but since this is a core idea in server-side scripting, let’s take a brief look at each of these in turn.
URL Query Parameters
We met these earlier in this chapter: hardcoded URL parameters in dynamically generated hyperlinks embedded in input pages produced as replies. By including both a processing script name and input to it, such links direct the operation of the next page when selected. The parameters are transmitted from client to server automatically, as part of a GET-style request.
Coding query parameters is straightforward—print the correctly formatted URL to standard output from your CGI script as part of the reply page (albeit following some escaping conventions we’ll meet later in this chapter). Here’s an example drawn from the next chapter’s webmail case study:
script = "onViewListLink.py"
user = 'bob'
mnum = 66
pswd = 'xxx'
site = ' pop.myisp.net'
print('<a href="%s?user=%s&pswd=%s&mnum=%d&site=%s">View %s</a>'
              % (script, user, pswd, mnum, site, mnum))
The resulting URL will have enough information to direct the next script when clicked:
<a href="onViewListLink.py?user=bob&pswd=xxx&mnum=66&site=pop.myisp.net">View 66</a>
Query parameters serve as memory, and they pass information between pages. As such, they are useful for retaining state across the pages of a single session of interaction. Since each generated URL may have different attached parameters, this scheme can provide context per user-selectable action. Each link in a list of selectable alternatives, for example, may have a different implied action coded as a different parameter value. Moreover, users can bookmark a link with parameters, in order to return to a specific state in an interaction.
Because their state retention is lost when the page is abandoned, though, they are not useful for remembering state from session to session. Moreover, the data appended as URL query parameters is generally visible to users and may appear in server logfiles; in some applications, it may have to be manually encrypted to avoid display or forgery.
Hidden Form Input Fields
We met these in the prior section as well: hidden form input fields that are attached to form data and are embedded in reply web pages, but are not displayed in web pages or their URL addresses. When the form is submitted, all the hidden fields are transmitted to the next script along with any real inputs, to serve as context. The net effect provides context for an entire input form, not a particular hyperlink. An already entered username, password, or selection, for instance, can be implied by the values of hidden fields in subsequently generated pages.
In terms of code, hidden fields are generated by server-side scripts as part of the reply page’s HTML and are later returned by the client with all of the form’s input data. Previewing the next chapter’s usage again:
print('<form method=post action="%s/onViewSubmit.py">' % urlroot)
print('<input type=hidden name=mnum value="%s">' % msgnum)
print('<input type=hidden name=user value="%s">' % user)
print('<input type=hidden name=site value="%s">' % site)
print('<input type=hidden name=pswd value="%s">' % pswd)
Like query parameters, hidden form fields can also serve as a sort of memory, retaining state information from page to page. Also like query parameters, because this kind of memory is embedded in the page itself, hidden fields are useful for state retention among the pages of a single session of interaction, but not for data that spans multiple sessions.
And like both query parameters and cookies (up next), hidden form fields may be visible to users—though hidden in rendered pages and URLs, their values still are displayed if the page’s raw HTML source code is displayed. As a result, hidden form fields are not secure; encryption of the embedded data may again be required in some contexts to avoid display on the client or forgery in form submissions.
HTTP “Cookies”
Cookies, an oextension to the HTTP protocol underlying the web model, are a way for server-side applications to directly store information on the client computer. Because this information is not embedded in the HTML of web pages, it outlives the pages of a single session. As such, cookies are ideal for remembering things that must span sessions.
Things like usernames and preferences, for example, are prime cookie candidates—they will be available the next time the client visits our site. However, because cookies may have space limitations, are seen by some as intrusive, and can be disabled by users on the client, they are not always well suited to general data storage needs. They are often best used for small pieces of noncritical cross-session state information, and websites that aim for broad usage should generally still be able to operate if cookies are unavailable.
Operationally, HTTP cookies are strings of information stored on the client machine and transferred between client and server in HTTP message headers. Server-side scripts generate HTTP headers to request that a cookie be stored on the client as part of the script’s reply stream. Later, the client web browser generates HTTP headers that send back all the cookies matching the server and page being contacted. In effect, cookie data is embedded in the data streams much like query parameters and form fields, but it is contained in HTTP headers, not in a page’s HTML. Moreover, cookie data can be stored permanently on the client, and so it outlives both pages and interactive sessions.
For web application developers, Python’s standard library
includes tools that simplify the task of sending and receiving:
http.cookiejar does cookie handling for HTTP clients that talk to web
servers, and the module http.cookies simplifies the task of
creating and receiving cookies in server-side scripts. Moreover, the
module urllib.request we’ve studied earlier has support for opening URLs
with automatic cookie handling.
Creating a cookie
Web browsers such as Firefox and Internet Explorer generally handle the client side of this protocol, storing and sending cookie data. For the purpose of this chapter, we are mainly interested in cookie processing on the server. Cookies are created by sending special HTTP headers at the start of the reply stream:
Content-type: text/html
Set-Cookie: foo=bar;

<HTML>...
The full format of a cookie’s header is as follows:
Set-Cookie: name=value; expires=date; path=pathname; domain=domainname; secure
The domain defaults to the hostname of the server that set the cookie, and the path defaults to the path of the document or script that set the cookie—these are later matched by the client to know when to send a cookie’s value back to the server. In Python, cookie creation is simple; the following in a CGI script stores a last-visited time cookie:
import http.cookies, time
cook = http.cookies.SimpleCookie()
cook['visited'] = str(time.time())     # a dictionary
print(cook.output())                   # prints "Set-Cookie: visited=1276623053.89"
print('Content-type: text/html
')
The SimpleCookie call
here creates a dictionary-like cookie object whose keys are
strings (the names of the cookies), and whose values are “Morsel”
objects (describing the cookie’s value). Morsels in turn are also
dictionary-like objects with one key per cookie property: path and domain, expires to give the cookie an expiration
date (the default is the duration of the browser session), and so
on. Morsels also have attributes—for instance, key and value give the name and value of the
cookie, respectively. Assigning a string to a cookie key
automatically creates a Morsel from the string, and the cookie
object’s output method returns
a string suitable for use as an HTTP header; printing the object
directly has the same effect, due to its __str__ operator overloading. Here is a
more comprehensive example of the interface in action:
>>>import http.cookies, time>>>cooks = http.cookies.SimpleCookie()>>>cooks['visited'] = time.asctime()>>>cooks['username'] = 'Bob'>>>cooks['username']['path'] = '/myscript'>>>cooks['visited'].value'Tue Jun 15 13:35:20 2010' >>>print(cooks['visited'])Set-Cookie: visited="Tue Jun 15 13:35:20 2010" >>>print(cooks)Set-Cookie: username=Bob; Path=/myscript Set-Cookie: visited="Tue Jun 15 13:35:20 2010"
Receiving a cookie
Now, when the client visits the page again in the future, the cookie’s data is sent back from the browser to the server in HTTP headers again, in the form “Cookie: name1=value1; name2=value2 ...”. For example:
Cookie: visited=1276623053.89
Roughly, the browser client returns all cookies that match
the requested server’s domain name and path. In the CGI script on
the server, the environment variable HTTP_COOKIE
contains the raw cookie data headers string uploaded from the
client; it can be extracted in Python as follows:
import os, http.cookies
cooks = http.cookies.SimpleCookie(os.environ.get("HTTP_COOKIE"))
vcook = cooks.get("visited")     # a Morsel dictionary
if vcook != None:
    time = vcook.value
Here, the SimpleCookie
constructor call automatically parses the passed-in cookie data
string into a dictionary of Morsel objects; as usual, the
dictionary get method returns a
default None if a key is
absent, and we use the Morsel object’s value attribute to extract the cookie’s
value string if sent.
Using cookies in CGI scripts
To help put these pieces together, Example 15-16 lists a CGI script that stores a client-side cookie when first visited and receives and displays it on subsequent visits.
"""
create or use a client-side cookie storing username;
there is no input form data to parse in this example
"""

import http.cookies, os
cookstr  = os.environ.get("HTTP_COOKIE")
cookies  = http.cookies.SimpleCookie(cookstr)
usercook = cookies.get("user")                     # fetch if sent

if usercook == None:                               # create first time
    cookies = http.cookies.SimpleCookie()          # print Set-cookie hdr
    cookies['user']  = 'Brian'
    print(cookies)
    greeting = '<p>His name shall be... %s</p>' % cookies['user']
else:
    greeting = '<p>Welcome back, %s</p>' % usercook.value

print('Content-type: text/html
')                 # plus blank line now
print(greeting)                                    # and the actual html
Assuming you are running this chapter’s local web server
from Example 15-1, you
can invoke this script with a URL such as
http://localhost/cgi-bin/cookies.py (type
this in your browser’s address field, or submit it interactively
with the module urllib.request). The first time you
visit the script, the script sets the cookie within its reply’s
headers, and you’ll see a reply page with this message:
His name shall be... Set-Cookie: user=Brian
Thereafter, revisiting the script’s URL in the same browser session (use your browser’s reload button) produces a reply page with this message:
Welcome back, Brian
This occurs because the client is sending the previously stored cookie value back to the script, at least until you kill and restart your web browser—the default expiration of a cookie is the end of a browsing session. In a realistic program, this sort of structure might be used by the login page of a web application; a user would need to enter his name only once per browser session.
Handling cookies with the urllib.request module
As mentioned earlier, the urllib.request module provides an
interface for reading the reply from a URL, but it uses
the http.cookiejar
module to also support storing and sending cookies on the client.
However, it does not support cookies “out of the box.” For
example, here it is in action testing the last section’s
cookie-savvy script—cookies are not echoed back to the server when
a script is revisited:
>>>from urllib.request import urlopen>>>reply = urlopen('http://localhost/cgi-bin/cookies.py').read()>>>print(reply)b'<p>His name shall be... Set-Cookie: user=Brian</p> ' >>>reply = urlopen('http://localhost/cgi-bin/cookies.py').read()>>>print(reply)b'<p>His name shall be... Set-Cookie: user=Brian</p> '
To support cookies with this module properly, we simply need to enable the cookie-handler class; the same is true for other optional extensions in this module. Again, contacting the prior section’s script:
>>>import urllib.request as urllib>>>opener = urllib.build_opener(urllib.HTTPCookieProcessor())>>>urllib.install_opener(opener)>>> >>>reply = urllib.urlopen('http://localhost/cgi-bin/cookies.py').read()>>>print(reply)b'<p>His name shall be... Set-Cookie: user=Brian</p> ' >>>reply = urllib.urlopen('http://localhost/cgi-bin/cookies.py').read()>>>print(reply)b'<p>Welcome back, Brian</p> ' >>>reply = urllib.urlopen('http://localhost/cgi-bin/cookies.py').read()>>>print(reply)b'<p>Welcome back, Brian</p> '
This works because urllib.request mimics the cookie
behavior of a web browser on the client—it stores the cookie when
so requested in the headers of a script’s reply, and adds it to
headers sent back to the same script on subsequent visits. Also
just as in a browser, the cookie is deleted if you exit Python and
start a new session to rerun this code. See the library manual for
more on this module’s interfaces.
Although easy to use, cookies have potential downsides. For one, they may be subject to size limitations (4 KB per cookie, 300 total, and 20 per domain are one common limit). For another, users can disable cookies in most browsers, making them less suited to critical data. Some even see them as intrusive, because they can be abused to track user behavior. (Many sites simply require cookies to be turned on, finessing the issue completely.) Finally, because cookies are transmitted over the network between client and server, they are still only as secure as the transmission stream itself; this may be an issue for sensitive data if the page is not using secure HTTP transmissions between client and server. We’ll explore secure cookies and server concepts in the next chapter.
For more details on the cookie modules and the cookie protocol in general, see Python’s library manual, and search the Web for resources. It’s not impossible that future mutations of HTML may provide similar storage solutions.
Server-Side Databases
For more industrial-strength state retention, Python scripts can employ full-blown database solutions in the server. We will study these options in depth in Chapter 17. Python scripts have access to a variety of server-side data stores, including flat files, persistent object pickles and shelves, object-oriented databases such as ZODB, and relational SQL-based databases such as MySQL, PostgreSQL, Oracle, and SQLite. Besides data storage, such systems may provide advanced tools such as transaction commits and rollbacks, concurrent update synchronization, and more.
Full-blown databases are the ultimate storage solution. They can be used to represent state both between the pages of a single session (by tagging the data with generated per-session keys) and across multiple sessions (by storing data under per-user keys).
Given a user’s login name, for example, CGI scripts can fetch all of the context we have gathered in the past about that user from the server-side database. Server-side databases are ideal for storing more complex cross-session information; a shopping cart application, for instance, can record items added in the past in a server-side database.
Databases outlive both pages and sessions. Because data is kept explicitly, there is no need to embed it within the query parameters or hidden form fields of reply pages. Because the data is kept on the server, there is no need to store it on the client in cookies. And because such schemes employ general-purpose databases, they are not subject to the size constraints or optional nature of cookies.
In exchange for their added utility, full-blown databases require more in terms of installation, administration, and coding. As we’ll see in Chapter 17, luckily the extra coding part of that trade-off is remarkably simple in Python. Moreover, Python’s database interfaces may be used in any application, web-based or otherwise.
Extensions to the CGI Model
Finally, there are more advanced protocols and frameworks for retaining state on the server, which we won’t cover in this book. For instance, the Zope web application framework, discussed briefly in Chapter 12, provides a product interface, which allows for the construction of web-based objects that are automatically persistent.
Other schemes, such as FastCGI, as well as server-specific extensions such as mod_python for Apache, may attempt to work
around the autonomous, one-shot nature of CGI scripts, or otherwise
extend the basic CGI model to support long-lived memory stores. For
example:
FastCGI allows web applications to run as persistent processes, which receive input data from and send reply streams to the HTTP web server over Inter-Process Communication (IPC) mechanisms such as sockets. This differs from normal CGI, which communicates inputs and outputs with environment variables, standard streams, and command-line arguments, and assumes scripts run to completion on each request. Because a FastCGI process may outlive a single page, it can retain state information from page to page, and avoids startup performance costs.
mod_pythonextends the open source Apache web server by embedding the Python interpreter within Apache. Python code is executed directly within the Apache server, eliminating the need to spawn external processes. This package also supports the concept of sessions, which can be used to store data between pages. Session data is locked for concurrent access and can be stored in files or in memory, depending on whether Apache is running in multiprocess or multithreaded mode.mod_pythonalso includes web development tools, such as the Python Server Pages (PSP) server-side templating language for HTML generation mentioned in Chapter 12 and earlier in this chapter.
Such models are not universally supported, though, and may come with some added cost in complexity—for example, to synchronize access to persistent data with locks. Moreover, a failure in a FastCGI-style web application impacts the entire application, not just a single page, and things like memory leaks become much more costly. For more on persistent CGI models, and support in Python for things such as FastCGI, search the Web or consult web-specific resources.
Combining Techniques
Naturally, these techniques may be combined to achieve a variety of memory strategies, both for interaction sessions and for more permanent storage needs. For example:
A web application may use cookies to store a per-user or per-session key on the client, and later use that key to index into a server-side database to retrieve the user’s or session’s full state information.
Even for short-lived session information, URL query parameters or hidden form fields may similarly be used to pass a key identifying the session from page to page, to be used by the next script to index a server-side database.
Moreover, URL query parameters and hidden fields may be generated for temporary state memory that spans pages, even though cookies and databases are used for retention that must span sessions.
The choice of technique is driven by the application’s storage needs. Although not as straightforward as the in-memory variables and objects of single process GUI programs running on a client, with creativity, CGI script state retention is entirely possible.
The Hello World Selector
Let’s get back to writing some code again. It’s time for something a bit more useful than the examples we’ve seen so far (well, more entertaining, at least). This section presents a program that displays the basic syntax required by various programming languages to print the string “Hello World,” the classic language benchmark.
To keep it simple, this example assumes that the string is printed to the standard output stream in the selected language, not to a GUI or web page. It also gives just the output command itself, not complete programs. The Python version happens to be a complete program, but we won’t hold that against its competitors here.
Structurally, the first cut of this example consists of a main page HTML file, along with a Python-coded CGI script that is invoked by a form in the main HTML page. Because no state or database data is stored between user clicks, this is still a fairly simple example. In fact, the main HTML page implemented by Example 15-17 is mostly just one big pull-down selection list within a form.
<html><title>Languages</title>
<body>
<h1>Hello World selector</h1>
<P>This demo shows how to display a "hello world" message in various
programming languages' syntax.  To keep this simple, only the output command
is shown (it takes more code to make a complete program in some of these
languages), and only text-based solutions are given (no GUI or HTML
construction logic is included). This page is a simple HTML file; the one
you see after pressing the button below is generated by a Python CGI script
which runs on the server. Pointers:

<UL>
<LI>To see this page's HTML, use the 'View Source' command in your browser.
<LI>To view the Python CGI script on the server,
    <A HREF="cgi-bin/languages-src.py">click here</A> or
    <A HREF="cgi-bin/getfile.py?filename=cgi-binlanguages.py">here</A>.
<LI>To see an alternative version that generates this page dynamically,
    <A HREF="cgi-bin/languages2.py">click here</A>.
</UL></P>

<hr>
<form method=POST action="cgi-bin/languages.py">
    <P><B>Select a programming language:</B>
    <P><select name=language>
        <option>All
        <option>Python
        <option>Python2
        <option>Perl
        <option>Tcl
        <option>Scheme
        <option>SmallTalk
        <option>Java
        <option>C
        <option>C++
        <option>Basic
        <option>Fortran
        <option>Pascal
        <option>Other
    </select>
    <P><input type=Submit>
</form>
</body></html>
For the moment, let’s ignore some of the hyperlinks near the middle of this file; they introduce bigger concepts like file transfers and maintainability that we will explore in the next two sections. When visited with a browser, this HTML file is downloaded to the client and is rendered into the new browser page shown in Figure 15-21.
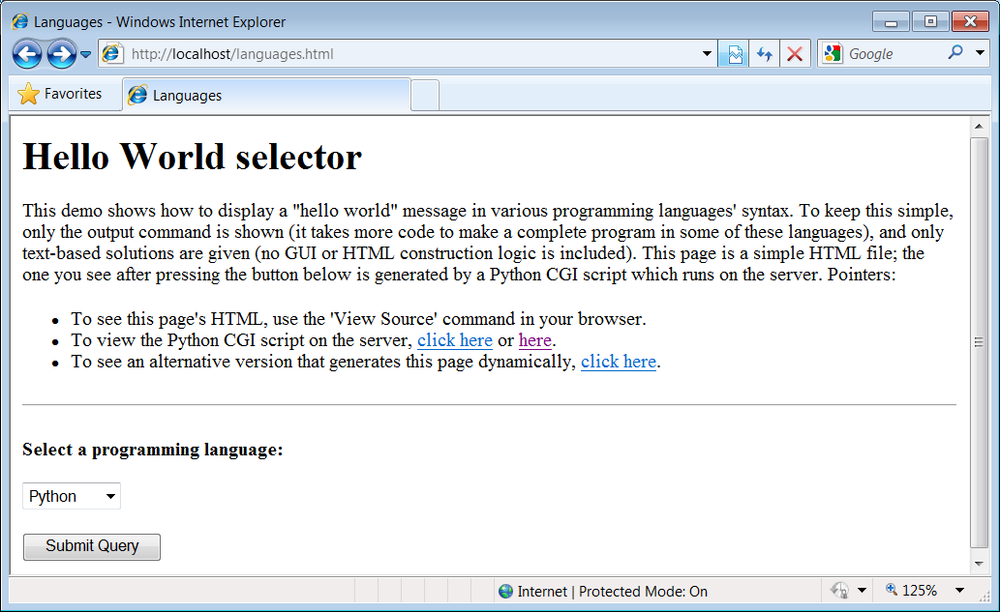
That widget above the Submit button is a pull-down selection
list that lets you choose one of the <option> tag values in the HTML file.
As usual, selecting one of these language names and pressing the
Submit button at the bottom (or pressing your Enter key) sends the
selected language name to an instance of the server-side CGI script
program named in the form’s action
option. Example 15-18 contains
the Python script that is run by the web server upon
submission.
#!/usr/bin/python
"""
show hello world syntax for input language name; note that it uses r'...'
raw strings so that '
' in the table are left intact, and cgi.escape()
on the string so that things like '<<' don't confuse browsers--they are
translated to valid HTML code; any language name can arrive at this script,
since explicit URLs "http://servername/cgi-bin/languages.py?language=Cobol"
can be typed in a web browser or sent by a script (urllib.request.urlopen).
caveats: the languages list appears in both the CGI and HTML files--could
import from single file if selection list generated by a CGI script too;
"""

debugme  = False                                 # True=test from cmd line
inputkey = 'language'                            # input parameter name

hellos = {
    'Python':    r" print('Hello World')               ",
    'Python2':   r" print 'Hello World'                ",
    'Perl':      r' print "Hello World
";             ',
    'Tcl':       r' puts "Hello World"                 ',
    'Scheme':    r' (display "Hello World") (newline)  ',
    'SmallTalk': r" 'Hello World' print.               ",
    'Java':      r' System.out.println("Hello World"); ',
    'C':         r' printf("Hello World
");           ',
    'C++':       r' cout << "Hello World" << endl;     ',
    'Basic':     r' 10 PRINT "Hello World"             ',
    'Fortran':   r" print *, 'Hello World'             ",
    'Pascal':    r" WriteLn('Hello World'),            "
}

class dummy:                                       # mocked-up input obj
    def __init__(self, str): self.value = str

import cgi, sys
if debugme:
    form = {inputkey: dummy(sys.argv[1])}          # name on cmd line
else:
    form = cgi.FieldStorage()                      # parse real inputs

print('Content-type: text/html
')                 # adds blank line
print('<TITLE>Languages</TITLE>')
print('<H1>Syntax</H1><HR>')

def showHello(form):                               # HTML for one language
    choice = form[inputkey].value
    print('<H3>%s</H3><P><PRE>' % choice)
    try:
        print(cgi.escape(hellos[choice]))
    except KeyError:
        print("Sorry--I don't know that language")
    print('</PRE></P><BR>')

if not inputkey in form or form[inputkey].value == 'All':
    for lang in hellos.keys():
        mock = {inputkey: dummy(lang)}
        showHello(mock)
else:
    showHello(form)
print('<HR>')
And as usual, this script prints HTML code to the standard output stream to produce a response page in the client’s browser. Not much is new to speak of in this script, but it employs a few techniques that merit special focus:
- Raw strings and quotes
Notice the use of raw strings (string constants preceded by an “r” character) in the language syntax dictionary. Recall that raw strings retain
backslash characters in the string literally, instead of interpreting them as string escape-code introductions. Without them, the- Escaping text embedded in HTML and URLs
This script takes care to format the text of each language’s code snippet with the
cgi.escapeutility function. This standard Python utility automatically translates characters that are special in HTML into HTML escape code sequences, so that they are not treated as HTML operators by browsers. Formally,cgi.escapetranslates characters to escape code sequences, according to the standard HTML convention:<,>, and&become<,>, and&. If you pass a second true argument, the double-quote character (") is translated to".For example, the
<<left-shift operator in the C++ entry is translated to<<—a pair of HTML escape codes. Because printing each code snippet effectively embeds it in the HTML response stream, we must escape any special HTML characters it contains. HTML parsers (including Python’s standardhtml.parsermodule presented in Chapter 19) translate escape codes back to the original characters when a page is rendered.More generally, because CGI is based upon the notion of passing formatted strings across the Net, escaping special characters is a ubiquitous operation. CGI scripts almost always need to escape text generated as part of the reply to be safe. For instance, if we send back arbitrary text input from a user or read from a data source on the server, we usually can’t be sure whether it will contain HTML characters, so we must escape it just in case.
In later examples, we’ll also find that characters inserted into URL address strings generated by our scripts may need to be escaped as well. A literal
&in a URL is special, for example, and must be escaped if it appears embedded in text we insert into a URL. However, URL syntax reserves different special characters than HTML code, and so different escaping conventions and tools must be used. As we’ll see later in this chapter,cgi.escapeimplements escape translations in HTML code, buturllib.parse.quote(and its relatives) escapes characters in URL strings.- Mocking up form inputs
Here again, form inputs are “mocked up” (simulated), both for debugging and for responding to a request for all languages in the table. If the script’s global
debugmevariable is set to a true value, for instance, the script creates a dictionary that is plug-and-play compatible with the result of acgi.FieldStoragecall—its “languages” key references an instance of thedummymock-up class. This class in turn creates an object that has the same interface as the contents of acgi.FieldStorageresult—it makes an object with avalueattribute set to a passed-in string.The net effect is that we can test this script by running it from the system command line: the generated dictionary fools the script into thinking it was invoked by a browser over the Net. Similarly, if the requested language name is “All,” the script iterates over all entries in the languages table, making a mocked-up form dictionary for each (as though the user had requested each language in turn).
This lets us reuse the existing
showHellologic to display each language’s code in a single page. As always in Python, object interfaces and protocols are what we usually code for, not specific datatypes. TheshowHellofunction will happily process any object that responds to the syntaxform['language'].value.[62] Notice that we could achieve similar results with a default argument inshowHello, albeit at the cost of introducing a special case in its code.
Now back to interacting with this program. If we select a particular language, our CGI script generates an HTML reply of the following sort (along with the required content-type header and blank line preamble). Use your browser’s View Source option to see:
<TITLE>Languages</TITLE>
<H1>Syntax</H1><HR>
<H3>Scheme</H3><P><PRE>
 (display "Hello World") (newline)
</PRE></P><BR>
<HR>
Program code is marked with a <PRE> tag to specify preformatted text
(the browser won’t reformat it like a normal text paragraph). This
reply code shows what we get when we pick Scheme. Figure 15-22 shows the page
served up by the script after selecting “Python” in the pull-down
selection list (which, for the purposes of both this edition and the
expected future at large, of course, really means Python 3.X).
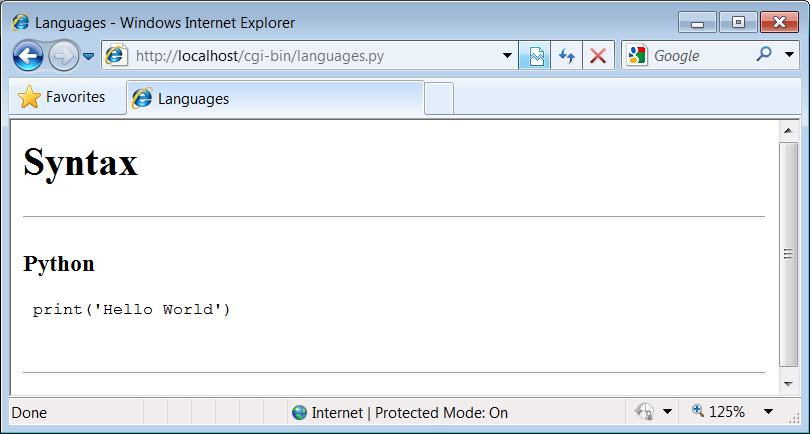
Our script also accepts a language name of “All” and interprets
it as a request to display the syntax for every language it knows
about. For example, here is the HTML that is generated if we set the
global variable debugme to True and run from the system command line
with a single argument, All. This
output is the same as what is printed to the client’s web browser in
response to an “All” selection[63]:
C:...PP4EInternetWebcgi-bin> python languages.py All
Content-type: text/html
<TITLE>Languages</TITLE>
<H1>Syntax</H1><HR>
<H3>C</H3><P><PRE>
printf("Hello World
");
</PRE></P><BR>
<H3>Java</H3><P><PRE>
System.out.println("Hello World");
</PRE></P><BR>
<H3>C++</H3><P><PRE>
cout << "Hello World" << endl;
</PRE></P><BR>
<H3>Perl</H3><P><PRE>
print "Hello World
";
</PRE></P><BR>
<H3>Fortran</H3><P><PRE>
print *, 'Hello World'
</PRE></P><BR>
<H3>Basic</H3><P><PRE>
10 PRINT "Hello World"
</PRE></P><BR>
<H3>Scheme</H3><P><PRE>
(display "Hello World") (newline)
</PRE></P><BR>
<H3>SmallTalk</H3><P><PRE>
'Hello World' print.
</PRE></P><BR>
<H3>Python</H3><P><PRE>
print('Hello World')
</PRE></P><BR>
<H3>Pascal</H3><P><PRE>
WriteLn('Hello World'),
</PRE></P><BR>
<H3>Tcl</H3><P><PRE>
puts "Hello World"
</PRE></P><BR>
<H3>Python2</H3><P><PRE>
print 'Hello World'
</PRE></P><BR>
<HR>Each language is represented here with the same code pattern—the
showHello function is called for
each table entry, along with a mocked-up form object. Notice the way
that C++ code is escaped for embedding inside the HTML stream; this is
the cgi.escape call’s handiwork.
Your web browser translates the < escapes to < characters when the page is rendered.
When viewed with a browser, the “All” response page is rendered as
shown in Figure 15-23;
the order in which languages are listed is pseudorandom, because the
dictionary used to record them is not a sequence.

Checking for Missing and Invalid Inputs
So far, we’ve been triggering the CGI script by selecting a language name
from the pull-down list in the main HTML page. In this context, we
can be fairly sure that the script will receive valid inputs.
Notice, though, that there is nothing to prevent a client from
passing the requested language name at the end of the CGI script’s
URL as an explicit query parameter, instead of using the HTML page
form. For instance, a URL of the following kind typed into a
browser’s address field or submitted with the module urllib.request:
http://localhost/cgi-bin/languages.py?language=Python
yields the same “Python” response page shown in Figure 15-22. However, because
it’s always possible for a user to bypass the HTML file and use an
explicit URL, a user could invoke our script with an unknown
language name, one that is not in the HTML file’s pull-down list
(and so not in our script’s table). In fact, the script might be
triggered with no language input at all if someone explicitly
submits its URL with no language
parameter (or no parameter value) at the end. Such an erroneous URL
could be entered into a browser’s address field or be sent by
another script using the urllib.request module techniques described
earlier in this chapter. For instance, valid requests work
normally:
>>>from urllib.request import urlopen>>>request = 'http://localhost/cgi-bin/languages.py?language=Python'>>>reply = urlopen(request).read()>>>print(reply.decode())<TITLE>Languages</TITLE> <H1>Syntax</H1><HR> <H3>Python</H3><P><PRE> print('Hello World') </PRE></P><BR> <HR>
To be robust, though, the script also checks for both error cases explicitly, as all CGI scripts generally should. Here is the HTML generated in response to a request for the fictitious language GuiDO (again, you can also see this by selecting your browser’s View Source option after typing the URL manually into your browser’s address field):
>>>request = 'http://localhost/cgi-bin/languages.py?language=GuiDO'>>>reply = urlopen(request).read()>>>print(reply.decode())<TITLE>Languages</TITLE> <H1>Syntax</H1><HR> <H3>GuiDO</H3><P><PRE> Sorry--I don't know that language </PRE></P><BR> <HR>
If the script doesn’t receive any language name input, it
simply defaults to the “All” case (this case is also triggered if
the URL ends with just ?language=
and no language name value):
>>>reply = urlopen('http://localhost/cgi-bin/languages.py').read()>>>print(reply.decode())<TITLE>Languages</TITLE> <H1>Syntax</H1><HR> <H3>C</H3><P><PRE> printf("Hello World "); </PRE></P><BR> <H3>Java</H3><P><PRE> System.out.println("Hello World"); </PRE></P><BR> <H3>C++</H3><P><PRE> cout << "Hello World" << endl; </PRE></P><BR> ...more...
If we didn’t detect these cases, chances are that our script
would silently die on a Python exception and leave the user with a
mostly useless half-complete page or with a default error page (we
didn’t assign stderr to stdout here, so no Python error message
would be displayed). Figure 15-24 shows the page
generated and rendered by a browser if the script is invoked with an
explicit URL like this:
http://localhost/cgi-bin/languages.py?language=COBOL
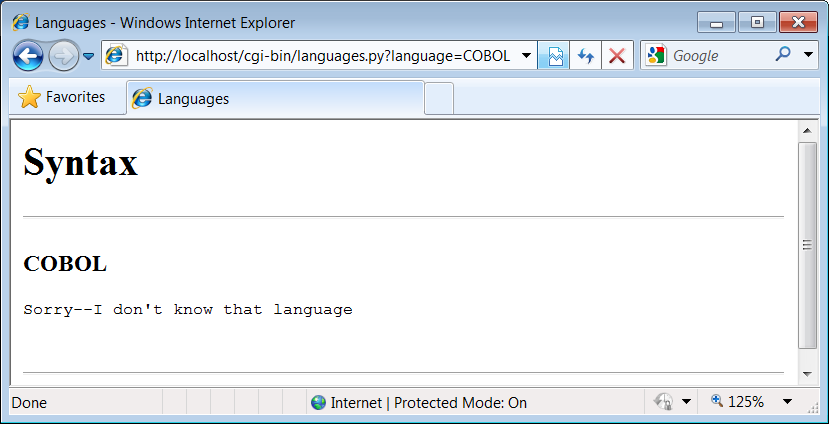
To test this error case interactively, the pull-down list includes an “Other” name, which produces a similar error page reply. Adding code to the script’s table for the COBOL “Hello World” program (and other languages you might recall from your sordid development past) is left as an exercise for the reader.
For more example invocations of our languages.py script, turn back to its
role in the examples near the end of Chapter 13. There, we used it to test script
invocation from raw HTTP and urllib client-side scripts, but you should
now have a better idea of what those scripts invoke on the
server.
Refactoring Code for Maintainability
Let’s step back from coding details for just a moment to gain some design perspective. As we’ve seen, Python code, by and large, automatically lends itself to systems that are easy to read and maintain; it has a simple syntax that cuts much of the clutter of other tools. On the other hand, coding styles and program design can often affect maintainability as much as syntax. For example, the “Hello World” selector pages of the preceding section work as advertised and were very easy and fast to throw together. But as currently coded, the languages selector suffers from substantial maintainability flaws.
Imagine, for instance, that you actually take me up on that challenge posed at the end of the last section, and attempt to add another entry for COBOL. If you add COBOL to the CGI script’s table, you’re only half done: the list of supported languages lives redundantly in two places—in the HTML for the main page as well as in the script’s syntax dictionary. Changing one does not change the other. In fact, this is something I witnessed firsthand when adding “Python2” in this edition (and initially forgot to update the HTML, too). More generally, there are a handful of ways that this program might fail the scrutiny of a rigorous code review:
- Selection list
As just mentioned, the list of languages supported by this program lives in two places: the HTML file and the CGI script’s table, and redundancy is a killer for maintenance work.
- Field name
The field name of the input parameter,
language, is hardcoded into both files as well. You might remember to change it in the other if you change it in one, but you might not.- Form mock-ups
We’ve redundantly coded classes to mock-up form field inputs twice in this chapter already; the “dummy” class here is clearly a mechanism worth reusing.
- HTML code
HTML embedded in and generated by the script is sprinkled throughout the program in
printcall statements, making it difficult to implement broad web page layout changes or delegate web page design to nonprogrammers.
This is a short example, of course, but issues of redundancy and reuse become more acute as your scripts grow larger. As a rule of thumb, if you find yourself changing multiple source files to modify a single behavior, or if you notice that you’ve taken to writing programs by cut-and-paste copying of existing code, it’s probably time to think about more rational program structures. To illustrate coding styles and practices that are friendlier to maintainers, let’s rewrite (that is, refactor) this example to fix all of these weaknesses in a single mutation.
Step 1: Sharing Objects Between Pages—A New Input Form
We can remove the first two maintenance problems listed earlier with a simple transformation; the trick is to generate the main page dynamically, from an executable script, rather than from a precoded HTML file. Within a script, we can import the input field name and selection list values from a common Python module file, shared by the main and reply page generation scripts. Changing the selection list or field name in the common module changes both clients automatically. First, we move shared objects to a common module file, as shown in Example 15-19.
"""
common objects shared by main and reply page scripts;
need change only this file to add a new language.
"""

inputkey = 'language'                            # input parameter name

hellos = {
    'Python':    r" print('Hello World')               ",
    'Python2':   r" print 'Hello World'                ",
    'Perl':      r' print "Hello World
";             ',
    'Tcl':       r' puts "Hello World"                 ',
    'Scheme':    r' (display "Hello World") (newline)  ',
    'SmallTalk': r" 'Hello World' print.               ",
    'Java':      r' System.out.println("Hello World"); ',
    'C':         r' printf("Hello World
");           ',
    'C++':       r' cout << "Hello World" << endl;     ',
    'Basic':     r' 10 PRINT "Hello World"             ',
    'Fortran':   r" print *, 'Hello World'             ",
    'Pascal':    r" WriteLn('Hello World'),            "
}
The module languages2common
contains all the data that needs to agree between
pages: the field name as well as the syntax dictionary. The hellos syntax dictionary isn’t quite HTML
code, but its keys list can be used to generate HTML for the
selection list on the main page dynamically.
Notice that this module is stored in the same cgi-bin directory as the CGI scripts that will use it; this makes import search paths simple—the module will be found in the script’s current working directory, without path configuration. In general, external references in CGI scripts are resolved as follows:
Module imports will be relative to the CGI script’s current working directory (cgi-bin), plus any custom path setting in place when the script runs.
When using minimal URLs, referenced pages and scripts in links and form actions within generated HTML are relative to the prior page’s location as usual. For a CGI script, such minimal URLs are relative to the location of the generating script itself.
Filenames referenced in query parameters and passed into scripts are normally relative to the directory containing the CGI script (cgi-bin). However, on some platforms and servers they may be relative to the web server’s directory instead. For our local web server, the latter case applies.
To prove some of these points to yourself, see and run the CGI script in the examples package identified by URL http://localhost/cgi-bin/test-context.py: when run on Windows with our local web server, it’s able to import modules in its own directory, but filenames are relative to the parent directory where the web server is running (newly created files appear there). Here is this script’s code, if you need to gauge how paths are mapped for your server and platform; this server-specific treatment of relative filenames may not be idea for portability, but this is just one of many details that can vary per server:
import languages2common                      # from my dir
f = open('test-context-output.txt', 'w')     # in .. server dir
f.write(languages2common.inputkey)
f.close()
print('context-type: text/html

Done.
')
Next, in Example 15-20, we recode the main page as an executable script and populate the response HTML with values imported from the common module file in the previous example.
#!/usr/bin/python
"""
generate HTML for main page dynamically from an executable Python script,
not a precoded HTML file; this lets us import the expected input field name
and the selection table values from a common Python module file; changes in
either now only have to be made in one place, the Python module file;
"""

REPLY = """Content-type: text/html

<html><title>Languages2</title>
<body>
<h1>Hello World selector</h1>
<P>Similar to file <a href="../languages.html">languages.html</a>, but
this page is dynamically generated by a Python CGI script, using
selection list and input field names imported from a common Python
module on the server. Only the common module must be maintained as
new languages are added, because it is shared with the reply script.

To see the code that generates this page and the reply, click
<a href="getfile.py?filename=cgi-binlanguages2.py">here</a>,
<a href="getfile.py?filename=cgi-binlanguages2reply.py">here</a>,
<a href="getfile.py?filename=cgi-binlanguages2common.py">here</a>, and
<a href="getfile.py?filename=cgi-bin\formMockup.py">here</a>.</P>
<hr>
<form method=POST action="languages2reply.py">
    <P><B>Select a programming language:</B>
    <P><select name=%s>
        <option>All
        %s
        <option>Other
    </select>
    <P><input type=Submit>
</form>
</body></html>
"""

from languages2common import hellos, inputkey

options = []
for lang in hellos:                        # we could sort keys too
    options.append('<option>' + lang)      # wrap table keys in HTML code
options = '
	'.join(options)
print(REPLY % (inputkey, options))         # field name and values from module
Again, ignore the getfile
hyperlinks in this file for now; we’ll learn what they mean in a
later section. You should notice, though, that the HTML page
definition becomes a printed Python string here (named REPLY), with %s format targets where we plug in values
imported from the common module. It’s otherwise similar to the
original HTML file’s code; when we visit this script’s URL, we get a
similar page, shown in Figure 15-25. But this
time, the page is generated by running a script on the server that
populates the pull-down selection list from the keys list of the
common syntax table. Use your browser’s View Source option to see
the HTML generated; it’s nearly identical to the HTML file in Example 15-17, though the order of
languages in the list may differ due to the behavior of dictionary
keys.

One maintenance note here: the content of the REPLY HTML code template string in Example 15-20 could be loaded from
an external text file so that it could be worked on independently of
the Python program logic. In general, though, external text files
are no more easily changed than Python scripts. In fact, Python
scripts are text files, and this is a major
feature of the language—it’s easy to change the Python scripts of an
installed system on site, without recompile or relink steps.
However, external HTML files could be checked out separately in a
source-control system, if this matters in your environment.
Step 2: A Reusable Form Mock-Up Utility
Moving the languages table and input field name to a module file solves the first two maintenance problems we noted. But if we want to avoid writing a dummy field mock-up class in every CGI script we write, we need to do something more. Again, it’s merely a matter of exploiting the Python module’s affinity for code reuse: let’s move the dummy class to a utility module, as in Example 15-21.
"""
Tools for simulating the result of a cgi.FieldStorage()
call; useful for testing CGI scripts outside the Web
"""

class FieldMockup:                                   # mocked-up input object
    def __init__(self, str):
        self.value = str

def formMockup(**kwargs):                            # pass field=value args
    mockup = {}                                      # multichoice: [value,...]
    for (key, value) in kwargs.items():
        if type(value) != list:                      # simple fields have .value
            mockup[key] = FieldMockup(str(value))
        else:                                        # multichoice have list
            mockup[key] = []                         # to do: file upload fields
            for pick in value:
                mockup[key].append(FieldMockup(pick))
    return mockup

def selftest():
    # use this form if fields can be hardcoded
    form = formMockup(name='Bob', job='hacker', food=['Spam', 'eggs', 'ham'])
    print(form['name'].value)
    print(form['job'].value)
    for item in form['food']:
        print(item.value, end=' ')
    # use real dict if keys are in variables or computed
    print()
    form = {'name': FieldMockup('Brian'), 'age': FieldMockup(38)}    # or dict()
    for key in form.keys():
        print(form[key].value)

if __name__ == '__main__': selftest()
When we place our mock-up class in the module formMockup.py, it automatically becomes a reusable tool and may be
imported by any script we care to write.[64] For readability, the dummy field simulation class has been
renamed FieldMockup here. For
convenience, we’ve also added a formMockup utility function that builds up
an entire form dictionary from passed-in keyword arguments. Assuming
you can hardcode the names of the form to be faked, the mock-up can
be created in a single call. This module includes a self-test
function invoked when the file is run from the command line, which
demonstrates how its exports are used. Here is its test output,
generated by making and querying two form mock-up objects:
C:...PP4EInternetWebcgi-bin> python formMockup.py
Bob
hacker
Spam eggs ham
38
Brian
Since the mock-up now lives in a module, we can reuse it anytime we want to test a CGI script offline. To illustrate, the script in Example 15-22 is a rewrite of the tutor5.py example we saw earlier, using the form mock-up utility to simulate field inputs. If we had planned ahead, we could have tested the script like this without even needing to connect to the Net.
#!/usr/bin/python
"""
run tutor5 logic with formMockup instead of cgi.FieldStorage()
to test: python tutor5_mockup.py > temp.html, and open temp.html
"""

from formMockup import formMockup
form = formMockup(name='Bob',
                  shoesize='Small',
                  language=['Python', 'C++', 'HTML'],
                  comment='ni, Ni, NI')

# rest same as original, less form assignment
Running this script from a simple command line shows us what the HTML response stream will look like:
C:...PP4EInternetWebcgi-bin> python tutor5_mockup.py
Content-type: text/html

<TITLE>tutor5.py</TITLE>
<H1>Greetings</H1>
<HR>
<H4>Your name is Bob</H4>
<H4>You wear rather Small shoes</H4>
<H4>Your current job: (unknown)</H4>
<H4>You program in Python and C++ and HTML</H4>
<H4>You also said:</H4>
<P>ni, Ni, NI</P>
<HR>
Running it live yields the page in Figure 15-26. Field inputs are hardcoded, similar in spirit to the tutor5 extension that embedded input parameters at the end of hyperlink URLs. Here, they come from form mock-up objects created in the reply script that cannot be changed without editing the script. Because Python code runs immediately, though, modifying a Python script during the debug cycle goes as quickly as you can type.

Step 3: Putting It All Together—A New Reply Script
There’s one last step on our path to software maintenance nirvana: we must recode the reply page script itself to import data that was factored out to the common module and import the reusable form mock-up module’s tools. While we’re at it, we move code into functions (in case we ever put things in this file that we’d like to import in another script), and all HTML code to triple-quoted string blocks. The result is Example 15-23. Changing HTML is generally easier when it has been isolated in single strings like this, instead of being sprinkled throughout a program.
#!/usr/bin/python
"""
Same, but for easier maintenance, use HTML template strings, get the
Language table and input key from common module file, and get reusable
form field mockup utilities module for testing.
"""

import cgi, sys
from formMockup import FieldMockup                   # input field simulator
from languages2common import hellos, inputkey        # get common table, name
debugme = False

hdrhtml = """Content-type: text/html

<TITLE>Languages</TITLE>
<H1>Syntax</H1><HR>"""

langhtml = """
<H3>%s</H3><P><PRE>
%s
</PRE></P><BR>"""

def showHello(form):                                 # HTML for one language
    choice = form[inputkey].value                    # escape lang name too
    try:
        print(langhtml % (cgi.escape(choice),
                          cgi.escape(hellos[choice])))
    except KeyError:
        print(langhtml % (cgi.escape(choice),
                         "Sorry--I don't know that language"))

def main():
    if debugme:
        form = {inputkey: FieldMockup(sys.argv[1])}  # name on cmd line
    else:
        form = cgi.FieldStorage()                    # parse real inputs

    print(hdrhtml)
    if not inputkey in form or form[inputkey].value == 'All':
        for lang in hellos.keys():
            mock = {inputkey: FieldMockup(lang)}     # not dict(n=v) here!
            showHello(mock)
    else:
        showHello(form)
    print('<HR>')

if __name__ == '__main__': main()
When global debugme is set
to True, the script can be tested
offline from a simple command line as before:
C:...PP4EInternetWebcgi-bin> python languages2reply.py Python
Content-type: text/html

<TITLE>Languages</TITLE>
<H1>Syntax</H1><HR>

<H3>Python</H3><P><PRE>
 print('Hello World')
</PRE></P><BR>
<HR>
When run online using either the page in Figure 15-25 or an explicitly typed URL with query parameters, we get the same reply pages we saw for the original version of this example (we won’t repeat them here again). This transformation changed the program’s architecture, not its user interface. Architecturally, though, both the input and reply pages are now created by Python CGI scripts, not static HTML files.
Most of the code changes in this version of the reply script are straightforward. If you test-drive these pages, the only differences you’ll find are the URLs at the top of your browser (they’re different files, after all), extra blank lines in the generated HTML (ignored by the browser), and a potentially different ordering of language names in the main page’s pull-down selection list.
Again, this selection list ordering difference arises because
this version relies on the order of the Python dictionary’s keys
list, not on a hardcoded list in an HTML file. Dictionaries, you’ll
recall, arbitrarily order entries for fast fetches; if you want the
selection list to be more predictable, simply sort the keys list
before iterating over it using the list sort method or the sorted function introduced in Python 2.4:
  for lang in sorted(hellos):               # dict iterator instead of .keys()
mock = {inputkey: FieldMockup(lang)}More on HTML and URL Escapes
Perhaps the subtlest change in the last section’s rewrite is that, for
robustness, this version’s reply script (Example 15-23) also calls cgi.escape for the language
name, not just for the language’s code snippet.
This wasn’t required in languages2.py (Example 15-20) for the known
language names in our selection list table. However, it is not
impossible that someone could pass the script a language name with an
embedded HTML character as a query parameter. For example, a URL such
as:
http://localhost/cgi-bin/languages2reply.py?language=a<b
embeds a < in the language
name parameter (the name is a<b). When submitted, this version
uses cgi.escape to
properly translate the < for use
in the reply HTML, according to the standard HTML escape conventions
discussed earlier; here is the reply text generated:
<TITLE>Languages</TITLE> <H1>Syntax</H1><HR> <H3>a<b</H3><P><PRE> Sorry--I don't know that language </PRE></P><BR> <HR>
The original version in Example 15-18 doesn’t escape the
language name, such that the embedded <b is interpreted as an HTML tag (which
makes the rest of the page render in bold font!). As you can probably
tell by now, text escapes are pervasive in CGI scripting—even text
that you may think is safe must generally be escaped before being
inserted into the HTML code in the reply stream.
In fact, because the Web is a text-based medium that combines multiple language syntaxes, multiple formatting rules may apply: one for URLs and another for HTML. We met HTML escapes earlier in this chapter; URLs, and combinations of HTML and URLs, merit a few additional words.
URL Escape Code Conventions
Notice that in the prior section, although it’s wrong to embed
an unescaped < in the HTML
code reply, it’s perfectly all right to include it literally in the
URL string used to trigger the reply. In fact, HTML and URLs define
completely different characters as special. For instance, although
& must be escaped as & inside HTML code, we have to use
other escaping schemes to code a literal & within a URL string (where it
normally separates parameters). To pass a language name like
a&b to our script, we have to
type the following URL:
http://localhost/cgi-bin/languages2reply.py?language=a%26b
Here, %26 represents
&—the & is replaced with a % followed by the hexadecimal value (0x26)
of its ASCII code value (38). Similarly, as we suggested at the end
of Chapter 13, to name C++ as a query
parameter in an explicit URL, +
must be escaped as %2b:
http://localhost/cgi-bin/languages2reply.py?language=C%2b%2b
Sending C++ unescaped will
not work, because + is special in
URL syntax—it represents a space. By URL standards, most
nonalphanumeric characters are supposed to be translated to such
escape sequences, and spaces are replaced by + signs. Technically, this convention is
known as the application/x-www-form-urlencoded
query string format, and it’s part of the magic behind those bizarre
URLs you often see at the top of your browser as you surf the
Web.
Python HTML and URL Escape Tools
If you’re like me, you probably don’t have the hexadecimal
value of the ASCII code for &
committed to memory (though Python’s hex(ord(c)) can help). Luckily, Python
provides tools that automatically implement URL escapes, just as
cgi.escape does for HTML escapes.
The main thing to keep in mind is that HTML code and URL strings are
written with entirely different syntax, and so employ distinct
escaping conventions. Web users don’t generally care, unless they
need to type complex URLs explicitly—browsers handle most escape
code details internally. But if you write scripts that must generate
HTML or URLs, you need to be careful to escape characters that are
reserved in either syntax.
Because HTML and URLs have different syntaxes, Python provides two distinct sets of tools for escaping their text. In the standard Python library:
cgi.escapeescapes text to be embedded in HTML.urllib.parse.quoteandquote_plusescape text to be embedded in URLs.
The urllib.parse module
also has tools for undoing URL escapes (unquote, unquote_plus), but HTML escapes are undone
during HTML parsing at large (e.g., by Python’s html.parser module). To illustrate the two
escape conventions and tools, let’s apply each tool set to a few
simple examples.
Note
Somewhat inexplicably, Python 3.2 developers have opted to
move and rename the cgi.escape
function used throughout this book to html.escape, to make use of its
longstanding original name deprecated, and to alter its quoting
behavior slightly. This is despite the fact that this function has
been around for ages and is used in almost every Python CGI-based
web script: a glaring case of a small group’s notion of aesthetics
trouncing widespread practice in 3.X and breaking working code in
the process. You may need to use the new html.escape name in a future Python
version; that is, unless Python users complain loudly enough (yes,
hint!).
Escaping HTML Code
As we saw earlier, cgi.escape translates code for inclusion
within HTML. We normally call this utility from a CGI script, but
it’s just as easy to explore its behavior interactively:
>>>import cgi>>>cgi.escape('a < b > c & d "spam"', 1)'a < b > c & d "spam"' >>>s = cgi.escape("1<2 <b>hello</b>")>>>s'1<2 <b>hello</b>'
Python’s cgi module
automatically converts characters that are special in HTML syntax
according to the HTML convention. It translates <, >, and & with an extra true argument,
", into escape sequences of the
form &X;, where the X is a mnemonic that denotes the original
character. For instance, <
stands for the “less than” operator (<) and & denotes a literal ampersand
(&).
There is no unescaping tool in the CGI
module, because HTML escape code sequences are recognized within the
context of an HTML parser, like the one used by your web browser
when a page is downloaded. Python comes with a full HTML parser,
too, in the form of the standard module html.parser. We won’t go into details on
the HTML parsing tools here (they’re covered in Chapter 19 in conjunction with text processing),
but to illustrate how escape codes are eventually undone, here is
the HTML parser module at work reading back the preceding
output:
>>>import cgi, html.parser>>>s = cgi.escape("1<2 <b>hello</b>")>>>s'1<2 <b>hello</b>' >>> >>>html.parser.HTMLParser().unescape(s)'1<2 <b>hello</b>'
This uses a utility method on the HTML parser class to unquote. In Chapter 19, we’ll see that using this class for more substantial work involves subclassing to override methods run as callbacks during the parse upon detection of tags, data, entities, and more. For more on full-blown HTML parsing, watch for the rest of this story in Chapter 19.
Escaping URLs
By contrast, URLs reserve other characters as special and must
adhere to different escape conventions. As a result, we use
different Python library tools to escape URLs for transmission.
Python’s urllib.parse module
provides two tools that do the translation work for us: quote, which implements the standard
%XX hexadecimal URL escape code
sequences for most nonalphanumeric characters, and quote_plus, which additionally translates
spaces to + signs. The urllib.parse module also provides
functions for unescaping quoted characters in a URL string: unquote undoes %XX escapes, and unquote_plus also changes plus signs back
to spaces. Here is the module at work, at the interactive
prompt:
>>>import urllib.parse>>>urllib.parse.quote("a & b #! c")'a%20%26%20b%20%23%21%20c' >>>urllib.parse.quote_plus("C:stuffspam.txt")'C%3A%5Cstuff%5Cspam.txt' >>>x = urllib.parse.quote_plus("a & b #! c")>>>x'a+%26+b+%23%21+c' >>>urllib.parse.unquote_plus(x)'a & b #! c'
URL escape sequences embed the hexadecimal values of nonsafe
characters following a % sign
(this is usually their ASCII codes). In urllib.parse, nonsafe characters are
usually taken to include everything except letters, digits, and a
handful of safe special characters (any in '_.-'), but the two tools differ on
forward slashes, and you can extend the set of safe characters by
passing an extra string argument to the quote calls to customize the
translations:
>>>urllib.parse.quote_plus("uploads/index.txt")'uploads%2Findex.txt' >>>urllib.parse.quote("uploads/index.txt")'uploads/index.txt' >>> >>>urllib.parse.quote_plus("uploads/index.txt", '/')'uploads/index.txt' >>>urllib.parse.quote("uploads/index.txt", '/')'uploads/index.txt' >>>urllib.parse.quote("uploads/index.txt", '')'uploads%2Findex.txt' >>> >>>urllib.parse.quote_plus("uploadsindex.txt")'uploads%5Cindex.txt' >>>urllib.parse.quote("uploadsindex.txt")'uploads%5Cindex.txt' >>>urllib.parse.quote_plus("uploadsindex.txt", '')'uploads\index.txt'
Note that Python’s cgi
module also translates URL escape sequences back to their original
characters and changes + signs to
spaces during the process of extracting input information.
Internally, cgi.FieldStorage
automatically calls urllib.parse
tools which unquote if needed to parse and unescape parameters
passed at the end of URLs. The upshot is that CGI scripts get back
the original, unescaped URL strings, and don’t need to unquote
values on their own. As we’ve seen, CGI scripts don’t even need to
know that inputs came from a URL at all.
Escaping URLs Embedded in HTML Code
We’ve seen how to escape text inserted into both HTML and
URLs. But what do we do for URLs inside HTML? That is, how do we
escape when we generate and embed text inside a URL, which is itself
embedded inside generated HTML code? Some of our earlier examples
used hardcoded URLs with appended input parameters inside <A HREF>
hyperlink tags; the file languages2.py, for
instance, prints HTML that includes a URL:
<a href="getfile.py?filename=cgi-binlanguages2.py">
Because the URL here is embedded in HTML, it must at least be
escaped according to HTML conventions (e.g., any < characters must become <), and any spaces should be
translated to + signs per URL
conventions. A cgi.escape(url)
call followed by the string url.replace("
", "+") would take us this far, and would probably suffice
for most cases.
That approach is not quite enough in general, though, because
HTML escaping conventions are not the same as URL conventions. To
robustly escape URLs embedded in HTML code, you should instead call
urllib.parse.quote_plus on the
URL string, or at least most of its components, before adding it to
the HTML text. The escaped result also satisfies HTML escape
conventions, because urllib.parse
translates more characters than cgi.escape, and the % in URL escapes is not special to
HTML.
HTML and URL conflicts: &
But there is one more astonishingly subtle (and thankfully rare) wrinkle:
you may also have to be careful with & characters in URL strings that are
embedded in HTML code (e.g., within <A> hyperlink tags). The & symbol is both a query parameter
separator in URLs (?a=1&b=2) and the start of escape
codes in HTML (<).
Consequently, there is a potential for collision if a query
parameter name happens to be the same as an HTML escape sequence
code. The query parameter name amp, for instance, that shows up as
&=1 in parameters two
and beyond on the URL may be treated as an HTML escape by some
HTML parsers, and translated to &=1.
Even if parts of the URL string are URL-escaped, when more
than one parameter is separated by a &, the & separator might also have to be
escaped as & according
to HTML conventions. To see why, consider the following HTML
hyperlink tag with query parameter names name, job, amp, sect, and lt:
<A HREF="file.py?name=a&job=b&=c§=d<=e">hello</a>
When rendered in most browsers tested, including Internet
Explorer on Windows 7, this URL link winds up looking incorrectly
like this (the S character in
the first of these is really a non-ASCII section marker):
file.py?name=a&job=b&=cS=d<=e             result in IE
file.py?name=a&job=b&=c%A7=d%3C=e         result in Chrome (0x3C is <)
The first two parameters are retained as expected (name=a, job=b), because name is not preceded with an & and &job is not recognized as a valid
HTML character escape code. However, the &, §, and < parts are interpreted as special
characters because they do name valid HTML escape codes, even
without a trailing semicolon.
To see this for yourself, open the example package’s
test-escapes.html file in
your browser, and highlight or select its link; the query names
may be taken as HTML escapes. This text appears to parse
correctly in Python’s own HTML parser module described earlier
(unless the parts in question also end in a semicolon); that might
help for replies fetched manually with urllib.request, but not when rendered in
browsers:
>>>from html.parser import HTMLParser>>>html = open('test-escapes.html').read()>>>HTMLParser().unescape(html)'<HTML> <A HREF="file.py?name=a&job=b&=c§=d<=e">hello</a> </HTML>'
Avoiding conflicts
What to do then? To make this work as expected in all cases,
the & separators should
generally be escaped if your parameter names may clash with an
HTML escape code:
<A HREF="file.py?name=a&job=b&amp=c&sect=d&lt=e">hello</a>
Browsers render this fully escaped link as expected (open test-escapes2.html to test), and Python’s HTML parser does the right thing as well:
file.py?name=a&job=b&=c§=d<=e result in both IE and Chrome >>>h = '<A HREF="file.py?name=a&job=b&amp=c&sect=d&lt=e">hello</a>'>>>HTMLParser().unescape(h)'<A HREF="file.py?name=a&job=b&=c§=d<=e">hello</a>'
Because of this conflict between HTML and URL syntax, most
server tools (including Python’s urlib.parse query-parameter parsing
tools employed by Python’s cgi
module) also allow a semicolon to be used as a separator instead
of &. The following link,
for example, works the same as the fully escaped URL, but does not
require an extra HTML escaping step (at least not for the ;):
file.py?name=a;job=b;amp=c;sect=d;lt=e
Python’s html.parser
unescape tool allows the semicolons to pass unchanged, too, simply
because they are not significant in HTML code. To fully test all
three of these link forms for yourself at once, place them in an
HTML file, open the file in your browser using its
http://localhost/badlink.html URL, and view
the links when followed. The HTML file in Example 15-24 will
suffice.
<HTML><BODY> <p><A HREF= "cgi-bin/badlink.py?name=a&job=b&=c§=d<=e">unescaped</a> <p><A HREF= "cgi-bin/badlink.py?name=a&job=b&amp=c&sect=d&lt=e">escaped</a> <p><A HREF= "cgi-bin/badlink.py?name=a;job=b;amp=c;sect=d;lt=e">alternative</a> </BODY></HTML>
When these links are clicked, they invoke the simple CGI script in Example 15-25. This script displays the inputs sent from the client on the standard error stream to avoid any additional translations (for our locally running web server in Example 15-1, this routes the printed text to the server’s console window).
import cgi, sys
form = cgi.FieldStorage()      # print all inputs to stderr; stodout=reply page
for name in form.keys():
    print('[%s:%s]' % (name, form[name].value), end=' ', file=sys.stderr)
Following is the (edited for space) output we get in our local Python-coded web server’s console window for following each of the three links in the HTML page in turn using Internet Explorer. The second and third yield the correct parameters set on the server as a result of the HTML escaping or URL conventions employed, but the accidental HTML escapes cause serious issues for the first unescaped link—the client’s HTML parser translates these in unintended ways (results are similar under Chrome, but the first link displays the non-ASCII section mark character with a different escape sequence):
mark-VAIO - - [16/Jun/2010 10:43:24] b'[:cxa7=d<=e] [job:b] [name:a] '
mark-VAIO - - [16/Jun/2010 10:43:24] CGI script exited OK

mark-VAIO - - [16/Jun/2010 10:43:27] b'[amp:c] [job:b] [lt:e] [name:a] [sect:d]'
mark-VAIO - - [16/Jun/2010 10:43:27] CGI script exited OK

mark-VAIO - - [16/Jun/2010 10:43:30] b'[amp:c] [job:b] [lt:e] [name:a] [sect:d]'
mark-VAIO - - [16/Jun/2010 10:43:30] CGI script exited OK
The moral of this story is that unless you can be sure that
the names of all but the leftmost URL query parameters embedded in
HTML are not the same as the name of any HTML character escape
code like amp, you should
generally either use a semicolon as a separator, if supported by
your tools, or run the entire URL through cgi.escape after escaping its parameter
names and values with urllib.parse.quote_plus:
>>>link = 'file.py?name=a&job=b&=c§=d<=e'# escape for HTML >>>import cgi>>>cgi.escape(link)'file.py?name=a&job=b&amp=c&sect=d&lt=e' # escape for URL >>>import urllib.parse>>>elink = urllib.parse.quote_plus(link)>>>elink'file.py%3Fname%3Da%26job%3Db%26amp%3Dc%26sect%3Dd%26lt%3De' # URL satisfies HTML too: same >>>cgi.escape(elink) 'file.py%3Fname%3Da%26job%3Db%26amp%3Dc%26sect%3Dd%26lt%3De'
Having said that, I should add that some examples in this
book do not escape & URL
separators embedded within HTML simply because their URL parameter
names are known not to conflict with HTML escapes. In fact, this
concern is likely to be rare in practice, since your program
usually controls the set of parameter names it expects. This is
not, however, the most general solution, especially if parameter
names may be driven by a dynamic database; when in doubt, escape
much and often.
Transferring Files to Clients and Servers
It’s time to explain a bit of HTML code that’s been lurking in the shadows. Did
you notice those hyperlinks on the language selector examples’ main
pages for showing the CGI script’s source code (the links I told you
to ignore)? Normally, we can’t see such script source code, because
accessing a CGI script makes it execute—we can see only its HTML
output, generated to make the new page. The script in Example 15-26, referenced by a
hyperlink in the main language.html
page, works around that by opening the source file and sending its
text as part of the HTML response. The text is marked with <PRE> as preformatted text and is
escaped for transmission inside HTML with cgi.escape.
#!/usr/bin/python
"Display languages.py script code without running it."

import cgi
filename = 'cgi-bin/languages.py'

print('Content-type: text/html
')          # wrap up in HTML
print('<TITLE>Languages</TITLE>')
print("<H1>Source code: '%s'</H1>" % filename)
print('<HR><PRE>')
print(cgi.escape(open(filename).read()))    # decode per platform default
print('</PRE><HR>')
Here again, the filename is
relative to the server’s directory for our web server on Windows (see
the prior discussion of this, and delete the cgi-bin portion of its path on other
platforms). When we visit this script on the Web via the first source
hyperlink in Example 15-17 or
a manually typed URL, the script delivers a response to the client
that includes the text of the CGI script source file. It’s captured in
Figure 15-27.
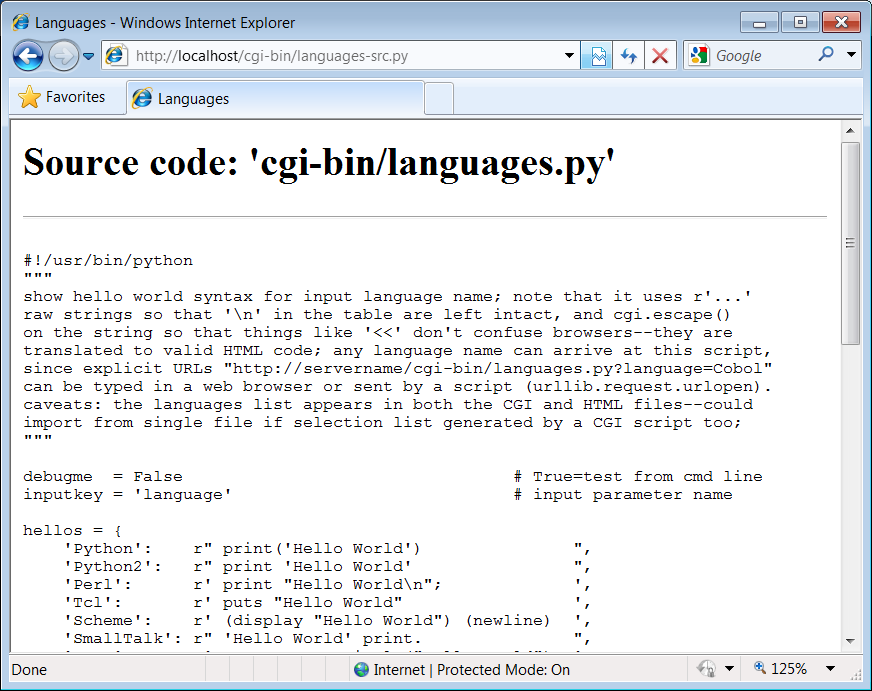
Note that here, too, it’s crucial to format the text of the file
with cgi.escape, because it is
embedded in the HTML code of the reply. If we don’t, any characters in
the text that mean something in HTML code are interpreted as HTML
tags. For example, the C++ <
operator character within this file’s text may yield bizarre results
if not properly escaped. The cgi.escape utility converts it to the
standard sequence < for safe
embedding.
Displaying Arbitrary Server Files on the Client
Almost immediately after writing the languages source code
viewer script in the preceding example, it occurred to me that it
wouldn’t be much more work, and would be much more useful, to write
a generic version—one that could use a passed-in filename to display
any file on the site. It’s a straightforward
mutation on the server side; we merely need to allow a filename to
be passed in as an input. The getfile.py Python
script in Example 15-27
implements this generalization. It assumes the filename is either
typed into a web page form or appended to the end of the URL as a
parameter. Remember that Python’s cgi module handles both cases
transparently, so there is no code in this script that notices any
difference.
#!/usr/bin/python
"""
##################################################################################
Display any CGI (or other) server-side file without running it. The filename can
be passed in a URL param or form field (use "localhost" as the server if local):

    http://servername/cgi-bin/getfile.py?filename=somefile.html
    http://servername/cgi-bin/getfile.py?filename=cgi-binsomefile.py
    http://servername/cgi-bin/getfile.py?filename=cgi-bin%2Fsomefile.py

Users can cut-and-paste or "View Source" to save file locally.  On IE, running the
text/plain version (formatted=False) sometimes pops up Notepad, but end-lines are
not always in DOS format;  Netscape shows the text correctly in the browser page
instead.  Sending the file in text/HTML mode works on both browsers--text is
displayed in the browser response page correctly. We also check the filename here
to try to avoid showing private files; this may or may not prevent access to such
files in general: don't install this script if you can't otherwise secure source!
##################################################################################
"""

import cgi, os, sys
formatted = True                                  # True=wrap text in HTML
privates  = ['PyMailCgi/cgi-bin/secret.py']       # don't show these

try:
    samefile = os.path.samefile                   # checks device, inode numbers
except:
    def samefile(path1, path2):                   # not available on Windows
        apath1 = os.path.abspath(path1).lower()   # do close approximation
        apath2 = os.path.abspath(path2).lower()   # normalizes path, same case
        return apath1 == apath2

html = """
<html><title>Getfile response</title>
<h1>Source code for: '%s'</h1>
<hr>
<pre>%s</pre>
<hr></html>"""

def restricted(filename):
    for path in privates:
        if samefile(path, filename):           # unify all paths by os.stat
            return True                        # else returns None=false

try:
    form = cgi.FieldStorage()
    filename = form['filename'].value          # URL param or form field
except:
    filename = 'cgi-bingetfile.py'            # else default filename

try:
    assert not restricted(filename)            # load unless private
    filetext = open(filename).read()           # platform unicode encoding
except AssertionError:
    filetext = '(File access denied)'
except:
    filetext = '(Error opening file: %s)' % sys.exc_info()[1]

if not formatted:
    print('Content-type: text/plain
')        # send plain text
    print(filetext)                            # works on NS, not IE?
else:
    print('Content-type: text/html
')         # wrap up in HTML
    print(html % (filename, cgi.escape(filetext)))
This Python server-side script simply extracts the filename
from the parsed CGI inputs object and reads and prints the text of
the file to send it to the client browser. Depending on the formatted global variable setting, it
sends the file in either plain text mode (using text/plain in the response header) or
wrapped up in an HTML page definition (text/html).
Both modes (and others) work in general under most browsers, but Internet Explorer doesn’t handle the plain text mode as gracefully as Netscape does—during testing, it popped up the Notepad text editor to view the downloaded text, but end-of-line characters in Unix format made the file appear as one long line. (Netscape instead displays the text correctly in the body of the response web page itself.) HTML display mode works more portably with current browsers. More on this script’s restricted file logic in a moment.
Let’s launch this script by typing its URL at the top of a browser, along with a desired filename appended after the script’s name. Figure 15-28 shows the page we get by visiting the following URL (the second source link in the language selector page of Example 15-17 has a similar effect but a different file):
http://localhost/cgi-bin/getfile.py?filename=cgi-binlanguages-src.py
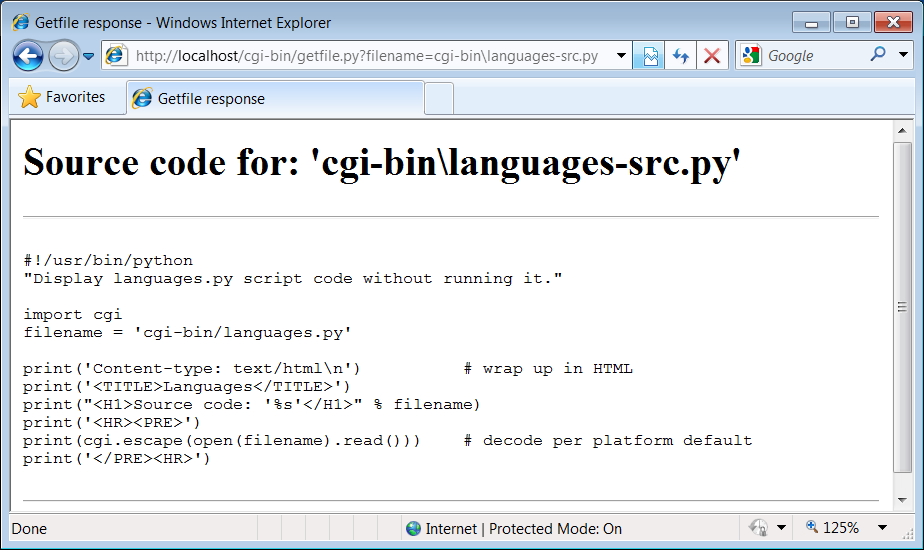
The body of this page shows the text of the server-side file whose name we passed at the end of the URL; once it arrives, we can view its text, cut-and-paste to save it in a file on the client, and so on. In fact, now that we have this generalized source code viewer, we could replace the hyperlink to the script languages-src.py in language.html, with a URL of this form (I included both for illustration):
http://localhost/cgi-bin/getfile.py?filename=cgi-binlanguages.py
Subtle thing: notice that the query parameter in this URL and
others in this book use a backslash as the Windows directory
separator. On Windows, and using both the local Python web server of
Example 15-1 and Internet
Explorer, we can also use the two URL-escaped forms at the start of
the following, but the literal forward slash of the last in
following fails (in URL escapes, %5C is and %2F is /):
http://localhost/cgi-bin/getfile.py?filename=cgi-bin%5Clanguages.py     OK too
http://localhost/cgi-bin/getfile.py?filename=cgi-bin%2Flanguages.py     OK too
http://localhost/cgi-bin/getfile.py?filename=cgi-bin/languages.py       fails
This reflects a change since the prior edition of this book
(which used the last of these for portability), and may or may not
be ideal behavior (though like working directory contexts, this is
one of a set of server and platform differences you’re likely to
encounter when working on the Web). It seems to stem from the fact
that the urllib.parse module’s
quote considers / safe, but quote_plus no longer does. If you care
about URL portability in this context, the second of the preceding
forms may be better, though arguably cryptic to remember if you have
to type it manually (escaping tools can automate this). If not, you
may have to double-up on backslashes to avoid clashes with other
string escapes, because of the way URL parameter data is handled;
see the links to this script in Example 15-20 for an example
involving f.
From a higher perspective, URLs like these are really direct calls (albeit across the Web) to our Python script, with filename parameters passed explicitly—we’re using the script much like a subroutine located elsewhere in cyberspace which returns the text of a file we wish to view. As we’ve seen, parameters passed in URLs are treated the same as field inputs in forms; for convenience, let’s also write a simple web page that allows the desired file to be typed directly into a form, as shown in Example 15-28.
<html><title>Getfile: download page</title>
<body>
<form method=get action="cgi-bin/getfile.py">
  <h1>Type name of server file to be viewed</h1>
  <p><input type=text size=50 name=filename>
  <p><input type=submit value=Download>
</form>
<hr><a href="cgi-bin/getfile.py?filename=cgi-bingetfile.py">View script code</a>
</body></html>
Figure 15-29 shows the page we receive when we visit this file’s URL. We need to type only the filename in this page, not the full CGI script address; notice that I can use forward slashes here because the browser will escape on transmission and Python’s open allows either type of slash on Windows (in query parameters created manually, it’s up to coders or generators to do the right thing).

When we press this page’s Download button to submit the form,
the filename is transmitted to the server, and we get back the same
page as before, when the filename was appended to the URL (it’s the
same as Figure 15-28, albeit
with a different directory separator slash). In fact, the filename
will be appended to the URL here, too; the
get method in the form’s HTML
instructs the browser to append the filename to the URL, exactly as
if we had done so manually. It shows up at the end of the URL in the
response page’s address field, even though we really typed it into a
form. Clicking the link at the bottom of Figure 15-29 opens the file-getter
script’s source in the same way, though the URL is
explicit.[65]
Handling private files and errors
As long as CGI scripts have permission to open the desired server-side file, this script can be used to view and locally save any file on the server. For instance, Figure 15-30 shows the page we’re served after asking for the file path PyMailCgi/pymailcgi.html—an HTML text file in another application’s subdirectory, nested within the parent directory of this script (we explore PyMailCGI in the next chapter). Users can specify both relative and absolute paths to reach a file—any path syntax the server understands will do.
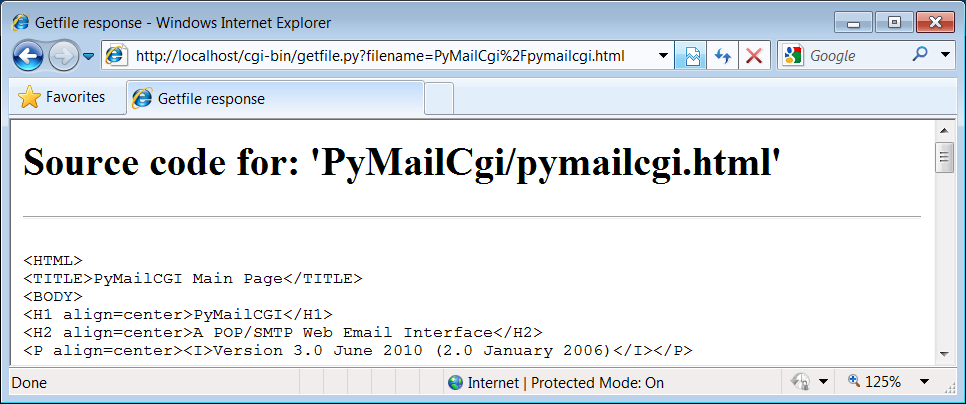
More generally, this script will display any file path for which the username under which the CGI script runs has read access. On some servers, this is often the user “nobody”—a predefined username with limited permissions. Just about every server-side file used in web applications will be accessible, though, or else they couldn’t be referenced from browsers in the first place. When running our local web server, every file on the computer can be inspected: C:UsersmarkStuffWebsitespublic_htmlindex.html works fine when entered in the form of Figure 15-29 on my laptop, for example.
That makes for a flexible tool, but it’s also potentially dangerous if you are running a server on a remote machine. What if we don’t want users to be able to view some files on the server? For example, in the next chapter, we will implement an encryption module for email account passwords. On our server, it is in fact addressable as PyMailCgi/cgi-bin/secret.py. Allowing users to view that module’s source code would make encrypted passwords shipped over the Net much more vulnerable to cracking.
To minimize this potential, the getfile script keeps a list, privates, of restricted filenames, and
uses the os.path.samefile
built-in to check whether a requested filename path points to one
of the names on privates. The
samefile call checks to see
whether the os.stat built-in
returns the same identifying information (device and inode
numbers) for both file paths. As a result, pathnames that look
different syntactically but reference the same file are treated as
identical. For example, on the server used for this book’s second
edition, the following paths to the encryptor module were
different strings, but yielded a true result from os.path.samefile:
../PyMailCgi/secret.py
/home/crew/lutz/public_html/PyMailCgi/secret.py
Unfortunately, the os.path.samefile call is supported on Unix, Linux, and Macs, but not
on Windows. To emulate its behavior in Windows, we expand file
paths to be absolute, convert to a common case, and compare (I
shortened paths in the following with ... for display here):
>>>import os>>>os.path.samefileAttributeError: 'module' object has no attribute 'samefile' >>>os.getcwd()'C:\...\PP4E\dev\Examples\PP4E\Internet\Web' >>> >>>x = os.path.abspath('../Web/PYMailCgi/cgi-bin/secret.py').lower()>>>y = os.path.abspath('PyMailCgi/cgi-bin/secret.py').lower()>>>z = os.path.abspath('./PYMailCGI/cgi-bin/../cgi-bin/SECRET.py').lower()>>>x'c:\...\pp4e\dev\examples\pp4e\internet\web\pymailcgi\cgi-bin\secret.py' >>>y'c:\...\pp4e\dev\examples\pp4e\internet\web\pymailcgi\cgi-bin\secret.py' >>>z'c:\...\pp4e\dev\examples\pp4e\internet\web\pymailcgi\cgi-bin\secret.py' >>> >>>x == y, y == z(True, True)
Accessing any of the three paths expanded here generates an error page like that in Figure 15-31. Notice how the names of secret files are global data in this module, on the assumption that they pertain to files viewable across an entire site; though we could allow for customization per site, changing the script’s globals per site is likely just as convenient as changing a per-site customization files.
Also notice that bona fide file errors are handled
differently. Permission problems and attempts to access
nonexistent files, for example, are trapped by a different
exception handler clause, and they display the exception’s
message—fetched using Python’s sys.exc_info—to give additional context.
Figure 15-32 shows one such error
page.
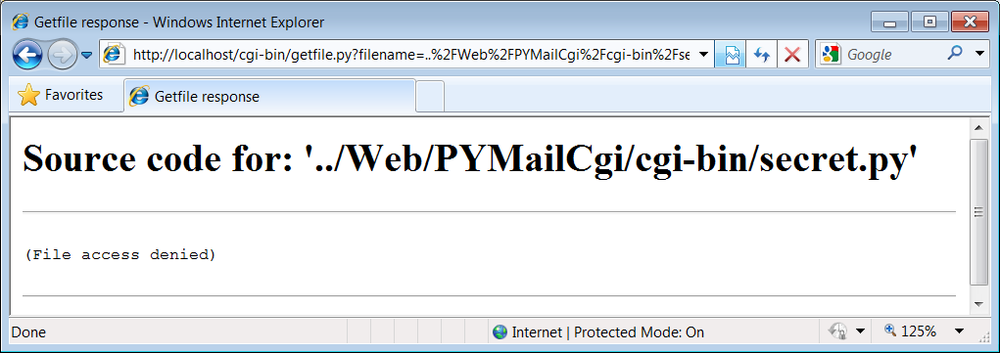

As a general rule of thumb, file-processing exceptions
should always be reported in detail, especially during script
debugging. If we catch such exceptions in our scripts, it’s up to
us to display the details (assigning sys.stderr to sys.stdout won’t help if Python doesn’t
print an error message). The current exception’s type, data, and
traceback objects are always available in the sys module for manual display.
Warning
Do not install the getfile.py script if you truly wish to keep your files private! The private files list check it uses attempts to prevent the encryption module from being viewed directly with this script, but it may or may not handle all possible attempts, especially on Windows. This book isn’t about security, so we won’t go into further details here, except to say that on the Internet, a little paranoia is often a good thing. Especially for systems installed on the general Internet at large, you should generally assume that the worst case scenario might eventually happen.
Uploading Client Files to the Server
The getfile script lets us
view server files on the client, but in some sense, it
is a general-purpose file download tool. Although not as direct as
fetching a file by FTP or over raw sockets, it serves similar
purposes. Users of the script can either cut-and-paste the displayed
code right off the web page or use their browser’s View Source
option to view and cut. As described earlier, scripts that contact
the script with urllib can also
extract the file’s text with Python’s HTML parser module.
But what about going the other way—uploading a file from the client machine to the server? For instance, suppose you are writing a web-based email system, and you need a way to allow users to upload mail attachments. This is not an entirely hypothetical scenario; we will actually implement this idea in the next chapter, when we develop the PyMailCGI webmail site.
As we saw in Chapter 13, uploads are easy enough to accomplish with a client-side script that uses Python’s FTP support module. Yet such a solution doesn’t really apply in the context of a web browser; we can’t usually ask all of our program’s clients to start up a Python FTP script in another window to accomplish an upload. Moreover, there is no simple way for the server-side script to request the upload explicitly, unless an FTP server happens to be running on the client machine (not at all the usual case). Users can email files separately, but this can be inconvenient, especially for email attachments.
So is there no way to write a web-based program that lets its
users upload files to a common server? In fact, there is, though it
has more to do with HTML than with Python itself. HTML <input> tags also support a type=file option, which produces an input
field, along with a button that pops up a file-selection dialog. The
name of the client-side file to be uploaded can either be typed into
the control or selected with the pop-up dialog. To demonstrate, the
HTML file in Example 15-29
defines a page that allows any client-side file to be selected and
uploaded to the server-side script named in the form’s action option.
<html><title>Putfile: upload page</title>
<body>
<form enctype="multipart/form-data"
      method=post
      action="cgi-bin/putfile.py">
  <h1>Select client file to be uploaded</h1>
  <p><input type=file size=50 name=clientfile>
  <p><input type=submit value=Upload>
</form>
<hr><a href="cgi-bin/getfile.py?filename=cgi-binputfile.py">View script code</a>
</body></html>
One constraint worth noting: forms that use file type inputs should also specify a
multipart/form-data encoding type
and the post submission method,
as shown in this file; get-style
URLs don’t work for uploading files (adding their contents to the
end of the URL doesn’t make sense). When we visit this HTML file,
the page shown in Figure 15-33 is
delivered. Pressing its Browse button opens a standard
file-selection dialog, while Upload sends the file.

On the client side, when we press this page’s Upload button,
the browser opens and reads the selected file and packages its
contents with the rest of the form’s input fields (if any). When
this information reaches the server, the Python script named in the
form action tag is run as always,
as listed in Example 15-30.
#!/usr/bin/python
"""
##################################################################################
extract file uploaded by HTTP from web browser;  users visit putfile.html to
get the upload form page, which then triggers this script on server;  this is
very powerful, and very dangerous: you will usually want to check the filename,
etc;  this may only work if file or dir is writable: a Unix 'chmod 777 uploads'
may suffice;  file pathnames may arrive in client's path format: handle here;

caveat: could open output file in text mode to write receiving platform's line
ends since file content always str from the cgi module, but this is a temporary
solution anyhow--the cgi module doesn't handle binary file uploads in 3.1 at all;
##################################################################################
"""

import cgi, os, sys
import posixpath, ntpath, macpath      # for client paths
debugmode    = False                   # True=print form info
loadtextauto = False                   # True=read file at once
uploaddir    = './uploads'             # dir to store files

sys.stderr = sys.stdout                # show error msgs
form = cgi.FieldStorage()              # parse form data
print("Content-type: text/html
")     # with blank line
if debugmode: cgi.print_form(form)     # print form fields

# html templates

html = """
<html><title>Putfile response page</title>
<body>
<h1>Putfile response page</h1>
%s
</body></html>"""

goodhtml = html % """
<p>Your file, '%s', has been saved on the server as '%s'.
<p>An echo of the file's contents received and saved appears below.
</p><hr>
<p><pre>%s</pre>
</p><hr>
"""

# process form data

def splitpath(origpath):                              # get file at end
    for pathmodule in [posixpath, ntpath, macpath]:   # try all clients
        basename = pathmodule.split(origpath)[1]      # may be any server
        if basename != origpath:
            return basename                           # lets spaces pass
    return origpath                                   # failed or no dirs

def saveonserver(fileinfo):                           # use file input form data
    basename = splitpath(fileinfo.filename)           # name without dir path
    srvrname = os.path.join(uploaddir, basename)      # store in a dir if set
    srvrfile = open(srvrname, 'wb')                   # always write bytes here
    if loadtextauto:
        filetext = fileinfo.value                     # reads text into string
        if isinstance(filetext, str):                 # Python 3.1 hack
            filedata = filetext.encode()
        srvrfile.write(filedata)                      # save in server file
    else:                                             # else read line by line
        numlines, filetext = 0, ''                    # e.g., for huge files
        while True:                                   # content always str here
            line = fileinfo.file.readline()           # or for loop and iterator
            if not line: break
            if isinstance(line, str):                 # Python 3.1 hack
                line = line.encode()
            srvrfile.write(line)
            filetext += line.decode()                 # ditto
            numlines += 1
        filetext = ('[Lines=%d]
' % numlines) + filetext
    srvrfile.close()
    os.chmod(srvrname, 0o666)   # make writable: owned by 'nobody'
    return filetext, srvrname

def main():
    if not 'clientfile' in form:
        print(html % 'Error: no file was received')
    elif not form['clientfile'].filename:
        print(html % 'Error: filename is missing')
    else:
        fileinfo = form['clientfile']
        try:
            filetext, srvrname = saveonserver(fileinfo)
        except:
            errmsg = '<h2>Error</h2><p>%s<p>%s' % tuple(sys.exc_info()[:2])
            print(html % errmsg)
        else:
            print(goodhtml % (cgi.escape(fileinfo.filename),
                              cgi.escape(srvrname),
                              cgi.escape(filetext)))
main()
Within this script, the Python-specific interfaces for
handling uploaded files are employed. They aren’t very new, really;
the file comes into the script as an entry in the parsed form object
returned by cgi.FieldStorage, as
usual; its key is clientfile, the
input control’s name in the HTML
page’s code.
This time, though, the entry has additional attributes for the
file’s name on the client. Moreover, accessing the value attribute of an uploaded file input
object will automatically read the file’s contents all at once into
a string on the server. For very large files, we can instead read
line by line (or in chunks of bytes) to avoid overflowing memory
space. Internally, Python’s cgi
module stores uploaded files in temporary files automatically;
reading them in our script simply reads from that temporary file. If
they are very large, though, they may be too long to store as a
single string in memory all at once.
For illustration purposes, the script implements either
scheme: based on the setting of the loadtextauto global variable, it either
asks for the file contents as a string or reads it line by line. In
general, the CGI module gives us back objects with the following
attributes for file upload controls:
filenameThe name of the file as specified on the client
fileA file object from which the uploaded file’s contents can be read
valueThe contents of the uploaded file (read from the file on attribute access)
Additional attributes are not used by our script. Files
represent a third input field object; as we’ve also seen, the
value attribute is a
string for simple input fields, and we may
receive a list of objects for
multiple-selection controls.
For uploads to be saved on the server, CGI scripts (run by the
user “nobody” on some servers) must have write access to the
enclosing directory if the file doesn’t yet exist, or to the file
itself if it does. To help isolate uploads, the script stores all
uploads in whatever server directory is named in the uploaddir global. On one Linux server, I
had to give this directory a mode of 777 (universal
read/write/execute permissions) with chmod to make uploads work in general.
This is a nonissue with the local web server used in this chapter,
but your mileage may vary; be sure to check permissions if this
script fails.
The script also calls os.chmod to set the permission on the
server file such that it can be read and written by everyone. If it
is created anew by an upload, the file’s owner will be “nobody” on
some servers, which means anyone out in cyberspace can view and
upload the file. On one Linux server, though, the file will also be
writable only by the user “nobody” by default, which might be
inconvenient when it comes time to change that file outside the Web
(naturally, the degree of pain can vary per file operation).
Note
Isolating client-side file uploads by placing them in a single directory on the server helps minimize security risks: existing files can’t be overwritten arbitrarily. But it may require you to copy files on the server after they are uploaded, and it still doesn’t prevent all security risks—mischievous clients can still upload huge files, which we would need to trap with additional logic not present in this script as is. Such traps may be needed only in scripts open to the Internet at large.
If both client and server do their parts, the CGI script presents us with the response page shown in Figure 15-34, after it has stored the contents of the client file in a new or existing file on the server. For verification, the response gives the client and server file paths, as well as an echo of the uploaded file, with a line count in line-by-line reader mode.
Notice that this echo display assumes that the file’s content
is text. It turns out that this is a safe assumption to make,
because the cgi module always
returns file content as str
strings, not bytes. Less happily,
this also stems from the fact that binary file uploads are not
supported in the cgi module in
3.1 (more on this limitation in an upcoming note).
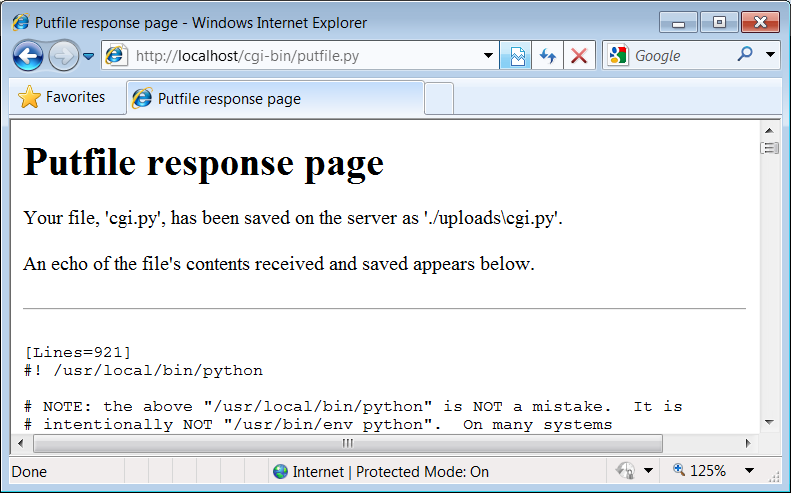
This file uploaded and saved in the uploads directory is
identical to the original (run an fc command on Windows to verify this).
Incidentally, we can also verify the upload with the getfile program we wrote in the prior
section. Simply access the selection page to type the pathname of
the file on the server, as shown in Figure 15-35.

If the file upload is successful, the resulting viewer page we will obtain looks like Figure 15-36. Since the user “nobody” (CGI scripts) was able to write the file, “nobody” should be able to view it as well (bad grammar perhaps, but true nonetheless).
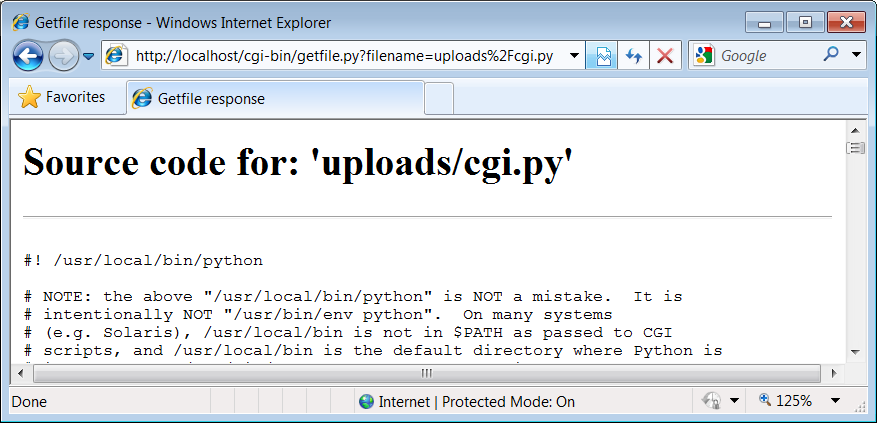
Notice the URL in this page’s address field—the browser
translated the / character we
typed into the selection page to a %2F hexadecimal escape code before adding
it to the end of the URL as a parameter. We met URL escape codes
like this earlier in this chapter. In this case, the browser did the
translation for us, but the end result is as if we had manually
called one of the urllib.parse
quoting functions on the file path string.
Technically, the %2F escape
code here represents the standard URL translation for non-ASCII
characters, under the default encoding scheme browsers employ.
Spaces are usually translated to + characters as well. We can often get
away without manually translating most non-ASCII characters when
sending paths explicitly (in typed URLs). But as we saw earlier, we
sometimes need to be careful to escape characters (e.g., &) that have special meaning within
URL strings with urllib.parse
tools.
Handling client path formats
In the end, the putfile.py script
stores the uploaded file on the server within a hardcoded
uploaddir directory, under the filename at
the end of the file’s path on the client (i.e., less its
client-side directory path). Notice, though, that the splitpath function in this script needs
to do extra work to extract the base name of the file on the
right. Some browsers may send up the filename in the directory
path format used on the client machine; this
path format may not be the same as that used on the server where
the CGI script runs. This can vary per browser, but it should be
addressed for portability.
The standard way to split up paths, os.path.split, knows how to extract the
base name, but only recognizes path separator characters used on
the platform on which it is running. That is, if we run this CGI
script on a Unix machine, os.path.split chops up paths around a
/ separator. If a user uploads
from a DOS or Windows machine, however, the separator in the
passed filename is , not
/. Browsers running on some
Macintosh platforms may send a path that is more different
still.
To handle client paths generically, this script imports
platform-specific path-processing modules from the Python library
for each client it wishes to support, and tries to split the path
with each until a filename on the right is found. For instance,
posixpath handles paths sent
from Unix-style platforms, and ntpath recognizes DOS and Windows client
paths. We usually don’t import these modules directly since os.path.split is automatically loaded
with the correct one for the underlying platform, but in this
case, we need to be specific since the path comes from another
machine. Note that we could have instead coded the path splitter
logic like this to avoid some split calls:
def splitpath(origpath):                                    # get name at end
    basename = os.path.split(origpath)[1]                   # try server paths
    if basename == origpath:                                # didn't change it?
        if '' in origpath:
            basename = origpath.split('')[-1]             # try DOS clients
        elif '/' in origpath:
            basename = origpath.split('/')[-1]              # try Unix clients
    return basename
But this alternative version may fail for some path formats (e.g., DOS paths with a drive but no backslashes). As is, both options waste time if the filename is already a base name (i.e., has no directory paths on the left), but we need to allow for the more complex cases generically.
This upload script works as planned, but a few caveats are worth pointing out before we close the book on this example:
Firstly,
putfiledoesn’t do anything about cross-platform incompatibilities in filenames themselves. For instance, spaces in a filename shipped from a DOS client are not translated to nonspace characters; they will wind up as spaces in the server-side file’s name, which may be legal but are difficult to process in some scenarios.Secondly, reading line by line means that this CGI script is biased toward uploading text files, not binary datafiles. It uses a
wboutput open mode to retain the binary content of the uploaded file, but it assumes the data is text in other places, including the reply page. See Chapter 4 for more about binary file modes. This is all largely a moot point in Python 3.1, though, as binary file uploads do not work at all (see ); in future release, though, this would need to be addressed.
If you run into any of these limitations, you will have crossed over into the domain of suggested exercises.
More Than One Way to Push Bits over the Net
Finally, let’s discuss some context. We’ve seen three getfile scripts at this point in the book.
The one in this chapter is different from the other two we wrote in
earlier chapters, but it accomplishes a similar goal:
This chapter’s
getfileis a server-side CGI script that displays files over the HTTP protocol (on port 80).In Chapter 12, we built a client- and server-side
getfileto transfer with raw sockets (on port 50001).In Chapter 13, we implemented a client-side
getfileto ship over FTP (on port 21).
Really, the getfile CGI
script in this chapter simply displays files only, but it can be
considered a download tool when augmented with cut-and-paste
operations in a web browser. Moreover, the CGI- and HTTP-based
putfile script here is also
different from the FTP-based putfile in Chapter 13, but it can be considered an
alternative to both socket and FTP uploads.
The point to notice is that there are a variety of ways to ship files around the Internet—sockets, FTP, and HTTP (web pages) can move files between computers. Technically speaking, we can transfer files with other techniques and protocols, too—Post Office Protocol (POP) email, Network News Transfer Protocol (NNTP) news, Telnet, and so on.
Each technique has unique properties but does similar work in the end: moving bits over the Net. All ultimately run over sockets on a particular port, but protocols like FTP and HTTP add additional structure to the socket layer, and application models like CGI add both structure and programmability.
In the next chapter, we’re going to use what we’ve learned here to build a more substantial application that runs entirely on the Web—PyMailCGI, a web-based email tool, which allows us to send and view emails in a browser, process email attachments, and more. At the end of the day, though, it’s mostly just bytes over sockets, with a user interface.
[57] Interestingly, in Chapter 12 we briefly introduced other systems that take the opposite route—embedding Python code or calls in HTML. The server-side templating languages in Zope, PSP, and other web frameworks use this model, running the embedded Python code to produce part of a reply page. Because Python is embedded, these systems must run special servers to evaluate the embedded tags. Because Python CGI scripts embed HTML in Python instead, they can be run as standalone programs directly, though they must be launched by a CGI-capable web server.
[58] These are not necessarily magic numbers. On Unix
machines, mode 755 is a bit mask. The first 7 simply means
that you (the file’s owner) can read, write, and execute the
file (7 in binary is 111—each bit enables an access mode). The
two 5s (binary 101) say that everyone else (your group and
others) can read and execute (but not write) the file. See
your system’s manpage on the chmod command for more
details.
[59] Notice that the script does not generate the enclosing
<HEAD> and <BODY> tags included in the
static HTML file of the prior section. Strictly speaking, it
should—HTML without such tags is technically invalid. But
because all commonly used browsers simply ignore the omission,
we’ll take some liberties with HTML syntax in this book. If you
need to care about such things, consult HTML references for more
formal details.
[60] If your job description includes extensive testing of server-side scripts, you may also want to explore Twill, a Python-based system that provides a little language for scripting the client-side interface to web applications. Search the Web for details.
[61] This technique isn’t unique to CGI scripts, by the
way. In Chapter 12, we briefly
met systems that embed Python code inside HTML, such as
Python Server Pages. There is no good way to test such
code outside the context of the enclosing system without
extracting the embedded Python code (perhaps by using
the html.parser HTML
parser that comes with Python, covered in Chapter 19) and running it with a
passed-in mock-up of the API that it will eventually
use.
[62] If you are reading closely, you might notice that this
is the second time we’ve used mock-ups in this chapter (see
the earlier tutor4.cgi example). If you
find this technique generally useful, it would probably make
sense to put the dummy
class, along with a function for populating a form
dictionary on demand, into a module so that it can be
reused. In fact, we will do that in the next section. Even
for two-line classes like this, typing the same code the
third time around will do much to convince you of the power
of code reuse.
[63] We also get the “All” reply if debugme is set to False when we run the script from the
command line. Instead of throwing an exception, the cgi.FieldStorage call returns an empty
dictionary if called outside the CGI environment, so the test for
a missing key kicks in. It’s likely safer to not rely on this
behavior, however.
[64] Assuming, of course, that this module can be found on the
Python module search path when those scripts are run. Since
Python searches the current directory for imported modules by
default, this generally works without sys.path changes if all of our files
are in our main web directory. For other applications, we may
need to add this directory to PYTHONPATH or use package (directory
path) imports.
[65] You may notice another difference in the response pages
produced by the form and an explicitly typed URL: for the form,
the value of the “filename” parameter at the end of the URL in
the response may contain URL escape codes for some characters in
the file path you typed. Browsers automatically translate some
non-ASCII characters into URL escapes (just like urllib.parse.quote). URL escapes were
discussed earlier in this chapter; we’ll see an example of this
automatic browser escaping at work in an upcoming
screenshot.