
Hosting in Windows Services
Hosting a WCF service in a Windows service is a logical choice. Windows services shouldn't be confused with WCF services. They both use the word service, but they have different meanings. A Windows service is a process managed by the operating system. Windows comes with the Service Control Manager, which controls the services installed on the operating system. Windows uses services to support operating system features such as networking, USB, remote access, message queuing, and so on. You can use Visual Studio 2005 to create a Windows service using the Windows Service project template shown in Figure 5-2.
The Windows Service project template generates a project that contains two files: the service1.cs that contains the service implementation and the program.cs file that instantiates and essentially hosts the Windows service. To host your WCF service inside a Windows service, you merely need to implement the Start() and Stop() methods of the Windows service, as shown in Listing 5-2. Since the paradigm of starting Windows services is similar to starting your services inside WCF ServiceHost, you end up tying the lifetime of your WCF service to the lifetime of your Windows service.
Visual Studio 2005 Windows Service project template

Example. Windows Service Hosting the WCF ServiceHost
using System;
using System.ServiceModel;
using System.ServiceProcess;
using QuickReturns.StockTrading.ExchangeService;
namespace QuickReturns.StockTrading.ExchangeService.Hosts
{
public partial class ExchangeWindowsService : ServiceBase
{
ServiceHost host;
public ExchangeWindowsService()
{
InitializeComponent();
}
protected override void OnStart(string[] args)
{
Type serviceType = typeof(TradeService);
host = new ServiceHost(serviceType);
host.Open();
}
protected override void OnStop()
{
if(host != null)
host.Close();
}
}
} |
|

So, writing a Windows service that hosts your WCF service is pretty easy and comes with several benefits when compared to the self-hosting scenario from earlier in this chapter. On the other hand, writing a Windows service that hosts your WCF service also comes with some disadvantages that you need to understand.
The following are the advantages:
Automatic starting
The Windows Service Control Manager allows you to set the start-up type to automatic so that as soon as Windows boots, the service will be started, without an interactive login on the machine.
Recovery
The Windows Service Control Manager has built-in support to restart services when failures occur.
Security identity
The Windows Service Control Manager allows you to choose a specific security identity under which you want the service to run including built-in system or network service accounts.
Manageability
In general, Windows operators know a lot about the Service Control Manager and other management tools that can work with Windows service installation and configuration. This will improve the acceptance of Windows services in production environments; however, to make services maintainable, you would probably have to add some instrumentation and logging features.
Support for all bindings and transports
Self-hosting doesn't limit you in using any of the out-of-the-box bindings and transports whatsoever. On Windows XP and Windows Server 2003, IIS limits you to HTTP only.
The following are some of the disadvantages of Windows services:
Deployment
Services need to be installed with the .NET Framework Installutil.exe utility or through a custom action in an installer package.
Limited features
Windows services still have a limited set of out-of-the-box features to support high availability, easy manageability, versioning, and deployment scenarios. Essentially you have to cover these requirements yourself through custom code while, for example, IIS comes with several of these features by default. Windows services do add recoverability and some security features, but you still have to do some work yourself.
To be able to install a service in the Service Control Manager, you have to add an installer to the project. Visual Studio 2005 allows you to do this easily:
Open the Designer view of the Service class in your Windows service project.
Click the background of the designer to select the service itself, rather than any of its contents.
In the Properties window, click the Add Installer link in the gray area beneath the list of properties, as shown in Figure 5-3. By default, this adds a component class containing two installers to your project. The component is named ProjectInstaller, and the installers it contains are the installer for your service and the installer for the associated process of the service.
The Add Installer function of a Windows service project

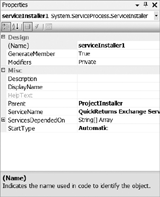
Access the Designer view for ProjectInstaller, and click ServiceInstaller1.
Set the StartType property to Automatic, as shown in Figure 5-4.
The Properties window of QuickReturns Exchange Service
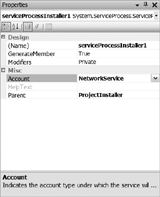
Access the Designer view for ProjectInstaller, and click serviceProcessInstaller1.
In the Properties window, set the Account property to Network Service, as shown in Figure 5-5.
The Properties window of QuickReturns Exchange Service
To be able create a setup that can be used to install your Windows service, you need to add a Visual Studio setup and deployment project to the solution. The following steps describe how to add a setup and deployment project to your solution:
Select File
 Add
Add  New Project.
In the New Project dialog box, select the Other Project Types category, select Setup and Deployment, and then select Setup Project, as shown in Figure 5-6.
Visual Studio 2005 setup project template

In Solution Explorer, right-click the setup project, point to Add, then choose Project Output, as shown in Figure 5-7. The Add Project Output Group dialog box appears.
Adding the Windows service project output

Select the Windows service project.
From the list box, select Primary Output, and click OK.
This adds a project item for the primary output of your Windows service to the setup project. Now add a custom action to install the executable file. To add a custom action to the setup project, follow these steps:
In Solution Explorer, right-click the setup project, point to View, and then choose Custom Actions, as shown in Figure 5-8. The Custom Actions view appears.
Opening the Custom Actions view

Right-click Custom Actions, and select Add Custom Action.
Double-click the application folder in the list box to open it, select Primary Output from the Windows service project, and click OK. The primary output is added to all four nodes of the custom actions—Install, Commit, Rollback, and Uninstall.
Build the setup project.
When you compile the project, the output is a Microsoft Installer file (.msi) that you can use to install the service into the Windows Service Control Manager.
NOTE
This chapter describes the basics of building Windows services and Windows service installers. Setting your Windows services to run under the unrestricted Localsystem account or the somewhat appropriate Network Service account is not always the best choice in terms of security best practices. Usually operators have the ability to choose the credentials during setup or adjust the security identity settings after installation through the Service Control Manager Management Console snap-in that can be accessed through Windows Computer Management. Please refer to Chapter 7 of this book, MSDN Help, or a book dedicated to .NET development for more details and best practices regarding developing Windows services.