
Understanding Service Contracts
Service contracts, one of the Cs in the ABCs of WCF, are what are advertised to the consumers of your services. This advertisement generally takes place through a schema and a contract definition that supports a standardized method for publishing the service contract (along with data contracts). Today, that schema is either a Web Services Description Language (WSDL) contract or a WS-MetadataExchange (MEX) contract. These formats are industry-supported, open specifications. These specifications are located at the following locations:
WSDL AND WS-METADATAEXCHANGEWSDL is an XML Schema-based description of supported operations and messages for an endpoint. MEX represents a message exchange protocol that allows the discovery of WSDL, WS-Policy, or XML Schema associated with a target namespace. More information is available at the following location: http://specs.xmlsoap.org/ws/2004/09/mex/WS-MetadataExchange.pdf. |
NOTE
For COM interop, a third type of contract exists—a typed contract. See Chapter 10 for more details.
The service is basically that, a service—something, perhaps a behavior, that takes place on behalf of another system. Services themselves can be a variety of types and generally fall into either informational or action oriented.
Platform and framework vendors have implemented the tools and libraries that can leverage these standardized contracts to provide a more seamless integration experience amongst the service provider and the consumers (sometimes referred to as receivers and senders). This is what WCF provides in its metadata model: the ability to both define and publish as well as consume these standardized schema definitions. It is possible, in WCF, to provide that support both programmatically at runtime and declaratively at design and configuration time.
WCF provides the standards and tools support primarily through SvcUtil.exe. This utility is the primary code and metadata interpretation tool. That, in combination with the WCF framework's ability to leverage reflection to interrogate types adorned with the appropriate attributes, makes generating and using the WCF framework less complicated than before. Figure 4-1 illustrates how service metadata is consumed by SvcUtil.exe for proxy generation; additionally, the same metadata is leveraged by the WCF framework for runtime interaction.
Metadata publishing and client code generation

Contract First or Code First?
There have been lots of discussions in SOA communities regarding best practices for either "code first" or "contract first" service development. We won't say one is better than the other. However, in a true "contract-first" paradigm, you'll spend all the up-front time generating the schema (WSDL) in XML that supports your service contract implementation. Frankly, we'd rather listen to someone scratch their nails on a blackboard than start with a whole bunch of XML. Although WCF can support a contract- and schema-driven starting point, for the most part you'll spend time adorning your types with attributes in a declarative model and allowing the WCF framework to generate the necessary schema and contract metadata.
The WCF programming model of "code first and then apply attributes to the interface" allows the WCF framework to do all the work of providing a standardized schema to publish to consumers of the service. This model works best in industries or organizations where you're the only provider of the service or where you're just working on internal solutions that require cross-application integration and you have full control over the interfaces.
.NET ATTRIBUTES BACKGROUND.NET uses attributes throughout the framework. Attributes permeate many aspects of how your types are hosted by the .NET CLR. Things such as Code Access Security (CAS) and general assembly metadata all depend upon attributes that are part of the generated MSIL. This is one of the declarative aspects of .NET. The ASP.NET 2.0 web service model relies as well on class- and method-level attributes that control how the .NET Framework manages the runtime support of web services through the request-reply cycle. For the most part, the declarative model remains the same when moving to WCF. According to the WCF product team, this was somewhat intentional to help the migration and transition of both existing ASP.NET 2.0 web services and developers to the WCF model. That initial transition started with the introduction of Web Services Enhancements (WSE) from version 1.0 up through version 3.0. In fact, the transition from out-of-the-box ASP.NET 2.0 web services to WSE web services required no change from a coding perspective. All WSE required was the modification of the application (Web.config) file that the site was hosted on, in addition to a recompile to bind to the updated assemblies that were part of the WSE distributions. |
WCF supports schema-first and contract-first development as well. This might sound like a new model in the .NET world, but it was possible under ASP.NET 1.1 web services as well; it just required some discipline to follow and implement. The paradigm also existed in the COM world; but again, discipline was required and tool support was limited, and we all need to get things done, right?
WCF offers the tools and framework support to provide the malleability of an implementation and definition that allows service architects to view what they implement from either the outside in or the inside out. The primary tool you'll use in WCF is SvcUtil.exe. We'll introduce how to use SvcUtil.exe in this chapter, but Chapter 5 covers it in more detail.
Service Design
WCF provides the complete decoupling at design time of the service from the actual ABCs of the service implementation. Why? This provides a greater level of flexibility in both choosing the implementation model today (which consists of both the service and the ABCs) and providing the greatest amount of flexibility and extensibility for supporting varied transports available today and in the future. In other words, you can write and maintain a single instance of your service code without regard for what the physical deployment model is.
Now, in the real world, you still need to consider what the service provides and what the overall performance is as it relates to marshaling objects across service boundaries and ultimately coupling physical nodes separated by a LAN, WAN, or the Internet. So, as good solution architects, you must never forget the "Eight Fallacies of Distributed Computing" by Peter Deutsch; see http://today.java.net/jag/Fallacies.html for more information.
In the ideal implementation, the service providers and service consumers will spend a significant amount of time collaborating from a business perspective. During that collaboration process, a service model will evolve to properly address many aspects of what the service contract will look like, including elements such as the following:
Granularity
Coupling
Cohesion
Security
Performance
Reliability
Other "ilities" of architecture
To be clear, WCF doesn't address these aspects directly; that's up to the solution architect. WCF provides the base framework for implementing service contracts, in conjunction with the rest of the ABCs for a solid foundation of any SOA implementation.
Programming Model
So, Table 4-3 compares WCF's programming model to ASP.NET 2.0 web services and WSE.
| ASP.NET 2.0 Attribute | WCF Attribute | Comments |
|---|---|---|
| [WebServiceAttribute] | [ServiceContractAttribute] | Interface, class-level attribute |
| [WebMethodAttribute] | [OperationContractAttribute] | Method-level attribute |
| [DataContractAttribute] | Class-level attribute | |
| [DataMemberAttribute] | Field, property, event-level attribute |
You probably noticed the name change from web-oriented naming to more SOA nomenclature—Service, Operation, and Data. This was done intentionally to shift the architectural thinking from a web-only mentality to an "any transport" paradigm.
WSE 3.0 provides the ability for different transports in addition to supporting more complex message exchange patterns such as duplex channels (through the ISoapDuplexChannel interface). WCF now provides a much more simplistic model for implementation in addition to a fully extensible framework along with support for WS-* specifications such as WS- Transactions, WS-Reliability, and others.
"Hello, World"
Now, you'll see the simplest of examples (Chapter04/Example01 in the downloadable code) in both ASP.NET 2.0 and WCF. This first sample is just to provide a minimal example of a service implementation. The example uses a "code first with attributes" model. To be clear, this is not a best practice—it's purely an example to show the similarities between ASP.NET 2.0 web services and WCF. The best practice is a contract-first model where you define the schema prior to coding the implementation. This removes the designer's bias toward any implementation details or restrictions.
NOTE
With some of the IIS-hosted samples, a set of scripts provides the IIS virtual directory creation and ASP.NET mapping, along with a script to remove the IIS virtual directory when done. The creation/removal scripts are in each example's directory and are named CreateVirtualDirs.bat and DeleteVirtualDirs.bat, respectively. You must be an administrator on the system from where these files are executed. Additionally, if you're on Vista, you must run from an elevated command prompt from the directory where these files exist.
Also, to ensure you focus on how the services are created, we will use only IIS as the hosting environment. (Chapter 5 discusses other WCF hosting options.)
ASP.NET 2.0 Web Service: "Hello, World"
Listing 4-2 shows MyService.asmx.
Example. MyService.asmx
<%@ WebService Language="C#" Class="MyService" %> using System.Web.Services; [WebService] public class MyService : System.Web.Services.WebService { [WebMethod] public string HelloWorld ( string yourName ) { return "Hello, World to " + yourName; } } |
WCF Service: "Hello, World"
Listing 4-3 shows MyService.svc, and Listing 4-4 shows Web.config.
Example. MyService.svc
<%@ ServiceHost Language="C#" Service="MyService" %> using System.ServiceModel; [ServiceContract] public class MyService { [OperationContract] public string HelloWorld ( string yourName ) { return "Hello, World to " + yourName; } } |
Example. Web.config
<?xml version="1.0"?>
<configuration>
  <system.serviceModel>
    <services>
<service
							name="MyService"
							behaviorConfiguration="returnFaults">
							<endpoint
							contract="MyService"
							binding="wsHttpBinding"/>
							</service>
    </services>
    <behaviors>
    <serviceBehaviors>
      <behavior name="returnFaults">
        <serviceMetadata httpGetEnabled="true"/>
        <serviceDebug
          httpHelpPageEnabled="true"
          includeExceptionDetailInFaults="true"/>
      </behavior>
    </serviceBehaviors>
    </behaviors>
  </system.serviceModel>
</configuration> |
|

From a coding and implementation perspective, the ASP.NET 2.0 web service and the WCF service aren't that different. The method bodies are identical. Deployment, under ASP.NET, is also nearly identical. When running from Visual Studio 2005, both can leverage the ASP.NET development server. Additionally, if running from IIS and the application mappings are correct, the deployment is identical between the ASP.NET 2.0 web services and WCF services.
The first obvious difference is that the WCF implementation requires a configuration (Web.config) file. The configuration file you see is one of the strengths of building services with WCF—you get almost complete control of the runtime characteristics of a service without forcing a change in the code. Configuration files are not required for WCF. However, given that this example is expected to be hosted by the ASP.NET runtime, a configuration file is required. In later chapters, we'll cover self-hosting and how to manage the WCF runtime characteristics through code.
"Hello, World" with Interfaces
A best practice in WCF is to define a contract up front, as an interface, and then provide the implementation of that interface in a concrete class. Why? This provides a clear abstraction of the contract from the implementation. The other aspect of this approach is a clear distinction of the service boundary (remember the "boundaries are explicit" SOA tenet) from the implementation. Although the service interface definition is in code, and not in metadata, it's a clear perimeter that permits some flexibility for exposing only what's necessary and that provides design-time and configuration-time flexibility.
WCF Service: "Hello, World"
The next example (Example02 in the downloadable code) follows the best practice of implementing the contract in a defined interface with the implementation provided for separately. The mapping, as you'll soon see, is managed through the framework either programmatically or through configuration options. Listing 4-5 shows MyService.svc.
Example. MyService.svc
<%@ ServiceHost Language="C#" Service="MyService" %> using System.ServiceModel; [ServiceContract] public interface IMyInterface { [OperationContract] string HelloWorld ( string yourName ); } public class MyService : IMyInterface { public string HelloWorld( string yourName ) { return "Hello, World to " + yourName; } } |
NOTE
For Vista users, if you've run CreateVirtualDirs.bat (from an elevated prompt as required) and attempt to open the Visual Studio 2005 solution file with Visual Studio 2005, you will be presented with a message box indicating the site is configured with the wrong version of .NET. You can answer either Yes or No to this prompt. This is because of Visual Studio 2005 incompatibilities with the Vista RTM release. To validate the correct version mapped for the virtual site, you must use the IIS manager and ensure the site is mapped to an application pool configuration with ASP.NET 2.0. The CreateVirtualDirs.bat script handles this automatically.
The implementation now provides a clear contract definition, void of implementation details, that is attributed as required to provide the automatic generation of the metadata (either WSDL or MEX). This separation, in the same source file, can appear elsewhere. How the contract is implemented, and ultimately bound, is managed through a configuration file or programmatically. For this example, and probably what is destined to be the norm, we do it via configuration.
In the Web.config file for the WCF service, shown in Listing 4-6, the mapping between the type and the contract takes place through the <services> element inside the <system. serviceModel> section. Note the clear contract mapping to the implementation type, which is the interface definition.
Example. Web.config
<?xml version="1.0"?>
<configuration>
  <system.serviceModel>
    <services>
    <service
							name="MyService"
							behaviorConfiguration="returnFaults">
							<endpoint
							contract="IMyInterface"
							binding="wsHttpBinding"/>
							</service>
    </services>
    <behaviors>
    <serviceBehaviors>
      <behavior name="returnFaults">
        <serviceMetadata httpGetEnabled="true"/>
        <serviceDebug
          httpHelpPageEnabled="true"
          includeExceptionDetailInFaults="true"/>
      </behavior>
    </serviceBehaviors>
    </behaviors>
  </system.serviceModel>
</configuration> |
If you launch this service in the ASP.NET development server, you'll see something different from Figure 4-2 because the URL will differ by the IP port in use for the project. The ASP.NET development server dynamically chooses the IP port, unless you've overridden it. If you're using IIS, then the default port 80 is left off, and the URL appears as in Figure 4-2.
Viewing the WCF "Hello, World" service
The initial difference when consuming ASP.NET web services vs. WCF services is the use of different client proxy generation tools. You'll see that step in the following sections using two different methods: Visual Studio 2005 integration and the SvcUtil.exe utility.
Service Client Proxy
Now that you have a service, it's time to define a client for that service. So, add a C# console application, and place the implementation code in a separate file as part of the ASP.NET application. The following is part of the Example03 sample code.
Proxy Generation: Using the Visual Studio 2005 Add-In
Similar to ASP.NET proxy creation, if you right-click the project in the IDE, you'll see three options for adding references. Select Add Service Reference, as shown in Figure 4-3.
Adding a reference to a WCF service

This menu option is a wrapper around the SvcUtil.exe utility, actually spawning a process with the necessary parameters. Once you've selected the Add Service Reference option, you'll see the Add Service Reference dialog box, as shown in Figure 4-4.
Add Service Reference dialog box

Click OK, and the add-in spawns SvcUtil.exe, generating (or modifying) the necessary proxy class and the required configuration file and adding the necessary references to the project. The project's references will now list the required WCF assemblies—System.Runtime. Serialization and System.ServiceModel. At this point, you're now ready to program your first service call into your service tier.
A brief explanation of the objects added to the project is necessary. During the SvcUtil.exe (Add Service Reference) call, the utility added the following items and references to the project automatically. Some are only to aid the Visual Studio integration; others are required for using the service directly through the proxy.
Service references
Within this folder two items were added. The first, a "map" file, provides support for the generation and regeneration of the proxy through the Visual Studio add-in. The second item—Example03.cs—represents the concrete proxy class implementation that leverages the namespace System.ServiceModel to provide a simple integration class.
Configuration
The second item is the App.config file. An App.config file (automatically renamed during the Visual Studio build process to <assembly name>.config) provides the runtime WCF configuration parameters. If you peer inside this file, you'll notice a tremendous amount of settings, many of which are either defaulted or redundant to the default settings. A general approach is to generate the file and then manage the file using the WCF SvcConfigEditor.exe editor utility. This utility is located in the Windows SDK Bin directory and accessible from within Visual Studio 2005 in the Tools menu as WCF SvcConfigEditor. Figure 4-5 shows the implementation of the tool.
Microsoft Service Configuration Editor—SvcConfigEditor.exe

As you can see from the Microsoft Service Configuration Editor, you can manage a tremendous amount of detailed properties through the configuration tool. This is one of the greatest strengths of WCF—the ability to control many aspects of an implementation without impacting the core service implementation. That a service implementation doesn't need to change in order to migrate from an HTTP-based protocol to another message-oriented one is a core strength of WCF's metadata approach.
You'll see many parts are controllable through the runtime configuration; however, you need to define many aspects of a service implementation at the service contract level.
Proxy Generation: Using SvcUtil.exe
An alternative method is to leverage the SvcUtil.exe utility directly instead of the Visual Studio add-in. Again, the Visual Studio add-in calls SvcUtil.exe, with parameters, to generate the proxy when executed directly from within Visual Studio. You can see the command line and results of that command by viewing the Output window and setting the Show Output From drop-down list to Service Reference.
To generate the proxy manually, choose Start ![]() All Programs
All Programs ![]() Microsoft Windows SDK
Microsoft Windows SDK ![]() CMD. This command prompt is useful because its path is set to the binary directory where the SDK tools and utilities are located.
CMD. This command prompt is useful because its path is set to the binary directory where the SDK tools and utilities are located.
We'll show how to use the SvcUtil.exe command-line tool to generate two outputs necessary for the example project: the client proxy source code file and the application configuration file. These files are then merged into the client project. The SvcUtil.exe can generate both. For this example, the following command (which should appear on a single line) produces both a proxy class and a configuration file:
svcutil /config:newConfig.config /out:"Example03.cs"
    /n:*,WcfClient.Example03
    "http://localhost/WcfHelloWorld/Service.svc?wsdl"
The command is fairly self-explanatory. The /n switch indicates in which namespace the generated proxy class should fall. The last parameter is the URL of the service endpoint where you can find schema information. Note that you can replace ?wsdl with ?mex because SvcUtil. exe supports both methods of discovery. Further help is available by executing svcutil.exe /? from the command prompt.
The next step is to take the output files Example03.cs and newConfig.config and merge them into the project. You can add the first file, Example03.cs, directly to the project by choosing Add Existing Item from the Project menu in Visual Studio 2005.
You need to add the second file as an application configuration (App.config) file in the project. If the project does not already have an App.config file, you can add one by again choosing Add Existing Item from the Project menu. If there is already an existing App.config, you need to merge the section system.serviceModel, ensuring you take all the appropriate child elements.
Client Code
The client code in Example03, shown in Listing 4-7, is a simple call through the proxy class. Here, you are leveraging a best practice of the using statement to ensure that the Dispose() method is called. The other option is to wrap it in a try...finally block, with a call to the object's Dispose() method inside the finally clause.
NOTE
The using keyword is a shortcut method that expands in the generated MSIL to try...finally block. This has always been available to C# and is in VB .NET 2005.
Example. WcfClient program.cs
using System;
namespace WcfClient
{
    class Program
    {
        static void Main( )
        {
            //using "block" as a shortcut for a try...finally block
            // with a call to the object Dispose() method in the finally block
      using( Example03.MyInterfaceClient proxy =
							new Example03.MyInterfaceClient() )
            {
string result = proxy.HelloWorld( "Shawn" );
                Console.WriteLine( result );
                Console.WriteLine( "Press <enter> to exit..." );
                Console.ReadLine();
            }
        }
    }
} |
Hosting on IIS
The previous examples are all included in the downloadable source code with an automated script for creating the virtual directory on IIS. This section shows you how to both create a .NET 3.0 WCF service and host it in IIS.
The first step to take is to create an empty solution file. This provides total control over the location of the file. If you bypass this step, Visual Studio 2005 creates the project where you want it to, but the solution file is put in your default location for your Visual Studio projects.
To generate an empty solution file that you'll add your projects to, from within Visual Studio select File ![]() New Project
New Project ![]() Other Project Types
Other Project Types ![]() Visual Studio Solutions
Visual Studio Solutions ![]() Blank Solution. Be sure to specify both the name and the location for the blank solution.
Blank Solution. Be sure to specify both the name and the location for the blank solution.
After creating the empty solution file, the next step is to add a .NET 3.0 (WCF) service web project. If you immediately add the project to the solution, the project files are created in the default c:inetpubwwwroot subdirectory. To gain a little more control, you can create the IIS virtual site before adding the project location to the solution file.
The next step is to just create a subdirectory where the solution file is located, as shown in Figure 4-6.
Creating a subdirectory in solution folder

Then, you need to create a mapping in IIS. You can navigate through IIS Manager; for simplicity, just right-click the folder, and select Properties.
Once the Properties dialog box appears, click the Web Sharing tab, as shown in Figure 4-7. Simply click the radio button Share This Folder, and the Edit Alias dialog appears. You can enable directory browsing to make it easier to view and click items in the website. Generally, this is a setting only for development.
|
Web Sharing tab's Edit Alias dialog box

At this point, click OK several times to dismiss the dialog boxes. The site should now be available through the URL http://localhost/Example04Web. However, you still need to check the version of ASP.NET that is set for this site. If you have only .NET 2.0 installed—that is, .NET 1.1 was never installed—there should be nothing else to do; however, it doesn't hurt to just check.
So, launch IIS Manager (Start ![]() Control Panel
Control Panel ![]() Administrative Tools
Administrative Tools ![]() Internet Information Services). Once you see the Properties dialog box, click the ASP.NET tab, and then switch the version of ASP.NET using the drop-down list to the .NET 3.0-supported version, which is 2.0.50727 (the RTM version).
Internet Information Services). Once you see the Properties dialog box, click the ASP.NET tab, and then switch the version of ASP.NET using the drop-down list to the .NET 3.0-supported version, which is 2.0.50727 (the RTM version).
|
This example has one additional step—to provide access to resources known as anonymous requests. Anonymous requests are any requests that have no identity or Windows principals associated with the HTTP request.
Click the Directory Security tab, and then click Edit under the Anonymous Access and Authentication Control section of the dialog box. Ensure that the option Anonymous Access is enabled. This will allow the example to run without stepping into how to provide authentication credentials on the requests.
Dismiss all open dialog boxes by clicking the OK buttons. At this point, you now have a solution directory with a child project that has, or will have, all its resources (source code files and content) located in a directory of your choosing (that is, not in the default c:inetpub wwwroot directory).
Now you're ready to add the project to the solution you created earlier. In Visual Studio, select the solution in Solution Explorer, right-click, and then select Add ![]() New Web Site.
New Web Site.
At this point, ensure you select the .NET 3.0/WCF service template, set HTTP as the location, use the URL that was set on the folder alias using web sharing in Windows Explorer, and set the language of your choice. Click OK, and the Visual Studio .NET 3.0 template system creates a project starting point for your service, giving you a complete project.
Notice that the project template leverages the special folder names for the application code and application data. In the prior example, the source code was hosted directly in the *.svc file. The project shown here, which is generated from the .NET 3.0 template, has a distinct source directory along with a *.cs file that contains the interface and class implementation.
|
If you look at the file system using Windows Explorer or using a command prompt and view the directory you started in, you'll see the same set of files listed under the project in Visual Studio Solution Explorer.
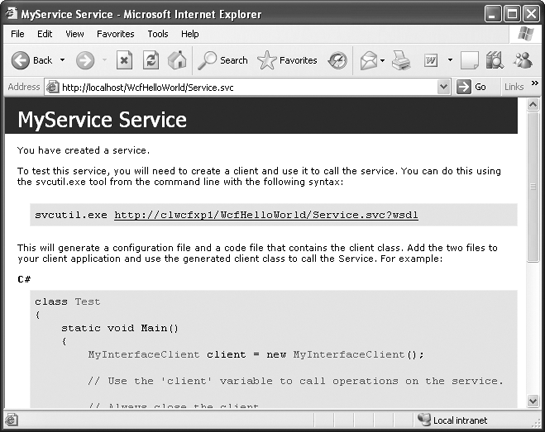
At this point, if you browse to the location http://localhost/example04Web/ using Internet Explorer, you'll see a directory listing (as long as the settings are like those in Figure 4-7).
If you click service.svc, you are then brought to the default help screen generated by System.ServiceModel.Activiation.HttpHandler for the *.svc extensions, as shown in Figure 4-2.
At this point, you follow the same steps in a client application, either generating a proxy class directly through the use of the SvcUtil.exe utility or right-clicking the project and generating the proxy through the Add Service Reference add-in feature, as shown previously.
The accompanying solution for this example has a complete console client that makes a call into the WCF service you just created.
ServiceContract Attribute
One of the valuable capabilities of WCF is getting control over how the WCF framework generates the metadata for the service contract. The examples presented so far have been the simplest forms, relying on the default settings and values that are generated by SvcUtil.exe (for the client) or at runtime by the framework.
When designing services, it's important to understand what is generated as metadata. You need an awareness of what the naming conventions are because they directly impact the generated service description metadata. This section helps you identify what capabilities exist in WCF for controlling how this metadata is created.
The ServiceContract attribute is the entry point into the definition of a service. In conjunction with binding and endpoint information (generally through configuration), it is this information that clients (service consumers) apply in order to exercise your service.
This represents the contract and not the behavior. To control the behavior, you need to leverage the behavior aspect of the WCF programming model. More specifically, apply the class-level attribute ServiceBehaviorAttribute and the required properties associated with your implementation. Chapter 3 provides more details on behaviors. Table 4-4 lists the properties that are part of the ServiceContractAttribute to control metadata generation and runtime capabilities support by WCF.
| Class Property | Description |
|---|---|
| CallBackContract | Designates the contract in duplex message exchange (two-way) pattern implementations. |
| Name | Controls the naming of the interface in the WSDL or metadata; allows overriding using the interface or class name in the generated metadata. |
| Namespace | Controls the namespace that is used in the WSDL or metadata from the default of tempuri.org. |
| SessionMode | Indicates whether this service requires bindings that can support sessions amongst more complex message exchange patterns. Used in conjunction with ServiceBehaviorAttribute that is applied on a class. |
At the service contract level, you have a few options that give you a foundation to work upon for managing the emitted metadata. Since types are ultimately turned into XML to support the loosely coupled world of WCF services, you have two choices for serialization, described in Table 4-5.
| Attribute Type | Description |
|---|---|
| DataContractSerializer | Default serialization class that handles serializable types in addition to contract types (data or message). Supports two modes: shared type and shared contract. The first is when both "types" exist on both sides of the channel—such as with .NET Remoting. The second type is a loosely coupled mode, where the only requirement is that types exist on both sides of the channel that can serialize/deserialize from the XML. |
| XmlSerializer | Serialization class that handles only serializable types. Use this class when you need greater control over the XML that is emitted from the WCF serialization process. |
Let's take a look at a different example, one that's from the QuickReturns Ltd. company (Example05). Specifically, this section shows how to implement the exchange's service for TradeSecurity. (Please refer to Chapter 3 for background information on QuickReturns Ltd.)
The core requirement for TradeSecurity is a request-reply message exchange pattern. This pattern is a fairly simple but common interaction between service endpoints. The definition from the high-level view is the method requires a Trade schema, and on return, it provides an Execution schema. For the examples here, we'll just return a decimal in order to simplify the explanation.
You'll start by implementing the service contract using all the defaults. First, create an empty Visual Studio Solution. The Blank Solution template appears under Other Project Types ![]() Visual Studio Solutions after you choose File
Visual Studio Solutions after you choose File ![]() New Project.
New Project.
Second, add a class library, or what's called a .NET 3.0/WCF service library to the project. Therefore, select the solution in Solution Explorer, and right-click. Then, choose Add ![]() New Project.
New Project.
Once the Add New Project dialog box appears, ensure you select the .NET 3.0 grouping along with the .NET 3.0/WCF service library template. Also ensure you name your project ExchangeService along with validating the location of where the files are created.
|
At this point, Visual Studio adds the project, creating a source file that has a simple WCF implementation with the customary "Hello, World" method implementation. The template has embedded comments that provide some basic pointers on how to proceed with your implementation. Additionally, a commented code section provides the necessary steps on hosting the WCF service from your newly created WCF library in another project. The code provided in that commented section is for hosting outside ASP.NET. (Chapter 5 covers hosting options in depth.)
In addition to a sample implementation, the project references have been updated to make it easier to work with WCF applications.
Now in Solution Explorer, delete the generated Class1.cs file. Then right-click the project, and add a new item. Locate the .NET 3.0/WCF service item. Enter TradeService in the Name field, and click Add.
In the generated TradeService.cs file, replace the contents with Listing 4-8.
Example. TradeService.cs Implementation
using System;
using System.ServiceModel;
namespace ExchangeService
{
[ServiceContract(
							Namespace="http://PracticalWcf/Exchange/TradeService",
							Name="TradeService")
    ]
    public interface ITradeService
    {
        [OperationContract]
        decimal TradeSecurity( string ticker, int quantity );
    }
    public class TradeService : ITradeService
    {
        const decimal IBM_Price = 80.50m;
        const decimal MSFT_Price = 30.25m;
        public decimal TradeSecurity( string ticker, int quantity )
        {
            if( quantity < 1 )
                throw new ArgumentException(
                    "Invalid quantity", "quantity" );
            switch( ticker.ToLower() )
            {
                case "ibm":
                    return quantity * IBM_Price;
                case "msft":
                    return quantity * MSFT_Price;
                default:
                    throw new ArgumentException(
                        "SK security - only MSFT amp IBM", "ticker" );
            }
        }
    }
} |
Notice that the top of the file contains a reference to the System.ServiceModel namespace. This namespace contains the necessary types that provide attribute support for the contract declaration.
This implementation follows the best practice of separating the contract definition from the implementation. In the example, the ServiceContract attribute is applied to the ITradeService interface. Additionally, the single method signature within ITradeService has the OperationContract attribute. These attributes signal to the WCF runtime how to generate the metadata and WSDL necessary for discovering supported operations in addition to managing the actual runtime calls from clients.
The TradeService class simply implements ITradeService. How does the WCF runtime know what type to load in response to client requests? You'll see in a little bit how it takes place through configuration, specifically, how the ABCs are tied together.
Make sure it compiles before proceeding. If there are no errors, create a simple ASP.NET hosting project for this newly created .NET 3.0/WCF service library.
In Solution Explorer, add a new empty website—which is just a standard ASP.NET website to your solution. Do this either by right-clicking the solution and choosing Add New Web Site or by choosing File ![]() Add
Add ![]() New Web Site from the Visual Studio menu.
New Web Site from the Visual Studio menu.
Now, select the web project you just created in Solution Explorer, right-click, and choose to add a reference. Once the Add Reference dialog box opens, select the Projects tab, and choose the Exchange Service project from the list.
Now, right-click the project again, and add a Web.config (web configuration) file to the project if one does not already exist. Modify the contents of the Web.config file, ensuring the <system.serviceModel> section appears as a child to the <configuration> element, as shown in Listing 4-9.
Example. Website Web.config File (Partial)
<?xml version="1.0"?> <configuration> <system.serviceModel> <services> <service name="ExchangeService.TradeService" behaviorConfiguration="returnFaults"> <endpoint contract="ExchangeService.ITradeService" binding="wsHttpBinding"/> </service> </services> <behaviors> <serviceBehaviors> <behavior name="returnFaults"> <serviceMetadata httpGetEnabled="true"/> <serviceDebug httpHelpPageEnabled="true" includeExceptionDetailInFaults="true"/> </behavior> </serviceBehaviors> </behaviors> </system.serviceModel> <appSettings/> <connectionStrings/> <system.web> ... |
This configuration file contains a system.serviceModel section, in bold, that provides the necessary binding and contract information for the sample. The service element identifies the specific .NET type that is exposed through this service endpoint. The endpoint element identifies the specific contract that is bound to the service type listed. Since the example is using IIS activation, the wsHttpBinding is the binding used, which supports request-reply in addition to reliable, secure, and transactional message exchange.
Then, right-click again the web project, and add a .NET 3.0/WCF service. Modify the dialog box entries by specifying TradeService.svc as the name of the file and setting C# as the language.
Open the newly created TradeService.svc file, and replace the contents with this single line:
<%@ ServiceHost Language="C#" Service="ExchangeService.TradeService" %>
Note that the Service parameter is now set to a type that resides in the assembly generated from the exchange service project.
First, do a solution build (Build ![]() Build Solution). Now, right-click the web project, and choose View in Browser (you must have directory browsing enabled as in Figure 4-7). Once Internet Explorer opens and you see the directory listing, click the TradeService.svc file. At this point, the ASP.NET runtime will begin the compilation process, generating the required assemblies to service your request. After a few seconds (depending upon your machine configuration), you should see the standard help screen similar to what is shown in Figure 4-2.
Build Solution). Now, right-click the web project, and choose View in Browser (you must have directory browsing enabled as in Figure 4-7). Once Internet Explorer opens and you see the directory listing, click the TradeService.svc file. At this point, the ASP.NET runtime will begin the compilation process, generating the required assemblies to service your request. After a few seconds (depending upon your machine configuration), you should see the standard help screen similar to what is shown in Figure 4-2.
You've now created a simple TradeService that leverages a best practice of separating the service implementation into its own assembly and referencing it from a web project. If you look at the accompanying solution, a simple client console project calls the service for a few securities.
If you enter the following into a browser (ensure the ASP.NET development server is running and the port for your site matches), you'll see the differences in the generated metadata for the namespace and name of the service:
http://localhost:8888/ExchangeWeb/TradeService.svc?wsdl
OperationContract Attribute
The OperationContract attribute, as with the ServiceContract attribute, provides for even greater control over the WSDL generation. Generally you'll accept most of the defaults, but for certain features, such as duplex messaging, you'll need to use options indicating the operation is one-way. Additionally, for session management, you'll be leveraging some of the options for overall service session management.
Table 4-6 describes the properties in the OperationContract attribute type.
| Class Property | Description |
|---|---|
| Action | Controls the action on the request (input) message; the default is the contract namespace, contract name, and operation name. Use this in conjunction with * to indicate the operation can handle all unmatched operation requests—there can be only one of these, and it must take a message as a parameter. |
| AsyncPattern | Provides for the implementation of an asynchronous process on the server, client, or both tiers. This feature aids .NET clients in supporting operations with the efficiency of using a single client thread. |
| IsInitiating | Indicates that this operation is an initiation of a session; the default is true, so if you require session initiation, you need to set all operations to false except the initiation operation. |
| IsOneWay | Indicates that the operation returns nothing (void) or can't accept out parameters. The default is false; as a result, all operations without it return an empty message that is useful for capturing exceptions. If applying the value of true to an operation that is marked with a return type other than void, WCF doesn't throw a compiler error. Instead, it throws an InvalidOperation exception when the WCF framework inspects the ServiceContract types at runtime. |
| IsTerminating | Indicates this operation terminates the session and the channel should close. |
| Name | Overrides the operation name from the method name on the interface. |
| ReplyAction | Controls the action on the reply (output) message. Used in conjunction with the Action property. |
The solution Example06 has an updated version of the ITradeService service contract. In this version, the OperationContract properties have been explicitly set. You'll also notice that the ServiceContract attribute now has a new property indicating it supports sessions. Without the ServiceContract.SessionMode property being set to SessionMode.Required, the OperationContract properties of IsInitiating and IsTerminating would be illogical. This condition is not caught at compile time, only at reflection time.
Listing 4-10 is a snippet from Example06. Notice that some added properties have been set in both the ServiceContract and OperationContract attribute initialization.
Example. TradeService.cs with OperationContract Properties
[ServiceContract(
    Namespace = "http://PracticalWcf",
    Name = "TradeService",
SessionMode = SessionMode.Required)
]
public interface ITradeService
{
    [OperationContract(
Action="http://PracticalWcf/TradeSecurityNow",
							IsOneWay = false,
IsTerminating = false, Name = "TradeSecurityNow" )] decimal TradeSecurity( string ticker, int quantity ); } |
These changes provide control over the WSDL generated from the metadata on your service contract. If you take a brief "before" and "after" look, you'll see some of the changes.
If you open the URL that points to the WSDL for the definitions, you'll see the changes and added control. The URL to open is as follows (ensure your ASP.NET development server is running!):
http://localhost:8888/ExchangeWeb/TradeService.svc?wsdl=wsdl0
NOTE
The generated URL by the .NET Framework may differ from the one shown here. To find the correct URL, look for the <wsdl:import...> element in the base URL.
Listing 4-11 is the generated WSDL before applying the OperationContract properties.
Example. TradeService.cs WSDL Before Property Changes
<wsdl:input wsaw:Action="http://PracticalWcf/TradeService/TradeSecurity"
message="tns:TradeService_TradeSecurityNow_InputMessage" /> |
Listing 4-12 shows the WSDL definition for a newly modified service contract.
Example. TradeService.cs WSDL after Property Changes
<wsdl:input
    wsaw:Action="http://PracticalWcf/TradeSecurityNow"
message="tns:TradeService_TradeSecurityNow_InputMessage"/> |
Note the updated Action names for both the input and output messages. If you look inside the client proxy code generated as part of the project, you'll see the updated matching names for the new contract.
|
Inside the client program, the only change required, other than updating the service reference through SvcUtil.exe, is to modify the method name on the proxy class from the following:
result = proxy. TradeSecurity( "MSFT", 2000 );to the following:
result = proxy.TradeSecurityNow( "MSFT", 2000 );The reason for this change is that the OperationContract.Name property is now set to TradeSecurityNow. As a result, when the call to SvcUtil.exe was made to regenerate the proxy, the new operation name instead of the old is used, which causes a break in the compile.
ServiceBehavior Attribute
So far, we've focused specifically on the contract definition. We've intentionally avoided any discussion of how a service behaves. Generally, service behavior is an implementation- dependant aspect of a solution. In addition to using ServiceBehavior, you also have an ability to apply behavior at the operation level with the OperationBehavior attribute (covered in the next section).
The ServiceBehavior attribute is applicable only at the class (implementation) level. Although the ServiceContract attribute was applicable at both the interface (contract) and the class levels, it is this distinction that is important. Behaviors in WCF are not part of the contract; they are implementation-specific aspects.
The capability exists to control service-wide behavior elements such as the following:
Concurrency
Controls threading behavior for an object and whether it supports reentrant calls. Valid only if the Instancing property is not PerCall.
Instancing
Controls new object creation and control object lifetime. The default is PerCall, which causes a new object on each method call. Generally, in session-oriented services, providing either PerSession or Shareable may provide better performance, albeit at the cost of concurrency management.
Throttling
Managed through configuration, when concurrency allows for multiple calls, to limit the number of concurrent calls, connections, total instances, and pending operations.
Transaction
Controls transaction aspects such as autocompletion, isolation level, and object recycling.
Session management
Provides automatic session shutdown or overrides default behavior.
Thread behavior
Forces the service thread to have affinity to the UI thread; this is helpful if the underlying service host is a WinForms application and updates to controls on that form may happen in the service implementation.
OperationBehavior Attribute
The other important behavior attribute is the OperationBehavior attribute. Although you have control over the service-wide behaviors using the ServiceBehavior attribute, you have more granular control at the operation level.
Again, these are implementation details applied at the class method level instead of the service interface. Operation aspects controllable through this attribute are as follows:
Transactional
Provides for autocompletion along with transaction flow and the required and supported options
Caller identity
When binding supports, provides the ability to execute under the caller's identity
Object recycling
Provides for overriding the InstanceMode mode of the ServiceContractBehavior