11. Accessing Your MySQL Database from the Web with PHP
Previously, in our work with PHP, we used a flat file to store and retrieve data. When we looked at this file in Chapter 2, “Storing and Retrieving Data,” we mentioned that relational database systems make a lot of these storage and retrieval tasks easier, safer, and more efficient in a web application. Now, having worked with MySQL to create a database, we can begin connecting this database to a web-based front end.
In this chapter, we explain how to access the Book-O-Rama database from the web using PHP. You learn how to read from and write to the database and how to filter potentially troublesome input data.
Key topics covered in this chapter include
![]() How web database architectures work
How web database architectures work
![]() Querying a database from the web using the basic steps
Querying a database from the web using the basic steps
![]() Setting up a connection
Setting up a connection
![]() Getting information about available databases
Getting information about available databases
![]() Choosing a database to use
Choosing a database to use
![]() Querying the database
Querying the database
![]() Retrieving the query results
Retrieving the query results
![]() Disconnecting from the database
Disconnecting from the database
![]() Putting new information in the database
Putting new information in the database
![]() Using prepared statements
Using prepared statements
![]() Using other PHP-database interfaces
Using other PHP-database interfaces
![]() Using a generic database interface: PDO
Using a generic database interface: PDO
How Web Database Architectures Work
In Chapter 8, “Designing Your Web Database,” we outlined how web database architectures work. Just to remind you, here are the steps:
1. A user’s web browser issues an HTTP request for a particular web page. For example, the user might have requested a search for all the books written by Michael Morgan at Book-O-Rama, using an HTML form. The search results page is called results.php.
2. The web server receives the request for results.php, retrieves the file, and passes it to the PHP engine for processing.
3. The PHP engine begins parsing the script. Inside the script is a command to connect to the database and execute a query (perform the search for books). PHP opens a connection to the MySQL server and sends on the appropriate query.
4. The MySQL server receives the database query, processes it, and sends the results—a list of books—back to the PHP engine.
5. The PHP engine finishes running the script. This usually involves formatting the query results nicely in HTML. It then returns the resulting HTML to the web server.
6. The web server passes the HTML back to the browser, where the user can see the list of books she requested.
Now you have an existing MySQL database, so you can write the PHP code to perform the preceding steps. Begin with the search form. The code for this plain HTML form is shown in Listing 11.1.
Listing 11.1 search.html—Book-O-Rama’s Database Search Page
<!DOCTYPE html>
<html>
<head>
<title>Book-O-Rama Catalog Search</title>
</head>
<body>
<h1>Book-O-Rama Catalog Search</h1>
<form action="results.php" method="post">
<p><strong>Choose Search Type:</strong><br />
<select name="searchtype">
<option value="Author">Author</option>
<option value="Title">Title</option>
<option value="ISBN">ISBN</option>
</select>
</p>
<p><strong>Enter Search Term:</strong><br />
<input name="searchterm" type="text" size="40"></p>
<p><input type="submit" name="submit" value="Search"></p>
</form>
</body>
</html>
This HTML form is reasonably straightforward. The output of this HTML is shown in Figure 11.1.

Figure 11.1 The search form is quite general, so you can search for a book by its title, author, or ISBN
The script that will be called when the Search button is clicked is results.php. It is listed in full in Listing 11.2. Through the course of this chapter, we discuss what this script does and how it works.
Listing 11.2 results.php—This Script Retrieves Search Results from the MySQL Database and Formats Them for Display
<!DOCTYPE html>
<html>
<head>
<title>Book-O-Rama Search Results</title>
</head>
<body>
<h1>Book-O-Rama Search Results</h1>
<?php
// create short variable names
$searchtype=$_POST['searchtype'];
$searchterm=trim($_POST['searchterm']);
if (!$searchtype || !$searchterm) {
echo '<p>You have not entered search details.<br/>
Please go back and try again.</p>';
exit;
}
// whitelist the searchtype
switch ($searchtype) {
case 'Title':
case 'Author':
case 'ISBN':
break;
default:
echo '<p>That is not a valid search type. <br/>
Please go back and try again.</p>';
exit;
}
$db = new mysqli('localhost', 'bookorama',
'bookorama123', 'books');
if (mysqli_connect_errno()) {
echo '<p>Error: Could not connect to database.<br/>
Please try again later.</p>';
exit;
}
$query = "SELECT ISBN, Author, Title, Price
FROM Books WHERE $searchtype = ?";
$stmt = $db->prepare($query);
$stmt->bind_param('s', $searchterm);
$stmt->execute();
$stmt->store_result();
$stmt->bind_result($isbn, $author, $title, $price);
echo "<p>Number of books found: ".$stmt->num_rows."</p>";
while($stmt->fetch()) {
echo "<p><strong>Title: ".$title."</strong>";
echo "<br />Author: ".$author;
echo "<br />ISBN: ".$isbn;
echo "<br />Price: $".number_format($price,2)."</p>";
}
$stmt->free_result();
$db->close();
?>
</body>
</html>
Figure 11.2 illustrates the results of using this script to perform a search.

Figure 11.2 The result of searching the database for a specific ISBN is presented in a web page using the results.php script
Querying a Database from the Web
In any script used to access a database from the Web, you follow some basic steps:
1. Check and filter data coming from the user.
2. Set up a connection to the appropriate database.
3. Query the database.
4. Retrieve the results.
5. Present the results back to the user.
These are the steps we followed in the script results.php, so now let’s go through each of them in turn.
Checking and Filtering Input Data
We begin the script by stripping any whitespace that the user might have inadvertently entered at the beginning or end of his search term. You can do this by applying the function trim() to the value of $_POST['searchterm'] when giving it a shorter name:
$searchterm=trim($_POST['searchterm']);
The next step is to verify that the user has entered a search term and selected a search type. Note that we check whether the user entered a search term after trimming whitespace from the ends of $searchterm. If you arrange these lines in the opposite order, you could encounter situations in which a user’s search term is not empty and therefore does not create an error message; instead, it is all whitespace, so it is deleted by trim():
if (!$searchtype || !$searchterm) {
echo '<p>You have not entered search details.<br/>
Please go back and try again.</p>';
exit;
}
We then check the $searchtype variable to make sure it contains a valid value, even though in this case it’s coming from an HTML <select> element:
switch ($searchtype) {
case 'Title':
case 'Author':
case 'ISBN':
break;
default:
echo '<p>That is not a valid search type. <br/>
Please go back and try again.</p>';
exit;
}
You might ask why you should bother checking data that has to be filled in. It’s important to remember that there might be more than one interface to your database. For example, Amazon has many affiliates who use its search interface. Also, it’s sensible to screen data in case of any security problems that arise because of users coming from different points of entry.
When you plan to use any data input by a user, you need to filter it appropriately for any control characters. (As you might remember we discussed this in Chapter 4, “String Manipulation and Regular Expressions”). You need to validate data when submitting any user input to a database such as MySQL.
In this case we do two things. First, we whitelist the search type, as shown above. In order to protect against problematic input in the search term field, we use a MySQL construct known as a prepared statement. We’ll talk about this more in a moment.
Setting Up a Connection
The basic PHP library for connecting to MySQL is called mysqli. The i stands for improved, as there was an older library called mysql. When using the mysqli library in PHP, you can use either an object-oriented or procedural syntax.
You use the following line in the script to connect to the MySQL server:
@$db = new mysqli('localhost', 'bookorama', 'bookorama123', 'books');
This line instantiates the mysqli class and creates a connection to host localhost with username bookorama, and password bookorama123. The connection is set up to use the database called books.
Using this object-oriented approach, you can now invoke methods on this object to access the database. If you prefer a procedural approach, mysqli allows for this, too. To connect in a procedural fashion, you can use
@$db = mysqli_connect('localhost', 'bookorama', 'bookorama123', 'books');
This function returns a resource rather than an object. This resource represents the connection to the database, and if you are using the procedural approach, you will need to pass this resource in to all the other mysqli functions. This is similar to the way the file-handling functions, such as fopen(), work.
Most of the mysqli functions have an object-oriented interface and a procedural interface. Generally, the differences are that the procedural version function names start with mysqli_ and require you to pass in the resource handle you obtained from mysqli_connect(). Database connections are an exception to this rule because they can be made by the mysqli object’s constructor.
The result of your attempt at connection is worth checking because none of the rest of code will work without a valid database connection. You do this using the following code:
if (mysqli_connect_errno()) {
echo '<p>Error: Could not connect to database.<br/>
Please try again later.</p>';
exit;
}
(This code is the same for the object-oriented and procedural versions.) The mysqli_connect_errno() function returns an error number on error, or zero on success.
Note that when you connect to the database, you begin the line of code with the error suppression operator, @. This way, you can handle any errors gracefully. (This could also be done with exceptions, which we have not used in this simple example.)
Bear in mind that there is a limit to the number of MySQL connections that can exist at the same time. The MySQL parameter max_connections determines what this limit is. The purpose of this parameter and the related Apache parameter MaxClients is to tell the server to reject new connection requests instead of allowing machine resources to be completely used up at busy times or when software has crashed.
You can alter both of these parameters from their default values by editing the configuration files. To set MaxClients in Apache, edit the httpd.conf file on your system. To set max_connections for MySQL, edit the file my.conf.
Choosing a Database to Use
Remember that when you are using MySQL from a command-line interface, you need to tell it which database you plan to use with a command such as
use books;
You also need to do this when connecting from the web. The database to use is specified as a parameter to the mysqli constructor or the mysqli_connect() function. If you want to change the default database, you can do so with the mysqli_select_db() function. It can be accessed as either
$db->select_db(dbname)
or as
mysqli_select_db(db_resource, db_name)
Here, you can see the similarity between the functions that we described before: The procedural version begins with mysqli_ and requires the extra database handle parameter.
Querying the Database
To actually perform the query, you can use the mysqli_query() function. Before doing this, however, it’s a good idea to set up the query you want to run:
$query = "SELECT ISBN, Author, Title, Price FROM Books WHERE $searchtype = ?";
There are two things to notice here. You’ll see that we have placed the $searchtype variable directly in the query. Where you might expect to see the $searchterm variable, you’ll instead see a question mark character (?). What’s going on here?
In some places, you may see queries being created like this:
$query = "SELECT ISBN, Author, Title, Price FROM Book WHERE$searchtype =
'$searchterm'";
Don’t do this
The reason for this is that while you can filter user input data to avoid security problems, it’s safer if you can delegate that responsibility elsewhere.
The class of security issue here is called SQL injection, and we’ll discuss it in plenty of detail in Part III of this book, “Web Application Security.” The short version is that users may type something in a form field that ends up being interpreted as SQL, which is something we dearly wish to avoid.
The reason we have a question mark in the query is that we’re going to use a type of query known as a prepared statement. The question mark is a placeholder. This tells MySQL, “whatever we replace the question mark with should be treated as data only, and not code.” We’ll cover how to do that in a moment.
You may be asking why we can’t use the same approach with the $searchtype variable. This is because these placeholders can only be used for data, and not for column, table, or database names. To be safe here, we used a whitelisting approach to specify valid values for the $searchtype variable. (You may also have noticed this was quite a lot of work.)
Next, let’s look at how we turn the placeholder query into a real query.
Tip
Remember that the query you send to MySQL does not need a semicolon at the end of it, unlike a query you type into the MySQL monitor.
Using Prepared Statements
The mysqli library supports the use of prepared statements. These are useful for speeding up execution when you are performing large numbers of the same query with different data. As we just discussed, they also help protect against SQL injection-style attacks.
The basic concept of a prepared statement is that you send a template of the query you want to execute to MySQL and then send the data separately. You can send multiple lots of the same data to the same prepared statement; this capability is particularly useful for bulk inserts.
We use a prepared statement in the results.php script, as follows:
$query = "SELECT ISBN, Author, Title, Price FROM Books WHERE $searchtype = ?";
$stmt = $db->prepare($query);
$stmt->bind_param('s', $searchterm);
$stmt->execute();
Let’s consider this code line by line.
When you set up the query, you put in question marks for each piece of data. You should not put any quotation marks or other delimiters around these question marks.
The second line is a call to $db->prepare(), which is called mysqli_stmt_prepare() in the procedural version. This line constructs a statement object or resource that you will then use to do the actual processing.
The statement object has a method called bind_param(). (In the procedural version, it is called mysqli_stmt_bind_param().) The purpose of bind_param() is to tell PHP which variables should be substituted for the question marks. The first parameter is a format string, not unlike the format string used in printf(). The value you are passing here ('s') means that the parameter is a string. Other possible characters in the format string are i for integer and b for blob. After this parameter, you should list the same number of variables as you have question marks in your statement. They will be substituted in this order.
The call to $stmt->execute() (mysqli_stmt_execute() in the procedural version) actually runs the query. You can then access the number of affected rows and close the statement.
So how is this prepared statement useful? The clever thing is that you can change the value of the bound variables and re-execute the statement without having to re-prepare. This capability is useful for looping through bulk inserts.
Retrieving the Query Results
A large variety of functions is available to break the results out in different ways.
In this example, we counted the number of rows returned and also retrieved the individual values for each column in each row returned.
As well as binding parameters, you can bind results. For SELECT-type queries, you can use $stmt->bind_result() (or mysqli_stmt_bind_result()) to provide a list of variables that you would like the result columns to be filled into. Each time you call $stmt->fetch() (or mysqli_stmt_fetch()), column values from the next row in the resultset are filled into these bound variables. For example, in the book search script you looked at earlier, you could use
$stmt->bind_result($isbn, $author, $title, $price);
to bind these four variables to the four columns that will be returned from the query. After calling
$stmt->execute();
you can call
$stmt->fetch();
in the loop. Each time this is called, it fetches the next result row into the four bound variables.
We’d like to get a count of the number of rows returned. To do this, we first tell PHP to retrieve and buffer all of the rows returned from the query:
$stmt->store_result();
When you use the object-oriented approach, the number of rows returned is stored in the num_rows member of the result object, and you can access it as follows:
echo "<p>Number of books found: ".$stmt->num_rows."</p>";
When you use a procedural approach, the function mysqli_num_rows() gives you the number of rows returned by the query. You should pass it the result identifier, like this:
$num_results = mysqli_num_rows($result);
Next, we retrieve each row from the result set, in a loop, and display it as follows:
while($stmt->fetch()) {
echo "<p><strong>Title: ".$title."</strong>";
echo "<br />Author: ".$author;
echo "<br />ISBN: ".$isbn;
echo "<br />Price: $".number_format($price,2)."</p>";
Each call to $stmt->fetch() (or, in the procedural version, mysqli_stmt_fetch()) retrieves the next row from the result set and populates the four bind variables with the values from that row, and we can then display them.
There are other approaches to fetching data from a query result other than using mysqli_stmt_fetch(). To use these, first we must extract a result set resource from the statement. You can do this using the mysqli_stmt_get_result() function, as follows:
$result = $stmt->get_result();
This function returns an instance of the mysqli_result object, which itself has a number of useful functions for extracting the data. Probably the most useful are
![]()
mysqli_fetch_array() (and related mysqli_fetch_assoc()), which returns the next row from the result set as an array. The mysqli_fetch_assoc() version uses the column names as keys, although you can also get this behavior from mysqli_fetch_array(). The mysqli_fetch_array() function takes a second parameter for the type of array to return. Passing MYSQLI_ASSOC will get you the column names as keys, passing MYSQLI_NUM will result in numbered keys, and MYSQLI_BOTH will give you an array containing two sets of the data, one with column names as keys and one with numerical keys.
![]()
mysqli_fetch_all() returns all of the rows returned by the query as an array of arrays where each of the inner arrays is one of the rows returned.
![]()
mysqli_fetch_object() returns the next row from the result set as an object, where each value is stored in an attribute carrying the name of the column.
Disconnecting from the Database
You can free your result set by calling either
$result->free();
or
mysqli_free_result($result);
You can then use
$db->close();
or
mysqli_close($db);
to close a database connection. Using this command isn’t strictly necessary because the connection will be closed when a script finishes execution anyway.
Putting New Information in the Database
Inserting new items into the database is remarkably similar to getting items out of the database. You follow the same basic steps: make a connection, send a query, and check the results. In this case, the query you send is an INSERT rather than a SELECT.
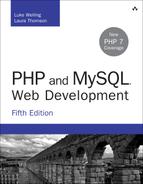
Although this process is similar, looking at an example can sometimes be useful. In Figure 11.3, you can see a basic HTML form for putting new books into the database.
Figure 11.3 This interface for putting new books into the database could be used by Book-O-Rama’s staff
The HTML for this page is shown in Listing 11.3.
Listing 11.3 newbook.html—HTML for the Book Entry Page
<!DOCTYPE html>
<html>
<head>
<title>Book-O-Rama - New Book Entry</title>
<style type="text/css">
fieldset {
width: 75%;
border: 2px solid #cccccc;
}
label {
width: 75px;
float: left;
text-align: left;
font-weight: bold;
}
input {
border: 1px solid #000;
padding: 3px;
}
</style>
</head>
<body>
<h1>Book-O-Rama - New Book Entry</h1>
<form action="insert_book.php" method="post">
<fieldset>
<p><label for="ISBN">ISBN</label>
<input type="text" id="ISBN" name="ISBN"
maxlength="13" size="13" /></p>
<p><label for="Author">Author</label>
<input type="text" id="Author" name="Author"
maxlength="30" size="30" /></p>
<p><label for="Title">Title</label>
<input type="text" id="Title" name="Title"
maxlength="60" size="30" /></p>
<p><label for="Price">Price</label>
$ <input type="text" id="Price" name="Price"
maxlength="7" size="7" /></p>
</fieldset>
<p><input type="submit" value="Add New Book" /></p>
</form>
</body>
</html>
The results of this form are passed along to insert_book.php, a script that takes the details, performs some minor validations, and attempts to write the data into the database. The code for this script is shown in Listing 11.4.
Listing 11.4 insert_book.php—This Script Writes New Books into the Database
<!DOCTYPE html>
<html>
<head>
<title>Book-O-Rama Book Entry Results</title>
</head>
<body>
<h1>Book-O-Rama Book Entry Results</h1>
<?php
if (!isset($_POST['ISBN']) || !isset($_POST['Author'])
|| !isset($_POST['Title']) || !isset($_POST['Price'])) {
echo "<p>You have not entered all the required details.<br />
Please go back and try again.</p>";
exit;
}
// create short variable names
$isbn=$_POST['ISBN'];
$author=$_POST['Author'];
$title=$_POST['Title'];
$price=$_POST['Price'];
$price = doubleval($price);
@$db = new mysqli('localhost', 'bookorama', 'bookorama123', 'books');
if (mysqli_connect_errno()) {
echo "<p>Error: Could not connect to database.<br/>
Please try again later.</p>";
exit;
}
$query = "INSERT INTO Books VALUES (?, ?, ?, ?)";
$stmt = $db->prepare($query);
$stmt->bind_param('sssd', $isbn, $author, $title, $price);
$stmt->execute();
if ($stmt->affected_rows > 0) {
echo "<p>Book inserted into the database.</p>";
} else {
echo "<p>An error has occurred.<br/>
The item was not added.</p>";
}
$db->close();
?>
</body>
</html>
The results of successfully inserting a book are shown in Figure 11.4.

Figure 11.4 The script completes successfully and reports that the book has been added to the database
If you look at the code for insert_book.php, you can see that much of it is similar to the script you wrote to retrieve data from the database. First, we check that all the form fields were filled in and then, because the price is stored in the database as a float, we make sure that it is one:
$price = doubleval($price);
This also takes care of any currency symbols that the user might have typed into the form.
Again, we connect to the database by instantiating the mysqli object and setting up a query to send to the database. In this case, the query is an SQL INSERT:
$query = "INSERT INTO Books VALUES (?, ?, ?, ?)";
$stmt = $db->prepare($query);
$stmt->bind_param('sssd', $isbn, $author, $title, $price);
$stmt->execute();
In this case, we’re passing four parameters into our prepared statement, so the format string is four characters long. In that string, each s represents one of the strings, and the d represents a double.
We’ve now covered the basics of using MySQL databases from PHP.
Using Other PHP-Database Interfaces
PHP supports libraries for connecting to a large number of databases, including Oracle, Microsoft SQL Server, and PostgreSQL.
In general, the principles of connecting to and querying any of these databases are much the same. The individual function names vary, and different databases have slightly different functionality, but if you can connect to MySQL, you should be able to easily adapt your knowledge to any of the others.
If you want to use a database that doesn’t have a specific library available in PHP, you can use the generic ODBC functions. ODBC, which stands for Open Database Connectivity, is a standard for connections to databases. It has the most limited functionality of any of the function sets, for fairly obvious reasons. If you have to be compatible with everything, you can’t exploit the special features of anything.
In addition to the libraries that come with PHP, the data access abstraction extension called PDO allows you to use the same interface for many different databases.
Using a Generic Database Interface: PDO
Let’s look at a brief example using the PDO data access abstraction extension. This extension enables a consistent interface to different databases. PDO is installed by default in PHP.
For comparative purposes, let’s look at how you could write the search results script differently using PDO (Listing 11.5).
Listing 11.5 results_pdo.php—Retrieves Search Results from the MySQL Database and Formats Them for Display
<!DOCTYPE html>
<html>
<head>
<title>Book-O-Rama Search Results</title>
</head>
<body>
<h1>Book-O-Rama Search Results</h1>
<?php
// create short variable names
$searchtype=$_POST['searchtype'];
$searchterm=trim($_POST['searchterm']);
if (!$searchtype || !$searchterm) {
echo '<p>You have not entered search details.<br/>
Please go back and try again.</p>';
exit;
}
// whitelist the searchtype
switch ($searchtype) {
case 'Title':
case 'Author':
case 'ISBN':
break;
default:
echo '<p>That is not a valid search type. <br/>
Please go back and try again.</p>';
exit;
}
// set up for using PDO
$user = 'bookorama';
$pass = 'bookorama123';
$host = 'localhost';
$db_name = 'books';
// set up DSN
$dsn = "mysql:host=$host;dbname=$db_name";
// connect to database
try {
$db = new PDO($dsn, $user, $pass);
// perform query
$query = "SELECT ISBN, Author, Title, Price
FROM Books WHERE $searchtype = :searchterm";
$stmt = $db->prepare($query);
$stmt->bindParam(':searchterm', $searchterm);
$stmt->execute();
// get number of returned rows
echo "<p>Number of books found: ".$stmt->rowCount()."</p>";
// display each returned row
while($result = $stmt->fetch(PDO::FETCH_OBJ)) {
echo "<p><strong>Title: ".$result->Title."</strong>";
echo "<br />Author: ".$result->Author;
echo "<br />ISBN: ".$result->ISBN;
echo "<br />Price: $".number_format($result->Price, 2)."</p>";
}
// disconnect from database
$db = NULL;
} catch (PDOException $e) {
echo "Error: ".$e->getMessage();
exit;
}
?>
</body>
</html>
Let’s examine what you do differently in this script.
To connect to the database, you use the line
$db = new PDO($dsn, $user, $pass);
This function accepts a connection string, also called a DSN or data source name, that contains all the parameters necessary to connect to the database. You can see this if you look at the format of the connection string:
$dsn = "mysql:host=$host;dbname=$db_name";
You will note that all the database interaction code is contained in a try:catch block. By default, if a problem occurs, PDO will throw an exception. Near the bottom of the script you’ll see the catch block for errors:
catch (PDOException $e) {
echo "Error: ".$e->getMessage();
exit;
}
The type of exception thrown is a PDOException, and as you can see from the code it includes a message about the type of error that occurred.
Assuming everything has gone well, you then set up a query and execute it as follows:
$query = "SELECT ISBN, Author, Title, Price
FROM Books WHERE $searchtype = :searchterm";
$stmt = $db->prepare($query);
$stmt->bindParam(':searchterm', $searchterm);
$stmt->execute();
This is similar to the way we set up and executed a prepared statement using the mysqli extension. One difference here is that we used a named parameter for replacement. (You can also use these with mysqli, and you can use question mark–style replacement with PDO.)
You can check the number of rows returned:
echo "<p>Number of books found: ".$stmt->rowCount()."</p>";
Note that in PDO this is a method rather than an attribute, and as such requires the parentheses(()).
You retrieve each row as follows:
$result = $stmt->fetch(PDO::FETCH_OBJ)
The generic method fetch()can fetch a row in many formats; the parameter PDO::FETCH_OBJ tells it that you would like the row returned as an anonymous object.
After outputting the returned rows, you finish by freeing the database resource to close the connection:
$db = NULL;
As you can see, this PDO example is similar to the first script.
The advantages of using PDO are that you need to remember only one set of database functions and that the code will require minimal changes if you decide to change the database software.
Further Reading
For more information on connecting MySQL and PHP together, you can read the appropriate sections of the PHP and MySQL manuals.
For more information on ODBC, visit http://support.microsoft.com/kb/110093.