
![]()
6
The Care and Feeding of Files and Folders
In This Chapter
![]() Checking out the OS X folder structure
Checking out the OS X folder structure
![]() Saving your document before it’s too late
Saving your document before it’s too late
![]() Opening icons
Opening icons
![]() Getting (and staying) organized
Getting (and staying) organized
![]() Copying, pasting, and moving files and folders
Copying, pasting, and moving files and folders
This could be the most important chapter in this book. If you don’t understand how to open and save files by using the Open dialog and Save sheets or how to use the file and folder system, you’ll have a heck of a time getting the hang of your Mac. Ask any longtime Mac user; the old lament is pretty common: “Well, I saved the file, but now I don’t know where it went.” It happens all the time with new users; if they don’t master these essential techniques, they often become confused about where files are located on their hard drives. Sure, the Sidebar has an item called All My Files that displays all of your files, and Spotlight can find files in milliseconds, but if you have thousands or tens of thousands of files, both can be more of a curse than a blessing.
This chapter is a tonic for finding the file or folder you want. Knowing where your files are is something every Mac user should grok (fully understand). Hang with me and pay attention; everything will soon become crystal clear.
 All My Files (in the Sidebar) is a fast and easy way to find a file or folder (although the sheer number of files it displays may overwhelm you, no matter how you sort or arrange them). And Chapter 7 is chock-full of tools and tips for finding files and folders when you misplace them. Furthermore, although you can often find files or folders by using Spotlight, you have to remember enough details about the file or its contents for Spotlight to find it.
At the end of the day, all the aforementioned techniques are useful and good to know, but take it from me: It’s often faster and easier if you know exactly where a file or folder is than to hunt for it.
Later in the chapter, I look at using Open dialogs and Save sheets within applications to find files and folders. You see them only after you launch a program and use that program’s File menu to open or save a file. (For more on launching applications, read the parts of Chapter 5 about icons; for more on creating and opening documents, see the documentation or Help file for the program that you’re using.)
 Spotlight (which you discover in Chapter 7) is OS X’s built-in search mechanism. It’s available just about everywhere you look in Mavericks: The magnifying glass on the menu bar, the Toolbar of Finder windows, and Open dialogs and Save sheets. The point is, if you can’t find a file or folder manually as described in the rest of this chapter, try Spotlight.
Understanding the OS X Folder Structure
Start by looking at the folder structure of a typical OS X installation. Open a Finder window and click the icon for your hard drive (which is typically called Macintosh HD) in the Sidebar. You should now see at least four folders: Applications, Library, System, and Users. Within the Users folder, each user with an account on this Mac has his own set of folders containing documents, preferences, and other information that belongs to that user and account.
 If you’re the sole person who accesses your Mac, you probably have only one user. Regardless, the folder structure that OS X uses is the same whether you have one user or dozens.
Within the Users folder, you find your personal Home folder (which bears your short user name), along with a Shared folder, where you can put files you want to share with other users. All these files are stored in a nested folder structure that’s a bit tricky to understand at first. This structure makes more sense after you spend a little time with it and figure out some basic concepts.
If you display the path bar at the bottom of your windows by choosing View⇒Show Path Bar, it’ll start to make sense much sooner.
Take a look at Figure 6-1; you can see how these main folders are related to one another. In the sections that follow, you look at each of these folders in more depth and find out more about what’s nested inside each one.

Figure 6-1: A bird’s-eye view of key folders on your Mac.
Understanding nested folders
Folders within other folders are often called nested folders. To get a feel for the way nested folders work in OS X, check out Figure 6-2.

Figure 6-2: Nested folders, going four levels deep.
You can see the following in Figure 6-2:
![]() The Desktop is the top-level folder in this example; all the other folders and files you see reside within the Desktop folder.
The Desktop is the top-level folder in this example; all the other folders and files you see reside within the Desktop folder.
![]() Folder 1 is inside the Desktop folder, which is one level deep.
Folder 1 is inside the Desktop folder, which is one level deep.
![]() Folder 2 is inside Folder 1, which is one level deeper than Folder 1, or two levels deep.
Folder 2 is inside Folder 1, which is one level deeper than Folder 1, or two levels deep.
![]() Folder 3 is inside Folder 2 and is three levels deep.
Folder 3 is inside Folder 2 and is three levels deep.
![]() The two files inside Folder 3 are four levels deep.
The two files inside Folder 3 are four levels deep.
If the preceding list makes sense to you, you’re golden. What’s important here is that you’re able to visualize the path to Folder 3. That is, to get to files inside Folder 3, you open Folder 1 and then open Folder 2 to be able to open Folder 3. Understanding this concept is important to understanding the relationships between files and folders. Keep reviewing this section, and eventually, the concept will click. You’ll slap yourself in the head and say, “Now I get it!”
From the top: The Computer folder
I start with the Computer folder, which is the top level of the folder hierarchy. The Computer folder shows all the storage devices (hard drives, CD- or DVD-ROM, USB flash drive, and so forth) that are currently connected to your Mac. The following steps show how you can start at the Computer folder and drill down through the folder structure:
1. To find the Computer folder, choose Go⇒Computer or press Shift+![]() +C.
+C.
In Figure 6-1, the Computer folder is called Bob L’s MacBook Pro, and it contains a hard-drive icon (Mavericks HD) and a Network icon, with which you can access servers or other computers on your local network. (If that seems mysterious, read Chapter 16 for the whole scoop on sharing files with other Macs and sharing your Mac with other users.)
If you don’t see a Computer icon in your Sidebar, choose Finder⇒Preferences, click the Sidebar icon at the top, and then select the check box for your computer. You can change a Mac’s name (Bob L’s MacBook Pro in Figure 6-1) in the Sharing System Preferences pane, which you can access by launching the System Preferences application (from the Applications folder, the Dock, or the ![]() menu) and then clicking the Sharing icon.
menu) and then clicking the Sharing icon.
You might have more or fewer icons in your Computer folder than you see in Figure 6-1, depending on how many disks you have mounted.
2. Double-click the icon that holds your OS X stuff.
(Technically, this drive is called your boot drive.) In Figure 6-1, that hard drive is called Mavericks HD. I have no idea what yours is called, of course; if you haven’t changed it, it’s probably called Macintosh HD.
3. Check out the folders you find there.
You should see at least four folders (unless you’ve added some; if you installed the Xcode programming tools, for example, you have more). In the next few sections, I walk you through what you can find in each one.
Peeking into the Applications folder
You can access the Applications folder, located at the root level of your boot drive (the one with OS X installed on it), by clicking the Applications icon in the Sidebar, by choosing it in the Go menu, or by pressing Shift+![]() +A. In this folder, you find applications and utilities that Apple includes with OS X. Most users of a given Mac have access to all the items in the Applications folder, with the exception of managed accounts or accounts with Parental Controls, as discussed in Chapter 16.
+A. In this folder, you find applications and utilities that Apple includes with OS X. Most users of a given Mac have access to all the items in the Applications folder, with the exception of managed accounts or accounts with Parental Controls, as discussed in Chapter 16.
Finding fonts (and more) in the public Library folder
The Library folder, at the root level of your OS X hard drive, is like a public library; it stores items available to everyone who logs into any account on this Mac.
There are actually four or more Library folders on your hard drive: one at the root level of your OS X disk, a second inside the root-level System folder, a third inside the Users folder, and the fourth in your Home folder.
What’s that you say? You don’t see a Library folder inside your Home folder? Well it’s like this: In versions of OS X earlier than OS X Lion (10.7), you would have seen a folder named Library between the Downloads and Movies folders in your Home folder (or mine — bobl — in Figure 6-1). But that was then, and this is now. In OS X Mavericks, the Home Library folder is hidden from view to protect you from yourself. You discover the secret to making it visible if you need it in the “Your personal Library card” section of this chapter, which is coming up.
 Leave the
 /System/Library folder alone. Don't move, remove, or rename it, or do anything within it. It's the nerve center of your Mac. In other words, you should never have to touch this third Library folder. You find a bunch of folders inside the Library folder at root level (the "public" Library folder). Most of them contain files that you never need to open, move, or delete.
By and large, the public Library subfolder that gets the most use is the Fonts folder, which houses many of the fonts installed on the Mac. For the most part, fonts can be made available in one of two ways:
![]() To everyone who uses the Mac: If that’s the case, they’re stored here in the Fonts folder.
To everyone who uses the Mac: If that’s the case, they’re stored here in the Fonts folder.
![]() To a single user: In this case, you place the fonts in the user’s Library folder (the one in the user’s Home folder).
To a single user: In this case, you place the fonts in the user’s Library folder (the one in the user’s Home folder).
I discuss fonts more in Chapter 14. Meanwhile, some other public Library subfolders that you might use or add to are the iMovie, iTunes, iPhoto, and iDVD folders (where you put plug-ins for those programs); the Scripts folder (which houses AppleScripts accessible to all users); and the Desktop Pictures folder (where you can place pictures to be used as Desktop backgrounds).
Finally, the Library in the Users folder is where OS X stores configuration and preferences files shared by all users.
Don’t remove, rename, or move any files or folders in any of your Library folders unless you’re sure of what you’re doing and why. OS X is very picky about folders in its Libraries being in the proper place and bearing the proper name. While I’m on the subject, you probably shouldn’t remove, rename, or move applications installed by Mavericks in the Applications folder.
Note: Under most circumstances, you won’t actually add items to or remove items from folders in this Library yourself. Software installers usually do the heavy lifting for you by placing all their little pieces in the appropriate Library folders. You shouldn’t need to touch this Library often, if ever. That said, knowing what these folders are — and who can access their contents — might come in handy down the road a piece.
The locations of all these libraries are illustrated in Figure 6-3.

Figure 6-3: A guide to which Library is which.
If your Mac is set up for multiple users, only users with administrator (admin) privileges can put stuff in the public (root-level) Library folder. (For more information on admin privileges, check out Chapter 16.)
Let it be: The System folder
The System folder contains the files that OS X needs to start up and keep working.
Leave the System folder alone. Don’t move, remove, or rename it or anything within it. It’s part of the nerve center of your Mac.
The bottom line is that you should, for the most part, restrict yourself to using the folders within your Home folder. If you’re the only user of your Mac, you can pretty much forget about the root level Library. But those with more than one user account on their Mac may someday need to add or remove a file from this folder.
So now you can forget everything outside your Home folder because with few exceptions, that’s where all of your “stuff” will reside.
The usability of the Users folder
When you open the Users folder, you see a folder for each person who has a user account on the Mac, as well as the Shared folder.
The Shared folder that you see inside the Users folder allows everyone who uses the Mac to use any files stored there. If you want other people who use your Mac to have access to a file or folder, the Shared folder is the proper place to stash it. You can see the Shared folder under the MissKitty folder in Figure 6-1 earlier in this chapter.
I realize that a lot of people don’t share their Macs with others, and if you’re one of these folks, you may wonder why I keep mentioning sharing and multiple users and the like. Well, OS X is based on the Unix operating system — a multiuser operating system used on high-end servers and workstations that are often shared by several people. OS X has both the benefit of this arrangement and a bit of the confusion caused when a single user (could it be you?) fires up a computer that could be set up for several people. That’s why OS X folders are organized the way they are — with different hierarchies for each user and for the computer as a whole.
I should also mention that each user account has its own preferences and settings and that one user can’t see another user’s files by default.
If your Mac has more than one constant user, consider creating a user account for each person. If you’re a parent, separate user accounts mean you can enable Mavericks’ terrific Parental Controls, which are a very good thing if you ask me. But I’m getting ahead of myself again; Chapter 16 has the scoop on sharing your Mac and Parental Controls.
There’s no place like Home
From the Users folder, you can drill down into the Home folder to see what’s inside. When the user logs on to this Mac, his Home folder appears whenever he clicks the Home icon in the Sidebar, chooses Go⇒Home, or uses the keyboard shortcut Shift+![]() +H.
+H.
Your Home folder is the most important folder for you as a user — or at least the one where you stash most of your files. I strongly recommend that you store all the files you create in subfolders within your Home folder — preferably, in subfolders in your Home/Documents folder. The advantage of doing so is that your Home/Documents folder is easy to find, and many programs use it as the default folder for opening or saving a file.
When you open your Home folder, you see a Finder window with a little house icon and your short username in the title bar. Seeing your short username in the title bar tells you that you’re in your Home folder. Every user has a Home folder named after his or her short username (as specified in the Users & Groups System Preferences pane). Figure 6-4 shows that my Home folder is named bobl — the short name I used when I first set up my Mac.

Figure 6-4: My Home folder.
If your Mac has more than one user, you can see the other users’ Home folders in your Users folder, but OS X prevents you from opening files from or saving files to them.
By default, your Home folder has several folders inside it created by OS X. The following four are the most important:
![]() Desktop: If you put items (files, folders, applications, or aliases) on the Desktop, they’re actually stored in the Desktop folder.
Desktop: If you put items (files, folders, applications, or aliases) on the Desktop, they’re actually stored in the Desktop folder.
![]() Documents: This is the place to put all the documents (letters, spreadsheets, recipes, and novels) that you create.
Documents: This is the place to put all the documents (letters, spreadsheets, recipes, and novels) that you create.
![]() Library: As I mention earlier in this chapter, this Library folder is invisible in Mavericks; I show you how to deal with that shortly. Rest assured that even though it’s hidden, it’s still one of the most important folders in your Home folder, containing Preferences (files containing the settings you create in System Preferences and other places), fonts available only to you (as described earlier in this chapter), and other stuff that you — and only you — expect to use.
Library: As I mention earlier in this chapter, this Library folder is invisible in Mavericks; I show you how to deal with that shortly. Rest assured that even though it’s hidden, it’s still one of the most important folders in your Home folder, containing Preferences (files containing the settings you create in System Preferences and other places), fonts available only to you (as described earlier in this chapter), and other stuff that you — and only you — expect to use.
![]() Public: If others on your local area network use file sharing to connect with your Mac, they can’t see or use the files or folders in your Home folder (unless you’ve explicitly shared them), but they can share files you’ve stored in your Home folder’s Public folder. (Read more about file sharing and Public folders in Chapter 16.)
Public: If others on your local area network use file sharing to connect with your Mac, they can’t see or use the files or folders in your Home folder (unless you’ve explicitly shared them), but they can share files you’ve stored in your Home folder’s Public folder. (Read more about file sharing and Public folders in Chapter 16.)
You can create more folders, if you like. In fact, every folder that you ever create (at least every one you create on this particular hard drive or volume) should be within your Home folder. I explain more about creating folders and subfolders and organizing your stuff inside them later in this chapter.
The following are a few more tidbits to keep in mind as you dig around your Home folder:
![]() If you decide that you don’t want an item on the Desktop anymore, delete it by dragging its icon from the Desktop folder to the Trash or by dragging its icon from the Desktop itself to the Trash. Both techniques yield the same effect: The file is in the Trash, where it remains until you empty the Trash. Or if you don’t want it on the Desktop anymore but don’t want to get rid of it either, you can drag it from the Desktop into any other folder you like.
If you decide that you don’t want an item on the Desktop anymore, delete it by dragging its icon from the Desktop folder to the Trash or by dragging its icon from the Desktop itself to the Trash. Both techniques yield the same effect: The file is in the Trash, where it remains until you empty the Trash. Or if you don’t want it on the Desktop anymore but don’t want to get rid of it either, you can drag it from the Desktop into any other folder you like.
![]() The other four folders that you should see in your Home folder are Downloads, Movies, Music, and Pictures. All these folders except Downloads are empty until you (or a program such as iTunes, GarageBand, iPhoto, or iMovie, which create files inside these folders automatically the first time you launch them) put something in these folders. And the Downloads folder might as well be empty, but it contains a document entitled, About Downloads, with a little info on Dock stacks and the Downloads folder and concludes by saying, “. . . when you’re done reading this document, feel free to throw it out.”
The other four folders that you should see in your Home folder are Downloads, Movies, Music, and Pictures. All these folders except Downloads are empty until you (or a program such as iTunes, GarageBand, iPhoto, or iMovie, which create files inside these folders automatically the first time you launch them) put something in these folders. And the Downloads folder might as well be empty, but it contains a document entitled, About Downloads, with a little info on Dock stacks and the Downloads folder and concludes by saying, “. . . when you’re done reading this document, feel free to throw it out.”
Your personal Library card
The invisible Library subfolder of your Home folder is the repository of everything that OS X needs to customize your Mac to your tastes. If you want to add something to a Library folder, it's usually best to add it to your Home/Library folder. You won't spend much time (if any) adding things to the Library folder or moving them around within it, and that's probably why it's now hidden from sight. Still, I think it's a good idea for you to know what's in your Home/Library.
In the “Finding fonts (and more) in the public Library folder” section, earlier in this chapter, I discuss the Library folder that’s used to specify preferences for the Mac as a whole. But this Library folder is all about you and your stuff.
Be cautious with all Library folders. OS X is very persnickety about how the folders and files within it are organized. As I discuss earlier in the chapter, you can add items to and remove items safely from most public or Home Library folders, but leave the folders themselves alone. If you remove or rename the wrong folder, you could render OS X inoperable. It’s like the old joke about the guy who said to the doctor, “It hurts when I do that,” and the doctor replies, “Then don’t do that.”
To find your hidden Home/Library folder, do this:
1. Hold down the Option key on your keyboard.
2. Click the Go menu.
The (formerly) invisible Library folder appears in the Go menu as long as the Option key is pressed, as shown in Figure 6-5.
3. Select Library and release the mouse button.

Figure 6-5: A normal Go menu (left) and a Go menu with the Option key pressed (right).
You should see several folders in the Home/Library folder; the exact number depends on the software that you install on your Mac. You probably have folders called Mail, Safari, Logs, and Preferences, for example.
If you don't want to have to do this dance every time you want to open your Home/Library, Mavericks has a new option for you: There's now a Show Library Folder check box in the View Options window (choose View⇒Show/Hide View Options or press ![]() +J). Select it, and your
+J). Select it, and your Home/Library will be visible evermore (or at least until you deselect the check box).
Some of the most important standard folders in the Library folder include the following:
![]() Application Support: Some applications store their support files here; others store theirs in the main (root-level) public Library folder.
Application Support: Some applications store their support files here; others store theirs in the main (root-level) public Library folder.
![]() Fonts: This folder is empty until you install your own fonts here. The fonts that come with OS X aren’t stored here, but in the Library folder at root level for everyone who uses this Mac. I discuss this topic earlier in this chapter. If you want to install fonts so that only you have access to them, put them in the Fonts folder in your Library folder.
Fonts: This folder is empty until you install your own fonts here. The fonts that come with OS X aren’t stored here, but in the Library folder at root level for everyone who uses this Mac. I discuss this topic earlier in this chapter. If you want to install fonts so that only you have access to them, put them in the Fonts folder in your Library folder.
The easiest way to install a font is to double-click its icon and let Mavericks’ Font Book utility handle it for you, as described in Chapter 14. But I’d be remiss if I didn’t also mention how to install a font manually:
• To install a font that only you can use: Drag the font file's icon to the Fonts folder in your Home/Library. The font is available only to this user account (because other users can't use fonts stored in your Home/Library folder).
• To install a font for all users of this Mac: Drag the font file’s icon into the Fonts folder in the public Library folder — the one at root level that you see when you open your hard drive’s icon.
![]() Preferences: The files here hold the information about whichever things you customize in OS X or in the applications you run. Whenever you change a system or application preference, that info is saved to a file in the Preferences folder.
Preferences: The files here hold the information about whichever things you customize in OS X or in the applications you run. Whenever you change a system or application preference, that info is saved to a file in the Preferences folder.
Don't mess with the Preferences folder! You should never need to open or use this folder unless something bad happens — if, for example, you suspect that a particular preferences file has become corrupted (that is, damaged). My advice is to just forget that you know about this folder and let it do its job. If you don't know why you're doing something to a folder (other than the Fonts folder) in your Home/Library, don't do it. There must be some good reasons why Apple decided to hide the Home/Library folder in OS X Mavericks, and I'm sure that one of them is to keep you (or me) from accidentally screwing something up.
Saving Your Document Before It’s Too Late
If you have a feel for the OS X folder structure, you can get down to the important stuff — namely, how to save documents and where to save them. You can create as many documents as you want, using one program or dozens of ’em, but all could be lost if you don’t save the files (or versions of the files) to a storage device such as your hard drive or other disk.
When you save a file, you’re committing a copy to a disk — whether it’s a disk connected directly to your Mac, one available over a network, or a removable disk such as a USB flash drive or portable hard disk.
Lion introduced three new features — Resume, Auto Save, and Versions — to make your life easier. In previous versions of OS X, applications generally showed a blank page or nothing at all when you launched them. Mavericks’ Resume feature automatically reopens all windows that were onscreen when you quit the app. So, when you launch the app again, all the windows are reopened in the same position onscreen as when you quit. Best of all, Resume seems to work with most third-party apps.
Programs have offered Auto Save before, but now it’s baked into OS X. Auto Save automatically saves versions of your work as you work, when you pause, and every five minutes, whether you need it or not.
For as long as we’ve had Macs, we’ve saved unique versions of our files, creating and managing them with the Save As command or by duplicating and renaming them in the Finder. Now Mavericks (like Lion and Mountain Lion before it) takes over version control for you by automatically saving versions as described in the preceding paragraph.
That’s the good news, but there’s also bad news . . . although Auto Save and versions are baked right into OS X, third-party apps require a software update before they can take advantage of these features. So please don’t get too comfortable with Auto Save and Versions until you’re sure that your applications take advantage of these features. Most third-party apps still rely on the good old Save and Save As commands, which have been around since time immemorial (or at least since 1984).
In the following sections, I show you how to save your masterpieces. Prevent unnecessary pain in your life by developing good saving habits. I recommend that you save your work (or save a version in apps that support versions)
![]() Every few minutes
Every few minutes
![]() Before you switch to another program
Before you switch to another program
![]() Before you print a document
Before you print a document
![]() Before you stand up
Before you stand up
The keyboard shortcut for Save in almost every Mac program is ![]() +S. Memorize it. See it in your dreams. Train your finger muscles to do it unconsciously. Use it (the keyboard shortcut) or lose it (your unsaved work).
+S. Memorize it. See it in your dreams. Train your finger muscles to do it unconsciously. Use it (the keyboard shortcut) or lose it (your unsaved work).
If you don’t heed this advice — and the program that you’re using crashes while switching programs, printing, or sitting idle (the three likeliest times for a crash) — you may lose everything you did since your last save or saved version. The fact that a program crash doesn’t bring down the entire system or force a restart is small consolation when you’ve lost everything you’ve typed, drawn, copied, pasted, or whatever since the last time you saved or saved a version.
Stepping through a basic Save
This section walks you through the steps you use the first time you save a document. The process is the same whether your app supports Auto Save and Versions or not. It’s only after the initial save that Auto Save and Versions come into play.
Does it have Auto Save and Versions or not?
It can be hard to discern at a glance whether an app uses the Auto Save and Versions features introduced with OS X Lion. In Mavericks, the Save a Version command has gone back to its original (and less confusing) moniker, which is plain ol’ Save. Fortunately, there are other ways to determine whether a program supports Auto Save and Versions.
The first is whether the app has a Save As or Duplicate command in its File menu. Programs with a Save As command are old-school and don’t support the new Auto Save and Versions features. Programs with a Duplicate command have usually been updated with support for Auto Save and Versions. (Interestingly, the shortcut for Duplicate and Save As is almost always the same, namely ![]() +Shift+S.)
+Shift+S.)
The next is whether the app has Rename and Move To commands in its File menu. If it doesn’t, it’s old-school; if it does, it’s Auto Save- and Version-savvy.
The easiest way to tell, however, is to look at the title bar of a document. If it displays a little triangle to the right of the document’s name and a pop-up window appears if you click the triangle (as shown in the following figure), it means that the app supports Auto Save and Versions. (You read more about the options in the pop-up window later in this chapter.)

In a few sections of this book, I ask you not only to read the instructions while sitting in front of your Mac but also to perform each step of the instructions as described. This section is one of them. If you read it and follow along, I can pretty much guarantee that it’ll make sense. If you read it somewhere other than at your Mac, it could be a mite confusing.
Saving a file works pretty much the same way in any application you use to create documents. For this example, I use OS X’s word processing application, TextEdit, but the process will be very similar in Microsoft Word, Adobe Photoshop, Apple Keynote, or any other application.
If you’re going to follow along as I recommend, please launch the TextEdit program now (it’s in your Applications folder), click the New Document button or choose File⇒New, and type a few words on the Untitled page that appears after you launch it.
Now that we’re both on the same page, both literally and figuratively, here’s how saving a file works: When you choose to save a file for the first time (by choosing File⇒Save or pressing ![]() +S), a Save sheet appears in front of the document that you’re saving, as shown in Figure 6-6. I call this a basic Save sheet (as opposed to an expanded Save sheet, which I get to in a moment):
+S), a Save sheet appears in front of the document that you’re saving, as shown in Figure 6-6. I call this a basic Save sheet (as opposed to an expanded Save sheet, which I get to in a moment):
1. In the Save As field, type a name for your file.
When a Save sheet appears for the first time, the Save As field is active and displays the name of the document. The document name (usually, Untitled) is selected; when you begin typing, the name disappears and is replaced by the name you type.
2. If the Where pop-up menu lists the location where you want to save your file, choose that location and proceed to Step 5; if not, click the disclosure button (the one with the little triangle to the right of the word Untitled in Figure 6-6).

Figure 6-6: A basic Save sheet looks a lot like this.
You can choose from a short list of folders and volumes listed in the basic Save sheet’s Where pop-up menu (which are the same devices and favorites you see in the Sidebar of Finder windows). Or, if you click the disclosure button (triangle), the sheet expands so that you can navigate folders just as you do in the Finder: by opening them to see their contents.
If you clicked the Save button instead of pulling down the Where menu, your file will be saved to iCloud, Apple’s free online storage service (which you discover in Chapter 10).
If you switch to expanded view by clicking the disclosure button, the Where pop-up menu shows the path to the folder the file will be saved in (Documents in Figure 6-6 and Figure 6-7).
 I think that the Where menu should be the same in both basic and expanded Save sheets, as it was before OS X 10.5 Leopard. It seems more confusing to have the contents of this menu change based on whether the Save sheet is expanded or not. I’ve called it to your attention so it won’t confuse you.

Figure 6-7: An expanded Save sheet looks similar to this one (shown in List view).
Switch between the basic and expanded Save sheets a few times by clicking the disclosure button. Make sure that you see and understand the difference between what you see in the Where menu in a basic Save sheet and what you see in the Where menu in an expanded Save sheet.
3. To find the folder where you want to save your file, choose among views by clicking the Icon, List, Column, or Cover Flow view button.
(The buttons look like their counterparts in Finder windows.) In icon view, you double-click a folder to open it. List and Cover Flow views offer disclosure triangles for folders and disks, so single-click the disclosure triangles of folders to see their contents. In column view, you click an item on the left to see its contents on the right, just as you do in a column-view Finder window.
You can also use the Forward and Back buttons or the Sidebar, both available only in an expanded Save dialog, to conveniently navigate your disk. Many of these navigation aids work just like the ones in the Finder; flip back to Chapter 5 for more details. You can enlarge the Save sheet to see more the same way you enlarge a Finder window: Drag an edge or corner of the sheet.
If you can’t find the folder in which you want to save your document, type the folder’s name in the Search box. It works just like the Search box in a Finder window, as described in Chapter 5. You don’t even have to press Enter or Return; the Save sheet updates itself to show you only items that match the characters as you’ve typed them.
4. Select the folder where you want to save your file in the Where pop-up menu or Sidebar.
5. If you want to create a new subfolder of the selected folder to save your file in, click the New Folder button, give the new folder a name, and then save your file in it.
In Figure 6-8, I’ve selected an existing folder named Novels. You can tell that it’s selected because its name is displayed in the Where menu and highlighted below that in the first column.

Figure 6-8: Saving a file in the Novels folder (which is in the Documents folder).
The selected folder is where your file will be saved.
The keyboard shortcut for New Folder is Shift+![]() +N, regardless of whether you’re in a Save sheet or the Finder. If I’d wanted to create a new folder inside the Novels folder in Figure 6-8, I could have clicked the New Folder button or pressed the shortcut.
+N, regardless of whether you’re in a Save sheet or the Finder. If I’d wanted to create a new folder inside the Novels folder in Figure 6-8, I could have clicked the New Folder button or pressed the shortcut.
6. In the File Format pop-up menu, make sure the format selected is the one you want.
7. If you want to turn off the display of file extensions (such as .rtf, .pdf, and .txt) in Save sheets, select the Hide Extension check box.
8. Double-check the Where pop-up menu one last time to make sure that the correct folder is selected; then click the Save button to save the file to the active folder.
If you click Save, the file appears in the folder you selected. If you change your mind about saving this file, clicking Cancel dismisses the Save sheet without saving anything anywhere. In other words, the Cancel button returns things to the way they were before you displayed the Save sheet.
After you’ve saved a file for the first time, choosing File⇒Save or pressing ![]() +S won’t bring up a Save sheet. Instead, what happens next depends on whether the app supports Mavericks’ Auto Save and Versions. If the app doesn’t support Auto Save and Versions, Save and its shortcut,
+S won’t bring up a Save sheet. Instead, what happens next depends on whether the app supports Mavericks’ Auto Save and Versions. If the app doesn’t support Auto Save and Versions, Save and its shortcut, ![]() +S, merely resave your document in the same location and with the same name. If you want to save a unique version with a different name you choose the Save As command and save the file under a new name. If the app does support Auto Save and Versions, however, the upcoming section, “Save As versus Duplicate: Different names for same result,” explains how things work.
+S, merely resave your document in the same location and with the same name. If you want to save a unique version with a different name you choose the Save As command and save the file under a new name. If the app does support Auto Save and Versions, however, the upcoming section, “Save As versus Duplicate: Different names for same result,” explains how things work.
When you use apps that don’t support Auto Save and Versions, I beg you to get into the habit of pressing ![]() +S often. It can’t hurt — and just might save your bacon someday.
+S often. It can’t hurt — and just might save your bacon someday.
One last thing: In Figures 6-6, 6-7, and 6-8, I used the Save sheet for TextEdit as an example. In programs other than TextEdit, the Save sheet might contain additional options, fewer options, or different options, and therefore may look slightly different. The File Format menu, for example, is a feature specific to TextEdit; it might not appear in other applications’ Save sheets. Don’t worry. The Save sheet always works the same way, no matter what options it offers.
Save As versus Duplicate: Different names for same result
File⇒Duplicate and File⇒Save As serve the same purpose and achieve the same result. The difference is that you’ll find File⇒Duplicate in apps that support Versions and Auto Save, and File⇒Save As in apps that don’t. They’re different names for achieving the same result: Saving a file that’s already been saved with a different name, with the option of saving the renamed file in a different folder.
Before I get into the details, you may be wondering why you would want to save an existing file with a different name. So here's a good (albeit kind of rude) example: Suppose that you have two cousins, Kate and Nancy. You write Kate a long, chatty letter and save this document with the name Letter to Kate. Later, you decide that you want to send almost the same letter to Nancy, but you want to change a few things. So you change the part about your date last night and replace all references to Kate's husband, Kevin, with references to Nancy's husband, Norman. (Aren't computers grand?)
So you make all these changes in Letter to Kate, but you haven't resaved this document yet, and although the document on your screen is actually a letter to Nancy, its filename is still Letter to Kate. Think of what would happen if you were to save it now without using the Save As feature: Letter to Kate reflects the changes that you just made. (The stuff in the letter meant for Kate is blown away, replaced by the stuff that you just wrote to Nancy.) Thus the filename Letter to Kate is inaccurate. Even worse, you might no longer have a copy of the original letter you sent to Kate! The solution? Just use Save As or Duplicate to rename this file Letter to Nancy by choosing File⇒Save As or File⇒Duplicate.
If you chose Save As: A Save sheet appears, in which you can type a different filename in the Save As field. You can also navigate to another folder, if you like, and save the newly named version of the file there. Now you have two distinct files: Letter to Kate and Letter to Nancy. Both contain the stuff they should, but both started life from the same file.
If you chose Duplicate: The title bar of the document becomes editable so you can change its name without even seeing a Save sheet. (Refer to the figure in the earlier sidebar, “Does it have Auto Save and Versions or not?”) Press Enter or Return, and the renamed file will be saved in the same folder as the original. Or, if you want to save the newly renamed file in a different location, choose File⇒Move To or click the little triangle to the right of the document’s name, choose Move To in its pop-up menu, and then from the pop-up menu, select a folder in which to save the file.
Now that you understand what Save As or Duplicate are all about, here’s an easier way to get the same result: Before you start, duplicate the document in the Finder (choose File⇒Duplicate or press ![]() +D). Rename the copy and open it. This way, when you’re done making changes, you don’t have to remember to choose Save As; you can just perform your habitual Save. This approach also protects you from accidentally saving part of the letter to Nancy without changing the file’s name first (which you’re likely to do if you’re following my advice about saving often). So when you decide that you’re going to reuse a document, choose Save As (or duplicate and rename the file) before you begin working on it, just to be safe.
+D). Rename the copy and open it. This way, when you’re done making changes, you don’t have to remember to choose Save As; you can just perform your habitual Save. This approach also protects you from accidentally saving part of the letter to Nancy without changing the file’s name first (which you’re likely to do if you’re following my advice about saving often). So when you decide that you’re going to reuse a document, choose Save As (or duplicate and rename the file) before you begin working on it, just to be safe.
Versions gives you the benefits of Save As without any action on your part, many programs still lack support for Auto Save and Versions at press time. And, in fact, some of Apple’s apps, as well as most third-party apps, still use the Save As technique, and I expect that to be the status quo for quite some time. But since some of Apple’s offerings (most notably TextEdit) use Auto Save and Versions, I’d be remiss if I glossed over the new way of doing things.
One last thing: If the app you’re using supports Mavericks’ Versions, it creates a snapshot called a Version automatically as you work, when you pause, every five minutes, and every time you choose File⇒Save (![]() +S). Choose File⇒Revert To⇒Browse All Versions to compare different versions of the document you’ve saved side-by-side, as shown in Figure 6-9.
+S). Choose File⇒Revert To⇒Browse All Versions to compare different versions of the document you’ve saved side-by-side, as shown in Figure 6-9.
Figure 6-9 is actually Mavericks’ Time Machine backup utility displaying the various Versions. Read more about Time Machine in Chapter 18.
Tabbing around the Save (or Save As) sheet
In the expanded view, if you press the Tab key while the Save As field is active, it becomes inactive, and the Search box becomes active. Press Tab again, and the Sidebar becomes active. Press the Tab key one more time, and the file list box (more accurately known as the detail pane — the part with Icon, List, Column, or Cover Flow view buttons in it) becomes active. That’s because the file list box, the Search box, the Sidebar, and the Save As field are mutually exclusive. Only one can be active at any time. You can always tell which item is active by the thin blue or gray border around it.
When you want to switch to a different folder to save a file, click the folder in the Sidebar or click anywhere in the file list box to make the file list active. The following tricks help you get a hold on this whole active/inactive silliness:
![]() If you type while the file list box is active, the list box selects the folder that most closely matches the letter(s) that you type. It’s a little strange because you won’t see what you type: You’ll be typing blind, so to speak.
If you type while the file list box is active, the list box selects the folder that most closely matches the letter(s) that you type. It’s a little strange because you won’t see what you type: You’ll be typing blind, so to speak.
![]() When the file list is active, the letters that you type don’t appear in the Save As field. If you want to type a filename, you have to activate the Save As field again (by clicking in it or using the Tab key) before you can type in it.
When the file list is active, the letters that you type don’t appear in the Save As field. If you want to type a filename, you have to activate the Save As field again (by clicking in it or using the Tab key) before you can type in it.
![]() If you type while the Sidebar is active, nothing happens. You can, however, use the up- and down-arrow keys to move around in the Sidebar.
If you type while the Sidebar is active, nothing happens. You can, however, use the up- and down-arrow keys to move around in the Sidebar.
![]() Pressing Shift reverses the order of the sequence. If you press Shift+Tab, the active item moves from the Save As field to the file list box to the Sidebar to the Search box and back to the Save As field again.
Pressing Shift reverses the order of the sequence. If you press Shift+Tab, the active item moves from the Save As field to the file list box to the Sidebar to the Search box and back to the Save As field again.

Figure 6-9: Browse All Versions lets you compare all versions and revert to an earlier version.
Open Sez Me
You can open any icon in the Finder — whether it’s a file or a folder — in at least six ways. (Okay, there are at least seven ways, but one of them belongs to aliases, which I discuss in great detail back in Chapter 5.) Anyway, here are the ways:
![]() Click the icon once to select it and choose File⇒Open.
Click the icon once to select it and choose File⇒Open.
![]() Click the icon twice in rapid succession.
Click the icon twice in rapid succession.
If the icon doesn’t open, you double-clicked too slowly. You can test (and adjust) your mouse’s sensitivity to double-click speed in the Mouse (or Trackpad) System Preference pane, which you can access by launching the System Preferences application (from the Applications folder, the Dock, or the ![]() menu) and then clicking the Mouse (or Trackpad) icon.
menu) and then clicking the Mouse (or Trackpad) icon.
![]() Select the icon and then press either
Select the icon and then press either ![]() +O or
+O or ![]() +
+![]() .
.
![]() Right-click or Control-click it and then choose Open from the contextual menu.
Right-click or Control-click it and then choose Open from the contextual menu.
![]() If the icon is a document, drag it onto the application icon (or the Dock icon of an application) that can open that type of document.
If the icon is a document, drag it onto the application icon (or the Dock icon of an application) that can open that type of document.
![]() If the icon is a document, right-click or Control-click it and choose an application from the Open With submenu of the contextual menu.
If the icon is a document, right-click or Control-click it and choose an application from the Open With submenu of the contextual menu.
You can also open any document icon from within an application, of course. Here’s how that works:
1. Just launch your favorite program, and choose File⇒Open (or press ![]() +O, which works in most Mac programs).
+O, which works in most Mac programs).
An Open dialog appears, like the one shown in Figure 6-10.

Figure 6-10: The Open dialog using column view.
When you use a program’s Open dialog, only files that the program knows how to open appear enabled (in black rather than light gray) in the file list. In effect, the program filters out the files it can’t open, so you barely see them in the Open dialog. This method of selectively displaying certain items in Open dialogs is a feature of most applications. Therefore, when you’re using TextEdit, its Open dialog dims all your spreadsheet files (because TextEdit can open only text, Rich Text Format, Microsoft Word, and some picture files). Pretty neat, eh?
2. In the dialog, simply navigate to the file you want to open (using the same techniques you use in a Save sheet).
Click a favorite folder in the Sidebar or use Spotlight if you can’t remember where the file resides.
3. Select your file and click the Open button.
For what it’s worth, some applications allow you to select multiple files in their Open dialogs by holding down either Shift (for contiguous selections) or ![]() (for noncontiguous selections). If you need to open several files, it’s worth a try; the worst thing that could happen is that it won’t work and you’ll have to open the items one at a time.
(for noncontiguous selections). If you need to open several files, it’s worth a try; the worst thing that could happen is that it won’t work and you’ll have to open the items one at a time.
Some programs, including Microsoft Word and Adobe Photoshop, have a Show or Format menu in their Open dialogs. This menu lets you specify the type(s) of files you want to see as available in the Open dialog. You can often open a file that appears dimmed by choosing All Documents from the Show or Format menu (in those applications with Open dialogs that offer such a menu).
With drag-and-drop
Macintosh drag-and-drop is usually all about dragging text and graphics from one place to another. But there’s another angle to drag-and-drop — one that has to do with files and icons.
You can open a document by dragging its icon onto that of the proper application. You can open a document created with Microsoft Word, for example, by dragging the document icon onto the Microsoft Word application’s icon. The Word icon highlights, and the document launches. Usually, of course, it’s easier to double-click a document’s icon to open it; the proper application opens automatically when you do — or at least, it does most of the time. Which reminds me . . .
With a Quick Look
To use the Quick Look command to peek at the contents of most files in Open dialogs, right-click or Control-click the file and choose Quick Look, or use its easy-to-remember shortcut: Press the spacebar. Whichever way, you’ll soon see the contents of that file in a floating window without launching another application.
The Quick Look window, shown in Figure 6-11, shows you the contents of many types of files.

Figure 6-11: The Quick Look window showing the contents of the B&W Head Shot.tiff file.
Sometimes Quick Look even works on files the current application can’t open. For the most part, if a file can be selected in an Open dialog, you can probably view its contents with Quick Look. Quick Look is so wonderful it’s also available for icons in the Finder. But you’ll have to wait for Chapter 7 to read about the rest of Quick Look’s charms.
When your Mac can’t open a file
If you try to open a file, but OS X can't find a program to open that file, OS X prompts you with an alert window. I tried to open a very old (1993) file created on a long-defunct Psion Series 3 handheld PDA — a file so old that most of you have probably never seen the .wrd file extension, shown in Figure 6-12.
Click Cancel to abort the attempt to open the file, or click the Choose Application or Search App Store button to select another application to open this file.

Figure 6-12: Oops! OS X helps you find the correct application.
If you click the Choose Application button, a dialog appears (conveniently opened to your Applications folder and shown in Figure 6-13). Applications that OS X doesn’t think can be used to open the file are dimmed. For a wider choice of applications, choose All Applications (instead of Recommended Applications) from the Enable pop-up menu.

Figure 6-13: Choosing an application to open this document.
You can’t open every file with every program. If you try to open an MP3 (audio) file with Microsoft Excel (a spreadsheet), for example, it just won’t work; you get an error message or a screen full of gibberish. Sometimes, you just have to keep trying until you find the right program; at other times, you don’t have a program that can open the file.
When in doubt, Google the file extension. You’ll usually find out more than you need to know about what application(s) create files with that extension.
With the application of your choice
I don’t know about you, but people send me files all the time that were created by applications I don’t use . . . or at least that I don’t use for that document type. OS X lets you specify the application in which you want to open a document in the future when you double-click it. More than that, you can specify that you want all documents of that type to open with the specified application. “Where is this magic bullet hidden?” you ask. Right there in the file’s Info window.
Assigning a file type to an application
Suppose that you want all .jpg files that usually open in Preview to open instead in Acorn, a more capable third-party image-editing program. Here's what to do:
1. Click one of the files in the Finder.
2. Choose File⇒Get Info (![]() +I).
+I).
3. In the Info window, click the gray triangle to disclose the Open With pane.
4. From the pop-up menu, choose an application that OS X believes will open this document type.
In Figure 6-14, I’m choosing Acorn. Now Acorn opens when I open this file (instead of the default application, Preview).

Figure 6-14: Before (left) and after (right) changing the application that opens this document.
5. (Optional) If you click the Change All button at the bottom of the Open With pane, as shown on the right side of Figure 6-14, you make Acorn the new default application for all .jpg files that would otherwise be opened in Preview.
Notice the handy alert that appears when you click the Change All button and how nicely it explains what will happen if you click Continue.
Opening a file with an application other than the default
Here’s one more technique that works great when you want to open a document with a program other than its default. Just drag the file onto the application’s icon or alias icon or Dock icon, and presto — the file opens in the application.
If I were to double-click an MP3 file, for example, the file usually would open in iTunes (and, by default, would be copied into my iTunes Library). But I frequently want to audition (listen to) MP3 files with QuickTime Player, so they’re not automatically added to my iTunes music library. Dragging the MP3 file onto QuickTime Player’s icon in the Applications folder or its Dock icon (if it’s in the Dock) solves this conundrum quickly and easily.
If the icon doesn’t highlight and you release the mouse button anyway, the file ends up in the same folder as the application with the icon that didn’t highlight. If that happens, just choose Edit⇒Undo (or press ![]() +Z), and the mislaid file magically returns to where it was before you dropped it. Just remember — don’t do anything else after you drop the file, or Undo might not work. If Undo doesn’t work, you must move the file back to its original location manually.
+Z), and the mislaid file magically returns to where it was before you dropped it. Just remember — don’t do anything else after you drop the file, or Undo might not work. If Undo doesn’t work, you must move the file back to its original location manually.
Only applications that might be able to open the file should highlight when you drag the file on them. That doesn’t mean the document will be usable — just that the application can open it. Suffice it to say that OS X is usually smart enough to figure out which applications on your hard drive can open what documents — and to offer you a choice.
One last thing: If all you want to do is open a file with an application other than its default (and not change anything for the future), the techniques I’ve just described work fine, but the easiest way is to right-click the file and choose another app from the pop-up menu, as shown in Figure 6-15.
You can also change the default application to open this file by pressing Option after you right-click the file, and the Open With command will magically transform into Always Open With. Alas, you can't change the default application for all files of this type (.jpg in Figures 6-14 and 6-15); for that you'll have to visit the Info window.

Figure 6-15: To open a file with an app other than its default, right-click and choose the app you desire.
Organizing Your Stuff in Folders
I won’t pretend to be able to organize your Mac for you. Organizing your files is as personal as your taste in music; you develop your own style with the Mac. But after you know how to open and save documents when you’re using applications, these sections provide food for thought — some ideas about how I organize things — and some suggestions that can make organization easier for you, regardless of how you choose to do it.
The upcoming sections look at the difference between a file and a folder; show you how to set up nested folders; and cover how some special folder features work. After you have a good handle on these things, you’ll almost certainly be a savvier — and better organized — OS X user.
Files versus folders
When I speak of a file, I’m talking about what’s connected to any icon except a folder or disk icon. A file can be a document, an application, an alias of a file or an application, a dictionary, a font, or any other icon that isn’t a folder or disk. The main distinction is that you can’t put something in most file icons.
The exceptions are icons that represent OS X packages. A package is an icon that acts like a file but isn't. Examples of icons that are really packages include many software installers and applications, as well as "documents" saved by some programs (such as Keynote, GarageBand, or TextEdit files saved in its .rtfd format). When you open an icon that represents a package in the usual way (double-click, choose File⇒Open, press ![]() +O, and so on), the program or document opens. If you want to see the contents of an icon that represents a package, you have to right-click or Control-click the icon first and choose Show Package Contents from the contextual menu. If you see an item by that name, you know that the icon is a package; if you don't see Show Package Contents on the contextual menu, the icon represents a file, not a package.
+O, and so on), the program or document opens. If you want to see the contents of an icon that represents a package, you have to right-click or Control-click the icon first and choose Show Package Contents from the contextual menu. If you see an item by that name, you know that the icon is a package; if you don't see Show Package Contents on the contextual menu, the icon represents a file, not a package.
 When I talk about folders, I’m talking about things that work like manila folders in the real world. Their icons look like folders, like the one in the margin to the left; they can contain files or other folders, called subfolders. You can put any icon — any file or folder — inside a folder.
Here’s an exception: If you try to put a disk icon in a folder, all you get is an alias to the disk unless you hold down the Option key. Remember that you can’t put a disk icon in a folder that exists on the disk itself. In other words, you can copy a disk icon only to a different disk; you can never copy a disk icon to a folder that resides on that disk. For more about aliases, flip to Chapter 5; for details on working with disks, see Chapter 8.
File icons can look like practically anything. If the icon doesn’t look like a folder, package, or one of the numerous disk icons, you can be pretty sure that it’s a file.
Organizing your stuff with subfolders
As I mention earlier in this chapter, you can put folders inside other folders to organize your icons. A folder “nested” inside another folder is called a subfolder.
You can create subfolders according to whatever system makes sense to you — but why reinvent the wheel? Here are some organizational topic ideas and naming examples for subfolders:
![]() By type of document: Word-Processing Documents, Spreadsheet Documents, Graphics Documents
By type of document: Word-Processing Documents, Spreadsheet Documents, Graphics Documents
![]() By date: Documents May–June, Documents Spring ’12
By date: Documents May–June, Documents Spring ’12
![]() By content: Memos, Outgoing Letters, Expense Reports
By content: Memos, Outgoing Letters, Expense Reports
![]() By project: Project X, Project Y, Project Z
By project: Project X, Project Y, Project Z
When you notice your folders swelling and starting to get messy (that is, filling with tons of files), subdivide them again by using a combination of these methods that makes sense to you. Suppose that you start by subdividing your Documents folder into multiple subfolders. Later, when those folders begin to get full, you can subdivide them even further, as shown in Figure 6-16.
My point (yes, I do have one!): Allow your folder structure to be organic, growing as you need it to grow. Let it happen. Don’t let any single folder get so full that it’s a hassle to deal with. Create new subfolders when things start to get crowded. (I explain how to create folders in the next section.)
If you want to monkey around with some subfolders, a good place to start is the Documents folder, which is inside your Home folder (that is, the Documents folder is a subfolder of your Home folder).
If you use a particular folder a great deal, put it in your Dock, or make an alias of it and move the alias from the Documents folder to your Home folder or to your Desktop (for more info on aliases, see Chapter 5) to make the folder easier to access. Or drag the folder (or its alias) to the Sidebar, so it’s always available, including in Open dialogs and Save sheets. If you write a lot of letters, keep an alias to your Correspondence folder in your Home folder, in the Dock, on your Desktop, or in the Sidebar for quick access. (By the way, there’s no reason why you can’t have a folder appear in all four places, if you like. That’s what aliases are for, right?)

Figure 6-16: Before (left) and after (right) organizing the Novels and Finances folders with subfolders.
Creating subfolders . . . or not
How full is too full? When should you begin creating subfolders? That’s impossible to say, at least in a one-size-fits-all way, but having too many items in a folder can be a nightmare — as can having too many subfolders with just one or two files in each one.
My guideline is this: If you find more than 15 or 20 files in a single folder, begin thinking about ways to subdivide it. On the other hand, some of my biggest subfolders contain things that I don’t often access. My Bob’s Correspondence 1992 folder, for example, contains more than 200 files. But because I don’t use it very often, its overcrowded condition doesn’t bother me. (Your mileage may vary.)
Here are some tips to help you decide whether to use subfolders or just leave well enough alone:
![]() Don’t create subfolders until you need them. That way, you avoid opening an empty folder when you’re looking for something else — a complete waste of time.
Don’t create subfolders until you need them. That way, you avoid opening an empty folder when you’re looking for something else — a complete waste of time.
![]() Let your work style decide the file structure. When you first start working with your Mac, you may want to save everything in your Documents folder for a while. When a decent-size group of documents has accumulated in the Documents folder, consider taking a look at them and creating logical subfolders for them.
Let your work style decide the file structure. When you first start working with your Mac, you may want to save everything in your Documents folder for a while. When a decent-size group of documents has accumulated in the Documents folder, consider taking a look at them and creating logical subfolders for them.
If you create your own subfolders in the Documents folder, you can click that folder in the Dock to reveal them, as shown in Figure 6-17. I show you how to customize the Dock in Chapter 4.

Figure 6-17: It’s super-convenient to have your Documents folder in the Dock.
It’s even more convenient if you choose to view the Documents folder as a list, as described in Chapter 4 and shown in Figure 6-17!
Creating new folders
So you think that Apple has already given you enough folders? Can’t imagine why you’d need more? Think of creating new folders the same way you’d think of labeling a new folder at work for a specific project. New folders help you keep your files organized, enabling you to reorganize them just the way you want. Creating folders is really quite simple.
To create a new folder, just follow these steps:
1. Decide which window you want the new folder to appear in — and then make sure that window is active.
If you want to create a new folder right on the Desktop, make sure that no window is active or that you're working within your Home/Desktop folder window. You can make a window active by clicking it, and you can make the Desktop active if you have windows onscreen by clicking the Desktop itself.
2. Choose File⇒New Folder (or press Shift+![]() +N).
+N).
A new, untitled folder appears in the active window with its name box already highlighted, ready for you to type a new name for it.
3. Type a name for your folder.
If you accidentally click anywhere before you type a name for the folder, the name box is no longer highlighted. To highlight it again, select the icon (single-click it) and press Return (or Enter) once. Now you can type its new name.
Give your folders relevant names. Folders with nebulous titles like sfdghb or Stuff or Untitled won't make it any easier to find something six months from now.
For folders and files that you might share with users of non-Macintosh computers, here’s the rule for maximum compatibility: Use no punctuation and no Option-key characters in the folder name. Periods, slashes, backslashes, and colons in particular can be reserved for use by other operating systems. When I say Option-key characters, I’m talking about special-purpose ones such as ™ (Option+2), ® (Option+R), ¢ (Option+4), and even © (Option+G).
Navigating with spring-loaded folders
A spring-loaded folder pops open when you drag something onto it without releasing the mouse button. Spring-loaded folders work with all folder or disk icons in all views and in the Sidebar. Because you just got the short course on folders, subfolders, and various ways to organize your stuff, you’re ready for your introduction to one of my favorite ways to get around my disks, folders, and subfolders.
Here’s how spring-loaded folders work:
1. Select any icon except a disk icon.
The folder highlights to indicate that it’s selected.
2. Drag the selected icon onto any folder or disk icon — but don’t release the mouse button.
• I call this hovering because you’re doing just that: hovering the cursor over a folder or disk icon without releasing the button.
• In a second or two, the highlighted folder or disk flashes twice and then springs open, right under the cursor.
• Press the spacebar to make the folder spring open immediately.
3. After the folder springs open, perform any of these handy operations:
• Continue to traverse your folder structure this way. Subfolders continue to pop open until you release the mouse button.
• If you release the mouse button, the icon you’ve been dragging is dropped into the active folder at the time. That window remains open — but all the windows you traversed clean up after themselves by closing automatically, leaving your window clean and uncluttered.
• If you want to cancel a spring-loaded folder, drag the cursor away from the folder icon or outside the boundaries of the sprung window. The folder pops shut.
After you get used to spring-loaded folders, you’ll wonder how you ever got along without them. They work in all four views, and they work with icons in the Sidebar or Dock. Give ’em a try, and you’ll be hooked. You can toggle spring-loaded folders on or off in the Finder’s Preferences window. There’s also a setting for how long the Finder waits before it springs the folders open. See Chapter 5 for more on Finder preferences.
Smart Folders
As the late Steve Jobs was fond of saying near the end of his keynotes, “There is one more thing,” and when it comes to folders, that one last thing is the Smart Folder.
A Smart Folder lets you save search criteria and have them work in the background to display the results in real time. In other words, a Smart Folder is updated continuously, so it displays all the files on your computer that match the search criteria at the moment.
So, for example, say you create a Smart Folder that contains all the Rich Text Format files on your computer that you’ve opened in the past two weeks, as shown in Figure 6-18. Or you can create a Smart Folder that displays graphics files, but only the ones bigger (or smaller) than a specified file size. Then all those files appear in one convenient Smart Folder.
The possibilities are endless. Because Smart Folders use aliaslike technology to display items, the actual files reside in only one location: the folder where you originally put them. True to their name, Smart Folders don’t gather the files themselves in a separate place; rather, they gather aliases of files, leaving the originals right where you stashed them. Neat!

Figure 6-18: A Smart Folder that displays only RTF files created in the past two weeks.
Also, because Spotlight (discussed in Chapter 7) is built deep into the bowels of the OS X file system and kernel, Smart Folders are updated in real time and so are always current, even after you’ve added or deleted files on your hard drive since creating the Smart Folder.
Smart Folders are so useful that Apple provides five ways to create one. The following steps show you how:
1. Start your Smart Folder by using any of the following methods:
• Choose File⇒New Smart Folder.
• Press ![]() +Option+N.
+Option+N.
• Choose File⇒Find.
• Press ![]() +F.
+F.
• Type at least one character in the Search box of a Finder window.
If you have All My Files selected in the Sidebar, you can’t use the last method, because All My Files is a Smart Folder — one with a weird icon, but a Smart Folder nonetheless.
2. Refine the criteria for your search by clicking the + button to add a criterion or the – button to delete one.
3. When you’re satisfied and ready to turn your criteria into a Smart Folder, click the Save button below the Search box.
A sheet drops down.
4. Choose where you want to save your folder.
While the Save sheet is displayed, you can add the Smart Folder to the Sidebar, if you like, by clicking the Add to Sidebar check box.
5. When you’re finished editing criteria, click the Save button to save the folder with its criteria.
After you create your Smart Folder, you can save it anywhere on any hard drive and use it like any other folder. There’s also an option to display it in your Sidebar, if you want.
If you want to change the criteria for a Smart Folder you created earlier, right-click or Control-click the Smart Folder in the Sidebar and select Show Search Criteria, as shown in Figure 6-19.

Figure 6-19: Right-click or Control-click a Smart Folder in the Sidebar and choose Show Search Criteria.
Alternatively, you can right-click or Control-click the Smart Folder (even one in the Sidebar) and choose Show Search Criteria from the contextual menu.
When you’re finished changing the criteria, click the Save button to resave your folder. Don’t worry — if you try to close a Smart Folder you’ve modified without saving your changes, OS X politely asks if you want to save this Smart Folder and warns that if you don’t save, the changes you made will be lost. You may be asked whether you want to replace the previous Smart Folder of the same name; usually, you do.
Smart Folders (with the exception of the Sidebar’s All My Files, which has its own weird little icon) display a little gear in their center, as shown in Figure 6-19, making them easy to tell apart from regular folders.
Smart Folders can save you a lot of time and effort, so if you haven’t played with them much (or at all) yet, be sure to give ’em a try.
Shuffling Around Files and Folders
Sometimes, keeping files and folders organized means moving them from one place to another. At other times, you want to copy them, rename them, or compress them to send to a friend. These sections explain all those things and more.
All the techniques that I discuss in the following sections work at least as well for windows that use List, Column, or Cover Flow view as they do for windows that use Icon view. I use Icon view in the figures in this section only because it’s the best view for pictures to show you what’s going on. For what it’s worth, I find moving and copying files much easier in windows that use List or Column view.
Comprehending the Clipboard
Before you start moving your files around, let me introduce you to the Clipboard. The Clipboard is a holding area for the last thing that you cut or copied. That copied item can be text, a picture, a portion of a picture, an object in a drawing program, a column of numbers in a spreadsheet, any icon (except a disk), or just about anything else that can be selected. In other words, the Clipboard is the Mac’s temporary storage area.
Most of the time, the Clipboard works quietly in the background, but you can ask the Clipboard to reveal itself by choosing Edit⇒Show Clipboard. This command summons the Clipboard window, which lists the type of item (such as text, picture, or sound) on the Clipboard — and a message letting you know whether the item on the Clipboard can be displayed.
As a storage area, the Clipboard’s contents are temporary. Very temporary. When you cut or copy an item, that item remains on the Clipboard only until you cut or copy something else, logout, or restart. When you do cut or copy something else, the new item replaces the Clipboard’s contents, and the newcomer remains on the Clipboard until you cut or copy something else. And so it goes.
Whatever is on the Clipboard heads straight for oblivion if you crash, lose power, log out, or shut down your Mac, so don’t count on it too heavily or for too long.
The Clipboard commands on the Edit menu are enabled only when they can actually be used. If the selected item can be cut or copied, the Cut and Copy commands in the Edit menu are enabled. If the selected item can’t be cut or copied, the commands are unavailable and are dimmed (gray). If the Clipboard is empty or the current document can’t accept what’s on the Clipboard, the Paste command is dimmed. Finally, when nothing is selected, the Cut, Copy, and Clear commands are dimmed.
Icons can’t be cut; they can only be copied or pasted. So when an icon is selected, the Cut command is always gray.
Copying files and folders
One way to copy icons from one place to another is to use the Clipboard. When a file or folder icon is selected, choose Edit⇒Copy (or use its shortcut, ![]() +C) to copy the selected icon to the Clipboard. Note that this doesn’t delete the selected item; it just makes a copy of it on the Clipboard. To paste the copied icon in another location, choose Edit⇒Paste (or use its shortcut,
+C) to copy the selected icon to the Clipboard. Note that this doesn’t delete the selected item; it just makes a copy of it on the Clipboard. To paste the copied icon in another location, choose Edit⇒Paste (or use its shortcut, ![]() +V).
+V).
Other methods of copying icons from one place to another include these:
![]() Drag an icon from one folder icon onto another folder icon while holding down the Option key. Release the mouse button when the second folder is highlighted. This technique works regardless of whether the second folder’s window is open. If you don’t hold down the Option key, you move the icon to a new location rather than copy it, as I explain a little later in this section.
Drag an icon from one folder icon onto another folder icon while holding down the Option key. Release the mouse button when the second folder is highlighted. This technique works regardless of whether the second folder’s window is open. If you don’t hold down the Option key, you move the icon to a new location rather than copy it, as I explain a little later in this section.
 When you copy something by dragging and dropping it with the Option key held down, the cursor changes to include a little plus sign (+) next to the arrow, as shown in the margin. Neat!
![]() Drag an icon into an open window for another folder while holding down the Option key. Drag the icon for the file or folder that you want to copy into the open window for a second folder (or other hard disk or removable media such as a USB flash drive).
Drag an icon into an open window for another folder while holding down the Option key. Drag the icon for the file or folder that you want to copy into the open window for a second folder (or other hard disk or removable media such as a USB flash drive).
![]() Choose File⇒Duplicate (
Choose File⇒Duplicate (![]() +D) or right-click or Control-click the file or folder that you want to duplicate; then choose Duplicate from the contextual menu that appears. This makes a copy of the selected icon, adds the word copy to its name, and then places the copy in the same window as the original icon. You can use the Duplicate command on any icon except a disk icon.
+D) or right-click or Control-click the file or folder that you want to duplicate; then choose Duplicate from the contextual menu that appears. This makes a copy of the selected icon, adds the word copy to its name, and then places the copy in the same window as the original icon. You can use the Duplicate command on any icon except a disk icon.
You can’t duplicate an entire disk onto itself. But you can copy an entire disk (call it Disk 1) to any other actual, physical, separate disk (call it Disk 2) as long as Disk 2 has enough space available. Just hold down Option and drag Disk 1 onto Disk 2’s icon. The contents of Disk 1 are copied to Disk 2 and appear on Disk 2 in a folder named Disk 1.
You can cut an icon’s name, but you can’t cut the icon itself; you may only copy an icon. To achieve the effect of cutting an icon, select the icon, copy it to the Clipboard, paste it in its new location, and then move the original icon to the Trash.
If you're wondering why anyone would ever want to copy a file, trust me: Someday, you will. Suppose that you have a file called Long Letter to Mom in a folder called Old Correspondence. You figure that Mom has forgotten that letter by now, and you want to send it again. But before you do, you want to change the date and delete the reference to Clarence, her pit bull, who passed away last year. So now you need to put a copy of Long Letter to Mom in your Current Correspondence folder. This technique yields the same result as making a copy of a file by using Save As, which I describe earlier in this chapter.
When you copy a file, it's wise to change the name of the copied file. Having more than one file on your hard drive with exactly the same name isn't a good idea, even if the files are in different folders. Trust me that having 12 files called Expense Report or 15 files named Doctor Mac Consulting Invoice can be confusing, no matter how well organized your folder structure is. Add distinguishing words or dates to file and folder names so that they're named something more explicit, such as Expense Report Q3 2010 or Doctor Mac Consulting Invoice 4-4-2011.
You can have lots of files with the same name on the same disk (although, as I mention earlier, it's probably not a good idea). But your Mac won't let you have more than one file with the same name and extension (.txt, .jpg, .doc) in the same folder.
Pasting from the Clipboard
As I mention earlier in this chapter, to place the icon that’s on the Clipboard someplace new, click where you want the item to go, and choose Edit⇒Paste or use the keyboard shortcut ![]() +V to paste what you’ve copied or cut.
+V to paste what you’ve copied or cut.
Pasting doesn’t purge the contents of the Clipboard. In fact, an item stays on the Clipboard until you cut, copy, restart, shut down, log out, or crash. This means that you can paste the same item over and over and over again, which can come in pretty handy at times.
Almost all programs have an Edit menu and use the Macintosh Clipboard, which means you can usually cut or copy something from a document in one program and paste it into a document in another program. Usually.
Moving files and folders
You can move files and folders around within a window to your heart’s content, as long as that window is set to Icon view. Just click and drag any icon to its new location in the window. Some people spend hours arranging icons in a window until they’re just so. But because using Icon view wastes so much screen space, I avoid using icons in a window.
You can’t move icons around in a window that is displayed in List, Column, or Cover Flow view, which makes total sense when you think about it. (Well, you can move them to put them in a different folder in List, Column, or Cover Flow view, but that’s not moving them around, really.) And you can’t move icons around in a window under the spell of the Arrange By command.
As you probably expect from Apple by now, you have choices for how you move one file or folder into another folder. You can use these techniques to move any icon (folder, document, alias, or program icon) into folders or onto other disks.
![]() Drag an icon onto a folder icon. Drag the icon for one folder (or file) onto the icon for another folder (or disk) and then release when the second icon is highlighted (see Figure 6-20). The first folder is inside the second folder. Put another way, the first folder is a subfolder of the second folder. This technique works regardless of whether the second folder’s window is open.
Drag an icon onto a folder icon. Drag the icon for one folder (or file) onto the icon for another folder (or disk) and then release when the second icon is highlighted (see Figure 6-20). The first folder is inside the second folder. Put another way, the first folder is a subfolder of the second folder. This technique works regardless of whether the second folder’s window is open.

Figure 6-20: Two ways of putting one folder into another.
![]() Drag an icon into an open folder’s window. Drag the icon for one folder (or file) into the open window for a second folder (or disk), as shown in Figure 6-20.
Drag an icon into an open folder’s window. Drag the icon for one folder (or file) into the open window for a second folder (or disk), as shown in Figure 6-20.
If you want to move an item from one disk to another disk, you can’t use the preceding tricks. Your item is copied, not moved. If you want to move a file or folder from one disk to another, you have to hold down the ![]() key when you drag an icon from one disk to another. The little Copying Files window even changes to read Moving Files. Nice touch, eh?
key when you drag an icon from one disk to another. The little Copying Files window even changes to read Moving Files. Nice touch, eh?
Selecting multiple icons
Sometimes you want to move or copy several items into a single folder. The process is pretty much the same as it is when you copy one file or folder (that is, you just drag the icon to where you want it and drop it there). But you need to select all the items you want before you can drag them en masse to their destination.
If you want to move all the files in a particular folder, simply choose Edit⇒Select All or press ![]() +A. This command selects all icons in the active window, regardless of whether you can see them onscreen. If no window is active, choosing Select All selects every icon on the Desktop.
+A. This command selects all icons in the active window, regardless of whether you can see them onscreen. If no window is active, choosing Select All selects every icon on the Desktop.
But what if you want to select only some of the files in the active window or on the Desktop? Here’s the most convenient method:
1. To select more than one icon in a folder, do one of the following:
• Click once within the folder window (don’t click any one icon), and drag your mouse (or keypad) while continuing to hold down the mouse button. You see an outline of a box around the icons while you drag, and all icons within or touching the box become highlighted (see Figure 6-21).
• Click one icon and hold down the Shift key while you click others. As long as you hold down the Shift key, each new icon that you click is added to the selection. To deselect an icon, click it a second time while still holding down the Shift key.
• Click one icon and hold down the ![]() key while you click others. The difference between using the Shift and
key while you click others. The difference between using the Shift and ![]() keys is that the
keys is that the ![]() key doesn’t select everything between it and the first item selected when your window is in List, Cover Flow, or Column view. In Icon view, it really doesn’t make much difference.
key doesn’t select everything between it and the first item selected when your window is in List, Cover Flow, or Column view. In Icon view, it really doesn’t make much difference.
To deselect an icon, click it while holding down the ![]() key.
key.
2. After you select the icons, click one of them (clicking anywhere else deselects the icons) and drag them to the location where you want to move them (or Option-drag to copy them).
Be careful with multiple selections, especially when you drag icons to the Trash. You can easily — and accidentally — select more than one icon, so watch out that you don’t accidentally put the wrong icon in the Trash by not paying close attention. (I detail how the Trash icon works later in this chapter.)
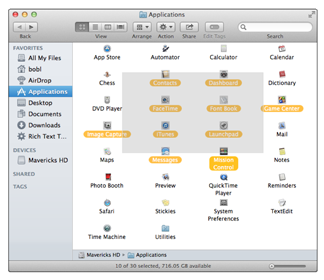
Figure 6-21: Select more than one icon by clicking and dragging with your mouse (or trackpad).
Playing the icon name game: Renaming icons
Icon, icon, bo-bicon, banana-fanna fo-ficon. Betcha can change the name of any old icon! Well, that’s not entirely true. . . .
If an icon is locked or busy (the application is currently open), or if you don’t have the owner’s permission to rename that icon (see Chapter 16 for details about permissions), you can’t rename it. Similarly, you should never rename certain reserved icons (such as the Library, System, and Desktop folders).
To rename an icon, you can either click the icon’s name directly (don’t click the icon itself because that selects the icon) or click the icon and press Return (or Enter) once.
Either way, the icon’s name is selected and surrounded with a box, and you can type a new name, as shown in Figure 6-22. In addition, the cursor changes from a pointer to a text-editing I-beam. An I-beam cursor is the Mac’s way of telling you that you can type now. At this point, if you click the I-beam cursor anywhere in the name box, you can edit the icon’s original name. If you don’t click the I-beam cursor in the name box but just begin typing, the icon’s original name is replaced by what you type.
If you’ve never changed an icon’s name, give it a try. And don’t forget: If you click the icon itself, the icon is selected, and you won’t be able to change its name. If you do accidentally select the icon, just press Return (or Enter) once to edit the name of the icon.

Figure 6-22: Change an icon’s name by typing over the old one.
One last thing: If you have two or more icons you want to move to a new folder, select the items and choose File⇒New Folder with Selection, press ![]() +Control+N, or right-click or Control-click one of the selected items and choose New Folder with Selection. All three techniques will create a new folder, move the selected icons into it, and select the name of the new folder (which will be New Folder with Items) so you can type its new name immediately.
+Control+N, or right-click or Control-click one of the selected items and choose New Folder with Selection. All three techniques will create a new folder, move the selected icons into it, and select the name of the new folder (which will be New Folder with Items) so you can type its new name immediately.
Compressing files
If you're going to send files as an e-mail enclosure, creating a compressed archive of the files first and sending the archive instead of the originals usually saves you time sending the files and saves the recipient time downloading them. To create this compressed archive, simply select the file or files and then choose File⇒Compress. This creates a compressed .zip file out of your selection. The compressed file is smaller than the original — sometimes by quite a bit.
Getting rid of icons
To get rid of an icon — any icon — merely drag it onto the Trash icon in your Dock.
Trashing an alias gets rid of only the alias, not the parent file. But trashing a document, folder, or application icon puts it in the Trash, where it will be deleted permanently the next time you empty the Trash. The Finder menu offers a couple of commands that help you manage the Trash:
![]() Finder⇒Empty Trash: This command deletes all items in the Trash from your hard drive, period.
Finder⇒Empty Trash: This command deletes all items in the Trash from your hard drive, period.
I’ll probably say this more than once: Use this command with a modicum of caution. After a file is dragged into the Trash and the Trash is emptied, the file is gone, gone, gone unless you have a Time Machine or other backup. (Okay, maybe ProSoft Engineering’s Data Rescue II or some other third-party utility can bring it back, but I wouldn’t bet the farm on it.)
![]() Finder⇒Secure Empty Trash: Choosing this command makes the chance of recovery by even the most ardent hacker or expensive disk-recovery tool difficult to virtually impossible. Now the portion of the disk that held the files you’re deleting will be overwritten with randomly generated gibberish. You’re hosed unless you have a Time Machine or other backup.
Finder⇒Secure Empty Trash: Choosing this command makes the chance of recovery by even the most ardent hacker or expensive disk-recovery tool difficult to virtually impossible. Now the portion of the disk that held the files you’re deleting will be overwritten with randomly generated gibberish. You’re hosed unless you have a Time Machine or other backup.
If you put something in the Trash by accident, you can almost always return it from whence it came: Just invoke the magical Undo command. Choose Edit⇒Undo or press ![]() +Z. The accidentally trashed file returns to its original location. Usually. Unfortunately, Undo doesn’t work every time — and it remembers only the very last action that you performed when it does work — so don’t rely on it too much.
+Z. The accidentally trashed file returns to its original location. Usually. Unfortunately, Undo doesn’t work every time — and it remembers only the very last action that you performed when it does work — so don’t rely on it too much.