3. Browsing the Web

In this chapter, you discover how to browse the World Wide Web using the Chrome browser app that comes with your Galaxy Note 3. Topics include the following:
→ Bookmarking websites
→ Using tricks to browse quickly
→ Keeping track of websites you have visited
→ Configuring Chrome to work your way
Your Galaxy Note 3 comes with not one, but two web browsers to enable you to explore the Web on its large screen. This chapter shows you how to use Chrome, a browser developed by Google. You can bookmark sites you want to revisit, hold your Galaxy Note 3 in landscape orientation so you can see more on the screen, and even share your GPS location with sites.
Navigating with Chrome
The Chrome browser app enables you to access sites quickly, bookmark them for future use, and return instantly to the sites you visit most frequently. You can even sync your open Chrome tabs among your Galaxy Note 3, your other portable devices, and your computer.
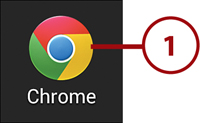
1. Touch the Chrome icon. This icon might be on the Apps screen or in the Google folder on the Apps screen.
2. Touch the omnibox—a combined address box and search box—to type in a new web address. If the website has moved the previous page up so that the omnibox is hidden, drag the web page down so that the omnibox appears again.
3. Touch to navigate among your tabs. Read more about tabs later in this chapter.
4. Touch a thumbnail to go to one of your Most Visited sites.
5. Touch to display one of the pages you have closed most recently. You might need to scroll down to reach the button for the page you want.
6. Touch to display the list of Most Visited sites.
7. Touch to display your bookmarks.
8. Touch to display your Other Devices list, which shows the tabs open on your other phones, tablets, and computers that use Chrome and sign in to your Google account.
9. Touch to refresh the display of the current page. You’d normally do this either if a page failed to load completely or to load updated information, such as fresh news.

10. Touch the Menu button to display more options for working with Chrome and web pages.
Web Page Options
While a web page is open, you have a number of options, such as creating a bookmark for the page or finding text on the page.
1. Touch the Menu button to display the menu.
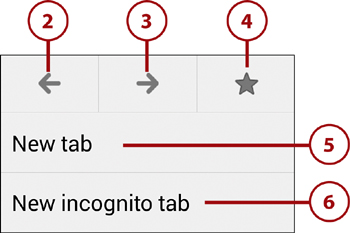
2. Touch to go back to the previous web page you visited on this tab.
3. Touch to go forward again in the chain of pages you’ve browsed on this tab. Touching this button takes you to the last web page from which you went back (as described in step 2). This button is unavailable until you go back from a page.
4. Touch to add a bookmark for this page.
5. Touch New Tab to open a new tab.
6. Touch New Incognito Tab to open a new Incognito tab for private browsing. Incognito tabs are covered later in this chapter.
7. Touch Bookmarks to display your bookmarks.
8. Touch Other Devices to display your Other Devices list.
9. Touch History to display the History screen, which contains a list of the pages you have visited. This list comes from each device that signs into the same Chrome account.
10. Touch Share to share this web page with other people using apps such as Email, Gmail, Facebook, Messaging, or Twitter. The Share Via dialog shows all the apps you can use to share the web page.

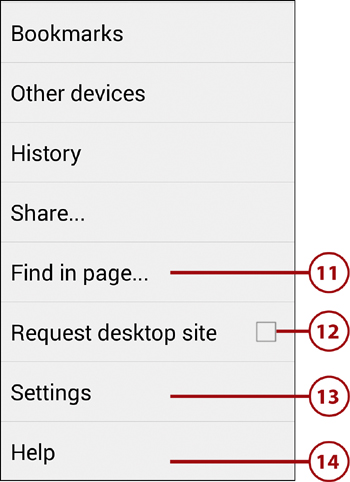
11. Touch Find in Page to search this page for specific text you type.
12. Touch Request Desktop Site to enable or disable forcing websites to show the regular view of a web page designed for full-size screens instead of a mobile view designed for small screens.
13. Touch to change the settings for the Chrome browser.
14. Touch to get help.
Browser Tricks
The Chrome browser app has some neat tricks to help you browse regular websites comfortably on your Galaxy Note 3’s screen.
Portrait
1. Rotate your Galaxy Note 3 so that its long edge is sideways. This puts the screen into what’s called landscape orientation. Your Galaxy Note 3 automatically switches the screen to Landscape mode.
Landscape
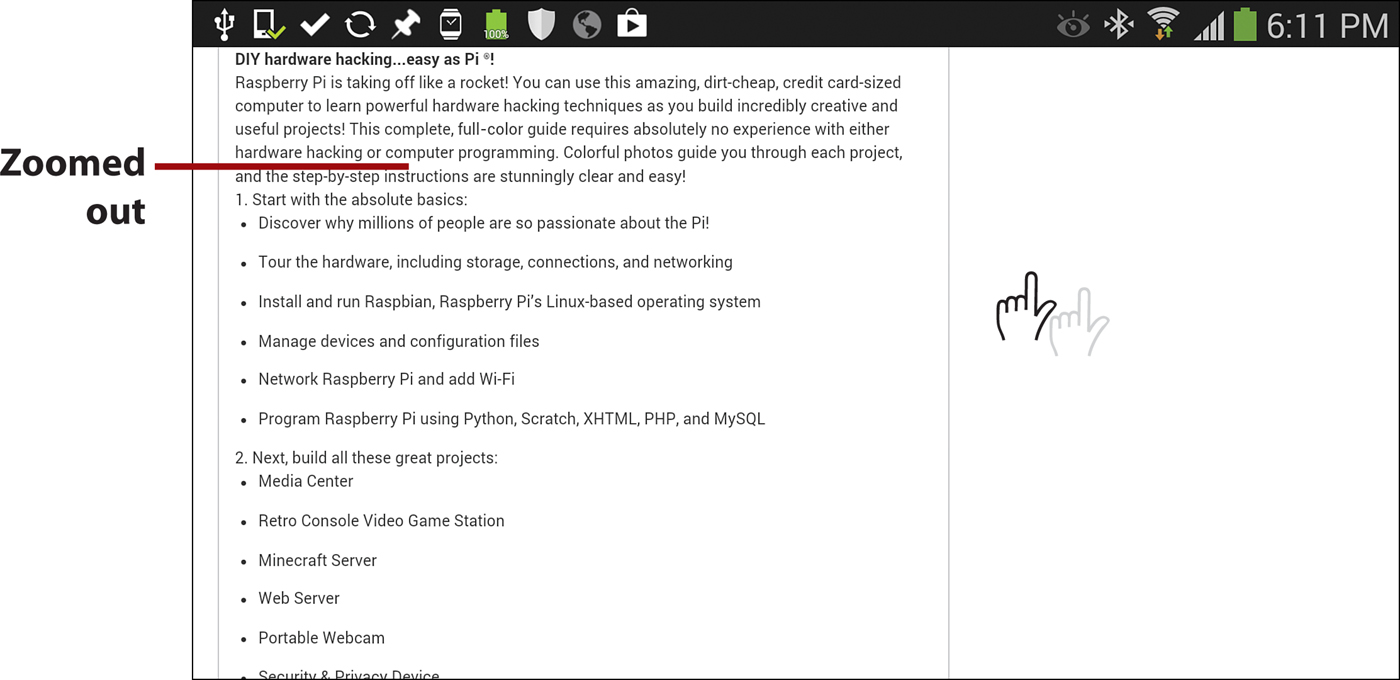
2. Double-tap the screen to zoom in and out.

If Chrome does not switch to landscape mode when you rotate the Galaxy Note 3, you need to turn on screen rotation. Pull down the notification panel and tap the Quick Settings icon to display the Quick Settings screen and then tap Screen Rotation, turning the arrow green.
Pinch to Zoom
When you need to zoom in further, or zoom in to exactly the degree you want, use the alternative way to zoom. Place your thumb and forefinger on the screen and spread them apart to zoom in. Move them back together to zoom out.
Managing Bookmarks, Most Visited Sites, and Other Devices
The Chrome app enables you to bookmark your favorite websites for quick access, but it also keeps a list of the sites you visit most often so you can return to them at the tap of an icon. The app also syncs your open tabs among your devices that run Chrome and sign in to the same Google account, so you can quickly pick up browsing on your Galaxy Note 3 exactly where you left it on your desktop computer, laptop, or tablet—or vice versa.
Manage Bookmarks
1. Touch the Menu button.
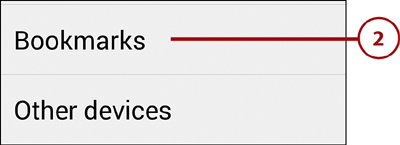
2. Touch Bookmarks. Normally, the Mobile Bookmarks folder opens. If not, you can navigate to it manually.
3. Touch to display the main Bookmarks folder. From there, you can touch a bookmark it contains or another bookmarks folder.
4. Touch a bookmarks folder to display the bookmarks it contains.
5. Touch a bookmark to display the web page it marks.
6. Touch and hold a bookmark to display a menu of extra actions you can take with it.

7. Touch Open in New Tab to open the bookmarked web page in a new tab.
8. Touch Open in Incognito Tab to open the bookmark in an Incognito tab.
9. Touch Edit Bookmark to edit the bookmark. For example, you can change the bookmark’s name or move it to a different folder.

10. Touch Delete Bookmark to delete the bookmark.
11. Touch Add to Home Screen to add the bookmark to your Galaxy Note 3’s Home screen, where you can quickly access it without having to switch to Chrome first. This is a great move for bookmarks that point to your most valued sites.

2. Touch the Menu button to open the menu.
3. Touch to start creating a new bookmark.

4. Change the bookmark name if you want to. The default is the web page’s title; you might prefer a shorter name.
5. Edit the address if necessary. If you went to the right page in step 1, you do not need to change the address.
6. Select the folder in which to save the bookmark. You can create new folders as needed.

7. Touch Save.

Manage the Most Visited Sites List
The Chrome app’s Most Visited sites list enables you to quickly return to sites you visit frequently but that you have not necessarily bookmarked.
1. Touch the Menu button.
2. Touch Bookmarks to display the Bookmarks screen.

3. Touch to display the Most Visited screen.

4. Touch to open one of the pages in the current tab.
5. Touch and hold a page thumbnail to display further options.

6. Touch to open in a new tab.
7. Touch to open in an Incognito tab.
8. Touch to remove the web page from the Most Visited list.

Manage the Other Devices List
The Other Devices list gives you instant access to the tabs open in Chrome on your other devices, such as your tablet and your PC or Mac.
1. Touch the Menu button.
2. Touch Other Devices.

3. Touch a heading to expand or collapse the list of pages on a device.
4. Touch a page to open it.

Managing Multiple Tabs
The Chrome app can have multiple web pages open at the same time, each in a different tab. This enables you to open multiple web pages at once and switch between them.
1. Touch the tab icon in the Chrome app.

2. Touch to open a new tab.
3. Touch to close an existing tab.
4. Touch a tab to switch to it.

If you want to visit a website in secret, you can. Visiting a website in secret means that the site you visit does not appear in your browser history or search history and does not otherwise leave a trace of itself on your Galaxy Note 3. To browse secretly, create a new Incognito browser tab by touching the Menu button and then touching New Incognito Tab. Inside that browser tab, all sites you visit are in secret.

Customizing Browser Settings
You can customize Chrome to make it behave the way you want. Here are the various settings you can change.
1. Touch the Menu button.
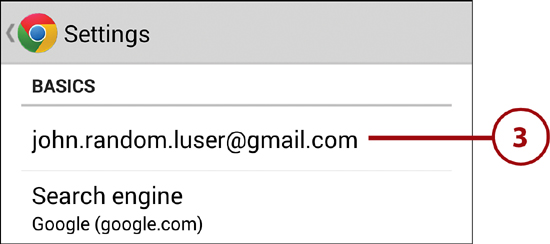
2. Touch Settings.

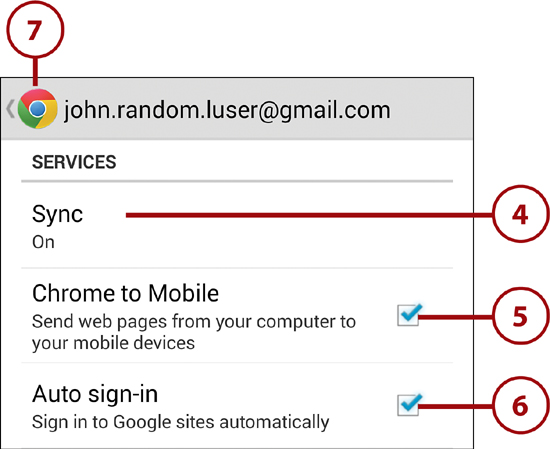
3. Touch your Google account name.
4. Touch Sync to turn sync on or off. If you turn sync on, you can choose which items to sync: Autofill data, bookmarks, history, passwords, open tabs, or everything. You can also choose whether to use encryption.
5. Touch Chrome to Mobile to enable or disable sending web pages from your computer to the Chrome app on your Galaxy Note 3.
6. Touch Auto Sign-In to enable or disable automatically signing in to Google sites. Signing in automatically saves you time and typing but decreases your privacy.
7. Touch to return to the Settings screen.
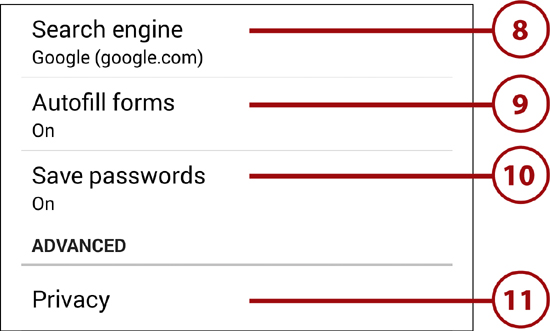
8. Touch Search Engine to choose your search engine. Your choices might include Google, Yahoo!, Bing, Ask, and AOL.
9. Touch Autofill Forms to enable or disable the Autofill Forms feature. This feature lets you add profile information—your name, address, and so on—and credit card information for the Chrome app to fill in automatically on web forms. This means you can complete web forms and spend your money with even less effort.
10. Touch Save Passwords to enable or disable the Chrome app’s ability to save your passwords so it can enter them for you.
11. Touch Privacy to display the Privacy screen.
12. Touch Navigation Error Suggestions to enable or disable showing suggestions for web addresses that you enter incorrectly or that Chrome cannot locate.
13. Touch Search and URL Suggestions to enable or disable showing related queries and popular websites similar to those you type in the omnibox.
14. Touch Network Action Predictions to enable or disable the Network Action Predictions feature. See the nearby sidebar for details.
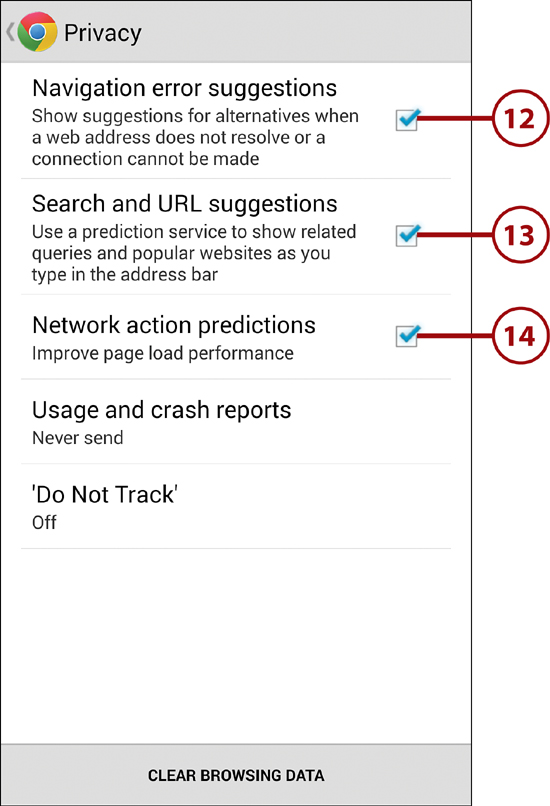
15. Touch Usage and Crash Reports to choose whether to send usage and crash reports to Google. Your choices are Always Send, Only Send on Wi-Fi, and Never Send. If you are happy to provide this data, choosing Only Send on Wi-Fi is usually the best choice because it prevents the reports from consuming your cellular data allowance.
16. Touch ‘Do Not Track’ to choose whether to turn on the Do Not Track feature. This feature requests that the websites you visit not track you, but websites are not bound to honor the request.
17. Touch Clear Browsing Data to display the Clear Browsing Data dialog.

18. Touch Clear Browsing History to enable or disable clearing your browsing history. This clears the history of websites you have visited using the Chrome app on your Galaxy Note 3.
19. Touch Clear the Cache to enable or disable clearing the cache, data that Chrome stores so that it can redisplay web pages more quickly when you visit them again.
20. Touch Clear Cookies, Site Data to enable or disable clearing your cookies and website data. Browser cookies are used by websites to personalize your visit by storing information specific to you in the cookies.
21. Touch Clear Saved Passwords to enable or disable clearing your saved passwords.

22. Touch Clear Autofill Data to enable or disable clearing your Autofill data.
23. Touch Clear to clear the items whose boxes you checked in the Clear Browsing Data dialog.
24. Touch to return to the Settings screen.

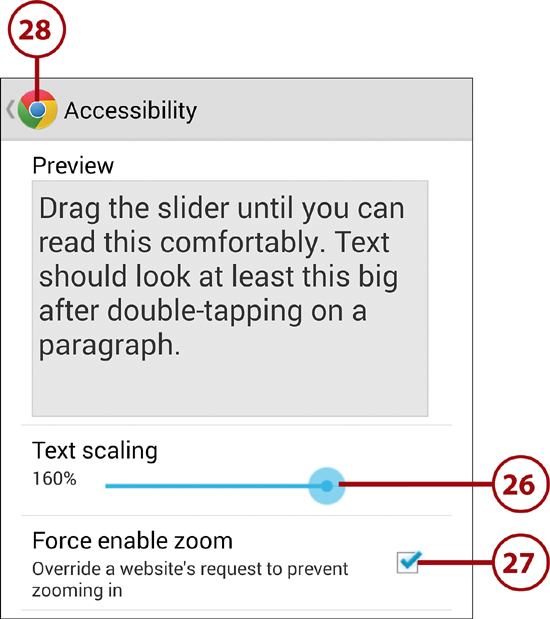
25. Touch Accessibility.

26. Drag the Text Scaling slider to make the text in the Preview box appear at a comfortable size for reading. This is the minimum size to which the Chrome app zooms the text when you double-tap a paragraph.
What Is Text Scaling?
When you use text scaling, you instruct your Galaxy Note 3 to always increase or decrease the font sizes used on a web page by a specific percentage. For example, you can automatically make all text 150% larger than was originally intended.
27. Touch Force Enable Zoom to turn on or off Chrome’s ability to zoom in on a website that prevents zooming. Some websites turn off zooming because their creators consider design to be more important than readability.
28. Touch to return to the Settings screen.
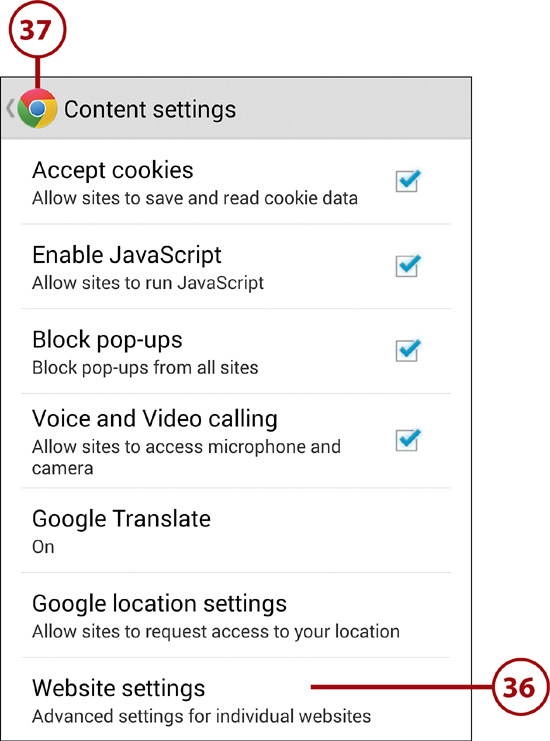
29. Touch Content Settings to display the Content Settings screen.

30. Touch Accept Cookies to enable or disable accepting cookies. Browser cookies are used by websites to personalize your visit by storing information specific to you in the cookies.
31. Touch Enable JavaScript to enable or disable JavaScript. JavaScript is used on many web pages for formatting and other functions, so you might want to leave this enabled.
32. Touch Block Pop-Ups to enable or disable blocking pop-up windows. Pop-up windows are almost always advertisements, so keeping this enabled is a good idea; however, some websites might not work correctly if pop-up blocking is on.
33. Touch Voice and Video Calling to enable or disable giving websites access to your Galaxy Note 3’s microphone and camera through Chrome. If you don’t need this capability, it’s best to disable it.
34. Touch Google Translate to enable or disable the Google Translate service, which you can use to translate web pages.
35. Touch Google Location Settings to allow or disallow websites access to your GPS information. Providing your location to websites is helpful when you need information related to where you are, but at other times, you might prefer to keep your location private.

36. Touch to view the list of websites that are storing data on your Galaxy Note 3. You can then clear the data for a specific website if necessary.
37. Touch to return to the Settings screen.
38. Touch Bandwidth Management to display the Bandwidth Management screen.

39. Touch Preload Webpages to open the Preload Webpages dialog. (Refer to the “What Are Network Action Predictions” sidebar for more information about preloading webpages.)

40. Touch to preload pages over both Wi-Fi and cellular connections.
41. Touch to preload pages over Wi-Fi only.
42. Touch to turn off preloading. You would normally do this only if you need to minimize data use on your Wi-Fi connection.
43. Touch to return to the Settings screen.


What Are the Developer Tools in Chrome Settings?
The Chrome app’s Developer Tools screen offers two features intended for people developing apps for Android, but one of the features is useful for nondevelopers as well. The Enable Tilt Scrolling feature enables you to scroll through your open tabs in Chrome by tilting your Galaxy Note 3 backward and forward. The Enable USB Web debugging option lets developers use Chrome on a PC or Mac to hunt down bugs in Chrome on Android.