11. Working with Android Apps

In this chapter, you find out how to purchase and use Android apps on your Galaxy Note 3. Topics include the following:
→ Finding apps with Google Play
→ Purchasing apps
→ Keeping apps up to date
Your Galaxy Note 3 comes with enough apps to make it a worthy smartphone. However, wouldn’t it be great to play games, work on business or school documents, or keep a grocery list? Well, finding these types of apps is what the Google Play Store is for. Read on to learn about finding, purchasing, and maintaining apps.
Configuring Google Wallet
Before you start buying apps in the Play Store app, you must first sign up for a Google Wallet account. If you plan to only download free apps, you do not need a Google Wallet account.
1. From a desktop computer or your Galaxy Note 3, open the web browser and go to http://wallet.google.com.
2. Sign in using the Google account that you will be using to synchronize email to your Galaxy Note 3. See Chapter 4, “Email,” or Chapter 7, “Contacts,” for information about adding a Google account to your Galaxy Note 3.
3. Choose your location. If your country is not listed, you have to use free apps until it’s added to the list.
4. Enter your name.
5. Enter your ZIP Code.
6. Enter your credit card number. This can also be a debit card that includes a Visa or MasterCard logo, also known as a check card, so that the funds actually are withdrawn from your checking account.
7. Select the month and year of the card’s expiration date.
8. Enter the card’s CVC number, which is also known as the security code. This is a three- or four-digit number that’s printed on the back of your card.
9. Check this box if your billing address is the same as your name and home location. Otherwise, uncheck this box and enter your billing address and phone number when prompted.
10. Uncheck this box unless you want to receive Google Wallet special offers, invitations, and other marketing messages.
11. Click Accept and Create when you finish filling in the form.

Navigating Google Play
Android is the operating system that runs your Galaxy Note 3, so any apps that are made for your Note 3 need to run on Android. The Google Play Store is a place where you can search for and buy Android apps.
1. On the Home screen, touch Apps to display the Apps screen.

2. Touch the Play Store app icon to launch the Play Store app.
3. Touch to browse all Android apps.
4. Touch to browse all Android games.
5. Touch to search Google Play.
6. Touch to display the navigation panel.

7. Touch Store Home to display the Home page of the Play Store.
8. Touch My Apps to display the list of apps you have already purchased or acquired for free.
9. Touch My Wishlist to display your wishlist. This is a list to which you can add items you want to buy or you want others to buy for you.
10. Touch Redeem to redeem a gift card or promotional code.

Download Free Apps
You don’t have to spend money to get quality apps. Some of the best apps are actually free. Other free apps are feature-light versions that give you a chance to test-drive the app without paying and decide whether you want to upgrade to the full version.
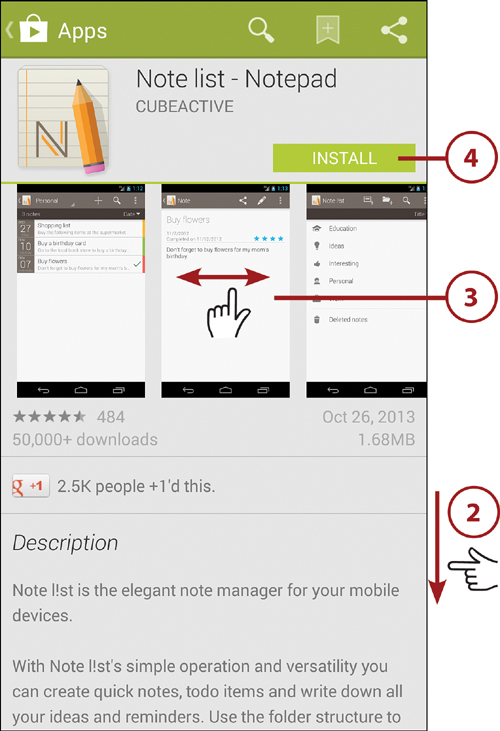
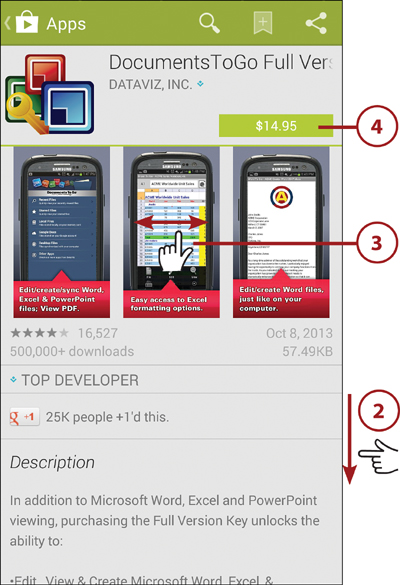
1. Touch the app you want to download. The screen for the app appears.

2. Scroll down to read the app features, reviews by other people who installed it, and information on the person or company who wrote the app.
3. Scroll left and right to see the app screenshots.
4. Touch Install to download and install the app.
5. Touch to accept the app permissions and proceed with the download.

Beware of Permissions
Each time you download a free app or purchase an app from Google Play, you are prompted to accept the app permissions. App permissions are permissions the app wants to have to use features and functions on your Galaxy Note 3, such as access to the wireless network or access to your phone log.
Pay close attention to the kinds of permissions each app is requesting and make sure they are appropriate for the type of functionality that the app provides. For example, an app that tests network speed will likely ask for permission to access your wireless network, but if it also asks to access your list of contacts, it might mean that the app is malware and just wants to steal your contacts.
6. After your Galaxy Note 3 downloads and installs the app, the Open button appears in the Play Store app. Tap Open to open the app.

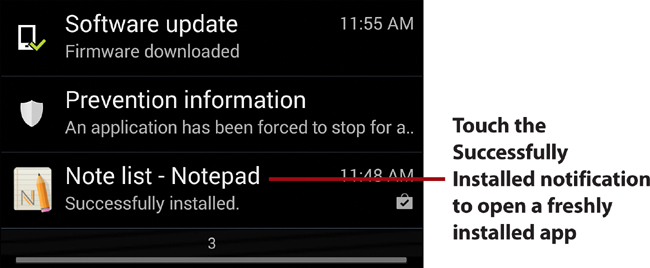
>>>Go Further: Open a Newly Installed App in Other Ways

Buy Apps
If an app is not free, the price appears next to the app icon. If you want to buy the app, remember that you need to already have a Google Wallet account. See the “Configuring Google Wallet” section earlier in the chapter for more information.
1. Touch the app you want to buy.

What If the Currency Is Different?
When you browse apps in Google Play, you might see apps that have prices in foreign currencies, such as in euros. When you purchase an app, the currency is simply converted into your local currency using the exchange rate at the time of purchase.
2. Scroll down to read the app’s features, reviews by other people who have used it, and information on the person or company who created the app.
3. Scroll left and right to see the app screenshots.
4. Touch the price to download and install the app.
5. Review the app permissions and make sure you can accept them. Some apps, such as the one shown here, do not require any permissions, but most require at least some. Then touch Accept (if the app requires permissions) or Continue (if it requires none) to proceed with the purchase.

6. Touch Buy to purchase the app. You will receive an email from Google Play after you purchase an app. The email serves as your invoice.

Getting a Refund on an App
If you realize you’ve bought the wrong app, or otherwise regret a purchase, you can return it within 15 minutes and get a full refund. To do this, open the Play Store app, go to the My Apps screen, touch the app to display its screen, and then touch Refund. If the Refund button doesn’t appear, you’re too late.

Manage Apps
You can use the My Apps section of Google Play to update apps, delete them, or install apps that you have previously purchased.
1. Touch to display the navigation panel.
2. Touch My Apps.

3. Touch All to see all apps that you have installed on your Galaxy Note 3.
4. Look for the Installed indicator to see whether the app is currently installed.
5. Touch an app marked with Free to install a free app again. The Free readout shows a free app that you previously installed, but that is no longer installed.
6. Touch the X button to remove an app from the list of apps.
7. Touch an app marked as Purchased to reinstall an app that you previously purchased and installed, but that is no longer installed. Because you have already purchased the app, you do not need to pay for it again.

Allowing an App to Be Automatically Updated
When the developer of an app you have installed updates it to fix bugs or add new functionality, you are normally notified in the Notification bar and Notification panel so that you can manually update the app. Google Play enables you to choose to have the app automatically updated without your intervention. To do this, open the My Apps screen and touch the app you want to update automatically. On the app’s screen, touch the Menu button, and then check the Auto-Update box. Be aware that if these updates occur while you are on a cellular data connection, your data usage for the month will be affected.

Uninstalling an App
To uninstall an app, touch the app’s button on the My Apps screen, and then touch Uninstall on the app’s screen. Uninstalling the app removes both the app itself and its data from your Galaxy Note 3. Although the app no longer resides on your Note 3, you can reinstall it as described in step 7 because the app remains tied to your Google account.
2. Touch Settings.

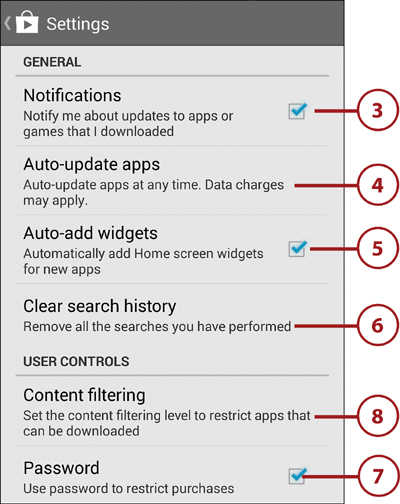
3. Touch to enable or disable notifications of app or game updates.
4. Touch to enable or disable automatic updating for apps. In the Auto-Update Apps dialog that opens, touch the setting you want. Your choices are Do Not Auto-Update Apps, Auto-Update Apps at Any Time, and Auto-Update Apps over Wi-Fi Only. Because apps can be large, choosing Auto-Update Apps over Wi-Fi Only is usually the best choice unless you want to disable automatic updating.
5. Touch to allow or prevent an app icon from appearing on your Home screen for each app that you install.
6. Touch to clear the Google Play search history. There’s no double-check or confirmation beyond a quick blink of the button.
7. If you want to filter content in apps, make sure the Password check box is checked. If it’s not checked, touch to check it.
8. Touch Content Filtering to display the Allow Apps Rated For dialog, in which you can adjust or set your content filtering for apps.
9. Touch the check box for the highest level of maturity you want to allow: Everyone, Low Maturity, Medium Maturity, High Maturity, or Show All Apps. Android checks any check boxes above the one you touch and unchecks any check boxes further down the list. For example, if you touch the Medium Maturity check box, Android selects the Everyone check box and the Low Maturity check box, and deselects the High Maturity check box and the Show All Apps check box.
10. Touch OK to close the Allow Apps Rated For dialog. The Content PIN dialog opens.

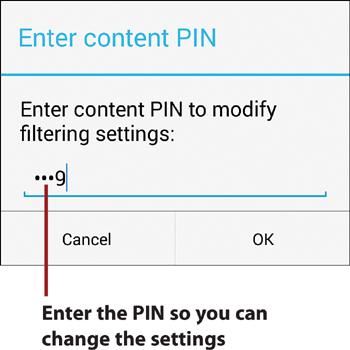
11. Touch to set a four-digit PIN that must be typed in before changing the Google Play User Control settings (Content Filtering, PIN for purchases, and Set PIN).
12. Touch OK. The Content PIN dialog closes, and the Confirm Content PIN dialog opens.

13. Type the PIN again, and then touch OK again. Android returns you to the Play Store app (not to the Settings screen).
Why Lock the User Settings?
Imagine if you buy a Galaxy Note 3 for your child but want to make sure that he doesn’t get to any undesirable content. First, you set the content filtering to restrict the content visible in Google Play. Next, you set the PIN so he can’t change that setting. A similar idea goes for limiting purchases.
Accidentally Uninstall an App?
What if you accidentally uninstall an app or you uninstalled an app in the past but now decide you’d like to use it again? To get the app back, go to the My Apps view in Google Play. Scroll to that app and touch it. Touch Install to reinstall it.
Keeping Apps Up to Date
Developers who write Android apps often update their apps to fix bugs or to add new features. With a few quick touches, you can easily update the apps you have installed.
1. On the Home screen, touch Apps to display the Apps screen.

2. Touch the Play Store app icon to launch the Play Store app.
3. Touch to display the navigation panel.
4. Touch My Apps to display the My Apps screen.

5. Touch Installed to display the Installed screen.
6. Touch Update to update an app.

Starting an Update from the Notification Panel
When your Galaxy Note 3 detects an update available for one of the apps you have installed, it displays the update notification in the Notification bar. You can open the My Apps screen in Google Play quickly by pulling down the Notifications panel and touching the notification.

Inserting and Removing SD Cards
You can expand your Galaxy Note 3’s storage by inserting an SD card in the slot above the SIM slot inside the back of the phone. Most SD cards come formatted with a supported file system (FAT or exFAT), so you can simply insert the card and use it. If it uses another file system, your Galaxy Note 3 prompts you to format it.
Touch to format the SD card
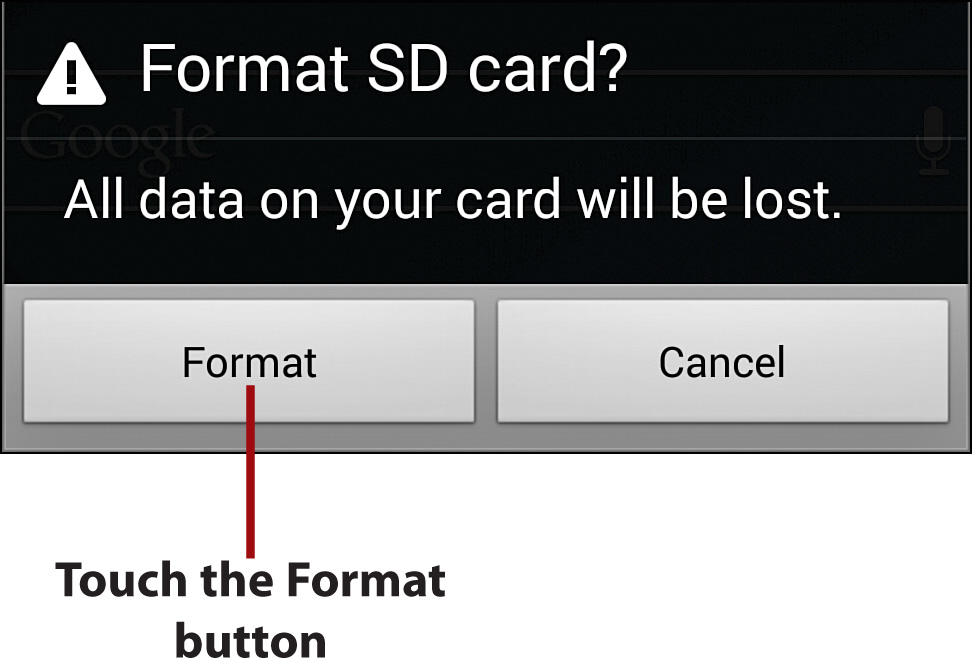
If you touch the notification, the Format SD Card? dialog opens, warning you that formatting the card will lose all the data. Touch Format if you want to proceed.

Touch the Format button
Before you remove the card, you should unmount it. Open the Settings app, touch General, and then touch Storage. On the Storage screen, touch Unmount SD Card, and then touch OK in the resulting dialog box. After unmounting the SD card, you can remove the back from your Galaxy Note 3 and slide the card out.
Touch to unmount the SD card before removing it
Samsung claims that the Galaxy Note 3 can take SD cards up to 64 GB, but some users report that some 128 GB cards also work.
