
12
MuleSoft Integration with Salesforce
In the previous chapter, we learned how to test your Mule application. We also studied several testing tools and a few testing mechanisms and explored MUnit and how to create an MUnit test suite. In addition, we explored the MUnit test recorder, which automates and eases the creation of test case jobs.
Testing is an integral part of an application development life cycle, hence it’s important to understand the fundamentals of testing your Mule applications.
In this chapter, we’ll be mainly focusing on integrating your third-party applications and Salesforce with the help of MuleSoft. We will study different connectors and templates available to speed up your integration.
Apart from the basics, we’ll focus on some of the Salesforce capabilities with MuleSoft. As a Salesforce developer/architect, this chapter will help you to integrate Salesforce and MuleSoft. It’ll also help you to explore all the capabilities of integrating MuleSoft with respect to Salesforce.
Here’s what you can expect to cover in this chapter:
- Exploring Salesforce connectors
- Discovering accelerators and templates for Salesforce
- Getting started with MuleSoft Composer
- Salesforce capabilities with MuleSoft – the Bulk API, CDC events, and analytics tools
- Quiz and practice
Technical requirements
- Anypoint Studio installation (see Chapter 3, Exploring Anypoint Studio, for Studio installation guidance)
- An Anypoint Platform account (see Chapter 2, Designing Your API, to create a 30-day free trial account)
- Sign up for a Salesforce Developer trial account: https://developer.salesforce.com/signup
Exploring Salesforce connectors
Ever since the acquisition of MuleSoft by Salesforce in 2018, there has been a major advancement in terms of integrating MuleSoft and Salesforce. Several connectors and templates are offered to users that help to ease Salesforce and MuleSoft integration. This also helps us to unlock data present in silos and benefits in retrieving, transforming, and analyzing the data. We can pair MuleSoft with several Salesforce tools and components such as Tableau, Slack, Einstein Analytics, Service Cloud, Sales Cloud, and so on. This enables us to solve complex transformations. We can also receive Platform Events and publish Platform Event messages with the Salesforce connector. This helps us to stream API events.
Let us understand the different types of Salesforce connectors and how to use them.
Connectors, by far, are the most used and easiest means of integrating Salesforce with MuleSoft.
Let’s have a look at the connectors in Mule Palette, which are confined mainly to Salesforce integration. By default, you will have the Salesforce Connector module available in your Mule Palette, which will help you to perform operations on your Salesforce APIs (see Figure 12.1).
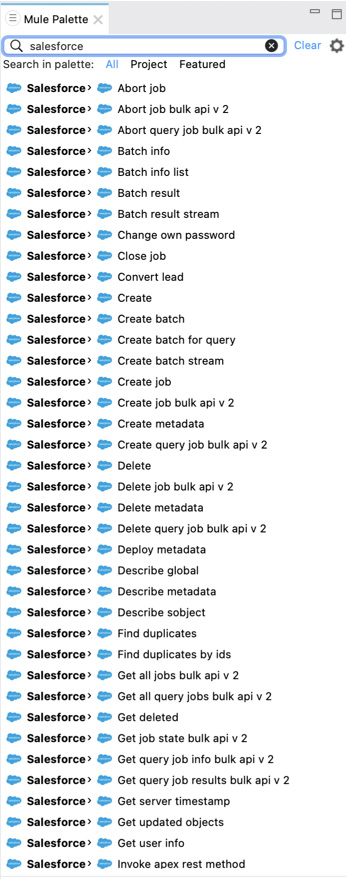
Figure 12.1 – Salesforce connectors in Mule Palette
To use these connectors, drag and drop the suitable connector in your Mule flow.
We have seen different Salesforce connectors in Mule Palette. Let’s understand how to configure a Salesforce connector.
Configuring a Salesforce connector
Let’s configure one of these connectors from the Salesforce Connector module. The configuration for all the Salesforce connectors is similar. Let’s follow these simple steps to configure a Salesforce connector in Anypoint Studio.
In order to use these connectors, you need access to a Salesforce Developer account. You will also require valid credentials, a security token, and an authentication/authorization token.
- Choose any connector as per your requirements. We will select the Get user info connector from the Salesforce connector module. Drag and drop the connector in your Mule flow (see Figure 12.2).

Figure 12.2 – Choosing a Salesforce connector
- Click on the + symbol as shown in Figure 12.2. Fill in the Username, Password, Security token, and Authorization URL fields (see Figure 12.3). Test your connection and click OK.
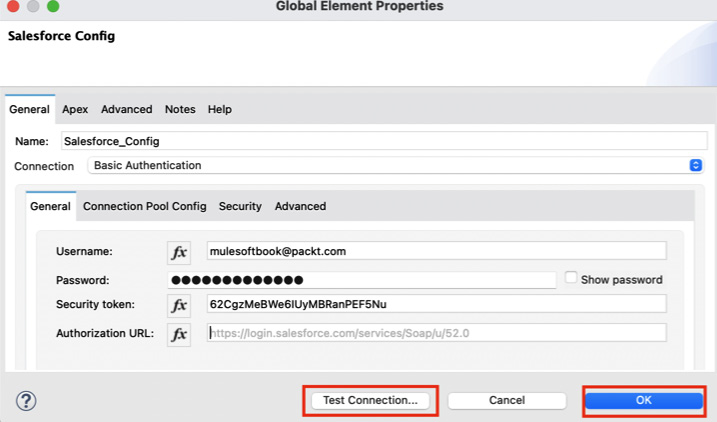
Figure 12.3 – Configuring the Salesforce connector
Note
You can extract the configuration details from your Salesforce Developer account.
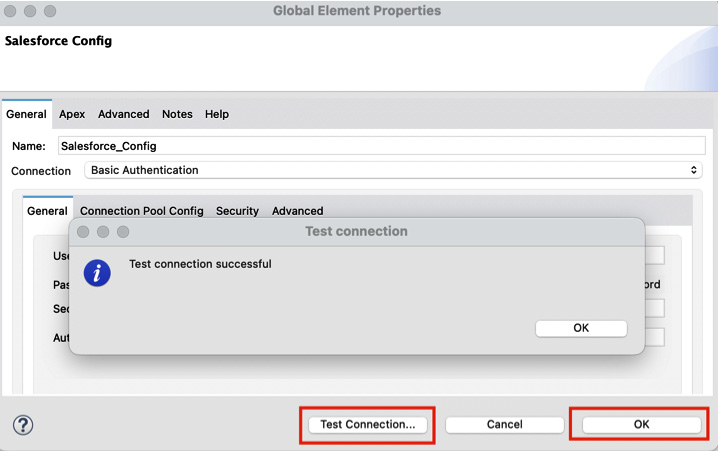
Figure 12.4 – Salesforce connector configured successfully
- Now complete the flow by adding HTTP Listener (as the event source), Transform Message (to convert payload to JSON), and Logger (to log the payload).
- Now run the Mule project. Right-click on the project and select Run As | Mule Application.
Once you see the status as Deployed, trigger the application from Postman or any web browser and you should see the response as User info from the Salesforce account (see Figure 12.5).
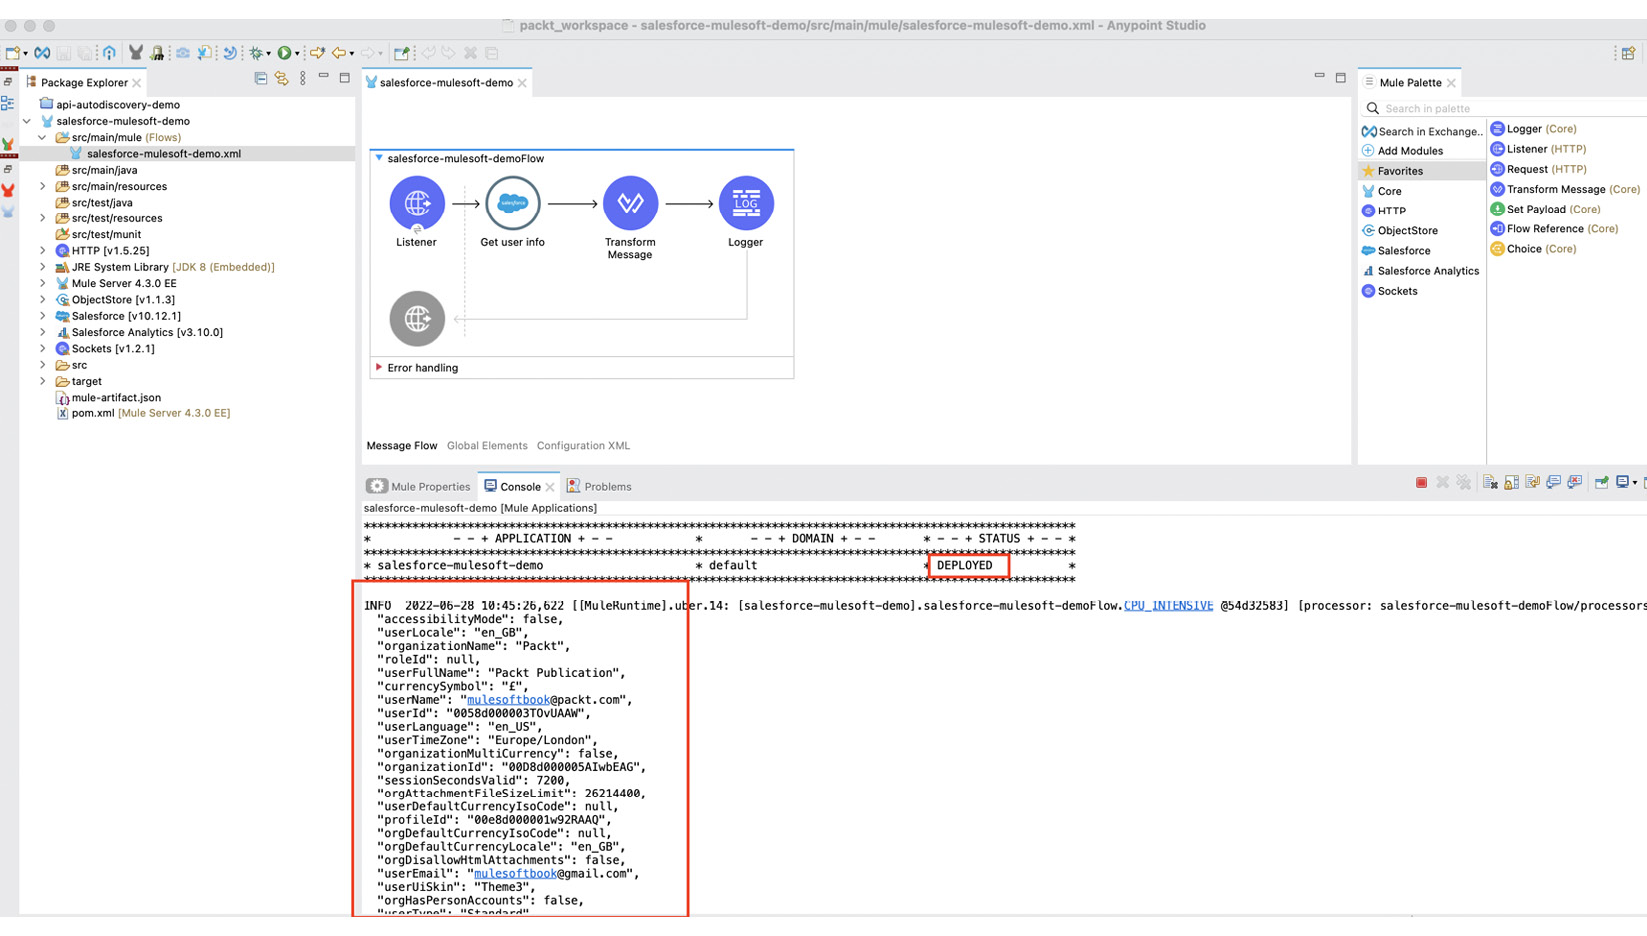
Figure 12.5 – User info from the Salesforce Developer account
We have now understood how to configure a default Salesforce connector. Try other connectors in the palette to get more hands-on experience with Salesforce connectors.
In the next section, we will learn how to add a Salesforce connector explicitly to match your particular use case.
Adding a Salesforce connector
In this section, we’ll learn how to add a Salesforce connector to your Mule Palette.
Apart from the default Salesforce connectors, you can also add connectors specific to your use case. These connectors will help you integrate with specific Salesforce components or tools.
In order to add these connectors to your Mule Palette, follow these steps:
- Click on the Search in Exchange option in your Mule Palette.
- Log in to your MuleSoft Anypoint Platform account and add your account if you haven’t already.
- Search Salesforce or any specific service for which you want to use the connector.
- Select the connector you want to add to your Mule Palette.
- Click on the Add button. You can add and remove multiple connectors.
- Once done finalizing the connectors you wish to add to Mule Palette, click on the Finish button (see Figure 12.6).

Figure 12.6 – Adding Salesforce connectors to Mule Palette
We have now understood how to add a Salesforce connector explicitly to Mule Palette. Let us now review the list of connectors that are available in MuleSoft’s Anypoint Exchange:
- Salesforce Connector
- Salesforce Commerce Cloud Connector
- Salesforce Composite Connector
- Salesforce Einstein Analytics Connector
- Salesforce Marketing Cloud Connector
- Salesforce Marketing Cloud REST Connector
- Salesforce B2C Commerce Cloud Data Connector
- Salesforce CDP Connector
- Commerce Cloud B2C Shop Connector
And there will be a few more added to the list in the future. Similarly, there are connectors available to integrate Slack and Tableau with MuleSoft. We have now learned about different types of Salesforce connectors and how to add Salesforce connectors.
In the upcoming section, let’s learn about MuleSoft accelerators and templates that are available for Salesforce integration with MuleSoft.
Discovering accelerators and templates for Salesforce
In this section, we’ll mainly learn about accelerators and templates for Salesforce. We will also understand how to leverage these templates for easy integrations.
Getting started with accelerators
Accelerators are ready-to-use and predefined use cases with end-to-end implementation. They provide you with detailed use cases, low-level and high-level designs, API specifications, implementations, documentation, and so on. Accelerators speed up integration time. They also exemplify what an actual integration use case would look like.
You can access these accelerators from Anypoint Exchange. One such instance is MuleSoft Accelerator for Salesforce Service Cloud (see Figure 12.7): https://www.mulesoft.com/exchange/org.mule.examples/mulesoft-accelerator-for-salesforce-service-cloud/minor/1.5/pages/home.
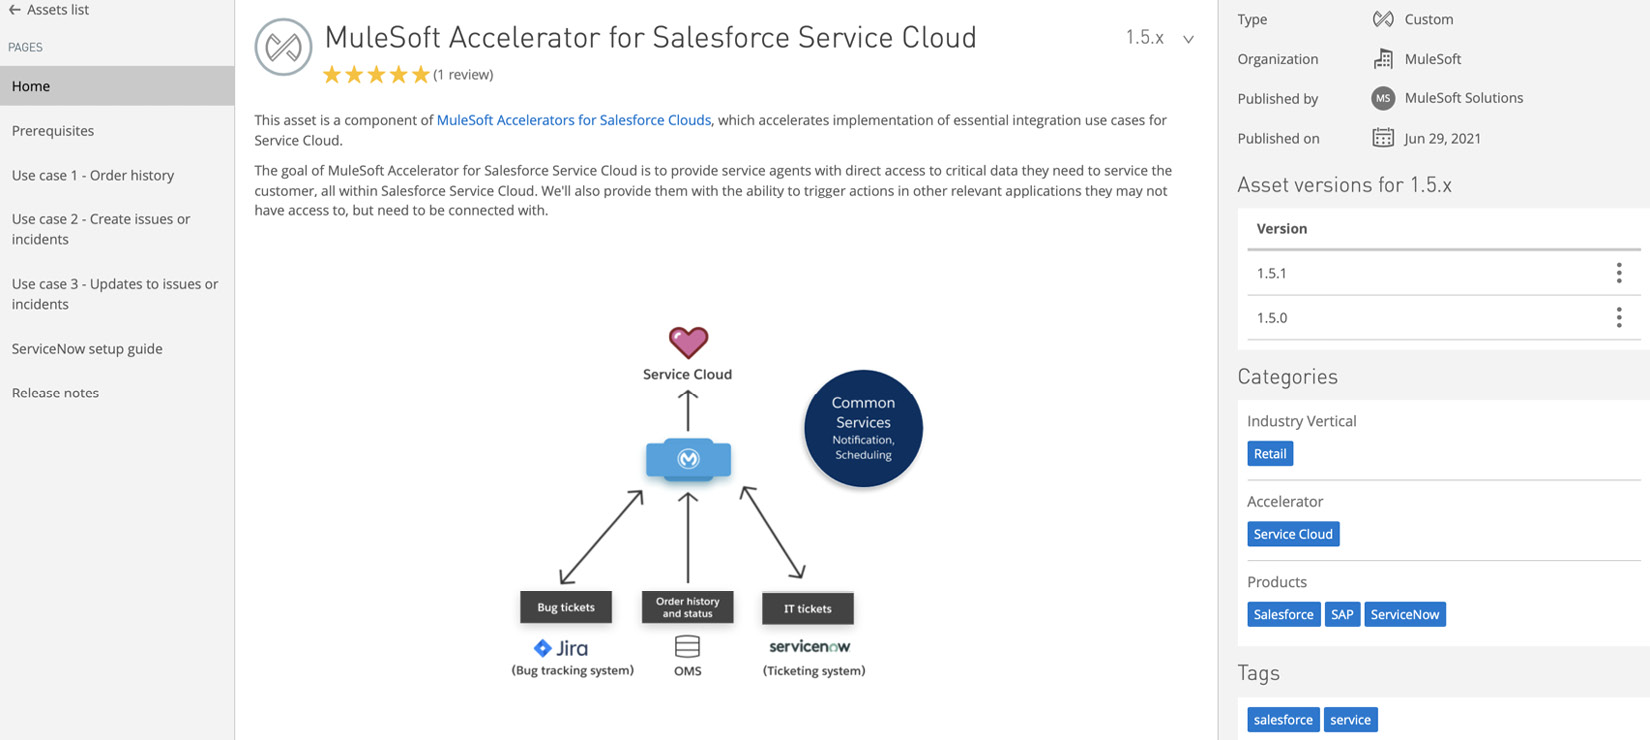
Figure 12.7 – MuleSoft Accelerator for Salesforce Service Cloud
Review all the use cases in Anypoint Exchange mentioned to get a fair understanding of accelerators. In order to get hands-on, you can download and import the use cases in Anypoint Studio.
We have learned about accelerators in MuleSoft and their functionality. Now let’s deep dive into templates and learn how to use them.
Exploring templates
MuleSoft provides out-of-the-box templates available on Anypoint Exchange. Templates are pre-built integrations that provide you with a skeleton for your integration. They are readily available implementations. Templates can be considered a subset of accelerators as the latter has a lot more to offer.
You can download these templates, configure them, and get started without having to build the integration from scratch.
Let’s now learn how to access and configure templates with simple steps:
- In order to access templates, go to MuleSoft’s Anypoint Exchange, go to the Provided by MuleSoft tab, and select Templates. You can find all the templates available (see Figure 12.8).
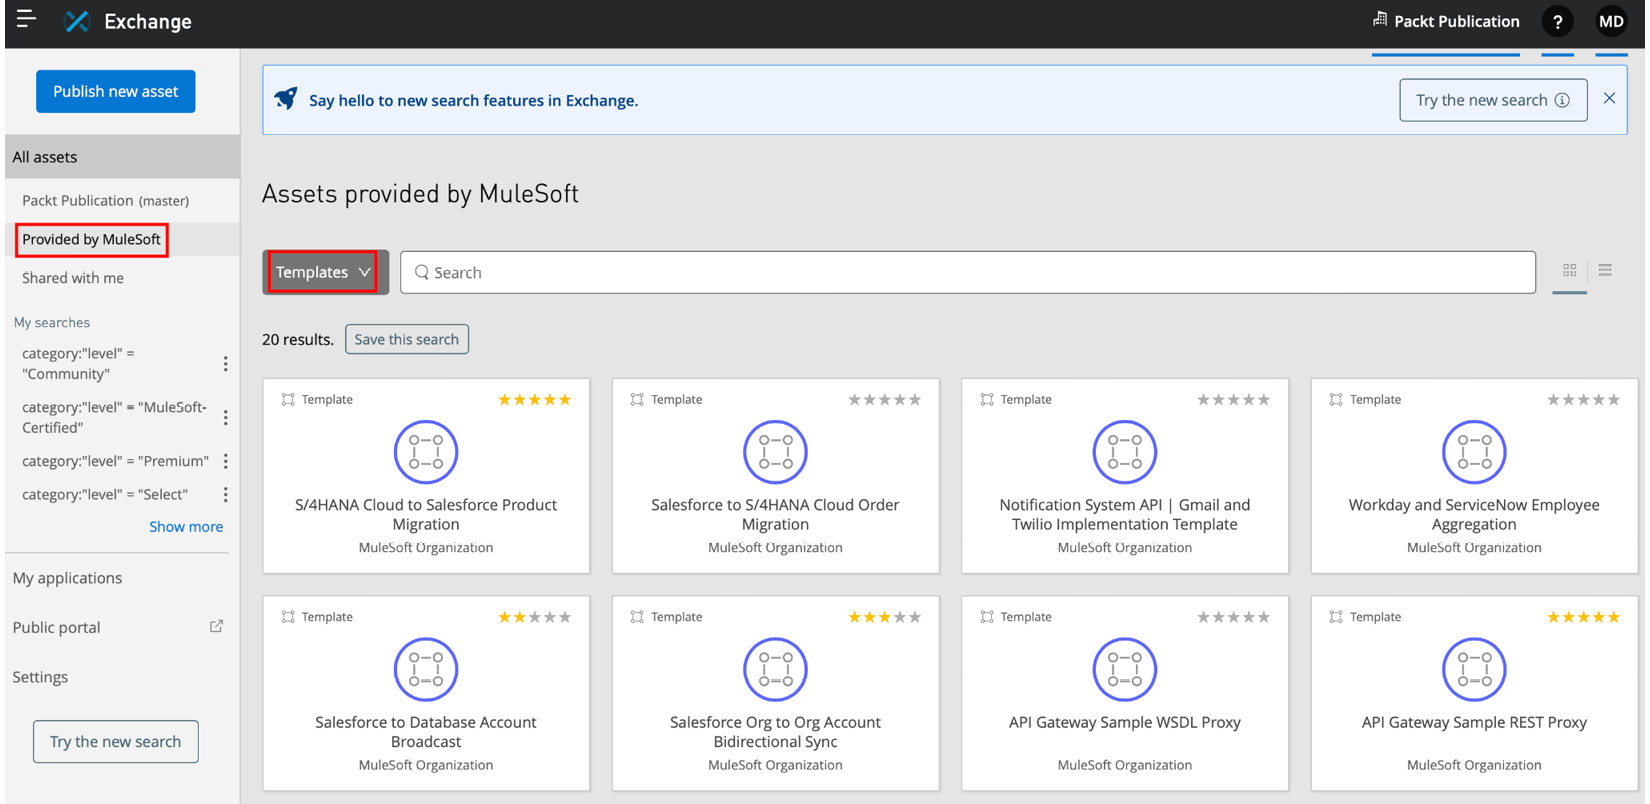
Figure 12.8 – Templates provided by MuleSoft
If you have a particular use case, then you can search for a specific template. For instance, if you want to integrate NetSuite with Salesforce, you can simply search for NetSuite to Salesforce and you’ll get a list of templates available (see Figure 12.9).
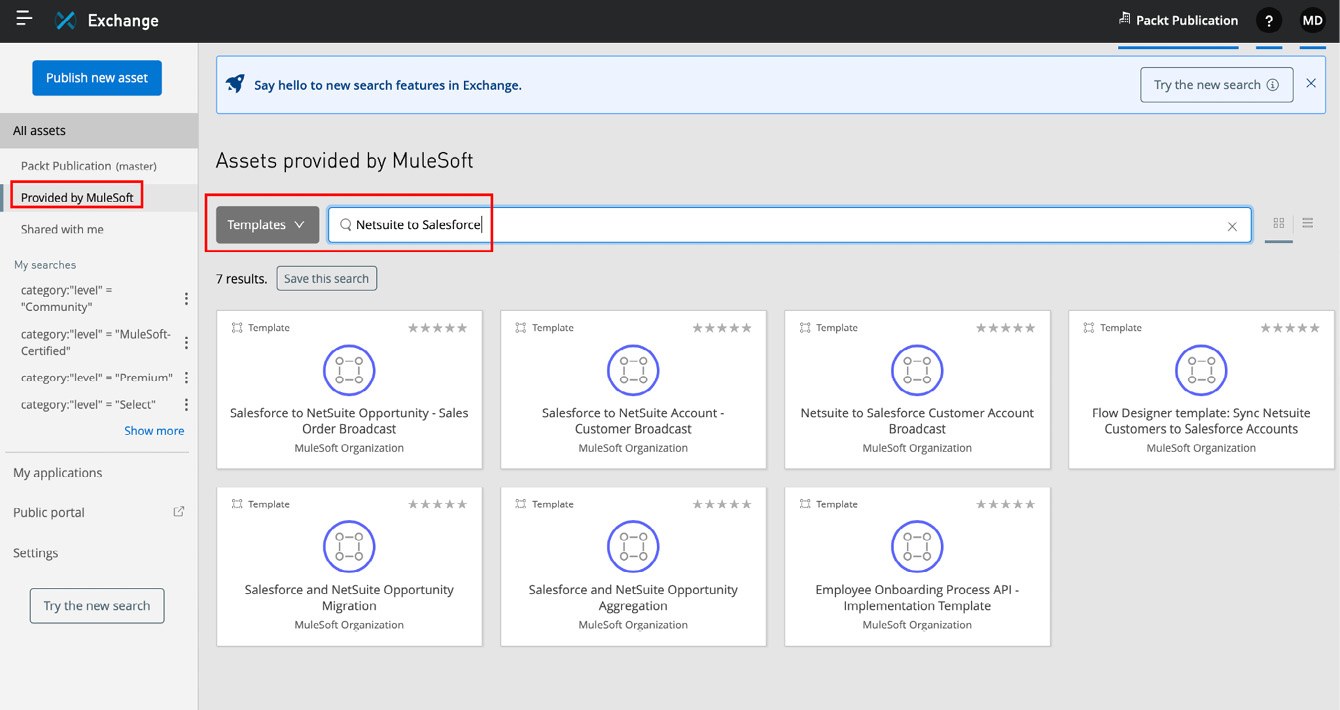
Figure 12.9 – NetSuite to Salesforce templates
You can review all these templates, go through the information documented, and choose the template that is relatable to your use case.
- Once you’ve chosen the template, click Download. A .jar file will be downloaded (see Figure 12.10).
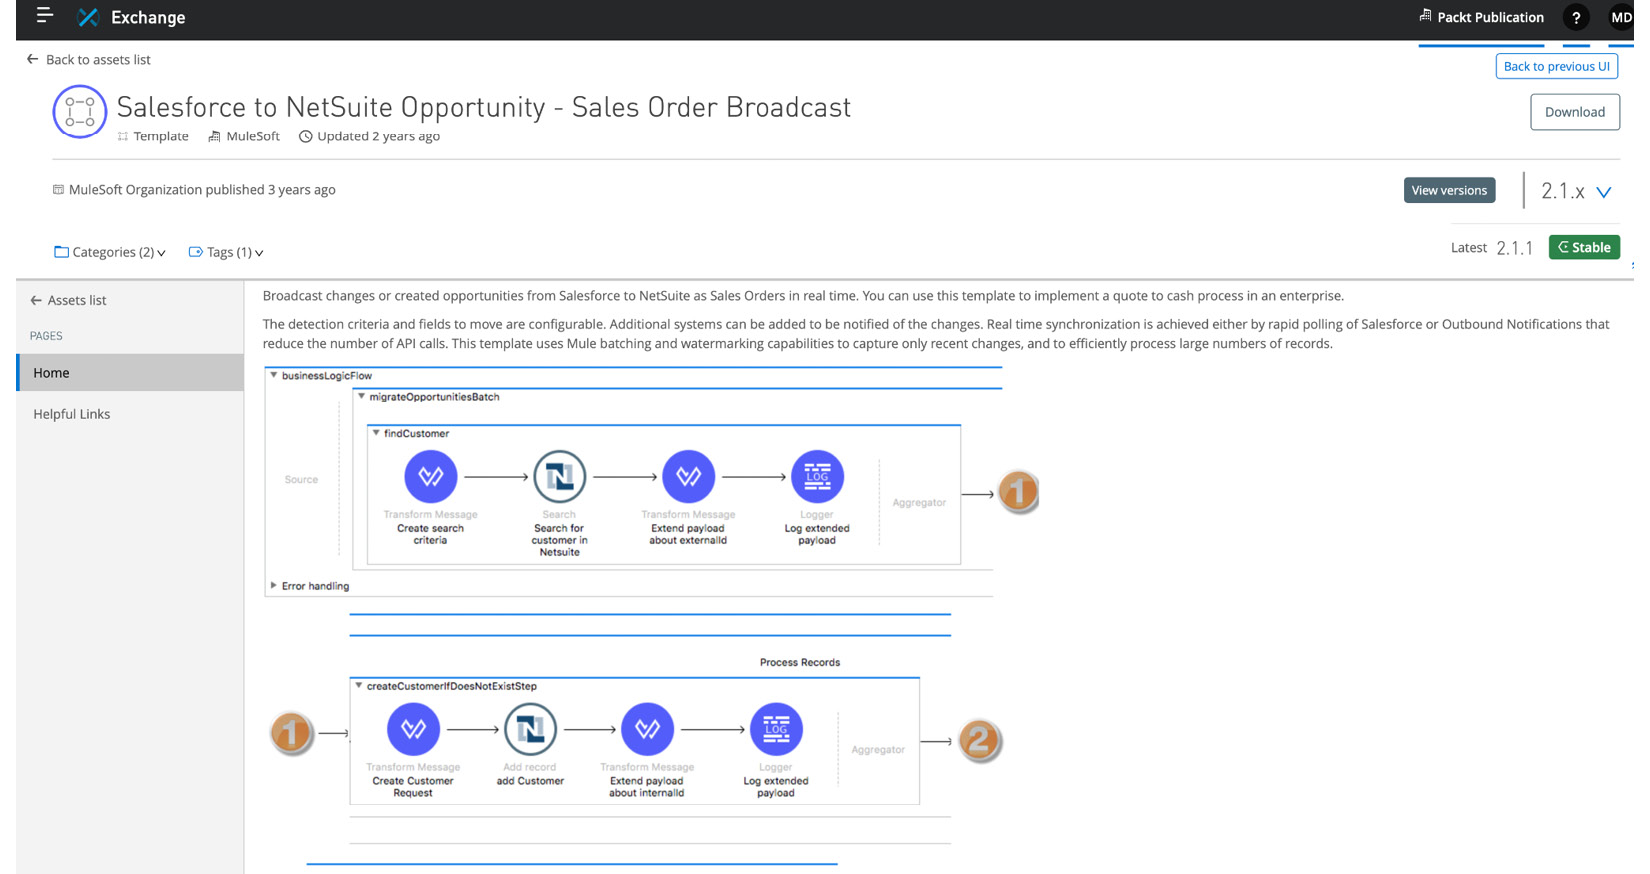
Figure 12.10 – Reviewing and downloading the template
Go to File | Import, click Packaged mule application(.jar), navigate to the file directory, click Finish.
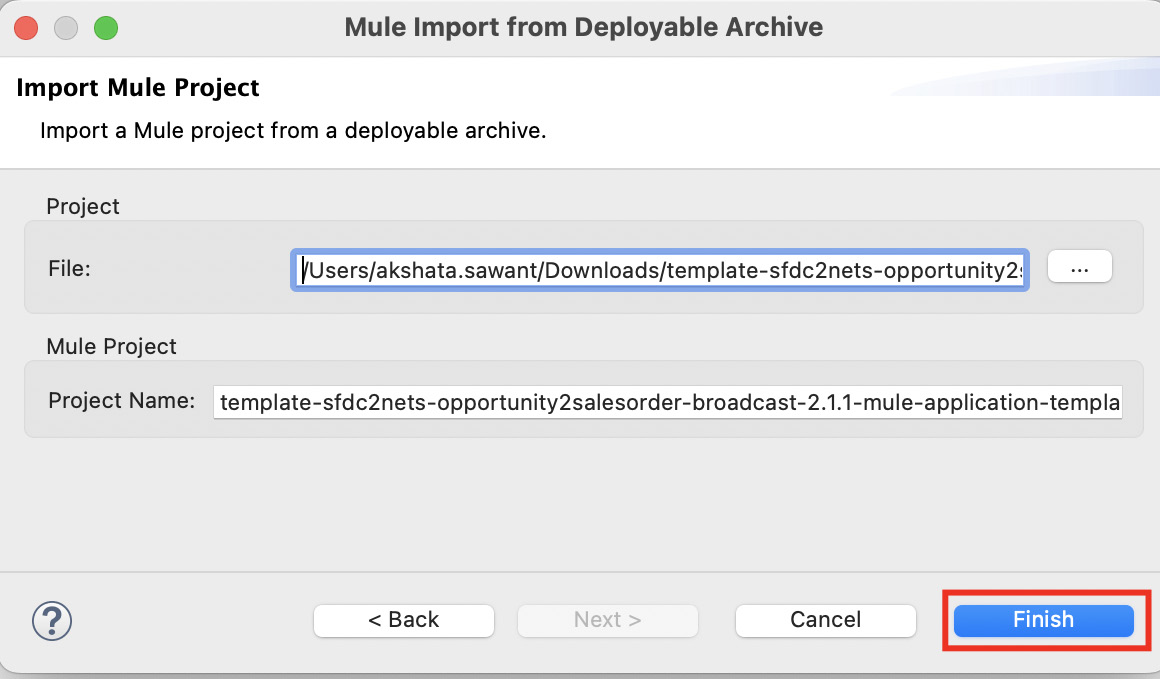
Figure 12.11 – Importing a .jar file into Anypoint Studio
- Once the file is imported into Anypoint Studio, review all the files, flows, configurations, and so on (see Figure 12.12). You can make changes to the flow and the transformation logic as per your requirements.
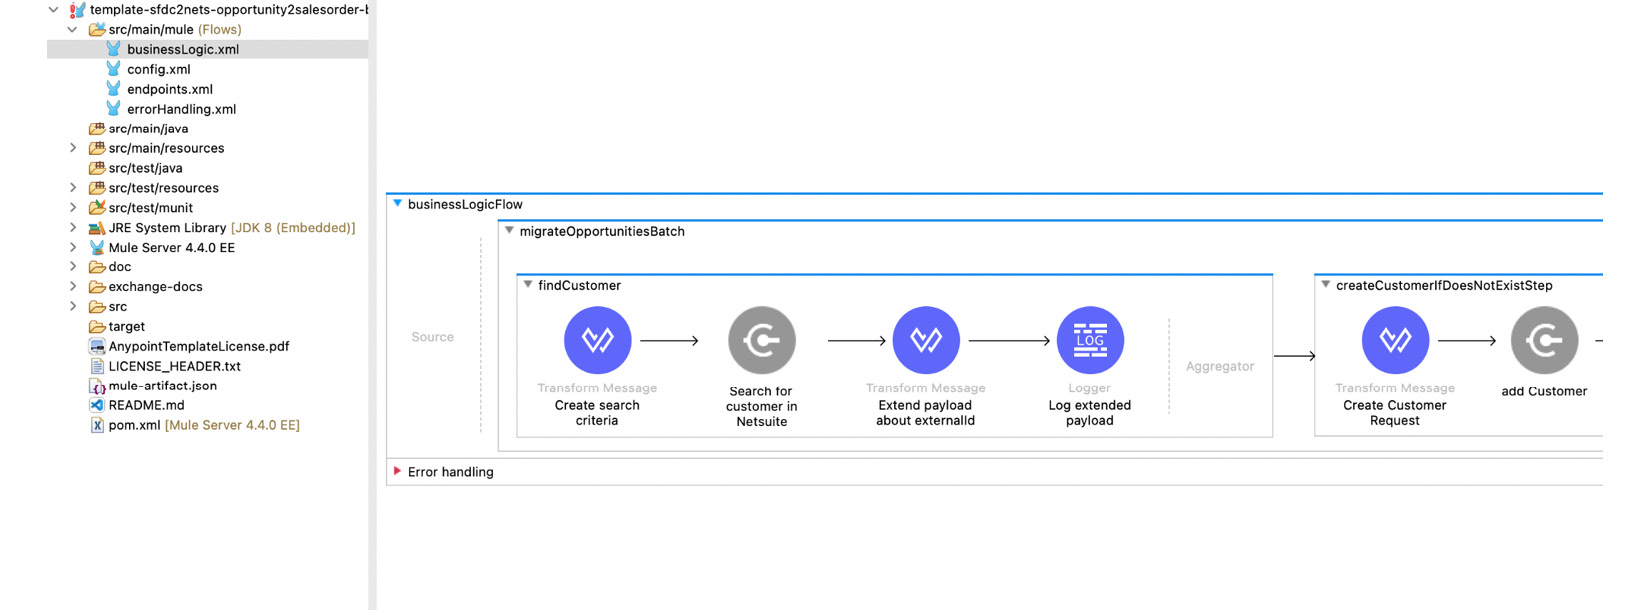
Figure 12.12 – Reviewing the template in Anypoint Studio
You can navigate to the .properties file in the src/main/resource folder and configure your end systems – NetSuite and Salesforce, in this case (see Figure 12.13).
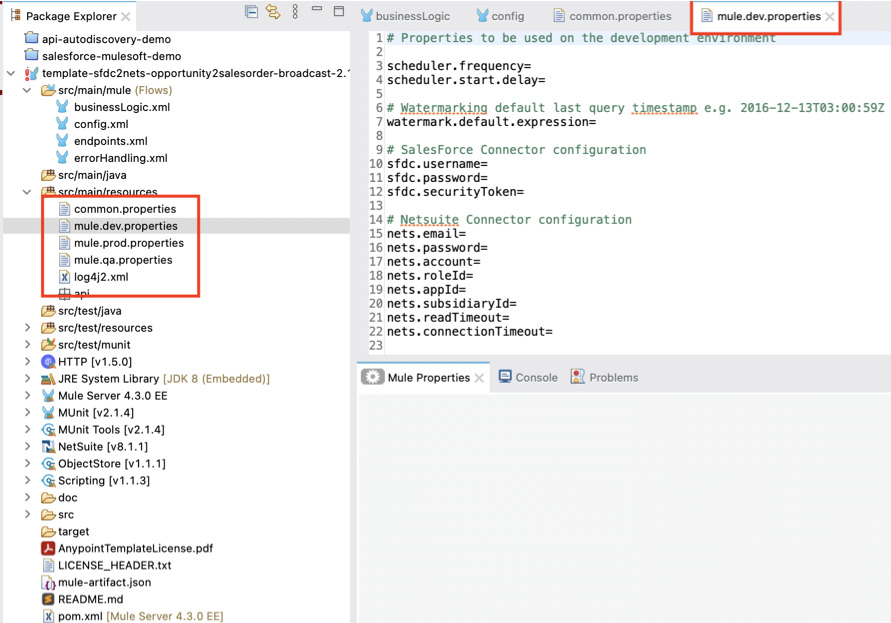
Figure 12.13 – Connector credentials in the properties file
We have now successfully reviewed and added the template to Anypoint Studio.
Note
The configuration of accelerators and templates implementation-wise is similar.
Let’s now review a few advantages of accelerators and templates:
- As they consist of pre-built implementations, it reduces development time as you don’t have to build everything from scratch
- If you’re new to MuleSoft, you can use them as a reference if you’re not already aware of the best practices and coding standards
- You can focus more on the transformation logic and building new integrations
- You can reuse, extend, and customize them as per your needs
We have now learned and understood how to utilize accelerators and templates efficiently to simplify our integrations and reduce our development time.
MuleSoft Composer helps Salesforce admins to integrate data and apps with ease and hence it’s essential to learn about it. In the next section, we’ll learn about MuleSoft Composer and explore its capabilities.
Getting started with MuleSoft Composer
As a Salesforce developer, you are already aware of how essential it is to unlock the data present in silos. MuleSoft Composer is a tool available in the Salesforce ecosystem that helps you to connect, transform, and integrate various end systems.
It’s a no-code platform that is accessible from a Salesforce developer account. Currently, it has around 14+ in-built connectors to connect with different end systems directly, such as Workday, NetSuite, Slack, Jira, Stripe, Asana, and so on. This list will continue to grow over time.
Before deep diving into the configuration of MuleSoft Composer, let’s understand its capabilities.
Capabilities of MuleSoft Composer
Let us now review the capabilities of MuleSoft Composer, in order to leverage it better:
- Connects different end systems easily
- You can synchronize, retrieve, and transform data from different end systems
- No-code data transformation with if-else blocks, routers, and filters
- Manage the application life cycle (build, test, debug, deploy, and so on) with the help of flows
We’ve seen the capabilities of MuleSoft Composer, so now let’s learn when we can leverage it:
- When you want to map/transform data from different systems (such as NetSuite, SAP, and legacy systems) without implementing complex logic
- When polling data from one end system, adding logical conditions, and transforming the data
- For data migration and data transformation
We have now understood the capabilities of MuleSoft Composer and when to use it. Let’s get some hands-on practice and set up MuleSoft Composer with some easy steps.
Configuring MuleSoft Composer
In order to configure MuleSoft Composer, you need to have valid admin access. Let’s assume you have the required access and get started with installing and configuring MuleSoft Composer.
In this use case, we will poll the data from Salesforce every 15 minutes. Based on the information retrieved from Salesforce, we will apply conditional logic and fetch data from Slack. Let’s follow these steps to get started with MuleSoft Composer:
- Log in to your Salesforce org. Go to Setup, enter MuleSoft Composer in the Quick Find search, and click on Install the Managed Package for MuleSoft Composer. You will be automatically granted permission to access MuleSoft Composer (see Figure 12.14).
As a first-time user and an admin, you can also change the required permission set and configure OAuth authorization and IP address restrictions by clicking Change the Type of Permitted Users and Relax IP Restrictions.
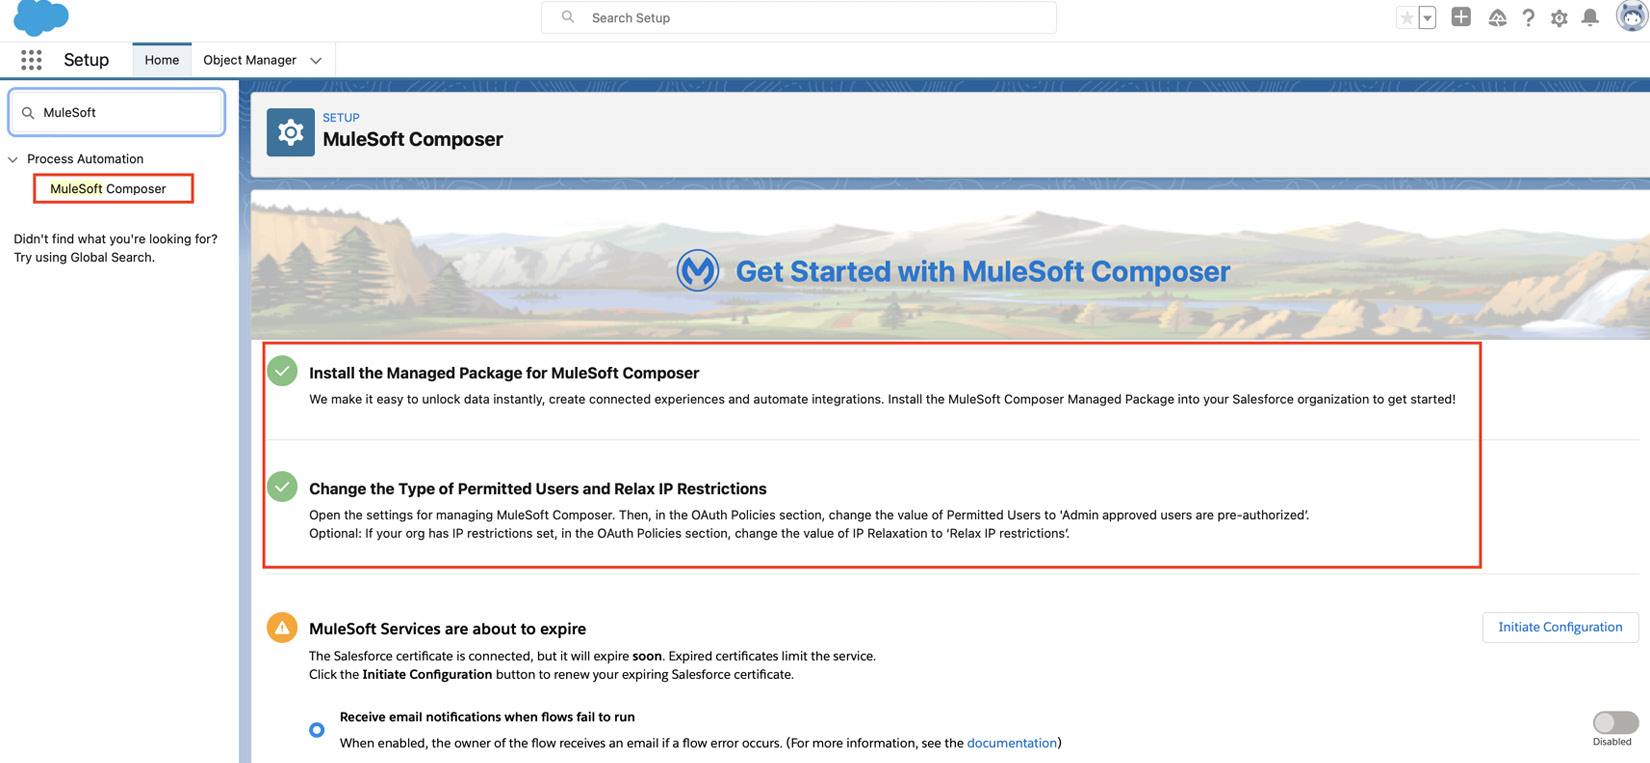
Figure 12.14 – Installing MuleSoft Composer
- Once the installation is complete, you’ll be redirected to MuleSoft Composer’s home page. Click on the Create New Flow option in order to create a new flow (see Figure 12.15).
- The flow consists of triggers and a series of events that show the execution of the process.
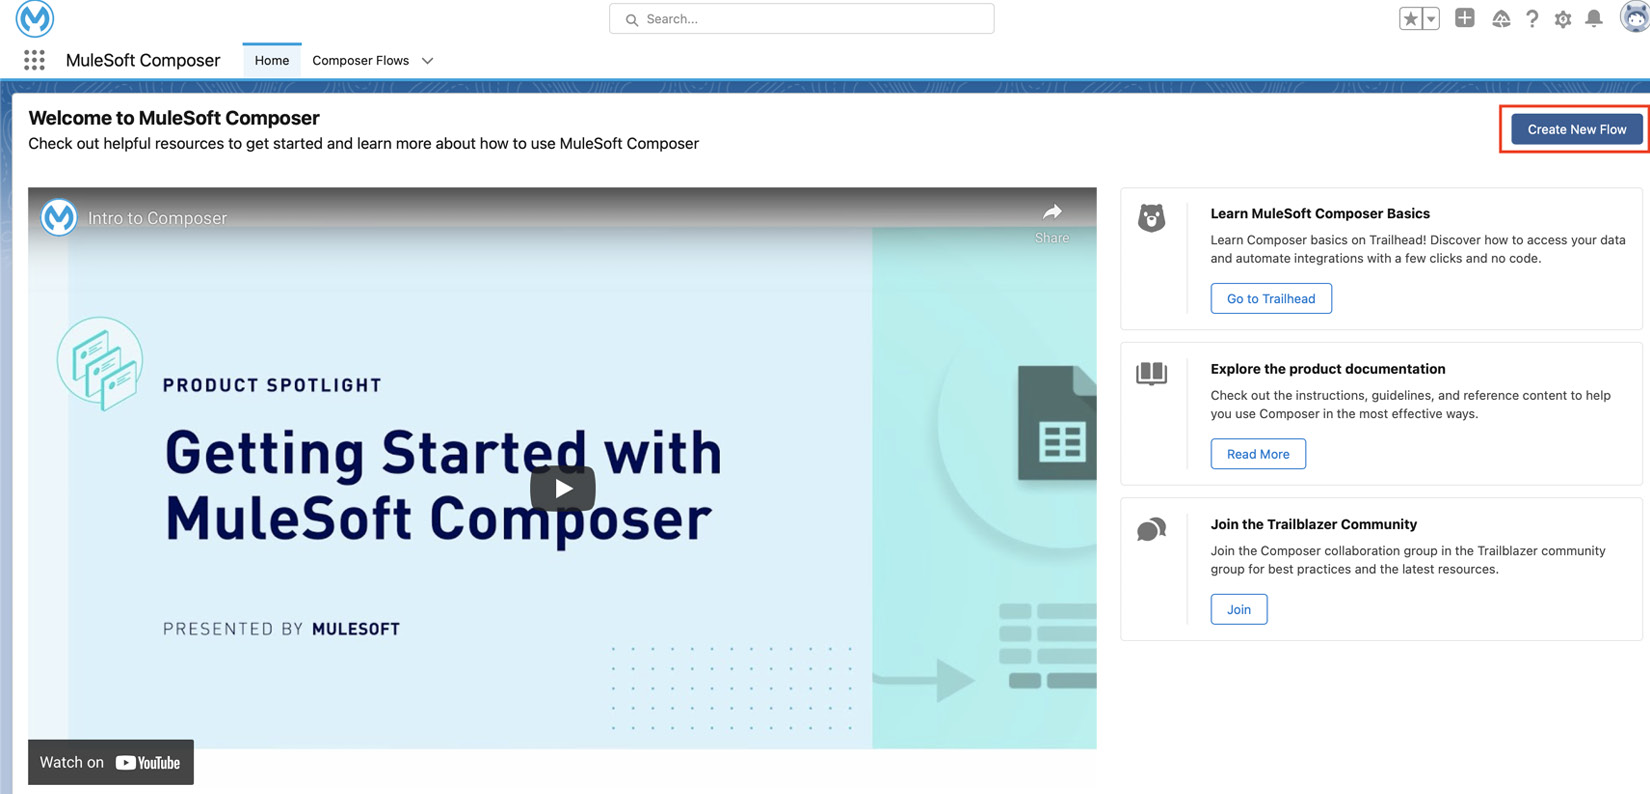
Figure 12.15 – Creating a new flow
- To start the execution flow, we need to define flow triggers. The flow can either be started by an event triggered from any of these predefined end systems or you can poll the flow using a scheduler. In this case, we’ll select Scheduler (see Figure 12.16).
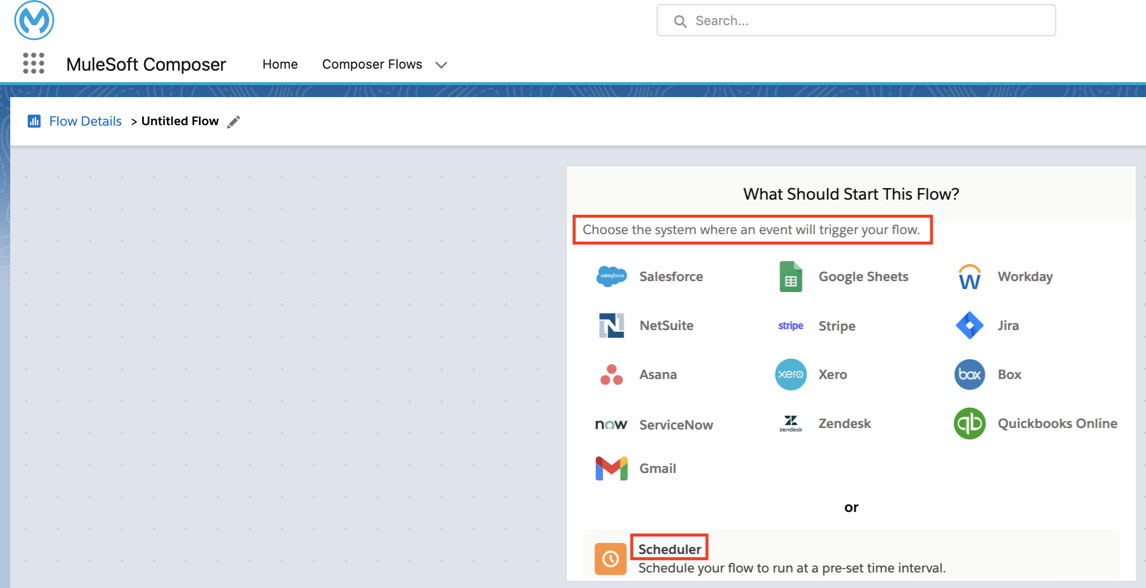
Figure 12.16 – Choosing a flow trigger
- Configure the end system. As we have selected a scheduler here, you can choose the frequency of events (see Figure 12.17).
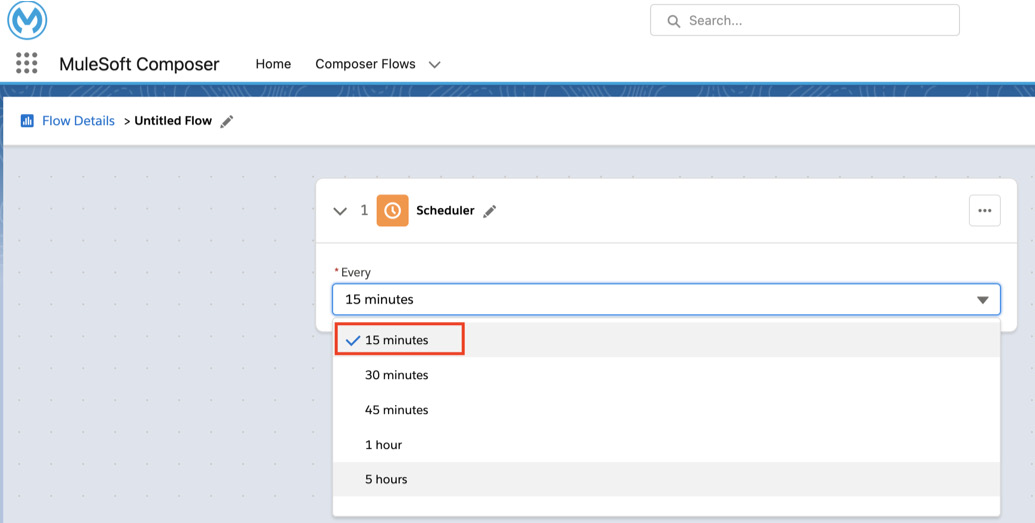
Figure 12.17 – Configuring Scheduler
Note
The configuration of any other end system is similar and easy, provided you have valid access to it.

Figure 12.18 – Adding the next step
- Similar to flow trigger selection, you can select the next action. This action will be responsible for the execution or processing of the flow (see Figure 12.19).

Figure 12.19 – Selecting the next action
- In this case, we’re choosing Salesforce as the actionable end system. Authorize Salesforce and select the connection that you wish to integrate (see Figure 12.20).
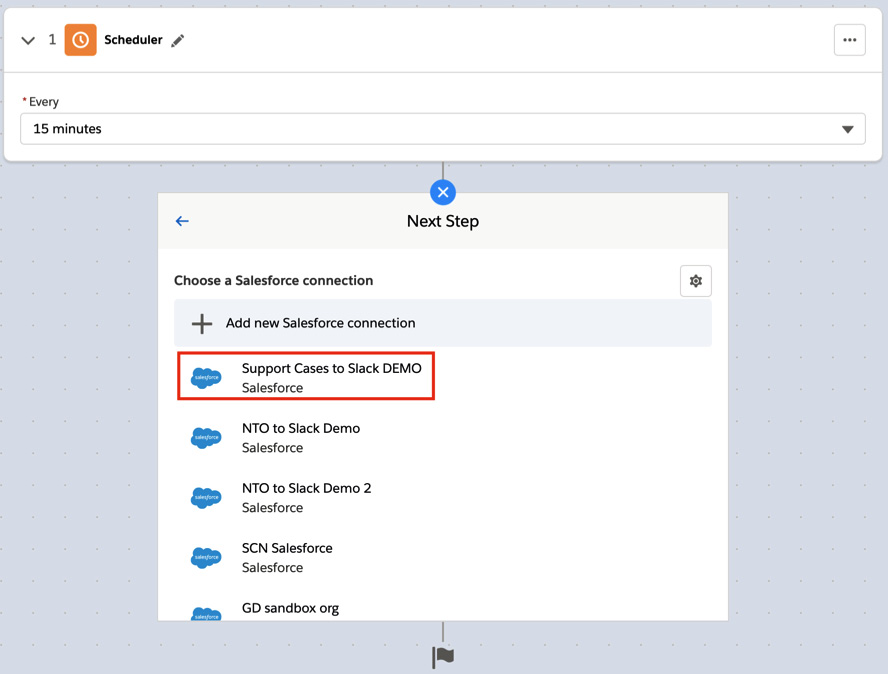
Figure 12.20 – Configuring the Salesforce end system
- Once you’re done selecting and configuring system events, you can select the next step. Here, along with predefined end systems, you also get an option to select a flow control out of two flow controls, namely If/Else Block and a For Each loop. You also have an option to connect to any other end system that is not mentioned in the list using an HTTP connection (see Figure 12.21).
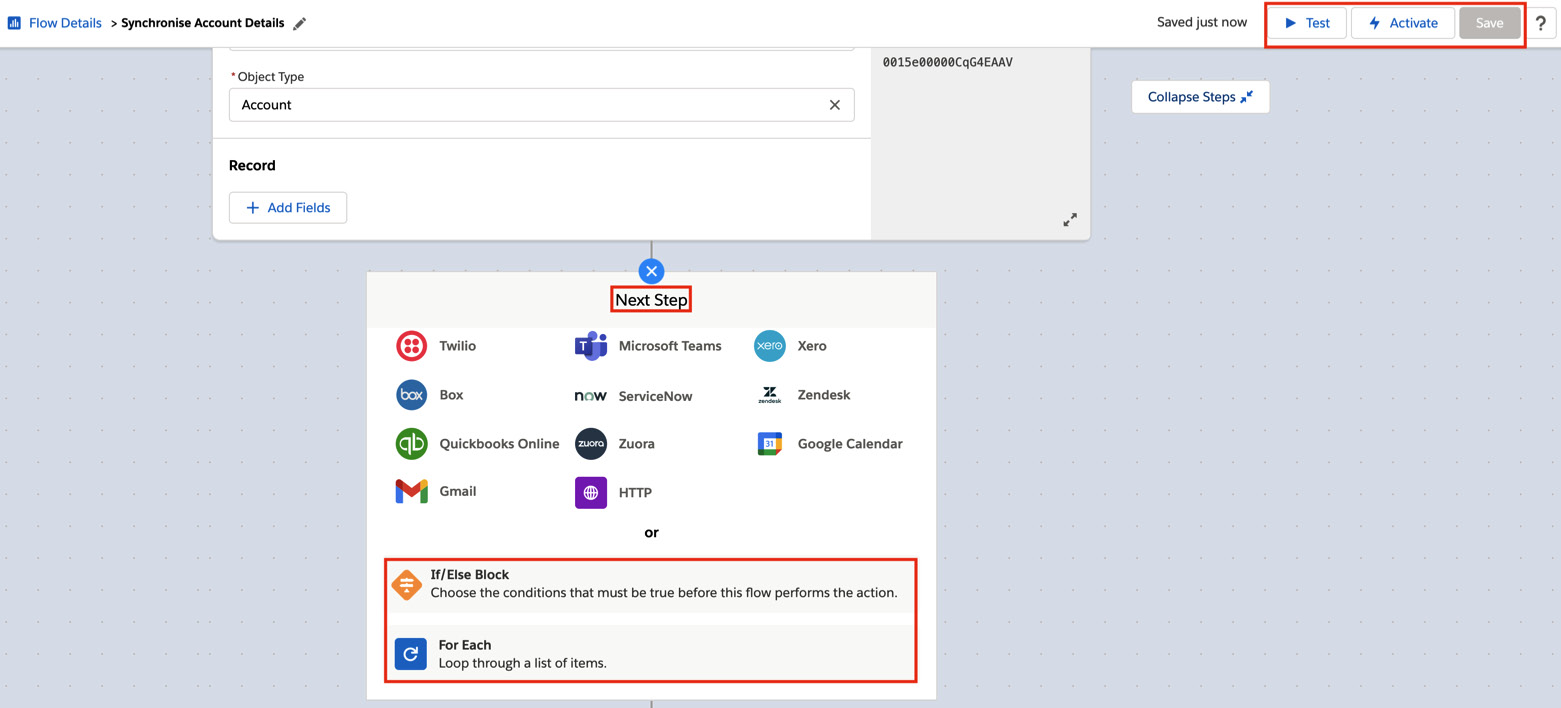
Figure 12.21 – Selecting routers in the next step
- Once you’re done selecting all the steps, you’ll have a flow outline describing the activity of the flow. Click Test to test the flow. Once you’re done testing and are satisfied with the integration result, you can activate the flow by clicking Activate (see Figure 12.22).
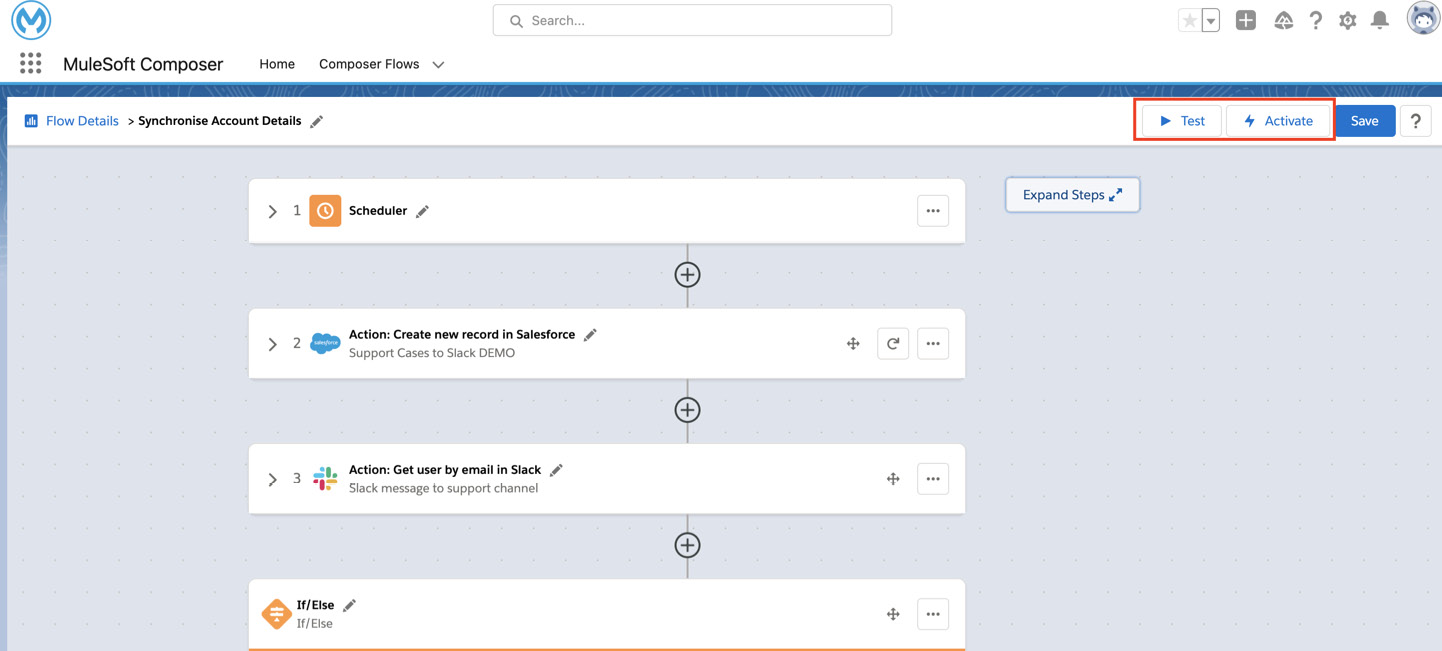
Figure 12.22 – Flow overview
We have studied MuleSoft Composer and its features. We have also learned how to install and configure MuleSoft Composer and create a flow.
In the next section, we’ll further explore the integration capabilities of MuleSoft with Salesforce.
Exploring MuleSoft’s integration capabilities with Salesforce
We have previously studied connectors, accelerators, templates, and so on to integrate with Salesforce. These are the most commonly used mechanisms. Let’s now explore other integration capabilities that can be leveraged with MuleSoft and Salesforce.
The Bulk API
In order to process voluminous data efficiently, you can make use of the Bulk API v2.
You can perform operations such as creating, getting, deleting queries using the MuleSoft connectors for the Bulk API v2 (see Figure 12.23). This helps you to easily integrate Salesforce objects and process large volumes of records asynchronously. You can process these records in one go and thus optimize your integration. For instance, if we want to retrieve and process the personal details of all customers, we can use the Create job bulk api v 2 connector from Mule Palette.
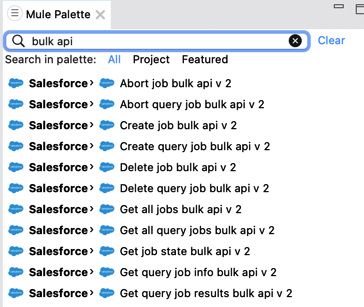
Figure 12.23 – Bulk API v2 connectors
We have now learned about the Bulk API. Let’s explore more about CDC events.
CDC events
Change Data Capture events (CDC events) are used to keep external end systems in sync. As the name suggests, they keep track of event changes and hence are useful in real-time integration.
With the help of MuleSoft and Salesforce, you can publish an event change in a Salesforce object.
We can use the MuleSoft connector from the Salesforce module Replay channel listener (see Figure 12.24). In this case, we can use the publish-subscribe pattern. We can subscribe to the event published by the Salesforce object to capture the data change. For instance, in the case of the Order Management system, as soon as the status changes from Processing to Shipped, the customer should receive communication via email and SMS. This change should be reflected across all end systems involved. In such situations, using CDC would be appropriate to keep all the end systems in sync.
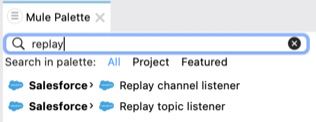
Figure 12.24 – Replay channel listener
By using this pattern, we can avoid polling and hence optimize the integration by confining it to change events.
We have now studied CDC events. Let’s learn more about the data analytics tools.
Data analytics tools
Data analytics and visualization tools such as Salesforce Analytics, Salesforce Einstein Analytics, and Tableau can be easily integrated with MuleSoft. These tools help us to get real-time results with customized dashboards and visual reports.
We can extract, transform, and process data from several end systems and perform transformation logic. Further, we can send such processed data to analytics tools with the help of connectors present in the Mule palette. Analytical tools will help us to portray the information in the form of metrics, charts, reports, customized dashboards, and so on.
For instance, if we have our data residing in several end systems such as NetSuite, Salesforce, and several other legacy end systems, we can transform this data and send it to Einstein Analytics. Further, we can create a customized dashboard to study the data and generate leads for our marketing team.
We have now understood several out-of-the-box integration capabilities of MuleSoft. In order to further understand them and get hands-on experience, review and try out these connectors.
Summary
In this chapter, we have learned about Salesforce integration with MuleSoft. We have studied different approaches to tackle integration such as the use of connectors, accelerators, and templates. We have explored MuleSoft Composer for Salesforce, learned about its capabilities, and created flows using it. We have also studied other integration capabilities such as connecting with a topic listener, the Bulk API, CDC events, and so on.
Learning about various integration techniques with Salesforce will help you to choose the best integration approach.
In the next chapter, we’ll learn more about commonly used MuleSoft connectors such as file-based modules, SOAP connectors, VM queues, and so on. We will also understand some industry-based use cases and how to optimize integrations. In order to ace industry-based integration challenges, it’s essential to learn about frequently used connectors and some best practices.
Assignments
- Download the Salesforce accelerator, review it, and import the implementation into Anypoint Studio. Go through the Integration logic and best practices.
- Integrate Salesforce’s Einstein Analytics with MuleSoft using the connector available in the Mule palette.
- Try out the Bulk API v2 connectors and process data using Salesforce and MuleSoft.
Questions
- What are the details you need to know before configuring Salesforce with MuleSoft?
- What are templates and accelerators?
- What is the purpose of using MuleSoft Composer?
Answers
- We need to be aware of the username, password, security token, authorization token (if authorization is enabled), and valid access.
- Templates consist of built-in implementation code and accelerators consist of end-to-end use cases, API specifications, and implementation code.
- It helps to build no-code integrations inside the Salesforce ecosystem.