
With the number of security threats increasing, consumers want to ensure that their computers have the latest updates, hotfixes, and patches. Consumers go to the Microsoft Windows Update Site to download the latest patches. In a corporate environment, it does not make much sense to visit every workstation and download the latest Windows Update; it would be more beneficial to download those updates to one or more centrally located servers, then deploy the updates to the clients (and servers) within the enterprise.
Microsoft originally released Software Update Services, or SUS, to allow network administrators to centrally deploy the latest Windows Updates. Software Update Services was managed from a web interface and allowed the administrator to approve or deny updates for the computers in the enterprise. Windows Software Update Services, or WSUS, replaced the discontinued Software Update Services with more features and options for the network administrator. Before SUS and WSUS, either end-users downloaded their own updates or administrators visited each machine and loaded the updates. If users failed to download updates, their systems could wind up being vulnerable and bring down the network. There was also a possibility that a user could download a patch that caused the computer’s operating system to crash.
Microsoft Windows Software Update Services allows for the central deployment of updates, hotfixes, and patches. One of the importance benefits of using WSUS is that updates will only be deployed if they are authorized by the WSUS console operator. Microsoft Windows Software Update Services has advanced features like reporting, and allowing the grouping of computers. These features will make the life of a network administrator a lot easier. In order to counteract threats from bugs and vulnerabilities, network administrators need to constantly update the family of Windows operating systems. When properly utilized, Microsoft Windows Software Update Services will deploy the latest updates efficiently to help prevent computer vulnerabilities in an enterprise environment.
Microsoft Windows Software Update Services provides a robust, easy to deploy, and easy to manage patch/update management system. Although there are third party products that accomplish the same thing, WSUS provides one advantage that none of its competitors provide—it’s free! Realizing the importance of customers consistently updating their systems, Microsoft provides this solution for absolutely no cost to the consumer. Administrators are able to download WSUS directly from Microsoft’s Web page and begin installing immediately.
Before installing, you need to do two things: choose a WSUS topology and verify that your configuration meets the system requirements. In the next few sections we’ll examine both of those, walk through the configuration and installation of WSUS 3.0, cover client requirements, demonstrate how to configure Group Policies, and see why TCP port 8530 is so important.
In deploying WSUS 3.0, you have the option to create different topologies depending on your environment. The most basic of deployment topologies is the single-server implementation. Here WSUS 3.0 runs on a single-server that downloads updates directly from the Microsoft Update site and then distributes them to servers, desktops, and laptops throughout the internal network. A diagram of a single-server topology is shown in Figure 3.1.

In the single-server topology, the WSUS server synchronizes with the Windows Update site on the Web. During synchronization, WSUS determines if any new updates have been made available since it last performed synchronization. During the initial synchronization, the download can take an hour or longer, depending on the bandwidth of your organization. Regardless of the bandwidth, any additional synchronizations should be significantly shorter than the initial one.
So what if you have a large organization but you don’t want to overload a single-server, or your network covers multiple geographic locations? Server hierarchies probably make the most sense. In a server hierarchy setup, one server acts as the primary upstream server directly synchronizing with the Windows Update site. Downstream servers on the network then perform the same synchronization but with the upstream WSUS server and not the Windows Update site. A very simple diagram of a WSUS server hierarchy is shown in Figure 3.2.

Another topology option involves failover capabilities. By using network load balancing servers, administrators can provide more reliability while also improving performance. It starts by setting a back-end SQL Server 2005 cluster, then installing multiple WSUS front-end systems with Network Load Balancing (NLB). Figure 3.3 is a simple example of such a topology.

Laptops can be difficult to keep up to date on the newest patches and updates. These computers travel with their users (typically sales reps) from office to office and site to site. The roaming clients’ topology takes this into consideration. The roaming client topology allows the traveling laptop to pull its updates from the closest WSUS server, thereby reducing the chances of update traffic going across WAN lines. This topology is set up by entering (A) records in DNS for the WSUS servers but doing so with the same host name and different IP addresses. Once an administrator has done that, they set up netmask ordering and round robin on the DNS server. Netmask ordering restricts the name resolution to computers in the same subnet; if there is a location without a WSUS server, round robin will rotate through the list of available hosts on other subnets. Figure 3.4 shows a simple diagram of a roaming client topology.

As you see, there are many different setup options with WSUS that work in various network environments. This provides administrators with the flexibility they need to design and implement WSUS. Once the topology has been decided, we then need to install a WSUS server.
As mentioned above, before installing WSUS 3.0, choose the deployment topology. Once that’s decided, verify that your system meets the minimum requirements. In the example, we will be setting up a single WSUS 3.0 server topology. Although Windows Server 2008 supports WSUS, in our example we will be installing WSUS 3.0 on Windows Server 2003. Just like any other product, certain system requirements must be met. These are shown in Tables 3.1 and 3.2.
Table 3.1. WSUS Requirements on Windows Server 2003
System Requirements | |
|---|---|
Windows Server 2003 Service Pack 1 or higher | Internet Information Services (IIS) 6.0 Any updates for Background Intelligent Transfer Services (BITS) 2.0 and WinHTTP 5.1 .NET Framework 2.0 Redistributable Package Report Viewer Redistributable 2005 Microsoft Management Console (MMC) 3.0 SQL Server 2005 Service Pack 1 (optional) 1GB (minimum) of free space on the system partition 2GB (minimum) of free space to store the database files 20GB (minimum) of free space on the volume that will store the content |
Table 3.2. WSUS Requirements on Windows Server 2008
Server Operating System | System Requirements |
|---|---|
Windows Server 2008 | IIS 7 (enable Windows Authentication, Static Content, ASP.NET, 6.0 Management Compatibility, IIS Metabase Compatibility) Microsoft Report Viewer SQL Server 2005 Service Pack 1 1GB (minimum) of free space on the system partition 2GB (minimum) of free space on which the database files will be stored |
Note
WSUS 3.0 cannot be installed on compressed drives, nor is it supported on systems running as Terminal Servers.
Note
In Windows Server 2008, after installing IIS 7 the administrator must configure the applicationhost.config file. This configuration file is found in the %windir%system32inetsrv folder. In the applicationhost.config file, go to the <system. webServer> <modules> tag and remove <add name=“CustomErrorModule”> if it is present and replace it with <remove name=“CustomErrorModule”> then save the file.
Installation of WSUS 3.0 can be performed interactively by the administrator or done so in quiet mode. We will briefly cover quiet mode and unattended installations.
Administrators have the option to install WSUS 3.0 interactively or in an automated manner. To do this an administrator will issue a command called WSUSSetup.exe with switches that meet their requirements. The setup command line parameters are shown in Table 3.3 and the command line properties for WSUS 3.0 are shown in Table 3.4.
Table 3.4. WSUS Setup Command Properties
Property | Description |
|---|---|
CONTENT_LOCAL | 0=content hosted locally 1=host on Microsoft Update |
CONTENT_DIR | Path to the content directory |
WYUKON_DATA_DIR | Path to the Windows Internal Database data directory |
SQLINSTANCE_NAME | The name of the SQL Server Instance. Format is <servername> SQLInstanceName. NOTE: If database instance resides on local machine then the <servername> should be %computername%. |
DEFAULT_WEBSITE | 0=port 8530 1=port 80 |
PREREQ_CHECK_LOG | Path and file name for log file |
CONSOLE_INSTALL | 0=install the WSUS server 1=install console only |
ENABLE_INVENTORY | 0=do not install inventory features 1=install inventory features |
DELETE_DATABASE | 0=retain database 1=remove database |
DELETE_CONTENT | 0=retain content files 1=remove content files |
DELETE_LOGS | 0=retain log files 1=remove log files (used in conjunction with /u) |
CREATE_DATABASE | 0=use current database 1=create database |
PROGRESS_WINDOW_HANDLE | Windows handle returns MSI progress messages |
MU_ROLLUP | 0=do not join 1=join Microsoft Update Improvement |
FRONTEND_SETUP | 0=write content location to the database (used with Network Load Balancing) 1=do not write content location to the database |
Many administrators will select the interactive setup for WSUS 3.0. To install the software you must first download it. WSUS 3.0 can be downloaded from http://go.microsoft.com/fwlink/?LinkId=89379. If you are installing on an x64 system you must download WSUS3Setupx64.exe, 32-bit systems use WSUS3Setupx86.exe. The following steps install WSUS 3.0.
Go to the directory where you saved WSUS3Setupx86.exe (or WSUS3-Setupx64.exe) and double-click it to start the installation.
At the Open File box choose Run.
Setup will extract the files required for installation. If there are any prerequisites that were not met, the setup program will inform you of them and you will need to install the missing software before setup will continue.
If the prerequisites are met, you will then come to the Welcome screen seen in Figure 3.5. Here you can click Next.
Now you must select the type of installation you want to perform. You have two choices, as shown in Figure 3.6. You can select a Full server installation including Administration Console (which is what we will select in our example) or you can choose to install the Administration Console only if you want to install the console on a remote administration machine.
Now accept the terms of the license agreement and click Next.
The next step is to select the drive and directory where we will store the updates so that the client systems can download them quickly. In our example, our F drive has more free space than any other volume so we are selecting it and choosing the default directory of WSUS (Figure 3.7). Once you choose the location, click Next.
Now we come to the Database Options screen. Here, choose where to store the database file. As you see in Figure 3.8, we can choose to Install Windows Internal Database on this computer, which is the option chosen in the example, or Use an existing database server on this computer, or select Using an existing database server on a remote computer. Once you’ve chosen your location, click on Next.
Next we have to select the Web site preference. In the example, we chose Use the existing IIS Default Web site (Figure 3.9); you can also choose to Create a Windows Server Update Services 3.0 Web site. If you decide to create a WSUS Web site, your client systems will need to access the update server using TCP 8530 instead of TCP 80. Once you’ve made your selection click Next to continue.
Now the WSUS installation program will verify the selections we’ve made (Figure 3.10). If any of the configuration options are incorrect then you can choose the Back button and keep selecting it until you get to the screen you need to correct. If everything is fine, just click Next and setup will install WSUS 3.0.
Once the program is finished installing, you will see a screen indicating that the WSUS setup is complete, as seen in Figure 3.11. Now just click Finish and you’re done with the installation.


After WSUS is installed you must configure it. Once the installation is done, WSUS immediately starts the Configuration Wizard. This will allow you to select options like an upstream server, proxy server, any languages supported on your network, products you want to support updates for, and more. Let’s quickly run through the wizard for our setup.
Note
If you decide not to run through the configuration wizard immediately after the installation you can choose to run it later by launching the WSUS Administrator tool and going to Options.
First is the Before You Begin screen shown below in Figure 3.12. It will ask you if the server firewall is configured correctly, if the server can connect to the upstream server, which in our case will be the Microsoft Update site, and if you have user credentials for a proxy server if one is installed.

Now you have the option to Join the Microsoft Update Improvement Program (Figure 3.13). This program uses your WSUS server to upload information to Microsoft in an effort to improve the quality and reliability of updates. We will allow the default which is Yes, I would like to join the Microsoft Update Improvement Program. If you decide not to, just remove the check mark and select Next.

Now we choose our upstream server, demonstrated in Figure 3.14. For our example, this will be the Microsoft Update site. For some with hierarchical WSUS topologies, your upstream server will be another WSUS system on your network. Once you’ve selected your upstream server, click Next.

If you have a proxy server, then in Figure 3.15 in the Specify Proxy Server screen you must provide the server name, port number, and the user credentials so that the WSUS server can receive updates. Remember if the user account that the WSUS server uses to get through the proxy changes, if either the password or the actual account is renamed, you must type the new account and changed password in the Proxy Server settings for WSUS or synchronization with Microsoft Update will fail. If you do not have a proxy server then just click Next.

Now we must connect to the upstream server, as you see in Figure 3.16. At this point, just click Start Connecting.

After the update information is downloaded, click Next.
Now choose the language(s) of the updates you need to support. You can choose to download updates in all languages, including any additional languages that Microsoft later supports, or you can select which language(s) you need to download updates for. As you see in Figure 3.17, we have chosen just to download updates in English.

Note
It is highly suggested that you not download updates in all languages. This takes up a tremendous amount of bandwidth and drive space. Choose only the languages that your environment uses.
Now, choose the Microsoft products for which you want updates. You can select All Products, as in Figure 3.18, or individually select certain products. For our example, we have selected to download updates for: Exchange Server 2003, Forefront Client Security, all Office suites, and all Windows operating systems. Once your product(s) are selected, click Next to continue.

Classification selection is next, as seen in Figure 3.19. Here you can choose what type of updates you want downloaded to the WSUS server. For our example, we have chosen Critical Updates, Definition Updates, Security Updates, Service Packs, and Updates. Once you’ve made your selections, click Next.

Now you must set a synchronization schedule. You can either Synchronize manually or Synchronize automatically, thereby choosing an exact time for synchronization. We’ve chosen to synchronize at midnight and only synchronize once per day, as you see in Figure 3.20. After selecting your synchronization strategy, choose Next.

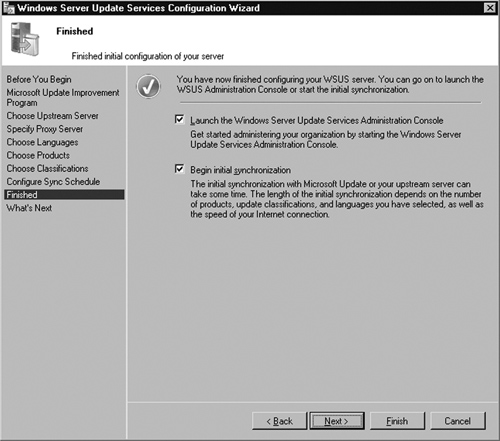
At the Finished screen, you can Launch the Windows Server Update Services Administration Console and/or Begin initial synchronization. Looking at Figure 3.21, you see we are choosing to do both. After your selection(s), click Next.
Now you come to a What’s Next screen where you are provided suggestions such as: Using SSL with WSUS, Creating computer groups, Assigning computers to groups using Group Policies, and Configuring auto-approval rules. For our example, we will just select Finish.
After WSUS 3.0 is setup and fully configured, we need to tell the client systems that they need to download updates from our WSUS server. The easiest way to do that is via Group Policy. In our example, we will have all systems in the domain get their updates from our newly created WSUS server, whose name is OBI1. To do this we will modify the Default Domain Policy. On the domain controller, open up the Group Policy Management Console (GPMC). If you do not have the GPMC, it is advisable to download and install it. The GPMC with Service Pack 1 can be downloaded from http://go.microsoft.com/fwlink/?linkid=21813. To open the GPMC, click Start | Administrative Tools | Group Policy Management.
In the GPMC, go to the Group Policy Objects folder and highlight the Default Domain Policy as you see in Figure 3.22. Left-click it and choose Edit. Now the Group Policy Object Editor should come up. Go to Computer Configuration | Administrative Templates | Windows Components | Windows Update. On the right window pane there is a list of settings that are most likely not configured. We want to configure two of them: Configure Automatic Updates and Specify intranet Microsoft update service location.

To configure the automatic updates, double-click the Configure Automatic Updates setting. For our example we will enable the setting and configure the automatic updating for 3-Auto download and notify for install as you see in Figure 3.23. After configuring the setting, click OK. You will then come back to the Group Policy Object Editor but should see the Configure Automatic Updates setting on the right side set to Enabled.

Now we need to actually tell the client systems where to get their updates by configuring the Specify intranet Microsoft update service location setting. On the right side of the screen, double-click on the setting Specify intranet Microsoft update service location and select Enabled. In the area for Set the intranet update service for detecting updates, we type in the URL for the WSUS server on our network. In this case it is http://obi1 as you see in Figure 3.24. Type the same thing for the Set the intranet statistics server setting.

Once configured, the Group Policy Object Editor will show both settings configured as you see in Figure 3.25. You can then close the Group Policy Object Editor and the GPMC. The Default Domain Policy has been modified to provide the WSUS information.

During the installation of WSUS, you had the choice of using the default Web site which uses port 80. This is recommended by Microsoft as long as there are no other websites on the server listening on port 80. If there are, Microsoft allows you to choose Create a Windows Server Update Services 3.0 Web Site as you saw back in Figure 3.9. This then informs you that client systems must now use TCP 8530 to access the update server. For instance, in our example, if we had chosen to create a Web site our WSUS server would be accessed by clients with http://obi1:8530. If this had been the case then we would need to make sure that the individual firewalls on the clients (Windows XP, Windows Server 2003, and Windows Vista) allowed TCP 8530.
The client software for WSUS is called Automatic Updates. The clients supported are:
Windows Vista
Windows Server 2008
Windows Server 2003
Windows XP Service Pack 2
Windows 2000 Service Pack 4 (Professional, Server, and Advanced Server)
After setting up the GPO for clients to use the WSUS server, we can force the newly modified GPO to take effect on our system(s) and check for updates. To force the changed GPO to take effect just click Start | Run and in the run box type gpupdate.exe /force. If prompted, restart your system. On Windows 2000 systems you do not have gpupdate.exe, so you must run secedit.exe /refreshpolicy machine_ policy. Now we need to get our client to check for updates that are on the newly installed WSUS server. Click Start | Run and in the run box type wuauclt.exe / detectnow. This forces the client to communicate with the WSUS server and check for updates. To verify you are communicating with and searching for updates from the WSUS server look for the WindowsUpdate.txt file found in the C:Windows directory. Some lines to look for in this file are:
Under the Agent: Refreshing global settings cache
WSUS server: Error! Hyperlink reference not valid.> (Changed)
WSUS status server: Error! Hyperlink reference not valid.> (Changed)
Under the AU: Policy changed processed section
WSUS server: Error! Hyperlink reference not valid.>
Additional lines to watch for include:
Server URL =. Error! Hyperlink reference not valid.
After confirming any of the above lines in the WindowsUpdate.txt, you are communicating successfully to the WSUS server.
In previous versions of WSUS (SUS included), servers were managed via the administrative console, which was Web-based. Although effective, moving to the MMC interface has provided administrators with a more friendly and powerful console. The new console uses MMC 3.0. To open the new console from the WSUS server, click Start | Administrative Tools | Microsoft Windows Server Update Services 3.0 and you should see the Update Services console come up, similar to the one seen in Figure 3.26. The Update Services tool consists of three primary panes: Console Tree, Details Pane, and an Action Pane. When an administrator selects a different area of the Console Tree, the Details Pane and Action Pane change to show the pertinent information and available actions of the selection.

As you see in Figure 3.26, the top level of the WSUS administrative console is Update Services. In the Update Services Details Pane, you are provided Computer Status and Update Status. The Computer Status area provides you with information about the clients that the WSUS server serves. Administrators can see how many computers need updates, if any have experienced errors while installing updates, and those where updates have been installed and are no longer applicable. In the Update Services Actions Pane, administrators are given the option to connect to another WSUS server by selecting Connect to Server.
The node below Update Services is the actual WSUS server itself, as seen in Figure 3.27. In our case, it’s OBI1. Under this selection, the Details Pane provides the administrator with a To Do list. This list informs the administrator of how many security updates, critical updates, and new products, along with their classifications, are waiting to be approved or have been added. Administrators are also provided an overview with the same information seen in the Update Services Details Pane along with the Synchronization Status, Download Status, Server Statistics, and Connection type. In the Actions Pane, you have the ability to remove the selected server from the console by clicking on Remove from Console. You can also search for specific updates by title, description, Knowledge Base article number, or the Microsoft Security Response Center number of all updates. You can also search for specific computers by their names if need be. Also in the Actions Pane is the ability to import updates to the WSUS server. This can be done by clicking on Import Updates in the Actions Pane.

The Updates node in the Console Tree provides more information about the updates on the WSUS server. It breaks them down into four categories: All Updates, Critical Updates, Security Updates, and WSUS Updates (Figure 3.28). The Actions Pane allows administrators the same Search option previously mentioned, along with the same Import Updates option. It does allow some customization for the administrator in that they can click on New Update View and choose the properties they want to include in the view, the specifics of that property, and even a name for the customized view. For instance, if we wanted to view the updates required for all Windows Vista and XP systems we could create a custom view.

The subnodes for the Updates folder include: All Updates, Critical Updates, Security Updates, WSUS Updates, and any custom views the administrator may have added. The subnodes have the same options. In the Details Pane, administrators can view a list of Approved, Unapproved, Declined, and Any Except Declined. To the right, you can view the Status of the updates, such as Failed or Needed, Installed/ Not Applicable or No Status. In Figure 3.29, we see a list of some of the updates that are currently Unapproved with a status of Failed or Needed. Below this you will see the list of the updates that meet these criteria. By highlighting an update you get information such as the Title of the update, its Classification, the Installed/Not Applicable percentage, and whether that update is approved or not. Below this information, you are provided data such as Computers needing this update, the KB article number(s), a description of the update, and additional details about it.

To approve an update in WSUS 3.0, highlight the update in the Details Pane, and choose Approve in the Actions Pane. In our example, we will choose to approve the update you see in the Details Pane from Figure 3.29, which is titled Update for Outlook 2003 (KB943649). Once we click Approve in the Actions Pane, we see the Approve Updates screen, which allows us to choose the computer group we want to approve the update for. Since we don’t currently have any computer groups created, for this instance we will approve the update for All Computers. To do this click on the down-arrow button to the left of All Computers in the Computer Group column and choose Approved for Install. You can see this in Figure 3.30.

Now you should see a green check mark beside All Computers in the Approve Updates screen, along with the Approval status changed to Install. Once you see this, just select OK. The Approval Progress is shown after approving the update (Figure 3.31). Once the action has finished and the result reads as Success, you can click Close.

After the approval has been completed you can go back to the Details Pane in the WSUS Update Services MMC and change the Approval status to Approved. You should then see the newly approved update, as in Figure 3.32. You will probably need to hit the Refresh button in the upper right of the Details Pane.

Declining an update is just as easy as approving one. To decline an update, just highlight the update you wish to decline in the Details Pane and choose Decline from the Actions Pane. For our example, we will decline an update titled Thai Language Pack. When you decline an update, after clicking the Decline button you come to a warning message asking you if you’re sure you want to decline the update (Figure 3.33). To decline, just click Yes.

After you’ve declined the update, to confirm go to the Details Pane and change the Approval status to Declined, where you should see the update you just declined. Figure 3.34 shows the Thai Language Pack that we just declined.

Sometimes you may need to change an update’s status from approved to declined or vice versa. To change an update from approval to decline, just change the Approval status to Approved, find and highlight the update whose status you want to change and click Decline in the Actions Pane. To change an update from decline to approval, you would do the same thing but change the Approval status to Declined to find the update, and then in the Actions Pane choose Approve.
Sometimes there are revisions made to updates, whether it is metadata changes, a new update description or title, or even actual changes to the update files themselves. By highlighting a particular update in the Details Pane, you can then go to the Actions Pane and select Revision History to view any changes that have occurred with that particular update.
Reports from WSUS 3.0 allow administrators to monitor updates, computers, and synchronization results for computers and additional WSUS servers that are managed via your particular WSUS server. With the integration of Microsoft Report Viewer 2005, report performance has increased dramatically over WSUS 2.0. WSUS 3.0 ships with many preconfigured reports that are accessible via the Reports node in the Console Tree as you see in Figure 3.35. Reports are broken down into three categories: Update Reports, Computer Reports, and Synchronization Reports.

Update reports are available in three formats, depending on an administrator’s need: Update Status Summary, Update Detailed Status, and Update Tabular Status. Update Status Summary provides a detailed summary on each update that is specified in the report criteria. While an Update Detailed Status report provides information about the status of all computers for each update, an Update Tabular Status report provides update status for multiple updates. The data is presented in a tabular format. For our example, we will walk through creating an Update Status Summary for critical updates for Exchange Server 2003 that has a status of Needed, Failed.
To do this we click on the Reports node in the Console Tree pane, then go to the Details Pane and select Update Status Summary under the Update Reports category. In the Updates Report screen our New report type will be Summary Report, while the Include updates in these classifications will be set for just Critical Updates. For the Include updates for these products criteria, we will choose Windows Vista. Since we don’t have any groups configured in our example, we will leave this as default, which is Any computer group. Next we will choose Needed, Failed for Include updates that have a status of. Finally we will leave the Include status from replica downstream servers to their default, which is All replica downstream servers. Now that our report criteria have been selected, as you see in Figure 3.36, we can run our report.

To run the report, just select Run Report from the menu at the top. After the report has run, you should see any updates that have a status of Needed, Failed. Figure 3.37 shows one of three pages that our report has produced.

If we decided that we wanted more details about our updates, we could run a Detailed Report on the same criteria. The results of that report are shown in Figure 3.38; there doesn’t seem to be a difference between the two on first look.

Notice that the number of pages has increased from three to five. Looking at the next page, we will see which computer needs the Update for Exchange Server 2003 SP2 (KB924334)-Non-cluster. Looking at Figure 3.39, you see that the computer requiring this update is jedi.sigr.local.

What if we just want a summary of the report but in a friendlier view—say in a tabular layout? Just select Update Tabular Status within the Details Pane and choose the same criteria and your report should look something similar to Figure 3.40.

Computer reports consist of Computer Status Summary, Computer Detailed Status, and Computer Tabular Status. The Computer Status Summary provides a detailed summary of each computer, including computer group information and update installation status. Computer Detailed Status shows a summary of computer status, with the status for each update. Computer Tabular Status provides computer status for multiple computers; this report is shown in a tabular manner. In our example here, we are going to run a Computer Status Summary report for critical updates on systems running Microsoft Office 2003 and 2007 and have either a Needed or Failed status.
To do this, just click Reports in the Console Pane and go to the Computer Reports area. Click on Computer Status Summary and you are shown a similar screen that you saw when creating update reports earlier. Figure 3.41 shows our report criteria for our Computers Status Summary report.

Once you’ve established your criteria you can click on Run Report in the menu at the top. Once the report generation has completed, you will see the Computer Status Summary Report as seen in Figure 3.42. Here we are provided information with the name of the system(s) that fall into our criteria and additional information such as: Operating System, Service Pack, Language, IP Address, and their Last Status Reported date and time.

If you decided you wanted a more detailed report, one in which you were provided the actual updates that were missing on this system, you could then choose the Computer Detailed Status report. If you needed the summary report to present in a tabular format, you would choose to run the Computer Tabular Status report.
Synchronization Results show the results of a WSUS’s last synchronization or any synchronization for a given period of time. For our example, we will run a Synchronization Report for the dates of December 25 to December 27. To do this, click on Reports in the Console Pane and go down to the Synchronization Reports area in the Details Pane. Once here, click on Synchronization Results and a screen for the synchronization report for that WSUS server will appear. As you see in Figure 3.43, we have clicked on the radio button beside Between these dates and have put a start date of December 26 and an end date of December 27. After this you can go ahead and click on Run Report just as you’ve done with the previous reports.

In Figures 3.44 and 3.45, you see our results. You are provided the date and time the synchronizations took place, how many new updates were downloaded, and how many updates had expired. Further down in the report (Figure 3.45), you see a list of the actual new updates and a list of the ones that have expired. As we’ve shown throughout this chapter, one of the biggest changes to WSUS 3.0 is the use of the Microsoft Report Viewer 2005 and it is possibly the most important, next to the ability to deliver updates to clients.


To manage computers in WSUS 3.0, you must go to the Computers node in the Console Tree. Here you will find any computer groups you’ve set up plus the default group Unassigned Computers. Selecting any computer groups in the Computers node will display those computers in the Details Pane. If you select a computer from a group, you will see its properties, which will include general details about that system and the status of updates for it. Figure 3.46 shows the details of a computer named Alderon from our test network. You can see that this system runs Windows Vista Ultimate Edition, and you can view its IP address, computer make and model, the processor type, and even the BIOS version. In the status area you see a breakdown of the updates it needs and those that are already installed.

Since WSUS 2.0, administrators have been able to organize their management of updates by targeting specific computers using computer groups. This way an administrator can ensure that specific computers get the right updates and at the most convenient times. We will walk through creating a computer group for our computers that reside in the Marketing Department. What you will notice is something new in WSUS 3.0—nested groups. We will create two nested groups under the Marketing Department. One subgroup will be for Windows XP systems and another for Windows Vista systems.1. Go to the WSUS server or a system with the WSUS Administrative Console.
Click Start | Administrative Tools | Microsoft Windows Server Update Services 3.0.
Once the WSUS Administrative Console comes up, in the Console Tree, go to the All Computers node which resides underneath the Computers node.
Right-click on the All Computers node and select Add Computer Group
In the Add Computer Group dialog box beside Name type Marketing and click Add.
You should see the Marketing group beneath the Unassigned Computers group. Right-click the Marketing group node and select Add Computer Group.
In the Add Computer Group dialog box beside Name type Vista Computers. This will add a sub-group or node underneath the computer group Marketing.
Back in the Console Tree right-click the Marketing group and select Add Computer Group.
In the Add Computer Group dialog box beside Name type XP Computers. This will add a sub-group or node underneath the Marketing node. After creating this you should see our newly created computer group and its nested groups as shown in Figure 3.47.
Now that our computer groups are created, we need to populate them. Go to the Unassigned Computers group and find all the computers running Windows Vista that are from the Marketing Department. If you need to you can go to the Actions Pane under Computer and select Group By and group the computers by operating system. In our example, we only have one computer that meets this criterion, but in reality this would be a more populated group.
In the Details Pane, right-click on the computer that you need to move and select Change Membership.
You will see the list of groups from Marketing. Put a check mark beside Vista Computers and press OK. Do the same thing for your Windows XP systems that are part of the Marketing Department and put them in the XP Computers group.
After moving the computers to their respective groups, you can then go into each group and view the computers that you just moved. Figure 3.48 shows the Windows Vista system we moved from the Unassigned Computers top level group.


Now that you have created computer groups you’ll be able to target updates to those specific groups instead of having them update all systems throughout the network at the same time.
During the installation of WSUS 3.0, you are given the opportunity to provide information about any upstream servers, proxy servers, products you wish to download updates for, the update classifications, and even setup synchronization. You can change these settings after the WSUS configuration wizard is finished. To do this you need to go to Options in the WSUS Administrative Console.
In the Console Tree at the bottom you will see the Options node. This node allows you to configure settings on your WSUS server. The list of options that can be configured is shown in Table 3.5.
Table 3.5. Available Options in WSUS 3.0
Option | Description |
|---|---|
Update Source and Proxy Server | Choose whether the WSUS server synchronizes with Microsoft Update or an upstream WSUS server |
Products and Classifications | Specify the products and the types of updates you want |
Update Files and Languages | Decide whether to download update files, the location to store them at, and which languages you need to support |
Synchronization Schedule | Choose to synchronize manually or set a schedule for daily automatic synchronization |
Automatic Approvals | Specify how to automatically approve installation of updates for selected groups and how to approve revisions to existing updates |
Computers | Specify how to assign computers to groups |
Server Cleanup Wizard | Can be used to free up old computers, updates, and update files from the WSUS server |
Reporting Rollup | Choose to have replica downstream servers roll up updates and computer status |
E-mail Notifications | WSUS can send e-mail notifications of new updates and status reports |
Microsoft Update Improvement Program | Can join the Microsoft Update Improvement Program to improve quality, reliability, and performance of Microsoft software |
Personalization | Choose how downstream server rollup data is displayed, which items are shown in the To Do list, and how validation errors are displayed |
WSUS Server Configuration Wizard | Configure several of the basic WSUS settings |
Figure 3.49 is a view of the Options node and its Details Pane.

By default, WSUS 3.0 is configured to synchronize and obtain updates from Microsoft Update and to do so without going through a proxy server. If either of these settings need to be modified after installation, simply pull up the WSUS Administrative console and go to Options | Update Source and Proxy Server. The Update Source and Proxy Server setup screen is shown in Figures 3.50 and 3.51. Figure 3.50 is the Update Source tab where administrators can decide where they will obtain downloads. In our example, we will synchronize from Microsoft Update. However, we could change this to synchronize with another WSUS server. If we were to do that we would need to provide that server’s name and the port number. We could use Secure Sockets Layer (SSL) to synchronize with an upstream WSUS server by putting a check beside Use SSL when synchronizing update information. We can also inform WSUS that this server is a replica of the upstream server. Doing this would prevent anyone independently approving updates on this downstream system. This is a good idea if we have a hierarchy server topology and a centrally located administrative staff.


The proxy server settings can be changed by clicking on the Proxy Server tab in the Update Source and Proxy Server dialog box. In situations where a proxy server has been added since the installation of the WSUS 3.0, you will need to enter the proxy server’s name, the port number, and any user credentials that may be required to allow the server to synchronize upstream with the Microsoft Update site.
Products and classifications allow you to choose and/or modify which products you wish to download updates for. For instance, if you wanted to synchronize updates for all supported versions of Microsoft Office you would first go into Options | Products and Classifications. At the Products tab, scroll down the list of products and put a check mark in the box beside Office, as you see in Figure 3.52. This selects Office versions 2002/XP, 2003, and 2007.

Classifications such as Critical Updates, Definition Updates, Drivers, Feature Packs, Security Updates, Service Packs, Tools, Update Rollups, and Updates can be selected by clicking on the Classifications tab and choosing the type(s) you wish to support.
In Update Files and Languages an administrator can decide to store update files locally on the WSUS server or not. They can also decide what languages of the updates they need to support. Figure 3.53 shows the option to store updates on the WSUS server itself. If we want to store the update files locally then we would select Store update files locally on this server. We then would choose when we needed to download the files. We have the option to Download update files to this server only when updates are approved, meaning that we only download what we approve.

We can alternatively choose to Download express installation files. An express installation file is the delta or change between the version of a file that already exists on a system needing updated and the updated file itself. The advantage of this is that you limit the bandwidth consumed on the local network, but at the cost of bandwidth consumption on your Internet connection plus disk space on the server.
So why would this increase the amount of bandwidth used for the Internet connection? The files/updates downloaded must contain all the possible deltas of that file. You could end up doubling or tripling the size of an updates download using express installation files, but you gain on the cost of bandwidth when you install those updates.
Besides deciding whether or not to store updates locally, notice the option grayed out. That option is Download files from Microsoft Update; do not download from upstream server. Since this is the only WSUS server on the network and it is already configured to download updates from the Microsoft Update site, we aren’t provided this option. If we were a downstream server and we had permission to do so, we could download directly from Microsoft Update. This does not mean that the particular server would no longer be a downstream server, just that the updates that are approved from the upstream server would be downloaded directly from Microsoft Update.
In the Update Languages tab seen in Figure 3.54, you are given the option of downloading updates in all languages, including any new languages supported later, or choosing individual languages that are supported in your environment.

Note
As mentioned earlier in this chapter, it is highly recommended to choose Download updates only in these languages and select the language(s) used in your environment. Choosing to download updates in all languages will increase the amount of bandwidth used in downloading updates from Microsoft Update, the time needed to download the updates, and the amount of disk space used to store them.
The Synchronization Schedule option allows administrators to choose how they want to synchronize with Microsoft Update or an upstream server, when they want to synchronize, and how often each day. For our example, during setup we chose to Synchronize automatically at 12:12 A.M. and do so only once per day (Figure 3.55).

The Automatic Approvals option allows an administrator to automatically approve updates to be installed based on product and classification, and gives the ability to target which computers to set the automatic approval(s) for. Automatic approvals are based on rules. For instance, we could create a simple rule to automatically update all computers in the Vista Computers group within the Marketing department for any Windows Vista updates.
To create a new rule, first click on Automatic Approvals, found in Options.
In the Update Rules tab, select New Rule, as shown in Figure 3.56.
There are three steps in the Add Rule box. The first step is to select properties. For our example, we chose an update based on product, so we selected When an update is in a specific product. We could also specify a certain classification if we wanted to.
The second step is to edit the properties or values. Click on the link for any product and in the list of products remove the check from All Products. Now scroll down to the listing for Windows and select all the Windows Vista selections: Windows Vista Dynamic Installer, Windows Vista Ultimate Language Packs, and Windows Vista. After doing this, click OK.
We are now back at the Add Rule box. Click the link for all computers, found within the line that reads Approve the update for all computers.
Now you should see the Choose Computer Groups list. The groups listed here are those we created earlier in this chapter. For our example we will go down to the Marketing group and put a check mark beside the group labeled Vista Computers. If any other groups have checks, remove the checks and click OK.
Back at the Add Rule dialog box, go to step three at the bottom and Specify a name for our rule; in this case it will be called Marketing Vista Rule. Once finished the Add Rule box will look like Figure 3.57. Now click OK.
Back at the Automatic Approvals and Update Rules tab shown in Figure 3.58, you will now see the new Marketing Vista Rule listed, its rule properties, and a check mark beside it showing that it is enabled. Click OK.


As you probably noticed there is an Advanced tab in the Automatic Approvals screen. This tab allows administrators to automatically approve updates for WSUS 3.0 itself, automatically approve new revisions of previously approved updates, and decline updates when a new one causes them to expire.
The Computers option allows administrators to specify how computers are assigned to groups. Computers can be added to groups using either Group Policies (or registry settings) or via the Update Services console but not both.
The Server Cleanup Wizard is used to help administrators manage their disk space by removing unused updates and revisions, deleting computers not contacting the server, deleting unneeded update files, declining expired updates, and declining superseded updates.
In environments where there are multiple WSUS servers, administrators have the option to consolidate status information into a single console. This is done using Reporting Rollup in WSUS 3.0. By using Reporting Rollup, administrators can easily view downstream replica WSUS servers in both the WSUS Administrative Console and in WSUS reports themselves.
WSUS 3.0 can send e-mail notifications of new updates and provide status reports to whomever an administrator feels needs this information. To set this up do the following:
Create a user account for the WSUS server to use as an e-mail account. For instance, in our example we created a user account with a mailbox in our domain called WSUS.
Now open the WSUS Administrative Console, go to Options in the Console Tree area, then in the Details Pane select E-mail Notifications.
In the General tab of E-mail Notifications, as seen in Figure 3.59, put a check beside Send e-mail notification when new updates are synchronized and type the e-mail addresses of the recipients. If you have more than one recipient, separate them by commas.
If you are sending status reports to these recipients, put a check beside Send status reports. Select the frequency with which each report is sent (Weekly or Daily) and the time the reports are to be sent, and type in the names of the recipients. You can also select which language you wish the reports to be sent in.
Now that the information on the General tab is complete, go to the E-mail Server tab and enter the information about the SMTP server, its port number, the sender’s name and e-mail address, and the username and password of the user that you created for the WSUS account earlier. Figure 3.60 is an example of an E-mail Server tab with the pertinent information.
Once you’ve entered the correct information, click the Test button to verify your settings are correct. If everything looks correct, click OK and you’re done. Figure 3.61 is an example of an e-mail report using E-mail Notifications.


The Microsoft Update Improvement Program is used to improve the quality and reliability of Microsoft’s updates. If you opt in to this program, your WSUS server will send information to Microsoft, such as the number of computers in the organization, number of computers that successfully install each update, and number of computers that fail installation. You are not forced to join. If you decide you want to, click on Microsoft Update Improvement Program within Options. Once there, check Yes, I would like to join the Microsoft Update Improvement Program and you’re in.
If you want to personalize the way information is displayed for a WSUS server you can do so by clicking on Personalization within Options. This option allows administrators to choose how server rollup data is displayed, what items will be listed in the To Do list, and how validation errors are displayed. Figure 3.62 shows the option to consolidate information from replica downstream servers to your WSUS 3.0 server.

In the To Do List tab, you can choose which items will be shown in the To Do list for that server, as seen in Figure 3.63.

After we installed WSUS 3.0 earlier in this chapter, the next thing we did was run through the Windows Server Update Services Configuration Wizard. This wizard allows administrators to easily configure basic settings for upstream server, proxy server settings, supported languages, products, classifications, and synchronization schedule. If for any reason an administrator needs to re-run this wizard, click on WSUS Server Configuration Wizard under Options.
As you’ve already seen, WSUS 3.0 has many components and therefore many potential areas for problems to occur. The key to troubleshooting any product such as WSUS is knowing where to begin. Many times this process starts with examining event logs via Event Viewer and then checking out Microsoft’s Knowledge Base at http://support.microsoft.com, examining news groups on the Internet, and even using Google or Yahoo, to name a few options.
WSUS 3.0 provides even more help than its predecessors. It now includes a new health monitoring service that logs detailed status information to the Application Event Log in Windows. The source in event viewer found for WSUS events is Windows Server Update Services. This information is very helpful in troubleshooting problems in WSUS. When a problem occurs WSUS immediately writes an event and will continue logging updates until the problem is resolved.
The WSUS health check service has two cycles: Detect and Refresh. In the detect cycle, changes in the status of WSUS are logged. An example would be a service that was running and has stopped. The detect cycle will poll WSUS every ten minutes. With the refresh cycle, all warnings and errors are logged. The refresh cycle polls WSUS every six hours, but can be configured using the wsusutil tool, located on the WSUS server in the C:Program Files update services ools directory. The syntax for changing either the detect and/or refresh cycles is wsusutil.exe HealthMonitoring IntervalsInMinutres <Detect interval> <Refresh interval>. The WSUS components that are monitored by the two cycles are shown in Table 3.6.
Table 3.6. WSUS Components Monitored by Detect and/or Refresh Cycles
Component | Description |
|---|---|
Core | Disk space, permissions, e-mail notifications, catalog and content synchronization |
Database | Connectivity and availability |
Web Services | Permissions and Web service health |
Clients | Clients not reporting, client self-update, update agent, client inventory, client ability to install updates |
Group Policies are the easiest way to configure automatic update settings for client systems in an Active Directory environment. We’ve already talked about how to enable these settings using GPOs. We also introduced you to examining the WindowsUpdate. log file, verifying that the new WSUS server is being used by client systems. One way to verify that the Group Policy is running on a client is by using the Resultant Set of Policy (RSoP). Although this isn’t specific to WSUS troubleshooting, it is a place to examine whether the GPO you’ve created for configuring your update settings is running on your client systems. For this example, we’ve created a GPO called Updates that is set to use the server Obi1 as the WSUS server. Here is how to verify using the Group Policy Management Console (GPMC) and RSoP.
Click Start | Administrative Tools | Group Policy Management. The Group Policy Management Console will come up.
At the bottom of the Console Tree, you will see a node called Group Policy Results. Right-click on it and choose Group Policy Results Wizard.
It will come up to the Welcome to the Group Policy Results Wizard screen. Just click Next.
Now you will come to the Computer Selection screen. You have the choice of This computer or Another computer. In our example, we are choosing Another computer and have selected the computer named Alderon (Figure 3.64). Now click Next.
Now you can select a specific user or check Do not display policy settings for the selected computer in the results (display user policy settings only). Since we are only interested in whether the Updates GPO has run, we will not select a user.
Next the Summary of Selections screen comes up, allowing you to review your selections. Once you’ve verified them, click Next and the Completing the Group Policy Results Wizard will come up. Click Finish.

Now RSoP will run and generate a report for our computer. In the details pane at the right, under Summary, click on Group Policy Objects | Applied GPOs. You should see the list of applied GPOs. In this case we are looking for the GPO Updates. In Figure 3.65, you can see our GPO at the bottom, so it has run.

As we mentioned earlier in this chapter, Computer Groups allows administrators to better manage updates going to specific/targeted machines. There are two distinct ways of assigning computers to groups in conjunction with WSUS. An administrator can do it through the WSUS Administrator’s console which is referred to as server-side targeting, or by GPOs, referred to as client-side targeting.
One common issue is when an administrator has chosen to manage computer group populations via client-side targeting but never sees the changes made in the GPO. As we demonstrated in the last example, whether or not a GPO has executed can be verified by running through RSoP. When an administrator runs through RSoP and verifies that the GPO is being received, they may be confused. With WSUS 3.0, you must specify via the WSUS Administrator’s Console that you are using client-side targeting. To do this, perform the following steps:
On the WSUS server, click Start | Administrative Tools | Microsoft Windows Server Update Services 3.0.
In the WSUS Administrator’s Console, choose Options in the Console Tree. In the Details Pane, select Computers.
You will then come to the Computers screen at the General tab. You are shown on the screen that You can specify how to assign computers to groups. The default value is Use the Update Services console. To take advantage of client-side targeting, select Use Group Policy or registry settings on computers. Once this has been selected, click OK.
You should then be able to manage the Computer Group populations via Group Policies.
However, sometimes even that will fail. Another thing to check is to make sure that the Computer Group names specified in the GPOs match those on the WSUS console. If not then the modifications that an administrator tries to make to Computer Groups will fail. By making a change to group membership using client-side targeting, you can reset the automatic update client by issuing the command wuauclt.exe /resetauthorization/detectnow. The detection cycle will take about ten minutes to finish.
Although this is not every issue an administrator can run across working with Computer Groups, this is one of the most common and easiest to resolve. As we said earlier in the section, in troubleshooting errors with WSUS, start by examining the Event logs in Event Viewer. Then check the Microsoft Knowledge database, news groups, and engines such as Google or Yahoo. Most likely whatever issue you are working to solve, someone else has already done it and has posted the resolution on the Internet.
Microsoft’s Windows Software Update Services 3.0 builds on the components and services that its predecessors did. WSUS is a free, robust, easy to deploy, and easy to manage patch/update management solution. Before setting up WSUS 3.0, administrators must decide which topology works/fits best with their environment(s). Choices can range from a single-server solution to an NLB failover design. WSUS 3.0 runs on both Windows Server 2003 Service Pack 1 or higher and Windows Server 2008. WSUS 3.0 can run on both 64 and 32-bit architectures. It supports clients such as Windows 2000 Service Pack 4 or higher, Windows XP Service Pack 1 or higher, Windows Server 2003, Windows Vista, and Windows Server 2008. Installation of WSUS 3.0 can be done with an administrator actively running through setup or it can be kicked off in a script making use of the WSUSSetup.exe command. Administrators are given the choices of what Microsoft Products they want updates for, what language packs they support, and what classifications they require. Using Group Policies is the easiest way to configure client systems to use WSUS 3.0. Two of the main settings that have to be enabled are: Configure Automatic Updates and Microsoft Update Service Location.
WSUS 3.0 does not support a Web-based administrator’s interface. The administrator’s console uses MMC 3.0 or higher and consists of three panes: a console tree, a details pane, and an action pane. The reporting capability of WSUS has improved performance and the level of detail provided with the support of the Microsoft Report Viewer 2005. As with WSUS 2.0, version 3.0 supports the use of computer groups, allowing administrators to better manage their update environments. One improvement in this area is that now administrators can have nested computer groups, thereby specifying computer groups to even lower levels.
Troubleshooting WSUS should always start off with examining the event logs in Event Viewer. Once the error is confirmed, then further investigation can take place in the knowledge base at http://support.microsoft.com along with checking out Internet news groups and querying Google and Yahoo for additional help. WSUS 3.0 also uses Health Monitoring to better check the health of WSUS servers.
WSUS has continued to grow more and more and become a viable product for companies of many sizes. It has allowed administrators to analyze and test updates before deploying them to the masses. With each version Microsoft creates a friendlier and more powerful product.
| WSUS is a robust, easy to deploy, and easy to maintain patch/update management system |
| Four WSUS topologies include: single-server, hierarchy server, NLB failover, and roaming client |
| WSUS 3.0 is supported on Windows Server 2003 SP1 or higher |
| Clients supported by WSUS 3.0 are: Windows 2000 SP4 or higher, Windows XP SP1 or higher, Windows Server 2003, Windows Vista, and Windows Server 2008 |
| WSUS 3.0 can be installed interactively or through scripts using the WSUSSetup.exe file |
| Administrators can choose which Microsoft products they want to maintain updates for and the classifications they need |
| WSUS 3.0 can be set up to synchronize with an upstream server manually or automatically with a scheduled time |
| Two Group Policy settings for WSUS are: Configure Automatic Updates and Microsoft Update Service Location |
| TCP 8530 should be used whenever another website on the WSUS server uses TCP 80 |
| To force clients to check for new updates run the command wuauclt.exe/detectnow |
| WSUS 3.0 administrative console makes use of MMC 3.0 or higher and no longer provides a Web interface |
| The administrative console consists of a console tree, details pane, and an action pane |
| Approving updates in WSUS 3.0 consists of going to the Updates node in the console tree, finding the specific update in the details pane, and clicking approve in the actions pane |
| WSUS 3.0 uses the Microsoft Report Viewer 2005, which provides better performance and reporting detail then found in previous versions |
| Three category of reports are: Update, Computer, and Synchronization reports |
| Computer Groups in WSUS allow administrators to better organize their computer systems and how they want to deliver their updates |
| Troubleshooting begins by examining event logs in Event Viewer and then checking external resources such as: Microsoft’s Knowledge Base, Internet news groups, Google, and Yahoo |
| Troubleshooting issues with GPOs can be tricky but with tools such as RSoP it becomes easier than ever before |
| Computer Groups can also be an area where problems arise, such as how to manage group populations, especially when administrators make use of client-side targeting. Settings must be adjusted in both the WSUS Administrator’s console and in the GPMC |