
If a company has more than one physical connection to the Internet, more than one Microsoft Internet Security and Acceleration Server 2006 will be needed. Microsoft Internet Security and Acceleration Servers are software firewalls that will protect each location’s internal network. In the case of a branch office, the employees at the remote location will often need to utilize the internal network resources of the main office.
By creating Firewall Policies, the different offices will be able to securely communicate over the Internet. Secure communication can be ensured via firewall policy and by utilizing other security mechanisms such as certificates. Once a secure connection is established between the internal networks of the branch office and the main office, users on either network can have access to resources, such as databases, network shares, and printers.
If an Active Directory is present in the infrastructure, replication of the Directory Service can also take place over a secure connection. Network administrators need to carefully configure the firewall polices of their ISA Servers to ensure internal servers on both networks can communicate over the secure channel. Microsoft offers several tools, such as replemon, to verify that replication of the Active Directory database is functioning properly. In summary, ISA firewall policies can be used to connect the internal networks of a main and an office branch in a secure manner.
Years back it was tedious and complicated, not to mention expensive, to connect remote sites or satellite offices to a network. However, due to technology enhancements, better means have been developed to connect sites. With Microsoft’s ISA Server 2006, this method is a security gateway that acts as a firewall gateway joining two networks over the Internet, protecting an IT environment from Internet-based threats and attacks while providing the environment fast and secure access to applications and data utilizing a VPN site-to-site connection.
A virtual private network (VPN) is an extension of a private network in any large or small business environment where links are shared across a public network such as the Internet connecting two or more networks using a VPN link. The site-to-site configurations work like any LAN router, addressing packets addressed to IP addresses at sites routed through the ISA Server 2006 firewall.
A quicker definition is depicted in Figure 13.1 showing how a VPN works.

ISA Server 2006 is available in two versions: Microsoft Standard Edition and Microsoft Enterprise Edition. For demonstration purposes, Microsoft ISA Server 2006 Enterprise will be used.
Site-to-site links can be used with one of the following VPN protocols:
IPSec Tunnel Mode
L2TP/IPSec (Layer Two Tunneling Protocol over IPSec)
PPTP
Table 13.1 compares the three protocols that are most common.
Table 13.1. Comparison of VPN Protocols
Protocol | Purpose | Security | Comments |
|---|---|---|---|
IPSec Tunnel Mode | To connect to third-party VPN servers that do not support L2TP/IPSec or PPTP. | Low—Provides “tunneling” encapsulation for data protection. | Can be used to connect to with third-party VPN gateways that do not support PPTP or L2TP/IPSec. |
L2TP/IPSec | To connect to an ISA Server 2000, ISA Server 2004, or Windows VPN server. | High—Requires Public Key Infrastructure (PKI). Server 2003 can be set up with certification authority to issue machine certificates to authenticate both users and computers. | Requires the remote VPN server to be an ISA Server computer or Windows VPN server. Less restricted than IPSec Tunneling solution. Uses Routing and Remote Access. |
PPTP | To connect to an ISA Server 2000, ISA Server 2004, or Windows VPN server. | Moderate—Does not require Public Key Infrastructure (PKI), uses CHAP/EAP to authenticate user. Does not authenticate the computer. | Requires the remote VPN server to be an ISA Server computer or Windows VPN server. Less restricted than IPSec Tunneling solution. Uses Routing and Remote Access. |
IPSec Tunneling Mode is the best suited option when you are using ISA Server 2006 as your VPN server and the site you are connecting to is using a third-party NON-Microsoft VPN gateway that does not support PPTP or L2TP/IPSec as its VPN server, while providing a higher level of security than PPTP.
IPSec Tunneling mode has the following advantages:
Security: Is IPSec Tunneling mode secure? Somewhat, but not the best. In actuality, it’s somewhat vulnerable to some exploits. IPSec Tunneling is secure; in fact IPSec Tunneling mode encrypts the portion of creating a VPN Tunnel and encapsulates the tunnel creation verifying packet integrity.
Good protection from Denial of Service (DoS), replay, and man-in-the-middle attacks.
Scalability through IPs, IPSec can be applied in networks of all sizes including LANs to global networks. This is a big plus for medium to large enterprises.
Not limited to applications, thus guaranteeing they will be routable with IPs, making IPSec compatible.
IPSec Tunneling mode has the following disadvantages:
Encryption of small packets generates a lot of network overhead, thus reducing network performance.
IPSec is complicated and complex with many features. This complexity increases the probability of loopholes being discovered by hackers.
The Data Encryption Standard (DES) algorithm is very susceptible to brute-force attacks using readily available software on the Internet.
L2TP/IPSec should be the preferred site-to-site protocol where security and routing is a concern if the infrastructure is in place to support it.
L2TP/IPSec has the following advantages:
Security: L2TP/IPSec VPN protocol provides a higher level of security due to the fact it uses the IPSec encryption protocol securing the connection and enforcing machine authentication as well as user authentication. For an even higher level of security, computer and user certificates can be provided to the L2TP/IPSec connection. If the infrastructure is not ready to deploy a certificate server, a preshared key can be created to the site-to-site L2TP/IPSec VPN connection.
Provides data confidentiality and data integrity.
Routing: Uses routing and remote access on Windows Server 2003 servers.
L2TP/IPSec has the following disadvantages:
More difficult to install when utilizing the security certificates.
IPSec encryption is processing intensive and on some low-end servers you may see a decrease in performance.
PPTP is a point-to-point Tunneling Protocol that provides secure transfers of data from a client to private enterprise servers via TCP/IP VPN connections. PPTP allows traffic to be encapsulated in an IP header to be sent across a corporate network or public networks such as the Internet.
PPTP has the following advantages:
Security: PPTP provides a moderate level of security due to the fact that it is dependent on the complexity of the password used to authenticate the PPTP connection. You can enhance the level of security applied to a PPTP link by using EAP/TLS-based authentication methods.
Widely supported by many major firewall appliances and enterprise software firewalls such as ISA servers.
No Public Key Infrastructure (PKI) required, EAP uses the digital signatures for both client and server security.
Routing: Uses routing and remote access on Windows Server 2003 servers.
Low overhead on performance.
To start off, let’s navigate to start the configuration process by configuring the ISA firewall at the corporate Main Office ISA firewall.
Step one of this process is to navigate to the Remote Site Network in the Microsoft Internet Security and Acceleration Server 2006 management console.
Open the Microsoft Internet Security and Acceleration Server 2006 management console and expand the server name.
Click the Virtual Private Networks (VPN) node.
Click the Remote Sites tab in the details pane. Click the Tasks tab in the Task pane. Click Create VPN Site-to-Site Connection.
On the Welcome to the Create VPN Site-to-site Connection Wizard page, enter a name for the remote network in the Site-to-site network name text box. In this example, enter Branch. Click Next.
On the VPN Protocol wizard page (see Figure 13.2), you have the choice of using the different protocols that you deemed as your primary protocol that meets your standards for your organization. Click Next.

Remember, if your security plan or your infrastructure is not capable to roll out to a PKI standard or does not require security certificates to be installed on your main office server and branch PCs, or you do not plan to deploy keys in the future, it’s best to use the PPTP option. However, if you have certificates installed choose the L2TP/IPSec option.
Another method of security is preshared keys. Using preshared keys can be a weak spot in your security and is really recommended only for demonstration purposes or testing where no security issues are of concern. This option works well with L2TP/IPSec.
For demonstration purposes, I will be choosing the use preshared keys for the site-to-site VPN along with Layer Two Tunneling Protocol (L2TP) over IPSec.
A dialog box will prompt requiring you to create a user account matching the network name on the MAIN OFFICE ISA firewall (see Figure 13.3). This user account will be used by the branch’s office ISA firewall to authenticate to the MAIN OFFICE ISA firewall. Without this user account, no authentication can be established when the firewall attempts to create its site-to-site VPN connection to the MAINOFFICE ISA firewall.
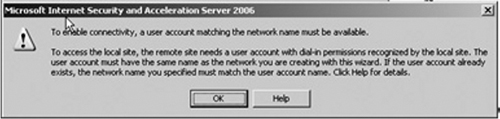
Click OK.
Note
It is very important that the user account have the same name as the BRANCH network we’re creating, and that it is defined by the name from the first page in the wizard. In this example, we named the site-to-site Network connection BRANCH, so the user account we create on the main office ISA firewall must also have the name BRANCH. Do not forget to grant dial-up access for this account.
On the Local Network VPN Settings page select the Dynamic Host Configuration Protocol (DHCP), button for this demonstration (see Figure 13.4).

If you do not have a DHCP server on the branch side of the network, then the Static address pool would apply. Also if we had multiple-server arrays on our network, DHCP would not be possible.
Next in the setup steps comes the Connection Owner page, where you select which machine in the array should be the connection owner for this site-to-site VPN connection.
Note
This option is seen only in the ISA Enterprise Edition and not in Standard Edition. If you have NLB enabled from when you installed ISA Server 2006, then you don’t need to manually assign the connection owner; as part of the NLB process it will automatically assign a connection owner when NLB is enabled on the array.
If you are working with the ISA Standard Edition, you can skip the NLB section.
Network Load Balancing, or NLB, provides automatic routing of client requests to the ISA server that is hosting the VPN connection. If a VPN connection fails, the NLB process automatically redistributes the connection to another server array one good example, if you have multiple ISA servers with VPN connections connected to the Internet. NLB will evenly inbound VPN requests, preventing any one server from being over-tasked, allowing VPN clients to connect to the same IP and be automatically sent to the appropriate server array.
In this demonstration, MainOffice, we are not using NLB on the Main Office array, plus we have only one member of our MAIN OFFICE ISA firewall Enterprise Edition array.
Making things simple then, take the default entry, which is the name of the ISA firewall at the MainOffice.
Click Next.
On the Remote Site Gateway wizard screen, enter the IP address or FQDN representing the external interface of the branch ISA firewall: Branch.Demo.Org.
Click Next.
On the Remote Authentication screen you will see the checkbox Allow the local site to initiate connections to remote site, using This user account: Checking this box allows the local site to initiate connections to the remote site using the account specified.
Enter the account name that you will create on the branch office ISA Server 2006 firewall to allow the MainOffice ISA firewall access. In this demonstration, the user account will be named MainOffice. This is an important step with authenticating to the branch office ISA firewall when creating the VPN connection.
The Domain name is represents the branch office ISA Server 2006 firewall, which in this example is DEMO. Enter a password for the account and confirm the password. Remember this password–you will need it again when you create the account later on the branch office ISA 2006 firewall.
Click Next.
Figure 13.5 shows you the L2TP/IPSec Outgoing and Incoming Authentication wizard screen. Remember that planning step I spoke about? Well, it’s back. At this point you will have to decide on which authentication method you want to authenticate your machine. In this example, I choose to select the preshared key authentication option, entering a preshared key in the Pre-shared key text box.
Click Next.


Remember! Jot this key down somewhere for safe keeping; also we’ll need this information when configuring the machine authentication settings at the branch office.
The Network Addresses wizard screen displays IP Ranges properties.
Click Add Range on the Network Addresses page.
In the IP Address Range Properties dialog box, enter 10.0.1.0 in the Starting address text box. Enter 10.0.1.255 in the Ending address text box (see Figure 13.6).
Click OK.
Click Next. on the Network addresses page.
Obviously your network IPs will be different than the ones stated here. If you are not sure, contact your Network Administrator. Again, this falls back to the planning stages of implementing any configuration.
The Remote NLB wizard page will prompt asking if you want to enable the NLB option. Again in this demonstration, I chose not to enable it, so no checkmark is needed at ÒThe remote site is enabled for Network Load Balancing” box.
Click Next.

Now let’s discuss the steps for setting up a firewall policy.
On the Site-to-site Network Rule wizard, Figure 13.7, you can configure a Network rule that connects the MainOffice and Branch Office ISA firewall networks.

Warning
ISA 2006 firewall requires that you always have a Network rule to connect ISA firewall networks to each other for proper security and communications. Do not forget even if you create an Access Rule—the connections will not work until you create a Network Rule.
Select the Create a network rule specifying a route relationship option along with the default name. Keep in mind that you have the option to manually create the network rule at anytime by clicking the I’ll create a network rule later option.
Click Next.
On the Site-to-Site Network Access Rule screen, select the Create and Allow Access Rule. This rule will allow traffic between the internal network and the site-to-site network for all users’ option. In the Apply the rule to these protocols dropdown box you will have a choice of three selections, as described in Table 13.2.
Table 13.2. Options for Access Rules
All outbound traffic: This option allows all traffic from the main office to the branch office.
Selected protocols: This option allows control in which traffic can move from the main office to the branch office. This option also will allow the option to limit the connections to a selected list of protocols.
All outbound traffic except selected: Selecting this option will allow all traffic with the exception of a few protocols.
If you want to block certain protocols, click Add to select which protocols you want to block.
Select the All outbound traffic option and click Next.
Click Finish on the Completing the New Site-to-Site Network Wizard page.
Remember: For the Branch Office, Figure 13.8 reminds you to create a user account as mentioned before.
Click Apply to save changes and update the configuration (see Figure 13.9).
Select the Remote Sites Task panel and click EDIT Selected Network in the Task Panel (see Figure 13.10).
Click on the Branch Properties box. You will see the following tabs:
General: Information about the Remote Site Network. This is also where you can enable or disable the VPN site-to-site connection.
Remote NLB: Allows you to enter specific IP addresses on the remote site VPN Gateway.
Connection: Allows credential changes.
Addresses: Allows you to change or add addresses to the IP range.
Server: Allows you to change the Connection Owner for the site-to-site.
Authentication: Allows you to choose the authentication protocol to want the main office ISA firewall server to use when authenticating with branch offices VPN. CHAP Version 2 is the default authentication protocol.
Protocol: Allows you to configure the protocol for site-to-site tunneling and to change the preshared keys.


You are almost done with configuring. Now it is time to verify the DHCP configuration for your site-to-site VPN gateway. Two IP Address options are also part of the planning stages:
DHCP
Static address pool
Which to use? In this demonstration, I chose the DHCP option due to the simplicity.
If you are running ISA Server 2006 Enterprise Edition and you have an array with two or more array members you cannot use DHCP; you must use Static Pool address assignment.
After you select the IP Address Assignment tab on the Virtual Private Networks (VPN) properties screen in the left pane of the console, your options are there for Static address pool or DHCP (see Figure 13.11).

Choose The Dynamic Host Configuration Protocol (DHCP) and click OK. Again for this demo, DHCP was chosen.
A user account must be created on the Main Office ISA firewall allowing the Branch Office firewall to authenticate when the site-to-site connection is complete. The user account must have the same name as the demand-dial interface on the Main Office computer.
Follow these steps to create the account needed to connect to the Main Office VPN gateway.
Right-click My Computer on the desktop and click Manage.
In the Computer Management console, expand the Local Users and Groups node. Right-click the Users node, and click New User.
In the New User dialog box, enter the name of the Main Office demand-dial interface. In our current example, the demand-dial interface is named Branch. Enter Branch into the text box. Enter a password and confirm the password. Remove the checkmark from the User must change password at next logon check box. Check the User cannot change password and Password never expires check boxes. Click Create.
Click Close in the New User dialog box.
Double-click the Branch user in the right pane of the console.
In the Branch Properties dialog box, click the Dial-in tab. Select Allow access (see Figure 13.12). Click Apply and then click OK.

We are almost done. The last part is to set up and configure the Branch Office side of this demonstration and set up the Remote Site Network at the Branch Office. You will repeat the steps that we’ve just completed, with a few minor changes for the Branch configuration.
In the Remote Gateway Screen wizard, your Remote Site VPN Server box should have MainOffice.Demo.Org.
In the Remaining VPN Site-to-site Tasks dialog box, it reminds you that you need to create a user account with the name Branch. Click OK.
Make a note of the firewall policy created by the VPN wizard and then click Apply to save the changes. Click OK in the Apply New Configuration dialog box (see Figure 13.13).

Perform the following steps to create the account the remote ISA Server 2006 firewall will use to connect to the Main Office VPN gateway:
Right-click My Computer on the desktop, and click Manage.
In the Computer Management console, expand the Local Users and Groups node. Right-click the Users node, and click New User.
In the New User dialog box, enter the name of the Main Office demand-dial interface. In our current example, the demand-dial interface is named MainOffice. Enter MainOffice into the text box. Enter a password and confirm the password. Write down this password because you’ll need to use it when you configure the remote ISA Server 2006 VPN gateway machine. Remove the checkmark from the User must change password at next logon check box. Place checkmarks in the User cannot change password and Password never expires check boxes. Click Create.
Click Close in the New User dialog box.
Double-click the MainOffice user in the right pane of the console.
In the MainOffice Properties dialog box, click the Dial-in tab. Select Allow access (see Figure 13.14). Click Apply, and then click OK.

Troubleshooting VPN connections can be the most tedious and difficult tasks you will encounter when it comes to communications between sites. Most common problems that you may expect to see are related to the VPN server or the VPN client configuration due to the fact the ISA server software does very little interaction in regard to VPN connections.
A few common configuration issues to look out for are:
Name resolution: Verify you have in place and configured all network services such as NetBIOS, WINS, DNS, DHCP, and directory services.
IP issues: Verify you have installed the DHCP relay agent. The agent will proxy for the VPN clients and allow them to receive DHCP information. Also, keep in mind, if you are using static IP addressing; verify you are not assigning duplicate IPs to your clients.
VPN client issues: Verify client VPN settings that work with your network.
VPN gateway: Verify only the remote/branch site is capable of initiating the VPN connection. If both servers initiate a call simultaneously, this will prevent both servers from accepting an incoming connection.
Authentication issues: Verify that your VPN protocols are the same on both the ISA Server and the VPN Clients. Misconfigurations will cause headaches with troubleshooting connectivity.
Now that both the MainOffice and Branch site ISA Server 2006 firewalls are configured as VPN routers, let’s test the site-to-site connection.
The simplest today is the ping test to verify any connectivity loss between networks and even hardware.
From the branch computer, click Start, and then click Run.
In the run dialog box, type cmd.
In the command window, type ping • t 10.0.0.2 and press Enter.
This ping should return packet ping information verifying the host is the replying.
The same test should be performed also on the Main Office, pinging 10.0.1.2 the Branch Office.
The intent of this chapter is to give you the basic understanding of how to connect two ISA 2006 servers from different site locations. The examples covered demonstrated how to configure two sites to connect via a VPN connection utilizing the Microsoft Internet Security and Acceleration Server software. This was demonstrated by creating the Remote Site Network at the main office ISA firewall and setting up a user account so that both the main office and branch office ISA firewall can connect via VPN.
In the Branch section of the chapter, I demonstrated pretty much the same procedures from the first section of creating the Main Office ISA steps so that the Branch Office ISA firewall can contact the Main Office ISA firewall, again creating a user account so that the Branch Office can communicate.
We discussed the differences between the protocols and chose the most secure one creating an L2TP/IPSec site to site VPN connection between two ISA firewalls. Due to the complexity of certificate authentication process and the scope of the chapter, our discussion was limited to using a preshared key between the ISA firewalls at the Main and Branch Offices. However, in corporate enterprise situations, it is recommended to use certificate authentication in lieu of preshared keys.
Finally, we spoke about troubleshooting connections between sites. This was accomplished by simple means, using the ping command. We pinged the site(s) and verified the log files and session information to verify what the ISA console is seeing when a successful VPN session is communicating properly.
| IPSec Tunnel Mode is the best-suited option when you are using ISA Server 2006 as your VPN server and the site you are connecting to is using a third-party NON-Microsoft VPN gateway. |
| L2TP/IPSec (Layer Two Tunneling Protocol over IPSec) provides secure transfers of data from a client to private enterprise servers preferred site-to-site protocol where security and routing is a concern. |
| PPTP provides secure transfers of data from a client to private enterprise servers via tunneling. |
| All outbound traffic. Remember ISA does not allow traffic to pass unless you create a rule to allow it. |
| Selected protocols. This option allows control in which traffic can move from the main office to the branch office, also allowing the option to limit the connections to a selected list of protocols. |
| All outbound traffic except selected. This option will allow all traffic with the exception of a few protocols. |