Chapter 8
Security Mechanisms
Since the early days of computer technology, security has been a vital issue for both IT professionals and developers. How do we secure our computers, operating systems, software, networks, and communications? These were the questions that computer professionals were asked all the time—and many projects in every organization were performed to configure security settings at the maximum possible level. Well, so many years after those first computers, the questions remain the same. Technology is evolving. Unfortunately, computer attacks have also evolved.
Security Overview
Beginning with Windows Server 2003, Microsoft introduced a new strategy for operating systems—secure by default and secure by design. This means that many security settings are enabled by default. For example, Windows Firewall with Advanced Security is enabled by default and Windows Updates are enabled by default. From that version until now, many new technologies have been introduced and included in the Windows Server operating system that organizations can use to increase their security to the maximum level. Furthermore, operating system features have been developed with security design in mind. However, providing security for your organization's IT resources has never been nor will it ever be something that you can “set it and forget it.” Every organization must be aware of the latest security threats and act appropriately to protect their IT resources.
Where to Begin?
Even if you have never worked with security solutions, there are a couple of things that you can do before you bring the experts into your organization or before you start your own security technologies and techniques training. We have identified several important components of operating system security that are great starting points for protecting your organization from malicious behavior and attacks.
- Windows Firewall You should always run Windows Firewall and open only the ports that are needed for network communication of the specific server. Best practice is to work closely with your colleagues from the other departments (such as network admins and AD admins) so they can tell you what ports are being used by your infrastructure servers (such as domain controllers and DNS servers) and application and database servers (such as intranet applications, Exchange Server, SQL Server, Skype for Business, and SharePoint).
- Windows Updates Most of the viral Internet attacks in the past spread over the Internet so quickly because computers had not been updated with the latest operating system updates. Furthermore, the updates that would have prevented those attacks weren't newly released updates; they were released long before an actual attack was executed. Remember, because you are working with servers running different kinds of software, best practice is to test new Windows updates in a nonproduction environment first, before you deploy them to production servers.
- Anti-Malware Software Depending on the type of a server, anti-malware protection must be enabled and updated with latest malware definitions. Best practice is to be aware of application restrictions on anti-malware software, such as for Exchange Server, where you need to configure exclusions so that certain folders or file types are not scanned. Furthermore, ensure that all other clients and devices in your network have anti-malware installed and updated.
- User Permissions Users (including administrators) must have sufficient permissions to perform their job-related activities and nothing more; this is also known as the “principle of least privilege.”
- Admin Permissions Even admins should work as standard users and only run administrative tasks with elevated permissions, because any type of malware that tries to use user permissions will be restricted to user-level permissions.
- User Credentials Security best practices for user credentials are explained in other chapters in this book, where you will read that passwords need to meet complexity requirements in order to be more secure. Furthermore, password lockout policies must be in place to protect against brute force attacks, where an attacker tries multiple combinations of words in order to guess user passwords.
Be regularly informed about the latest security threats and read the recommendations and best practices from the software and hardware vendors of the equipment and solutions you are using in your organization.
Now that you have a foundation on which to learn, let's get into the detailed planning for security in Windows Server.
What Are the Risks?
In every organization, identifying the critical resources that each individual business depends on is extremely important. These resources will be first on your list for protection against malware, attacks, and unauthorized access. No less important, however, is identifying the dependencies for those business-critical resources. For example, if email is business critical and attackers successfully bring down your DNS services, Exchange Server will not be able to resolve different types of records, which means it will not be able to send and receive email.
After identifying your critical resources and dependencies, you should know what types of threats can harm your organization's critical resources.
Thinking Like an Attacker
You have probably heard this statement: “In order to protect from attackers, you should think like the attacker.” Attackers use so-called attack vectors, the activities that lead the path to unauthorized access to an organization's resources. From the other side, an organization's resources need to minimize the attack surface area, the resources that can potentially be attacked. Shutting down unneeded services will minimize the attack surface area. Furthermore, technologies such as the Server Core installation of Windows Server and Nano Server reduce the attack surface area even more. However, some services have to be running and available for business processes, so they need to be protected.
Attackers use a lot of different methods to breach an organization's security. An attack vector might contain multiple components, including:
- Attacks against network components, firewalls, routers, and VPN gateways. Your networking department should already know how to protect the equipment with regular software updates released by networking equipment vendors.
- Attacks against operating systems. These attacks include finding and exploiting vulnerabilities in server or client operating systems.
- Attacks against software products and custom applications. These attacks include exploiting vulnerabilities in applications.
- Attacks against virtualization infrastructure. If an attacker compromises the virtualization host, then all virtual machines could be compromised.
- Malware or malicious software. Malicious software can be differentiated into several types, including:
- Viruses. Self-replicating malware that infects computers.
- Trojans. Malware that gives the attacker remote access to the infected system.
- Ransomware. A new and increasingly more advanced type of malware that encrypts important data. Decryption keys are sold to organizations that pay the ransom fee to the malware authors.
- Phishing. An attack where an individual unintentionally infects their computer with malware by visiting a specially created website or by opening a specially created email. Phishing is an email that attempts to convince a large number of recipients to perform an action (such as opening an email or visiting a website) that triggers an infection.
- Social engineering. Maybe one of the most underestimated but yet one of the most dangerous threats. The goal of this type of attack is to deceive people inside an organization and trick them into revealing security information (such as usernames, passwords, and IP addresses) that would help attackers access corporate data and services. As an example, someone could contact the support department and pretend to be a general manager requesting a password change immediately.
Ethical Hacking
Finding security breaches requires knowledge of operating systems, applications, networking, and security technologies. Many organizations hire IT security professionals as full-time employees or external consultants responsible for securing infrastructure, data, and services. Security professionals regularly perform ethical hacking, which includes running applications and performing procedures in order to try to compromise the security systems of the organization, but with the desired outcome of fixing potential security issues found during the testing. Ethical hacking procedures might include penetration testing, where security professionals try to attack and enter the internal IT infrastructure from the Internet. Some procedures include just scanning to determine which ports are unnecessarily open as a potential surface attack area.
Protecting Accounts
User accounts are some of the most attractive objects of attack. Why? Because correctly entered user account information provides the necessary permission to access all the resources that user can access. Therefore, attackers have developed many types of techniques to steal user credentials and obtain access to data and services.
In the following sections, you will learn about the different technologies that will help you maximize the security and protection of your user accounts.
Privileged Access
For a long time now, one of the best principles for securing a Windows Server infrastructure is to grant users and administrators the lowest level of privilege needed so they can perform their everyday activities. That way if an account is compromised, the attackers gain access only to the minimal set of privileges assigned to that account.
For this reason, administrators and developers need to have separate accounts for day-to-day activities such as reading email and browsing content on the Internet, and they should use privileged accounts only when they are performing tasks that require those specific privileges.
You may wonder how do to achieve this. It is much more convenient if you assign rights to groups rather than to users; once a group's security permissions are defined, an administrator can just add or remove users from those groups, where group membership will automatically define the user permission over resources and admin tools.
Furthermore, you can use Group Policy to assign user accounts rights in the Group Policy Editor, which is located under Computer ConfigurationPoliciesLocal PoliciesUser Rights Assignment. The settings are described in Table 8.1.
TABLE 8.1: User Account Rights in Group Policy Editor
| USER RIGHTS ASSIGNMENT POLICY | FUNCTION |
| Access Credential Manager as a trusted caller | Used by Credential Manager during backup and restore. |
| Access this computer from the network | Defines which users and groups can connect to the computer from the network. |
| Act as part of the operating system | Allows a process to impersonate a user without authentication. |
| Add workstations to domain | Enables you to join workstations to the domain. |
| Adjust memory quotas for a process | Defines which security principals can adjust the maximum amount of memory assigned to a process. |
| Allow log on locally | Defines which users can sign in locally to a computer. |
| Allow log on through Remote Desktop Services | Defines which users and groups can sign in remotely by using Remote Desktop. |
| Back up files and directories | Gives permission to backup files, directories, and Registry. |
| Bypass traverse checking | Enables the user with this right with the ability to traverse directories on which they don't have permission. |
| Change the system time | Enables the user with this right to alter the system time. |
| Change the time zone | Enables the user with this right to alter the time zone. |
| Create a pagefile | Enables the user with this right with the ability to create and modify the page file. |
| Create a token object | Defines which user accounts can be used by processes to create tokens that allow access to local resources. |
| Create global objects | Defines which user accounts can create global objects that are available to all sessions. |
| Create permanent shared objects | Defines which user accounts can create directory objects by using the object manager. |
| Create symbolic links | Defines which user accounts can create symbolic links from the computer to which they are signed in. |
| Debug programs | Defines which user accounts can attach a debugger to processes within the operating system kernel. |
| Deny access to this computer from the network | Blocks specified users and groups from accessing the computer from the network. |
| Deny log on as a batch job | Blocks specified users and groups from signing in as a batch job. |
| Deny log on as a service | Blocks service accounts from registering a process as a service. |
| Deny log on locally | Blocks accounts from signing on locally. |
| Deny log on through Remote Desktop Services | Blocks accounts from signing in by using Remote Desktop Services. |
| Enable computer and user accounts to be trusted for delegation | Defines whether you can configure the Trusted For Delegation setting on a user or a computer object. |
| Force shutdown from a remote system | Users assigned this right can shut down computers from remote network locations. |
| Generate security audits | Defines which accounts can be used by processes that will generate security security logs. |
| Impersonate a client after authentication | Allows apps that are running on behalf of a user to impersonate a client. |
| Increase a process working set | Accounts assigned this right can increase or decrease the number of memory pages visible to the process in memory. |
| Increase scheduling priority | Accounts can change the scheduling priority of a process. |
| Load and unload device drivers | Accounts can dynamically load and unload device drivers into kernel mode. |
| Lock pages in memory | Accounts can use a process to keep data stored in physical memory, blocking that data from paging to virtual memory. |
| Log on as a batch job | Users can sign in to a computer through a batch-queue facility. This right is applicable only to versions older than Windows 10 and Windows Server 2016. |
| Log on as a service | Allows a security principal to sign in as a service. |
| Manage auditing and security log | Users can configure object-access auditing options for resources such as files, folders, and AD DS objects; they can also view events in the security log and clear the security log. |
| Modify an object label | Users can modify the integrity level of objects, including files, Registry keys, or processes. |
| Modify firmware environment values | Defines which users can modify firmware environment variables. |
| Obtain an impersonation token for another user in the same session | When this privilege is assigned to a user, all programs that run on behalf of that user can obtain an impersonation token of other users who interactively logged on within the same session. |
| Perform volume maintenance tasks | Defines which user accounts can perform maintenance tasks on a volume. Assigning this right is a security risk, because users who have this permission might access data stored on the volume. |
| Profile single process | Defines which user accounts can leverage performance-monitoring tools to monitor nonsystem processes. |
| Profile system performance | Defines which user accounts can leverage performance-monitoring tools to monitor system processes. |
| Remove computer from docking station | When assigned, user account can undock a portable computer from a docking station without signing in. |
| Replace a process level token | When assigned, user account can call the CreateProcessAsUser application programming interface (API) so that one service can trigger another. |
| Restore files and directories | Allows users to bypass permissions on files, directories, and the Registry so that they can overwrite these objects with restored data. |
| Shut down the system | Assigns the ability for a locally signed-in user to shut down the operating system. |
| Synchronize directory service data | Assigns the ability to synchronize AD DS data. |
| Take ownership of files or other objects | When assigned, user account can take ownership of any securable object, including AD DS objects, files, folders, Registry keys, processes, and threads. |
Securing User Accounts
User accounts in organizations are one of the most sensitive objects that attackers want to obtain. You can configure the security of a user account by opening the properties window of the user account in Active Directory Users and Computers and selecting the Account tab, as shown in Figure 8.1.

FIGURE 8.1 Configuring User Account settings in Active Directory Users and Computers
The following security options can be configured for an account:
- Logon Hours. The Logon Hours setting can be used to configure when users can use an account. For example, the account can be configured so that users can only use it from 7:00 AM to 8:00 PM Monday to Friday. By default, users can always sign in.
- Log On To. The Log On To settings can be used to limit the computers to which an account can sign in. By default, users can use an account to sign in to any computer in the domain.
- Unlock Account. Used to unlock accounts that are locked because an incorrect password was entered multiple times and the Account Lockout Policy threshold was reached.
- User Must Change Password At Next Logon. This setting is used when an administrator creates a new account or resets a password, so that users can choose their own password that is not known to anyone else.
- User Cannot Change Password. This option is not recommended to be configured because changing the password on regular intervals increases the security.
- Password Never Expires. This option is not recommended to be configured because it makes the accounts easier to compromise.
- Store Password Using Reversible Encryption. Unless there is some legacy application requirement that uses protocol for password authentication, this option is not recommended because it enables passwords to be decrypted,
- Account Is Disabled. Used for disabling or enabling the user account.
- Smart Card Is Required For Interactive Logon. When this option is enabled, it ensures that a smart card must be present for the account sign-in to occur.
- Account Is Sensitive And Cannot Be Delegated. When this option is enabled, it ensures that trusted applications cannot forward an account's credentials to other services or computers on the network.
- Use Only Kerberos DES Encryption Types For This Account. This option configures an account to use only Data Encryption Standard (DES) encryption.
- This Account Supports Kerberos AES 128-bit Encryption. This option allows Kerberos AES 128-bit encryption to occur.
- This Account Supports Kerberos AES 256-bit Encryption. This option turns on Kerberos AES 256-bit encryption.
- Do Not Require Kerberos Preauthentication. Enabling this option is not recommended because it will lower the security of the logon process.
- Account Expires. This option configures expiration dates where accounts do not remain in AD DS after they are no longer needed.
Configuring Account Policy Settings
Account policies are divided into password policies and account-lockout policies. The domain password and account-lockout policies apply at the domain level. They can be configured via the default domain Group Policy Object (GPO) by using the Group Policy Management Editor located under Computer ConfigurationPoliciesSecurity SettingsAccount Policies.
The Domain Password policy can be overridden by configuring a fine-grained password policy that applies to the members of security groups or individual user accounts. Fine-grained password policies are configured by using the Active Directory Administrative Center console.
The password policy defines:
- How many previous passwords are remembered. The default value is 24 passwords remembered. This means that when changing a password, users cannot use any of their previous 24 passwords.
- Maximum password age. This is the maximum amount of time that can elapse, in days, before a user must change their password. The default value is 42 days.
- Minimum password age. The minimum length of time that a user must retain a password before changing it. This setting ensures that users do not continually change their password, exhaust the password history, and return to using the same password. The default is one day.
- Minimum password length. The minimum number of characters that a password must include. The default is seven characters.
- Whether password must meet complexity requirements. Passwords must include three of the following four elements: uppercase letters, lowercase letters, numbers, and symbols. This is enabled by default.
The Domain-Account Lockout policy defines:
- How long an account is locked when a user types a specified number of incorrect passwords. The default is no lockout.
- How many incorrect passwords the user may type, in succession, during a specific time period before Windows locks the account.
- How much time must pass before the account lockout counter is reset.
Protected Users, Authentication Policies, and Authentication Policy Silos
Some of the attacks that are happening frequently are pass-the-hash, where an attacker authenticates by using the NTLM hash of the user's password. Since Windows Server 2012 R2 and later, there are new features that prevent these types of attack. By limiting the use of the account with less-secure security and authentication options, Protected Users groups are used to help protect highly privileged user accounts against compromise. A Protected Users group differs from other users because Windows does not cache their credentials locally. User accounts that are members of this group cannot use:
- Default credential delegation
- Windows Digest
- NTLM
- Kerberos long-term keys
- Sign-on offline
If the domain functional level is Windows Server 2012 R2 or higher, user accounts that are members of the Protected Users group cannot:
- Use NT LAN Manager (NTLM) for authentication
- Use DES for Kerberos preauthentication
- Use RC4 cipher suites for Kerberos preauthentication
- Be delegated using constrained delegation
- Be delegated using unconstrained delegation
- Renew user ticket-granting tickets (TGTs) beyond the first 240-minute lifetime
Only user accounts should be added to the Protected Users group. Computer and service accounts should not be added to the Protected Users group.
Using an authentication policy will allow you to configure settings, such as TGT lifetime and access-control conditions, that specify conditions a user must meet before logging in to a computer. For example, you might configure an authentication policy that specifies a TGT lifetime of 180 minutes and limit a user account so that users can use it only with specific devices. Authentication policies require that you set the domain functional level to Windows Server 2012 R2 or newer.
Authentication policy silos allow administrators to define a relationship between the user, computer, and managed service accounts, and they certify that the accounts belong to a single authentication policy silo only. You associate accounts in an authentication policy silo with a silo claim, and you then can use this silo claim to control access to claims-aware resources. For example, you must associate accounts that can access particularly sensitive servers with a specific silo claim.
Delegating Privileges
When you are planning the security permission assignment in an organization, you, as the administrator, might want to choose from the default built-in groups that have a specific set of privileges. For example, a member of the Domain Admins group can perform one specific set of administrative tasks, and a member of the Schema Admins group can perform another set of administrative tasks.
However, in many scenarios, the default security groups won't fit your organization's security requirements. Therefore, you can create new security groups and delegate to them specific and custom security permissions. You can do this by delegating specific rights using the Delegation of Control Wizard. The Delegation of Control Wizard allows you to delegate the following rights:
- Create, delete, and manage user accounts
- Reset user passwords and force password change at next logon
- Read all user information
- Create, delete, and manage groups
- Change group membership
- Manage Group Policy links
- Generate Resultant Set of Policy (Planning)
- Generate Resultant Set of Policy (Logging)
- Create, delete, and manage inetOrgPerson accounts
- Reset inetOrgPerson passwords and force password change at next logon
- Read all inetOrgPerson information
The wizard can also be used to create a custom task that can be delegated. When this is done, the objects are specified within the organizational unit (OU) or folder over which you want to delegate control and the permissions over those objects for which you want to delegate control.
Credential Guard
Credential Guard protects organizations from pass-the-ticket and pass-the-hash attacks by using virtualization-based security that isolates cached credentials, so that only specially privileged system software can access them. Credential Guard can restrict access to the special processes and memory that manage and store authorization and authentication-related data.
Credential Guard includes the following features and solutions:
- Credential Guard takes advantage of hardware security including secure boot and virtualization, where all credentials are isolated from the operating system.
- Credential Guard is managed by using Group Policy, Windows Management Instrumentation (WMI), or Windows PowerShell.
Credential Guard can be deployed only on computers that fulfill certain hardware requirements, such as 64-bit CPU, CPU virtualization extensions plus extended page tables, and Windows hypervisor. If a protected operating system runs on a virtual machine, the Hyper-V host must run Windows Server 2016 or minimum Windows 10 version 1607. The virtual machine must be Generation 2. Enabling Credential Guard on domain controllers is not supported.
To enable Credential Guard, you can use the Group Policy Management Editor's Computer ConfigurationAdministrative TemplatesSystemDevice Guard node, and enable "Turn On Virtualization Based Security" setting, as shown in Figure 8.2.

FIGURE 8.2 Configuring Credential Guard in the Group Policy Management Editor
When you're configuring this policy, it first must be set to Enabled, and then the platform security level is set to Secure Boot or Secure Boot and DMA Protection. After that, the Credential Guard Configuration option must be set to Enabled With UEFI lock or Enabled Without lock.
Protecting Data at Rest
Data at rest represents all data that is stored on client computers, servers, databases, or backup media. Data at rest is also a popular target for attackers because, if successfully accessed, it can be copied, transferred, and then used for different types of illegal activities. Numerous examples of stolen personal user information and credit card numbers from different parts of the world have been reported by the news media. All these examples show that protection of the data at rest should be taken very seriously. We will explain some technologies that will help you to protect your data stored on multiple locations in your organization.
Encrypting File System
Encrypting File System (EFS) has been around in Windows operating systems for many years. The only prerequisite for deploying EFS is that the disk needs to be formatted with NTFS file system. It encrypts files and folders, allows only authorized users to decrypt data, and prevents unauthorized users from viewing its content, no matter of the type of permissions users have to a file. The process of encryption and decryption is transparent to the user and applications. When encrypting a file or folder, users just need to select a check box to encrypt the contents to secure data, as shown in Figure 8.3.
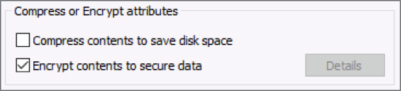
FIGURE 8.3 Configuring EFS on a folder editor
When users access the encrypted files or encrypted folders, they open them the same way they would open a nonencrypted file. When unauthorized users attempt to open the file, they will receive a message stating that access is denied.
The EFS encryption and decryption processes include the following steps, as shown on Figure 8.4:

FIGURE 8.4 The process of encryption and decryption in EFS
- When a user wants to encrypt a file, EFS first generates a random symmetric file encryption key (FEK) for each file that has to be encrypted. EFS then encrypts the file with the generated FEK and encrypts the FEK with the user's public key. EFS stores the encrypted FEK with the user's public key, in the Data Decryption Field (DDF). This ensures that only the user who has the matching private key can decrypt the FEK and then decrypt the file with the FEK.
- If you define a recovery agent, EFS creates a Data Recovery Field (DRF). A DRF contains the FEK that is encrypted by the data recovery agent's public key. EFS obtains the recovery agent's public key automatically from the recovery agent's file recovery certificate, which is stored in Group Policy.
- Users can decrypt a file if they have at least Read access permissions to the file. Only users who have a matching private key to the public key that is stored in the DDF or DRF can decrypt the file. To decrypt a file, EFS uses the user's private key to decrypt the FEK. If EFS decrypts the FEK successfully, EFS uses it to decrypt the file content.
BitLocker
While EFS protects files and folders, BitLocker is a volume-encryption technology that encrypts the whole volume to protect data from unauthorized access. BitLocker was introduced for the first time on the Windows Vista operating system; it has the following features:
- BitLocker can encrypt an entire volume or only the used parts of a volume.
- BitLocker can use a Trusted Platform Module (TPM) to protect the integrity of the Windows startup process. BitLocker verifies that the required boot files have not been tampered with nor modified. If the verification process finds files that were modified—for example, by a rootkit or boot sector virus—then Windows does not start.
- BitLocker can require multifactor authentication, such as a PIN or a USB startup key.
- You can configure Network Unlock at Startup for BitLocker. With Network Unlock, the BitLocker-protected device will start automatically when it is connected to a trusted company network; otherwise, you will need to provide a startup PIN.
- BitLocker provides a recovery mechanism, a 48-digit recovery key, or a recovery agent to access the volume data if a TPM fails or the password is lost.
- BitLocker protects the whole volume from offline attacks. After the Windows device starts and users gain access to the protected volume, authorized users can access data on the BitLocker-encrypted volume if they have the appropriate file permissions.
- You can combine BitLocker with EFS. BitLocker encrypts at the volume level, whereas EFS encrypts data at the file level.
- The BitLocker performance overhead is minimal. For most installations, the performance impact is not noticeable. The BitLocker drive encryption architecture is described in Figure 8.5.
FIGURE 8.5 The architecture of BitLocker drive encryption
Sectors are encrypted by the full-volume encryption key (FVEK). The FVEK is further encrypted with the volume master key (VMK). The FVEK must be stored securely, because it has the capability to decrypt the volume. The FVEK (encrypted with the VMK) is stored on the disk as part of the volume metadata. The VMK is also encrypted (or protected) by one or more key protectors. The default key protector is the TPM, but you can configure additional protectors, such as a PIN and a USB startup key. If the device does not have a TPM, you can configure BitLocker to store a key protector on a USB drive.
For more information on BitLocker, visit the following link: https://docs.microsoft.com/en-us/windows/device-security/bitlocker/bitlocker-overview.
BitLocker uses the AES algorithm with 128-bit keys encryption by default. You can modify this setting with Group Policy—for example, to configure the use of 256-bit keys. BitLocker encrypts each volume sector individually, and part of the encryption key is derived from the sector number. Therefore, each two sectors have different encrypted data, even if the two sectors have the same unencrypted data. The settings in the Group Policy Management Editor are illustrated in Figure 8.6.

FIGURE 8.6 The process of drive encryption configured in the Group Policy Management Editor
Protecting Data in Transit
Data in transit includes all the information that client computers and servers transfer during their communication. Data in transit might be limited only in local area networks, between an organization's headquarters and branch offices, or even between an organization and the Internet. If not well protected, all these different types of network communications provide opportunities for different types of attacks. By learning about the technologies available to protect data in transit, you will be able to successfully plan and deploy security for your network communications.
Windows Firewall with Advanced Security
Windows Firewall with Advanced Security was introduced in Windows Server 2008, and it has been constantly present in newer operating systems. It provides organizations with the capability to manage ports and protocols that will be used on client and server operating systems. Even though many network admins prefer using only hardware firewalls, turning off Windows Firewall is never recommended, according to the principle of minimizing attack surface area.
Windows Firewall with Advanced Security uses firewall profiles that consist of settings, firewall rules, and connection security rules for related networks at the same security level. Three network profiles are available in the Windows Firewall management console:
- Domain Networks. Represent networks at a workplace that are attached to a domain, which means they communicate with a domain controller.
- Private Networks. Represent nondomain but trusted networks, such as network connections configured with business partner that collaborates with your company.
- Guest or Public Networks. Represent networks in public places and are less secure than the previous two.
Each network location has the following information:
- Windows Firewall State. This refers to whether Windows Firewall is turned on or off.
- Inbound Connections. This provides the status of what will be performed on the incoming connections, such as Allow or Block connections.
- Outbound Connections. This provides the status of what will be performed on the outgoing connections, such as Allow or Block connections.
- Protected Network Connections. This specifies network adapter where the settings will apply.
- Settings. This specifies the settings that control Windows Firewall behaviors, such as notifications, and merging rules configured with Group Policy.
- Logging. This specifies the name, size of the log, as well as data to be logged.
Windows Server 2016 allows multiple firewall profiles to be simultaneously active on a server. For example, a server with two network adapters that is connected to both the internal network and the perimeter network can apply the Domain firewall profile to the internal network and Public firewall profile to the perimeter network.
The Windows Firewall with Advanced Security properties window is displayed on Figure 8.7.

FIGURE 8.7 Windows Firewall with Advanced Security properties window
The navigation pane (left pane) provides for more-granular control of firewall rules, connection security rules, and monitoring. When the Windows Firewall with Advanced Security On Local Computer object is selected in the navigation pane, the results pane shows an overview of the firewall configuration with links to the various configuration panes and dialog boxes. Finally, the Actions pane (right pane) provides the following options:
- Import Policy. Allows you to overwrite the current settings with a previously exported policy.
- Export Policy. Allows you to save the current configuration.
- Restore Default Policy. Resets any changes that have been made to the Windows Firewall settings.
- Diagnose/Repair. Starts the Network and Internet Troubleshooting Wizard.
The final tab in this Properties dialog box is the IPsec Settings tab. This tab lets you configure the customized values for IPsec configuration.
As in other network firewall technologies, Windows Firewall with Advanced Security includes Rules as a collection of criteria that define which IP address, port, and protocol you will allow, block, or secure with the firewall, as shown on Figure 8.8.

FIGURE 8.8 Configuring rules in Windows Firewall with Advanced Security
- Inbound and outbound rules explicitly allow or block traffic that matches the criteria in the rules. For example, you can configure a rule to allow HTTP traffic from the internal network through the firewall but block the same traffic if it is coming from the Internet.
- For Windows Server roles and features, you do not have to create the rules. For example, enabling Microsoft Internet Information Services (IIS) automatically adjusts Windows Firewall to allow the appropriate traffic. You can change the default action to allow or to block all connections regardless of any rules.
Following kinds of inbound and outbound rules exist: FIGURE 8.9 Configuring connection security rules in Windows Firewall with Advanced Security You can configure settings for Windows Firewall either individually on each computer or by accessing the following location from the Group Policy management console: You can enable and configure Windows Firewall by using Windows PowerShell cmdlets from the NetSecurity module. Table 8.2 describes these cmdlets. TABLE 8.2: Windows PowerShell CmdletsINBOUND AND OUTBOUND RULE TYPES
.exe file).
ADDITIONAL CONFIGURATION OPTIONS
Computer ConfigurationPoliciesWindows SettingsSecurity SettingsWindows Firewall with Advanced Security
WINDOWS POWERSHELL CMDLET
DESCRIPTION
New-NetFirewallRuleCreates a new inbound or outbound firewall rule and adds the rule to the destination computer.
Enable-NetFirewallRuleEnables a network firewall rule that was previously disabled.
Show-NetFirewallRuleDisplays all of the existing firewall rules in the policy store along with the associated objects.
Get-Help *Net*Lists all the cmdlets that have “Net” in their names. This returns all of the Windows Firewall cmdlets.
IPsec
IPsec is a suite of protocols that can help protect data in transit through a network by providing authentication, integrity checking, and encryption. IPsec is a set of industry-standard, cryptography-based protection services and protocols.
Its original purpose was to secure traffic across public networks, but many organizations have chosen to implement IPsec to address perceived weaknesses in their own private networks that might be susceptible to exploitation.
If you implement it properly, IPsec provides a private channel for sending and exchanging potentially sensitive or vulnerable data, where applications that communicate over the network are not aware of IPsec because only endpoints are responsible for performing the processes of authentication and encryption/decryption.
IPsec has the following characteristics:
- Offers mutual authentication before and during communications
- Forces both parties to identify themselves during the communication process
- Enables confidentiality through IP traffic encryption and digital packet authentication
Some network environments are well suited to IPsec as a security solution, whereas others are not. We recommend IPsec in the following scenarios:
You can configure IPsec in one of two modes, as shown in Figure 8.10: FIGURE 8.10 Transport and tunnel mode in IPsec
You can use connection security rules to configure IPsec in Windows Firewall with Advanced Security. With these connection security rules, you can associate IPsec rules with Windows Firewall network profiles. The advantage of combining IPsec and Windows Firewall is that you can avoid overlapping rules and policies that might conflict, and you can streamline the process of securing your computer against unauthorized access. The configurable connection security rules include:
When you enable and configure a connection security rule, you must define the following properties:
As you advance through the New Connection Security Rule Wizard to create a new connection security rule, you will configure the rule's main options on the Requirements and Authentication Method pages. On the Requirements page, you can configure when authentication will occur by using the following options:
Computers always use the first authentication method when establishing an IPsec connection. You can specify more than one authentication method, and the computers will try the authentication methods in the order that you specify until the authentication succeeds. The options available for the first authentication method are listed here:
There are multiple ways to configure IPsec, depending on your environment and goals. Ultimately, you will configure and deploy IPsec as a policy. Computers that are domain members can have IPsec configured through a GPO. You can configure both IPsec policies and Windows Firewall with Advanced Security connection security rules by using a GPO. Domain and nondomain members can have IPsec configured locally by using the Windows Firewall with Advanced Security management console. Additionally, you can use Windows PowerShell to script the creation of IPsec rules. The IPsec default settings are on the IPsec Settings tab of the Windows Firewall with Advanced Security on Local Computer Properties dialog box. Click Customize to configure the methods that you want IPsec to use for:
There are multiple ways of configuring IPSec. You can use GPO, Firewall Rules, or Windows PowerShell. When configuring IPsec policies by using a GPO, you define the IPsec settings in the
You can create your own IPsec policies. Some of the options that you can use when creating your own IPsec policies are listed here:
Using firewall rules to define IPsec is a more granular experience than using GPOs. First, you must create a connection security rule to define the authentication method. After you configure the connection security rules, you can configure the inbound rules and outbound rules to enable the Allow The Connection If It Is Secure option. Some rules, such as the ICMPv4 rule, do not support this option. If you choose to require security on an inbound or outbound rule, the following policies are available:
When you use firewall rules to configure IPsec encryption, negotiation between both systems is always in use to find the most secure encryption method that both systems support. You can use the following commands to administer Windows Firewall. To enable the firewall, at the Windows PowerShell command prompt, type the following command and then press Enter. To create a firewall rule, at the Windows PowerShell command prompt, type the following command and then press Enter. To modify an existing rule, at the Windows PowerShell command prompt, type the following command and then press Enter. To delete an existing rule, at the Windows PowerShell command prompt, type the following command and then press Enter. Isolation zones logically separate your network into computers that can authenticate with one another and those that cannot authenticate. IPsec is the basis for these network isolation zones, which you implement by using Windows Firewall with Advanced Security connection security rules. To create an isolated network, you must separate the various types of computers in your organization's network according to the access you want those computers to have. The following factors apply to isolated networks:
It is important to remember that computers in your isolated network ignore all requests to initiate communication from computers that are not in the isolated network. Windows Server 2016 supports two types of isolation: domain isolation and server isolation. You can monitor IPsec through the IP Security Monitor snap-in or through the Monitoring node in the Windows Firewall with Advanced Security management console. The IP Security Monitor shows additional details that relate to the IPsec policy applied either locally or through a GPO. The Monitoring node in the Windows Firewall with Advanced Security management console does not show policy-related information. When monitoring IPsec that you configure by using the Windows Firewall with Advanced Security management console, the two top-level nodes that you can view are the Connection Security Rules and Security Associations nodes. In the Security Associations node, there are nodes for Main Mode monitoring and Quick Mode monitoring. Each of these nodes shows details about their associated configuration item. To ensure that IPSec is working properly, you should monitor how IPSec is functioning. Therefore, you can use IP Security Monitor snap-in, where you can use two views, Main Mode and Quick Mode. Main Mode—or Phase 1 Internet Key Exchange (IKE) negotiation—establishes a secure channel known as the Internet Security Association and Key Management Protocol (ISAKMP) SA between two systems. The ISAKMP SA protects the key exchanges between peer computers that establish the Quick Mode connection. When establishing the secure channel, the Main Mode negotiation determines a common set of cryptographic suites that both systems use, establishes the shared secret key that the systems will use, and authenticates the computer identities. Monitoring Main Mode SAs provide information about peers that are currently connected to the computer, including:
Quick Mode IKE negotiation establishes a secure channel between two systems that will help protect data during transmission. The SAs that the Quick Mode IKE negotiates in this phase are IPsec SAs for the IPsec service. Quick Mode can use the existing keying material or generate new keys as necessary. During this negotiation, the Quick Mode IKE selects a common protection suite for use with the IP traffic to which this rule applies. Monitoring Quick Mode SAs can provide information about which peers are currently connected to the computer, and the information they show includes:
WHEN TO USE IPSEC
IPSEC MODES

SETTINGS FOR CONNECTION SECURITY RULES
Requirements Page
Authentication method
CONFIGURING IPSEC
Using a GPO
Computer ConfigurationPoliciesWindows SettingsSecurity SettingsIP Security Policies on Active Directory (Domain) node. Although you can use GPOs to assign different policies to different computer groups, there is a single repository for all IPsec policies. There are three predefined IPsec policies, but none of them are assigned. All GPOs display all of the defined IPsec rules, and within the GPO, you assign the IPsec rule that you want the GPO to apply. Each GPO can assign IPsec policies independently of other GPOs. However, you can assign only one IPsec policy within a single GPO. Furthermore, clients can have only one IPsec policy applied to them at a time. The three predefined policies are listed here:
Using Firewall Rules
Using Windows PowerShell to Administer Windows Firewall
Set-NetFirewallProfile -Profile Domain,Public,Private -Enabled True
New-NetFirewallRule -DisplayName "Allow Inbound Telnet" -Direction Inbound -Program %SystemRoot%System32 lntsvr.exe -RemoteAddress LocalSubnet -Action Allow
Set-NetFirewallRule –DisplayName "Allow Web 80" -RemoteAddress 192.168.0.2
Remove-NetFirewallRule –DisplayName "Allow Web 80"
MONITORING IPSEC
Main Mode
Quick Mode
Protecting Administrative Access
In many attack scenarios, administrators are some of the most wanted targets because they have access to the Enterprise Admins and Domain Admins accounts. Attackers might try to obtain access to an administrator's username, password, or even workstation or laptop. Therefore, administrators must be acutely aware that they have one of the most important roles in an organization's security. By learning about and executing some of the following technologies, they can strengthen even more the security of their credentials.
Privileged Access Workstations
One way to mitigate the risk of an attack on an administrator's credentials is to use a Privileged Access Workstation (PAW)—or secure administrative host—that represents a computer that is used only for performing administrative tasks.
PAWs are configured with following options:
- Only authorized users can sign in to the PAW.
- Device Guard and AppLocker policies should be configured to allow only authorized applications to run on PAW.
- Credential Guard should be configured to protect the credentials.
- BitLocker should be configured to protect the boot environment and the hard disk data.
- Configure PAW to control access by using a firewall.
You can also configure a PAW as a jump server that represents a PAW that can be accessed remotely by using Remote Desktop protocol. If not configured securely, jump servers can be compromised if they are accessed by a compromised computer.
SECURING DOMAIN CONTROLLERS
Domain controllers are also favorite targets for attacks. If an attacker gains access to domain controllers, the attacker will have access to all of the domain objects. The steps to secure your domain controllers include the following:
- Regularly update domain controllers with the most recent operating system updates.
- Deploy domain controllers on a Server Core installation in order to reduce the domain controller's attack surface area.
- Configure Windows Firewall with Advanced Security to protect the ports on domain controllers from unauthorized access.
- To minimize the chance that unauthorized executable files and scripts can run on the computer, control the execution of executables and scripts on the domain controller with AppLocker and Device Guard.
- Deploy domain controllers on hardware that includes a Trusted Platform Module (TPM) chip, and configure all volumes with BitLocker Drive Encryption.
- Consider configuring domain controllers in branch offices as read-only domain controllers (RODC). Be aware that some applications, such as Exchange Server, do not support RODC.
- The virtualized domain controllers should run either on separate virtualization hosts or as a shielded virtual machine on a guarded fabric.
- Configure Remote Desktop Protocol (RDP) through a Group Policy assigned to the domain controller's OU to limit RDP connections so that they can occur only on PAWs.
Local Administrator
Each computer has a Local Administrator account. The Local Administrator account allows IT operations personnel to sign in to the computer if they cannot establish connectivity to the domain, or if the computer is not a domain member. Managing passwords for the Local Administrator account for every computer in the organization can be challenging, especially if the number of computers is very large.
Local Administrator Password Solutions (LAPS) provides organizations with a central repository for Local Administrator passwords for domain-member machines with the following functionalities:
- Unique Local Administrator passwords are on each computer managed with LAPS.
- It randomizes and changes Local Administrator passwords regularly.
- It stores Local Administrator passwords and secrets securely within AD DS.
- It configures permissions control access to passwords and secrets.
- LAPS retrieves and transmits encrypted passwords to the client.
LAPS is downloaded from Microsoft Download Center and is configured through a Group Policy client-side extension. LAPS requires an update to the Active Directory schema performed by running the Update-AdmPwdADSchema cmdlet, which is included in a Windows PowerShell module that becomes available when you install LAPS on a computer. Security permission for update the schema require membership of Schema Admins group and this cmdlet should be executed on a computer that is in the same Active Directory site as the computer that holds the Schema Master role for the forest. LAPS requirements also include .NET Framework 4.0 and Windows PowerShell 2.0 or newer to be installed.
The LAPS process runs every time Group Policy refreshes, and it includes the following steps:
- LAPS determines if the password of the Local Administrator account has expired.
- If the password has expired, LAPS performs the following steps:
- Changes the Local Administrator password to a new random value based on the configured parameters for Local Administrator passwords.
- Transmits the new password to AD DS, which stores it in a special confidential attribute associated with the computer account of the computer that has had its Local Administrator Account password updated.
- Transmits the new password-expiration date to AD DS, where it is stored in a special confidential attribute associated with the computer account of the computer that has had its Local Administrator Account password updated.
Authorized users can read passwords from AD DS, and an authorized user can initiate a Local Administrator password change on a specific computer.
Several steps need to be taken to configure and manage passwords by using LAPS. The first set of steps involves configuring AD DS. It starts by moving the computer accounts of computers that want to use LAPS to manage passwords to an OU. After the computer accounts are moved into an OU, the Set-AdmPwdComputerSelfPermission cmdlet is used to assign computers in an OU the ability to update the password of their Local Administrator account when it expires.
For example, to allow computers in the London OU to update their passwords by using LAPS when they expire, the following command should be used:
Set-AdmPwdComputerSelfPermission -Identity "London"
By default, accounts that are members of the Domain Admins and Enterprise Admins groups can access and view stored passwords. You can use the Set-AdmPwdReadPasswordPermission cmdlet to allow customized groups to access to Local Administrator password.
For example, to assign the LondonAdmins group the ability to view the Local Administrator password on computers in the London OU, the following command should be used:
Set-AdmPwdReadPasswordPermission -Identity "London" -AllowedPrincipals "LondonAdmins"
The next step is to install the GPO templates into AD DS. After the templates are installed, the following policies can be configured:
- Enable Local Admin Password Management. This policy will enable LAPS and will allow you to manage the Local Administrator Account password centrally.
- Password Settings. This policy allows configuration of the complexity, length, and maximum age of the Local Administrator password. The default is to utilize uppercase and lowercase letters, numbers, and special characters. The default password length is 14 characters, and the default password maximum age is 30 days.
- Do Not Allow Password Expiration Time Longer Than Required. When enabled, the password updates according to the Domain Password Expiration policy.
- Name of Administrator Account to Manage. Use this policy to identify custom Local Administrator accounts.
You can view the passwords assigned to a computer by using one of the following methods:
- View the properties of the computer account with Advanced Features enabled in Active Directory Users and Computers by examining the
ms-Mcs-AdmPwdattribute. - Use the LAPS user interface (UI) app.
- Use the
Get-AdmPwdPasswordWindows PowerShell cmdlet, which is available through theAdmPwd.PSmodule when you install LAPS.
Just Enough Administration
In previous sections, we mentioned that one of the best practices for users is to have enough security permissions to perform the job and nothing more. Just Enough Administration (JEA) is a technology that helps administrators achieve this security best practice by granularly defining what actions are allowed on specific resources by running Windows PowerShell commands. Once JEA is configured, an authorized user can connect to a specially defined endpoint and use a specific set of Windows PowerShell cmdlets, parameters, and parameter values. For example, a JEA endpoint can be configured to allow an authorized user to restart a specific service, such as the IIS, but not have permissions to restart any other service or perform other administrative actions.
JEA performs tasks by using a virtual account rather than the user's account. The benefits of this method include:
- The user's credentials are not saved on the remote system, so the user's credentials cannot be compromised.
- The user account that is used to connect to the endpoint does not need to be with administrative permissions. It only needs permission to be allowed remote connections.
- The virtual account is limited to the system on which it is hosted. The virtual account cannot be used to connect to remote systems. Attackers cannot use a compromised virtual account to access other protected servers.
- The virtual account has Local Administrator privileges but is limited to performing only the activities defined by JEA. The virtual account can be configured with membership of a group other than the Local Administrators group to further reduce privileges.
JEA is supported on Windows Server 2016 and Windows 10 version 1511 or later operating systems. If Windows Management Framework 5.0 is installed, then JEA functions on minimum Windows 7 and Windows Server 2008 R2 operating systems. JEA also needs PowerShell, which is enabled on each computer running minimum Windows Server 2012. Optionally, you might enable PowerShell module and script blocking as we described earlier in this chapter.
Role-Capability Files
JEA needs role-capability files that enable specifying actions that can be performed in a Windows PowerShell session. Only actions that are listed in this file will be allowed.
You can create a role-capability file by using the New-RoleCapabilityFile cmdlet, which creates a file with a .psrc extension. Once created, the role-capability file can be edited as needed.
Role-capability files support the components shown in Table 8.3.
TABLE 8.3: Role Capabilities
| CAPABILITY | DESCRIPTION |
ModulesToImport |
Allows custom modules to import |
VisibleAliases |
Lists aliases that will be available in the JEA session |
VisibleCmdlets |
Lists Windows PowerShell cmdlets that will be available in the session |
VisibleFunctions |
Lists which Windows PowerShell functions will be available in the session |
VisibleExternalCommands |
Allows users connected to the session to run external commands |
VisibleProviders |
Lists Windows PowerShell providers that are visible to the session |
ScriptsToProcess |
Configures Windows PowerShell scripts to run automatically when the session is started |
AliasDefinitions |
Defines Windows PowerShell aliases for the JEA session |
FunctionDefinitions |
Defines Windows PowerShell functions for the JEA session |
VariableDefinitions |
Defines Windows PowerShell variables for the JEA session |
EnvironmentVariables |
Specifies environment variables for the JEA session |
TypesToProcess |
Configures Windows PowerShell–type files to load for the JEA session |
FormatsToProcess |
Configures Windows PowerShell formats to load for the JEA session |
AssembliesToLoad |
Specifies which assemblies to load for the JEA session |
Let's see some examples. For example, to allow the Restart-Service cmdlet to be used only for DNS service, we should provide the following entry in the role-capability file:
VisibleCmdlets = @{ Name = 'Restart-Service'; Parameters = @{ Name='Name'; ValidateSet = 'DNS'}}
Session-Configuration Files
When deploying JEA, you should register and configure an endpoint. When configuring an endpoint, you should define who will have access to the JEA endpoint, which roles will be assigned to the object accessing the endpoint, and the name of the endpoint.
To create a new session-configuration file, you should use the New-PSSessionConfigurationFile cmdlet, which will create a file with the .pssc file extension.
Session configuration files have the components shown in Table 8.4.
TABLE 8.4: Session Configuration Files Components
| FIELD | EXPLANATION |
SessionType |
Configuration of the session's default settings. If the setting is to RestrictedRemoteServer, it can use the Get-Command,Select-Object, Get-Help,Exit-PSSession, Clear-Host, andRemoteSigned.Example: SessionType = 'RestrictedRemoteServer' |
RoleDefinitions |
Assigns role capabilities to specific security groups. Example: RoleDefinitions =@{'CONTOSODNSOps' = @{RoleCapabilities='DNSOps'}} |
RunAsVirtualAccount |
Configures JEA to use a privileged virtual account created just for the JEA session. This virtual account has local administrator's privileges on member servers and is a member of the Domain Admins group on a domain controller. |
TranscriptDirectory |
Specifies the location where JEA activity transcripts are stored. |
RunAsVirtualAccountGroups |
If you do not want the virtual account to be a member of the Local Administrators group or Domain Admins group, you can use this field instead to specify the groups in which the virtual account is a member. |
One server can have multiple JEA endpoints, and each JEA endpoint can be used for a different administrative task. For example, you can use one endpoint to perform IIS administrative tasks and a different endpoint to perform DNS administrative tasks. Users do not have to have administrative permissions to connect to an endpoint. Once connected, users are assigned administrative permissions assigned to the virtual account configured in the session-configuration file.
JEA endpoints are created by using the Register-PSSessionConfiguration cmdlet. When using this cmdlet, you specify an endpoint name and a session-configuration file hosted on the local machine.
For example, to create the endpoint named IISManagement by using the IISManagement.pssc session-configuration file, run the following command:
Register-PSSessionConfiguration -Name 'IISManagement' -Path IISManagement.pssc
Connecting to a JEA endpoint is done by using the Enter-PSsession cmdlet from a Windows PowerShell session. For example, in order to connect to JEA endpoint named IISManagement on computer NY-DC1, using credentials from user Paul in the Contoso domain, run the following command:
Enter-PSSession -ComputerName NY-DC1 -ConfigurationName IISManagement -Credential ContosoPaul
After completing the administrative tasks, you can use Exit-PSSession cmdlet to end the interactive session.
The first step of deploying JEA is to test the configuration. If the test is successful, the configuration can be deployed to other computers by copying the role-capability files and session-configuration files to the target computer, and creating JEA endpoints on that computer. You can use JEA Desired State Configuration (DSC) that allows central deployment of JEA to computers within the organization that have their configuration maintained by DSC. Furthermore, by using DSC, users and role mapping can be centrally managed.
Protecting Active Directory Infrastructure
Active Directory is a foundation of every Windows-based server infrastructure. It stores user accounts, computer accounts, and groups. Many applications (such as Exchange, SharePoint, Skype for Business, and SQL Server) use Active Directory for storing information and for authentication and authorization purposes. An attack on Active Directory is an attack against all the applications that depend on Active Directory. Protecting Active Directory is one of the most important tasks for security administrators.
Enhanced Security Administrative Environment
Enhanced Security Administrative Environment (ESAE) forests represent a specific architectural approach to designing Active Directory infrastructure. In ESAE, a dedicated administrative Active Directory forest hosts privileged access workstations, security groups, and accounts with administrative permissions, while resources and non-admin user accounts are located in a separate production forest. The ESAE forest is configured with a one-way trust relationship from the production forest to the administrative forest, which means that administrative forest accounts will have permissions to access the production forest resources.
The ESAE forest should be a single-domain Active Directory forest in order to avoid complexity. Furthermore, ESAE forest hosts only a small number of accounts to which strict security policies must be applied. No applications are deployed in the ESAE forest, because it is used only for hosting admin accounts.
The ESAE forest servers need to be configured in the following ways:
- Installation media should be validated.
- Servers should run the most recent version of the Windows Server operating system.
- Servers should be updated automatically with security updates.
- Security compliance manager baselines should be used as the starting point for server configuration.
- Servers should be configured with secure boot, BitLocker volume encryption, Credential Guard, and Device Guide.
- Servers should be configured to block USB storage.
- Servers should be on isolated networks. Inbound and outbound Internet connections should be blocked.
ESAE forests have the following benefits:
- Locked-Down Accounts Standard nonprivileged user accounts in the ESAE forest can be configured as highly privileged in the production forest. For example, a standard user account in the ESAE forest is made a member of the Domain Admins group in a domain in the production forest. It is possible to lock down the standard user account hosted in the ESAE forest so that it cannot sign on to hosts in the ESAE forest and can only be used to sign on to hosts in the production forest. This design is more secure if an account is compromised while it is used in the production forest, because the attacker cannot use that account to perform administrative tasks in the ESAE forest.
- Selective Authentication ESAE forest design allows organizations to leverage the trust relationship's selective authentication feature. For example, sign-ins from the ESAE forest will be restricted to specific hosts in the production forest. This is another method that helps limit credential exposure. For example, you can limit credential exposure when you configure selective authentication so that privileged accounts in the production forest can be used only on privileged access workstations or jump servers.
Privileged Access Management
Privileged Access Management (PAM) is a technology that grants administrative permission to admin users for a limited amount of time instead of permanently. It uses temporary membership of a security group that has been delegated privileges, instead of permanent membership of a security group. PAM increases security because rights are assigned temporarily instead of permanently, and PAM can be configured so that privileges are assigned when requested or assigned only after approval has been requested and granted.
When implemented, PAM can provide the following security improvements:
- All accounts that need admin privileges are standard user accounts. Privileges are granted only after being requested and approved. If a user account used by an admin team becomes compromised, the attacker gains no additional rights beyond those assigned to a standard user account.
- All requests for privileges are logged.
- Privileges are temporary. This makes it much more difficult for members of the IT Operations team to carry out unauthorized activities.
Once privileges are granted, a user must establish a new session by opening a new Windows PowerShell session or by signing out and signing in again to leverage the new group memberships configured for their account.
In order to deploy a PAM solution, you will also need to deploy Microsoft Identity Manager (MIM) 2016. MIM functionality includes managing users, credentials, policies, and access within an organization, including hybrid and cross forests scenarios.
The architecture of deploying PAM in an organization is shown on Figure 8.11.

FIGURE 8.11 Privileged Access Management (PAM) architecture
A PAM deployment consists of the following components:
- Administrative Forest. An administrative, or bastion, forest is configured as an ESAE management forest.
- Microsoft Identity Manager (MIM) 2016. A product that is used to manage accounts and group membership from so called bastion forest. A bastion forest is a separate forest contains the accounts that administer the production forest.
- Production Forest. This is the forest that hosts the organization resources.
- PAM Client. A client software that interacts with the MIM PAM functionality and is used to request access to a PAM role.
- PAM Component Service. Manages the life cycle of the privileged accounts.
- PAM Monitoring Service. Monitors the production forest and duplicates changes to the administrative forest or the MIM service.
- PAM REST API. Can be used to enable a custom client to interact with PAM.
- MIM Service. The MIM server manages the privileged account management process.
- MIM Portal. The MIM Portal is a SharePoint site. It provides management and configuration functionality.
- MIM Service Database. The MIM service database can be hosted on SQL Server 2012 or SQL Server 2014. It holds configuration and identity data that the MIM Service uses.
PAM uses shadow accounts and shadow groups that represent a copy of the account and groups that exists in the production forest. When a user is added to a PAM role, MIM adds the user's shadow account in the administrative forest to the shadow group in the administrative forest. When the user logs in by using this account, their Kerberos token will then include a security identifier that matches the security identifier of the original group from the production forest.
A shadow user is created by using the New-PAMUser cmdlet, where a trust relationship must exist between the production forest and bastion forest. You must also specify the source domain and source account name. For example, to create a new shadow user based on the George account in the Contoso.com domain, you should use the following command:
New-PAMUser –SourceDomain Contoso.com –SourceAccountName George
You can configure the following PAM role settings by using the MIM portal web interface:
- Display Name The name of the PAM role.
- PAM Privileges A list of security groups to which a user that is granted access to the role is temporarily added.
- PAM Role TTL(sec) This is the maximum amount of time that the member can be granted this role. The default is 3,600 seconds (1 hour).
- MFA Enabled MIM's PAM functionality can be integrated with Azure Multi-Factor Authentication. MFA requires two forms of authentication. This second form of authentication can include a text message or a telephone call.
- Approval Required You can configure PAM role membership to be granted only if a PAM administrator approves the request.
- Availability Window Enabled When configured, the PAM role can be used only during certain hours.
- Description Provides a description of the PAM role.
Finally, by combining PAM with JEA, you maximize the level of security by limiting who can perform administrative tasks, you granularly control what tasks are allowed to be performed, you secure privileged user accounts by isolating them in the separate forest, and you limit the time duration where administrative privileges are assigned. However, this infrastructure adds complexity for managing and maintaining such a solution. Therefore, you should carefully analyze your organization's business requirements and decide what security scenario and solution you will deploy.
Malware Protection
Malicious software, or malware, has been around since personal computers came into existence. Unfortunately, malware keeps being developed, and attackers keep finding new ways to harm operating systems. Every now and then we hear about new viruses spreading across the Internet and ransomware attacks that encrypt users' and organizations' data.
Windows Server 2016 includes Windows Defender that helps protect a user's computer from various types of malware. Windows Defender uses anti-malware definitions to determine if software that it detects is malicious, and it alerts the user about potential risks. Since there are new threats on the Internet every day, Windows Defender automatically checks for new definitions and installs them as they are released. When Windows Defender detects potential malware activity, it raises a different level of alert, depending on the type of the threat. Windows Defender also sends an alert if any software attempts to change important Windows operating system settings. To help prevent malware and other unwanted software from running on a computer, turn on Windows Defender real-time protection.
Windows Defender has three scanning options, which are listed in Table 8.5.
TABLE 8.5: Windows Defender Scan Options
| SCAN OPTION | DESCRIPTION |
| Quick | Checks the areas such as system folders and Registry, where malware will most probably attack |
| Full | Checks all files on your hard disk and all running programs |
| Custom | Enables users to scan specific drives and folders |
When Windows Defender detects a potentially harmful file, it moves the file to a quarantine area; it does not allow it to run nor allow other processes to access it. Users can examine the quarantined files and decide if they should be removed or restored by using the Remove or Restore Quarantined Items option. Additionally, the user can choose to allow items by maintaining the Allowed list.
Software Restriction Policies
Software Restriction Policies (SRPs) were introduced in the Windows Server 2003 operating system, and they provide administrators with the capability to specify which applications can run on client computers. An SRP contains rules and security levels and is configured through Group Policy.
Rules govern how SRP answers to an application that is being run or installed and are based on one of the following criteria:
- Hash. A cryptographic fingerprint of the file.
- Certificate. A software publisher certificate that signs a file digitally.
- Path. The local or Universal Naming Convention (UNC) path to where the file is stored.
- Zone. The Internet zone.
Each applied SRP can be configured with a security level that determines how an operating system responds to different types of applications. The three available security levels are listed here:
- Disallowed. The software that the rule identifies will not run, regardless of the user's access rights.
- Basic User. The software that the rule identifies as a standard user is allowed to run.
- Unrestricted. The software that the rule identifies is allowed to run unrestricted by the SRP.
SRPs can be configured at the following location in the Group Policy Management Editor:Computer ConfigurationPoliciesWindows SettingsSecurity SettingsSoftware Restriction Policies

FIGURE 8.12 Configuring Software Restriction Policies in the Group Policy Management Editor
AppLocker
AppLocker was introduced with the Windows Server 2008 R2 operating system, and it controls which applications users can run. AppLocker is applied through Group Policy to computer objects within an organizational unit (OU). Individual AppLocker rules can be applied to individual Active Directory Domain Services (AD DS) users or groups. AppLocker can be used to monitor or audit the application of rules. By using the AppLocker technology, administrators can control how users can access and use files such as .exe files, scripts, Windows Installer files (.msi and .msp files), dynamic-link libraries (DLLs), and packaged applications, such as Windows Store apps.
AppLocker can be used to restrict software that is not allowed in a company, is not supported or used in the company anymore, or is limited for usage only in specific departments.
AppLocker settings are configured at the following location in the Group Policy Management Editor: Computer ConfigurationPoliciesWindows SettingsSecurity SettingsApplication Control Policies, as shown in Figure 8.13.

FIGURE 8.13 Configuring AppLocker in the Group Policy Management Editor
AppLocker uses the Application Identity service to verify a file's attributes. You should configure this service to start automatically on each computer on which you are applying AppLocker
Rules in AppLocker are defined based on the file attributes that it derives from the file's digital signature. File attributes in the digital signature include the following:
- Publisher name
- Product name
- File name
- File version
Allow and Deny are rule actions that permit or forbid the execution of applications based on an application list that is configured. If you choose Allow Action, your organization's computers will run only those applications that are specifically allowed. If you choose Deny Action, your organization's computers will run all applications except those that are on a list of denied applications.
An AppLocker policy has two modes of enforcement: Enforce and Audit Only. If you choose Enforce, AppLocker will enforce all rules and audit all events. If you choose Audit Only, AppLocker will only evaluate the rules and it will write events to the AppLocker Log. You can use the Audit Only option to help you evaluate what could happen if AppLocker is configured with the Enforce option, so you can test scenarios before actually enforcing them.
Device Guard
Device Guard is a new feature, introduced in Windows Server 2016, and it is a combination of hardware and software components ensuring that only trusted and authorized applications are allowed to run on a computer. Device Guard uses virtualization-based security to isolate the code integrity service and run it alongside the Windows kernel in a hypervisor-protected container. Administrators can configure what applications can run on the computer where Device Guard is implemented. This is done using a Code Integrity policy to protect the environment. The location of the Code Integrity policy is in the file: C:WindowsSystem32CodeIntegritysipolicy.p7b.
Device Guard includes the following technologies:
- Virtual Secure Mode Virtual Secure Mode is a virtual shell that isolates the Local Security Subsystem Service
LSASS.exeprocess from the operating system. In Windows 10 and Windows Server 2016, the hypervisor is on top of the hardware, and it interacts directly with the hardware to allow sharing of the hardware with virtual guests. - Configurable Code Integrity (CCI) CCI verifies the code that the Windows operating system is executing. It doesn't allow nonauthorized applications to be started.
- Virtual Secure Mode Protected Code Integrity Configurable Code Integrity policies have two components: user mode code integrity (UMCI) and kernel mode code integrity (KMCI). The KMCI offers memory management improvements over the previous Windows versions, and it allows organizations to set their own KMCI and UMCI settings. Configurable Code Integrity should be running along with other security solutions, such as antivirus software or AppLocker.
- Platform and Unified Extensible Firmware Interface (UEFI) Secure Boot Secure Boot was introduced in Windows 8 and ensures that boot loader code and firmware are protected from tampering by malicious code. This feature requires UEFI booting and Secure Boot option enabled in the UEFI.
To enable Virtual Secure Mode in Windows 10 or Windows Server 2016, the following steps must be performed:
To ensure that only trusted publisher-signed software is on the server, the code-integrity file should be created on a server with a preconfigured setting that runs only software that is needed. You can create the code integrity file by running the The command scans through user mode and kernel mode files, and then finds all the signers and puts them into the Code Integrity policy XML file that is created using the Once the After Device Guard is enabled, it will start working in audit mode. Once the administrator reviews the audit log and is confident that the Code Integrity policy is correct, Device Guard can be switched from audit mode to enforcement mode on computers with Windows 10 and Windows Server 2016 operating systems. The The Configurable Code Integrity policy includes different rule options. To examine the various Rule Options for Device Guard, you can use the following command: The previous command will display following options:
To change the Device Guard from audit mode to enforcement mode, you can use the A complete scenario would look like this: After you restart the machine, the Code Integrity policy will be in enforcement mode. If you attempt to execute a file that is not allowed by Device Guard, you will see the message, “The system cannot execute the specified program.” Device Guard supports working with different types of applications, including signed and those that do not have any digital signatures. Two types of digital signatures are supported, as follows:
CONFIGURING DEVICE GUARD
Enable Secure Boot and UEFI in BIOS.Enable Trusted Platform Module (TPM).Install Microsoft Hyper-V hypervisor. The Hyper-V services and management tools are not needed.Enable Isolated User Mode.Enable the Virtual Secure Mode policy named Enabled Credential Guard. You can locate this setting in the Computer ConfigurationAdministrative TemplatesSystemDevice GuardTurn on Virtualization Based Security policy.Configure the Boot Configuration Data (BCD) to start Virtual Secure Mode by running the following command as an administrator and then restarting the machine:bcdedit /set vsmlaunchtype autoNew-CIPolicy cmdlet as shown here:
New-CIPolicy -Level Publisher -FilePath C:CIaudit-publisher.xml -UserPEs -auditNew-CIPolicy cmdlet. Once the XML file is created, it needs to be converted into a binary file by running the following command:
ConvertFrom-CIPolicy .software.xml .software.bin.bin file is created, it needs to be copied to the CodeIntegrity folder under Windows System32 by using the graphical interface or by running following command and then restarting the computer:
Copy-Item .software.bin C:WindowsSystem32CodeIntegritysipolicy.p7bNew-CIPolicy cmdlet allows you to build policies based on your audit log by using the -Audit parameter. Furthermore, you can capture policies from several servers and merge them by using the Merge-CIPolicy cmdlet. For example, you can merge the policy that you created from your audit logs and with your initial policy. The ConvertFrom-CIPolicy cmdlet converts the policy in XML into a binary format. After the policy is in a binary format, you can copy it to the CodeIntegrity folder, as shown in the following example and then restart the computer:
ConvertFrom-CIPolicy C:CIMergedPolicy.xml c:CIsoftware.bincp C:CIsoftware.bin c:WindowsSystem32CodeIntegritySIPolicy.p7b
Set-Ruleoption - Help
Set-RuleOption cmdlet and choose the appropriate option from the previous list, as shown in following example:
Set-RuleOption -Option 5 -FilePath [file location] -Delete
Set-RuleOption -FilePath C:ci
ewci.xml -Option 3 -DeleteConvertFrom-CIPolicy .
ewci.xml .
ewci.binCopy-Item . newci.bin C:WindowsSystem32CodeIntegritysipolicy.p7b.
[System32]CatRoot folder. They are required for driver packages or an install-time check. You can manage and deploy catalog signing independently of the package binaries, and they preserve any existing signatures.
Hardening Operating Systems Security with Additional Microsoft Products
In our everyday experience, we usually meet tools that have additional features compared to standard operating system technologies. Some of those tools are also developed by Microsoft and some are developed by third-party vendors. In this section, we will learn about Advanced Threat Analytics, a security tool developed by Microsoft that can help administrators monitor their infrastructure for potential security threats.
Advanced Threat Analytics
Advanced Threat Analytics (ATA) is a separate product by Microsoft that you can install on Windows Server, and it has an intrusion detection system (IDS) functionality. IDS systems detect attacks and alert security admins. Different vendors provide security products known as intrusion prevention systems (IPS), which not only detect but also prevent attacks.
ATA is a network-based intrusion-detection system (NIDS) that uses both signature-based and anomaly-based detection. ATA helps identify known malicious attacks and techniques, security issues, and risks by using a signature-based method. In addition, the anomaly-based detection analyzes, learns, and identifies normal and abnormal entity (user, devices, and resources) behaviors. ATA is an on-premises solution that monitors Active Directory activity. It examines Active Directory Domain Services (AD DS) traffic to understand authentication patterns. ATA is a behavior analytics tool, which means that a malicious hacker can no longer hide behind a valid user account. Attackers do not know the normal user behavior of the account that is captured in the baseline, so even if they try to make some changes slowly, ATA would detect a change in the pattern for that user.
After ATA is installed, the system is in the analyze phase; this is a simple, nonintrusive port-mirroring configuration that copies all Active Directory–related traffic, while remaining unseen for attackers. It studies all AD DS traffic and collects relevant events from SIEM and other sources.
After the analysis phase comes the learning phase. In this phase, ATA automatically starts learning and outlining object behavior. It identifies normal behavior for objects and learns nonstop to update the activities of users, devices, and resources.
The third phase is the detection phase; it arises automatically with no user involvement. It looks for abnormal behavior and identifies suspicious activities. It raises red flags only if abnormal activities are contextually aggregated.
The last phase is the alert phase. In this phase, ATA reports all suspicious activities on a simple, functional, and actionable timeline. It identifies who, what, when, and how. For each suspicious activity, ATA provides recommendations for investigation and remediation.
Deploying ATA is nonintrusive and does not affect production systems. ATA listens and gives reports based on the traffic it monitors, so there is no effect on the network.
For more information on Advanced Threat Analytics, visit the following link: https://docs.microsoft.com/en-us/advanced-threat-analytics/what-is-ata.
Evidence of the Attack
Breach detection consists of finding evidence on a system that attackers have compromised it. In most cases, attackers leave evidence on a compromised computer. You need to be educated and skilled in depth about how operating systems, applications, and network infrastructures work; and you need to use different security products, such as Intrusion Detection Systems (IDS). For example, Microsoft Advanced Threat Analytics has automatic processes that look for this evidence. Nevertheless, if you know where to look, you might find proof of breaches when they take place. Typically, you suspect that a breach has occurred when you notice something wrong with a system. For example, you might notice that a server is uploading large amounts of data outside of office hours, or that an abnormal amount of processor resources or memory is being used.
Event logs are used to record activities that occur on a computer. When auditing is configured properly, it records nearly all events that have any security significance. This makes event logs your first checking point when it comes to determining if a computer was the target of a security breach. IDS also uses event logs to identify malicious activities. Event logs should be moved off a computer on regular basis, because a sophisticated attacker will clear the event logs in order to hide an attack. Windows Server has an option to forward the event log; this is a built-in technology that enables you to configure automatic forwarding and storing event logs at another location. Moreover, administrators should create archives of event logs so that if they identify an attack, investigators can look at the event logs prior to the attack's detection to find out how long attackers have been compromising the system. Administrators also should certify that event logs are configured in a fashion that events are not overwritten when the log becomes full.
Attackers frequently compromise user, computer, and service accounts in the privilege escalation phase of an attack. In some cases, you can discover security breaches by identifying changes in accounts or changes in membership of privileged groups, such as the Domain Admins group.
Your organization might have suffered a security breach if you find proof that new accounts have suddenly appeared. They can be local accounts or accounts existing in Active Directory. Your organization should have a process that controls when an account was created, by whom, and for what reason. New accounts that are created by an attacker are unlikely to have names, which is an indication that the accounts are suspicious. Then again, a well-prepared attacker might use account names in correlation with organizational names that they have learned through social engineering, such as generating an account with the name of a former employee who no longer works for the organization.
An increase in privilege often indicates that an attacker added rights to an account they have already compromised. This usually happens with standard user accounts, as well as service accounts and computer accounts when an attacker is in the privilege escalation phase of an attack. For example, you would be suspicious if you found that a user account associated with the accounting department was a member of the Domain Admins group. Some evidences of security attack might include:
- Changes in membership of privileged groups. Attackers target groups such as the Domain Admins group and the Local Administrators group as these offer simple paths to privilege escalation.
- Creation of new groups. Well-prepared and sophisticated attackers who have compromised an organization's Active Directory environment create groups with special privileges that have similar privileges to built-in privileged groups, such as the Domain Admins and Local Administrators groups.
In order to detect such changes, you should ensure that regular audits of account management activity take place.
Auditing
The Windows Server operating system includes tools for analyzing logs that contain security audit information. Those tools provide auditing functionality that you can use to detect any unusual activity or attempts for unauthorized access.
An audit policy monitors different security-related activities and stores the results of that monitoring in audit logs. Audit policies are managed on a domain level by using the Group Policy Editor under the Computer Configuration node. In Computer Configuration, expand PoliciesWindows SettingsSecurity SettingsLocal Policies and then click Audit Policy, as shown in Figure 8.14.

FIGURE 8.14 Audit Policy settings in the Group Policy Management Editor
Table 8.6 defines each audit policy on a Windows Server 2016 domain controller.
TABLE 8.6: Audit Policy Settings
| AUDIT POLICY SETTING | DESCRIPTION |
| Audit Account Logon Events | Generates an event when a user or computer logs on by using a Windows Server Active Directory account to authenticate. |
| Audit Account Management | Audits events, including the creation, deletion, or modification of user, group, or computer accounts and the resetting of user passwords. |
| Audit Directory Service Access | Audits events when user attempts to access Active Directory objects that are specified in the system access control list (SACL), which can be seen in an Active Directory object's Properties Advanced Security Settings dialog box. |
| Audit Logon Events | Generates an event when a user logs on interactively (locally) to a computer or over the network (remotely). |
| Audit Object Access | Audits access to objects such as files, folders, Registry keys, and printers that have their own SACLs. In addition to enabling this audit policy, you must configure the auditing entries in the objects' SACLs. |
| Audit Policy Change | Audits changes to user-rights assignment policies, audit policies, or trust policies. |
| Audit Privilege Use | Audits the use of a permission or user right. See the explanatory text for this policy in the Group Policy Management Editor. |
| Audit Process Tracking | Audits events such as program activations and process exits. See the explanatory text for this policy in the Group Policy Management Editor. |
| Audit System Events | Audits system restarts, shutdowns, or changes that affect the system or security logs. |
Of course, every organization should customize their auditing policy according to their own security and compliance regulations. Besides auditing logon events, organizations might choose to audit different levels of access on file servers, such as successful or unsuccessful attempts to access specific folders and their content.
To configure file-level auditing, the following three steps must be completed:
- Specify the auditing settings.
- Enable an audit policy.
- Evaluate the events in the security log.
You can audit access to a file or folder by adding auditing entries to its SACL. To do this, the following steps must be performed, as illustrated in Figure 8.15.

FIGURE 8.15 Auditing the security settings on a folder
- Open the Properties dialog box of the file or folder, and then click the Security tab.
- On the Security tab, click Advanced.
- Click Auditing.
- To add an entry, click Edit. The Auditing tab will open in Edit mode.
- Click Add, and then select the user, group, or computer to audit.
- In the Auditing Entry dialog box, select the type of access to audit.
By using one or more of the access levels, you can audit for successes, failures, or both as the specified user, group, or computer attempts to access the resource.
You can audit successes for the following purposes:
- Audit successful accesses to verify security permissions so that you do not allow some users more permissions than they need for specific folders.
- Audit successful accesses to identify access from users who shouldn't have been allowed, which might indicate an unauthorized privilege.
- Audit failed accesses to monitor attempts to access a resource by unauthorized users.
- Audit failed accesses to identify failed attempts to access a file or folder to which a user does require access. This indicates that the permissions are not sufficient to meet a business requirement.
Once you have completed setup in the security descriptor of a file or folder, you should then enable auditing. The appropriate audit policy setting must be defined within Group Policy. The policy setting must be applied to the server that contains the object being audited.
Now you have completed the Group Policy settings and you are ready to monitor and analyze events in the server's security event logs, which are located in the Event Viewer console, under Windows LogsSecurity.
These security auditing improvements can help organizations comply with important business-related and security-related rules by tracking precisely defined activities, such as:
- An administrator modifying settings or data on servers that contain sensitive information
- An employee accessing an important file
- The correct SACL being applied to every file, folder, or Registry key on a computer or file share
Windows Server 2016 also contains advanced audit policy settings in the Group Policy Management Editor located under FIGURE 8.16 Advanced Audit Policies settings in the Group Policy Management Editor These are the settings:
Organizations that have deployed Dynamic Access Control can leverage Expression-based auditing that will bring them additional auditing capabilities, such as auditing files and folders based on their specific classification, user, or action. For example, based on a folder classification, it will be audited automatically for security access. AuditPol (
Analyzing security logs on many different servers can be a challenge to perform. Therefore, you can use event forwarding in Windows Server where a remote computer forwards the events. There are two types of event forwarding: source-initiated and collector-initiated. In order to collect security events from computers, you must verify that After the event source computer is configured, you, as an administrator, should run the following command in Windows PowerShell at an elevated command prompt on the collector computer. You must then add the computer account of the collector computer to the Event Log Readers group on each of the source computers, by using After the configuration is complete, you will be ready to create a new subscription to specify the events you want the event sources to forward to the event collector. To create a new subscription, perform the following steps: FIGURE 8.17 Configuring subscriptions in the Event Viewer
Nowadays IT departments rely on Windows PowerShell to automate administrative tasks. Therefore, you can use Windows PowerShell, which provides cmdlets for security auditing and analyzing audit logs, as described in Table 8.7. TABLE 8.7: Windows PowerShell Cmdlets for Managing Auditing Logs Windows PowerShell allows you to retrieve specific events based on certain criteria. For instance, if you want to retrieve the newest 50 security events, you can run following command: If your security department requests that all administrative commands be logged in a separate log, you can enable logging by using the FIGURE 8.18 Windows PowerShell logging settings in the Group Policy Management EditorADVANCED AUDIT POLICY SETTINGS
Computer ConfigurationPoliciesWindows SettingsSecurity Settings, as shown in Figure 8.16.
AUDITPOL
Auditpol.exe) is a command-line tool can be used to manage advanced audit policy settings with the following functionalities:
auditpol /get /category:* command, you can verify the current auditing settings across all of the advanced auditing categories.EVENT LOG FORWARDING
winrm service is running as an administrator. Use the following command in Windows PowerShell:
winrm qc
wecutil qcAdd-ADGroupMember cmdlet to add a computer to the Event Log Readers Active Directory group.
Add-ADGroupMember –identity 'Event Log Readers' –members AuditSRV$

WINDOWS POWERSHELL CMDLET
DESCRIPTION
Clear-EventLogDeletes all entries from specified event logs on a local or remote computer
Get-EventGets the events in the event queue
New-EventCreates a new event
New-EventLogCreates a new event log and a new event source on a local or remote computer
Remove-EventDeletes events from the event queue
Remove-EventLogDeletes an event log or unregisters an event source
Show-EventLogDisplays the event logs of the local or remote computer in the Event Viewer
Write-EventLogWrites an event to an event log
Limit-EventLogSets the event log properties that limit the size of the event log and the age of its entries
Get-EventLog -Newest 50 -LogName "Security"LogPipelineExecutionDetails property of the PowerShell module and setting it to value $true. You can also enable logging by configuring Group Policy in Administrative Template/Windows Components/Windows PowerShell, as shown in Figure 8.18.
The Bottom Line
- Always start with the organization's business requirements. Security is one of the greatest concerns for any organization. However, different types of organizations require different levels of protection and security strategies. You may notice a huge difference if, for example, you compare the security procedures of a company that sells newspapers to those of a banking institution. In this chapter, you have learned about many different security technologies.
- Master It Do you have a security strategy for your organization? Do you have security procedures in your IT department? Are they documented? What security technologies listed in this chapter will best fit your organization's requirements?
- Solution The security technology you choose will depend on your organization's business requirements. One of the most important things to understand is that security is not proportional with cost and with user-friendly solutions. For example, the more secure the password is, the less user friendly the password is. This is because complex passwords are more difficult for an attacker to guess; however, they are also more difficult to remember. Inability to remember can lead to situations where users write down their passwords on some notes located at their work stations. And speaking about cost, the more sophisticated the security product is that you deploy, the more expensive it is. Organizations must choose the compromise in the middle of complexity, cost, and best security.
- Perform regular security evaluations. Many administrators rely just on the brand name of their security equipment and do not pay attention to how that equipment is installed and configured. They don't update their operating systems or malware software definitions. They can also be quite surprised when a security breach occurs in their organization.
- Master It How do you guard against a security breach?
- Solution We always recommend that you perform regular security evaluations of your security solutions—even utilizing ethical hacking experts to simulate different attacks and generate reports about the level of your organization's infrastructure security vulnerability.
- Automate the processes as much as possible. IT departments are growing every day, and the lack of automation tools, such as Windows PowerShell and Group Policy, can be very challenging for an administrator who must manage and monitor different security solutions deployed in the company.
- Master It How do you get to know automation tools?
- Solution Create a library of useful Windows PowerShell scripts that will help you easily go through the necessary commands. Learn how Windows PowerShell and Group Policy work so you can, for example, configure firewall settings on 100 computers at once. Manually configuring a system in today's world is impractical, if not impossible. By using automation tools, you can shut down multiple attack surface areas or run malware scans simultaneously on different clients and servers whenever some security issue is reported.