
3 The dbatools lab
Now that you’ve installed dbatools, it’s time to connect to a nonproduction SQL Server instance! If you don’t already have SQL Server installed, this chapter will help you set up a lab where you can safely explore dbatools’s features and commands. This will allow you to test examples and labs from this book without worrying about causing any harm along the way.
Setting up a lab will give you the freedom to practice retrieving information as well as test some more complicated scenarios such as setting up log shipping or migrating databases between SQL Server versions.
By the end of this chapter, you’ll have an ideal SQL Server lab, either in Windows or using Docker. The choice is up to you.
3.1 Why is a lab included in this book?
Considering the number of online tutorials available to help you set up a local SQL Server instance, you may be wondering why we included a SQL Server lab in our book. First, a dbatools book without a SQL Server lab would feel incomplete because dbatools is not just about using PowerShell; it’s about using PowerShell with SQL Server.
Setting your expectations for this lab We did not create this tutorial intending for every example in the book to work verbatim. All of our examples were tested against live SQL Server instances, but many parameter values are intended to be theoretical.
In addition, we had our own challenging experiences with some of the tutorials and wanted to save you the headache. When Jess first got started with SQL Server and PowerShell, she wanted to build a lab and found the barriers to entry surprisingly high. She read so many blog posts that walked her through creating multiple Hyper-V VMs, setting up a domain controller, and changing network settings and IP addresses. And she did all of this only to finally log in to a lab that couldn’t even connect to the internet to download dbatools!
This chapter was written with her experience in mind, with the goal of providing an easier onboarding experience for those who are new to SQL Server and PowerShell.
Note Building the perfect lab is hard. We wish we could craft something that was guaranteed to work in 100% of situations for 100% of our readers. In reality, though, it is impossible to promise that every example and lab in this book will work perfectly in your environment. What we can promise is that this chapter will give you the foundation you need to start using dbatools right away.
3.2 Two options for building a dbatools lab environment
In recent years, Microsoft introduced containerized versions of SQL Server, which was a game changer for setting up test environments. We use and recommend containers, but we also continue to use and recommend SQL Server on Windows. Each platform has its own advantages and disadvantages, which we’ll highlight throughout the chapter.
For the first option, we’ll cover how to install two instances of SQL Server Developer edition on Windows using dbatools. That’s right! We’ll be jumping straight into using one of our most powerful commands to easily install SQL Server.
With this option, you can explore all that dbatools has to offer because Windows supports 100% of our commands. This includes commands that work with the registry, such as New-DbaClientAlias and others that use SQL WMI (SQL Server Configuration Manager) like Update-DbaServiceAccount. All of these will work on Windows hosts.
For the second option, we’ll take a look at how we can use containers to quickly create demo environments on our local machine. Containers are really convenient because they can be quickly destroyed and recreated.
The downside is that the SQL Server containers we’ll use are Linux-based. This allows us to use more than 75% of the dbatools commands, because the remaining commands use technology that is available only on Windows at this time. The time-saving trade-off is worth it in many scenarios, especially if we want to test an instance-to-instance migration, but we don’t want to clean the destination instance after every test.
3.3 Option 1: Windows lab
As we mentioned earlier, setting up a lab on a Windows machine will give us the ability to test all of our dbatools commands. For the building blocks of our Windows lab, you need to find a place where you have the ability and permission to install and configure a SQL Server instance and, preferably, two SQL Server instances. This will allow us to practice targeting multiple instances at once as well as migrating databases, logins, and more between the instances.
This could be your local machine, a spare virtual machine floating around at work, or even a virtual machine running in a third-party cloud provider such as Azure. We won’t need too many resources for the lab activities in this book because we are more interested in learning about dbatools rather than running any high-performance workloads. Even a small VM with two cores and 8 GB of RAM will be plenty for our needs.
Note that we will not be installing Hyper-V, Active Directory, or anything complicated—we wanted to keep this lab as straightforward as possible.
3.3.1 Installation media for our lab
Once you’ve found a machine to use, we’re going to download the installation media for both SQL Server 2017 and SQL Server 2019. Because we’re building a lab environment that won’t be used for production workloads, we can use the Developer edition of SQL Server that is free. You can download both versions from Microsoft at sqlps.io/sqlserverdown.
When you have both versions downloaded, make a note of the path because we’ll need that for the installation. If you have downloaded an ISO, you will need to mount it to be able to install SQL Server from it. We are going to install both 2017 and 2019 versions, so we recommend mounting each ISO and then copying the files into a folder, as shown in figure 3.1.

3.3.2 Building the lab
It’s now time to install some SQL Servers for our lab. We have several ways to accomplish this task. We’re all probably most familiar with double-clicking the setup.exe and working through the GUI to install SQL Server. This is an easy way for us to see exactly what we’re configuring and ensure we understand the different options. However, it also means we have to rely on humans to document—or, more likely, remember—to click the same box and enter the same values for each of our installs. Otherwise, we will end up with a whole estate of slightly different SQL Server configurations.
Chapter 13 will give you an in-depth look at how to install and update SQL Server instances using Install-DbaInstance and Update-DbaInstance. But, for this chapter, we’ll use Install-DbaInstance with simplified options as a way to slowly introduce the command. The aim here is to get our lab built so we can start learning; we recommend chapter 13 for when you want to install SQL Server in your production environment.
tip All of the scripts to build our lab are available in our dbatools-lab repository on GitHub, which you can find at sqlps.io/dbatoolslab. It’s a good idea to clone, or copy, that repository from GitHub onto your lab machine. It has everything you need to get your lab up and running in no time.
In listing 3.1, you can see the code we’ll use to get two SQL Server instances installed with a basic configuration. This is from the 01_Install_Lab.ps1 file from the dbatools-lab repository. You’ll need to run the script from an elevated prompt, so that you have the authorization to install SQL Server. You can do this by right-clicking the PowerShell icon and choosing Run as Administrator. The script will also prompt you twice for confirmation to ensure you do want to perform the installations.
Listing 3.1 Installing two SQL Server instances
# SQL Server Installation media extracted into folders on Z: drive
# Run PowerShell as Administrator

# Install SQL Server 2019 as the default instance
PS> Install-DbaInstance -Version 2019 -SqlInstance dbatoolslab
➥ -Feature Engine -Path Z:2019 -AuthenticationMode Mixed

Confirm
Are you sure you want to perform this action?
Performing the operation "Install 2019 from Z:2019setup.exe" on target
➥ "dbatoolslab".
[Y] Yes  [A] Yes to All  [N] No  [L] No to All  [S] Suspend  [?] Help
➥ (default is "Y"): Y

ComputerName : dbatoolslab
InstanceName : MSSQLSERVER
Version      : 15.0
Port         :
Successful   : True
Restarted    : False
Installer    : Z:2019setup.exe
ExitCode     : 0
LogFile      : C:Program FilesMicrosoft SQL Server150Setup
➥ BootstrapLogSummary.txt
Notes        : {}

# Install SQL Server 2017 as a named instance
PS> Install-DbaInstance -Version 2017 -SqlInstance dbatoolslabsql2017
➥ -Feature Engine -Path Z:2017 -AuthenticationMode Mixed

Confirm
Are you sure you want to perform this action?
Performing the operation "Install 2017 from Z:2017setup.exe" on target
➥ "dbatoolslab".
[Y] Yes  [A] Yes to All  [N] No  [L] No to All  [S] Suspend  [?] Help
➥ (default is "Y"): y

ComputerName : dbatoolslab
InstanceName : sql2017
Version      : 14.0
Port         :
Successful   : True
Restarted    : False
Installer    : Z:2017setup.exe
ExitCode     : 0
LogFile      : C:Program FilesMicrosoft SQL Server140Setup
➥ BootstrapLogSummary.txt
Notes        : {}
The output from Install-DbaInstance indicates that our installs were successful, and it also provides the path for the Summary.txt file created by the installation process. If you do have any issues during the install, this log file can be a goldmine of information, explaining what went wrong.
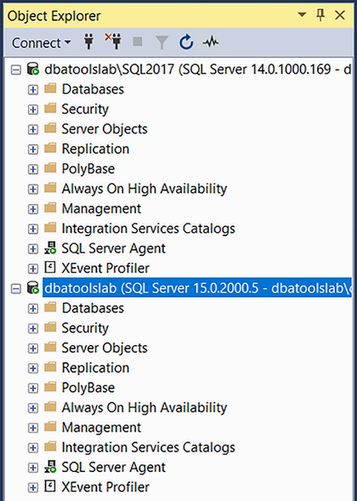
Because our instances were successfully installed, we can connect to them in SQL Server Management Studio (SSMS) using the names dbatoolslab for the 2019 default instance and dbatoolslabsql2017 to connect to our 2017 named instance. This is shown in figure 3.2.
Now your instances are installed and ready to go with dbatools. Connect to your new instance using Connect-DbaInstance as in the next listing.
Listing 3.2 Connecting using Windows authentication
If you are ever curious about the instances installed on a particular machine, you can use Find-DbaInstance as shown in the next code snippet.
Listing 3.3 Using dbatools to find installed SQL Server instances
PS> Find-DbaInstance -ComputerName localhost

ComputerName InstanceName Port  Availability Confidence ScanTypes
------------ ------------ ----  ------------ ---------- ---------
dbatoolslab  SQL2017      60653 Available    High       Default
dbatoolslab  MSSQLSERVER  1433  Available    High       Default
3.3.3 Configuration scripts
Now that our instances are installed, we still have a little bit of configuration and setup to make sure we have everything we need for our lab. For one thing, we don’t currently have any databases to work with—that’s pretty important. We’re also going to want to create some objects to interact with when we’re learning about the many dbatools commands. We’ll create a linked server, some SQL Server logins, and a few SQL Server Agent jobs to get us going.
Install SSMS and other tools with dbatools-lab scripts Along with the installation script, there is also an 00_Install_Prereqs.ps1 script in the dbatools-lab repository on GitHub that will install Chocolatey (a popular package manager for Windows) as well as SSMS, Azure Data Studio (ADS), and a couple of other useful tools.
If you ran the 00_Install_Prereqs.ps1 script from the dbatools-lab repository, you will notice that it downloaded two backup files to the backup folder specified in the config file. We’ll use dbatools to restore those databases to our SQL Server 2017 instance using the code shown in the next listing.
Listing 3.4 Using dbatools to restore two databases
PS> Restore-DbaDatabase -SqlInstance dbatoolslabsql2017
➥ -Path C:dbatoolslabBackupWideWorldImporters-Full.bak
PS> Restore-DbaDatabase -SqlInstance dbatoolslabsql2017
➥ -Path C:dbatoolslabBackupAdventureWorks2017-Full.bak
These databases are samples from Microsoft and will be perfect for our lab environment. dbatools doesn’t just deal in databases, though. Let’s also add a few SQL logins and SQL Server Agent jobs so we can also target those with dbatools in some of the other chapters. Again, all this code is within the dbatools-lab repo, or you can run the following from the next code sample.
Listing 3.5 Using dbatools to create test logins and jobs
# Create some SQL Logins
PS> $pw = (Get-Credential wejustneedthepassword).Password
PS> New-DbaLogin -SqlInstance dbatoolslabsql2017 -Password $pw
➥ -Login WWI_ReadOnly
PS> New-DbaLogin -SqlInstance dbatoolslabsql2017 -Password $pw
➥ -Login WWI_ReadWrite
PS> New-DbaLogin -SqlInstance dbatoolslabsql2017 -Password $pw
➥ -Login WWI_Owner

# Create database users
PS> New-DbaDbUser -SqlInstance dbatoolslabsql2017 -Login WWI_ReadOnly
➥ -Database WideWorldImporters -Confirm:$false
PS> New-DbaDbUser -SqlInstance dbatoolslabsql2017 -Login WWI_ReadWrite
➥ -Database WideWorldImporters -Confirm:$false
PS> New-DbaDbUser -SqlInstance dbatoolslabsql2017 -Login WWI_Owner
➥ -Database WideWorldImporters -Confirm:$false

# Add database role members
PS> Add-DbaDbRoleMember -SqlInstance dbatoolslabsql2017
➥ -Database WideWorldImporters -User WWI_Readonly -Role db_datareader
PS> Add-DbaDbRoleMember -SqlInstance dbatoolslabsql2017
➥ -Database WideWorldImporters -User WWI_ReadWrite -Role db_datawriter
PS> Add-DbaDbRoleMember -SqlInstance dbatoolslabsql2017
➥ -Database WideWorldImporters -User WWI_Owner -Role db_owner

# Create some SQL Server Agent jobs
PS> $job = New-DbaAgentJob -SqlInstance dbatoolslabsql2017
➥ -Job 'dbatools lab job'
➥ -Description 'Creating a test job for our lab'
PS> New-DbaAgentJobStep -SqlInstance dbatoolslabsql2017 -Job $Job.Name
➥ -StepName 'Step 1: Select statement'
➥ -Subsystem TransactSQL -Command 'Select 1'

# add second job
PS> $job = New-DbaAgentJob -SqlInstance dbatoolslabsql2017
➥ -Job 'dbatools lab - where am I'
➥ -Description 'Creating test2 job for our lab'
PS> New-DbaAgentJobStep -SqlInstance dbatoolslabsql2017 -Job $Job.Name
➥ -StepName 'Step 1: Select servername'
➥ -Subsystem TransactSQL -Command 'Select @@ServerName'
Finally, we’ll also change a couple of sp_configure values on our SQL Server 2017 instance. This way our instances don’t match exactly, and it’ll make things a little more interesting when we start to talk about migrations. In listing 3.6, we’re turning on remote admin connections and also slightly adjusting the cost threshold for parallelism. At this point, we’re not recommending these configuration changes; we’re merely setting up our lab to be a little more real-world-like.
Listing 3.6 Using dbatools to configure SQL Server instances
PS> Set-DbaSpConfigure -SqlInstance dbatoolslabsql2017
➥ -Name RemoteDacConnectionsEnabled -Value 1
PS> Set-DbaSpConfigure -SqlInstance dbatoolslabsql2017
➥ -Name CostThresholdForParallelism -Value 10
3.3.4 Windows lab is ready for action
At this point, we are ready to put our Windows lab to the test. We’ve installed a couple of SQL Server instances, restored some databases, and created a few other objects. This will give us the perfect area to work through the rest of the book, and we can be confident that our learning is separate from our real environments.
3.4 Option 2: Quick demo environments using containers
So far, we’ve installed two instances on Windows, which gives us the ability to test 100% of our dbatools commands because they are all supported in this environment. However, doing this can be a bit of an overkill if we just want to quickly test or perhaps demo a few dbatools commands. In this scenario, we can use containers. A lot of us are already using containers for most of our demo work because they provide a lightweight option and the majority of dbatools commands are supported on containers running Linux and SQL Server.
Containers have become a big part of the IT industry in the last few years, and it’s easy to see why when you look at the benefits they provide. We like to think of containers as the next step from virtual machines (VMs). With VMs, the operating system is included within each machine, whereas with containers, the operating system is part of what is virtualized. This means it’s not duplicated in each container, which makes containers quicker to boot and much lighter in terms of size and the resources needed to run.
Containers are perfect for lab environments. You can quickly destroy and recreate them, so you can easily get back to your starting state. This creates a playground where you can experiment and test whatever you need to, and when you’re done, you destroy the container. The next time you want to test something, just fire up a fresh container, and you’re ready to go. You never have to worry about trying to remember what you’ve done so you can unwind and get back to the perfect clean slate.
You need to consider some caveats when using containers, however, especially for databases or situations where you would usually want to persist data. Because containers are intended to be temporary, any data stored within the container is not persisted. However, you can create and attach volumes to a container to enable data to be persisted between containers. This is not a big concern for our lab environment, but something to keep in mind if you start using containers more.
The easiest way to run containers on your local machine is to use Docker Desktop (https://www.docker.com/products/docker-desktop/). To get started, head over to the Docker website and download Docker Desktop for your operating system. Once this downloads, follow the prompts to install, and then you’re ready to run your first container.
3.4.1 Running SQL Server in a container
We could take a couple of routes to get a SQL Server running in a container on our laptop. We could pull down the latest SQL Server 2019 container image from Microsoft, create a container from this image locally, and then connect to the SQL Server instance running on it. This will get you a shiny new SQL Server instance to play with, but it will contain no databases or objects.
This might be just what you need, but for the purpose of this book—and learning dbatools—it would be useful to have some databases and objects to play with. Luckily for us, the dbatools team has created some images based on the official SQL Server 2019 image that include just that. In this section of the chapter, we’ll pull those images down, create some containers from them, and then connect to and explore the SQL Server instances.
The code in listing 3.7 pulls down two images and starts SQL Server containers from them. That’s it! Three lines of code, and you’ll have two SQL Server instances running on your machine, chock-full of objects to use in your testing.
It is worth noting that if you haven’t already got the latest container images available locally on your machine, Docker will pull them down from the remote container repository. However, that image will then be cached locally, so the next time you run the code in the next listing, Docker will get that SQL Server instance up and running even faster.
Listing 3.7 Running SQL Server 2019 containers
PS> # create a shared network
PS> docker network create localnet

PS> # Expose engines and setup shared path for migrations
PS> docker run -p 1433:1433  --volume shared:/shared:z --name mssql1
➥ --hostname mssql1 --network localnet -d dbatools/sqlinstance
PS> docker run -p 14333:1433 --volume shared:/shared:z --name mssql
➥ --hostname mssql2 --network localnet -d dbatools/sqlinstance2
To prove that the instances are up and running, you can use docker ps to list all running containers. You can see in the following code snippet that both mssql1 and mssql2 containers have a status of up X seconds, meaning they are both up and ready for us to connect.
Listing 3.8 Viewing running containers using docker ps
PS> docker ps
CONTAINER ID   IMAGE                   COMMAND
➥ CREATED          STATUS          PORTS                     NAMES
d1f7bc2b6077   dbatools/sqlinstance2   "/bin/sh -c /opt/mss..."
➥ 18 seconds ago   Up 20 seconds   0.0.0.0:14333->1433/tcp   mssql2
fdcaa3cbb934   dbatools/sqlinstance    "/bin/sh -c /opt/mss..."
➥ 25 seconds ago   Up 26 seconds   0.0.0.0:1433->1433/tcp    mssql1
In the results for listing 3.8, you can see the port mapping of 1433:1433 for the mssql1 container. We defined this in our docker run command using the -p parameter. This maps ports on your local machine to ports within the container. If you already have a local install of SQL Server that is listening on port 1433 (the default port for SQL Server instances), you can instead map a different port from your local machine to 1433 on the container. Changing -p 1433:1433 to -p 14333:1433, as we have done for mssql2, means that the container will listen locally on port 14333, but then translate that to 1433 within the container.
When we connect to a SQL Server instance in a container, we can use the dbatools Connect-DbaInstance command, shown in listing 3.9. As with any connection to SQL Server, if you are using the default port of 1433, you don’t have to specify the port in the connection string. If you are using a different port, you should specify the port after localhost, as demonstrated in listing 3.9.
You’ll also notice we are using the -SqlCredential parameter for the connection, which uses the sqladmin account and the password dbatools.IO. This is specified within the image we pulled down. Using Get-Credential generates a pop-up for you to enter the credentials securely. You could also save the credentials to a variable within your PowerShell session and then reuse that going forward. This method is shown in the second example in the next code listing.
Listing 3.9 Connecting to our container using dbatools
# Connect to SQL Server in a container listening on port 1433
PS> Connect-DbaInstance -SqlInstance localhost -SqlCredential sqladmin

# Connect to SQL Server in a container listening on non standard port
PS> $cred = Get-Credential sqladmin
PS> Connect-DbaInstance -SqlInstance localhost:14333 -SqlCredential $cred
We can also connect to our containerized SQL Servers in SQL Server Management Studio, as shown in figure 3.3. You can see two databases are available in the container, and Ola’s maintenance solution is installed, giving us some SQL Server Agent jobs to work with as well.

You now have two SQL Server instances running in containers on your local machine. This is a great place to start: you have a basic environment to test dbatools, but there is a lot more you can do with containers. To find out more, you can check out Chrissy’s article on dbatools and Docker at dbatools.io/docker. Here, you are shown how to set up availability groups using containers, and it also demonstrates instance-to-instance migrations and exports for disaster recovery.
For the really curious, you can see how we built the Docker images that were used in this chapter. Like dbatools, the code is open source and available on GitHub at sqlps.io/docker.
Rob has also written a number of easy-to-use Jupyter Notebooks that will walk you through more complicated examples of using containers and dbatools. These notebooks are all available in the repository under the notebooks folder (see sqlps.io/dbatoolslab).
We also recommend reviewing Rob’s step-by-step blog post at sqlps.io/notebookssetup for getting .NET Notebooks set up and running. You can open the non-.NET notebooks in the repository with ADS.