
11
Command-Line Interface
In the previous chapter, we explored the Mail Templates feature, where we learned how to customize the look and feel of the communication for our website. Now, we’ll look at a hidden gem of the CMS known as the Command-Line Interface (CLI), which allows us to use Joomla through a terminal.
After reading this chapter, you will be able to do the following:
- Understand how to use the Joomla CLI
- Perform basic operations through the CLI
Using Joomla via the CLI
Joomla offers a CLI to perform operations on the website without the need to access it through a web browser. This CLI can be accessed through an SSH session in a terminal opened from your device.
Where is the terminal?
To access Joomla through the CLI, you can use the Terminal app on macOS or Linux. If you are using a Windows machine, you can use the built-in Command Prompt or SSH software such as Solar Putty or Termius. It’s common to refer to the terminal as a shell.
The CLI is less user-friendly than the web interface, but it’s faster and more efficient when you want to perform some maintenance options than via the web as they may require several clicks, especially when you are managing several instances of Joomla in the same web hosting account.
When you activate your hosting account, you should also receive the SSH credentials in the activation email, specifying when SSH access is allowed by the hosting service provider. To access Joomla through its CLI, we need to establish an SSH session. Follow these steps:
- To do so, open the terminal on your device and type the following command:
- Then, press Enter on your keyboard. The system will request your password. Generally, it’s the same as the main FTP password, but this may vary, depending on your hosting service configuration and characteristics.
- At the first login attempt, the system may request you to add the host to the list of known hosts on your machine. If requested, type Yes and press Enter:

Figure 11.1 – Logged into the server
- Once logged in, you can start inserting commands, as shown in Figure 11.1.
- To start using the CLI, you need to navigate to the folder in which the feature resides. After logging in, you will be on the home page of the user in the remote server. From here, you need to reach the public_html folder and its cli subfolder.
- To see the folder structure, type ls and press Enter. The ls command will display a list of files and folders under the current folder. You should see a folder called public_html or a link to it. The public_html folder is the root folder of your web space; this is where all the Joomla files will be located.
Which is your root folder?
Based on the remote server configuration, the name of your root folder may vary. Common names include public_html, www, and htdocs. The root folder may also be a subfolder of other folders; in fact, it’s common to have a path such as /home/<username>/domains/<domainname.tld>/public_html/. Refer to your hosting service’s instructions to find out which is your root folder. If you installed Joomla in a subdomain or a subfolder, when we talk about the root folder, we mean the folder in which your Joomla instance resides.
- To navigate to the public_html folder, just type cd public_html and press Enter.
- If you type ls again and press Enter, you will see the list of files and folders of your Joomla installation, as shown in Figure 11.2:

Figure 11.2 – Contents of the Joomla root folder
- To access the Joomla CLI, you need to move to the cli folder. To do so, use the cd cli command and press Enter.
- You should now be in the right folder. To start the CLI, you need to execute the php joomla.php command and press Enter. You will see something similar to what’s shown in Figure 11.3:
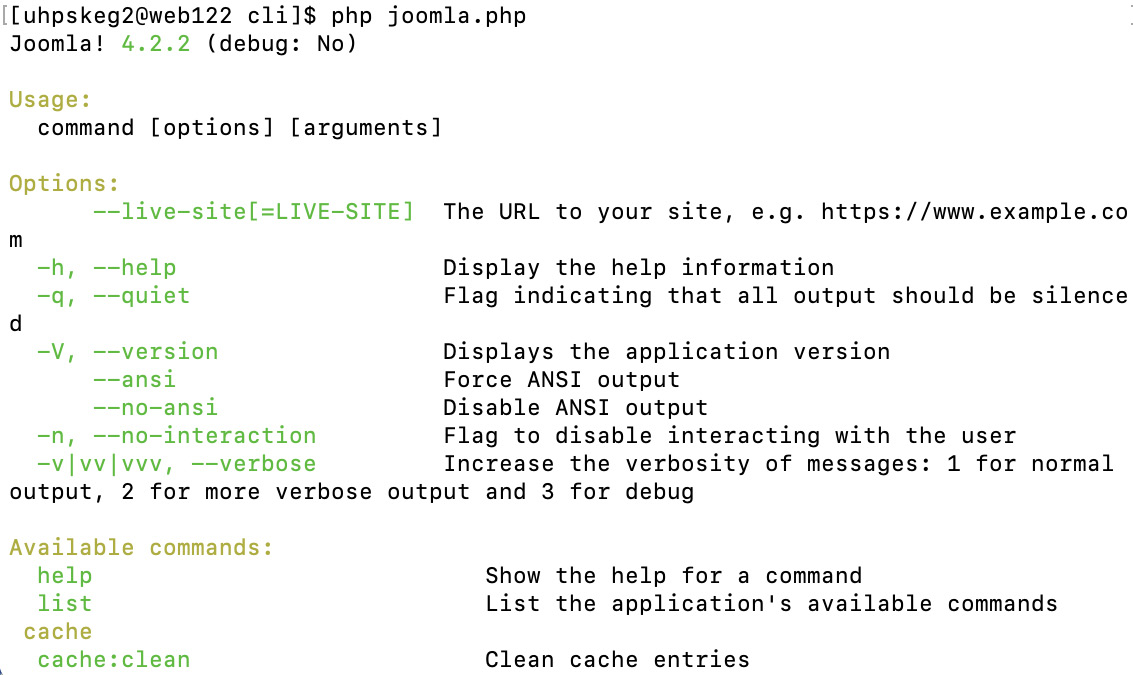
Figure 11.3 – Joomla CLI start screen
Now that you’ve opened the Joomla CLI, it is now ready to accept your commands. As shown in Figure 11.3, the welcome screen shows the available options and commands.
The Joomla CLI allows us to perform a long list of operations, from managing users (creating/removing/updating) to checking for Joomla updates, from managing extensions (installing/removing/updating) to performing a database backup.
Furthermore, through the CLI, you can create custom bash scripts that can be automated with a cron (or via a scheduled task) to perform operations automatically, such as checking for updates, cleaning the cache, and much more.
Now, let’s explore the commands that are available in Joomla 4 through its CLI.
Available commands
The Joomla CLI offers a long list of commands. To explore this list, type php joomla.php list in your Terminal and press Enter.
You will be provided with the list of available commands. This will look as follows:

Table 11.1 – List of CLI commands
The CLI commands listed in Table 11.1 can be launched from the terminal by preceding them with the php joomla.php command, as shown in the following example:
php joomla.php cache:clean
After executing this command, the system will prompt us with the result of the operation, as shown in Figure 11.4:
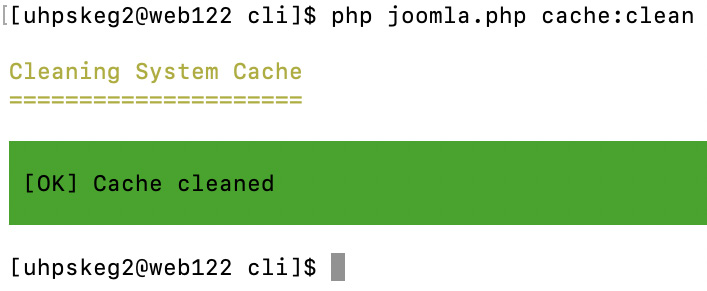
Figure 11.4 – CLI | cache:clean command
In the next few sections, we will explore some real-life scenarios where we will use the CLI to perform operations on users and update our website.
Example – managing users through the CLI
In this example, we will explore the commands that allow us to manage users through the CLI. Follow these steps:
- Let’s create a user using the php joomla.php user:add command:

Figure 11.5 – CLI | Creating a new user
- As shown in Figure 11.5, the system becomes interactive and requests us to input a username. In this case, we will type testuser as the username and press Enter.
- The system will then ask for the full name of the user. Type Test User and press Enter.
- The system will request the user’s email address. Insert their email address and press Enter.
- Next, we’ll be asked for the password of the user. Type their password and press Enter.
- The system will then request us to choose a User Group, as shown in Figure 11.6:

Figure 11.6 – CLI | New user creation
- In our example, we are creating a registered user account without any additional privileges, so we want to add the user to the Registered user group by typing 1 and pressing Enter.
The system will then confirm the creation of the user account, as shown in Figure 11.7:

Figure 11.7 – CLI | User created
With that, the user has been created. Now, let’s look at the list of all user accounts in our installation. To do so, we can use the following command:
php joomla.php user:list
The system will respond with a list of all users, as shown in Figure 11.8.:

Figure 11.8 – CLI | List of all users
You can also delete a user by using the following command:
php joomla.php user:delete
The system will request the username of the user to delete. In our example, we want to delete the user we created previously, so we will type testuser and press Enter. The system will then ask whether we are sure we wish to remove the user. Confirm this by typing Yes and pressing Enter. With that, the user will be deleted.
In the next example, we’ll check for updates and update our website.
Example – updating your site through the CLI
In this example, we will update our website using various CLI commands.
First, we will check for updates by using the php joomla.php core:check-updates command and pressing Enter.
The system will notify us of whether a new version can be installed, as shown in Figure 11.9:

Figure 11.9 – CLI | Checking for updates
To perform the update, we can execute the php joomla.php core:update command and press Enter.
The system will then process the update. This may take several minutes, depending on the size of the update package. Once the update is completed, the system will prompt you with a confirmation message, as shown in Figure 11.10:

Figure 11.10 – CLI | Joomla core updated successfully
As you can see, updating Joomla through the CLI is very easy.
With this example, we have finished exploring Joomla 4’s CLI.
Exercises
It’s time to apply the knowledge you’ve acquired in this chapter by using the CLI to perform some basic operations.
To complete the exercises proposed in this chapter, you will need to have SSH access to your web hosting. If you are not sure of this, check with your hosting service provider.
Exercise 1 – accessing Joomla’s CLI
Access your Joomla installation via SSH and locate the root folder – for example, public_html. Then, navigate to your root folder and then to the cli folder using the cd command. Start the CLI using the php joomla.php command and press Enter.
Check the available commands by using php joomla.php list.
Exercise 2 – Scheduled Tasks via the CLI
Using your Joomla CLI, check whether the website has some Scheduled Tasks configured. Use the php joomla.php scheduler:list command and press Enter.
Disable the two scheduled tasks we created in the exercises in Chapter 9, Planning Operations with Scheduled Tasks (put your website offline, put your website online). To do so, use the php joomla.php scheduler:state command and press Enter.
When requested by the system, disable the state of the task. Repeat this for both tasks we created in Chapter 9.
Summary
In this chapter, we explored the CLI offered by Joomla 4 and its commands. We went through multiple examples, which included managing users, performing updates, and cleaning the website’s cache.
In the next chapter, we will dig into Templates, exploring how they work and how we can customize the appearance of our website.
Further reading
To learn more about the topics that were covered in this chapter, take a look at the following resources:
- Joomla 4: A powerful CLI application: https://magazine.joomla.org/all-issues/june-2022/joomla-4-a-powerful-cli-application
- Joomla 4 CLI documentation: https://docs.joomla.org/Category:Joomla_CLI