
In this recipe, we will install and use the Dynamic Faces library in NetBeans 6.8. Dynamic Faces, also known as POJC (Plain Old JavaServer Faces Components), are an extension to JavaServer Faces technology that lets you easily implement Ajax functionality. Practically, you use the Ajax Transaction component included with the Dynamic Faces component library (0.2), which lets you visually configure Ajax functionality at design time.
The Dynamic Faces and necessary dependencies can be installed as shown next:
- Launch NetBeans 6.8.
- From the Tools main menu select the Plugins item.
- Switch to the Available Plugins tab and wait until it is populated.
- Locate the Dynamic Faces project and select it from the list.
- Press the Install button, from the bottom of the wizard.
- A new window will appear (notice that NetBeans will install all the necessary dependencies for us). Press the Next button.
- Next, you should accept the terms in all of the license agreements and press the Install button again.
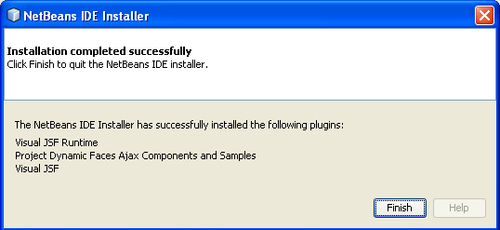
- Click Finish. When installation is complete, you should see the following message:
- Click Close to exit the Plugin Manager.
- Restart the IDE.
Now, let's try to make a simple stub for an application that uses Dynamic Faces. Follow the given steps:
- From the File main menu, select New Project.
- Select Java Web as the category and Web Application as the Project Type. Click Next.
- Name the project
dynaExampleand click Next. - Select GlassFish v3 Prelude as the server and click Next.
- From the Frameworks list, select the Visual Web JavaServer Faces framework and click Finish.
Now you have to add the component libraries as shown next:
- In the Projects window, right-click the Component Libraries node and choose Add Component Library.
- In the Add Component Library dialog box, make sure that Dynamic Faces Components (0.2) is selected and click Add Component Library.
Now, the Dynamic Faces category appears in the Palette as in the following screenshot (as you can see the Woodstock Basic JSF is also available):

At this point you have everything you need to start developing a Dynamic Faces application. We will not go through the entire process of developing such an application (because of a limited space), but we will show you the basic steps in adding AJAX support to a JSF component. Usually, the steps are:
- Drag and drop the JSF Woodstock components from the Palette to the Visual Designer.
- Right-click each component and choose the Add Binding Atrribute item from the contextual menu.
-
In the Visual Designer toolbar, click Show Virtual Forms
 The Ajax Transaction component included with the Dynamic Faces component library lets us configure Ajax functionality at design time in a visual approach, displaying various components with color-coded borders in the Visual Designer. Common settings indicate the components that send input to the server when the Ajax Transaction fires as well as the components that re-render when the client receives the Ajax response. The components that send input to the server are displayed with a solid border in the Visual Designer; the components that re-render are displayed with a dashed border. In addition, you must code a line of JavaScript to fire the Ajax Transaction.
 - Drag and drop an Ajax Transaction component onto Page1.
- Right-click on a component that will send input to the server and choose Configure Ajax Transactions (this will open a dialog box).
- Double-click the Send Input value and change the value to Yes and make sure that Re-Render is set to No. Click Ok.
For the components that re-render set Re-Render to Yes and Send Input to No.
- In the Visual Designer, select each component, and in the Properties window, add the following parameters to the proper event (for example, for a text field, use the onKeyUp event; for a list box, use the onChange event):
DynaFaces.Tx.fire("transaction", "component_id")
Done! From this point forward, you have to implement the application business logic.
For a complete example, please check http://www.netbeans.org/kb/docs/web/ajax-textfield.html?intcmp=925655.