
Let's first set up the IDE for the XBee that will be connected to the Galileo. Once you have connected the shield to the Galileo, simply connect the Galileo with the USB cable to your host computers. Bring up the IDE and then type in the following code into the sketch window:
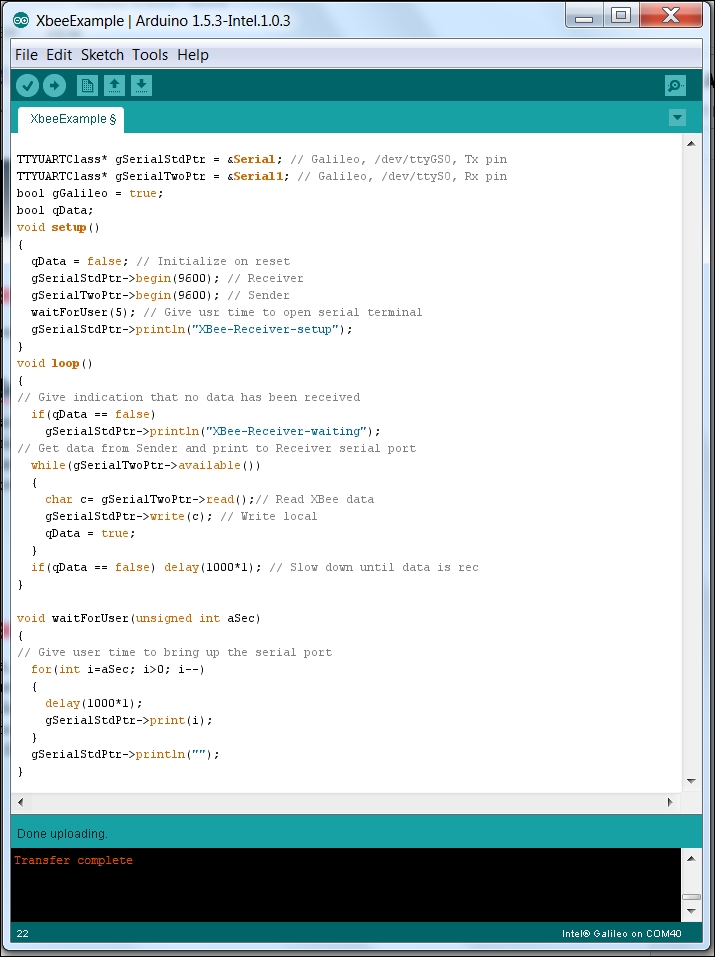
Here is an explanation of this set of code:
- This set of code initializes the serial port on the Galileo, so you can receive via the serial interface:
TTYUARTClass* gSerialStdPtr = &Serial; // Galileo, /dev/ttyGSO, Tx pin
TTYUARTClass* gSerialTwoPtr = &Serial1; // Galileo, /dev/ttySO, Rx pin
bool gGalileo = true;
bool qData;
int led = 13;
- This set of code starts the send and receive process, you'll only use the receive process for this application:
qData = false; // Initialize on reset gSerialStdPtr->begin(9600); // Receiver gSerialTwoPtr->begin(9600); // Sender waitForUser(5); // Give usr time to open serial terminal gSerialStdPtr->println("XBee-Receiver-setup"); pinMode(led, OUTPUT); - This code waits for a valid input from the serial port on the Xbee and then prints it to the Serial Monitor screen. It also takes the data and turns on the onboard LED, connected to Pin 13, if the input is a 1; it turns it off if the data is a 0:
if(qData == false) gSerialStdPtr->println("XBee-Receiver-waiting"); //Get data from Sender and print to Receiver serial port while(gSerialTwoPtr->available()) { char c= gSerialTwoPtr->read();// Read XBee data if (c == '1') digitalWrite(led, HIGH); if (c == '0') digitalWrite(led, LOW); gSerialStdPtr->write(c); // Write local qData = true; } if(qData == false) delay(1000*1); // Slow down until data is rec } - This code waits for a set time for the user to bring up the serial port:
void waitForUser(unsigned int aSec)
{
// Give user time to bring up the serial port
  for(int i=aSec; i>0; i--)
  {
    delay(1000*1);
    gSerialStdPtr->print(i);
  }
  gSerialStdPtr->println("");
}
Once the code is uploaded, you'll need to physically change a switch setting on the Wireless Shield, so the device will now accept commands from your XBee controller. It is on the opposite end of the shield from the device, and looks like this:
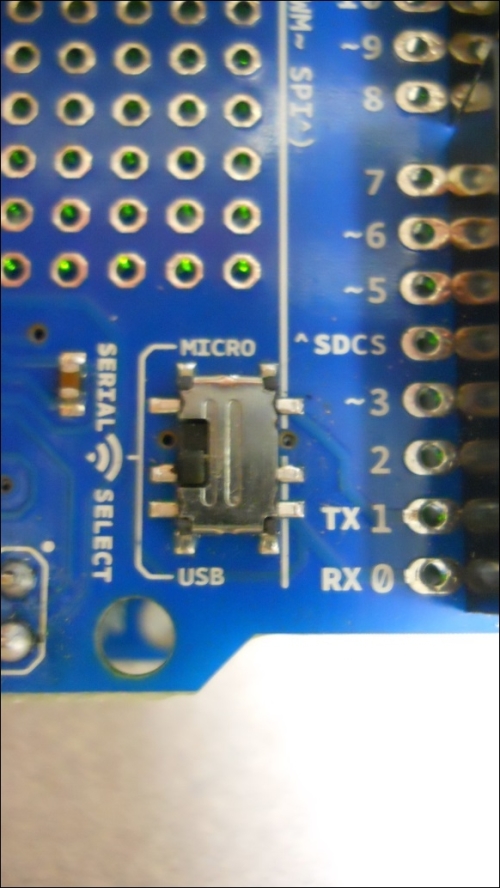
This switch connects the XBee to either the USB serial port or the microcontroller (in this case, the Galileo) serial port. Change it to the MICRO setting once your sketch has finished compilation and uploaded to the Galileo.
Now connect the other XBee device via the small, Xbee-specific USB shield to the computer. Open PuTTY or an other terminal emulator window. Make sure you set the terminal emulator data rate to 9600 baud. In PuTTY, your configuration will look like this:
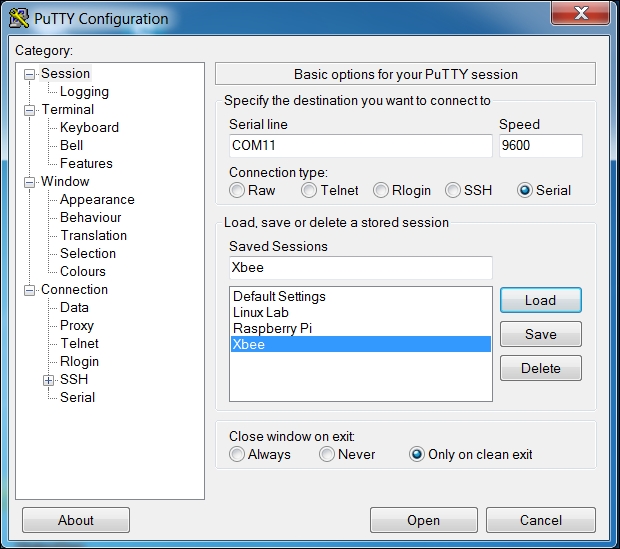
Now open the terminal window. You should now be able to enter commands into the Putty window and monitor them using the Serial Monitor on the Galileo. Here is a picture of the Putty application:
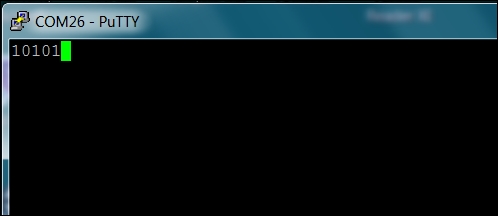
Here is what you should see if you open the Serial Monitor on your Galileo:
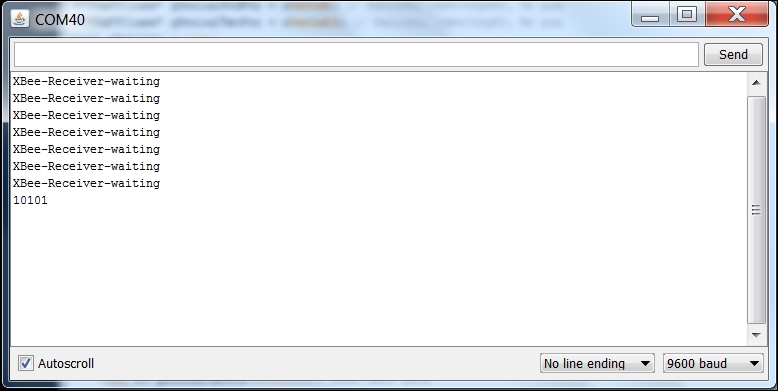
Most importantly, each time you enter a 1 you should see the LED on the Galileo turn on and, when you type a 0, you should see it turn off. Now, if your system is not working, there are a couple of ways to try and determine what is going wrong. First and foremost, make sure the Galileo is turned on and is executing the correct code. Second, check to see that characters are being typed in the Putty window. Third, check the baud rate of the PuTTY window. If it is too high, you will see characters come through the system, but you they will not be interpreted correctly on the Galileo. Fourth, make sure you actually configured both the devices instead of just one. Fifth, make sure the serial switch on the Xbee shield is in the right position. Finally, make sure the devices are in range.