
Chapter 2. Password Encryption, Hashing, and Salting
In the first chapter you learned about the underlying concepts of password security, and the current state of the industry and standards that are employed. Let’s start putting some of that into practice as we explore the practical application of password encryption and security. To start this implementer’s approach, let’s first look at the ways that data can be transmitted and stored.
Data at Rest Versus Data in Motion
As we start to explore the concepts of data security, there are two important concepts that we should address: data in motion versus data at rest.
When we talk about data at rest, we mean the inactive (or resting) digital data that is being stored on your servers, such as the databases that you are using to store passwords, profile information, or any other details needed within your application.
When we discuss the concept of data in motion, we’re talking about any data that is in transit, being sent back and forth from an application to a database, or communication back and forth between websites and APIs or external data sources.
Data at Rest
If you’re talking about credit card environments, where you’ve got a requirement to encrypt the credit card information at rest, I think the most common method people use there is enabling encryption within the database. That’s typically about as good as it gets in terms of host-based encryption.1
Chris Gatford, Hacklabs
Web and application developers rarely have to encounter the concept of protecting the database that stores secure information about our clients, but it is a concept that should be understood. While the technical aspects of data at rest are beyond the scope of this book, let’s cover some of the basic concepts and guidelines to understand that database encryption is absolutely needed, even though in 99% of organizations, this is simply not done.
As we’ve tried to reiterate on a few occassions, you should always assume a worst-case scenario when planning for data breaches. In this case, we should assume that an attacker has gained access to our database, with the end goal of capturing any sensitive data and passwords. Wouldn’t you want to have both the password encryption to prevent account access, as well as an additional layer of encryption on the database itself?
First, let’s address the encryption methods that should be used on the database. Different from the standards that we discussed in Chapter 1 for password encryption, the strong encryption methods that should be used for database encryption are SHA-256 (Secure Hash Algorithm) or better, AES (Advanced Encryption Standard), and RSA (Rivest-Shamir-Adleman). These are all part of the NIST-approved algorithms.2 Weak encryption algorithms, such as MD5 and SHA-1, should never be used for database encryption.
Now, a few standards should be followed:
-
Keep access control (user login) separate from database encryption. Should a username or password fail, the database itself should remain encrypted, effectively providing multiple levels of protection.
-
The keys used for database encryption should be updated on a regular basis.
-
Encryption keys should always be stored separately from the data.
Data federation is another method to help prevent unwanted access in the case of an application with global reach and data storage. The purpose of this strategy is to maintain distinct database systems in the regions where the personal information is needed (e.g., the personal information of a UK customer is stored within a database in the UK, not a centralized database in the US). Effectively, instead of having a centralized database with all customer information that is copied around to data centers as needed, only information in the region in which it is needed is maintained. This type of strategy is effective when government regulations/laws require access to be granted to all user information that is stored in their country, regardless of whether that data belongs to individuals in other countries.
Lastly, one underlying concept should be understood and implemented. You should store only the minimum amount of sensitive user data that is required to run your application, site, or services. A major industry trend over the past few years has been to capture as much information about your users as possible, store it, and then figure out whether it is useful and is viable at a later date. This is absolutely not the practice that should be employed when you are trying to provide the best level of protection for your users. When creating the architectural schema for your application or website, you should consider the type of data that is needed for the state of the application, and use that to build the database structure for personal information that should be stored. The less privileged information you store, the less potential impact on your customers.
Beyond the user data, sensitive financial information such as credit card data can also be offloaded, typically to the payment provider through a system such as a credit card vault. In addition to the security benefits of not having to host that data yourself, you don’t incur the implications of having to implement all standards for PCI DSS compliance, as required when hosting payment information for customers.3
Data in Motion
Data in motion, or data that is in transit, is what the vast majority of web and application developers will be dealing with in their day-to-day work. Realistically, this will encompass several scenarios, including these:
-
Signup information from a user that will be used for account access and identity
-
Transmission of profile information to and from service APIs
-
Other data collected through the application or website and transmitted for database storage
This is the data focus that we will be exploring throughout the upcoming chapters. Our first step is to look into security and encryption behind the user profile, through the proper storage and use of the user password.
Password Attack Vectors
There are many ways for an attacker to attempt to gain access to user accounts. Some are geared toward manipulation of the users themselves, while others attempt to target the application or website to gain access. A few of these are as follows:
- Phishing
-
Tricking users into providing their login credentials through a malicious site or application. Typically, you see these types of attempts come through email scams, where the sender pretends to be the company in question, and requires users to log in to the malicious site for some reason, thereby stealing their login credentials and access to their accounts.
- Social engineering
-
Taking the concept behind phishing to a new level, social engineering hacks are usually orchestrated by other communication means, such as through phone calls. The attacker pretends to be a network technician, or some sort of IT security for a company, and asks users for their login credentials to repair the issue that they are calling about. In doing so, they gain access to the user account.
As you can well imagine, it is difficult to build a safety net for cases such as these, but when it comes to attacks against the website or application that we are working with, we definitely can build safety measures into our login controls, profile systems, and database structures. These attack vectors include the following:
- Brute-force attacks
-
Calculating every possible key variation within a given length, and then trying each one, one after another, until the password is guessed. The shorter the password, the faster this method works. As the length of the password increases, the time to crack the password increases exponentially. When this method becomes too costly, other methods, such as dictionary attacks, are employed. One of the methods employed to counter brute-force attacks is key stretching, which we’ll explore later in this chapter.
- Dictionary attacks
-
Looping through a list of predetermined words/terms, such as all words in a dictionary (hence the term dictionary attack), and trying all combinations against an encrypted password to find matching values. Unlike a brute-force attack, a dictionary attack is just trying input that is considered to, most likely, be a common input word, term, or phrase. Use of a salt (which we’ll discuss in “Salting”) is an appropriate way of dealing with these types of attacks.
- Rainbow tables
-
Large lists that contain precalculated hashes (for a given hash function), and the passwords from which they were derived. Unlike a dictionary attack, where the hash function is applied at each crack attempt, the attacker can simply compare the precalculated hash with the password hash from the user database, making the entire process more efficient. Use of a salt is an appropriate way of dealing with these types of attacks. This type of attack is typically carried out offline, when the attacker has full access to the data.
- Malware
-
Key loggers or screen scrapers that might be present on a user’s machine, logging activity during login or sign-up. Typically, these are used in conjunction with social engineering to prompt the user to load or install a piece of infected content. An appropriate way of dealing with these attacks is to use a second factor of authentication (e.g., text-message verification) during login.
- Offline cracking
-
We cannot forget that there’s always the possibility that all of our stored user information will be stolen, giving attackers all the time they want to crack a password hash. Once the data is stolen, hardening techniques such as hashing our passwords with a salt, and using appropriate hashing mechanisms that are built to slow down cracking, are the barriers to data theft.
With an understanding of the general landscape of attack vectors, let’s dig into some of these in more depth.
Brute-Force Attack
Brute-force attacks, also known as an exhaustive key search, is the practice of attempting to break password encryption by going through all potential permutations of a password for a given length. In trying to break a password of a known length, up to five characters, a brute-force attack will attempt every possible password permutation of that length.
Obviously, this is not the first method that an attacker would use, because of the length of time that it would take to crack a password. For a password with a key length of N bits, the time that it would take to crack the password would be proportional to the number of bits, which would be proportional to 2N in the worst case, but half of that on average. Thus, as the password length increases, the time to break the password also increases, exponentially.
Other methods, such as the use of rainbow tables or dictionary attacks, are more viable attack vectors. Typically, brute-force attacks will be used with only offline data (not a direct site attack, but data that was downloaded in a hack), and will be used only when other more viable vectors are unavailable to the attacker. If proper password encryption methods are employed that utilize key stretching, this attack method becomes incredibly negligable.
Given these facts, when it does come to securing your web application from potential brute-force attacks, various methods can be implemented to prevent this attack vector:
-
Implementing a CAPTCHA (Completely Automated Public Turing test to tell Computers and Humans Apart) following an unsuccessful login attempt to increase login complexity and help prevent automated attacks.
-
Adding in a 2FA (two-factor authentication) verification mechanism, such as through an SMS to a verified phone number using Authy or a similar service.
We’ll go through an implementation of 2FA with Authy in Chapter 5, but let’s see what a CAPTCHA implementation might look like when integrated within our site.
Creating a CAPTCHA with reCAPTCHA
One of the methods that we can employ for preventing an attacker from attempting password after password is to use a CAPTCHA. Typically, you’ll want to use a CAPTCHA only after one to two failed password attempts. It could be that a user has simply forgotten his password, or an attacker could be trying different password combinations in an attempted brute-force attack.
Using a CAPTCHA
As with most security precautions, you want to try to impact users as little as possible. We don’t want to show a CAPTCHA for every login attempt, because it’s just an extra step that a user has to go through to log in. When restricting use after only one to two failed attempts, you ensure that the vast majority of your users are not impacted, and those who are will mostly understand the reasons for the added security on successive password attempts.
One of the leading CAPTCHA systems is reCAPTCHA by Google. It provides a very nice and simple user interface that typically just asks users to click a box to confirm they are not a robot. Your users aren’t heavily impacted as with traditional CAPTCHA systems that require you to type in words from a picture or audio recording, and it still provides high levels of security against potential bots and automated attacks.
With that said, let’s see how we’re going to implement reCAPTCHA on one of our sites, and then confirm user input on our Node server. The first step is to head over to the reCAPTCHA admin page to sign-up for an API key pair for our site that will allow us to use the system. On this page (given that we don’t have any existing keys), we are met with the registration system that looks like Figure 2-1.

Figure 2-1. Registering our keys
Following the instructions on the page to register a new site, we enter a few pieces of information:
- Label
-
Something to identify the site or keys for ourself, such as the site name or URL.
- Domains
-
The root domains that we will be placing reCAPTCHA on. This can be multiple domains that we maintain.
When we click the Register button, we now see all of the setup information that we need to go through to integrate reCAPTCHA on our site, as shown in Figure 2-2.

Figure 2-2. Adding reCAPTCHA to our site
At the top we can see the keys that we will be using for this process. Keep those in mind as we go through the two steps that are needed for integration.
First we need to add the reCAPTCHA script include at the end of the <head> section of our HTML document, and create the container for the widget within our login form. Stripping down this process into just the pieces that we need on the page, the HTML code looks like this:
<html>
<head>
    <script src='https://www.google.com/recaptcha/api.js'></script>
</head>
<body>

<form method="post" action="/capture">
    <div class="g-recaptcha" data-sitekey="6Lc2FxgTAAAXXXXXXXXXXXX"></div>
    <input type="submit" value="Submit">
</form>

</body>
</html>
Let’s walk through the code to see what we’re doing:
-
We add the https://www.google.com/recaptcha/api.js script include right before the closing
</head>tag of our HTML document. -
We create a form that will POST the login data to our Node endpoint,
/capture(we will set up an Express app to capture POST requests to that endpoint). -
In the form, we simply have the
<div>that will house the reCAPTCHA widget (placed where we want it to show up in the form), and a Submit button to submit the form to our server-side endpoint.
When we load that form, we should see something like Figure 2-3, clearly showing the reCAPTCHA widget, with our Submit button below that.
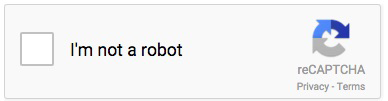
Figure 2-3. reCAPTCHA on our site
The user will interact with the widget and click (or not) the option to identify themselves as human. When the form is submitted, the POST data will be sent to our /capture endpoint. For the reCAPTCHA component, the data we will need to capture for the verification step will be located within the g-recaptcha-response parameter, and look something like this:
g-recaptcha-response=03AHJ_VusWHPddH611975sAE4rH9twXhs05HZcIlUa4Yv9eczU_aFxLl2VeB
kisEkZdCBd7a1R35rNvCikbsgkAsEN8KoP400SEFhzNebZN3yaK4826QQT2W0jjaK-fGIVxWGiTzHrcBW
roHDAbImEpukdJj58yN_vJFsgrnSvmXV3jWK09f_zqiOpOw07V848yYnXnIQdCuqR3SKJEvexIEmlRewZ
GnJvnN2pKMaQ_Hcnjp5p2mc5Nm-z_bELGwf2isrQvw8zm9m4lA9Etu0CS-N3PwZ_R0kELWdSTwNYH7aI8
wlWMHct8A71LDy_t82maP0jC07y6sVzlRJLQ5dsJ5gXCpnuUDPTfeASoJosTUChPPXjYWDEiZ8dAJxxNP
SNdyhftEXtrN7PiebkIEVngwRxVUqZRLe9JQpLk9HimOoOuuu5gKva4Ai_-ohHHqaAem6e_AJe6GnWO8f
PDpqXBcNOU_kkDOfQ_zHZ7FVoOvhbBW8GwV5xRjOB-7yxibHguemcm2X22W2atX0TC_hIaJZjWYZncGms
3Hgeq5lLTKzInV1W6kHmCvGqCVrakhHjQn1tfQppXsPZyWPx6RWzNKR0Mloe8bYefx2VdYZAhXeJfDMSD
sq1c7KYGJctNXiL34QIGwWxyPkUCYUxMHACkGyryRCxbYKDwi6fdsONeQHe4nhGwFneKU4kI4Kp-ymEgc
HvDUaTGS8sLrXiY36eKZrB6CIS0P4pQbJr4TJvt2dE9VkVPjKsyvRKMONpIu6G0pJsxb0ssUHHa_iTK7w
s0k681LM7LKH_MxtQJKwl8_6HycyhDn-BAjx8YEZ-KSslUvuVSelSxEo1R_y_n5MGo-qrRVSmKjP14O2k
DBF0vlW1UZTIgl2gc6Iz_QU6Oz6JQOUJOAZNtkMv6aWu5h-uVkMcIRqIHWWFqg
At this point, we need to set up that /capture endpoint to accept the form POST from our HTML document. We’ll be using Express for this one, with mostly standard packages. Because we will be dealing with JSON responses, the only package that we’ll need to pull down from NPM is body-parser, to handle those responses. We start out by installing this via the following terminal command:
npm install body-parser --save
Next, let’s set up the variables for the packages that we’ll need, as well as the configuration for body-parser to handle JSON data responses:
var querystring = require('querystring'),
    bodyParser = require('body-parser'),
    https = require('https'),
    app = require('express')();

//support JSON & URL encoded bodies
app.use(bodyParser.json());
app.use(bodyParser.urlencoded({
    extended: true
}));
Here is what each package will be used for:
querystring-
Converting JSON objects into strings for POSTing
body-parser-
Accepting JSON responses from the verification step
https-
Making HTTPS requests to verify the reCAPTCHA data sent from the previous form
app-
Express
Now let’s build an app handler for the data that will be POSTed from our previous form to the /capture endpoint. That block looks like this:
//handle all POST requests
app.post('/capture', function (req, res){
    var response = req.body['g-recaptcha-response'];

    var verify_data = querystring.stringify({
        'secret' : 'YOUR SECRET KEY',
        'response': response
    });

    //uber access token fetch endpoint
    var verify_options = {
        host: 'google.com',
        path: '/recaptcha/api/siteverify',
        method: 'POST',
        headers: {
            'Content-Type': 'application/x-www-form-urlencoded',
            'Content-Length': verify_data.length
        }
    };

    //set up request
    var post_req = https.request(verify_options, function(result){
        result.setEncoding('utf8');
        result.on('data', function (verification){
            console.log(verification);
        });
    });

    //post data
    post_req.write(verify_data);
    post_req.end();
});
This code will run for all POSTed data sent to the /capture endpoint. When data arrives, we run it through several steps:
-
We capture the reCAPTCHA data to be verified within the POSTed data, located within
req.body[g-recaptcha-response]. -
We build the POST object that will be needed to send to the verification endpoint. The data required will be our secret (this is the key that was given to us at the beginning of this section when we signed up for our keys) and the response from the POST body.
-
We then build out the endpoint data for the verification step. The endpoint to send this data is https://www.google.com/recaptcha/api/siteverify, so we set the host to google.com, the path to /recaptcha/api/siteverify, and the method should be POST.
-
We set up the request. Because this is an HTTPS endpoint, we need to use
https.request(…), passing along the endpoint option variable that we just created. When the results from that come back, we will simply be logging out the response. -
We begin the request by sending through the verification data variable that we set up at the beginning.
The last line is to start our server:
app.listen(process.env.PORT || 3000);
If we run this on localhost, it will listen on port 3000.
At this point, the verification has been sent, and a response on whether this is a human or not (that the person clicked the “I’m not a robot” box) will be logged out from our code.
If successful, the data response that we will see will look like this:
{
  "success": true
}
If not successful, we’ll see a response like this:
{
  "success": false,
  "error-codes": [
    "missing-input-response"
  ]
}
Basically, if we read the success parameter from the response, we can see whether we should process the login.
Using this method, we can prevent an automated script from simply making request after request to our login for a given username, passing through every possible variation of a password that it can generate, leading to an account being compromised.
Dictionary Attacks
A dictionary attack is slightly different from a brute-force attack. Instead of trying every permutation of a given password length, a dictionary attack takes words from a pre-arranged list (typically all words in a dictionary and other common password choices), encrypts those words, and compares the encrypted string against the encrypted password obtained from a user’s account.
In a practical sense, let’s say that we had each of the words that we wanted to check, such as the following (as just an example):
var words = ['animal', 'monkey', 'test', 'tornado', 'mango', 'slide', 'pepper',
             'diaper', 'tube', 'cloth', 'hair', 'smell', 'eyes', 'tip', 'right',
             'wrong', 'happy'];
Now, to conduct this type of attack, we would encrypt those words, perhaps with an obtained salt (a random unique string used to strengthen weak passwords) from a data breach, or perhaps without a salt, to give us a hash to compare. Given the words, we might now have the list of hashes shown in Table 2-1.
From our data dump, let’s say the user record has an encrypted password of $2a$10$TFKgAYZrfb7p/J6Mz1NZsuhlp62Sa24GKBb7G8q4j702rc1Ntlopa. We compare all of the hashes that we have produced against that user hash, and find a match with the word mango. We now have a cracked password that we can use to gain access to the user account.
| Common word | Associated hash |
|---|---|
test |
$2a$10$wkmirMIMsQxpSvKpn.KNyOTU65YuneDcMXwA7XEHR5brjhpjugWCm |
animal |
$2a$10$.hfSmZVMv3kv5SE9hMun8O5p/AAWsH7eOrhfYdItG0UCaU/aRT85W |
tornado |
$2a$10$GI5itVWvmom3vBLTCSsZJ.vUtp5qzAnjVUK5PG4PRIbleIkw8BldC |
monkey |
$2a$10$mmKLHtnYIlvGrcwF9pXgjOEkczGm99f/iNU3qCA2GOySPgOjAeguO |
pepper |
$2a$10$wbNHHKyHhIhToY6kpExOZO.qIS4UURMm7sKAUTLudiiyMO8wD.HGq |
slide |
$2a$10$/j9vzCZqmGvhGLMUFhwJ2.JvsiZ3i/MsXTfsf9VItR8Gitg.GWgv2 |
mango |
$2a$10$TFKgAYZrfb7p/J6Mz1NZsuhlp62Sa24GKBb7G8q4j702rc1Ntlopa |
diaper |
$2a$10$/ISCPiQC5wGh4JF9bXKJmeI9OKvWdikq8cUuKmXvh5Za9HWcOADVy |
tube |
$2a$10$lkZSe0Y1h710V4JGV5hBD.ZVttOnizitpqdeu1nQvO7txdemIvta2 |
cloth |
$2a$10$et.LBm.NeYWXhVl/TFB3cOs0kRAPFh8iBjSicap1ZUYNBqFlOLUp2 |
hair |
$2a$10$6taHB2eQJDLeUUYL7Fw.O.u1avLlLkOt74Jhv1uBHv350QAvwKRgC |
smell |
$2a$10$nVJwlzP5yheetOa8ALQGBehoreNsfY7eyC4X76tl3ZdiCGYtHNg4m |
tip |
$2a$10$xeKdWcIook9IOKjcQO2GkOpzgPo.pkbc3QVIFsGKfv6UqYV2KoZlG |
right |
$2a$10$Y0pfFl08OWinGu1/1T7NHe6LsE1ey9ggq7.kIvoiS2jkzSMpjZfZu |
wrong |
$2a$10$6Q34ws6flQDvZU6RftuaJeWC40c8GCO2NeZfmCHyoW7aZv9H1sYG2 |
eyes |
$2a$10$vIcnd/G9fyDYVklgvRhTUuTw26L57nw4MuZEYqHv2dSYiyppCnbA. |
happy |
$2a$10$3c3lF6ALH4kab4Cd8Zeq5OJEfSF9EcOcVJlxL5Ra.x9g8OVCjKKti |
The way we typically protect against dictionary attacks is through employing a salt in our password encryption. Using a salt means that the attacker cannot just employ a standard encryption algorithm to generate the hash, but also needs to compute the hash with the associated salt.
Reverse Lookup Tables
Taking the process of dictionary attacks a bit further, and thus reducing time to decrypt, a reverse table stores the plain-text variation of a password beside the associated hash of the password in a table. The table is stored to be searched on the hash as opposed to the plain-text password.
If we go back to our dictionary attack list, it would look very similar, as shown in Table 2-2.
| Hash | Associated word |
|---|---|
$2a$10$wkmirMIMsQxpSvKpn.KNyOTU65YuneDcMXwA7XEHR5brjhpjugWCm |
test |
$2a$10$6Q34ws6flQDvZU6RftuaJeWC40c8GCO2NeZfmCHyoW7aZv9H1sYG2 |
wrong |
We start with obtaining the hashed password from the user record. We then compare that hash to the other hashes in our database. If there is a match, we pull the associated plain-text word for the password.
Like dictionary attacks, salting a password during hashing makes reverse lookup tables essentially useless. Even if the salts were obtained in a user information data breach, a lookup table would need to be generated for each word with the associated one-time-use salt, making it incredibly inefficient.
Rainbow Tables
There is typically much confusion over the difference between a rainbow table and a simple lookup table that stores a hash to a matching plain-text password. Rainbow tables are essentially a way of reducing the amount of storage needed to calculate a long list of password guesses to try in order to break a hash.
Let’s compare that space/time trade-off. A rainbow table attack takes less processing time than a brute-force attack, but uses more storage. On the flip side, a rainbow table needs more processing time than a simple lookup table, but requires far less memory.
One important aspect is required for rainbow tables to function, and that’s called a reduction function. In short, the purpose of a reduction function is to take a given hash and run the algorithm to generate the next possible plain-text password for us.
For instance, say the passwords that we are looking for are numeric, and a maximum of five digits in length. Our reduction function can have an algorithm that pulls the first five digits from the resulting hash, like so:
-
We start with arbitrary password
12345. -
We use bcrypt to hash that password, giving us a hash of
$2a$06$qEMn/vmty3PCCc5qxyOpOOjbJYnokP9zfwWVxT1jnfJqIQwOzuqjq. -
We use our reduction function to take the first five characters we find in the hash.
-
That gives us the next plain-text password to try,
20635(the literal first five numbers we encounter in the hash).
Here’s how this whole process works in detail. Let’s say we want to generate 10,000 potential plain-text passwords, and their associated hashes, to compare against hashes that we have from a compromised list of user records. If we were using a lookup table, we would have each of those plain-text passwords mapped directly to its hash. That requires a lot of storage, but is rather trivial to query to see if we have a match.
Here’s how a rainbow table stores a chain of plain-text passwords and their associated hashes:
-
We take some arbitrary password, such as
treehouse. -
We then hash that, say with bcrypt, to give us a resulting hash,
$2a$06$TjlWuN71X8GshO31hK8qVueHhV4nsTi9ZGxk9fBSxwiU49nBw8kVy. -
We then run that hash through our reduction function, giving us our next viable plain-text password.
-
Next, we repeat steps 2 and 3 for a lengthy number of chains, say 10,000.
Here’s the secret. We store only the first plain-text password, and the last hash in the 10,000 word/hash chain. What we have done is created a list of 10,000 plain-text/hash-pair guesses, while storing only one plain-text password, and one hash.
Note
A rainbow table is not a decoding system for a hash, as hashing is built to be one-way (can encode but not decode). A hashing function allows you to map a plain-text password to a resulting hash, but if you try to get a plain-text password back from a hash, you’ll get only some other random plain-text password. A rainbow table works in reverse, mapping a hash to its associated plain-text password. We aren’t docoding; we’re mapping.
Let’s say we now have a hash that we want to get the plain-text password for. We follow a few steps to try to get it:
-
We look through the list of hashes that we have stored in our table (that last hash of a 10,000 word/hash chain). If we find a match, we just grab the associated word for that hash that we already precalculated.
-
If there is no match, we move to the next hash in the chain, hash #9,999, and do the same thing.
-
We then follow this process all the way to the end of the chain, tryng to find the associated plain-text password.
In a realistic implementation, we would have a multitude of chains created that we could run through. With multiple machines, we would run these chains in parallel to reduce the amount of time it would take to process the attack.
The best way to combat this attack is, again, through salting. In the case of attack vectors like this, having a long, complex password becomes important because:
-
It takes exponentially more time to run these attacks with each additional character added.
-
Parrotandparrot(change of case) need to be stored as different attack cases in the table, because they contain different characters. Adding mixed cases and special characters through the salt allows us to increase the size of the character set, and thus potential guesses, that an attacker needs to run through.
With that said, let’s look at the process of salting in more depth to truly understand how to properly implement it in our hashing functions.
Salting
A salt is a sort of random data that is used in conjunction with the user password, when hashing, to harden the data and to protect against a few of our attack vectors, specifically dictionary attacks and rainbow tables. By providing that piece of random data, of significant length, we’re ensuring that the produced hash is unique, so even if multiple users have the same password (as we know they do), the unique salt applied to the hash will ensure that the resulting hash itself is unique. The unique hash is what protects us from the hash comparison methodologies behind rainbow tables and dictionary attacks.
Let’s look at this in practice. First, let’s start by seeing what a hash might look like if we run it through scrypt with no applied salt. Let’s assume the password that the user is using is mechagodzilla:
//example hashes using the password 'mechagodzilla' and no salt
hash('mechagodzilla') =
    162e0a91026a28f1f2afa11099d1fcbdd9f2e351095ebb196c90e10290ef1227
Each time scrypt hashes that password, the resulting hash will remain the same. If mechagodzilla is part of the word list tested through a dictionary attack, then it would be an easy matter of comparing the hashes and figuring out the user password.
Now let’s see what applying a random salt to the equation will give us. Let’s use the same mechagodzilla user password, but use a salt generated from the Node crypto library when the hash is created. Here are three instances of that at work:
//example hashes using the password 'mechagodzilla' and random salt
hash('mechagodzilla' + '458cf2979ef27397db67077775225334') =
    f3499a916612e285612b32702114751f557a70606c32b54b92de55153d40d3b6
hash('mechagodzilla' + 'ef5b72eff781b09a0784438af742dd6e') =
    7e29c5c48f44755598dec3549155ad66f1af4671091353be4c4d7694d71dc866
hash('mechagodzilla' + 'cc989b105a1c6a5f0fb460e29dd272f3') =
    6dedd3dbb0639e6e00ca0bf6272c141fb741e24925cb7548491479a1df2c215e
In simple terms, a salt of sufficient length and randomness provides a massive boost in security toward certain attack vectors, with just that simple, unique addition.
Generating a Random Salt
Let’s look at how to generate a random salt for our hash functions by using the Node crypto library. Because it is part of the standard library, we don’t have to go through the additional step of installing from npm.
Note
The Node crypto library, in addition to providing functionality for generating random salts of varying length, also has built-in functionality for working with PBKDF2 to generate required hashes from the user password and salt.
We start by adding the crypto requirement to our Node project:
var crypto = require('crypto');
With that in place, we can generate our salt by using the randomBytes(…) method, like so:
crypto.randomBytes(32, function(ex, salt){
    //log readable string version of the salt
    console.log('salt: ' + salt.toString('hex'));

    //proceed to next step: using the salt
});
Generating a Salt Synchronously
Generating a salt via randomBytes can also be done synchronously, like so:
var buf = crypto.randomBytes(256);.
The randomBytes method will accept a parameter for the size of the generated salt, in bytes. What is returned to us is the randomly generated salt. At this point, we can go to the next step of adding that salt to one our our hash functions, as we’ll see in “Choosing the Right Password Hashing Function”.
Salt Reuse
One of the common issues in password hashing is reusing the salt over and over again. This completely defeats the purpose of using a salt to begin with. If we have a common salt being used, and a series of users who are using the same password, then the resulting hash will be the same. From there, an attacker can create a reverse lookup table and run a dictionary attack on each hash at the same time. When users create a new account, or they change their password, a new salt and hash should be generated and stored.
Salt Length
What is the appropriate length for our salt, and what are the implications of using a salt that is too short? Let’s tackle the first part: what is the ideal length of the salt? One general rule of thumb is for the salt to be the same size as the output of the hash function used. If we look at SHA-256, for instance, the resulting hash is 32 bytes in length, so our salt should be 32 bytes, at minimum. In the case of SHA-1, the output length is 20 bytes, so our salt should be 20 bytes as well.
The PBKDF2 standard recommends that a salt length of at least 64 bits (8 bytes) be used to be effective.4 In many cases, the next power of 2, so 128 bits (16 bytes), is typically used.
Let’s move on to the implications of a using a short salt. If the generated salt is short, lookup tables can be created with all possible salt values and then be used to crack the data.
Where to Store the Salt
The first thought that you may have is that the salt should be stored in a secure location, separate from the hash. The simple fact is that we use the salt to prevent precomputed attacks (e.g., rainbow tables), where we would have a series of hashes that can be compared against what is stored in the user database. If we can prevent that easy/quick lookup from happening, we force the attacker to start cracking the hashes individually, which is significantly slower.
Because that is the case, we don’t need to obfuscate or encrypt the salt, and it can be stored as a plain-text value in our database along with the hash. With that said, we also don’t want to make it readily accessible (like a username) to the open world.
Peppering
One of the other concepts in password crytography, beyond the salt, is the concept of a pepper. Much like the salt, a pepper is another value that is added to the salt and password when hashing.
Where the salt and pepper differ is that instead of the pepper being stored alongside the hash (like a public key), and being randomly generated anew for each hash, the pepper is a more safeguarded key, and is typically pulled from a single, or subset, of strings.
The simple formula for pepper use is as follows:
hash(salt + pepper + password) = password hash
When using a pepper, we will generally be following one of two scenarios:
-
The pepper value is held in a different location than the password hash, and is treated more like a private key than a public key.
-
The pepper is never stored, but is instead randomly chosen from a subset of values when the hash is generated. When doing a password comparison, we will instead compare the hash to the proposed password, the salt, and each possible value of the pepper, so we will make multiple comparisons against possible values for the pepper until the comparison either passes of fails. This means that the values for the pepper are calculated from the code layer, instead of the stored value.
In general, the reason to use a pepper is that the added characters and symbols can be utilized to bolster a weak password. By prepending a unique value that is chosen for a secure approach, we can harden passwords that would otherwise be easily crackable. Our password length is now increased, it has special characters, etc. With this, the resulting hash will be increasingly unique, helping to prevent dictionary attacks.
In reality, though, peppers have a few controversial aspects. Here are some of the reasons peppers are not heavily employed:
-
A pepper is valuable only if it’s kept secret. If an SQL injection attack is used, and only one table with the hash and salt are stolen, but the pepper is safe, then it does its job. Unfortunately, in many cases, the entire database structure is compromised and leaked, meaning that our pepper usually goes right along with it.
-
Hashing algorithms that are employed en masse, and publicly vetted, do not accept a pepper as an argument. Most implementers can bring about some disastrous results by doing this wrong, or modifying the hashing algorithm, which is heavily discouraged.
-
There is really no analysis of the benefits of a pepper out there, unlike salting.
Many in the cryptography community simply state that a salt of proper uniqueness and length, and a hash with an appropriate number of iterations employed to slow down cracking, is more than sufficient to make the pepper fairly useless.
In the end, it’s good to understand that these mechanisms are out there, but in practice, it’s sometimes more trouble than it’s worth, especially when implementing proper hashing and salting.
Choosing the Right Password Hashing Function
Now that we understand how everything works, let’s move on to how we are going to pick the hashing function that is best for our needs.
We already know that the three main hashing functions that we should be using for passwords are bcrypt, PBKDF2, and scrypt, but what’s the difference between the three? Let’s break these down a little bit further and explore the benefits of each, and how they are used in conjunction with a salt.
bcrypt
bcrypt is the first hashing function on our list. It’s a key derivation function designed for passwords, and is based on the blowfish cipher.
Some of the benefits of bcrypt are as follows:
-
It’s based on the blowfish cipher, which uses RAM-based lookup tables that are constantly being altered throughout the execution of the algorithm. These types of tables are easy to handle for a CPU, but because of the sequential memory access and parallel processing required, the GPU falls short. In this way, it hinders GPU hardware enhancements by an attacker.
-
It’s specifically designed as a password hashing algorithm, with the intent of being slow (a good thing in password hashing).
With that in mind, let’s jump into implementing this into our application or website.
First, we need to install the bcrypt package from npm, like so:
npm install bcrypt --save
We then require bcrypt in our Node app:
var bcrypt = require('bcrypt');
The bcrypt package has a built-in method for generating a salt, so we’re going to be using that instead of the one that is made available in the crypto library, so that we don’t need to include both bcrypt and crypto in our library:
function bcrypt_encrypt(username, password){
    bcrypt.genSalt(10, function(err, salt) {
        bcrypt.hash(password, salt, function(err, key) {
            //store username, hashed password, and salt in your database
        });
    });
}
We’ve built a function that accepts a username and password, presumably from user input when users are creating or updating their account. We’re taking an asynchronous approach to generating the hash, which is the preferred method. We call bcrypt.genSalt(…) to create our salt. The method accepts the number of rounds (or cost) of the process (default is 10), and the callback to the method returns any error and the derived salt.
Once the salt is generated, we then call the bcrypt.hash(…) method to generate our hash. It will accept the password to be hashed and the salt we just generated. The callback will return the hash key that is generated from the process.
We can then take that hash and store it in our database along with the salt and the rest of the user record.
To do the same thing using a synchronous approach, we can do the following:
var salt = bcrypt.genSaltSync(10);
var hash = bcrypt.hashSync(password, salt);
PBKDF2
Next, let’s look into PBKDF2, which is a key derivation function that has an academic background, coming from RSA laboratories.
PBKDF2 has a number of main benefits and implementations in the wild:
-
Time tested and has been the subject of intense research over the years
-
Recommended by NIST special publication 800-1325
-
Used by password management systems 1Password, LastPass, and others
-
Available as a standard method within the native Node crypto library
Because PBKDF2 is the hashing algorithm baked into the Node crypto library, it’s fairly easy to get started. We first need to require crypto in our Node application:
var crypto = require('crypto');
Now, we build a function much as we did with bcrypt, to accept a username and password:
function pbkdf2_encrypt(username, password){
    crypto.randomBytes(32, function(ex, salt){
        crypto.pbkdf2(password, salt, 4096, 512, 'SHA-256', function(err, key) {
          if (err) throw err;
          //store username, hashed password, and salt in your database
        });
    });
}
We make a request to crypto.randomBytes(…) to generate a random salt for us. The method accepts the number of bytes of data to be generated (in our case, 32 bytes), and returns a salt.
We then make a request to crypto.pbkdf2(…), passing in the following:
-
The user password.
-
The salt.
-
The number of iterations, or the number of times that the hash function should be applied (in our case, 4096).
-
The keylength (in our case, 512).
-
The digest function (in our case, SHA-256). You can get a list of supported digest functions with
crypto.getHashes().
What is returned to us is a hex string containing our hash. We can push it to a plain string for viewing, like so:
console.log('key: ' + key.toString('hex'));
As before, we then store our username, hash, and salt in the user database.
To do the same thing synchronously:
const salt = crypto.randomBytes(32);
var result = crypto.pbkdf2Sync(password, salt, 4096, 512, 'SHA-256');
scrypt
Last on our hashing function list is scrypt. While there are many heated debates on the use of PBKDF2 versus bcrypt, and which is better, scrypt takes a very different approach to hashing than either of the two.
Benefits and implementations of scrypt include the following:
-
Specifically designed to make it hardware and memory intensive for an attacker to perform large-scale attacks.
-
Implemented as the algorithm behind the cryptocurrencies Litecoin and Dogecoin.
The main benefit here is that, unlike bcrypt and PBKDF2, scrypt is designed to be incredibly hardware and memory intensive in order to crack. In the case of bcrypt and PBKDF2, an attacker would be able to run thousands of parallel attacks on the hashed data from minimal hardware resources, since they are not meant to have large resource demands.
Let’s get into the implementation. First, let’s install scrypt using npm:
npm install scrypt --save
With scrypt, we’re going to use a mix of the crypto library (for the salt), and the scrypt module (for the hash). We include those two into our Node application like this:
var scrypt = require('scrypt'),
    crypto = require('crypto');
With everything in place, we again have a function that accepts a username and password:
function scrypt_encrypt(username, password){
    crypto.randomBytes(32, function(ex, salt){
        scrypt.hash(password, {"N":16384,"r":8,"p":1}, 64, salt,
            function(err, key) {
                //store username, hashed password, and salt
                //in your database
            }
        );
    });
}
We use the crypto library to generate our salt, with crypto.randomBytes(…), passing in the number of bytes that should be generated in the output. The output gives us the generated salt.
We then go to our next step of generating the hash with that salt. We make a request to scrypt.hash(…), which accepts a number of values:
-
The user password to be hashed.
-
An object containing the parameters to control the scrypt hashing:
-
N: The maximum amount of time in seconds that scrypt will spend computing the derived key (double). -
r: The maximum number of bytes of RAM used when computing the derived key (integer). The default is 0. -
p: The fraction of the available RAM used when computing the derived key (0 to 1, converted to percentages). The default is 0.5.
-
-
The length of the resulting hash.
-
The salt we just generated.
Once computed, the derived hash will be sent back for us to store.
The same approach synchronously would look like this:
const salt = crypto.randomBytes(256);
var result = scrypt.hashSync(key,{"N":16384,"r":8,"p":1}, 64, salt);
Validating a Password Against a Hashed Value
Once we have a hashed valued of a password stored with the salt in our database, how do we validate that the hash we have stored matches a login attempt by a user at future iterations of the application use?
Because we are working with one-way hash functions, there is a simple way to validate a hash against another password to see if they are valid. We just follow a few steps:
-
We capture the password from the user login attempt.
-
We look up the record from our database that matches who the user is purporting to be, and get the hash and the salt.
-
We use the same hashing function that we did to derive that hash (e.g., bcrypt) with the salt from the database, to generate a new hash.
-
We compare the newly generated hash with the hash from the database. If they match, we have a valid password.
If we follow that process for PBKDF2, we can see how the comparison will work:
var dbsalt = 'USER RECORD SALT FROM YOUR DATABASE';
var dbhash = 'USER RECORD KEY FROM YOUR DATABASE';

crypto.pbkdf2(password, dbsalt, 4096, 512, 'SHA-256', function(err, comparehash){
    if (err) throw err;
    if (dbhash.toString('hex') === comparehash.toString('hex')){
        //passwords match
    } else {
        //passwords don't match
    }
});
As you can see, the preceding code looks quite similar to the encryption process with PBKDF2. There are several things that we need to note about the comparison process:
-
We first capture the hash and salt from our local user record storage for the user who is trying to log in (variables
dbsaltanddbhash). -
We then encrypt the password for the login attempt (the password that the user supplied to log in) and encrypt it using
dbsalt, the same salt that encrypted the user password during registration. -
Once that hash is produced (the
comparehashvariable), we then compare the hash stored for that user in their user record (dbhash) against the newly generated version. -
If the password was the same, using the same salt to encrypt the password and compare against the stored value, then we will have a matching password and can safely log the user in.
Some packages, such as bcrypt, make that process a bit easier for us by providing a compare method. The compare method simplifies the steps of having to encrypt the password with the salt that we stored by mixing hashing and comparison into a single call, like so:
bcrypt.compare(password, hash, function(err, res) {
    //returns true or false
});
In this case, we’re supplying the raw user password from the login attempt and the hash from the database. The result will be either true or false, depending on whether they’re a match.
Key Stretching
One of the underlying concepts that makes bcrypt, scrypt, and PBKDF2 effective is a technique that they employ called key stretching. As we learned in Chapter 1, a vast majority of people don’t utilize standards of significant password length and complexity to keep their profile data secure, and prevent attack vectors like brute-force attacks, on their own. This is where key stretching comes in. It takes a potentially weak password and outputs an encrypted key of significant length and complexity that attack vectors like brute forcing no longer become viable options.
In the case of our cryptographic hash functions, key stretching is done by applying the hash function repeatedly in a loop, until a hash of the desired length and complexity is obtained. When we talked about number of iterations in the hash function examples previously, that is the implementation of this key-stretching concept.
Recomputing Hashes
At some point, you may have the need to generate new secure password hashes for your users. Perhaps:
-
Hardware has changed because of Moore’s law and you need to change the weight/work factor used by your encryption algorithms.
-
Algorithms have changed, and the one you are using is no longer secure, or something better has come along.
-
The hashes are no longer as secure as they can be.
In these instances, the standard practice is to store a new hash for the users as they use your system. As each user logs in with their username/password, you log them in as you normally would by comparing the login hash with the stored hash. Then, instead of throwing out the password, you generate a new hash for the user, and replace the old one in the user database record, before throwing out the password.
To speed this process along, you can force logout for all users. For instance, if you allow users to remain logged in via a session cookie, you can invalidate all user cookies and force each user to log in on their next visit.
Next Steps
Expanding upon the concepts of password security, Chapter 3 looks at a few practical approaches to protecting our systems against attack vectors.
1 http://www.zdnet.com/article/encrypting-data-at-rest-is-vital-but-its-just-not-happening
2 http://csrc.nist.gov/publications/nistpubs/800-57/sp800-57_part1_rev3_general.pdf
3 https://www.pcisecuritystandards.org/security_standards
4 https://tools.ietf.org/html/rfc2898#section-4.1
5 http://nvlpubs.nist.gov/nistpubs/Legacy/SP/nistspecialpublication800-132.pdf