
7
Building Login and Registration Forms
Registration and login are essential features of web applications that have users. Even if an authentication flow can be handled directly with simple requests, there is also a need to have logic working behind the UI to manage the authentication and session, especially if we are using a JSON web token (JWT).
In this chapter, we’ll create login and registration forms with React. There is a lot to do and learn here, but here’s what this chapter will cover:
- Configuration of a CSS framework in a React project
- Adding protected and public pages to an application
- Creating a page for registration
- Creating a page for login
- Creating a welcome page after the login or registration is successful
By the end of the chapter, you will be able to build registration and login pages using React, and you will know how to manage JWT authentication from the frontend.
Technical requirements
Make sure to have VS Code installed and configured on your machine.
You can find the code for this chapter at https://github.com/PacktPublishing/Full-stack-Django-and-React/tree/chap7.
Understanding the authentication flow
We’ve already explored authentication on a social media project from a backend perspective in Chapter 2, Authentication and Authorization Using JWTs. But how does this manifest in the React application?
Well, things will be a little bit different. To quickly recapitulate, we have a registration and a login endpoint. These endpoints return the user objects with two tokens:
- An access token with a lifetime of 5 minutes: This token helps with authenticating on the server side when requesting without the need to log in again. Then, we can access resources and perform actions on these resources.
- A refresh token: This token helps you to retrieve another access token if one has already expired.
With this data coming from the server, we can manage authentication from the React application side like so. When a registration or a login is successful, we store the returned response in the client’s browser; we’ll use localStorage for this.
The localStorage property helps us to work with the browser storage, enabling browsers to store key-value pairs in the browser. Two methods will be used with localStorage: setItem() to set a key-value pair and getItem() to access the values.
Then, for each request sent to the server, we add the Authorization header to the request containing the access token retrieved from localStorage. If the request returns a 401 error, it means that the token has expired. If this happens, we send a request to the refresh endpoint to get a new access token, using the refresh token also retrieved from localStorage. And with this access token, we resend the failed request.
If we receive a 401 error again, it means that the refresh token has expired. Then, the user will be sent to the login page to log in again, retrieve new tokens, and store them in localStorage.
Now that we understand the authentication flow from the frontend side, let’s write the requests service we will use for data fetching and performing CRUD actions.
Writing the requests service
Making requests in JavaScript is relatively easy. The node environment and the browser provide native packages such as fetch to allow you to request a server. However, this project will use the axios package for HTTP requests.
Axios is a popular library mainly used to send asynchronous HTTP requests to REST endpoints. Axios is the perfect library for CRUD operations. However, we will also install axios-auth-refresh. This simple library assists with an automatic refresh of tokens via axios interceptors. To install the axios and axios-auth-refresh packages, follow these steps:
- In the social-media-app directory, add the axios and axios-auth-refresh packages by running the following command:
yarn add axios axios-auth-refresh
- Once it’s installed, create a directory called helpers in the src folder of the React project, and once it’s done, add a file called axios.js:

Figure 7.1 – The path of the helper.js file
Now, let’s make the import and write the basic configurations, such as the URL and some headers. Take a look at the following code block:
import axios from "axios";
import createAuthRefreshInterceptor from "axios-auth-refresh";
const axiosService = axios.create({
 baseURL: "http://localhost:8000",
 headers: {
   "Content-Type": "application/json",
 },
});
In the preceding code block, we have added the Content-Type header for the POST requests. The following figure shows the authentication flow we’ll follow in this book:

Figure 7.2 – Authentication flow with access/refresh tokens
In the preceding figure, note the following points:
- Every time we are requesting with axiosService, we retrieve the access token from localStorage and create a new header authorization using the access token
- The access token will expire if the request is made and a 400 status code is returned
- We retrieve the refresh token from localStorage and make a request to retrieve a new access token
- Once done, we register the new access token in localStorage and restart the previously failed request
- Yet, if the refresh token request has failed too, we simply remove auth from localStorage and send the user to the login screen
Let’s implement the previously described flow in the axios.js file by following these steps:
- First we will write a request interceptor to add headers to the request:
axiosService.interceptors.request.use(async (config) => {/**
* Retrieving the access token from the localStorage
and adding it to the headers of the request
*/
const { access } =JSON.parse(localStorage.getItem("auth"));config.headers.Authorization = `Bearer ${access}`;return config;
});
Note that we can use the object-destructuring syntax to extract property values from an object in JavaScript. In pre-ES2015 code, it probably goes like this:
var fruit = {
 name: 'Banana',
 scientificName: 'Musa'
};
var name     = fruit.name;
var scientificName = fruit.scientificName;
If you have a lot of properties to extract from an object, it can quickly become long. That’s where object destructuring comes in handy:
var fruit = {
 name: 'Banana',
 scientificName: 'Musa'
};
var  { name, scientificName } = fruit;
You can learn more about the syntax at https://developer.mozilla.org/en-US/docs/Web/JavaScript/Reference/Operators/Destructuring_assignment.
- After that, we will resolve the requests and return a resolved or rejected promise:
axiosService.interceptors.response.use(
(res) => Promise.resolve(res),
(err) => Promise.reject(err),
);
- This last step is the icing on the cake. Create a function that contains the refresh auth logic. This function will be called whenever the failed request returns a 401 error:
const refreshAuthLogic = async (failedRequest) => {const { refresh } =JSON.parse(localStorage.getItem("auth"));return axios
.post("/refresh/token/", null, {baseURL: "http://localhost:8000",
headers: {Authorization: `Bearer ${refresh}`,},
})
.then((resp) => {const { access, refresh } = resp.data;failedRequest.response.config.headers[
"Authorization"] = "Bearer " + access;
localStorage.setItem("auth", JSON.stringify({access, refresh }));
})
.catch(() => {localStorage.removeItem("auth");});
};
- And finally, initialize the authentication interceptor and create a custom fetcher too:
createAuthRefreshInterceptor(axiosService, refreshAuthLogic);
export function fetcher(url) {return axiosService.get(url).then((res) => res.data);
}
export default axiosService;
The fetcher will be used to make GET requests on the API resources. Great! The fetching logic is implemented, and we can move on to registering a user. But before that, we need to define protected routes in the project.
Protected routes
Routing with the condition on a frontend application is a big plus, as it helps with a better user experience. For example, if you are not logged in to Twitter and want to check a profile or comment, you will be redirected to the login page. These are protected pages or actions, so you must log in before accessing these resources. In this section, we’ll write a ProtectedRoute component using React-Router components.
Creating a protected route wrapper
To create a protected route wrapper, follow these steps:
- Create a new directory in the src directory called routes.
- Inside the newly created directory, create a file called ProtectedRoute.jsx.
- Once the file is created, import the needed libraries:
src/routes/ProtectedRoute.jsx
import React from "react";
import { Navigate } from "react-router-dom";
...- Write the following logic for the protected routes:
...
function ProtectedRoute({ children }) {const { user } =JSON.parse(localStorage.getItem("auth"));return auth.account ? <>{children}</> : <Navigateto="/login/" />;
}
export default ProtectedRoute;
...
In the preceding code snippet, we are retrieving the user property from localStorage.
We then use this property to check whether we should redirect the user to the login page or render the page (children). If user is null or undefined, it means that the user has not logged in, so we redirect the user to the login page, otherwise, we give access to the asked page.
- Then, inside the App.js file, let’s rewrite the content:
src/App.js
import React from "react";
import {
 Route,
 Routes
} from "react-router-dom";
import ProtectedRoute from "./routes/ProtectedRoute";
import Home from "./pages/Home";
function App() {
 return (
   <Routes>
     <Route path="/" element={
       <ProtectedRoute>
         <Home />
       </ProtectedRoute>
     } />
     <Route path="/login/" element={<div>Login</div>} />
   </Routes>
 );
}
export default App;
Now, the default location will be the profile page. However, with no credentials in the store, the user will be redirected to the login page.
Great! We’ve now implemented the first step of the authentication flow. In the next section, we will write a page for registration before writing the page for login.
Creating the registration page
If a user needs login credentials, they will need to register first. In this section, we will create a registration form while also handling the necessary requests.
Adding a registration page
Let’s start by writing code for the form page. We’ll start by writing the registration form component:
- Inside the src directory, create a new directory called components and then create a new directory called authentication inside the newly created directory.
This directory will contain the registration and login forms.
- Once that’s done, create a file called RegistrationForm.jsx inside the authentication directory:

Figure 7.3 – The registration file
React Bootstrap provides form components that we can use quickly to create a form and make basic validation. In this component, we’ll also have to make a request to the API, register the user details and tokens in the store, and redirect the user to the home page if the request is successful.
- Next, we will add the needed imports:
src/components/forms/RegistrationForm.js
import React, { useState } from "react";
import { Form, Button } from "react-bootstrap";
import axios from "axios";
import { useNavigate } from "react-router-dom";
...- Now, declare the states and functions we’ll use in the component:
src/components/forms/RegistrationForm.js
...
function RegistrationForm() {
 const navigate = useNavigate();
 const [validated, setValidated] = useState(false);
 const [form, setForm] = useState({});
 const [error, setError] = useState(null);
...
Let’s quickly explain what we are doing in the preceding code snippet.
The navigate Hook will help us navigate to the home page if the request is successful.
The validated, form, and error states are respectively used to check whether the form is valid or not, the values of each field in the form, and the error message to display if the request doesn’t pass.
- Great! Let’s write the function that will handle the form submission:
src/components/forms/RegistrationForm.js
...
const handleSubmit = (event) => {
   event.preventDefault();
   const registrationForm = event.currentTarget;
   if (registrationForm.checkValidity() === false) {
     event.stopPropagation();
   }
   setValidated(true);
   const data = {
     username: form.username,
     password: form.password,
     email: form.email,
     first_name: form.first_name,
     last_name: form.last_name,
     bio: form.bio,
   };
...src/components/forms/RegistrationForm.js
   axios
     .post("http://localhost:8000/api/auth/register/",
            data)
     .then((res) => {
       // Registering the account and tokens in the
       // store
       localStorage.setItem("auth", JSON.stringify({
         access: res.data.access,
         refresh: res.data.refresh,
         user: res.data.user,
       }));
       navigate("/");
     })
     .catch((err) => {
       if (err.message) {
         setError(err.request.response);
       }
     });
 };
In the preceding code block, we are first blocking the default form submission behavior with event.preventDefault() – that is, reloading the page. Next, we are checking whether the basic validations for the fields are done. With the validation successfully done, we can easily make a request with axios and store tokens and user details in localStorage.
This way, the user is navigated to the home page.
- Now, let’s add the basic UI components:
src/components/forms/RegistrationForm.js
...
return (
   <Form
     id="registration-form"
     className="border p-4 rounded"
     noValidate
     validated={validated}
     onSubmit={handleSubmit}
   >
     <Form.Group className="mb-3">
       <Form.Label>First Name</Form.Label>
       <Form.Control
         value={form.first_name}
         onChange={(e) => setForm({ ...form,
           first_name: e.target.value })}
         required
         type="text"
         placeholder="Enter first name"
       />
       <Form.Control.Feedback type="invalid">
         This file is required.
       </Form.Control.Feedback>
     </Form.Group>
...
There is more code after this, but let’s grasp the logic here first; the other will be significantly easier.
React Bootstrap provides a Form component that we can use to create fields.
Form.Control is a component input and it takes as props (name, type, etc.) attributes any input can take. Form.Control.Feedback will show errors when the fields are not valid.
src/components/forms/RegistrationForm.js
...
     <Form.Group className="mb-3">
       <Form.Label>Last name</Form.Label>
       <Form.Control
         value={form.last_name}
         onChange={(e) => setForm({ ...form,
           last_name: e.target.value })}
         required
         type="text"
         placeholder="Enter last name"
       />
       <Form.Control.Feedback type="invalid">
         This file is required.
       </Form.Control.Feedback>
     </Form.Group>
     <Form.Group className="mb-3">
       <Form.Label>Username</Form.Label>
       <Form.Control
         value={form.username}
         onChange={(e) => setForm({ ...form, username:
           e.target.value })}
         required
         type="text"
         placeholder="Enter username"
       />
       <Form.Control.Feedback type="invalid">
         This file is required.
       </Form.Control.Feedback>
     </Form.Group>
...src/components/forms/RegistrationForm.js
...
     <Form.Group className="mb-3">
       <Form.Label>Email address</Form.Label>
       <Form.Control
         value={form.email}
         onChange={(e) => setForm({ ...form, email:
           e.target.value })}
         required
         type="email"
         placeholder="Enter email"
       />
       <Form.Control.Feedback type="invalid">
         Please provide a valid email.
       </Form.Control.Feedback>
     </Form.Group>
...- Let’s also add a field for the password:
...
<Form.Group className="mb-3">
<Form.Label>Password</Form.Label>
<Form.Control
value={form.password}minLength="8"
onChange={(e) => setForm({ ...form, password:e.target.value })}
required
type="password"
placeholder="Password"
/>
<Form.Control.Feedback type="invalid">
Please provide a valid password.
</Form.Control.Feedback>
</Form.Group>
...
- Let’s add the bio field too. We’ll use the Textarea field type here:
src/components/forms/RegistrationForm.js
...
     <Form.Group className="mb-3">
       <Form.Label>Bio</Form.Label>
       <Form.Control
         value={form.bio}
         onChange={(e) => setForm({ ...form, bio:
           e.target.value })}
         as="textarea"
         rows={3}
         placeholder="A simple bio ... (Optional)"
       />
     </Form.Group>
...src/components/forms/RegistrationForm.js
...
     <div className="text-content text-danger">
         {error && <p>{error}</p>}
     </div>
     <Button variant="primary" type="submit">
       Submit
     </Button>
   </Form>
 );
}
export default RegistrationForm;
RegistrationForm is now created with the required fields and the logic to handle the form submission.
In the next section, we will add this registration form component to a page and register this page in our application route.
Registering the registration page route
Follow these steps to register the registration page route:
- Inside the src/pages directory, create a file called Registration.jsx:
src/pages/Registration.js
import React from "react";
import { Link } from "react-router-dom";
import RegistrationForm from "../components/forms/RegistrationForm";
function Registration() {
 return (
   <div className="container">
     <div className="row">
       <div className="col-md-6 d-flex align-items-center">
         <div className="content text-center px-4">
           <h1 className="text-primary">
             Welcome to Postman!
           </h1>
           <p className="content">
             This is a new social media site that will
             allow you to share your thoughts and
             experiences with your friends. Register now
             and start enjoying! <br />
             Or if you already have an account, please{" "}
             <Link to="/login/">login</Link>.
           </p>
         </div>
       </div>
       <div className="col-md-6 p-5">
         <RegistrationForm />
       </div>
     </div>
   </div>
 );
}
export default Registration;
We’ve added simple introduction text to the page and imported the LoginForm component.
- Next, open App.js and register the page:
src/App.js
...
import Registration from "./pages/Registration";
function App() {
 return (
   <Routes>
     ...
     <Route path="/register/" element={<Registration />} />
   </Routes>
 );
}
...- Great! Now, go to http://localhost:3000/register/, and you should have a similar result to this:
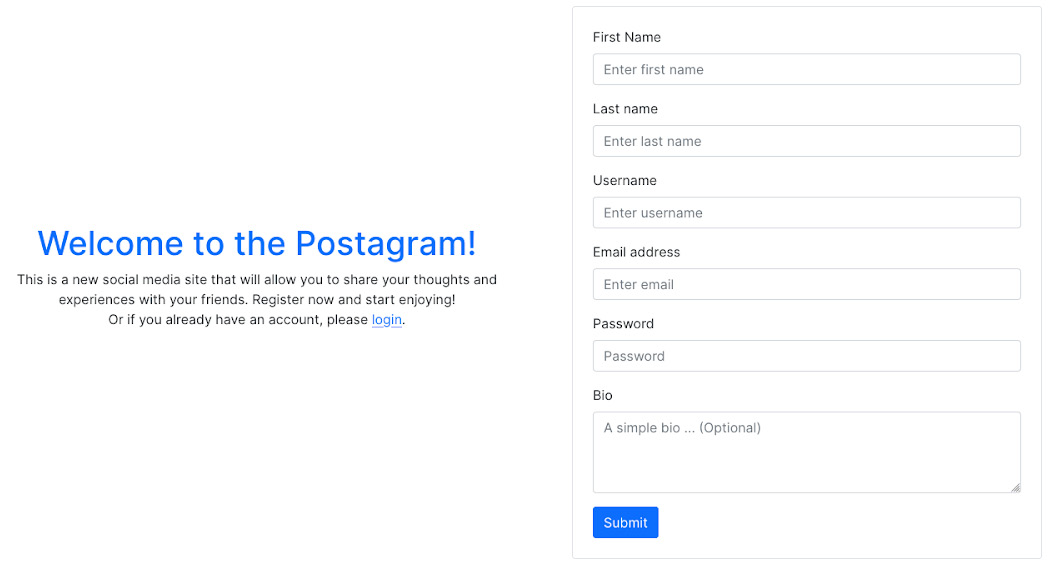
Figure 7.4 – The registration page
- Test it and register with an account. You’ll be redirected to the home page:

Figure 7.5 – The home page
Great! We’ve just written the registration page.
In the next section, we will create the login page.
Creating the login page
As we have already created the registration page, the logic for login will be pretty similar but with fewer fields.
Adding the login page
Follow these steps to add a login page:
- Inside the src/components/authentication directory, add a new file called LoginForm.jsx. This file will contain the form component to log in a user.
- Next, add the imports:
src/components/authentication/LoginForm.jsx
import React, { useState } from "react";
import { Form, Button } from "react-bootstrap";
import axios from "axios";
import { useNavigate } from "react-router-dom";
...- Write the logic to handle the login:
src/components/authentication/LoginForm.jsx
...
function LoginForm() {
 const navigate = useNavigate();
 const [validated, setValidated] = useState(false);
 const [form, setForm] = useState({});
 const [error, setError] = useState(null);
 const handleSubmit = (event) => {
   event.preventDefault();
   const loginForm = event.currentTarget;
   if (loginForm.checkValidity() === false) {
     event.stopPropagation();
   }
   setValidated(true);
   const data = {
     username: form.username,
     password: form.password,
   };
...src/components/authentication/LoginForm.jsx
...
   axios
     .post("http://localhost:8000/api/auth/login/",
            data)
     .then((res) => {
       // Registering the account and tokens in the
       // store
       localStorage.setItem("auth", JSON.stringify({
         access: res.data.access,
         refresh: res.data.refresh,
         user: res.data.user,
       }));
       navigate("/");
     })
     .catch((err) => {
       if (err.message) {
         setError(err.request.response);
       }
     });
...
This is nearly the same logic as the registration, but here, we are only working with the username and the password.
src/components/authentication/LoginForm.jsx
...
return (
   <Form
     id="registration-form"
     className="border p-4 rounded"
     noValidate
     validated={validated}
     onSubmit={handleSubmit}
   >
     <Form.Group className="mb-3">
       <Form.Label>Username</Form.Label>
       <Form.Control
         value={form.username}
         onChange={(e) => setForm({ ...form, username:
                    e.target.value })}
         required
         type="text"
         placeholder="Enter username"
       />
       <Form.Control.Feedback type="invalid">
         This file is required.
       </Form.Control.Feedback>
     </Form.Group>
     ...
In the preceding code, we are creating the form and adding the first input of the form, the username input.
- Let’s also add the password form input and the submit button:
...
<Form.Group className="mb-3">
<Form.Label>Password</Form.Label>
<Form.Control
value={form.password}minLength="8"
onChange={(e) => setForm({ ...form, password:e.target.value })}
required
type="password"
placeholder="Password"
/>
<Form.Control.Feedback type="invalid">
Please provide a valid password.
</Form.Control.Feedback>
</Form.Group>
<div className="text-content text-danger">
{error && <p>{error}</p>}</div><Button variant="primary" type="submit">
Submit
</Button>
</Form>
);
}
export default LoginForm;
...
We have created the LoginForm component with the required fields and logic to handle data submission.
In the next section, we will add LoginForm to a page and register this page in the application routes.
Registering the login page
Follow these steps to register the login page:
- Inside the src/pages directory, create a file called Login.jsx:
src/pages/Login.jsx
import React from "react";
import { Link } from "react-router-dom";
import LoginForm from "../components/forms/LoginForm";
...- Next, let’s add the UI:
src/pages/Login.jsx
...
function Login() {
 return (
   <div className="container">
     <div className="row">
       <div className="col-md-6 d-flex
         align-items-center">
         <div className="content text-center px-4">
           <h1 className="text-primary">
             Welcome to Postagram!</h1>
           <p className="content">
             Login now and start enjoying! <br />
             Or if you don't have an account, please{" "}
             <Link to="/register/">register</Link>.
           </p>
         </div>
       </div>
       <div className="col-md-6 p-5">
         <LoginForm />
       </div>
     </div>
   </div>
 );
}
export default Login;
This is also quite similar to the registration page.
- Register the page in the routes of the application in the App.js file:
src/App.js
...
     <Route path="/login/" element={<Login />} />
...- Visit http://localhost:3000/login/, and you should have a similar page to this:

`Figure 7.6 – The login page
- Test it again, and you should be redirected to the home page.
The authentication flow is working like a charm, but we have some repeated code in our project. Let’s do some refactoring by doing a little exercise in the next section.
Refactoring the authentication flow code
Instead of repeating the same code across the code base, we can follow the Don’t Repeat Yourself (DRY) rule. For example, we use the same code to store tokens and user information for the LoginForm and RegistrationForm components. In this section, we will write a custom React Hook to handle this logic, but before doing that, let’s understand what a Hook is.
What is a Hook?
Hooks were first introduced in React 16.8, allowing developers to use more of React’s features without writing a class. An interesting example of a React Hook is useState.
useState is a replacement for setState, used inside functional components to manage the internal state of a component. In LoginForm, we used useState to handle the form values. We also used useState to set the message error if the login request returns an error. For a simple test, go to the login page and enter the wrong credentials, and you’ll likely get a similar error to this:

Figure 7.7 – The login form
The logic from this comes from the following lines in LoginForm.jsx:
src/authentication/LoginForm.jsx
 const [error, setError] = useState(null);
...
     .catch((err) => {
       if (err.message) {
         setError(err.request.response);
       }
     });
This is an example of the useState Hook, and not every Hook works the same way. For example, you can check the usage of the useNavigate Hook in the LoginForm component. There are a few rules for using Hooks as per the React documentation:
- Only call Hooks at the top level: Don’t call Hooks inside loops, conditions, or nested routes
- Only call Hooks from React functions: Call Hooks from React function components and custom Hooks
React allows us to write custom Hooks. Let’s write a custom Hook to handle user authentication. Inside a new file, we’ll write functions that make it easier to retrieve and manipulate the auth object in localStorage.
Writing code for a custom Hook
Follow these steps to create a custom Hook:
- Inside the src directory, create a new directory called hooks. This directory will contain all the Hooks that we’ll write in this book.
- Inside the newly created directory, add a file called user.actions.js.
- Let’s add all the necessary content, starting with the imports:
src/hooks/user.actions.js
import axios from "axios";
import { useNavigate } from "react-router-dom";- Next, let’s add a function called useUserActions. A custom Hook is a JavaScript function whose name starts with use:
src/hooks/user.actions.js
function useUserActions() {
 const navigate = useNavigate();
 const baseURL = "http://localhost:8000/api";
 return {
   login,
   register,
   logout,
 };
}
We can now add the login and logout functions. These functions will return Promise, which, if successful, will register the user data in localStorage and redirect the user to the home page, or allow us to catch and handle errors.
- We will now write the register function as a bit of exercise, but it’s not that different from the login function:
src/hooks/user.actions.js
...
 // Login the user
 function login(data) {
   return axios.post(`${baseURL}/auth/login/`,
                      data).then((res) => {
     // Registering the account and tokens in the
     // store
     setUserData(data);
     navigate("/");
   });
 }
...- Next, write the logout function. This function will remove the auth item from localStorage and redirect the user to the login page:
src/hooks/user.actions.js
...
 // Logout the user
 function logout() {
   localStorage.removeItem("auth");
   navigate("/login");
 }
...
Note that we are using a method called setUserData, which we have not declared yet.
- After the useUserActions function, let’s add other utils functions that can be used across the project. These functions will help us to retrieve access tokens, refresh tokens, user information, or set user data:
src/hooks/user.actions.js
// Get the user
function getUser() {
 const auth =
   JSON.parse(localStorage.getItem("auth"));
 return auth.user;
}
// Get the access token
function getAccessToken() {
 const auth =
   JSON.parse(localStorage.getItem("auth"));
 return auth.access;
}
// Get the refresh token
function getRefreshToken() {
 const auth =
   JSON.parse(localStorage.getItem("auth"));
 return auth.refresh;
}
// Set the access, token and user property
function setUserData(data) {
 localStorage.setItem(
   "auth",
   JSON.stringify({
     access: res.data.access,
     refresh: res.data.refresh,
     user: res.data.user,
   })
 );
}
Important note
You might find it confusing to declare functions after calling them. Writing functions in JavaScript using the function keyword allows hoisting, meaning that functions declaration is moved to the top of their scope before code execution. You can learn more at https://developer.mozilla.org/en-US/docs/Glossary/Hoisting.
With the functions for retrieving a user, the access and refresh tokens, and the function to set user data in localStorage, we can now call the function in the LoginForm and RegisterForm components.
Using the functions in code
We have a useful Hook, useUserActions, in the user.actions.js file. We will use this Hook to call the login method, thus replacing the old login logic in the LoginForm.js file. Let’s start by using the newly written custom Hook in the LoginForm component. Follow these steps:
- First, import the Hooks and declare a new variable:
...
import { useUserActions } from "../../hooks/user.actions";function LoginForm() {const [validated, setValidated] = useState(false);
const [form, setForm] = useState({});const [error, setError] = useState(null);
const userActions = useUserActions();
...
- Now, we can make some changes to the handleSubmit function concerning the login request on the API:
src/hooks/user.actions.js
const data = {
     username: form.username,
     password: form.password,
   };
   userActions.login(data)
     .catch((err) => {
       if (err.message) {
         setError(err.request.response);
       }
     });
 };
In the preceding code block, we did some quick refactoring by removing the old logic for login and setting user data in localStorage. The same logic can be applied to RegistrationForm (the register method is already available in the useUserActions Hook). You can modify the RegistrationForm component as a small exercise. Feel free to check the code at https://github.com/PacktPublishing/Full-stack-Django-and-React/blob/chap7/social-media-react/src/components/authentication/RegistrationForm.jsx to make sure your solution is valid.
- Great! Let’s now use the other utils functions in the axios helper and the ProtectedRoute component:
src/routes/ProtectedRoute.jsx
...
function ProtectedRoute({ children }) {
 const user = getUser();
 return user ? <>{children}</> : <Navigate
   to="/login/" />;
...- Next, let’s do some tweaks in the axios helper:
...
import { getAccessToken, getRefreshToken } from "../hooks/user.actions";...
config.headers.Authorization = `Bearer ${getAccessToken()}`;...
.post("/refresh/token/", null, {baseURL: "http://localhost:8000",
headers: {Authorization: `Bearer ${getRefreshToken()}`,...
const { access, refresh, user } = resp.data;failedRequest.response.config.headers[
"Authorization"] =
"Bearer " + access;
localStorage.setItem("auth", JSON.stringify({access, refresh, user }));
})
.catch(() => {localStorage.removeItem("auth");});
...
In the preceding code block, we used the getAccessToken and getRefreshToken functions to retrieve the access token and the refresh token from localStorage for the requests. We just replaced the old logic to retrieve the access and refresh tokens.
And we are done. We have a pure React logic for the authentication flow, which will help us manage the CRUD operations for the posts and comments in the following chapters.
Summary
In this chapter, we dived deeper into more concepts, such as authentication in a React application. We implemented a clean logic for requests on the Django API with access tokens and also implemented the refresh logic if the access token has expired. We also had the chance to use more of the Bootstrap components to not only style login and registration forms but also to create login and register pages. Finally, we implemented a custom React Hook to handle everything concerning authentication on the frontend, with methods for registration and login, and some utilities to retrieve tokens from localStorage and also set tokens and user data in localStorage. The creation of the custom Hook helped us make some refactoring in the code base according to the DRY principle.
In the next chapter, we will allow users to create posts from the React application. We will learn how to make requests to the backend using the custom-written axiosService, display modals, handle more complex React states, and also use the useContext React Hook to handle pop-up displays.
Questions
- What is localStorage?
- What is React-Router?
- How do you configure a protected route in React?
- What is a React Hook?
- Give three examples of React Hooks.
- What are the two rules of React Hooks?