
9
Creating an Animated Intro from Scratch
Welcome to the ninth chapter of this book, where you will learn how to create your very first professional complete project!
In this chapter of the book, we will learn how to create a professional-looking intro using some of the tools from Filmora 11 that we learned about throughout the book. This is a great project to test out a lot of the knowledge and skills that you’ve acquired so far. Before you see what tools you will be using throughout this chapter, I would like to mention that you are not obligated to follow everything I do perfectly; I encourage you to add your own creative spins to your intro video, as that will help expand your creative boundaries.
In this chapter, you will learn the following:
- Planning ahead to avoid straying too far from the goal and stay within the scope of your project
- Creating a logo quickly using an online resource
- Making your effects pop and set the mood for your video
- Adding animations and filters that help you achieve a sleek and professional intro
- Adding audio to your video
- Exporting your video
Technical requirements
You can download the supporting files for this chapter from GitHub at https://github.com/PacktPublishing/Filmora-Efficient-Editing/tree/main/Chapter09.
Planning ahead
Before even opening the software, it is always advisable to make a rough plan of what you want your final version to be like. This will help us scope and stay focused on the task without deviating too much as we work on our project. This doesn’t mean it’s a bad thing to come up with new ideas in the middle of creating our video, which will happen regardless, but it will help us not to stray too far from our goal. A good way to do this is to create a small list of guidelines using simple wording that we can always refer back to. For example, for this project, I’ve made the following list, but feel free to create your own if you feel confident in doing so:
- The intro length should be 4 to 5 seconds long
- The intro is for gaming videos for a YouTube channel
- The intro should have upbeat audio
- The audio should fade in at the beginning and fade out at the end
- The style should be minimalistic yet sleek
I have given myself five guidelines in the list, but don’t let that stop you from adding more, as the more guidelines you add to the list, the easier it will be for you, as you’re creating the video.
One last thing before we move on to the next step of creating our intro – please note that I’ve used extremely simple and brief wording when adding my guidelines. This gives me the freedom to be creative if any new ideas come to me and easily allows me to build upon them if needed. If you are creating a project for a client, a list of guidelines will need to be created based on what the client wants.
Now that we’ve gotten all this out of the way, we can move on to creating the logo that we will be using for this project.
Adding the logo and preparing our video
For a small part of this chapter, you will need a logo or image to use. If you don’t have one, please feel free to download and use the logo that I’ll be using (see Appendix 1) and import it inside Filmora, as you learned earlier in this book. In the following steps, we will see how to add our backgrounds, logo, and text to give us a good starting point that is ready for editing.
Firstly, we need a background for our video, and for this, I am using a free Filmstock asset called Gaming Greenscreen Background. From the variety of different assets, I chose Gaming Greenscreen Background Overlay 10, which can be found in the Effects library. You can choose to use the same one, or if you have another idea for the background, please feel free to use that one:
- Once the background is added, it is time to add our logo and some text on new separate video tracks, as shown here.
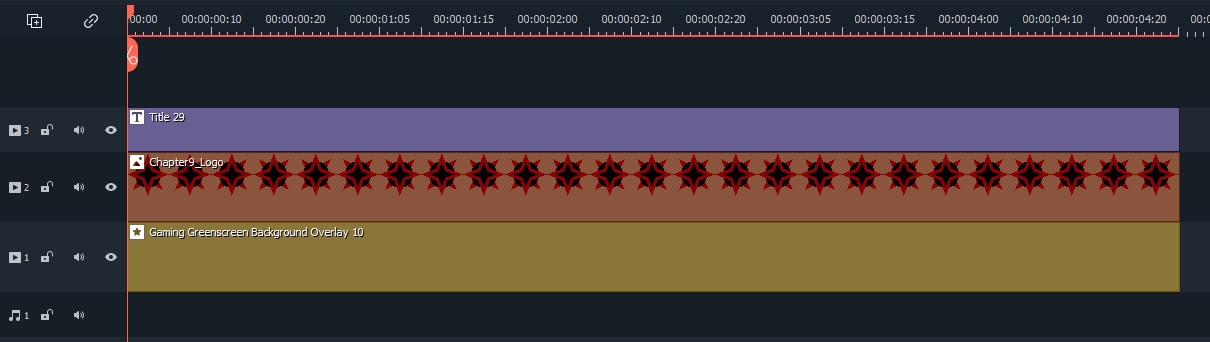
Figure 9.1: Wondershare Filmora 11 – the logo project initial timeline
As you can see, just adding them in and previewing our video won’t make our video look professional or good to be completely honest, so let’s change that. However, before we move on to adding all our cool effects and animations, let’s tweak a few of the properties of our existing assets.
- For the text, you’ll want to add the name of whatever the video is about and change the color so that it can be easily read; in my case, I will make up a random name for the supposed YouTube channel this is for. Once that is done, change the logo and the text to your desired size and position on the screen. For my project, I placed the logo in the center of the screen, changed both the X and Y axes to 48, and placed the text beneath the logo.
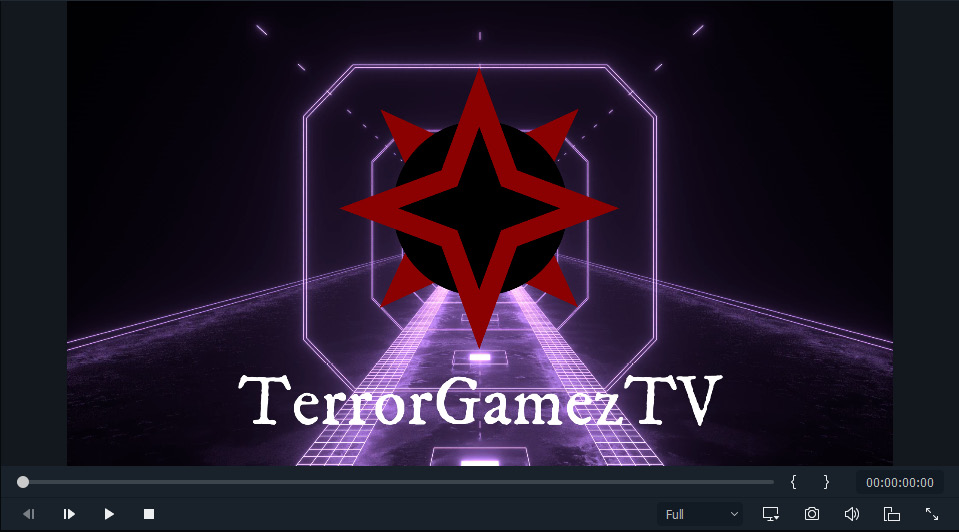
Figure 9.2: The logo project initial viewport
Now, we can move on to adding all the extra features that will make our intro unique and appealing.
Adding our effects, animations, and filters
Now that we have the basics set up, we can continue making this a great intro. We will work on each element that we added one at a time, starting with our background:
- The first thing we’ll do to spice up our background is add an effect to make it look slightly better than it does. To achieve this, I added two more video tracks and moved the text and logo on top of them, while also adding two new effects on the now-empty video tracks. The two effects are Chromatic Aberration and Cool Film, which again can be found in the Effects library.
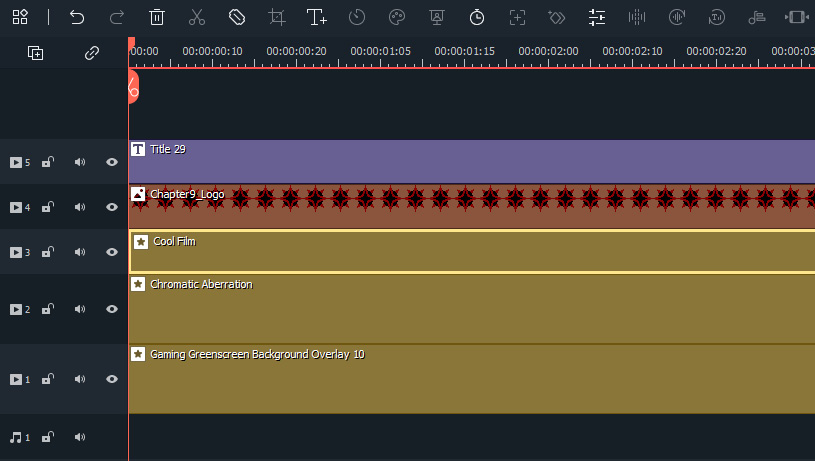
Figure 9.3: The logo project additional effects
Now, it’s worth mentioning that I changed my video length to around 6 seconds rather than 4 seconds as it was beforehand (refer to Figure 9.1) to show you that as you go along, you will need to sacrifice a few of your initial guidelines (unless explicitly considered vital by a client) in order to make the final outcome better. In this case, I felt that the intro was way too short after adding the effects, and in order to allow them to fulfill their purpose, I needed to extend the runtime of the intro.
- As I am now happy with the background, I can lock the first three video tracks to avoid any accidental changes and move on to the next video track containing our logo.
- For the logo, the plan is to gradually make it bigger at the beginning and fade in and out before it gets smaller and disappears at the end, which will make it more interesting to view. I know it sounds a little bit confusing, but please do not worry, as I’ll show you every step of the way. We’ll start with the size changing over time, and to do that, we first need to double-click on the logo, go to the Animation tab inside the Edit menu, and then select the Zoom In animation and make it last 1 second.
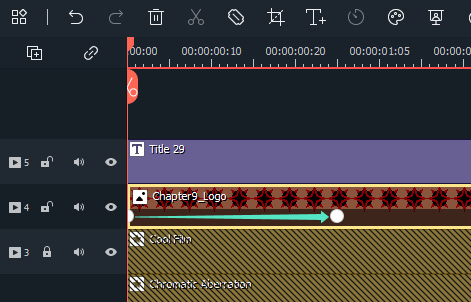
Figure 9.4: The intro logo animation
- Next, we need to use the Split functionality 1 second before the end of the remaining clip, as can be seen in the following screenshot, and add the Zoom Out animation.
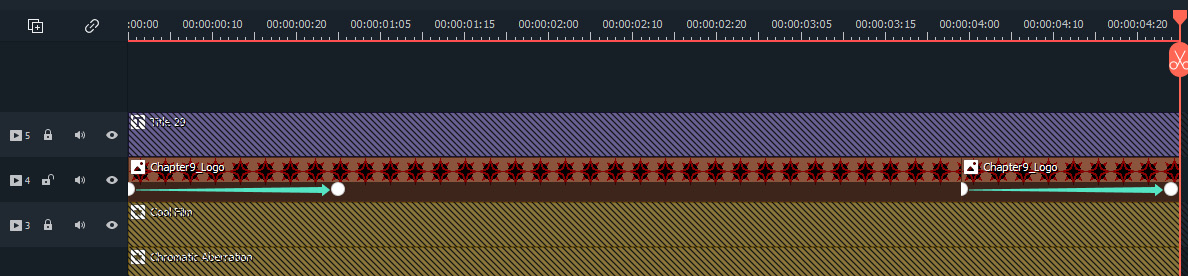
Figure 9.5: The second intro logo animation
- We are now left with the middle part of our logo on the timeline, and we want to drag the Chromatic Aberration effect on top of all three logo clips until we see the blue icon at the top left.
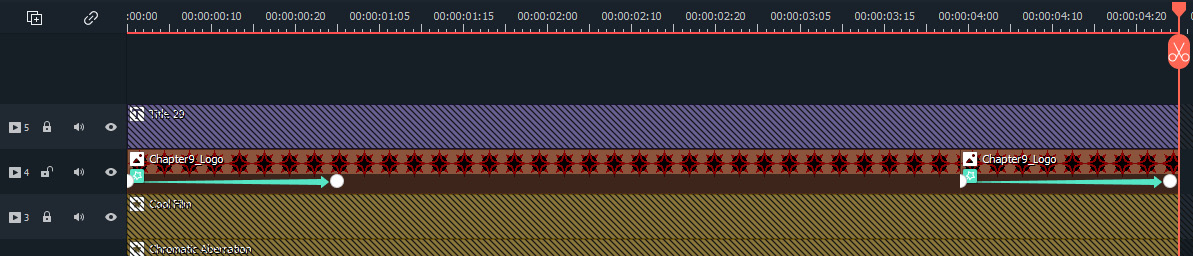
Figure 9.6: The intro logo effects
The reason we are adding the same effect as we did to the background is to promote consistency between our different clips and make them look and act as if they belong together, which is very important when making a good intro. Thus, we are now finished with the logo and can now move on to the text we added at the beginning of the chapter.
- For the text, we will mostly be tweaking the appearance, but as always, feel free to experiment and add your own ideas to it. To edit it, we need to go to the Edit menu once again by either double-clicking on it or clicking on the Edit button.
- The first thing we will do to the text is choose a preset text style, which for me will be the Text Style 4 option in the Titles tab and Preset category, as it gives it a cool-looking shadow that improves the look of the intro.
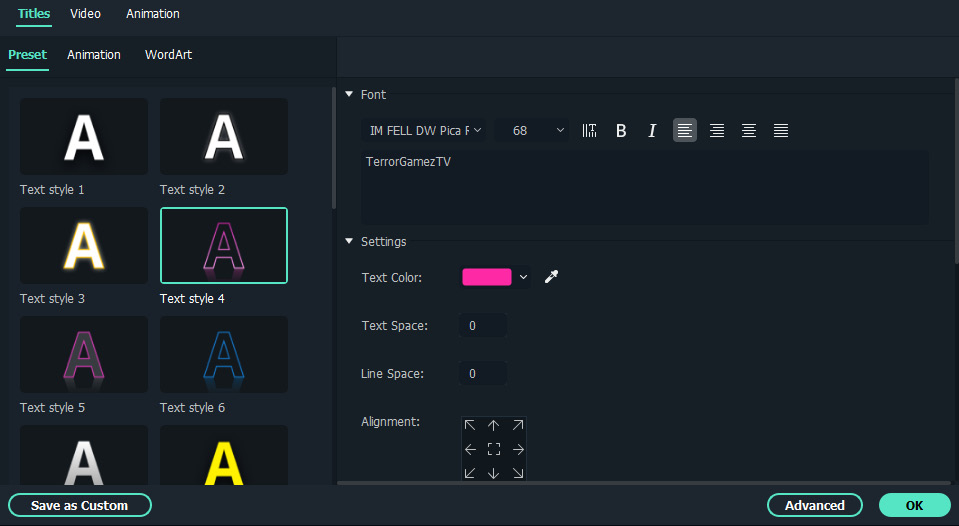
Figure 9.7: Text properties
Next to the Preset category, we have the Animation category. Please make sure that you are still in the Titles tab and not the Animation tab, as these two are completely different features.
- From the options given to us by Filmora, I have chosen to add the Random animation, as I really like this type of animation. A good reason to add an animation such as this here is that it will run simultaneously with our logo fading in, which again will give it a consistent and cohesive feel.
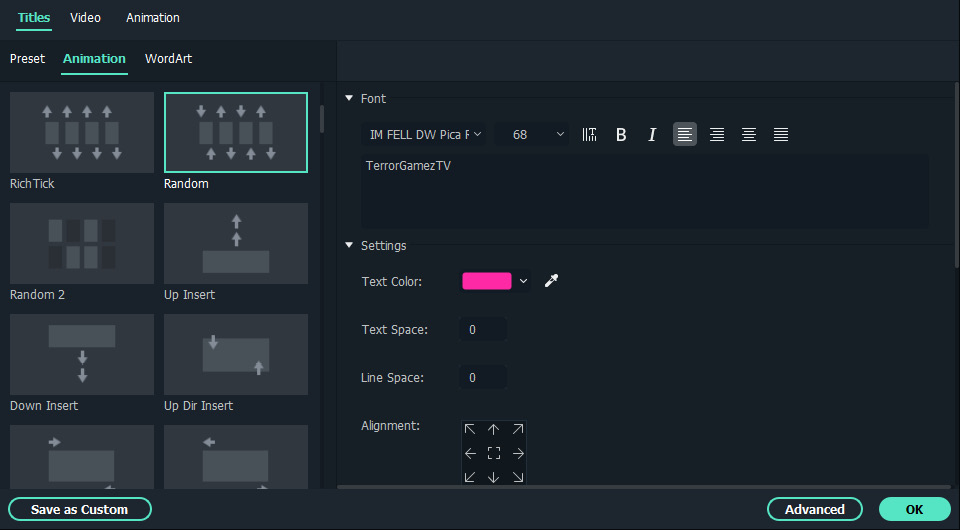
Figure 9.8: The text animation category
We have completed all the visual stuff that concerns our intro. We have used a lot of the tools and features that we learned throughout this book, including but not limited to effects, video tracks, animations, and so on. It is now time to focus our attention on the audio in the next and final part of this chapter.
Adding our audio and exporting
We’re not done just yet; the last part we need to work on before exporting is our audio. Now, not all intros have audios and not all need them, so if you feel like your intro is like that, feel free to skip to the next part of this section, where we’ll export our intro to finish up this chapter.
To start, you need to choose what kind of audio you’d like to have. As a rule of thumb, you want to match the intro to the type of content or product this will be used for. If you’re doing this for a client, this is where knowing as much as possible about the client and product will help you the most.
Let’s get started by adding the chosen audio on the audio track on the timeline and trimming it to match our video length.
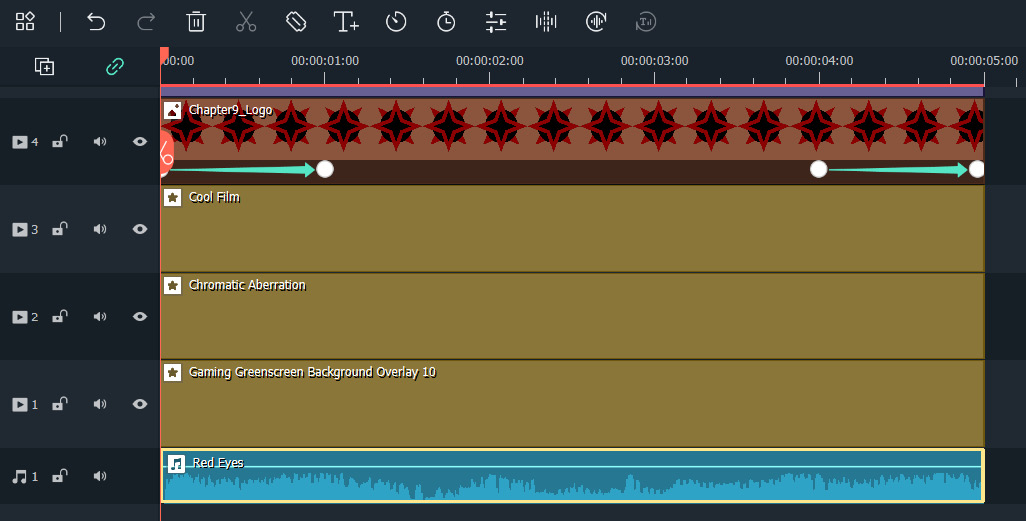
Figure 9.9: The audio track
Once that is done, you can double-click the audio clip to go inside the edit menu and add a 1.5-second Fade in effect and a 2-second Fade out effect. This is to help ease the viewer in and out of the intro so that it’s not a sudden cut in and out of the intro.
The other thing we want to do to make our audio that much better is to add an equalizer, and for my intro, I chose one called Classic, as it’s exactly what I was looking for.
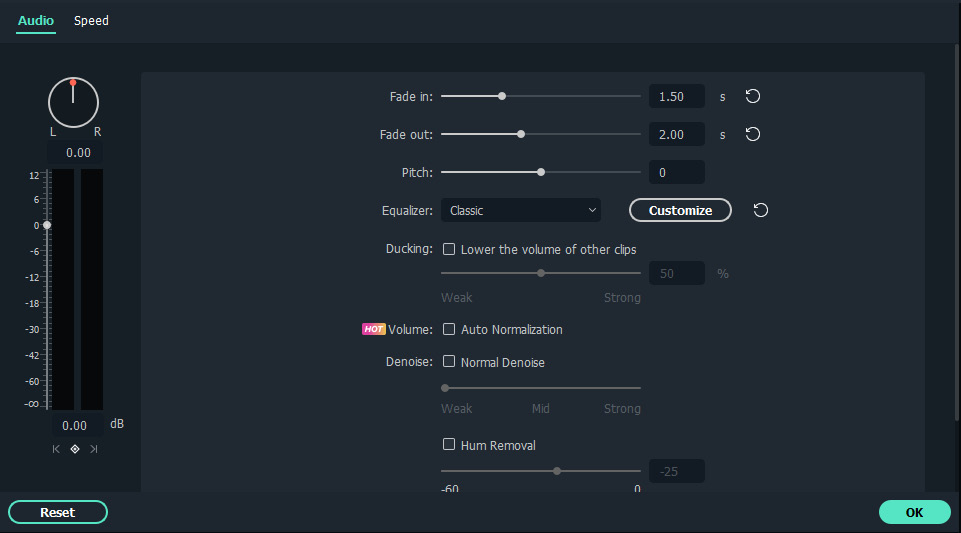
Figure 9.10: Audio properties
The last thing that remains is to export our video by clicking the Export button and simply exporting it as an MP4.
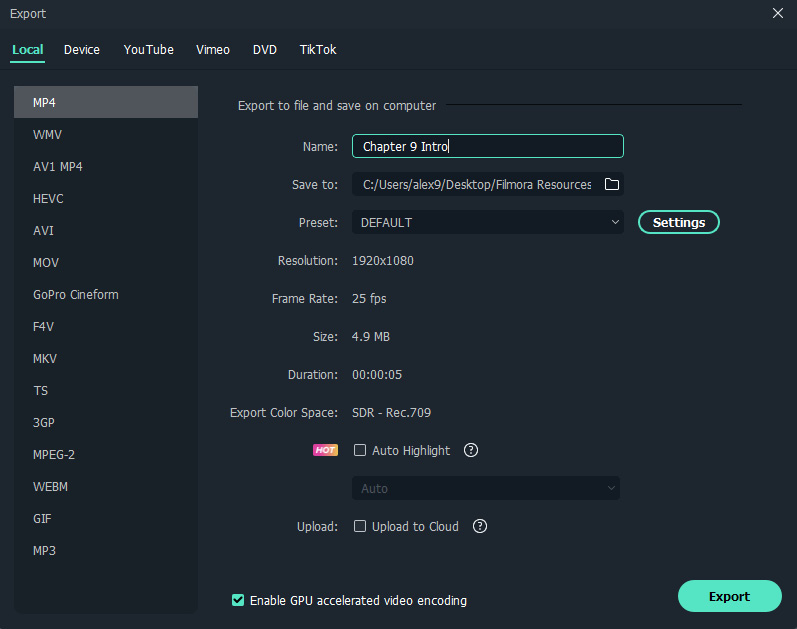
Figure 9.11: Exporting
And with that, we have reached the end of this last section of the chapter. We have added our audio and a few cool effects, including the utilization of the Equalizer tool, and exported the intro into a viewable and shareable format, which means we now have a final intro that we can use.
Summary
Congratulations on making it through this chapter, which saw us practice how to create an intro for a presentation or YouTube video! We saw how with just a few tweaks in the Edit menu, we can create something very cool and unique with very few initial resources.
In the next chapter, we will see how to record gaming videos and how to edit them in a way that is appealing and fun to watch.