Like the WPF technology discussed in Chapter 19, WCF is one of the pillars of the Microsoft .NET platform starting in version 3.0. WCF provides a unified approach to building service-oriented, client/server, messaging, and other distributed types of application. It effectively replaces or abstracts several older technologies:
Web Services (
asmxservices)Remoting
Enterprise Services
MSMQ
WSE
In Chapter 15, I discussed how the CSLA .NET data portal uses WCF to implement a powerful client/server model based on the mobile object concept. You can use XML services to build either client/server or service-oriented applications. My recommendation is that, when building an application interface using services, you follow a message-based, service-oriented architecture. This will result in looser coupling between your services and the applications that consume them, which in turn will increase the maintainability of your overall system and all the applications that interact using your services.
In this chapter, I'll provide a short overview of WCF as used to build XML services. Then I'll discuss the creation of a WCF service interface for the ProjectTracker business objects in order to illustrate how business objects can support the creation of XML services. First, however, we need to discuss the difference between the client/server and SOA models.
Terminology is important in any meaningful discussion about SOA. Table 21-1 defines the terms I'll be using in this chapter.
Table 21.1. Important Service-Oriented Terms
Term | Definition |
|---|---|
Application | A set of behaviors implemented within a logical trust boundary. This term includes traditional single-, 2-, and n-tier applica-tions, as well as applications that consume services, and applications that provide a service interface. |
Edge application | An application that provides a user interface and consumes services from other applications. It sits on the "edge" of the system. |
Logical trust boundary | A boundary describing both security and semantic trust. Data or messages crossing this boundary are going to or coming from code that is not trusted, either due to security or because you don't know if that code follows your semantic rules. |
XML service (or just service) | An application that implements its interface layer in the form of XML messages that are received from, or returned to, a consuming application. |
Consuming application | An application that interacts with one or more other applica-tions using XML messages. |
System | A group of two or more applications that interact with each other using XML messages. |
In short, this means that an application is a self-contained entity. It might be a WPF application, a web application, or a service. Each application might be deployed using a single-, 2-, or n-tier physical model, and each application should be implemented using an n-layer logical model, as described in Chapter 1.
This also means that services are used for communication between applications, not inside them. Service communication is used to cross a trust boundary from one application to another application.
When you start connecting different applications to each other using services, you are creating a system. None of these applications should trust each other; each one has its own trust boundary. However, they can interact with each other by passing messages, resulting in a loosely coupled environment where (within reason) each application can be independently versioned and maintained without breaking the overall system.
The reality is that few organizations are building XML services or Web Services in a service-oriented manner. The vast majority of XML services are built using an n-tier client/server mindset.
There's nothing wrong with using XML services to build client/server applications. (I obviously think client/server is valuable; look at the data portal.) However, it is important to realize the strong difference between n-tier and SOA, so you can consciously choose which architecture you want to pursue.
In Chapter 15, I demonstrated one way to use WCF to implement client/server, so this chapter will focus on a message-based, service-oriented implementation. In this context, your application is either a service provider or a service consumer (or it could be both).
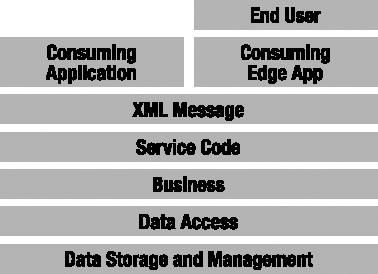
If your application is a service provider, you should understand that XML services are fundamentally just a text format for data interchange, much like HTML is for a web application. To be clear, I am suggesting that an XML service is merely another type of interface for an application. I've already discussed WPF and Web Forms interfaces, which allow a user to access an application. A service that accepts and returns XML messages is just another type of interface, as shown in Figure 21-1.

XML services are simply another type of interface that the application can make available. The primary difference is that an XML service interface is designed for use by other applications, not by users directly. Another application can use these services to get or update data in your application. This other application that's consuming your data may or may not have users of its own. This concept is illustrated in Figure 21-2, where you can see a consuming application without an end user, and an edge application that provides a user interface for some human end user.
At an abstract level, XML services enable one application to call procedures or methods in another application. On the surface, this is similar to the aims of RPC, DCOM, RMI, IIOP, and .NET Remoting—all of these technologies enable one application to invoke procedures in another application.
Note
It's also possible to view these technologies as a way for two components in the same application to interact with each other. While this is definitely a common use for the other technologies I mention, it isn't the intended use of XML services. XML services are designed for cross-application communication, not cross-component communication. This is because the focus is loosely coupled interoperability. Due to this focus, XML services don't offer the same performance or features as the other more platform-specific technologies listed.
The primary technology provided in .NET for creating and consuming XML services is the WCF, which enables the creation of services and consuming applications using a standardized API. It supports numerous network transport options, including
HTTP
TCP sockets
Named pipes
MSMQ
WCF also supports the WS-* standards, including
Messaging
Addressing
Metadata exchange
Policy
Security policy
Security
Trust
Secure conversation
Reliable messaging
Coordination
Atomic transaction
WCF is also extremely extensible and continues to evolve. For example, while I use the term XML services, it is possible to build a service that accepts and returns messages encoded in the JavaScript Object Notation (JSON) format. Architecturally, there's no significant difference; the data on the network is simply in a different format. Another example is support for REST services. There are some design differences between traditional XML services and REST services, but architecturally they remain comparable.
Complete coverage of WCF requires entire books, so this chapter won't discuss all these features and options. My focus in this chapter is on the architecture and design you should use when building an XML service interface on top of your business objects.
A WCF service consists of several elements. All the elements listed in Table 21-2 work together to implement the service and to expose it to consuming applications.
Table 21.2. Elements of a WCF Service
Element | Description |
|---|---|
Endpoint configuration | Configuration settings in |
Service contract | Definition of the operations, data types, and fault types exposed to a consuming application |
Endpoint definition | A |
Service implementation | The implementation of the service contract and associated operations |
I'll discuss each of these in more detail.
Endpoint Configuration
The three items listed in Table 21-3 define the configuration for a WCF service endpoint.
Table 21.3. Definition of a WCF Service
Element | Description |
|---|---|
Address | A URI describing where to find the service. Often this is an |
Binding | Defines the transport technology and related options used to communicate between the consumer and provider of the service. The binding describes not only the transport technology, but also options such as encryption, authentication, and reliability. |
Contract | Describes the specific service methods, data formats, and error formats accepted and returned by the WCF service. |
Of these, the binding and contract are the most complex.
The address is usually an http:// URL, such as
http://myserver/myroot/myservice.svc
The specific address format will vary slightly if you use a different network transport technology, but the basic concept is always the same: the address describes the location of the service.
Bindings are complex, because the binding describes the configuration for the technology used to transport messages to and from the service. Configuring bindings for various technologies, and all the related options such as security, can be complex and time consuming.
The configuration of bindings is outside the scope of this book. You should know, however, that the two most common bindings are wsHttpBinding and basicHttpBinding:
wsHttpBinding: Allows you to use the features of WCF. This is the default binding for most WCF-to-WCF communication. It employs the WS-* standards, so it may work with other XML service technologies if they also fully support the standards.basicHttpBinding: Provides an older protocol that is compatible withasmxWeb Services. It is also useful when working with Silverlight 2.0 clients and other client technologies that don't fully support the advanced WS-* standards.
Contracts can be complex, because they describe the shape of the WCF service itself. The contract for a service is really the definition of the service, and the contract contains the information required to create a consumer for the service. Much of the focus of this chapter is on the definition of contracts and how to implement a service that meets the contract's requirements.
These elements are expressed in web.config when configuring the WCF service endpoint—for example:
<system.serviceModel>
    <services>
      <service name="MyService">
        <endpoint address=""
                  binding="wsHttpBinding"
                  contract="IMyService" />
    </service>
  </system.serviceModel>
When hosting your service in IIS, you don't need to provide the address property because it is calculated based on the server name and the virtual root name in IIS. However, you do need to specify the binding and contract.
Configuration is perhaps the most complex part of working with WCF. This example illustrates the simplest configuration of an address, binding, and contract. Most production applications will have a lot more XML to configure security, time-outs, message size limits, and many other features. Visual Studio will help you with some of this configuration, but you will need to read a book or two on WCF to fully understand all the options and how to use them.
The Microsoft Patterns and Practices group has created a guidance project to help address this complexity. You can find details at www.codeplex.com/WCFSecurity.
Service Contract
Table 21-4 lists the primary elements of a contract for a WCF service. Defining a contract requires that you think about all these elements.
All three of these elements work together to define the overall contract for a WCF service.
Table 21.4. Primary Elements of a Service Contract
Element | Description |
|---|---|
Service contract | Defines the operations (service methods) exposed by the service that can be called by a consuming application |
Data contract | Defines the shape of message data sent to or from the service |
Fault contract | Defines any nonsuccessful responses that may be generated when a consuming application calls a service |
ServiceContract Attribute
The service contract is implemented as a .NET interface, decorated with WCF-specific attributes—for example:
[ServiceContract]
  public interface IMyService
  {
    [OperationContract]
    ResultData[] MyOperation();
    [OperationContract]
    [FaultContract(typeof(AuthorizationFault))]
    ResultMessage OtherOperation(RequestMessage request);
  }
The interface uses the ServiceContract attribute to indicate that it defines a service contract. Each method that is exposed to a consuming application is decorated with the OperationContract attribute. This means you can define an interface with some methods that are available only on the server, and with others that are available both on the server and to consuming applications. I recommend you avoid mixing those concepts and mark all methods in an interface with OperationContract. If you have methods that can be only called on the server, you should put them in a separate interface for clarity.
Also notice that the methods accept and return complex types, such as ResultData, ResultMessage, and RequestMessage. These are simple .NET classes, but they include attributes so they define specific data contracts. The service contract defines which data contracts are included as part of the overall contract for the WCF service.
The FaultContract attribute specifies the type AuthorizationFault. The FaultContract attribute is used to connect a fault contract to a service operation. This means that OtherOperation() can return a successful result or an AuthorizationFault. Both are valid responses that a consuming application should expect and handle properly.
DataContract Attribute
The service contract defines the operations, or service methods, that a consuming application can call. Operations often accept parameters and return results, and each of these parameter and result types are defined as a data contract.
Technically, it is possible for an operation to accept and return primitive types, but I strongly recommend against this. If your operation accepts a primitive type, such as int, you'll have a hard time versioning your service over time. Remember that the operations and their parameter/result types are all part of the contract. Changing them breaks the contract.
For example, you could define an operation like this:
CustomerData[] FindCustomers(string name);
This works great until you need to enhance the service to also find customers with sales less than some value. If you've used primitive types on your contract, all you can do is add a new method.
CustomerData[] FindCustomersBySales(double max);
This might not be so bad until you also have to find customers with sales greater than some value.
CustomerData[] FindCustomersBySales2(double min);
Pretty soon, you're reinventing the Win32 API or replicating many of the COM component APIs from the 1990s. No one wants that.
A better solution is to use data contract types for all parameter and return values. In that case, your operation is defined like this:
FindCustomerResponse[] FindCustomersBySales(FindCustomerRequest request);
Then you can define the two data contracts. FindCustomerResponse may look like this:
[DataContract]
  public class FindCustomerResponse
  {
    [DataMember]
    public int Id { get; set; }
    [DataMember]
    public string FirstName { get; set; }
    [DataMember]
    public string LastName { get; set; }
    [DataMember]
    public double SalesTotal { get; set; }
  }
The DataContract attribute indicates that this class defines a data contract. The DataMember attribute, which you can apply to fields or properties, indicates that the element is part of the contract. When an instance of FindCustomerResponse is serialized, all DataMember elements are included in the resulting byte stream.
The FindCustomerRequest class may start like this:
[DataContract]
  public class FindCustomerRequest
  {
    [DataMember]
    public string Name { get; set; }
  }
As you discover new requirements, you can add elements to the data contract without breaking the service contract (and thus without breaking existing consuming applications).
[DataContract]
  public class FindCustomerRequest
  {
    [DataMember]
    public string Name { get; set; }
    [DataMember(Order=2)]
    public double MaxSales { get; set; }
    [DataMember(Order=3)]
    public double MinSales { get; set; }
  }
The Order parameter to the DataMember attribute indicates which version of the data contract introduced the new element. You can use this technique to extend the contract of your WCF service over time without needing to add new operations.
FaultContract Attribute
The final part of a contract for a WCF service is the fault contract. When an operation is called, it either succeeds or fails. If it succeeds, the operation will typically return some information through a defined data contract. Failure is more complex, because there are different kinds of failure.
Failure might be due to something entirely unexpected or exceptional. In that case, the operation will typically throw an exception, which flows back through WCF to the consuming application as an unexpected fault. An unexpected fault not only tells the consuming application that the operation failed, but it faults the WCF channel, which means that the network channel is no longer valid.
However, it is also possible that the operation could fail due to something you do expect. For example, your operation may do some authorization, and you may know ahead of time that the authorization could fail. Or the operation may include business rules, and if certain business rules or requirements aren't met, the operation could fail. These expected failures are also returned to the consuming application as faults, but they are expected faults that indicate a valid, though unsuccessful, response.
How does a consuming application know which faults are "normal"? These faults are described as a fault contract, so the consuming application knows they are a valid (if unsuccessful) result.
Note
Not all XML service technologies support the concept of fault contracts. For example, the WCF implementation in Silverlight 2.0 doesn't support this concept, so Silverlight can't call operations decorated with the FaultContract attribute. Make sure your consuming applications can support fault contracts before you use them.
The FaultContract attribute is applied to an operation and defines a serializable type that is returned to contain information about the fault.
[FaultContract(typeof(MyFault))]
This serializable type is a data contract. Within the service implementation, the code may throw a fault using this type:
MyFault fault = new MyFault();
  // set fault properties here
  throw new FaultException<MyFault>(fault, "The code cannot run");
The information in the MyFault object is returned to the consuming application to indicate that the operation failed, but that it failed in an expected or valid manner. A responsible consuming application will be implemented to expect and properly handle any faults declared by a service.
If the consuming application is written using WCF, it'll get a FaultException<T> that contains a client-side representation of the MyFault object, along with the message text provided directly to the FaultException on the server. Again, a responsible consuming application will be expected to handle any faults declared as a FaultContract on each operation.
Endpoint Definition
A WCF service is exposed to consumers through an endpoint. This endpoint is expressed as a svc file that connects the endpoint to the code that implements the service contract. You can put the service code directly into the svc file, but I prefer to keep the code separate for clarity. Here's a typical svc file named MyService.svc:
<%@ ServiceHost Language=C#
                  Debug="true"
                  Service="MyService"
                  CodeBehind="~/App_Code/MyService.cs" %>
The primary properties here are Service and CodeBehind. The Service property specifies the name of the class that implements the service. The CodeBehind property specifies the location of the code file containing the code for that class.
Note
You could also put your service implementation in a separate Class Library assembly. In that case, you would not use the CodeBehind attribute; instead, you would provide the full type name of the class that implements the service in the Service property.
A consuming application will reference this MyService.svc as the entry point to the service implementation.
Service Implementation
At this point, most of the WCF-specific work is done. You've seen how to configure the endpoint, define the endpoint, and define the contract for the service. All that remains is to implement the service, which is pretty much all about your business and application requirements, not about WCF.
Remember that the service contract is defined as a .NET interface, with some WCF-specific attributes attached. Your service implementation is just a .NET class that implements that interface—for example:
public class MyService : IMyService
  {
    public ResultData[] MyOperation()
    {
      // implement operation here
    }

    public ResultMessage OtherOperation(RequestMessage request)
    {
      // implement operation here
    }
  }
The method implementations are typically business-focused. However, it is important to understand one key design issue: your internal implementation and data structures should be separate from the external data contract structures.
In other words, you shouldn't use ResultData, ResultMessage, or RequestMessage as business types or as types that are retrieved or stored directly into your database. These types are part of your public contract, and changing them is difficult and risky. Any change to these types risks breaking any consuming applications.
If you allow your business code to rely on these types directly, then changing your business code becomes difficult, because you are tying your external interface to your internal implementation. This is a direct violation of the concept of encapsulation, and encapsulation is one of the most powerful tools in the arsenal of object-oriented and service-oriented programming.
As you look at the ProjectTracker sample code later in this chapter, you'll see that I use the business object types from ProjectTracker.Library as my internal implementation, and I have entirely separate data contract types to define the public contract of the service. I do this specifically to achieve encapsulation and to preserve the maintainability of both my application and my service contract.
Note
Business objects created using CSLA .NET cannot be directly exposed as part of a service contract. The serialization process used by WCF will not serialize a CSLA-style business object. When using CSLA .NET to create your business layer, you must plan to expose separate data contract types in your service contract, which is what you should do in any case.
At this point, you should understand how to define a service contract, define and configure an endpoint, and implement the service contract as a service implementation. In many cases, this is enough information to build your services.
The ProjectTracker application is a bit more complex, however, because it uses a custom authentication scheme, where the user's credentials are validated against data in a custom SQL Server database. Unfortunately, this turns out to be one of the most complex security scenarios to implement in WCF, so before I get into the ProjectTracker WCF service, you'll need to understand how the custom authentication process works in WCF.
If you're using custom authentication in your business objects, you'll typically want the client to pass a username and password to the service. The service can then authenticate those credentials and set up your custom principal object for use by the server code.
This section of the chapter is pretty intense. WCF configuration can get very complex. You should know that when using Windows AD authentication or the ASP.NET MembershipProvider model, things are much simpler and you can essentially skip this section of the chapter. However, the ProjectTracker application does use a custom username/password authentication model, as do many web applications in the world. If you have a similar situation, then buckle your seat belt and read on.
You can easily authenticate the credentials and set up the principal object using a CSLA .NET-style custom principal object. For example, in ProjectTracker, the PTPrincipal class has a Login() method to do this:
PTPrincipal.Login(username, password);
Unfortunately, getting the username and password from a client into a WCF service is challenging. Remember that this is a function of security, so a lot of infrastructure and configuration work is required to get all the security pieces set up before you can safely pass a username and password across the network.
WCF is designed to be secure, so it won't allow you to pass a username and password without first having a secure and encrypted binding. To do that, you first need a server certificate, either for SSL or for WCF's built-in, message-level security. Creating, installing, and configuring a test certificate is challenging. After that, some of the WCF configuration and code to use the certificate is also a bit complex.
Three steps are required:
Acquire or create an X.509 certificate.
Configure WCF to use message-level security.
Configure WCF to use username credentials.
I'll walk through each of these steps.
Acquiring an X.509 Certificate
Securing a service or a website is typically done with something commonly called an SSL certificate, which is more formally called an X.509 certificate. In a production Internet environment, a commercial firm like VeriSign or RapidSSL typically issues these certificates. These commercial certificates are cryptographically linked to a trusted root certificate, and all the major vendors have their root certificates installed automatically on Windows, so all Windows clients automatically trust the certificates they sell to their customers.
In a production intranet environment, the certificates might come from your organization itself. Many organizations have their own internal certificate authority and their own internally trusted root certificate. Certificates issued by an organization are trusted only by computers within the organization (because they install the organization's trusted root certificate), not by all computers in the world.
In a development or test environment, the developer often creates the certificates. A developer might use a tool like makecert.exe, which comes with the Microsoft .NET SDK. Such a certificate isn't linked to any trusted root certificate, so no one trusts it unless the user on a specific machine trusts it specifically.
Creating a Test Certificate
Since most of us do development without access to either production or corporate certificates, it is important to understand how to create and install a test certificate. This is the focus of the rest of this section.
Note
If you do have access to the private key of a production or organizational certificate, you can use that instead of creating your own as discussed here.
Creating and installing a certificate is a multistep process:
Create the certificate using
makecert.exe.Install the certificate in the
LocalMachinecertificate store.Grant IIS access to the certificate file.
Copy the certificate to the
TrustedPeoplecertificate store on any test client machines.
Creating the Certificate
The Microsoft .NET SDK comes with a tool called makecert.exe. This complex tool has a lot of different uses and options. The article, "X.509 Certificate Validator" (MSDN, http://msdn2.microsoft.com/en-us/library/aa354512.aspx), describes in detail how to use the tool to create a certificate.
In summary, you can use the following command line to create a test certificate:
makecert -n CN=localhost localhost.cer -sky exchange -ss My -sr LocalMachine
Table 21-5 lists the arguments and their meaning.
Table 21.5. Makecert.exe Arguments
Argument | Meaning |
|---|---|
| Defines the name of the certificate. If possible, this should be the network domain name of your server, but you can provide a name unique to your service if desired. |
| This optional argument indicates that the certificate should be saved to a file named |
| Specifies that the certificate should support key exchange. This is required for WCF, because a key-exchange process occurs as the secure channel is established. |
| Indicates that the certificate should be installed to the certificate store named |
| Indicates that the certificate should be installed to the |
It is important to realize that this command not only creates the certificate, but it also installs it for use by the server. This means that you should run this command on the machine that will be hosting your WCF service.
In my example, I use the name CN=localhost because I'm running both the client and service components on the same development machine. The machine's domain name is localhost for all code on the same machine, and having the certificate name match the machine's domain name simplifies WCF configuration.
If you plan to use test clients that are on different machines, you'll want to use a public machine name for your certificate name, or some arbitrary name such as the name of your service. That last option requires a little more configuration of WCF.
Granting Access to the Certificate to IIS
Even though the certificate is installed into the LocalMachine certificate store, it isn't entirely available to IIS without some extra work. The reason is that websites run under a limited user account on the server. They don't, by default, have access to the key file that contains the certificate's private key information.
Granting access to the key file is complicated by the fact that actually finding the key file can be challenging. To help address this, the WCF team at Microsoft has provided a sample application called FindPrivateKey. The "FindPrivateKey" article (MSDN, http://msdn2.microsoft.com/EN-US/library/aa717039.aspx) provides details and download information about FindPrivateKey.
Once you've downloaded and built the sample application, you can run it as follows:
findprivatekey My LocalMachine -n "CN=localhost" -a
The result is the full path to the certificate file corresponding to CN=localhost in the LocalHost/My certificate store.
You can then use the cacls.exe tool to grant access to the IIS account. For example, you'd enter the following command (on one line):
cacls.eXE " ??? C:/Documents and Settings/All Users/
Application Data/Microsoft/Crypto/RSA
/MachineKeys/8aeda5eb81555f14f8f9960745b5a40d_38f7de48-5ee9-452d-8a5a-92789d7110b1"
/E /G "NETWORK_SERVICE":R
In this example, you can see both the full path to the certificate file (from the FindPrivateKey utility) and the account that is granted access (NETWORK_SERVICE). This is because I am working on Windows Server 2003, and it would be the same on Windows Vista. On Windows XP, however, you'd grant access to the ASPNET account.
The result is that your service, when hosted in IIS, will have access to the certificate's private key, so it can use that information to sign and encrypt messages.
Trusting the Certificate
Though the makecert.exe command shown earlier installs the certificate for server use, it doesn't make your machine trust the certificate. Because a trusted root authority didn't issue the certificate, you must manually establish that you trust the certificate.
To do this, you must copy the certificate into your TrustedPeople certificate store. You can do this using the certmgr.exe tool.
certmgr  -add -c -n localhost -r LocalMachine -s My -r CurrentUser -s
TrustedPeople
Table 21-6 lists the arguments to the command and their purpose. The article, "How to: Make X.509 Certificates Accessible to WCF" (MSDN, http://msdn2.microsoft.com/en-us/library/aa702621.aspx), discusses the process in more detail as it relates to WCF.
Table 21.6. Certmgr.exe Arguments
Argument | Meaning |
|---|---|
| Specifies that the certificate should be added to a certificate store |
| Indicates that the certificate should be copied from another certificate store |
| Specifies the name of the certificate to be copied |
| Indicates the source certificate store location |
| Indicates the source certificate store name |
| Indicates the target certificate store location |
| Indicates the target certificate store name |
In short, this command copies the certificate from LocalMachine/My to CurrentUser/TrustedPeople. Server components use the LocalMachine/My certificate store, while interactive user applications use CurrentUser/TrustedPeople.
Manual Installation
Another way you can install the certificate is by double-clicking the .cer file. You need to use this technique to install the certificate onto other client machines. This brings up a dialog that allows you to view details about the certificate.
Click the Install Certificate button to bring up the Certificate Import Wizard. Figure 21-3 shows the key panel of the wizard, where you must specify to install the certificate into the Other People store, which corresponds to CurrentUser/TrustedPeople.

The result is the same: the current user can now use the certificate to communicate with the server.
Configuring WCF to Use Message Security
WCF can use transport-level security, like SSL; message-level security, like I'll discuss in this section; or a combination of both. The important thing is that you must use some form of security (encryption and signing of data) before you can send a custom username and password from the client to your service.
If you're already set up to use SSL security, you don't need to switch to message security. However, if you're not using any security, it is often simpler to set up message security as shown here. The process involves customizing the behavior for both the service endpoint and the corresponding client configuration.
Configuring the Service
By default, the wsHttpBinding uses message-level security, but you need to provide a certificate for the security to actually be enabled. Configuring the service to use a certificate is done through a behavior. As with everything in WCF, you can configure the behavior through code, but it is more commonly done through the configuration file.
The config file needs to now include a custom service behavior.
<system.serviceModel><behaviors><serviceBehaviors><behavior name="ServiceCertificate"><serviceCredentials><serviceCertificatefindValue="localhost"storeLocation="LocalMachine"storeName="My"x509FindType="FindBySubjectName" /></serviceCredentials></behavior></serviceBehaviors></behaviors><services> <service name="MyService"behaviorConfiguration="ServiceCertificate"><endpoint address="" binding="wsHttpBinding" contract="IMyService" /> </service> </system.serviceModel>
Notice how the behaviorConfiguration property is now set on the service element to indicate that the service should use this custom behavior.
In the behavior element, the serviceCertificate element indicates how to find the certificate to be used to secure the communication channel. Table 21-7 lists the properties of this element.
Table 21.7. Properties of the serviceCertificate Element
Property | Description |
|---|---|
| The name of the certificate to find. This name must correspond to the name used earlier to name the certificate ( |
| The certificate store location containing the certificate. |
| The certificate store name containing the certificate. |
| Specifies which properties to use when searching for the certificate. In this case, the search is by subject name (the |
The result is that this behavior now requires that the communication be encrypted using the defined certificate.
Configuring the Client
All clients calling the service must also understand that a certificate is required for secure communication. On the client, you can configure WCF through code or in the client's config file. Typically, the configuration is through the config file, and that's what I'll show here.
As with the server, the client defines an endpoint with an address, binding, and contract. These properties must match those on the server, so both agree on the method of communication. Here's the simplest client configuration (prior to adding the requirement for encryption):
<system.serviceModel>
    <client>
      <endpoint name="MyService"
                address="http://localhost/MyService/MyService.svc"
                binding="wsHttpBinding"
                contract="MyService.IMyService">
      </endpoint>
    </client>
  </system.serviceModel>
This is much like the configuration for a server, except the endpoint element is contained in a client element. If a custom behavior is added on the server, an equivalent change is required on the client. The following illustrates the changes required in the client's configuration file:
<system.serviceModel><behaviors><endpointBehaviors><behavior name="ServiceCertificate"><clientCredentials><serviceCertificate><authentication certificateValidationMode="PeerTrust"/></serviceCertificate></clientCredentials></behavior></endpointBehaviors></behaviors><client> <endpoint name="MyService"behaviorConfiguration="ServiceCertificate"address="http://localhost/MyService/MyService.svc" binding="wsHttpBinding" contract="MyService.IMyService"><identity><dns value="localhost"/></identity></endpoint> </client>
There are two important changes here. First, the client endpoint now uses a customized behavior named ServiceCertificate. This behavior specifies that the service requires a certificate and that the client should validate the certificate using PeerTrust.
The default is ChainTrust, meaning that trust flows down from a trusted root certificate. With a test certificate, however, there is no trusted root, so that would fail. The PeerTrust option indicates that trust flows from the TrustedPeople certificate store location, where the certificate was installed in the previous section.
Note
This configuration setting is just for testing. In a production environment, you would typically use the default ChainTrust, because a production certificate would have a trusted root authority from a commercial vendor or from your organization itself.
Second, the identity element specifies the name of the certificate to use. This is not required here, because the certificate name, localhost, matches the domain name for the server, http://localhost/<etc>. However, if your certificate name does not match the server domain name, then you must use the identity element as shown to specify the name of the certificate.
At this point, the service and client are both configured to use message-level secure communications.
Configuring a Service to Use Username Credentials
By default, most common WCF bindings use Windows credentials from the client. This is true even if the client provides a username and password, as they are assumed to correspond to a Windows user account in the server's Windows domain.
If you want to use custom authentication and create a custom security principal object for your service, you need to configure WCF to use your authentication components instead of the defaults. You can do this in a couple of different ways:
Create custom ASP.NET membership and role providers and configure WCF to use your custom providers.
Create a custom WCF username/password validator and authorization policy object.
Both techniques are valid, but the second one is an entirely WCF solution, and it turns out to be relatively simple to implement. As a result, it is the second option I'll discuss in this section.
Using a custom principal object requires changes to the service, both in configuration and code. WCF allows customization for both authentication and authorization. In each case, a class must be created with a custom implementation of the required behavior. These two classes are invoked at different times during the WCF initialization process on every service call.
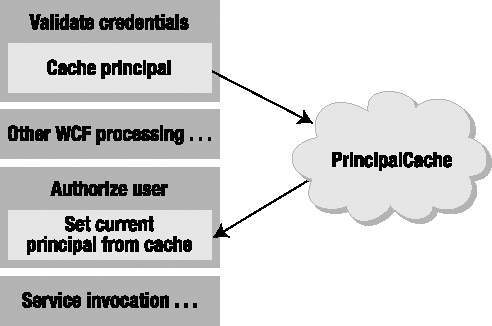
Unfortunately, the strong separation of these two concepts in WCF complicates matters a little. After the credential validation step, WCF clears the principal object from the current thread. Later in the process, the principal can be set for the service's thread, but at that point in time, the credentials are no longer available.
This means that the credential validation step must somehow cache the results of the Login() method in memory so that the principal object can be made current later in the process, as shown in Figure 21-4. This is the purpose behind the PrincipalCache object in Csla.Security.
The PrincipalCache object caches principal objects at the AppDomain level. Since WCF guarantees that a consistent AppDomain is used throughout the life of a service call, this is a safe location for such a cache.
To minimize memory consumption, the PrincipalCache object is implemented as a circular list with a default size of ten items. Keep in mind that the principal object only needs to be cached for the fraction of a second it takes WCF to go through its initialization process prior to invoking the service itself, so the size of the cache should be roughly the same as the number of service requests you expect to occur at any instance in time.
You can control the size of the cache by using the CslaPrincipalCacheSize key in the server's web.config file.
<appSettings>
  <add key="CslaPrincipalCacheSize" value="20" />
  </appSettings>
This overrides the default, expanding the cache to keep the most recent 20 principal objects in memory.
Without the PrincipalCache object, the authorization step would need to go back to the security database to reload the principal object. This would result in two hits to the security database for every service request.
Even with the PrincipalCache object, a second hit to the security database may be required. If the cache is configured to be too small, there's a chance that the principal object could be gone from the cache in the fraction of a second it takes to get from authentication to authorization. To prevent this unlikely occurrence from causing a failure, your authorization code should have the option of reloading the principal from the database if needed, and that's the approach I'll illustrate in this chapter.
Modifying PTPrincipal
Before I get into the WCF authorization and authentication code, it is necessary to modify PTPrincipal and PTIdentity to accommodate the separation between authentication and authorization.
WCF validates the user's credentials early in the process. Later in the process, WCF creates an authorization policy object that defines the principal and identity objects to be used as the service is executed. This authorization policy object is only provided with the username value, not the password, so PTPrincipal needs a way to load the principal and identity objects based purely on the username.
This requirement isn't unique to WCF. When creating a totally stateless web application, the custom principal can't be held in Session on the web server. Instead, it must be reloaded on each page request, based purely on the username. While ASP.NET forms authentication doesn't maintain the password, the username is provided on every page request. You can also use this LoadPrincipal() method to reload the principal from the database on every page request.
The LoadPrincipal() method is similar to the Login() method, except that it only requires a username, not a password. In fact, I've altered the Login() method to share some code.
public static bool Login(string username, string password)
    {
      return SetPrincipal(PTIdentity.GetIdentity(username, password));
    }

    public static void LoadPrincipal(string username)
    {
    SetPrincipal(PTIdentity.GetIdentity(username));
    }
private static bool SetPrincipal(PTIdentity identity)
{
if (identity.IsAuthenticated)
{
PTPrincipal principal = new PTPrincipal(identity);
Csla.ApplicationContext.User = principal;
}
return identity.IsAuthenticated;
}The highlighted line of code invokes a new overload of the GetIdentity() factory method on PTIdentity. This overload uses a different criteria object that contains only the username and calls an overload of DataPortal_Fetch() in PTIdentity:
private void DataPortal_Fetch(LoadOnlyCriteria criteria){using (var ctx = ContextManager<SecurityDataContext>.GetManager(ProjectTracker.DalLinq.Database.Security)){var data = from u in ctx.DataContext.Userswhere u.Username == criteria.Usernameselect u;if (data.Count() > 0)Fetch(data.Single());elseFetch(null);}}
The original login process is unchanged. The UI can either call Login(username, password) or LoadPrincipal(username), and the result will be the same. Of course, only the Login() method actually validates the user's credentials. I'll use the new LoadPrincipal() method in the implementation of the custom WCF authorization behavior.
Custom UserNamePasswordValidator
In WCF, custom username authorization is handled by subclassing UserNamePasswordValidator from the System.IdentityModel.Selectors namespace. The implementation of this class is not complex. If the user's credentials are valid, the method will return without an exception. If the credentials are invalid, the method must throw an exception. Only users with valid username/password combinations get past this point in the process.
It is important to realize that you cannot set the current principal at this point. WCF makes no guarantee that this code will run on the same thread as the actual service instance, and it explicitly resets the principal object at a point after this method completes. However, using the approach shown in Figure 21-4, it is possible to cache the principal in memory for use later by using the PrincipalCache object.
In this section of the chapter, I'm going to walk through the actual code used in the ProjectTracker application, because this will allow you to examine the code and configuration from the download in context. You can find the CredentialValidator class in the PTWcfServiceAuth project in ProjectTracker.
public class CredentialValidator : UserNamePasswordValidator
  {
    public override void Validate(string userName, string password)
    {
if (userName != "anonymous"){PTPrincipal.Logout();if (!PTPrincipal.Login(userName, password))throw new FaultException("Unknown username or password");// add current principal to rolling cacheCsla.Security.PrincipalCache.AddPrincipal(Csla.ApplicationContext.User);}}}
Notice the call to the Logout() method. This is required because the data portal must have a valid—even if unauthenticated—principal to work. Without the call to Logout(), the Login() call would throw a data portal exception due to having an invalid principal on the thread.
If the Login() call succeeds, the resulting principal (which is temporarily the current principal until this method completes) will be stored in the PrincipalCache object. This makes the principal object available for use later in the service initialization process.
Finally, notice that special consideration is made for the username anonymous. Remember that ProjectTracker allows unauthenticated users to access some information, so the application must allow anonymous users to at least make some service calls. This special username will get extra attention in the custom authorization policy class later.
I'll discuss how to configure WCF to use the CredentialValidator class later in the chapter. For now, it is enough to know that this code will be invoked early in the process as WCF initializes itself for every service call.
Custom Authorization Policy
During the initialization process for every service call, WCF creates an authorization policy object. This object is responsible for providing the principal and identity objects to be used during the service call itself, so this is the point at which the custom principal and identity objects must be set.
To implement a custom authorization policy, a class must implement the IAuthorizationPolicy interface from the System.IdentityModel.Policy namespace.
public class PrincipalPolicy : IAuthorizationPolicy
  {
    private string _id = Guid.NewGuid().ToString();

    public string Id
    {
      get { return _id; }
    }

    public ClaimSet Issuer
    {
      get { return ClaimSet.System; }
    }

    public bool Evaluate(EvaluationContext context, ref object state)
    {
      // get the identities list from the context
      object obj;
if (!context.Properties.TryGetValue("Identities", out obj))
return false;
IList<IIdentity> identities = obj as IList<IIdentity>;
// make sure there is already a default identity
if (identities == null || identities.Count <= 0)
return false;
// try to get principal from rolling cache
string username = identities[0].Name;
      IPrincipal principal =
        Csla.Security.PrincipalCache.GetPrincipal(username);
if (principal == null)
{
PTPrincipal.Logout();
if (username != "anonymous")
{
// load principal based on username authenticated in CredentialValidator
PTPrincipal.LoadPrincipal(username);
// add current principal to rolling cache
Csla.Security.PrincipalCache.AddPrincipal(Csla.ApplicationContext.User);
}
principal = Csla.ApplicationContext.User;
}
// tell WCF to use the custom principal
context.Properties["Principal"] = principal;
// tell WCF to use the custom identity
identities[0] = principal.Identity;
return true;
}
}The Evaluate() method is called to evaluate the current context and set the principal and identity. The highlighted lines of code show how the principal is retrieved from the PrincipalCache object based on the username value available from the identity object, which is retrieved from the context.Properties dictionary.
string username = identities[0].Name;
IPrincipal principal =
Csla.Security.PrincipalCache.GetPrincipal(username);The identity object from context.Properties is typically a GenericIdentity that merely contains the name of the user, based on the credentials originally provided to CredentialValidator. WCF created this identity object, which should be replaced by the custom identity associated with the custom principal object.
It is possible that there is no cached principal object matching the username. This can happen for two reasons: because the anonymous username was used, or because a valid user's principal was flushed from the cache since CredentialValidator was called (meaning the cache size is too small). Either way, some valid custom principal object must be created and made current.
Notice that the Logout() method is called before LoadPrincipal(). Remember that WCF clears the principal object between authentication and setting the authorization policy, so when Evaluate() is called by WCF, the principal is not a valid principal from the data portal's perspective. In fact, it is just an authenticated GenericPrincipal at this point. The Logout() method makes sure there's a valid PTPrincipal on the thread before LoadPrincipal() tries to use the data portal.
If the anonymous username was used, then that unauthenticated custom principal is left as the current principal. However, if the anonymous username wasn't used, that indicates that the user's principal was flushed from the cache prematurely. The solution is to call the LoadPrincipal() method to reload the principal and identity objects from the security database.
Note
You may also want to log that the anonymous username wasn't used, as it indicates that your cache size is too small to handle the number of service requests hitting your server.
The result is a valid custom principal that is current on the thread. You can use Csla.ApplicationContext.User to get at the principal like you would in any other environment.
Both the principal and identity must also be made available to WCF by setting values in context.Properties. The custom principal is provided to WCF through context.Properties.
context.Properties["Principal"] = principal;
The custom identity replaces the old GenericIdentity created by WCF.
identities[0] = principal.Identity;
This object is then used as the primary identity for the ServiceSecurityContext provided by WCF.
With these two classes defined in the PTWcfServiceAuth project, all that remains is to configure PTWcfService to use them.
Server Configuration
WCF allows the use of custom username validation and authorization policy objects through configuration. However, before changing web.config, it is important to reference the PTWcfServiceAuth project so that the assembly is available to the service. In the code download, look at the PTWcfService website to see the full web.config file.
The highlighted lines of code show the changes to web.config necessary to use the custom validation and authorization policy types.
<services>
      <service behaviorConfiguration="PTServiceBehavior" name="PTService">
        <endpoint address=""
               binding="wsHttpBinding" bindingConfiguration="UserNameWS"
                  contract="IPTService" />
         <endpoint address="mex" binding="mexHttpBinding"
                   contract="IMetadataExchange" />
      </service>
    </services>

  <bindings>
    <wsHttpBinding>
      <binding name="UserNameWS">
        <security mode="Message">
          <message clientCredentialType="UserName" />
        </security>
      </binding>
    </wsHttpBinding>
  </bindings>
<behaviors>
<serviceBehaviors>
<behavior name="PTServiceBehavior">
<serviceAuthorization principalPermissionMode="Custom">
<authorizationPolicies>
<add policyType="PTWcfServiceAuth.PrincipalPolicy,
PTWcfServiceAuth"/>
</authorizationPolicies>
</serviceAuthorization>
<serviceCredentials>
<serviceCertificate
findValue="localhost"
storeLocation="LocalMachine"
storeName="My"
x509FindType="FindBySubjectName" />
<userNameAuthentication
userNamePasswordValidationMode="Custom"
customUserNamePasswordValidatorType=
"PTWcfServiceAuth.CredentialValidator, PTWcfServiceAuth" />
</serviceCredentials>
<serviceMetadata httpGetEnabled="true" />
<serviceDebug includeExceptionDetailInFaults="true" />
</behavior>
</serviceBehaviors>
</behaviors>The endpoint is configured to use a special bindingConfiguration named UserNameWS. That defines a custom version of wsHttpBinding.
<bindings>
      <wsHttpBinding>
        <binding name="UserNameWS">
          <security mode="Message">
            <message clientCredentialType="UserName" />
          </security>
        </binding>
      </wsHttpBinding>
    </bindings>
It explicitly sets the security mode to Message, which is the default. More importantly, it specifies that the clientCredentialType is UserName, so the service will require that callers provide a username and password when calling the service.
Also, notice that the PTServiceBehavior behavior has been altered. A new serviceAuthorization element has been added.
<serviceAuthorization principalPermissionMode="Custom">
            <authorizationPolicies>
              <add policyType="PTWcfServiceAuth.PrincipalPolicy,
                               PTWcfServiceAuth"/>
            </authorizationPolicies>
          </serviceAuthorization>
This specifies that the principalPermissionMode is Custom, which means that a custom authorization policy must be defined. It is set to use a policyType that references the PrincipalPolicy class discussed earlier in the chapter.
The behavior's serviceCredentials element has also been enhanced to define the customUserNamePasswordValidatorType that refers to the CredentialValidator class discussed earlier in the chapter.
<userNameAuthentication
              userNamePasswordValidationMode="Custom"
              customUserNamePasswordValidatorType=
                        "PTWcfServiceAuth.CredentialValidator, PTWcfServiceAuth" />
With these changes, WCF will now invoke the CredentialValidator to authenticate the caller's username and password. Assuming that the method doesn't throw an exception, WCF will invoke the PrincipalPolicy to set up the authorization policy later in the process. This will include the custom principal and identity to be used by the service.
Providing a Username from the Client
The client application that calls the service must now provide a username with every call. It may also provide a password, but WCF will require that a username value be provided that is not empty or null. The client configuration also needs to change in order to reflect the changes made to the service's configuration.
In the client's code, setting the username and password values is relatively straightforward. You can see an example of the code in the PTWcfClient project.
PTWcfService.ProjectData[] list = null;
      PTWcfService.PTServiceClient svc =
        new PTWcfClient.PTWcfService.PTServiceClient();
      try
      {
      svc.ClientCredentials.UserName.UserName = "pm";
      svc.ClientCredentials.UserName.Password = "pm";
        list = svc.GetProjectList();
      }
      finally
      {
        svc.Close();
      }
      this.projectDataBindingSource.DataSource = list;
Because the service supports the special anonymous username, this will also work (for methods that don't require special roles):
PTWcfService.ProjectData[] list = null;
      PTWcfService.PTServiceClient svc =
        new PTWcfClient.PTWcfService.PTServiceClient();
      try
      {
      svc.ClientCredentials.UserName.UserName = "anonymous";
        list = svc.GetProjectList();
      }
      finally
      {
        svc.Close();
      }
      this.projectDataBindingSource.DataSource = list;
You might also use a channel factory to create the service proxy. In that case, you set the credentials on the factory.
PTWcfService.ProjectData[] list = null;
      ChannelFactory<PTWcfService.IPTService> factory =
        new ChannelFactory<PTWcfService.IPTService>("WSHttpBinding_IPTService");
      try
      {
      factory.Credentials.UserName.UserName = "pm";
      factory.Credentials.UserName.Password = "pm";
        PTWcfService.IPTService proxy = factory.CreateChannel();

        using (proxy as IDisposable)
        {
          list = proxy.GetProjectList();
        }
      }
      finally
      {
        factory.Close();
      }
      this.projectDataBindingSource.DataSource = list;
In this case, you can dispose the proxy, but you should call Close() on the factory object. Disposing the factory may result in an exception from WCF, because WCF treats a Dispose() as an abnormal scenario, whereas it treats Close() as a normal scenario.
Either way, the supplied values are passed securely to the service, where they are authenticated and then used to load the custom principal and identity objects.
Client Configuration
One change is required to the caller's WCF configuration, and it is highlighted here from the app.config file in PTWcfClient:
<bindings>
      <wsHttpBinding>
        <binding name="WSHttpBinding_IPTService" closeTimeout="00:01:00"
            openTimeout="00:01:00" receiveTimeout="00:10:00" sendTimeout="00:01:00"
            bypassProxyOnLocal="false" transactionFlow="false"
            hostNameComparisonMode="StrongWildcard"
            maxBufferPoolSize="524288" maxReceivedMessageSize="65536"
            messageEncoding="Text" textEncoding="utf-8" useDefaultWebProxy="true"
            allowCookies="false">
          <readerQuotas maxDepth="32"
                        maxStringContentLength="8192" maxArrayLength="16384"
              maxBytesPerRead="4096" maxNameTableCharCount="16384" />
          <reliableSession ordered="true" inactivityTimeout="00:10:00"
              enabled="false" />
          <security mode="Message">
            <transport clientCredentialType="Windows" proxyCredentialType="None"
                realm="" />
<message clientCredentialType="UserName"negotiateServiceCredential="true"algorithmSuite="Default"establishSecurityContext="true" /></security> </binding> </wsHttpBinding> </bindings> <behaviors> <endpointBehaviors> <behavior name="ServiceCertificate"> <clientCredentials> <serviceCertificate> <authentication certificateValidationMode="PeerTrust"/> </serviceCertificate> </clientCredentials> </behavior> </endpointBehaviors> </behaviors> <client> <endpoint behaviorConfiguration="ServiceCertificate" address="http://localhost/PTWcfServicecs/PTService.svc" binding="wsHttpBinding" bindingConfiguration="WSHttpBinding_IPTService" contract="PTWcfService.IPTService" name="WSHttpBinding_IPTService"> </endpoint> </client>
If you handcraft your client configuration, much of what you see here will be optional. However, if you allow Visual Studio to create the configuration for you, you'll see something similar to this. The highlighted lines of code merely specify that at the message level, the service expects a UserName type credential.
<message clientCredentialType="UserName"
                     negotiateServiceCredential="true"
                     algorithmSuite="Default" establishSecurityContext="true" />
With this change, the client will now properly pass the credentials through to the service.
I realize this section of the chapter has been pretty intense. WCF configuration can get complex, and enabling some seemingly simple scenarios like passing a username/password combination to the server can be difficult to figure out. However, if you use Windows AD authentication or the ASP.NET MembershipProvider model, things will be much simpler.
Now that you have a basic understanding of the technologies behind WCF services, I'll discuss how to build an application interface using XML services.
In many ways, a WCF service interface is easier to construct than a WPF or Web Forms interface, because you don't need to worry about any issues of display or user interaction. Those are the responsibilities of the calling application. All the service needs to worry about is providing an interface that allows the developer of a consumer application to access the information and functionality provided by this application's business logic and data.
You could subdivide the ProjectTracker application's functionality in many different ways. For example, you could be specific and provide a set of discrete service operations, such as those listed in Table 21-8.
Table 21.8. Possible Service Operations
Add project | Get project | Remove project | Change project name |
Change project start date | Change project end date | Add resource | Get resource |
Remove resource | Change resource first name | Change resource last name | Get list of projects |
Get list of resources | Change project description | Add resource to project | Remove resource from project |
Add project to resource | Remove project from resource | Change role of resource on project | and so on . . . |
Following this approach, you could end up writing a rather large number of service operations! Although it's perfectly possible to do that, you might instead consider consolidating some of these operations into methods with broader functionality, as follows:
Get a list of projects
Get details for a project
Add or update a project
Delete a project
Get a list of resources
Get details for a resource
Add or update a resource
Delete a resource
This is a smaller list of discrete operations, and by having fewer operations, there's less code to maintain. Moreover, this approach provides a higher level of abstraction—consumers have no idea what happens when they request details for a project, and over time you may change how that process works without having any impact on the consumers. Perhaps most importantly, having a small number of operations tends to improve performance, since a client application needs to make fewer cross-network method calls to get its work done.
The ProjectTracker WCF service interface, PTWcfService, implements the following set of operations:
GetProjectList()GetProject()AddProject()UpdateProject()GetRoles()
Later in this chapter, I'll walk through GetProjectList(), AddProject(), and UpdateProject(), as they provide a good cross section of the concepts and implementation issues. The WCF service implementation can be found in the ProjectTracker solution. It is named PTWcfService.
The website hosting the WCF service needs to provide some basic configuration information through the web.config file. In the web.config file, you can either provide connection strings so that the site can interact with the database directly, or you can configure the data portal to communicate with a remote application server.
I discussed the basic concept in Chapter 15 when I covered the channel adapter implementation. Recall that the data portal supports numerous communication channels, most notably Local and WCF.
In Chapter 1, I discussed the trade-offs between performance, scalability, fault tolerance, and security that come with various physical n-tier configurations. In most cases, the optimal solution for a web UI is to run the data portal locally in the client process. However, for security reasons, it may be desirable to run the data portal remotely on an application server.
The web.config file is an XML file that contains settings to configure the website. You use different XML depending on how you want the site configured.
The information in this section is much the same as that in Chapters 19 and 20. I'm repeating it here for completeness, so you don't need to refer back to those chapters if you are focused on creating a WCF service.
Authentication
CSLA .NET controls authentication through web.config.
<?xml version="1.0" encoding="utf-8" ?><configuration><appSettings><add key="CslaAuthentication" value="Csla" /></appSettings></configuration>
The CslaAuthentication key shown here specifies the use of custom authentication. The ProjectTracker.Library assembly includes the PTPrincipal and PTIdentity classes specifically to support custom authentication, and the UI code in this chapter will use custom authentication as well.
If you want to use Windows authentication, change the configuration to this:
<add key="CslaAuthentication" value="Windows" />
Of course, that change would require coding changes. To start, you would remove the PTPrincipal and PTIdentity classes from ProjectTracker.Library, as they would no longer be needed. Also, the virtual root would need to disallow anonymous users, and ASP.NET would need to be configured to impersonate the caller. If you use Windows authentication, you would not use the custom validation, authorization, and PrincipalCache code discussed earlier in the chapter.
Local Data Portal
The web.config file also controls how the application uses the data portal. To have the website interact directly with the database, use the following (with your connection string changed to the connection string for your database):
<?xml version="1.0" encoding="utf-8" ?>
<configuration>
  <appSettings>
    <add key="CslaAuthentication" value="Csla" />
  </appSettings>
<connectionStrings>
  <add name="PTracker" connectionString="your connection string"
    providerName="System.Data.SqlClient" />
  <add name="Security" connectionString="your connection string"
    providerName="System.Data.SqlClient" />
  </connectionStrings>
Because LocalProxy is the default for the data portal, no actual data portal configuration is required, so the only settings in the configuration file are to control authentication and to provide the database connection strings.
Tip
In the code download for this book (available at www.apress.com/book/view/1430210192 or www.lhotka.net/cslanet/download.aspx), the PTracker and Security database files are in the solution directory, not in the website's App_Data directory. This means that you can't use a local data portal from the website without first copying the database files into the App_Data directory and changing the connection strings accordingly.
Remote Data Portal (with WCF)
To have the data portal use an application server and communicate using the WCF channel, the configuration would look like this:
<?xml version="1.0" encoding="utf-8" ?>
<configuration>
  <appSettings>
    <add key="CslaAuthentication" value="Csla" />
  <add key="CslaDataPortalProxy"
            value="Csla.DataPortalClient.WcfProxy, Csla"/>
  </appSettings>
  <connectionStrings>
  </connectionStrings>
<system.serviceModel>
  <client>
    <endpoint name="WcfDataPortal"
              address="http://localhost:4147/WcfHost/WcfPortal.svc"
              binding="wsHttpBinding"
              contract="Csla.Server.Hosts.IWcfPortal"/>
  </client>
  </system.serviceModel>
The CslaDataPortalProxy setting indicates the WcfProxy should be used to communicate with the application server. This requires that you define a client endpoint in the system.serviceModel element of the config file.
The only value you need to change in this element is the address property. You need to change localhost:4147 to the name of the application server on which the data portal host is installed. Also, you need to replace the WcfHost text with the name of your virtual root on that server.
Before using this configuration, you must create and configure the WCF host virtual root. I'll show how to do this in the next section.
The most important thing to realize about the site configuration is that the data portal can be changed from local to remote (using any of the network channels) without needing to change any UI or business object code.
The website references the ProjectTracker.Library project, as shown in Figure 21-5. This causes Visual Studio to automatically put the associated Csla.dll files into the Bin directory as well, because Csla.dll is referenced by ProjectTracker.Library.

The PTWcfService website will only run within IIS, not within ASP.NET Development Server (commonly known as Cassini or VS Host).
ASP.NET Development Server (provided with Visual Studio) has various limitations—among them, the inability to load custom security objects from assemblies in the Bin directory. This means you can't use ASP.NET Development Server to test or debug custom principal objects, custom membership providers, or other custom security objects if they are in an assembly referenced from the project.
Though this is an unfortunate limitation, it can be argued that ASP.NET Development Server is not intended for anything beyond hobbyist or casual usage, and that IIS should be used for any serious business development.
Note
An alternative solution is to install the assembly containing your custom principal and identity classes into the .NET GAC. For PTWcfService, this would mean giving ProjectTracker.Library a strong name and using the gacutil.exe command-line utility to install the assembly into the GAC. You would need to update ProjectTracker.Library in the GAC after you build the assembly each time. I find that using IIS is a far simpler solution than using the GAC.
To host a website in IIS during development, you need to take the following steps:
Set up a virtual root in IIS, pointing to the directory containing the
PTWcfServiceproject files.Set the virtual root to use ASP.NET 2.0 using the ASP.NET tab of the virtual root properties dialog in the IIS management console.
Set the website's start options using the project properties dialog in Visual Studio 2008. Change the setting to use a custom server, so it starts up using IIS with a URL such as
http://localhost/PTWcfService.
As I mentioned in Chapter 20, it may seem odd that step 2 sets the virtual root to use ASP.NET 2.0 when this is actually an ASP.NET 3.5 application. However, .NET 3.5 uses the core .NET 2.0 runtime, and it is the core runtime that is set in step 2.
Now let's go through the creation of the WCF service interface. I'll start by discussing the structure of the service contract, data contract, and service implementation code. Then I'll walk through some of the methods that implement the service. Once I've covered the WCF service implementation, I'll briefly discuss the client application that calls the service.
As I discussed earlier, a WCF service has four components: the svc file, an associated code file, the service contract, and the endpoint configuration. The PTService.svc file is really just a pointer to the code file.
<%@ ServiceHost Language=C# Debug="true"Service="PTService" CodeBehind="~/App_Code/PTService.cs" %>
All the interesting work happens in the code file, PTService.cs. You can find this file in the App_Code folder beneath the virtual root. It implements the service contract, which is defined in IPTService.cs. Here's the service contract:
[ServiceContract]public interface IPTService{[OperationContract]List<ProjectData> GetProjectList(ProjectListRequest request);[OperationContract]ProjectData GetProject(ProjectRequest request);[OperationContract]ProjectData AddProject(AddProjectRequest request);[OperationContract]ProjectData UpdateProject(UpdateProjectRequest request);[OperationContract]List<RoleData> GetRoles(RoleRequest request);}
Of course, the contract for the service also includes the data contract definitions for all the types referenced in IPTService. For example, here's the ProjectRequest data contract:
[DataContract]public class ProjectRequest{[DataMember]public Guid Id { get; set; }}
This data contract specifies the parameter value passed into the GetProject() operation. What is perhaps more interesting is the RoleRequest data contract.
[DataContract]public class RoleRequest{}
This is an empty class, which might seem to make no sense. Why pass in an instance of an empty class as a parameter to an operation? The reason is versioning. As I discussed earlier in the chapter, it is difficult to change the signature of a service method after you've published your contract, because such a change would break all consuming applications. Someday this operation might need an input value, and by requiring even an empty object as a parameter today, it will become easy to add properties to the data contract in the future without breaking consuming applications. So as strange as it may be to define such empty data contracts, this technique directly addresses the issue of versioning and increases the maintainability of your service application.
The PTService class implements IPTService and thus is the implementation of the service itself.
public class PTService : IPTService{}
It contains the methods defined by the IPTService interface, each of which is defined as a service operation. I'll go through the details of three representative methods.
GetProjectList
The GetProjectList() operation is intended to return a list of the projects in the ProjectTracker application. A consumer application can use this data however it wishes, and this method will allow anonymous access with no authentication. Recall that the ProjectList business object applies no authorization rules, and both the PTWpf and PTWeb interfaces allow anonymous users access to the list of projects (and the list of resources through ResourceList).
This method provides an opportunity to see the simplest message-based implementation.
public List<ProjectData> GetProjectList(ProjectListRequest request){try{ProjectList list = null;if (string.IsNullOrEmpty(request.Name))list = ProjectList.GetProjectList();elselist = ProjectList.GetProjectList(request.Name);List<ProjectData> result = new List<ProjectData>();foreach (ProjectInfo item in list){ProjectData info = new ProjectData();Csla.Data.DataMapper.Map(item, info);result.Add(info);}return result;}catch (Csla.DataPortalException ex){throw new FaultException(ex.BusinessException.Message);}
catch (Exception ex){throw new FaultException(ex.Message);}}
The method accepts a ProjectListRequest parameter, allowing the consuming application to provide a Name property to filter the results. If no Name property value is provided, then the operation will return all the projects in the database.
The result is returned as a list of ProjectData objects, though once the list is serialized, it appears in the XML as though it were an array. The ProjectData class defines a data contract for project data. You can examine the data contract definition in the code download for this book.
This list is populated by looping through all the items in a ProjectList object and using DataMapper to copy the properties from each ProjectTracker.Library.ProjectInfo child object in the collection to a List<ProjectData> object. That list is then returned as a result.
ProjectList list = ProjectList.GetProjectList();
List<ProjectData> result = new List<ProjectData>();
foreach (ProjectInfo item in list)
{
ProjectData info = new ProjectData();
Csla.Data.DataMapper.Map(item, info);
result.Add(info);
}
return result;It is important to realize that the business object is not being returned directly as a result. The ProjectList object can't be serialized into XML using the DataContractSerializer (the serializer used by WCF). Attempting to directly return the business object as a result will cause a serialization exception.
More importantly, returning a business object (the internal implementation of the service) as a result would make the business object itself part of the service contract. That would entirely eliminate the concept of encapsulation and would radically reduce the maintainability of your service and your application.
The approach shown here—where the internal business object is used to implement the service, and the data is copied into the formal data contract object that is part of the service contract—is correct. This approach preserves encapsulation and allows for independent versioning and enhancement of the business objects and the service interface.
AddProject
The AddProject() operation allows a caller to add a new project to the system. To avoid breaking encapsulation, the actual Project class is never exposed to the consumer of the service. Instead, a ProjectData data contract object is used to provide data to the method and to return any updates to the consuming application. The core of the operation implementation is highlighted here:
public ProjectData AddProject(AddProjectRequest request)
{
try
{
ProjectData obj = request.ProjectData;
var project = Project.NewProject();
project.Name = obj.Name;
project.Started = obj.Started;
project.Ended = obj.Ended;project.Description = obj.Description;project = project.Save();ProjectData result = new ProjectData();Csla.Data.DataMapper.Map(project, result, "Resources");return result;} catch (Csla.DataPortalException ex) { throw new FaultException(ex.BusinessException.Message); } catch (Exception ex) { throw new FaultException(ex.Message); } }
By the time this code is running, WCF (with the custom validation and authorization components from the PTWcfServiceAuth project) will have verified the user's credentials and put a valid PTPrincipal class on the thread. The Project object will apply its normal authorization rules based on that user identity. In other words, the service code is not responsible for preventing an unauthorized user from adding a new project, because the Project object itself takes care of those details.
Thanks to the fact that all validation and authorization is in the Project object, the service method is straightforward. It creates a new Project, loads the parameter values from the caller into the object's properties, and then calls the Save() method to insert the data.
ProjectData obj = request.ProjectData;
var project = Project.NewProject();
project.Name = obj.Name;
project.Started = obj.Started;
project.Ended = obj.Ended;
project.Description = obj.Description;
project = project.Save();This is all within a try...catch block. Notice that the catch block simply rethrows the exception as a FaultException. You could add logging code here if desired, but you should remember to rethrow the exception as a fault so the information will be returned properly through WCF to the consuming application. When an exception is wrapped in a FaultException, the message text from the exception is returned to the consumer automatically, so it gets some information about what went wrong.
I have chosen to copy each field from the data contract object to the business object explicitly. You could use DataMapper to do this instead, but I wanted to illustrate the different options available.
If no exception occurs and the Save() call succeeds, then the updated project data is returned to the caller. To do this, a ProjectData object is created, loaded with the data from the Project object, and returned as a result.
ProjectData result = new ProjectData();
Csla.Data.DataMapper.Map(project, result, "Resources");
return result;The DataMapper is used to copy the values from Project into ProjectData. The first parameter is the source object, the second is the target object, and the Resources value indicates that the Resources property should be ignored so DataMapper won't try to copy that property value. Since the data contract doesn't have a Resources property, such an attempt would result in an exception.
The result is that the consuming application has access to the newly created Id value, along with any other changes that might have occurred to the data during the insert process.
UpdateProject
The UpdateProject() operation allows a caller to update data for an existing project in the system. To avoid breaking encapsulation, the actual Project class is never exposed to the consumer of the service. Instead, a ProjectData data contract object is used to provide data to the method and to return any updates to the consuming application. The core of the operation implementation is highlighted here:
public ProjectData UpdateProject(UpdateProjectRequest request)
{
try
{
ProjectData obj = request.ProjectData;
var project = Project.GetProject(obj.Id);
project.Name = obj.Name;
project.Started = obj.Started;
project.Ended = obj.Ended;
project.Description = obj.Description;
project = project.Save();
ProjectData result = new ProjectData();
Csla.Data.DataMapper.Map(project, result, "Resources");
return result;
}
catch (Csla.DataPortalException ex)
{
throw new FaultException(ex.BusinessException.Message);
}
catch (Exception ex)
  {
    throw new FaultException(ex.Message);
  }
}As you can see, this method implementation is similar to the AddProject() method. The only real difference is that this method calls the GetProject() factory method to get an existing business object, while AddProject() uses the NewProject() factory method to create a new business object. This is necessary, because the Project object's IsNew property needs to be false for an update to occur, and retrieving an existing object makes that happen.
Stateless Update Alternative
There is an alternative, which uses an overload of the Save() method and would require changing the Project code to allow for setting the Id property through a new factory method called CreateUpdatableProject(). That factory in the Project class might look like this:
public static Project CreateUpdatableProject(Guid id)
  {
    return DataPortal.Create<Project>(new SingleCriteria<Project, Guid>(id));
  }
This would call a new DataPortal_Create() overload:
private void DataPortal_Create(SingleCriteria<Project, Guid> criteria)
  {
    LoadProperty(IdProperty, criteria.Value);
    ValidationRules.CheckRules();
  }
Notice how this new factory creates a new instance of the business object, but one where the Id property is set to some specific value.
The service code could then look like this:
var project = Project.CreateUpdatableProject(obj.Id);project.Name = obj.Name; project.Started = obj.Started; project.Ended = obj.Ended; project.Description = obj.Description;project = project.Save(true);
The two highlighted lines are important. The first calls the new factory method to create a new object that has a specific Id value—namely, the value of some existing object. The object's property values are then all set, and the Save() method is called with a value of true for the forceUpdate parameter.
This Save() overload forces the data portal to perform an update operation, even if the object's IsNew value is true. It is included in CSLA .NET to enable stateless implementations of services and web pages, as shown here.
At this point, you've seen how to create service operations that retrieve, insert, and update information based on XML messages passed to and from a consuming application. The implementation shown here preserves encapsulation and decouples the service contract from the application's internal implementation, which increases the maintainability of both the service interface and the business layer.
The result is that there is now a WCF service interface to some of the ProjectTracker functionality. Consuming applications can now call these operations to interact with the application's business logic and data. These consumers may be running on any hardware platform or OS, and may be written in virtually any programming language. Those details don't matter in any meaningful way.
The important thing is that any consumers will interact with the ProjectTracker data through the business logic in the business objects, including validation, authentication, and authorization—thereby making it difficult for consumers to misuse the data or functionality.
The thing about creating WCF services is that it's not a very satisfying experience. There's nothing to see—no visual reinforcement that you've accomplished anything. Luckily, we can generate an information page to check the service.
WCF includes functionality to generate an information page for WCF services automatically, and you can use this page to ensure that the basic configuration of your service is correct. You can't determine if the service will actually work without writing a consuming application.
Figure 21-6 shows the information page for PTWcfService.
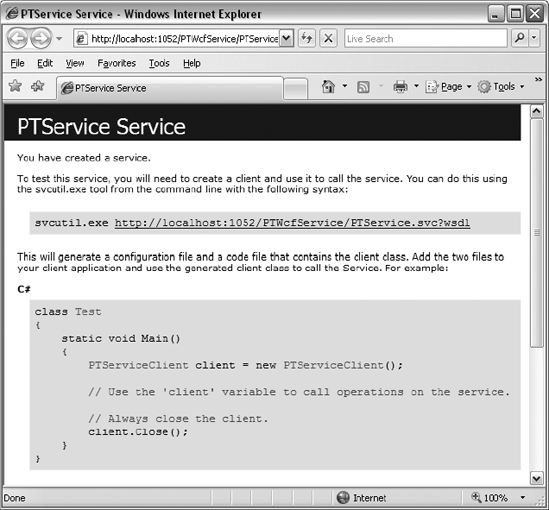
If this page displays properly, you'll know that IIS and ASP.NET are properly configured and that there are no major issues with the content of the web.config file, the svc file, or the service contract. Again, this doesn't mean that the service will actually work; it just means that there are no major configuration issues.
You can also click the link shown in the web page, which will display the WSDL for the service. This is a good idea, as it further tests the configuration and data contract definition for major issues. Figure 21-7 shows the resulting display.
To determine if your service implementation works, you need to create at least a simple consuming application. That's what I'll demonstrate in the rest of this chapter.
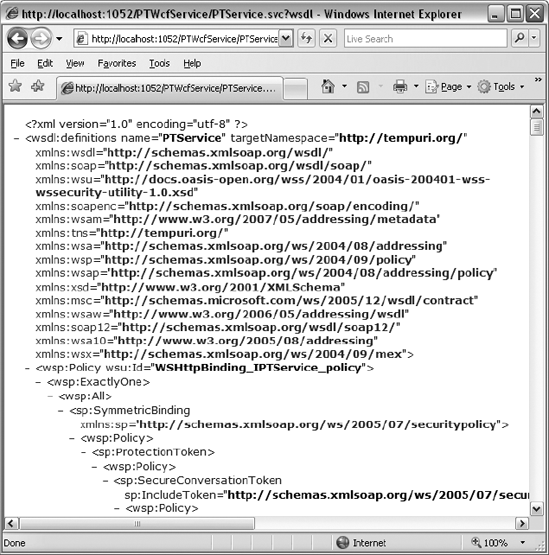
To illustrate how to call PTWcfService, the ProjectTracker solution contains a PTWcfClient project. This is a bare-bones Windows Forms application that acts as a consumer for PTWcfService. Figure 21-8 shows what the application looks like when running.

More interesting is Figure 21-9, which shows a simple DataGrid control bound to the results of the GetProjectList() operation.

My goal with this application isn't to create a complete consumer. Rather, I'm using this application to show how to consume a basic web service and how to set up and pass credentials through the WCF proxy.
As shown in Figure 21-10, PTWcfClient has a service reference to PTWcfService.

You can right-click the item in Solution Explorer and choose the Configure Service Reference menu option to see the dialog shown in Figure 21-11. This dialog allows you to control important elements of the service reference and also control how Visual Studio generates client-side proxy code so you can interact with the service.
Although you can override the service address in code, the default address is shown here. This address is important, because it is also the address used by Visual Studio if you ever right-click the service reference in Solution Explorer and choose the Update Service Reference menu option.
The remaining configuration values are the defaults. You may change them to suit your needs, but for this simple consuming application, the defaults are fine.
Notice the Collection type: option, which converts server-side collection or list types to an array on the client. The XML data transferred over the network is always the same format either way; this option simply controls whether "array data" from the server is expressed as an array or a list type on the client. This option controls the code generated by Visual Studio as it creates the service proxy classes, and it allows you to tell Visual Studio to insert code to convert array data into more complex types.
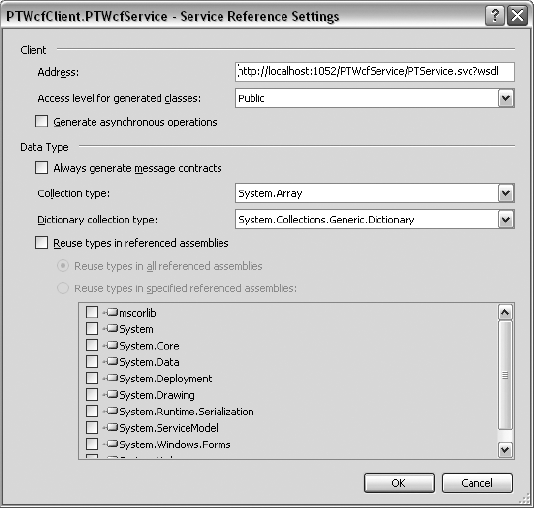
When the service reference was added to the project, Visual Studio automatically retrieved the WSDL description for the service and used that information to generate a set of proxy types and other important information. It also added configuration information to the app.config file based on the WSDL.
Note
You must create and install a test security certificate on your computer as described earlier in this chapter. If you do not create and install an X.509 certificate, the WCF service will be inaccessible to the client application.
You need to make a couple of changes to the generated configuration information. You need to add a custom behavior element to override the default certificate validation mode as discussed earlier in the chapter.
<behaviors>
      <endpointBehaviors>
        <behavior name="ServiceCertificate">
          <clientCredentials>
            <serviceCertificate>
              <authentication certificateValidationMode="PeerTrust"/>
            </serviceCertificate>
          </clientCredentials>
        </behavior>
      </endpointBehaviors>
    </behaviors>
You also must change the endpoint to use this new behavior and to not use the hard-coded certificate value.
<client>
      <endpoint name="WSHttpBinding_IPTService"
             behaviorConfiguration="ServiceCertificate"
                bindingConfiguration="WSHttpBinding_IPTService"
                address="http://localhost:1052/PTWcfService/PTService.svc"
                binding="wsHttpBinding"
                contract="PTWcfService.IPTService">
      <!—<identity>
        <certificate encodedValue="AwAAAA ..." />
      </identity>—>
      </endpoint>
    </client>
The reason for removing the identity element is that the encodedValue directly refers to the specific certificate used by the service. In the code download, this value corresponds to the test certificate I'm using on my computer, so it won't work with the certificate that you created and installed on your computer. The client will work without this value configured, so commenting it out is the simplest way to get the configuration to work.
You will probably also need to change the address property to match the specific address for your service.
Calling a Service Operation
The data binding support in Windows Forms works against the proxy classes generated for a WCF service. This means you can add a type like ProjectData to the Data Sources window. Figure 21-12 shows the Data Source Configuration Wizard listing all the types from the PTService service reference.
Once the types are in the Data Sources window, you can drag-and-drop these types onto a form just like you would with any business object. This is how the PTWcfClient UI was built.
For each type you drag onto the form, Visual Studio creates a corresponding BindingSource object in the form's component tray. The UI controls are bound to the BindingSource control, and that BindingSource control is bound to your data.

You need to write a bit of code to set the DataSource property of the BindingSource object. For instance, when the client's form loads, the following code is run:
private void Form1_Load(object sender, EventArgs e)
    {
      PTWcfService.ProjectData[] list;

      var svc = new PTWcfClient.PTWcfService.PTServiceClient(
        "WSHttpBinding_IPTService");
      try
      {
        svc.ClientCredentials.UserName.UserName = "anonymous";
        //svc.ClientCredentials.UserName.Password = "";
        list =
          svc.GetProjectList(new PTWcfClient.PTWcfService.ProjectListRequest());
      }
      finally
      {
        svc.Close();
      }

      this.projectDataBindingSource.DataSource = list;
    }
First, an instance of PTServiceClient is created.
var svc = new PTWcfClient.PTWcfService.PTServiceClient(
        "WSHttpBinding_IPTService");
This is a proxy object that allows the client code to interact with the WCF service. Because this service requires username/password credentials, those credentials must be set on the proxy.
svc.ClientCredentials.UserName.UserName = "anonymous";
        //svc.ClientCredentials.UserName.Password = "";
In this case, the anonymous username with no password is used, but you can see how a user's actual credentials could be provided if necessary.
The service operation is then invoked to get the list of project data.
list =
          svc.GetProjectList(new PTWcfClient.PTWcfService.ProjectListRequest());
The consuming application then uses this value. In this example, it is used as the data source for the projectDataBindingSource, so the data is displayed to the user in a DataGrid control.
You can look through the rest of the client code in the code download for the book. All the forms in the consuming application follow the same basic structure for interacting with the WCF service operations.
XML services enable the creation of another type of interface for your business objects. Rather than exposing an interface directly to users like WPF or Web Forms, XML services expose an interface for use by other applications. Those applications can call your service methods to leverage the business functionality and data provided by your application and its business objects.
You can design your XML services using either n-tier client/server or service-oriented models. While the client/server approach works, it isn't ideal, and you should consider implementing message-based, service-oriented services as shown in this chapter.
Service-oriented design specifies that a service is an autonomous entity—an independent application, not a tier within a larger application. Service orientation also specifies that your service methods should communicate using a message-based approach, where the service methods accept a complex type as a message and return a complex type as a resulting message. Those complex types are defined as data contracts when using WCF.
Whether you use a remote data portal or not, the framework and concepts discussed in this book should enable you to create applications using object-oriented design concepts, while leveraging the power of .NET. Your objects will support data binding in WPF, Web Forms, and Windows Forms, along with support for the encapsulation of business, validation, and authorization logic in a clear and concise manner.
I've thoroughly enjoyed exploring these concepts with you, and I wish you the best as you develop your software.
Code well, have fun.