Securing User Accounts
Over the years, Apple has gone to great lengths to make OS X strong by hardening its user security. Hardening means strengthening a component in a system to make it more secure. User accounts can be hardened in OS X by limiting the resources that users can access. You can accomplish this two ways: by using the built-in GUI tools, or by using the command line. In this chapter, we will go deeper into securing the Mac by focusing first on restricting user access and then on more advanced command-line security that can be used to harden user accounts.
Introducing Identification, Authentication, and Authorization
Identification is determining who a user is, or what something is. Authentication is an operating system’s attempt to verify the digital identity of someone or something attempting to communicate with the computer, such as a request to log in to the system. The sender attempting to be authenticated might be an actual person using a computer, a computer itself attempting to authenticate, or a computer program looking to run software on the machine. For example, if you are attempting to install software, authentication is the act of your Mac asking for your username and password and verifying that you are who you say you are.
Note Because authentication is the act of establishing or confirming something as authentic, a key security component of authentication is to protect authentication attempts, such as passwords or key pairs in transit.
Authorization is a process that determines whether a user has access to a given resource. All modern multiuser operating systems include an authorization process. This gives the operating system the ability to identify users and then verify whether they have the appropriate credentials to access a resource. Permissions are generally defined by a system administrator, either on the computer itself or in a networked environment. On OS X, the authorization process starts with the /etc/authorization file, which contains rules used when authorizing users.
Authorization can also be made extensible using pluggable authentication modules (PAMs), which were initially developed by Sun Microsystems. A PAM allows multiple authentication schemes to be integrated with new software so that programs that rely on authentication can be written independently of the underlying authentication scheme.
Verifying that the person sending you information is really who they say they are is obviously desirable at all times. Authentication, however, is time-consuming and can inconvenience users while resulting in overhead on the authentication services. To make situations like this more convenient and efficient, many systems use a method of identification, a procedure that verifies that the person or entity authenticating is the same one it communicated with when they last authenticated. The means of identification can be established through the use of a ticket or token issued when authentication is complete. This saves the user from being required to authenticate on each communication with the server.
WHEN IS SECURE TOO SECURE?
One example of a situation where security and usability often collide is in the deployment of one-time passwords. A one-time password is one that must be changed each time you log in to your computer. This effectively makes any intercepted password good for only the brief interval of time before the legitimate user logs in the next time. This way, if someone intercepts a password, it is probably already expired or will be on the verge of expiration within a matter of hours.
For nearly every situation, this is too much security and impacts the ability of users to remember passwords. In our experience, when one-time passwords are deployed, it typically means that users are writing passwords down. Anytime your password policy causes users to have to write down their passwords, it is a good idea to review whether you are being too strict with password policies. For example, if passwords are too complicated to remember, people will invariably write them down. This is how the kid in the movie War Games got into his school computer, thus sparking an entire generation of hackers.
Managing User Accounts
OS X is a multiuser operating system, and therefore every file on the system is owned by a user, and every process is run by a user. One great way to analyze the processes in use on your system, along with the names of the users running them, is to view them using the Activity Monitor, accessible via the Utilities folder. As you can see in Figure 3-1, a variety of accounts are listed in the User column, each running separate processes. Activity Monitor has permissions to manage processes that the user can access. Therefore, processes are restricted from accessing data they should not be able to access. This security extends to files and other system resources on your computer.

Figure 3-1. Activity Monitor
Key to being able to secure an operating system is understanding what actions each user account can perform on the operating system. Next, we will discuss the types of accounts available within OS X.
Introducing the OS X Account Types
Limiting the capabilities of users in a standard operating environment is one of the first and most important steps in securing a system or a network, no matter which operating system you’re running. There are six types of accounts in OS X: standard, managed, administrative, sharing, guest, and root.
The first and default user of a system is an administrative user; this user has almost unlimited access to the system. Administrative users can use many of the configuration utilities and change permissions of files to gain access to other users’ folders if need be.
With all the power that an administrative user has, it is easy to damage the operating system accidentally. Best practices for operating in a secure environment dictate that once a Mac is set up, the administrative account should not be used for everyday use, and a standard account should be used instead. When the system needs more privileges than a standard account allows, such as installing applications or making system preferences changes, you will be prompted to authenticate as an administrator. Standard users can operate basic applications, access their own files, and change some of their settings. They cannot make global configuration changes or changes to other accounts. The reasoning behind this is that it is easy to accidentally perform inappropriate actions on the system as an administrator without asking for authentication to confirm the action. For example, you can accidentally delete critical system data when logged in as an administrator, or use the rm command to remove the wrong data without being prompted if you’ve elevated your privileges. For a standard user, the likelihood of malware activity and misconfiguration on the system is almost nonexistent.
Sharing accounts were added to give other users access to log into shared resources over the network on your computer without giving them physical access to the machine locally.
To set up a sharing account, follow these steps:
- Open System Preferences from the Apple menu.
- Click Accounts to open the Accounts preference pane, and authenticate if needed by clicking the lock icon.
- Click the plus (+) sign on the lower-left side of the pane.
- Select Standard in the Type field (see Figure 3-2).

Figure 3-2. Creating a Sharing Only account
- Enter a name for the account in the Name field. This is the full name of the user who will be logging in.
- Enter a short name for the account in the Short Name field (keep in mind that this will be difficult to change at a later date).
- Enter a password for the account.
- Enter the password again in the Verify field.
- Enter a hint for a password reminder.
- Click the Create Account button.
Guest accounts allow users to perform basic functions such as surfing the Internet and checking email. Once the guest user logs off, their account’s settings are deleted. If you need to give someone access to your computer but would like to keep your data private, enabling a guest account is a quick-and-dirty way to give them access without going through the trouble of setting up another user account on the machine.
Note Selecting the guest account will allow you to enable the “Allow guests to connect to shared folders” option, which should only be used in extremely rare cases where you want to allow users without passwords to connect to your computer.
Root accounts, or superusers, are powerful user accounts that have full access to the entire filesystem on a Mac. More on root accounts in a bit.
Adding Users to Groups
You can grant access to resources based on group memberships. In Leopard and Snow Leopard, Apple has introduced a new account type to the GUI of Mac OS X, called a group. Groups contain users who are created on the Accounts preference pane. To create a group, follow these steps:
- Open System Preferences from the Apple menu.
- Open the Accounts preference pane by double-clicking Accounts.
- Click the plus (+) sign on the lower-left side of the pane.
- Change the account type to Group.
- Give the group a name (see Figure 3-3).

Figure 3-3. Creating a group
- Add users to the group by selecting the check boxes for each user you want to include as a member (Figure 3-4).

Figure 3-4. Adding users to a group
- Close the window to save the group settings.
Enabling the Superuser Account
Some items in this book will require the superuser, often referred to as the root user, to be enabled. The root account is disabled by default (for a reason) and has unlimited access to everything on the computer. This level of access is different from the level an administrative user has. For example, while logged in as a root user, one can incorrectly type commands that can erase important files in the operating system. Root is rarely required as a permanently accessible user account. Unless you are using the root account for specific tasks, such as running Carbon Copy Cloner, disable it for the majority of the time.
To enable the root account, follow these steps:
- Open the Directory Utility located in the /System/Library/CoreServices/ folder.
- Click the lock icon to authenticate as an administrator.
- Click the Edit menu, and select Enable Root User from the menu (see Figure 3-5).
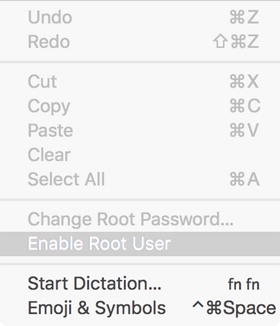
Figure 3-5. Enabling root
- Once you’ve enabled root, make sure to change the root password by clicking Change Root Password in the same menu.
- Save the settings by closing the Directory Utility.
To disable the root account, follow these steps:
- Open the Directory Utility by following the previous procedure.
- Click the lock icon to authenticate as an administrator.
- Click the Edit menu, and select Disable Root User in the menu (see Figure 3-6).

Figure 3-6. Disabling the root account
- Save the settings by closing the Directory Utility.
You can also enable the root account using the command line. The dsenableroot command can be used to enable the root user and assign it a password. This command enables root:
Dsenableroot
First you will be prompted for the current user password; this user must be an administrative account. You will then be prompted twice for a password to assign the root account and then to verify the password. If you were successful, you’ll see the following success code:
dsenableroot:: ***Successfully enabled root user.
To then disable the root account:
dsenableroot -d
Tip For security reasons, it is best to leave the root account disabled when you do not need it. If you do enable it, then do so temporarily. You can also use the sudoers file and sudo to manage which users can elevate privileges and how they are able to do so. We will cover sudoers later in this chapter.
Setting Up Parental Controls
Apple provides a rich set of ways to limit user access on a Mac. Included under the umbrella of empowering parents with the ability to limit their children’s access, Parental Controls also give administrators the ability to fine-tune their users’ access to resources. Using the Parental Controls system preference pane, you can configure controls for any user with the account type of Managed and have control over what they can do with Mail.app, iChat, and web browsing with Safari.
To use Parental Controls, open OS X’s System Preferences and click the Parental Controls preference pane. Here, if it’s the first time you’re opening Parental Controls, you will be prompted with two options: “Create a new user account with parental controls” and “Convert this account to a parental controls account” (see Figure 3-7). You can easily create a new account that is managed here.

Figure 3-7. Enabling the Parental Controls feature
You can also enable Parental Controls for a user by clicking a user account and then the option to “Enable parental controls.” Then click Open Parental Controls, as shown in Figure 3-8.

Figure 3-8. Enabling Parental Controls on preexisting accounts
Once you have enabled Parental Controls for an account, you can control whether the user is forced to use Simple Finder (a limited way of interacting with the Finder, where most of the command keys are disabled, along with many Finder options), control which applications a user is able to access, control whether they can burn CDs and DVDs, place limits on how long they can use the computer, limit access to whom the user is able to converse with over iChat and Mail, restrict access to web sites they can navigate to, and even review logs of attempted violations of these rules from another computer.
To specifically restrict applications a user is allowed to access, open the Parental Controls preference pane, open the user you want to control access for, and click Apps. Here, you have the following options:
- Allow use of camera: Disables the camera for the user account.
- Allow joining Game Center multiplayer games: Disables multiplayer games in Game Center.
- Allow adding Game Center friends: Disables adding new friends in the Game Center application
- Limit Mail to allowed contacts: Allows you to limit whom a user can communicate with. Click the Manage button to add new users that people can communicate with.
- Limit Applications on this Mac: This is the important part of this section. Here, you can use the checkboxes to disable which apps the highlighted user can check or uncheck, as you can see in Figure 3-9.

Figure 3-9. Managing apps in Parental Controls
Then go through the list of applications and place a check mark next to each application the user should be able to access. Once you’ve got a solid list of what a user should and should not be able to open, click the Web tab. Here, there are three options to limit access to web sites, as you can see in Figure 3-10:
- Allow unrestricted access to websites: Allows the user to visit any web site that they’d like to.
- Try to limit access to adult websites: Lets the computer guess at which sites should be accessed and which shouldn’t. Click the Customize button to whitelist or blacklist web sites. Sites that are whitelisted are allowed, even if the computer guesses that the site is bad. Sites that are blacklisted are blocked.
- Allow access to only these websites: Allows access only to sites for which you explicitly enable access.

Figure 3-10. Parental Controls, allowing access to selected applications
The option to allow access only to certain sites can be a bit challenging. Each time your child, or employee, would like to access a new site, or elements of a site are loaded, you will be prompted to enter a password.
As shown in Figure 3-11, you can also set up an opt-in list of web sites that the user is allowed to visit. If you are limiting access to certain sites, you can configure the whitelists or blacklists. If a user with this control enabled attempts to go to a site that’s not in the allowed list, they will have to enter an administrative password to be allowed to visit the site. You can also add sites to the “Never allow these sites” section. Sites listed in this section will not ask for an administrator password when requested, and access to the sites in this list will be denied whether or not they are allowed by the adult content filter.

Figure 3-11. Parental Controls, allowed and disabled web sites
Click the Stores tab (Figure 3-12). Here you can limit various forms of access to certain aspects of the iTunes Store. You have the following options:
- Disable iTunes Store: Disables the ability to buy music and movies using iTunes.
- Disable iTunes U: Disables the ability to access content in iTunes U.
- Disable iBooks Store: Disables the ability to purchase items in the iBooks Store.
- Restrict Music with explicit content: If you leave the iTunes Store enabled, this option will prevent access to content marked E for explicit.
- Restrict movies to: Disables the ability to watch movies of a certain rating (and above).
- Restrict TV shows to: Disables the ability to watch televisions of a certain rating (and above).
- Restrict Apps to: Disables the ability to access apps that are a certain rating (or above).
- Restrict Books with explicit sexual content: Restrict access to books on the iBooks Store that are marked with the explicit sexual content option.
Note If you would like more features for limiting access to sites for children, definitely consider a product such as NetNanny if an opt-in list will not work for you. NetNanny can be found at www.netnanny.com/mac.

Figure 3-12. Parental Controls, limiting content from the iTunes Store
Click the Time tab (see Figure 3-13). Here, you can configure when users will be able to access the computer. Use the following checkboxes to configure when computers are usable:
- Limit weekday use to: Provide a number of hours that a computer can be used by the user account during weekdays.
- Limit weekend use to: Provide a number of hours that a computer can be used by the user account during weekend days.
- Bedtime School nights: Enter the hours that bedtime begins and ends, respectively, for nights before a school day.
- Bedtime Weekend: Enter the hours that bedtime begins and ends, respectively, for nights that are not school days.

Figure 3-13. Parental Controls, setting time limits
Click the Privacy tab. Here you can restrict items that users can edit for themselves. As you can see in Figure 3-14, uncheck each box to restrict making changes to Contacts, Calendars, Reminders, Twitter, Facebook or Diagnostics.

Figure 3-14. Restricting changed in Privacy tab
Click the Other tab. Here are a few miscellaneous options (see Figure 3-15), which include the following:
- Turn off Dictation: Disables the dictation entry in the Dictation & Speech System Preferences pane.
- Disable editing of printers and scanners: Restricts users from altering their printer settings. This includes adding or removing printers.
- Block CD and DVD burning in the Finder: Restricts users from burning new optical media.
- Restrict explicit language in Dictionary: Disables accessing any entries in the Dictionary or Thesaurus that contain explicit content.
- Prevent the Dock from being modified: Prevents a user from accessing the Dock on their computer.
- Use Simple Finder: Forces the use of Simple Finder, which is a simple operating environment.

Figure 3-15. Miscellaneous Options
Managing the Rules Put in Place
Once you have set the controls for your managed users, you will be able to review logs on traffic, allowing you to find users attempting to breach the rules you have put in place. You can do this using the Logs tab of the Parental Controls preference pane.
You can also copy Parental Controls settings from one user to another. This makes it easy to set up multiple accounts on a system and quickly assign the same settings to new accounts. To do this, click the account with the settings you would like to copy, click the cogwheel icon at the bottom left of the screen, and choose the Copy Settings for “<Username>” option (see Figure 3-16).

Figure 3-16. Copying user settings in Parental Controls
Then select the user to whom you would like to copy the settings, select the Paste Settings option, and verify that the settings have been applied (see Figure 3-17).

Figure 3-17. Pasting settings to another user
The Parental Controls system is not just for parents to control access to resources for their children. Although Parental Controls existed in Tiger, it has been expanded to include the options in the new sandbox system and provide a more granular control of managed settings in Leopard. Sandbox represents a giant step forward from the options in Tiger, and as such, it’s a powerful new feature in Leopard that can be used in the workplace to limit what managed users can access, be it web sites or contacts used for iChat. It can even limit when a computer can be accessed, and in a manner that is not easily circumvented.
Profiles on OS X Server are a powerful way to provide administrators with more granular control of user access to resources. For example, with profiles, you can limit access on systems to global settings such as other System Preferences, Bluetooth, Fast User Switching, and Login Items. (For more on profiles, see Chapter 16). Parental Controls used in conjunction with Open Directory or a Mobile Device Management solution can push out these granular settings to many systems concurrently. It is an extremely attractive option to use these technologies together in schools or large corporations that have hundreds or even thousands of workstations.
The new Parental Controls system is missing some features that we would like to see, such as an online database that is updated with acceptable sites, but overall it is a big step in the right direction for limiting access to local resources. You can expect that Apple will continue to build on Parental Controls in the future.
Advanced Settings in System Preferences
You can also edit some slightly more advanced settings from within the Accounts System preference pane. These are accessible by Ctrl-clicking the account name and then clicking Advanced Options. This will bring up a screen similar to that shown in Figure 3-18. Here you can change a number of values for various attributes of the accounts, including Account name, UID, default group, path to the home folder, default shell, and the GeneratedID for the account. You can also add aliases using the plus (+) sign. This will allow the same account to authenticate using multiple names in the authentication dialogs throughout the operating system. We will discuss these attributes later in the chapter.

Figure 3-18. Advanced account options
Working with Local Directory Services
Accounts in OS X client can come from a variety of locations. But by default, they all reside in what is known as a local directory service. The local directory data resides primarily in the folder found at /private/var/db/dslocal. This folder, which will require elevated privileges to access, contains numerous files pertaining to the computer’s directory service configuration. For instance, accounts for Users and Groups are stored in flat property list (.plist) files nested in the /private/var/db/dslocal/nodes/Default directory. Users are stored in property lists located in /private/var/db/dslocal/nodes/Default/users, while groups are stored property lists in /private/var/db/dslocal/nodes/Default/groups. Every local user and group account has a corresponding .plist file found in these directories. Accounts that begin with an underscore (_) are hidden service users and groups. For example, the web server uses the _www account, which obtains user settings from the _www.plist file. The _www user account does not have the ability to log into the machine, because it has no terminal access, nor does it have a password. Creating a new user in the /private/var/db/dslocal/nodes/Default/users directory will create a .plist file with a name that corresponds to the new user’s short name.
Inside a .plist file are a number of attributes containing data about a given user or group. Readers with a Microsoft Windows background will notice that files in the local directory node more closely resemble registry keys for local accounts. Examine the .plist file for the user created earlier and look for the key named authentication_authority:
<key>authentication_authority</key>
    <array>
        <string>;ShadowHash;</string>
    </array>
This authentication key specifies the service that will be utilized to authenticate the user. Notice that it mentions ShadowHash, which indicates that the system will utilize a local file called a hash file to authenticate the user. OS X password hash files contain copies of a user’s password in multiple formats. This allows different services to authenticate a user each with its own native password encryption type. The name ShadowHash means that passwords are stored outside the directory service, in another location (one that “shadows” the directory). Going back to the concepts introduced earlier in this chapter, identification is done through the directory; authentication to the account is done through the shadow.
Note In OS X, users by default also have a Kerberos v5 authentication authority with a generated principal on the local KDC; accounts can be authenticated against the KDC or the shadow hash.
In the user’s .plist file, you will also see a generateduid key. This key is used to track the user account, even if the short name is changed. Generated UIDs are based on a standard called the Universally Unique IDentifier (UUID), which is a complex programmatically generated string of characters that are never duplicated. A UUID is unique across time and space for all users.
Unless full disk encryption is being used on the local boot volume of the computer, once you know a user’s GeneratedUID it is possible, in single-user mode, to swap password files with another user and log in to their account. To guard against this, you can require a password to enter single user mode. To do so, open /etc/ttys and then find the line that reads as follows:
console "/System/Library/CoreServices/loginwindow.app/Contents/MacOS/loginwindow"
 vt100 on insecure onoption="/usr/libexec/getty std.9600"
Next, change the line to read as follows:
console "/System/Library/CoreServices/loginwindow.app/Contents/MacOS/loginwindow"
 vt100 on secure onoption="/usr/libexec/getty std.9600"
Once this code is saved, attempting to boot into single user mode will require a password.
If you were to look in the /private/var/db/shadow/hash directory, you would find a file that is named using the value of this key. This means that even in the event of a user account’s username changing, their password would still be tied to their account. This also prevents the collection of stale password files that would accumulate if they were based on the short name.
In this example, the authentication_authority record, which has a value of ;ShadowHash;, tells the local directory service to consult the user’s local hash file when the user attempts to authenticate. This hash file will contain at least an sha-1 salted hash for the user, which is a secure unrecoverable password type. If Windows file-sharing services are enabled for the user, it will also contain the respective NTLM hash for that user, which is used by Windows file-sharing components. Over the years, Apple has struggled to balance security and functionality as it pertains to password hashes. Although hashes for Windows file sharing require NTLM, the NTLM hash type is more susceptible to common password attacks, which makes its recoverability more feasible. To solve this, Apple only enables the NTLM hash when windows file sharing users are specifically configured for SMB/Windows sharing access in the sharing pane of the system preferences. Storing a password in a hash file allows for a consistent password file location with flexible extensibility for other password hashes such as NTLM.
The data from the account plists can be managed by altering the text files directly. For example, if you preferred to change a user’s image for their profile pic without using System Preferences, then you would simply alter the picture key. However, editing property lists directly can be pretty cumbersome, and so Apple has provided a plethora of commands that can be used to manage and query data from the local directory node and other directory services plug-ins without needing to read raw XML-style property list data. Some have GUI equivalents while others do not. These commands include the following (you can learn more about these commands using their manuals; that is, by entering man ‘command’):
- dscacheutil: Looks up information stored in directory services cache and flushes various caches.
- dscl: Interactive command used to edit and browse directory services settings, such as user accounts, group accounts, and search policies (the order with which Mac OS X looks up account information in each directory service). The closest GUI equivalent would be twofold: the Accounts System Preference pane and the Directory Utility. This command is covered in more depth in the next section.
- dseditgroup: Used to edit, create, and delete groups, or to add or remove group members.
- dsenableroot: Controls the root user account (enable, disable, and reset the root password). The GUI equivalent would be the “Change root password”, “Enable root user” or “Disable root user” options in the Edit menu of the Directory Utility. (This command was covered earlier in this chapter.)
- dserr: Prints a description of directory services-related errors, example “dserr 14090.” Once you have the error code, you can then use the man page for DirectoryService to look up the meaning of each error (or search Google for more information on the specific errors; if there is a minus sign in front of the number, put quotation marks around the errors).
- dsexport: Exports directory services data. Similar functionality is available using the Export feature of Workgroup Manager, a tool distributed as part of Mac OS X Server.
- dsimport: Imports directory services data. Similar functionality is available using the Import feature of Workgroup Manager.
- dsmemberutil: Looks up UUIDs and group information and flushes group cache (example: dsmemberutil flushcache).
- dsperfmonitor: Runs performance monitors of the directory services plug-in, useful with debugging operations (example: dsperfmonitor –dump).
- id: Looks up a user identity, including the group memberships (example: id cedge).
When administrators from other platforms migrate to using OS X directory services, one of the first things they notice is that, by default, domain administrators from a directory service are not administrators of local Mac OS X client. To mimic this functionality, it is possible to nest a network directory service group inside the local administrators group, thereby propagating local administrator rights to all network members of that group. This is very handy in large environments where administrator access to specific resources may need to be limited to subsets of administrators.
Many still choose to maintain a dedicated local administrative account on Mac OS X systems; this is useful for desktop support, automated patch management, and other administrative tasks. There are three ways to go about creating those local administrative accounts. The first is using the Setup Assistant or the Accounts System preference pane, common in monolithic imaging environments but not entirely scalable in large deployments. The second is by taking the .plist and the password hash files that comprise an account and dropping them into the default directory domain’s hierarchy (as explained previously). The third way is by creating a script to automate the account creation. Scripting account creation is beyond the scope of this chapter, but there are many resources available on the Internet and in other books in this series that describe this process.
Creating a Second Local Directory Node
Now that we have a better understanding of how the local directory service works, let’s look at how to create a second instance of that local directory service database. This is useful for hiding administrative accounts and, if you have a rogue account running on your system, it can also be useful for finding the source of that account. To create another directory node, first make a copy of the local directory services information store that we’ve been working on throughout this chapter. For this example, we’re going to copy it into the same nodes folder that Mac OS X uses by default, but rather than call our node Default, we’re just going to call it NEW:
sudo cp -prnv /var/db/dslocal/nodes/Default /var/db/dslocal/nodes/NEW
When it is started, the accountsd daemon will look in the nodes directory for any newly created nodes, as we want it to do. Let’s restart the daemon with the following:
sudo killall accountsd
Now go ahead and open up the Directory Utility (as described previously in this chapter) and click the Search Policy tab. Authenticate using the lock in the lower-left corner of the screen, and then change the Search field to Custom path.
External Accounts
External accounts are similar to mobile accounts (which we will cover in more depth in Chapter 16). With an external account, you can store the user profile, password, and account information on removable media, making it portable across computers without a network. To do this, we’re going to do some crafty manipulation of the createmobileaccount command, which is located in the /System/Library/Coreservices/ManagedClient.app/Contents/Resources directory. This command is normally used when a Mobile Account logs into the computer. Rather than let the operating system decide whether it wants to invoke the createmobileaccount dialog at the login window, we’re going to force it to run the dialog manually now. The -n, -p, and -h flags define the username, password, and home directory of the account. Assuming your USB drive is named JUMPDRIVE, the following code will set up your external account on the removable media (by the way, this is not in your default path, which means you must always type the full path to the command or modify your shell preferences to make it your default path):
 ./createmobileaccount -n mobileadmin -p ‘MYSECRETPASSWORD’ -h
 /Volumes/JUMPDRIVE/Users/mobileadmin
That’s about all there is to it. If we wanted to, we could also enable FileVault by using the -e flag and/or run the command verbosely (a great option for troubleshooting issues during account creation) by using the -v flag. Next, use ls -al to verify that your new external account can write to the volume.
Restricting Access with the Command Line: sudoers
By editing the sudoers file, you can take a much more granular approach to securing users’ access to resources. Sudo stands for “su do,” and su stands for “substitute user.” sudo is a command-line utility in Unix, Linux, and Mac OS X that allows users to run programs as though they were another, more powerful user. By default, sudo will run as a system’s superuser, or root account (although this can be changed using the runas_default setting in the sudoers file). The syntax sudo will run one command as another user. The syntax su will run all commands that follow it as the administrative user who is invoked. su and sudo are useful tools, but they are also very powerful and can be used to accomplish almost anything once invoked, so take precautions. You should use su and sudo in as limited a fashion as possible. In fact, you should use su with even more caution than sudo, because it maintains the elevated permissions for the duration of a Terminal session, and its use is generally not recommended.
Note sudo keeps a record of every command executed through it, while su (and sudo -s, sudo /bin/sh, and so on) let users evade auditing once they have elevated.
As stated earlier, by default the root, or superuser, account is disabled in Mac OS X but can be enabled using the Directory Utility. In Mac OS X Server (as opposed to Client), the root account is enabled by default and automatically is given the password of the first administrative user who is created during installation (more about root access in Mac OS X Server in Chapter 16).
Note By default, any administrative user can use the sudo command.
The sudoers file is located at /private/etc/sudoers. Editing the sudoers file is a direct way to add or remove the ability of users and groups to run certain commands and perform certain tasks from the system without having to use the GUI. Before editing the sudoers file, you should always back up the file. The following code is the default content of the sudoers file on a system (the lines that start with # are inactive):
# sudoers file.
#
# This file MUST be edited with the ’visudo’ command as root.
#
# See the sudoers man page for the details on how to write a sudoers file.
#
# Host alias specification
# User alias specification
# Cmnd alias specification
# Defaults specification
Defaults  env_reset
Defaults  env_keep += "BLOCKSIZE"
Defaults  env_keep += "COLORFGBG COLORTERM"
Defaults  env_keep += "__CF_USER_TEXT_ENCODING"
Defaults  env_keep += "CHARSET LANG LANGUAGE LC_ALL LC_COLLATE LC_CTYPE"
Defaults  env_keep += "LC_MESSAGES LC_MONETARY LC_NUMERIC LC_TIME"
Defaults  env_keep += "LINES COLUMNS"
Defaults  env_keep += "LSCOLORS"
Defaults  env_keep += "SSH_AUTH_SOCK"
Defaults  env_keep += "TZ"
Defaults  env_keep += "DISPLAY XAUTHORIZATION XAUTHORITY"
Defaults  env_keep += "EDITOR VISUAL"
# Runas alias specification
# User privilege specification
root  ALL=(ALL) ALL
%admin  ALL=(ALL) ALL
# Uncomment to allow people in group wheel to run all commands
# %wheel  ALL=(ALL)  ALL
# Same thing without a password
# %wheel  ALL=(ALL)  NOPASSWD: ALL
# Samples
# %users ALL=/sbin/mount /cdrom,/sbin/umount /cdrom
# %users localhost=/sbin/shutdown –h now
In the following lines (part of the original file), root and users in the admin group are given access to a Host_Alias of ALL to Runas_Alias for all users and run Cmnd_Alias of ALL. This is unlimited access to the system, and it is what makes root the powerful account that it is. If you want to reduce the access that administrative users (users defined as administrators in the Accounts preference pane) are given, you can edit this setting. Let’s take a look at the following two lines in the default sudoers file:
root  ALL=(ALL) ALL
%admin ALL=(ALL) ALL
Note In a Unix file, when you see an item with % in front of it, you are typically looking at a variable. Thus, %admin is the administrators group. If you create a new group named pirates on the Accounts preference pane, you would refer to it as %pirates here.
Table 3-1 lists some of the flags that you can use to define privileges in the sudoers file.
Table 3-1. sudoers Flags
Flag | Description |
|---|---|
mail_always | Sends mail to the mailto user for every sudo event. |
mail_badpass | Sends mail to the mailto user if the password is entered incorrectly. |
mail_no_user | Sends mail to the mailto user if the user is not in the sudoers file. |
mail_no_host | Sends mail to the mailto user if the host disallows the user. |
mail_no_perms | Sends mail to the mailto user if a disabled command is run. |
tty_tickets | Specifies that users must authenticate per shell instance. |
authenticate | Specifies that users must authenticate before running commands. |
root_sudo | Disables users from invoking a shell using sudo. |
log_host | Adds the hostname to logs. |
log_year | Adds the year to logs. |
set_home | Sets the HOME variable (~) to the target user’s home. |
always_set_home | Always sets the HOME variable (~) to the target user’s home. |
path_info | Disables prompts warning that a command is not in a user’s path. |
fqdn | Puts fully qualified hostnames in the sudoers file. |
insults | Insults users when they enter incorrect passwords. |
requiretty | Disables running visudo unless a Terminal session is present. |
env_editor | Allows other text editors to edit the sudoers file. This is useful if limiting to pico or vi. |
rootpw | Prompts for root password versus invoking a user’s password. |
runaspw | Prompts for the password of the user defined by runas_default. |
targetpw | Prompts for the password of the user specified with -u. |
set_logname | Logs sudo events using the invoking user’s name. |
stay_setuid | Runs sudo as the real UID of the invoking user (same as set_logname). |
To edit the sudoers file, you will use the visudo command. This command will lock the file so that it cannot be written to by multiple programs. It will also verify that the file is complete with all its necessary parts and will check the file for syntax errors before allowing you to save it. Because the visudo command uses the vi text editor to edit the sudoers file, you will likely want to become familiar with vi before editing your sudoers file. For more on using the vi command, see the man page by entering the following from a command prompt (/Applications/Utilities/Terminal):
man vi
Tip Before editing the file, it is also a good idea to read the man page for visudo by entering man visudo at the command line. man will go into full detail on the uses and syntax for the program as well as any other command you’re curious about.
If the file is not edited properly, visudo should not allow you to save it when you are finished editing. You can use the -c option with visudo to run a check of the file’s syntax and ensure that it is able to parse properly. The -c stands for “check mode.” You can run the command by entering the following:
visudo –c
This should return with the following line, provided that the file parses correctly:
/private/etc/sudoers file parsed OK
Now that you know how to check the file, let’s take a look at the -f option, which is used to specify an alternate sudoers file in a different location, leaving the live sudoers file untouched. There are a variety of reasons for wanting to work with a file in a separate location, such as transferring the file to another system or changing its configuration, with the reconfiguration planned to go live at a later date. For example, you can use the following command to create a temporary sudoers file named sudoers.inprogress:
visudo –f /etc/sudoers.inprogress
You can use aliases in the sudoers file to indicate a variable that contains a user, multiple users, a group, or multiple groups. When working with multiple users or groups on a system, it is always a good idea to create aliases on the system to apply attributes to multiple users or groups at once. If you need to apply the same access rights to a group of users, you can do that by using an alias membership rather than by applying permissions for each user individually. When referencing an alias or group of users in sudoers, you will notice that % will be placed in front of the group name. To be clear, the % character is not used to signify the name of a new group, but is used to reference groups. For example, by adding the following line to the sudoers file, you could create an alias named powerusers that contains members of a group named admin, the user named cedge, and a user named MyCompany. We will also create an entry that simply lists those who the webmasters are:
User_Alias    powerusers = %admin, cedge, MyCompany
User_Alias    webusers = mark, joel, michael
Setting up a Runas_Alias for a user or group will define the user or system daemon that a user or alias can run as when using the sudo command. In the following line, we will tell the system that the webusers defined previously are able to run commands as the apache system user:
Runas_Alias webusers = apache
The Host_Alias command allows you to define a group of computers, also called hosts. You can reference hosts by name, by IP, or by a range of either. When defining a range, rather than specify every element within the range, it’s preferable to use wildcards as catchalls. Wildcards that can be used are similar to those available in shell scripting, as shown in Table 3-2.
Table 3-2. Wildcards
Wildcard | Description |
|---|---|
? | Matches a single character. |
* | Matches multiple characters. |
[…] | Matches a character in a range. |
[!…] | Matches a character that is not in the range, except in a regular expression, which uses the syntax [^…]. |
x | Escapes characters, similar to regular expressions. |
Note When using wildcards, you cannot grant access to commands in subfolders of those you define. You will need to specify those separately.
For example, if you want to create an alias list of all your servers, which are named afpserver1, afpserver2, odserver1, odserver2, adserver1, and adserver2, then you could use *server? for the Host_Alias. Additionally, you can use specific IP addresses or IP addresses with a subnet defined. Host_Alias comes in handy when you are pushing out a sudoers file to a large number of machines and want to have different options for different hosts. An example of a Host_Alias configuration might include the following:
Host_Alias  Servers = *server?, 10.0.1.0/255.255.255.0
Host_Alias  Workstations = 10.0.2.0/255.255.255.0
The next portion of the sudoers file defines the commands that aliases or users can access. Cmnd_Alias is used to set them. For example, if you want to give a user access to run all the commands in the /usr/sbin directory and all the commands located in the /usr/bin folder, you would use the following line:
Cmnd_Alias = /usr/sbin/*, /usr/bin/*
The final portion of the sudoers file is where access to resources is granted to users or aliases. In previous sections of the sudoers file, we defined lists of groups, computers, and commands. Now you can take all of this and put it together by listing the group of users that has access to run specified commands on specified machines. The basic syntax of the sudoers file would read like this:
<User_Alias> <Host_Alias> = (<Runas_Alias>) <Cmnd_Alias>
To put this into a real-world example, you can look at allowing the web scripters who were defined earlier to access the /private/etc/httpd program on servers. Here you will also introduce NOPASSWD and PASSWD into the sudoers file. This tells the system whether to prompt a user for a password when they are attempting to sudo the command that is being called. Keep in mind that when using the NOPASSWD tag, you will not be prompted for a password. Once you’ve written in a section and you’re committing a password to authenticate, it’s a good idea to give it a once-over to catch any errors with the line before submitting the password to the system.
The section of the sudoers file for webscripters is as follows:
User_Alias  webscripters = mark, joel, michael
Runas_Alias webscripters = apache
Host_Alias  Servers = *server?, 10.0.1.0/255.255.255.0
Cmnd_Alias  web = /private/etc/httpd
Webscripters Servers = (webscripters) NOPASSWD: web
Once you have written a good sudoers file, you can push it to other users on your network. You can do this a variety of ways; most notably through ARD, radmind, the Casper Suite, or SSH. These technologies are a bit beyond the scope of this book, but they’re definitely worth researching for their administrative abilities. You can find more information on ARD at www.apple.com/remotedesktop. You can find more information on radmind at http://rsug.itd.umich.edu/software/radmind. You can find more information on the Casper Suite at www.jamfsoftware.com/products/casper5.php.
Note If rules in sudoers conflict, the last rule applied will be activated.
Securing Mount Points
Navigating the file system through the Finder or through Terminal on a mounted drive is one of the most common tasks a user will do on their computer. It is also one of the most common things an attacker looking for information will do. You never want your system to be compromised, but when it does happen, you want to limit the access that an unauthorized user will have. Restricting access to disks, volumes, and RAIDs using mount options is one way to accomplish this.
Note Each disk in a computer has a collection of disks that are mounted. This can be seen and controlled easily in the Disk Utility application. However, you will often need more granular controls, such as mounting a volume in verbose mode.
Once a disk is mounted, it is typically considered a volume. Running the df command, which is used exclusively for mounting disks, shows you all the volumes mounted on the system. Another command, mount, also displays mounted disks but can further be used to mount disks with different options, giving administrators a higher level of control over those disks. Until a disk is mounted, it remains listed in /dev/diskname (disks are often listed sequentially, as disk0s2, disk0s3, and so on). The mount command will be active only until the first reboot.
Common options for the mount command include the following:
- -t Specifies the file system type.
- -r Mounts the file system as read-only.
- -f Forces the file system into a read-only state.
- -a Mounts all the file systems available in the fstab file.
- -d Uses all the options in a dry run.
- -v Uses verbose mode with the mount command.
Administrators can mount drives that have disabled the ability to write to them or enabled other access options by mounting a disk using the -o flag in the command. The proper syntax for this command is to put the option in front of the o, such as -fo or -do. One example of using the option with the mount command is using -ro to make a disk read-only (or more specifically revoke-write access), often used when forensics are being performed on a system.
It is also possible to stop Mac OS X from automatically registering and mounting drives that are inserted, by disabling diskarbitrationd, the system process that polls for new disks. There are multiple methods for doing this, which will force users to use the mount command in order to register a new disk with the operating system. One way is to kill the process and then remove the /usr/sbin/diskarbitrationd file, completely removing the daemon. Another is to move the /System/Library/LaunchDaemons/com.apple.diskarbitrationd.plist file to another location, such as the Desktop. Removing or renaming the property list (plist) file is typically the best choice. You can also control the mounting and unmounting of disks using the Disk Utility or the Terminal diskutil framework.
SUID Applications: Getting into the Nitty-Gritty
There are a variety of applications running on your system, and not all run as your user. When you open Activity Monitor from /Applications/Utilities and change the filter option to Administrator Processes, you will see all the processes running on the system as root. Applications that are running as root often have the SUID bit set, causing them to be run as the owner of the file, which for many of these applications is root. To view whether a file has the SUID bit set, you can run an ls -l command in a given directory to look for any file with a listing that has an s listed rather than an execute bit in the permissions line for owners of the file. For example:
-r-s--x--x 1 root root 19809 Jan 14 14:05 ps
Binary files (executables) that are not written well can cause SUID bits to allow for privilege escalation to an administrative user. Although you might not want to allow SUID files on your system, it’s not realistic to remove the SUID bit from all files, because some applications will require certain files to be SUID, such as login. Most SUID applications exist specifically to let users perform privileged operations or gain access to resources that require root privileges when they are not logged in as the root user. Therefore, the root user owns most SUID applications.
Many applications that are not written specifically to allow manual privilege escalation actually provide a way for users to execute a command. vi allows users to run commands from within the interactive text editor. Many other commands, such as less and more, allow commands to be executed by pressing the ! key while viewing a file that takes up more than one page of content. Knowing whether each SUID application is dangerous requires knowing the usage details of these applications, and whether a shell command can be run from within the command or some binary file can be invoked receiving root access. To find all SUID applications, use the following command for a listing of all SUID or SGID files:
sudo find / –type f ( –perm –04000 –or –perm 02000 ) –ls
Note Mac OS X allowed SUID shell scripts until the 10.3.9 software update, so if you are running an operating system prior to Tiger 10.4, consider SUID shell scripts when auditing your system, as they are too dangerous to allow on the system.
To fix the SUID scenario, set the UID for a user. In our example, the user will be test. If the file is executed, it will now run with the rights of the user invoking the file and not with the rights of the user who runs it:
chmod u+s test
If you are in an SGID (group SUIDs) scenario rather than an SUID scenario, set the GID for test. If executed, the file will now run with the rights of the group of the file and not with the rights of the group that runs it:
chmod g+s test
If an SGID is set on a directory, all newly created files inside this folder won’t inherit the main group ID of the creator. Instead, they will be created with the group ID of the folder. For example, the SGID is set for the test folder folder1, and it has the group ID for www. Now, if the root user creates a file inside folder1, the group ID for this file will not be root but www. SUID and SGID can be set at the same time.
Creating Files with Permissions
By default, when creating a new file, the default permissions of that file are determined by the umask variable. You can work with the umask to edit the default permissions of new files. You can configure the umask setting by using the umask command. Of course, we advise that you only perform the following commands if you have a pretty good idea of what you’re doing here. Fixing disk permission mistakes can be a time-consuming and costly endeavor.
First, run the command umask from a Terminal screen by typing umask at a command prompt. When you do this, you will get a number as your response. The umask variable is subtracted from the total permissions number possible for securing Unix files, 777. This leads to a umask of 0022, creating new files on a hard drive with permissions of 755.
Note For more information on POSIX permissions, see Chapter 4.
If you enter umask 0002 at the command line, you will be telling the system to create new files with permissions of 775. However, if you use a umask of 077, you will cause all new files to be readable only by the user who creates and subsequently owns the files.
Using the umask command to set default file permissions only applies to the umask setting for your session. This means the next time you restart your system, this setting will be lost. To permanently reset the permissions for new files, you will need to edit the globalpreferences.plist file on a per-user basis by inserting an NSUmask override setting in the file ~/Library/Preferences/.GlobalPreferences.plist. Insert these lines using your favorite plist file editor or using the defaults command:
<key>NSUmask</key>
<integer>0</integer>
Replace the 0 with the decimal conversion of the octal umask you want to set. A decimal NSumask of 0 gives the octal umask value of 007, meaning that we allow only owners and users in a files group access to newly created files. The recommendation from Apple is to use /etc/launchd-user.conf, with a line containing umask nnn. However, users can then set their own umasks using ~/.launchd.conf. The umask can also be defined in /etc/launchd.conf, but that sets it for all processes, including system daemons, which can potentially cause unexpected results.
Note To edit this globally, insert the same setting into the file /Library/Preferences/.GlobalPreferences.plist.
Summary
We started this chapter with securing accounts using graphical tools such as the Accounts system preferences. Once we looked at the options available through graphical means, we switched gears and started looking at those available only from the command line (such as visudo). You’ll notice that the granularity of control over accounts goes far beyond that which has been provided in those preference panes. Once we moved through the options in the preferences, we then correlated them with how those options reflect some of the changes in the property list files that make up the local directory service. By the way, there are other locations where accounts can reside, and so in Chapter 16, we will look at how Open Directory impacts accounts.
In Chapter 4 we cover permissions, one of the most important aspects of securing Mac OS X, a concept that builds on the concepts explained throughout this chapter!