
1
Building a Counter App with History Tracking to Establish Fundamentals
When you decided to buy this book, you had probably already played with Flutter a bit or even already worked with it. We have organized this book in a way that chapters gradually increase in difficulty, and they can be read in any order. Even if you aren’t a Flutter master, you will still be able to get through all the chapters, thanks to in-depth analysis, images, and code snippets. When you arrive at the end of the book, you’ll be able to build Flutter apps up to version 2.5 in a professional and performant way.
When you create a new Flutter project, regardless of whether you’re using Android Studio or Visual Studio Code (VS Code), a new counter app is created for you. This is the default template used by the framework to set up a simple app you can run on mobile, desktop, and the web. In the first chapter, we’ll be building an enhanced version of the counter app that also keeps a history of the increased values. Even if it may seem a trivial app to build, you’ll see that there are many considerations to make.
In this chapter, we will mainly touch on three areas, as follows:
- Understanding the foundations – widgets, elements, and RenderObjects
- Setting up the project
- Creating an enhanced counter app
You may be surprised to discover how a simple app actually requires various bits of knowledge to be efficiently created. Mastering constant widgets, elements, state, and much more is the key to success. We’re first reviewing some important theories about Flutter’s foundations, and then we will start coding. Without further ado, let’s dive in!
Technical requirements
Flutter runs on Windows, macOS, and Linux, so you don’t really need to worry about the operating system. Make sure to have your Flutter version updated to the latest version in the stable channel and create a new project using—preferably—Android Studio or VS Code. If you’re brave enough, there is also the possibility of coding on a simple text editor and then manually building and running projects, but this is quite inconvenient. To make sure that your Flutter environment is correctly set up, you can run the flutter doctor command in the console and check the output.
If you’re looking for a complete Flutter installation guide, make sure to check the official documentation at https://flutter.dev/docs/get-started/install.
For now, we will ignore the test folder, but I promise we will come back to it in Chapter 9, Writing Tests and Setting Up GitHub Actions, where we will test our app and publish it to GitHub.
To keep the code clear and concise, we have removed colors and styling portions from the various snippets across the chapter. The complete code can be found at https://github.com/PacktPublishing/Cross-Platform-UIs-with-Flutter/tree/main/chapter_1. You will find two folders because we’re first building a good but improvable version of our project, and then a better version later.
Understanding the foundations – widgets, elements, and render objects
Before moving to the project creation, we want to review some fundamental concepts of the Flutter framework: Widget, Element, and RenderObject types.
While a widget tree is created and managed by the developer, the Flutter framework builds and manages two other trees in parallel, called an element tree and a render object tree. At a very practical level, these three trees are used to build user interfaces (UIs) and decide when it’s time to refresh them. At the highest level, there are widgets, and they come in two flavors, as outlined here:
- StatelessWidget: This kind of widget doesn’t require a mutable state and is best used to describe those parts of the UI that never change. Stateless widgets are immutable.
- StatefulWidget: This kind of widget has a mutable state and is generally used when the developer needs to control the widget’s life cycle or dynamic contents. Stateful widgets are immutable too.
Note that both kinds of widgets in Flutter are immutable because all of their parameters—if any—are final. A StatefulWidget itself is immutable but its state is mutable, and it’s represented by a separated State<T> object. Whenever the UI needs to be updated, Flutter follows this logic:
- If a widget is initialized with a const constructor, then nothing special happens and the framework just skips to the next child. This is one of the main reasons why you should try to use constant constructors as much as possible.
- If a widget isn’t initialized with a const constructor, then it’s removed and regenerated with a new one. This is totally fine; Flutter has been built for this exact purpose and is really fast at replacing widgets.
When Flutter rebuilds a widget, it uses the Element object associated with that widget to compare the old and new instances. In case of changes, the UI is updated; otherwise, nothing happens and the framework proceeds to visit the next child.
Note
Don’t think that StatelessWidget is less efficient than StatefulWidget. They are both subclasses of Widget and they’re treated in the same way! The only difference is that a stateful widget has a State class too, which survives to rebuilds because it’s stored in the Element object behind that widget.
In general, StatefulWidget is used when the widget needs a one-time initialization or it has to change whenever the configuration updates. The State class has a few useful methods for this purpose, as outlined here:
- void initState(): This method is called only once when the widget is created—it’s like the constructor of a widget.
- void didChangeDependencies(): This is called right after initState() and it’s used to perform initialization based on an InheritedWidget above it.
- void didUpdateWidget(covariant T oldWidget): This is called whenever the widget configuration changes. For example, this method is invoked whenever a widget’s parameter value is changed.
- void dispose(): This is called when the widget is removed from the tree—it’s like the destructor of a widget.
If you don’t need to use any of the preceding widget life cycle methods and don’t use setState(), then StatelessWidget is the best choice.
Having three trees allows Flutter to only repaint the UI when it’s really needed. Element objects are the glue between the configuration we want to create (widgets) and the actual implementation in the UI (render objects). They detect widget changes and decide whether a render object has to simply be updated or removed and recreated. Let’s see a concrete example here:
Widget build(BuildContext context) {
  return  Container(
    width: 250,
    height: 250,
    color: Colors.white,
    child: const Text('I love Flutter!'),
  );
}
When it’s time to render the UI, Flutter traverses the widget tree and calls the build method of the various stateful or stateless widgets. At the same time, it builds the element and the render tree by calling createElement() and createRenderObject(), respectively, on the widget being built. The actual situation that the framework is dealing with in the end is shown in the following screenshot:

Figure 1.1 – The widget, element, and render trees
Here’s what’s actually happening under the hood:
- Every widget has an associated Element object that holds the state (in the case of stateful widgets) and is used by the framework to detect changes on the widget that might require a repaint of the UI.
- Elements are backed by a RenderObject that contains all the logic to paint graphics on the screen and is relatively expensive to create. It takes care of hit testing, painting, layout constraints, and much more.
- When a widget changes (using setState(), for example), the underlying element is marked as dirty and the framework triggers the build method to be called. Elements compare the differences between the old and the newly modified widget to update or recreate the render box.
- Render boxes are modified and kept in the framework’s cache as much as possible. They are recreated only when the widget type is different. They’re generally recreated only when the widget type changes or there are too many variations to apply. Updating or modifying a render object also updates the UI.
- The RenderObject is the one that actually has instructions to paint the UI. The Flutter framework uses elements to decide which changes, if any, have to be applied to a render object.
When you use the const constructor on a widget, you can save Element comparisons, RenderObject modifications, or (even better) recreations, plus other compiler and framework optimizations. Flutter already knows about the widget’s location on the tree; the BuildContext variable is nothing more than the framework giving you access to the element behind your widget.
On the other hand, functions are always evaluated. When we put a function directly inside the build method, the returned widget (along with the Element and RenderObject types) will always be re-evaluated. Functions cannot be more efficient than an optimized, constant class hierarchy, however.
Here’s a small comparison of the two widget-creation approaches, with the advantages they bring.
The only advantage functions give you is that we have less code than if creating a new class extending StatelessWidget or StatefulWidget.
Widgets instead have a lot more advantages, such as the following:
- They can have a constant constructor and allow for granular rebuilds.
- They can have keys.
- Flutter can skip the rebuild of a widget if it didn’t change by looking at its Element object.
- They’re well integrated into the Object Inspector, which may be essential in certain debugging scenarios.
- Hot reload always works as expected.
- There’s no risk of reusing some previous state because they correctly dispose of all the resources.
- Since they have an Element object behind them, you can use the BuildContext object and its application programming interface (API).
- They follow the single-responsibility principle (SRP) and lead to more maintainable, extensible, and testable code.
As you can see, preferring widgets over functions is a great idea because you can get so many advantages for free. The only optimization you need to do is using const in front of the constructor’s name, and Flutter will take care of the rest.
Let’s now jump into the practical side of things, where you see how this theory can be useful when building an efficient Flutter app!
Setting up the project
To really get started, create a new Flutter project with your favorite integrated development environment (IDE) to get the skeleton of a minimal, working Flutter app. Next, open the pubspec.yaml file and make sure to have these two dev dependencies installed:
dev_dependencies:
  # https://pub.dev/packages/dart_code_metrics
  dart_code_metrics: ^4.9.1
  # https://pub.dev/packages/flutter_lints
  flutter_lints: ^1.0.4
We’re now going to dedicate some time to work on the analysis_options.yaml file. Very simply, this file contains a series of static analysis rules to help you with writing readable, high-quality code. By default, a new Flutter project already creates this file for you with a minimal setup (we have removed comments for simplicity), as illustrated in the following code snippet:
include: package:flutter_lints/flutter.yaml
linter:
  rules:
    avoid_print: false
    prefer_single_quotes: true
The flutter_lints package included in the file adds a series of static analysis rules recommended by the Flutter team. While this setup is fine, we suggest you improve it with stricter rules and static analysis parameters in order to do the following:
- Make sure to adhere to the Dart and Flutter standard coding practices.
- Improve your code quality even more.
- Increase the possibility of finding potential bugs even before compiling your code.
We get the first point for free because a new Flutter project already generates the minimal static analysis setup for us. For the other two points, we can use a well-known package called dart_code_metrics, which adds even more code metrics and static analyzer rules to the Flutter analysis machinery. After adding it to our pubspec file’s dev-dependencies list, we can install it in this way:
include: package:flutter_lints/flutter.yaml
analyzer:
  plugins:
    - dart_code_metrics
dart_code_metrics:
  metrics:
    cyclomatic-complexity: 20
    number-of-parameters: 4
    maximum-nesting: 5
  metrics-exclude:
    - test/**
    - build/**
  rules:
    - avoid-unused-parameters
    - avoid-wrapping-in-padding
    - binary-expression-operand-order
    - double-literal-format
    - newline-before-return
    - no-boolean-literal-compare
    - no-equal-then-else
    - no-object-declaration
    - prefer-trailing-comma
linter:
    avoid_print: false
    prefer_single_quotes: true
    # … plus a lot more rules!
This is the setup we recommend for all your Flutter and Dart projects. If you wish, you can add even more rules to the dart_code_metrics analyzer! Just navigate to its pub.dev page and make sure to visit the documentation for a complete overview of the available rules.
Note
Each project we have hosted on GitHub contains the complete version of the analysis_options.yaml file we’d recommend you to use. You can easily copy and paste it into your projects from there!
Adding all of the possible linter rules to your analysis options file may work, but sometimes it doesn’t make much sense. In the previous code snippet, we’ve tried to build a file with the most important rules, according to our experience, to help you as much as possible with Dart and Flutter’s best coding practices.
At this point, we’re all set, and we can start creating a counter app!
Creating an enhanced counter app
Since this chapter focuses on performance considerations and Flutter’s fundamentals, we want to keep the UI minimal. The app we’re going to build is just some text, two buttons, and a horizontal list view. Very intuitively, the plus and minus buttons respectively increase and decrease the text at the center by 1. New tiles are only added to the scrollable list underneath when the value is increased; tapping on minus won’t add a new item in the ListView widget. You can see a representation of the UI in the following screenshot:
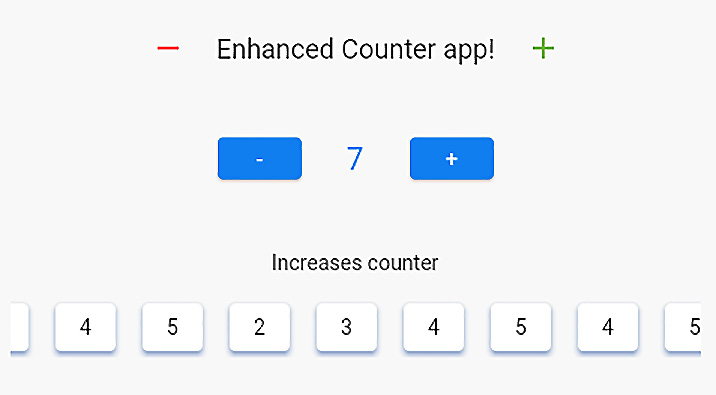
Figure 1.2 – The UI of our enhanced counter app
We can immediately see that the UI is made up of the following three main parts:
- A title at the top with two red and green signs
- The counter itself in the middle
- A scrollable list at the bottom
These three main UI pieces can be mapped to three widgets we need to create for the app. We have decided to structure the contents of the lib folder like so:
lib/
  - counter_app/
     - widgets/
         - app_title.dart
         - history.dart
     - counter_app_body.dart
  - main.dart
The counter_app_body.dart file contains the entire UI, which is actually made up of the three previously mentioned pieces.
As always, the main.dart file is located at the root of the lib folder, and it looks like this:
void main() {
  // Running the app
  runApp(
    const EnhancedCounterApp(),
  );
}
/// The root widget of the app.
class EnhancedCounterApp extends StatelessWidget {
  /// Creates an [EnhancedCounterApp] instance.
  const EnhancedCounterApp({
    Key? key,
  }) : super(key: key);
  @override
  Widget build(BuildContext context) {
    return const MaterialApp(
      home: CounterAppBody(),
      // Hiding the debug banner
      debugShowCheckedModeBanner: false,
    );
  }
}
Notice how we’ve put in the effort to document and comment all of the code. While this is not compulsory, it’s highly recommended (and also enforced by the linter) that you at least document the public code.
Now that the app setup is finally completed, we can start creating a CounterAppBody widget, which is the central point of this chapter. We’re going to fill this skeleton in the next section by replacing the comments in the children list with an actual widget, but before we do that, here’s the code we need:
/// The contents of the counter app.
class CounterAppBody extends StatelessWidget {
  /// Creates a [CounterAppBody] widget.
  const CounterAppBody({
    Key? key,
  }) : super(key: key);
  @override
  Widget build(BuildContext context) {
    return Scaffold(
      body: Center(
        child: Column(
          mainAxisSize: MainAxisSize.min,
          children: [
            // Title widget

            // The counter widget

            // The history widget
          ],
        ),
      ),
    );
  }
}
In the next section, we’re going to replace the inline comments with actual, useful widgets.
The title widget
The app title is the first widget we need to build. Since it’s never going to change, we can safely use a stateless widget and use a constant constructor to prevent unneeded rebuilds, as follows:
/// This widget simply contains the title of the app.
class AppTitle extends StatelessWidget {
  /// Creates an [AppTitle] widget.
  const AppTitle({
    Key? key,
  }) : super(key: key);
  @override
  Widget build(BuildContext context) {
    return Row(
      mainAxisSize: MainAxisSize.min,
      children: const [
        Icon(
          Icons.remove,
          color: Colors.redAccent,
        ),
        Text('Enhanced Counter app!'),
        Icon(
          Icons.add,
          color: Colors.lightGreen,
        ),
      ],
    );
  }
}
The most important part of the AppTitle widget we have just built is the const keyword in front of the constructor’s name. This allows us to create a constant widget to be inserted in the tree or—more specifically—in our Column widget, as follows:
Column(
  mainAxisSize: MainAxisSize.min,
  children: [
    const AppTitle(),
    // The counter widget
    // The history widget
  ],
),
Thanks to constant constructors, we can cache widgets and make sure that they’re built only once. In this specific case, the widget doesn’t have external dependencies and it’s just a static piece of UI, so it’d be useless if the framework rebuilt it more than once. If you forget to add the const keyword in front of your constructor, the linter will warn you!
Tip
Widgets can have a constant constructor and they can be cached to improve your app’s performance. Functions, instead, are always rebuilt every time the framework calls the widget’s build method.
We really discourage you to create functions to return widgets because they cannot be marked with the const keyword and so they won’t be cached. We already looked at the benefits of widgets over functions in the Understanding the foundations – widgets, elements, and render objects section. For example, if you decided to not create an AppTitle widget, you could have simply used a function, like this:
Widget appTitle() {
  return Row(
    mainAxisSize: MainAxisSize.min,
    children: const [
      Icon(Icons.remove),
      Text('Enhanced Counter app!'),
      Icon(Icons.add),
    ],
  );
}
It works as intended but you can’t write const appTitle(), so the widget is rebuilt whenever the framework calls the widget’s build method.
Let’s now move to our app’s core: the counter widget.
The counter widget
The second widget we need to build is the counter itself; we’re going to place two buttons and set up a state variable to hold the count. In the Making everything constant section, we will see that this approach is not really optimal, and we will improve it even more.
However, for now, let’s start by converting the CounterAppBody widget into a stateful one and adding a counter variable, as follows:
class _CounterAppBodyState extends State<CounterAppBody> {
  /// The current status of the counter.
  int counter = 0;
  /// Increases the counter by 1.
  void increase() {
    setState(() {
      counter++;
    });
  }
  /// Decreases the counter by 1.
  void decrease() {
    setState(() {
      counter--;
    });
  }
  @override
  Widget build(BuildContext context) {
    return Scaffold(
      body: Center(
        child: Column(
          mainAxisSize: MainAxisSize.min,
          children: [
            const AppTitle(),
            // The counter
            // The history
          ],
        ),
      ),
    );
  }
}
We now need to add the two buttons and the counter text. The problem here is that we cannot really extract those into a separated, constant widget as we did with AppTitle. The counter variable is inside the state itself, so we’d either need to pass a direct dependency, which forbids a const constructor, or keep things as they are. For now, let’s put everything directly inside the Column widget, as follows:
Column(
  size: mainAxisSize: MainAxisSize.min,
  children: [
    const AppTitle(),

    Row(
      mainAxisSize: MainAxisSize.min,
      children: [
        ElevatedButton(
          onPressed: decrease,
          child: const Text('-'),
        ),
        Text('$counter'),
        ElevatedButton(
          onPressed: increase,
          child: const Text('+'),
        ),
      ],
    ),
  ],
),
At the moment, we cannot move the Row widget and its children into a separated widget because the counter variable is in this State class. We will come back to this in the Making everything constant section to see how we can improve the architecture and make more constant widgets.
Since we also want to keep track of the counter value when we press the increment button, we need to add another state variable to remember the value’s history, as follows:
/// Keeps track of the counter status when '+1' is pressed.
List<int> increaseHistory = [];
/// Increases the counter by 1.
void increase() {
  setState(() {
    counter++;
    increaseHistory = List<int>.from(increaseHistory)
      ..add(counter);
  });
}
Note that we haven’t just added a new value to the list, but we have created a new instance. We’ve done this because we’re about to compare this value in HistoryWidget, and in this way, operator== will work as intended. It will compare two different instances, not the same one.
Let’s see how the history widget is going to benefit from the comparison of two different list instances.
The history widget
The last UI piece we need to build is a scrolling list underneath the counter. Since we want to keep the build methods fairly short for the sake of readability and separation of UI pieces, we’re creating another separated widget called HistoryWidget, like this:
/// Keeps track of the counter values whenever it is
/// increased.
class HistoryWidget extends StatefulWidget {
  /// The counters history.
  final List<int> increasesHistory;
  /// Creates an [HistoryWidget] from the given
  /// [increasesHistory].
  const HistoryWidget({
    Key? key,
    required this.increasesHistory,
  }) : super(key: key);
}
class _HistoryWidget extends State<HistoryWidget> {
  @override
  Widget build(BuildContext context) {
    return Column(
      mainAxisSize: MainAxisSize.min,
      children: [
        // The title
        const Text('Increases counter'),
        // The actual list
        Flexible(
          child: Padding(
            padding: const EdgeInsets.symmetric(
              horizontal: 40,
              vertical: 15,
            ),
            child: SizedBox(
              height: 40,
              child: ListView.separated(
                scrollDirection: Axis.horizontal,
                itemCount: widget.increasesHistory.length,
                separatorBuilder: (_, __) {
                  return const SizedBox(width: 10);
                }
                itemBuilder: (_, index) {
                  return Text(
                    '${widget.increasesHistory[index]}');
                }
              ),
            ),
          ),
        ),
      ],
    );
  }
}
}
You can see in the previous code block that the list is located outside of this widget, so we need to pass it via a constructor. While this is perfectly fine, it denies the possibility of adding a const constructor when instantiating the widget in the tree. We’ve ended up with this body:
Column(
  size: mainAxisSize: MainAxisSize.min,
  children: [
    const AppTitle(),
    // The buttons with the counter
    Row(…),
    HistoryWidget(
      increasesHistory: increasesHistory,
    ),
  ],
),
We now have a fully functional app, but we’re not entirely satisfied with the result and we think we can do better! Right now, when the widget’s build method is called, this is the situation:
- The AppTitle() widget has a constant constructor and it won’t get rebuilt.
- The Row() widget isn’t constant so its build method is executed.
- The HistoryWidget() isn’t constant either.
When calling setState(() {}), the subtree is always rebuilt. This means that every time we increase or decrease the counter, we always rebuild the entire contents of Row and HistoryWidget. We’re working on a small app and thus the rebuild cost is negligible, but on larger subtrees, our UI may create a lot of junk. Let’s try to fix this!
Manually caching a widget
Let’s take a closer look at the functionality of the app to see whether we can save some computational time. Right now, when we increase or decrease the counter, we call setState(() {}), and it always rebuilds HistoryWidget entirely to correctly show the latest value on the list. The problem is that when we decrease the counter, the history shouldn’t be rebuilt because no new entries are added.
In other words, we need to make sure that the contents of HistoryWidget are rebuilt only when we tap on +. When tapping on -, we should only decrease the counter and leave the list as it is. Here’s how didUpdateWidget comes to the rescue:
class _HistoryWidgetState extends State<HistoryWidget> {
  /// Manually caching the list.
  late ListView list = buildList();
  /// Building the list.
  ListView buildList() {
    return ListView.separated(…);
  }
  @override
  void didUpdateWidget(covariant HistoryWidget oldWidget) {
    super.didUpdateWidget(oldWidget);
    if (widget.increasesHistory.length !=
        oldWidget.increasesHistory.length) {
      list = buildList();
    }
  }
  @override
  Widget build(BuildContext context) {
    return Column(
      mainAxisSize: MainAxisSize.min,
      children: [
        const Text('Increases counter'),
        SizedBox(
          height: 40,
          child: list,
        ),
      ],
    );
  }
}
In the previous code block, you can see that we’ve refactored HistoryWidget into a stateful widget and stored ListView in a state variable called list. We have also overridden didUpdateWidget to refresh the variable whenever the widget’s dependencies change.
Here are a few points to remember:
- We have manually cached the ListView widget so that it will be rebuilt only when required (which is when the list length changes).
- The didUpdateWidget method is called whenever one or more dependencies of the widget change. In our case, we need to make sure that whenever the increasesHistory dependency changes, the cached widget is also updated.
- If we didn’t override didUpdateWidget, the list would never be rebuilt again because the list variable would never be assigned again with the new data.
In this particular case, having a function to return a widget is good because the function is not inside the build method. The advice we gave in the Understanding the foundations – widgets, elements, and render objects section is still valid: try to never use functions inside the build method of a widget. However, when you manually cache a widget using a state variable and didUpdateWidget, it’s fine. Make sure to follow this rule of thumb:
- When you use functions inside the build method, you cannot control how often the returned child is rebuilt.
- When you use functions outside the build method, you can control the returned widget’s life cycle and rebuilds thanks to didUpdateWidget, and that is fine.
In general, you should always try to use const constructors, but when you have large subtrees that cannot be constant, you can go for a manual caching strategy! To use another example, Container in Flutter doesn’t have a constant constructor, but it may be an immutable piece of the UI. You can see this represented in the following code snippet:
Container(
  color: Colors.red
  width: 200,
  height: 160,
  child: VeryBigSubtree(
    color: Colors.red.withAlpha(140),
  ),
),
This is an example where manual caching may be useful. This widget may have a fairly big subtree but both Container and VeryBigSubtree cannot be marked as const. Since we know that they are immutable and they don’t need to be rebuilt, we can cache them very easily inside the State class, like so:
final cachedChild = Container(
  color: Colors.red
  width: 200,
  height: 160,
  child: VeryBigSubtree(
    color: Colors.red.withAlpha(140),
  ),
);
Since there are no dependencies from widget parameters, we don’t even need to override didUpdateWidget, and the variable can simply be final rather than late final. While this approach is quite good, we can still do even better! We can move the state up in the tree and make everything constant.
Making everything constant
At the moment, our app is more efficient than the one we created on the first try, thanks to the manual caching strategy we have just analyzed. However, we can do even better than this by lifting the state up! We’re doing all of this in order to remove setState(() {}) calls and make as many const widgets as possible.
We’re going to use an InheritedWidget to move the state up the tree in order to remove direct dependencies on the state and be able to listen for changes. In this way, we can avoid using setState(() {}) and have more granular control of rebuilds in our app.
Let’s start by creating a model class to hold the counter state. It is going to mix with ChangeNotifier because it has the notifyListener() method, which can be listened to trigger rebuilds on children. The code is illustrated in the following block:
/// The state of the counter in the app.
class Counter with ChangeNotifier {
  int _counter;
  List<int> _history;
  /// Initializes the counter to 0.
  Counter()
      : _counter = 0,
        _history = [];
  /// The current counter state.
  int get counter => _counter;
  /// The increases history.
  List<int> get history =>
    UnmodifiableListView<int>(_history);
  /// Increases the counter by 1.
  void increase() {
    _counter++;
    _history.add(_counter);
    notifyListeners();
  }
  /// Decreases the counter by 1.
  void decrease() {
    _counter--;
    notifyListeners();
  }
}
Since the state is now untied to a specific widget, we can use an InheritedWidget to provide the values to any widget down the tree. Any children will be able to access the state directly inside the build method without having to ask for values via the constructor.
In the following code block, we’re creating an inherited widget that will hold our app’s state:
class CounterState extends InheritedWidget {
  /// The state of the counter app.
  final Counter model;
  /// Creates a [CounterState] widget.
  const CounterState({
    Key? key,
    required Widget child,
    required this. model,
  }) : super(key: key, child: child);
  static CounterState of(BuildContext context) {
    return context
        .dependOnInheritedWidgetOfExactType<CounterState>()!;
  }
  @override
  bool updateShouldNotify(covariant CounterState oldWidget) {
    return model.counter != oldWidget. model.counter ||
        model.history.length !=
          oldWidget. model.history.length;
  }
}
At this point, our three widgets have no more dependencies from the local widget state, and thus it can also be converted into a Stateless widget. Notice how we’re now able to make everything constant without the boilerplate of manual caching, just by using Dart’s syntax. We can now make the entire children of the Column constant, as follows:
/// The contents of the counter app.
class CounterAppBody extends StatelessWidget {
/// Creates a [CounterAppBody] widget.
  const CounterAppBody({
    Key? key,
  }) : super(key: key);
  @override
  Widget build(BuildContext context) {
    return CounterState(
      model: Counter(),
      child: Scaffold(
        body: Center(
          child: Column(
            mainAxisSize: MainAxisSize.min,
            children: const [
              AppTitle(),
              CounterButtons(),
              HistoryWidget(),
            ],
          ),
        ),
      ),
    );
  }
}
The CounterButtons widget simply contains the Row widget with the counter and the two increment and decrement buttons. They now alter the state by getting a reference of the inherited widget and directly acting on the model class, which will notify the listeners, as illustrated in the following code snippet:
ElevatedButton(
  onPressed: CounterState.of(context).model.decrease,
  child: const Text('-'),
),
In HistoryWidget, we can now remove didUpdateWidget and buildList since we don’t have a dependency anymore. To listen for updates on the state from the inherited widget, we simply need to wrap the list on an AnimatedBuilder widget, and we’re done! The AnimatedBuilder widget will take care of rebuilding the list only when really needed, leaving the other parts of the widget untouched. The code is illustrated in the following snippet:
SizedBox(
  height: 40,
  child: AnimatedBuilder(
    animation: _counterState,
    builder: (context, _) {
      return ListView.separated(
        scrollDirection: Axis.horizontal,
        itemCount: _counterState.history.length,
        itemBuilder: (_, index) {
          return Text('${_counterState.history[index]}');
        },
        separatorBuilder: (_, __) {
          return const SizedBox(width: 10);
        }
      );
    },
  ),
),
While it may seem a bit weird, the AnimatedBuilder widget is not only used to listen for animations (more on this in Chapter 7, Building an Animated Excuses Application) but is also designed to work in conjunction with inherited widgets!
Our counter app is now fully functional and well structured. Thanks to inherited widgets and constant constructors, we’ve made sure that the framework only rebuilds widgets that need to be updated, leaving the others untouched.
Summary
In this chapter, we learned that Flutter has three trees to efficiently paint the UI. The widget tree is used to configure the underlying Element object. The element tree manages the widget life cycle, holds its state (if any), and much more. It’s good at comparing because it detects changes and updates or recreates the render object behind. The render object tree is used to paint the UI and handle gestures and does the low-level work.
With this information, we have built a simple but efficient counter app that keeps a small history of increased values. We have learned about the importance of constant constructors and saw a very effective technique to manually cache widgets. We could say that the more constant constructors we can use, the better.
In the last section, the app has been improved even more with the usage of an inherited widget that lifted the state up and allowed for more constant constructors.
The next chapter is about techniques to build UIs in Flutter. We will be building a race standings app using Flutter’s material library to show how its layout widgets are best used.
Further reading
- InheritedWidget: https://api.flutter.dev/flutter/widgets/InheritedWidget-class.html
- setState: https://api.flutter.dev/flutter/widgets/State/setState.html
- Element: https://api.flutter.dev/flutter/widgets/Element-class.html
- RenderObject: https://api.flutter.dev/flutter/rendering/RenderObject-class.html