Now that we have a basic idea of what an N-Body simulation is and how different bodies interact with each other, we will proceed to the installation of the GalaxSee library.
First, we need to download the archive of the source code. We can do this with the wget command:
wget http://www.shodor.org/refdesk/Resources/Tutorials/MPIExamples/Gal.tgz
Next, we extract the .tgz archive, assuming it was downloaded to the home folder. If the path is different, we need to enter the correct path:
tar -xvzf ~/Gal.tgz
Navigate to the folder:
cd Gal
We need to use Makefile to successfully build GalaxSee on our Raspberry Pi. To do that, open the file in the terminal:
nano Makefile
Then, change the line:
cc = mpicc
to:
cc = mpic++
This is done so that the final result looks like this:

To build the program, simply run this:
make
Now if you enter ls inside the Gal folder, you will see a newly created executable file named GalaxSee. Run the file with the following command:
./GalaxSee
This will execute the program and will open a new window that looks like the following:
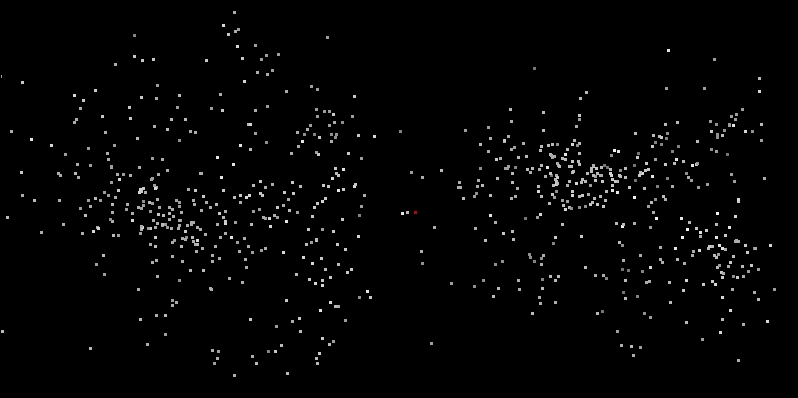
Here, the white dots are the bodies that are interacting with each other with the force of gravity. There are a few options that you can configure in GalaxSee to change the number of bodies or their interaction. For example, run the following command:
./GalaxSee 200 400 10000
Here, the first argument to the program, 200, gives the number of bodies to be simulated. The second argument gives the speed of the simulation. The higher the number, the higher the speed. The third argument gives the amount of time to run the simulation in milliseconds. So, in the preceding command, we will simulate 200 bodies for 10 seconds. Obviously, we can experiment with different variables and see how these variables affect the simulation.
The preceding example was running on a single Raspberry Pi. But as promised, we will now see how to run it on a cluster. It will probably be surprising if we learn that the program can run on a cluster of Raspberry Pi devices with a single command and one that we've seen before. The following command does the trick:
mpiexec -f ~/machinefile -n 3 ./GalaxSee
In the preceding command, mpiexec initiates the MPI process on our host computer. Here, we will give it three points of data on which to execute the GalaxSee program. These are as follows:
- The path to the file containing the IP addresses for each device in the network
- The number of devices to be used
- The path to the executable file
The -f option specifies the machinefile. The -n option specifies the number of devices to be used, and finally, we give the GalaxSee executable file to it.
Try it for yourself! If you try to increase the number of bodies in the simulation on a single Raspberry Pi, it would probably run slower. But if you try the same on a cluster, it will definitely run faster because now, we have a lot more computational resources at our disposal.