
Now that you've learned how to get to the Linux operating system on your Galileo, you have a whole new set of capabilities that you can add to your projects. One example is speech; it is a good basic project and offers an example of adding capability in both hardware and software. You'll be adding a speaker to your Galileo. You'll also add functionality so the robot can respond via the speaker.
Specifically, in this chapter you'll learn how to:
- Hook up the hardware to input sound
- Use Espeak to allow your projects to respond in a robot voice
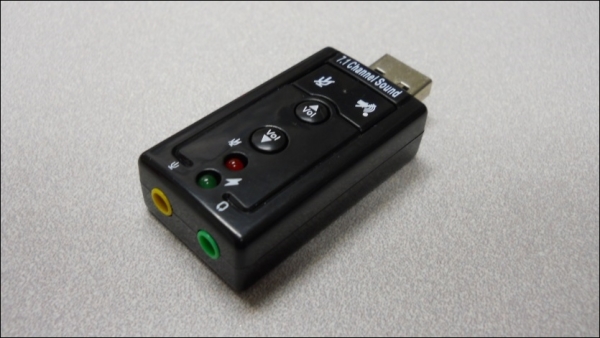
This project requires a USB microphone or speaker adapter. The board itself does not have audio out or audio in. On the Galileo Gen 1 board, the 3.5 mm connector is to connect to the host computer. So you'll need the following two pieces of hardware:
- A USB device that supports microphone in and speaker out. These are inexpensive and can be purchased at any online electronics outlet. Refer to the following image:
- A powered speaker that can plug into the USB device. Again, these are available online or at any audio store. Refer to the following image:
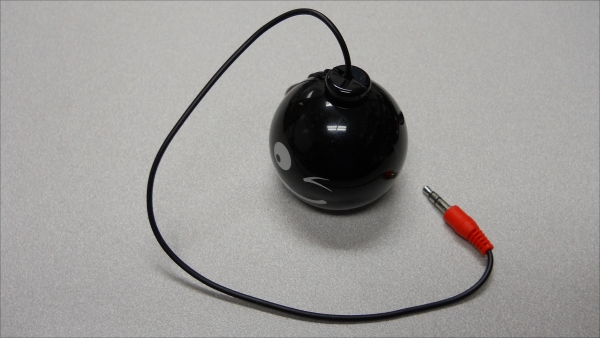
Make sure the speaker is powered because your board will generally not be able to drive a passive speaker with enough power for your applications. The speaker can use either internal battery power, or an externally powered USB hub.
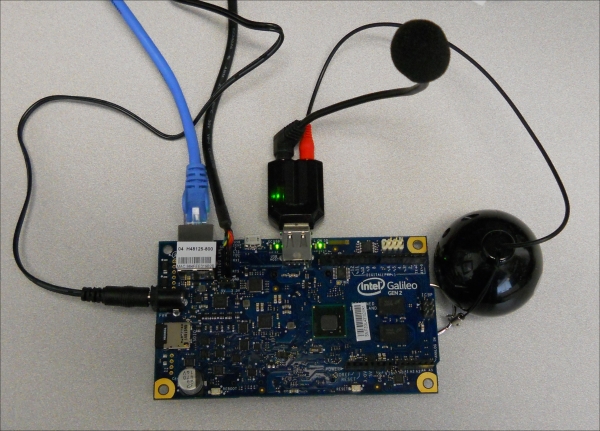
For this task, you are going to hook up your hardware so that you can record and play sound. To do this, assemble your Galileo and the components. Plug in the LAN cable, or connect via the wireless adapter. Plug in the microphone or speaker USB device. Also, plug in your speakers and the microphone. Plug in the power, as well as the UART connector. The entire system should look like the following image:
Plug in the power. Once the terminal window comes up, log in with your user name and password. Now type in cat /proc/asound/cards. The Galileo will tell you what sound card it sees attached. You should see a response that resembles the following screenshot:
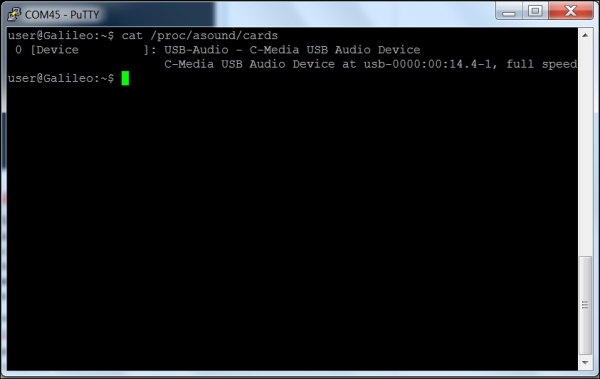
There is only one audio device, your USB audio plugin. First, let's play some music to test that the USB sound device is working. You'll need to configure your system to look for your USB audio plugin and use it as the default sound device to play and record sound. To do this, you'll need to add a couple of libraries to your system. The first is Advanced Linux Sound Architecture (ALSA). It is going to enable your sound system on the Galileo. Perform the following steps:
- Firstly, install two libraries associated with ALSA by typing
sudo apt-get install alsa-base alsa-utils. As a reminder, you need to have a network connection to download new packages, and apt-get will search the default package repository by name. - Then, also install some files that help provide the sound library by typing
sudo apt-get install libasound2-dev.
If your system already contains these libraries, Linux will simply tell you that they are already installed or that they are up-to-date. After installing both libraries, reboot your Galileo. It takes time, and is not always required, but the system often needs a reboot after new libraries or hardware are installed.
Now you'll use an application named alsamixer to control the volume of both the input and the output of our USB sound card. Perform the following steps:
- Type
alsamixeron the prompt. You should see a screen that looks like the following screenshot: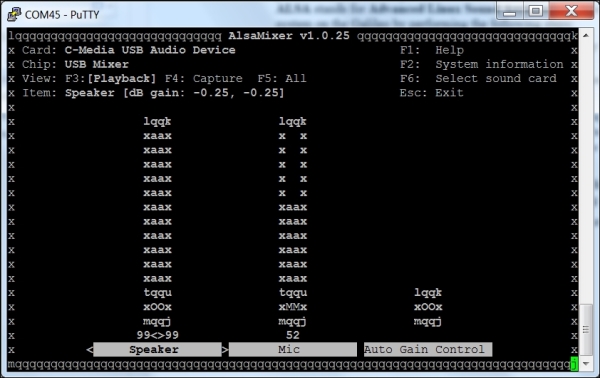
- You can use the arrow keys to set the volume for both the speakers and the microphone. Use the M key to unmute the microphone. In the preceding screenshot, MM is mute and ∞ is unmute.
- Let's make sure your system knows about your USB sound device. At the prompt, type
sudo aplay –l. You should now see a screen resembling the following screenshot:
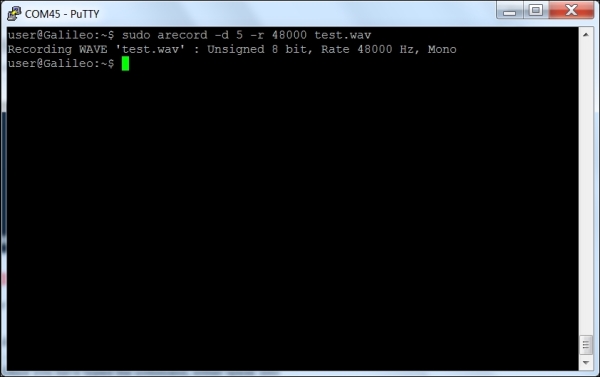
Now that you have some sound hardware, let's first record some sound. To do this, you're going to use the arecord program. At the prompt, type arecord -d 5 -r 48000 test.wav. This will record five seconds of sound at a 48,000 Hz sample rate and save it to a file called test.wav.
Once you have typed the command, either speak into the microphone or make some other recognizable sound. You should see the following output in the terminal:
Once you create the file, play it with aplay. Type sudo aplay test.wav and you should hear the recording. If you can't hear your recording, check alsamixer to make sure your speakers and microphone are both unmuted.
Now you can play music or other sound files using your Galileo. You can change the volume of your speaker and record your voice or other sounds on the system. You're ready for the next step.