
Mail is one of the easiest aspects of Mac OS X Server to manage. Managing all of the things that go into protecting a mail server, on the other hand, can be one of the more challenging aspects of managing a mail server on Mac OS X. Lion Server has many features that help to protect your mail server; however, spammers and virus writers make their living off of the distribution of their nasty little wares. Therefore, managing a mail server is a constant battle to keep up-to-date on the latest trends of mail serving, to keep your server able to communicate with other mail servers on the Internet.
Before you sit down to install your own Lion Server as a mail server, think carefully about what you are about to do. If you only have a few accounts, then a solution like Hosted Exchange or Google Apps might be a better fit for you. This isn’t because managing the Lion Server is difficult; it’s not. But the ecosystem that goes into mail can be frustrating.
If you do decide to continue, there are a few tasks to perform before you get started. These include getting a domain name (e.g., krypted.com), configuring the DNS for that domain name (e.g., mail.krypted.com), configuring the IP address you use through your Internet service provider (ISP), and making sure that the IP address the ISP gives you isn’t blacklisted.
Most organizations already own a domain name. Most also already have a website for the domain name and potentially a host of other services. But not all do. And certainly, it’s easiest to set up a fresh, new domain when setting up a mail server. To set up a domain, first go to one of the bevy of registrars or companies who sell domains. These include companies like Network Solutions, Go Daddy, Register.com, and hundreds of other companies that can sell domains. I usually like to leave DNS on the registrar.
Finding the right domain name can be tricky. Take into account how it will look on business cards, how you will spell and say the domain name on phone calls, and how closely it resembles how you will use the domain name. For example, if you clean carpets and your name is Bill, then chances are you wouldn’t want johnspipes.com.
Once you have a domain name, it is important to know which DNS servers are used for the domain. You can use Network Utility to query the domain name and you should get back a list of DNS servers. If DNS is hosted by the registrar, then there will usually be a control panel to log in and make changes to the DNS records that comprise the name. When considering DNS, there are two issues to take into account. The first is that you should have an A record (for more on records, zones, and other DNS fun, check out Chapter 9) that points to mail.domain.com. For example, for krypted.com, you would want a record that points to mail.krypted.com.
Mail isn’t the only DNS record to make. If you have separate DNS servers for POP or IMAP and SMTP, then you can also have separate records for each service (e.g., imap.krypted.com or smtp.krypted.com). In addition, you will also want a record that points the MX record to the name of the server.
In addition to A records and MX records, reverse DNS records (or PTR records) are important as well. Many spam prevention solutions require the PTR record match the forward lookup record (which is usually an A record or a CNAME). The authoritative DNS server for the IP address is going to be your registrar. Therefore, the registrar should be able to create such a record for you.
Because you will need reverse DNS, it is highly unlikely that you will want to use a dynamic IP address as the public address of your mail server. If you do, few domains will accept your mail. Overall, this represents a few steps so far. First, obtain a domain name. Then build the correct records on the DNS service and finally contact the ISP to verify that you have a static IP address and that a PTR record has been created for the IP address that the server uses on the ISP’s DNS servers. This provides the best chance that the IP address being used will be allowed to relay outgoing mail as needed.
Something else to consider about the public IP address used for your mail server is that it hasn’t been blocked by one of the spam blacklists. Even if you have all of the previous requirements, if the IP was blacklisted before it was given to your organization, then you may have some work to get the address removed from blacklists. A great site for checking the blacklists is http://whatismyipaddress.com/blacklist-check.
From the Blacklist Check site, locate the Blacklist Check field and enter the IP address of the server. Then click on the Blacklist Check button and the IP will be checked against each blacklist database. The green checkmarks mean the server isn’t listed (Figure 6-1).
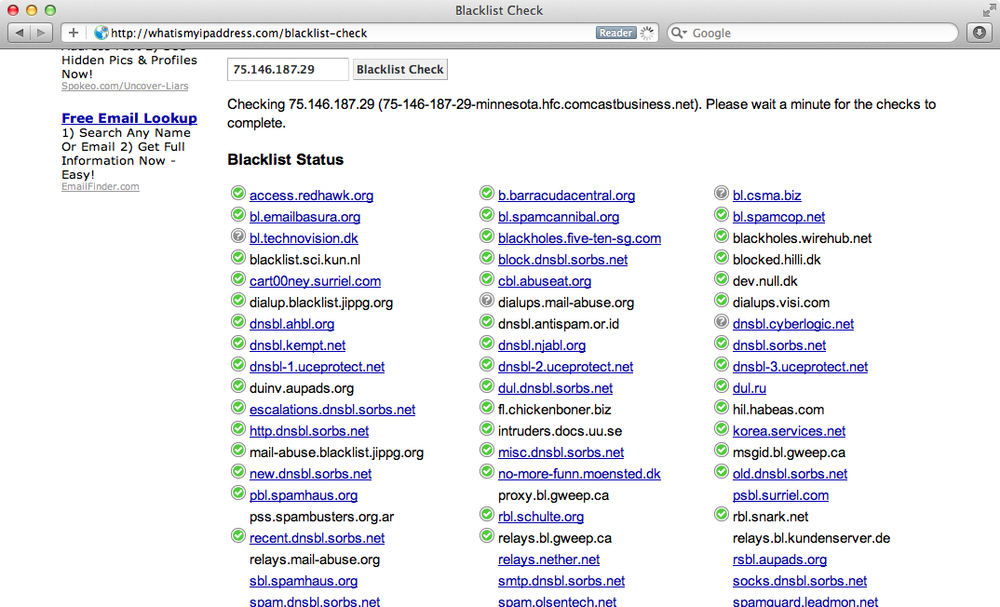
If the server is listed on any of the blacklists, then contact each of the blacklisting entities individually to have the issue resolved (once the server is not an open relay, used for routing spam, etc.).