
Gallery: Beginners’ Gallery
On the following pages, you’ll find some images from the book as well as images created by a few artists fairly new to the Autodesk® Maya® software. I hope these images will inspire your own creativity as you become more familiar with 3D in general and Maya specifically.
Some of these artists have been using Maya for only a short period of time, and already they’ve been able to use the tools and techniques they’ve learned to channel their artistic eye and creativity into some beautiful and interesting imagery. (All images are used with permission.)


This still life from Chapter 10, “Autodesk Maya Lighting” was modeled and textured by Maya students Juan Gutierrez and Robert Jauregui. The fruit still life was modeled by Juan using mostly polygons. The textures were created by Robert, who took this opportunity to learn all about UV texture space and mapping polygons because this was his first texturing experience with Maya. I laid out the scene, lit it, and rendered it to demonstrate some rendering concepts.


Below Left: This pool table was modeled by Victor J. Garza to demonstrate modeling techniques in an introductory Maya class and to show the students how to be creative when combining surfaces to form a complex object. After Victor modeled the table, he and I textured and lit the scene. Below Right: A photo of the toy red wagon that was textured in Chapter 7, “Autodesk Maya Shading and Texturing.” Take a look at not just the coloring but also the sense of surface and texture as you do the exercise in Chapter 7.


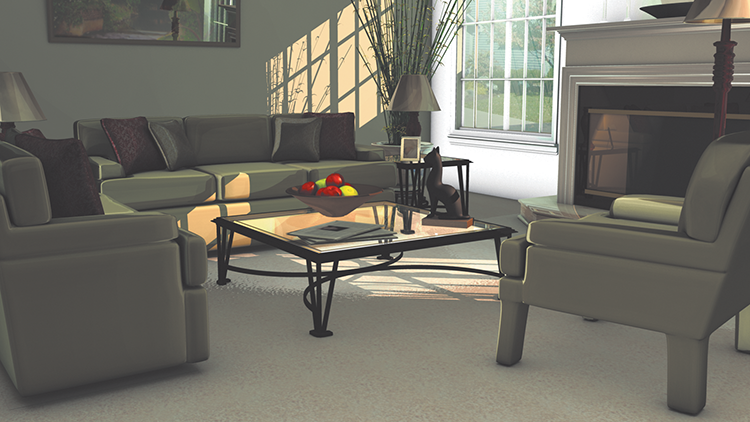
Above: This living room scene was modeled by Huyen Dang of the Art Institute of California—Los Angeles for a lighting class; I lit it using global illumination in mental ray®. Middle: The color render can be enhanced with the addition of an Ambient Occlusion pass to add detail and contact shadows. Below: The Ambient Occlusion render creates contact shadows and some further detail in the dark areas of the image to enhance the look of the color render. This pass is multiplied in a compositing package to add realism.
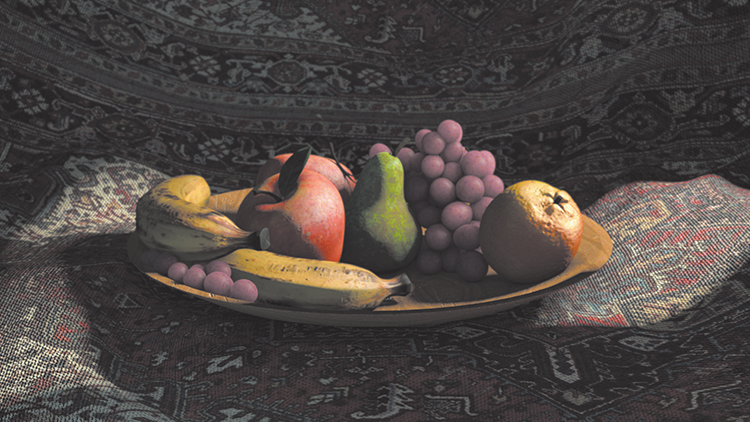

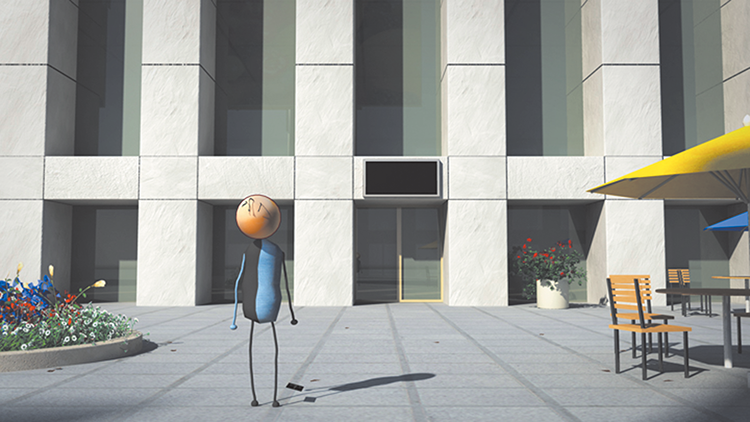
Above: Yang Liu, my teaching assistant at the University of Southern California, created this fruit still life as a texturing exercise for his demo reel. Yang painted images for color, bump, and specular in Adobe Photoshop and applied them as maps with mental ray shaders, including Subsurface Scattering shading on the grapes to achieve their softly lit look. Below: Yang’s thesis film creates a stylistic animation look. He created the scene entirely in Maya and rendered it with textures only. He used mental ray to render passes for the keylight, the Ambient Occlusion, and the vector outlines of the character to make it look 2D. He then painted on the passes in Photoshop, and composited everything in Adobe After Effects and The Foundry’s Nuke.


Above: Jordan Prieto, a student at the University of Southern California, created his look by using direct lighting techniques and raytrace shadows to light his interior space. He used point lights for the bulbs in the hallway and rendered using mental ray for Maya. Below: Jordan created his character to fit into the style of his space, using mental ray shading for the subtle and stylized skin look for his character. The images for his project were rendered in passes, including Ambient Occlusion and Z-depth, and were composited together in postproduction.

Above: Andre Champion created this still life render for my lighting and rendering course at Santa Monica College. The entire scene was modeled and rendered in Maya. The nontransparent objects were modeled out of simple geometric shapes, which were then unwrapped and brought into Photoshop to texture. Each of the glasses and the red wine objects were broken down into multiple pieces to create light refraction for a realistic feel. Below: Wen Huang of the University of Southern California’s John C. Hench Division of Animation and Digital Arts created an illustrative style using clever texturing. His exterior scenes use mental ray Physical Sun And Sky in Maya for his lighting, with each shot of the short film fine-tuned based on the camera angle.


Above: USC student Ryan Kravertz’s goal for the lighting and rendering of his short film was to make the characters and the world feel like they existed in a real, tangible space. He used simple, direct lighting and rendered with mental ray with Final Gather for secondary light in his rich world. Ryan used a combination of Maya shaders and mental ray shaders for the characters, using custom-painted color, specular, and bump maps.


Above: Christian Enriquez created this still life in my lighting and rendering class at Santa Monica College using an HDRI and some direct lights. The scene was rendered in mental ray and composited together in After Effects. Middle: This still life was created by Natalya Sevastyanova, also from Santa Monica College, using a variety of models to create the composition. She rendered using mental ray for Maya after painting the color maps for her objects. Below: This is from University of Southern California student Louis Morton’s mixed-media short film Shape Dance. The backgrounds were modeled, textured, and lit in Maya, and the characters were shot live action on green screen. The characters were then keyed in After Effects and imported onto an image plane in Maya to render within the CG environments. Final color correction and compositing work was done in After Effects.