
The last subject to be explored is one of the most exciting and dynamic areas in Java: the use of a web server as a platform for application development.
The Java language has moved beyond applications that run on your computer and applets that run on a web page. Servlets, web applications run by a server over the Internet and presented by a web browser, employ Java with all the features of the language.
Using servlets, you can collect input from users through web page forms, present records from a database or another source, and create web pages dynamically.
This approach can be enhanced by Java Server Pages (JSP), a way to create web pages that mix static Hypertext Markup Language (HTML) with the output of servlets and Java expressions.
JSP enables nonprogrammers to work on websites developed with Java. Today you learn about each of the following topics:
How servlets differ from applications and applets
How to run servlets as part of the Apache web server and other servers
How to receive data from a web page form
How to store and retrieve cookies
How to use servlets to dynamically generate web content
How to develop web applications using JSP
How to use Java variables, expressions, and statements on a page
Servlets are Java classes run by a web server that has an interpreter that supports the Java Servlet specification. This interpreter, which is called a servlet engine, is optimized to run servlets with a minimum of the server’s resources.
Java servlets often serve the same purpose as programs implemented using the common gateway interface (CGI), a protocol for writing software that sends and receives information through a web server. CGI programming has been supported on the web for most of its existence. Most CGI programs, which also are called CGI scripts, have been written using languages such as Perl, Python, and PHP.
CGI programs are used often for these purposes:
Collecting user input from a form on a web page
Receiving information from arguments specified as part of a uniform resource locator (URL)
Running programs on the computer that runs the web server
Storing and retrieving cookies, files that store a user’s preferences and other information on his computer
Sending data back to a user in the form of an HTML document, GIF graphic, or another format
Java servlets can do all these things along with some behavior that’s difficult to implement using most CGI scripting languages.
Servlets offer full support for sessions, a way to keep track of a particular user over time as a website’s pages are being viewed. They also can communicate directly with a web server using a standard interface. As long as the server supports Java servlets, it can exchange information with those programs.
Java servlets have the same portability advantages as the language itself. Although Sun’s official implementation of servlets was created with the Apache Software Foundation—the open source developers who created the Apache web server—many other companies and groups have introduced tools to support Java servlets such as IBM WebSphere, BEA WebLogic, and the Jetty server.
Servlets also run efficiently in memory. If 10 people are simultaneously using the same CGI script, a web server will have 10 copies of that script loaded into memory. If 10 people are using a Java servlet, only one copy of the servlet will be loaded, spawning threads to handle each user.
Servlets can be created using the javax.servlet and javax.servlet.http packages, which are a standard part of the Java’s enterprise edition, an expanded version of the Java class library that supports large-scale development projects.
These classes implement the Java Servlet and JSP specifications. At this time, the current versions are Java Servlet 2.5 and JSP 2.1.
For users of the standard Java edition, which has been covered throughout this book, the servlet packages can be downloaded from Sun’s Java servlet site at http://java.sun.com/products/servlet. Click the Downloads link and under the Specifications heading, choose the Download Class Files link for the Java Servlet specification version 2.3 (class files for newer versions also might be available).
After installing the class files, to make them available, add the root folder of the installation to your computer’s Classpath environmental variable (for example, if the javax folder was saved in c:javaservlet-2.3, add the c:javaservlet-2.3 folder to the Classpath).
Another way to get these files is to use the Java servlet class library that ships with the server you’ll be using to deploy these applications.
Running servlets and JSP requires a server that supports the technologies.
Servlets are supported by several web servers, each of which has its own installation, security, and administration procedures.
The most popular choice for new servlet developers is Tomcat, an open source server developed by the Apache Software Foundation in cooperation with Sun Microsystems. Version 5.5 of Tomcat supports Java Servlet 2.4 and JSP 2.0.
Tomcat can run in conjunction with another web server (such as Apache’s web server) or as a standalone server. Your current web server or web application server might already include support for servlets.
The software is available as a free download from Apache’s website at the address http://jakarta.apache.org/tomcat. Several versions are available: Download version 5.5.
Full installation instructions for Tomcat are available from the website. If you want to run it as a standalone server for testing purposes, in most cases, the following procedure works:
View the downloads page for Tomcat and other Apache projects: Visit http://jakarta.apache.org/tomcat, and in the Downloads section of the site menu, click the Binaries link.
A page opens with links to Apache software you can download, which are called builds.
In the Release Builds section, scroll to the Tomcat 5.5 heading.
The software can be downloaded as a
ZIParchive, an archive compressed withTARandGZ, or a Windows installer.Click the link of the version you want to download.
Install the software, making note of the folder where it is installed.
Create an environmental variable called
JAVA_HOMEthat contains the folder where Java is installed on your computer.Create an environmental variable called
CATALINA_HOMEthat contains the folder where Tomcat was installed.In the
binfolder of the Tomcat installation, use eithercatalina.shorcatalina.batto run the server with one of these commands:catalina.sh start catalina.bat start
Tomcat begins running at port 8080 of your computer. (There’s also a
stopcommand to shut it down.)To verify that it’s running, open the address http://localhost:8080 with a web browser. If you’re testing Tomcat from another computer, replace
localhostwith the domain name or IP address of the server where Tomcat has been installed.Add to your
Classpatha reference to the Java servlet class library,servlet-api.jar, that ships with Tomcat. In version 5.5, it’s in thecommonlibsubfolder.
If you don’t have a server but you want to begin developing servlets, several companies offer commercial web hosting with Java servlet support. These companies have already installed Tomcat and configured it to work with their servers, leaving you to focus on writing servlets using the classes of the javax.servlet and javax.servlet.http packages.
Note
For previous editions of the book, I tested servlets using Motivational Marketing Associates (MMA) to host servlets and JSP. MMA offers Java servlet hosting on an Apache web server running Linux. You can find out more about its commercial hosting services by visiting http://www.mmaweb.com.
Java servlets are created and compiled just like any other Java class. After you install the servlet packages and add them to your computer’s Classpath, you can compile servlets with the JDK’s Java compiler or any other current compiler.
Every servlet is a subclass of the HttpServlet class, which is part of the javax.servlet package. This class includes methods that represent the life cycle of a servlet and collect information from the web server running the servlet.
A servlet’s life cycle methods function similarly to the life cycle methods of applets.
The init(ServletConfig) method is called automatically when a web server first brings a servlet online to handle a user’s request. As mentioned earlier, one Java servlet can handle multiple requests from different web users. The init() method is called only once, when a servlet comes online. If a servlet is already online when another request to use the servlet is received, the init() method won’t be called again.
The init() method has one argument—ServletConfig, an interface in the javax.servlet package that contains methods to find out more about the environment in which a servlet is running.
The destroy() method is called when a web server takes a servlet offline. Like the init() method, this is called only once, when all users have finished receiving information from the servlet. If this doesn’t take place in a specified amount of time, destroy() is called automatically, preventing a servlet from being hung up while it waits for information to be exchanged with a user.
One of the main tasks of a servlet is to collect information from a web user and present something back in response. You can collect information from a user by using a form, which is a group of text boxes, radio buttons, text areas, and other input fields on a web page.
Figure 21.1 shows a web form on a page loaded with the Mozilla web browser.
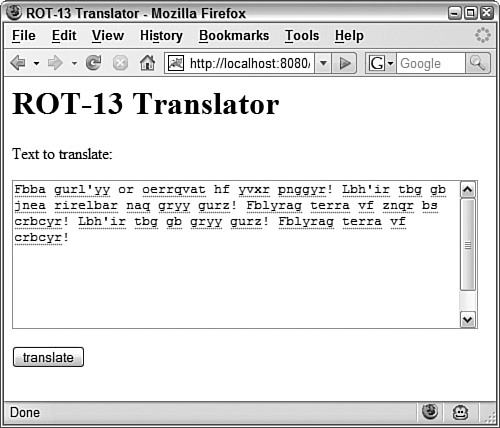
The form displayed in Figure 21.1 contains two fields: a text area and a clickable Translate button. The HTML tags used to display this page are the following:
<html>
<body>
<head><title>ROT-13 Translator</title></head>
<h1>ROT-13 Translator</h1>
<p>Text to translate:
<form action="Rot13" method="post">
<textarea name="text" rows="8" cols="55">
</textarea>
<p><input type="submit" value="translate">
</form>
</body>
</html>
The form is contained within the <form> and </form> HTML tags. Each field on the form is represented by its own tags: textarea for the text area and input for the Translate button. The text area is given a name, “text”.
Tip
Servlets require you to have a basic familiarity with HTML because the only user interface for a servlet is a web page running in a browser. Two books that are good for learning HTML are Sams Teach Yourself HTML and CSS in 24 Hours, Seventh Edition, by Dick Oliver and Michael Morrison (ISBN 0-67232-841-0) and Sams Teach Yourself Web Publishing with HTML and CSS in One Hour a Day, Fifth Edition, by Laura Lemay and Rafe Colburn (ISBN 0-67232-886-0).
Each field on a form stores information that can be transmitted to a web server and then sent to a Java servlet. Web browsers communicate with servers by using Hypertext Transfer Protocol (HTTP). Form data can be sent to a server using two kinds of HTTP requests: get and post.
When a web page calls a server using get or post, the name of the program that handles the request must be specified as a web address, also called a uniform resource locator (URL).
A get request affixes all data on a form to the end of a URL, as in this example:
http://www.java21days.com/servlets/beep?number=5551220&repeat=no
A post request includes form data as a header sent separately from the URL. This is generally preferred, and it’s required when confidential information is being collected on the form. Also, some web servers and browsers do not support URLs longer than 255 characters, which limits the amount of information that can be sent in a get request.
Java servlets handle both of these requests through methods inherited from the HttpServlet class: doGet(HttpServletRequest, HttpServletResponse) and doPost(HttpServletRequest, HttpServletResponse). These methods throw two kinds of exceptions: ServletException, which is part of the javax.servlet package, and IOException, an exception in the standard java.io package that involves input and output streams.
The doGet() and doPost() methods have two arguments: an HttpServletRequest object and an HttpServletResponse object. One is called when a get request is used to execute the servlet, and the other is called with post. A common technique in Java servlet programming is to use one method to call the other, as in the following example:
public void doGet(HttpServletRequest request,
    HttpServletResponse response) throws ServletException, IOException {

    doPost(request, response);
}
The request and response objects belong to classes in the javax.servlet.http package. A servlet receives information about how it was run by calling methods of the HttpServletRequest class. For example, when a web form is submitted to a servlet, each field on the form is stored as a string by the HttpServletRequest class.
You can retrieve these fields in a servlet by calling the getParameter(String) method with the name of the field as an argument. This method returns null if no field of that name exists.
A servlet communicates with the user by sending back an HTML document, a graphics file, or another type of information supported by a web browser. It sends this information by calling the methods of the HttpServletResponse class.
The first thing you must do when preparing a response is to define the kind of content the servlet is sending to a browser. Call the setContentType(String) method with the content type as an argument.
The most common form for a response is HTML, which is set by calling setContentType("text/html"). You also can send a response as text (“text/plain”), graphics files (“image/gif”, “image/jpeg”), and application-specific formats such as “application/msword”.
To send data to a browser, you create a servlet output stream associated with the browser and then call the println(String) method on that stream. Servlet output streams are represented by the ServletOutputStream class, which is part of the javax.servlet package. You can get one of these streams by calling the response object’s getOutputStream() method.
The following example creates a servlet output stream from an HttpServletResponse object called response and then sends a short web page to that stream:
ServletOutputStream out = response.getOutputStream();
out.println("<html>");
out.println("<body>");
out.println("<h1>Hello World!</h1>");
out.println("</body>");
out.println("</html>");
Listing 21.1 contains a Java servlet that receives data from the form displayed in Figure 21.1.
Example 21.1. The Full Text of Rot13.java
 1: import java.io.*;
 2:
 3: import javax.servlet.*;
 4: import javax.servlet.http.*;
 5:
 6: public class Rot13 extends HttpServlet {
 7:
 8:     public void doPost(HttpServletRequest req, HttpServletResponse res)
 9:         throws ServletException, IOException {
10:
11:         String text = req.getParameter("text");
12:         String translation = translate(text);
13:         res.setContentType("text/html");
14:         ServletOutputStream out = res.getOutputStream();
15:         out.println("<html>");
16:         out.println("<body>");
17:         out.println("<head><title>ROT-13 Translator</title></head>");
18:         out.println("<h1>ROT-13 Translator</h1>");
19:         out.println("<p>Text to translate:");
20:         out.println("<form action="Rot13" method="post">");
21:         out.println("<textarea name="text" ROWS=8 COLS=55>");
22:         out.println(translation);
23:         out.println("</textarea>");
24:         out.println("<p><input type="submit" value="translate">");
25:         out.println("</form>");
26:         out.println("</body>");
27:         out.println("</html>");
28:     }
29:
30:     public void doGet(HttpServletRequest req, HttpServletResponse res)
31:         throws ServletException, IOException {
32:
33:         doPost(req, res);
34:     }
35:
36:     String translate(String input) {
37:         StringBuffer output = new StringBuffer();
38:         if (input != null) {
39:             for (int i = 0; i < input.length(); i++) {
40:                 char inChar = input.charAt(i);
41:                 if ((inChar >= 'A') & (inChar <= 'Z')) {
42:                     inChar += 13;
43:                     if (inChar > 'Z')
44:                         inChar -= 26;
45:                 }
46:                 if ((inChar >= 'a') & (inChar <= 'Z')) {
47:                     inChar += 13;
48:                     if (inChar > 'z')
49:                         inChar -= 26;
50:                 }
51:                 output.append(inChar);
52:             }
53:         }
54:         return output.toString();
55:      }
56: }
After saving the servlet, compile it with the Java compiler.
The Rot13 servlet receives text from a web form, translates it using ROT-13, and then displays the result in a new web form. ROT-13 is a trivial method of encrypting text through letter substitution. Each letter of the alphabet is replaced with the letter that’s 13 places away: A becomes N, N becomes A, B becomes O, O becomes B, C becomes P, P becomes C, and so on.
Because the ROT-13 encryption scheme is easy to decode, it isn’t used when information must remain secret. Instead, it’s used casually on Internet discussion forums such as Usenet newsgroups. For example, if someone on a movie newsgroup wants to share a spoiler that reveals a plot detail about an upcoming movie, she can encode it in ROT-13 to prevent people from reading it accidentally.
Note
Want to know the big secret from the 1973 film Soylent Green? Decode this ROT-13 text: Fbba gurl’yy or oerrqvat hf yvxr pnggyr! Lbh’ir tbg gb jnea rirelbar naq gryy gurz! Fblyrag terra vf znqr bs crbcyr! Lbh’ir tbg gb gryy gurz! Fblyrag terra vf crbcyr!
To make the ROT-13 servlet available, you must publish its class files in a folder on your web server that has been designated for Java servlets.
Tomcat is organized so that servlets, other classes, and JSP pages are placed in subfolders of the software’s webapps folder. One way to deploy a servlet’s class file is to store it in a WEB-INFclasses subfolder somewhere in the webapps hierarchy of folders.
If you chose to install them during installation, Tomcat 5.5 includes several sample servlets in the servlets-examples and jsp-examples folders inside webapps. You can deploy the ROT-13 servlet in the servlet-examples folder by storing Rot13.class in webappsservlet-examplesWEB-INFclasses (Windows) or webapps/servlet-examples/WEB-INF/classes (Linux).
If you place the Rot13.class file in this folder, edit the web.xml file in its parent folder and add the following lines:
<servlet>
    <servlet-name>Rot13</servlet-name>
    <servlet-class>Rot13</servlet-class>
</servlet>
<servlet-mapping>
    <servlet-name>Rot13</servlet-name>
    <url-pattern>/servlet/Rot13</url-pattern>
</servlet-mapping>
The web.xml file configures a web application such as the group of servlet examples stored in wepappsservlet-examples.
These lines must be placed somewhere after the opening <web-app> tag and before the closing </web-app> tag.
After adding the class file and editing web.xml, restart Tomcat and run the servlet by loading its address with a web browser.
The address of the servlet depends on where it was stored in the webapps folder. If you used the preceding configuration, it’s in /servlets-examples/servlet/Rot13, as in http://localhost:8080/servlets-examples/servlet/Rot13.
Many websites can be customized to keep track of information about you and the features you want the site to display. This customization is possible because of a web browser feature called cookies, small files containing information that a website wants to remember about a user, such as a username, the number of visits, and the like. The files are stored on the user’s computer, and a website can read only the cookies on the user’s system that the site has created.
Because of privacy considerations, most web browsers can be configured to reject all cookies or ask permission before allowing a site to create a cookie. The default behavior for most browsers is to accept all cookies.
With servlets, you can easily create and retrieve cookies as a user runs your application. Cookies are supported by the Cookie class in the javax.servlet.http package.
To create a cookie, call the Cookie(String, String) constructor. The first argument is the name you want to give the cookie, and the second is the cookie’s value.
One use for cookies is to count the number of times someone has loaded a servlet. The following statement creates a cookie named visits and gives it the initial value of 1:
Cookie visitCookie = new Cookie("visits", "1");When you create a cookie, you must decide how long it should remain valid on a user’s computer. Cookies can be valid for an hour, a day, a year, or any time in between. When a cookie is no longer valid, the web browser deletes it automatically.
Call a cookie’s setMaxAge(int) method to set the amount of time the cookie remains valid, in seconds. If you use a negative value as an argument, the cookie remains valid only while the user’s web browser is open. If you use 0 as a value, the cookie is not stored on a user’s computer.
Note
The purpose of creating a cookie with a maximum age of 0 is to tell the web browser to delete the cookie if it already has one.
Cookies are sent to a user’s computer along with the data displayed by the web browser. To send a cookie, call the addCookie(Cookie) method of an HttpServletResponse object.
You can add more than one cookie to a response. When cookies are stored on a user’s computer, they’re associated with the URL of the web page or program that created the cookie. You can associate several cookies with the same URL.
When a web browser requests a URL, the browser checks to see whether any cookies are associated with that URL. If there are, the cookies are sent along with the request.
In a servlet, call the getCookies() method of an HttpServletRequest object to receive an array of Cookie objects. You can call each cookie’s getName() and getValue() methods to find out about that cookie and do something with the data.
Listing 21.2 contains ColorServlet, an extended version of the ROT-13 servlet that enables a user to select the background color of the page. The color is stored as a cookie called color, and the servlet requests the cookie from a web browser every time the servlet is loaded.
Example 21.2. The Full Text of ColorServlet.java
 1: import java.io.*;
 2:
 3: import javax.servlet.*;
 4: import javax.servlet.http.*;
 5:
 6: public class ColorServlet extends HttpServlet {
 7:
 8:     public void doPost(HttpServletRequest req, HttpServletResponse res)
 9:         throws ServletException, IOException {
10:
11:         String pageColor;
12:         String colorParameter = req.getParameter("color");
13:         if (colorParameter != null) {
14:             Cookie colorCookie = new Cookie("color", colorParameter);
15:             colorCookie.setMaxAge(31536000);
16:             res.addCookie(colorCookie);
17:             pageColor = colorParameter;
18:         } else {
19:             pageColor = retrieveColor(req.getCookies());
20:         }
21:         String text = req.getParameter("text");
22:         String translation = translate(text);
23:         res.setContentType("text/html");
24:         ServletOutputStream out = res.getOutputStream();
25:         out.println("<html>");
26:         out.println("<body bgcolor="" + pageColor + "">");
27:         out.println("<head><title>ROT-13 Translator</title></head>");
28:         out.println("<h1>ROT-13 Translator</h1>");
29:         out.println("<p>Text to translate:");
30:         out.println("<form action="ColorServlet" method="post">");
31:         out.println("<textarea name="text" ROWS=8 COLS=55>");
32:         out.println(translation);
33:         out.println("</textarea>");
34:         out.println("<p>Background color of page:");
35:         out.println("<p><input type="text" name="color" value="" +
36:             pageColor + "" SIZE=40>");
37:         out.println("<p><input type="submit" value="submit">");
38:         out.println("</form>");
39:         out.println("</body>");
40:         out.println("</html>");
41:     }
42:
43:     public void doGet(HttpServletRequest req, HttpServletResponse res)
44:         throws ServletException, IOException {
45:
46:         doPost(req, res);
47:     }
48:
49:     String translate(String input) {
50:         StringBuffer output = new StringBuffer();
51:         if (input != null) {
52:             for (int i = 0; i < input.length(); i++) {
53:                 char inChar = input.charAt(i);
54:                 if ((inChar >= 'A') & (inChar <= 'Z')) {
55:                      inChar += 13;
56:                      if (inChar > 'Z')
57:                          inChar -= 26;
58:                 }
59:                 if ((inChar >= 'a') & (inChar <= 'Z')) {
60:                      inChar += 13;
61:                      if (inChar > 'z')
62:                          inChar -= 26;
63:                 }
64:                 output.append(inChar);
65:             }
66:         }
67:         return output.toString();
68:     }
69:
70:     String retrieveColor(Cookie[] cookies) {
71:         String inColor = "#FFFFFF";
72:         for (int i = 0; i < cookies.length; i++) {
73:             String cookieName = cookies[i].getName();
74:             if (cookieName.equals("color")) {
75:                 inColor = cookies[i].getValue();
76:             }
77:         }
78:         return inColor;
79:     }
80: }
Figure 21.2 shows the servlet running in a web browser.
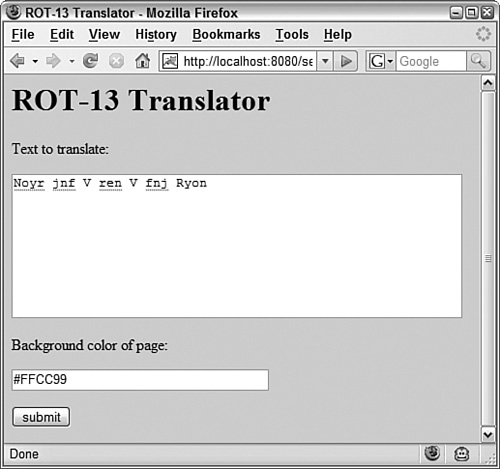
To change the page’s color, type a new value into the “Background color of page” text field and click the Submit button.
Colors are expressed as a # sign followed by three 2-digit hexadecimal numbers (in Figure 21.2, the numbers are FF, CC, and 99). These numbers represent the amount of red, green, and blue the color contains, ranging from a minimum of 00 to a maximum of FF. If you aren’t familiar with hexadecimal colors, you can try these out while testing the servlet:
#FF0000—. Bright red#00FF00—. Bright green#0000FF—. Bright blue#FFAAAA—. Light red#AAFFAA—. Light green#AAAAFF—. Light blue#FFCC99—. Butterscotch
One of the most powerful features offered in servlets is support for sessions, a means of monitoring a user over time as a servlet is being used.
Normally, the Web is a stateless protocol, which means that there’s no easy way to follow a user around from page to page. A client web browser requests a URL from a server, receives the file associated with that URL, and then is completely forgotten by the server. Nothing is done to track what a specific user does over a period of time on a website.
This information isn’t important if you’re just offering a collection of static pages, but it’s essential for many web applications. This is especially true in e-commerce: An online store needs to know which items you’ve added to your shopping cart when it’s time to calculate your bill, the final total needs to be remembered when a charge must be applied to your credit card, and so on.
Servlets can retain the state of a user through the use of HttpSession, a class that represents sessions. There can be one session object for each user running your servlet.
Sessions are created, deleted, and maintained behind the scenes by the server running the servlet.
A user’s session can be created or retrieved by calling the getSession(Boolean) method of the servlet’s request object. Use an argument of true if a session should be created when one doesn’t already exist for the user, as in this example for an HttpRequest object named req:
HttpSession state = req.getSession(true);
A session object must be accessed in this manner before any servlet output has been composed by calling a response object’s methods.
You can find out whether the session is newly created by calling its isNew() method, which returns true under that circumstance.
If you need to keep track of something as a user employs your servlet, it can be stored in the session object.
The session object can hold objects in a manner comparable to a Vector, one of the data structures described on Day 8, “Data Structures.”
Objects held by a session are called its attributes. Call the session’s setAttribute(String, Object) method with two arguments: a name to give the attribute and the object.
To retrieve an attribute, call the getAttribute(String) method with its name as the only argument. It returns the object, which must be cast from Object to the desired class, or null if no attribute of that name exists.
To remove an attribute when it’s no longer needed, call removeAttribute(String) with its name as the argument. This method does not return null if the attribute does not exist; instead, it simply does nothing.
All three methods throw IllegalStateException exceptions if the session is no longer valid. This can occur if the session was deleted by the server before the request was made, some kind of error prevented sessions from being maintained, or similar reasons.
Today’s next project uses sessions to track whether a user has provided login information to the servlet yet, as shown in Figure 21.3.

A servlet that’s used to log in a user, authenticating that the person has a valid username and password, can be loaded under three different circumstances:
The servlet is run before the user logs in. A form must be provided so that the user can provide a username and password.
The servlet is run to log in. The username and password provided by the user must be authenticated in some manner, presumably by checking a database.
The servlet is run after a user logs in.
To know what has happened before, which is necessary in all these circumstances, sessions are used.
The LoginServlet program handles user logins with three session attributes: username, password, and loggedIn, a Boolean object that is true when the user has logged in and false otherwise. The source code is shown in Listing 21.3.
Example 21.3. The Full Text of LoginServlet.java
 1: import java.io.*;
 2: import java.util.Date;
 3: import javax.servlet.*;
 4: import javax.servlet.http.*;
 5:
 6: public class LoginServlet extends HttpServlet {
 7:
 8:     public void doPost(HttpServletRequest req, HttpServletResponse res)
 9:         throws ServletException, IOException {
10:
11:         HttpSession session = req.getSession();
12:         Boolean loggedIn = (Boolean) session.getAttribute("loggedIn");
13:         if (loggedIn == null) {
14:             loggedIn = new Boolean(false);
15:         }
16:         String username = req.getParameter("username");
17:         String password = req.getParameter("password");
18:         Date lastVisit;
19:         res.setContentType("text/html");
20:         ServletOutputStream out = res.getOutputStream();
21:         out.println("<html>");
22:         out.println("<body>");
23:         out.println("<head><title>Login Page</title></head>");
24:         if (loggedIn.booleanValue() == true) {
25:             // user is already logged in
26:             username = (String) session.getAttribute("username");
27:             password = (String) session.getAttribute("password");
28:             lastVisit = (Date) session.getAttribute("lastVisit");
29:             out.println("<p>Welcome back, " + username);
30:             out.println("<p>You last visited on " + lastVisit);
31:             lastVisit = new Date();
32:             session.setAttribute("lastVisit", lastVisit);
33:         } else {
34:             if (username == null) {
35:                 // user has not submitted the form required to log in
36:                 out.println("<h1>Log In</h1>");
37:                 out.println("<form action="LoginServlet" " +
38:                     "method="post">");
39:                 out.println("<p>Username:");
40:                 out.println("<input type="text" name="username" " +
41:                     "value="" SIZE=30>");
42:                 out.println("<p>Password:");
43:                 out.println("<input type="password" name="password" " +
44:                     "value="" SIZE=30>");
45:                 out.println("<p><input type="submit" value="log in">");
46:                 out.println("</form>");
47:             } else {
48:                 // user has submitted the login form
49:                 out.println("Logging in " + username);
50:                 session.setAttribute("username", username);
51:                 session.setAttribute("password", password);
52:                 session.setAttribute("loggedIn", new Boolean(true));
53:                 session.setAttribute("lastVisit", new Date());
54:                 out.println("<a href="LoginServlet">Reload Page</a>");
55:            }
56:            out.println("</body>");
57:            out.println("</html>");
58:         }
59:     }
60:
61:     public void doGet(HttpServletRequest req, HttpServletResponse res)
62:         throws ServletException, IOException {
63:
64:         doPost(req, res);
65:     }
66: }
When the servlet is loaded for the first time in a web browser, it presents a form as shown earlier in Figure 21.3.
Filling out the form and clicking the Submit button displays a page that has the text “Logging in” and a Reload Page hyperlink.
Clicking the hyperlink loads a page with a greeting such as the following:
Welcome back, rcade

You last visited on Sat Feb 29 18:04:45 EST 2007
The servlet does not contain any code to check whether the provided username and password are valid. It simply stores them in a session so that they’re available when the servlet is run again subsequently.
Java servlets make it easy to generate HTML text dynamically, producing pages that change in response to user input and data.
However, servlets make it difficult to generate HTML text that never changes because it is cumbersome and tedious to use Java statements to output HTML.
Servlets also require the services of a Java programmer any time the HTML needs to be changed. The servlet must be edited, recompiled, and deployed on the Web, and few organizations would be comfortable handing that task to a nonprogrammer.
JSP is a complement to servlets rather than a replacement. They make it easy to separate two kinds of web content:
Static content, the portions of a web page that don’t change, such as an online store’s description of each product
Dynamic content, the portions of a web page generated by a servlet, such as the store’s pricing and availability data for each product, which can change as items sell out
When you use only servlets on a project, it becomes difficult to make minor changes, such as correcting a typo in text, rewording a paragraph, or altering some HTML tags to change how the page is presented. Any kind of change requires the servlet to be edited, compiled, tested, and redeployed on the web server.
With JSP, you can put the static content of a web page in an HTML document and call servlets from within that content. You also can use other parts of the Java language on a page, such as expressions, if-then blocks, and variables. A web server that supports the Tomcat specification knows how to read these pages and execute the Java code they contain, generating an HTML document as if you wrote a servlet to handle the whole task. In actuality, JSP uses servlets for everything.
You create a JSP page as you would create an HTML document—in a text editor or web publishing program such as Macromedia Dreamweaver. When you save the page, use the .jsp file extension to indicate that the file is a JSP page instead of an HTML document. Then, the page can be published on a web server like an HTML document, as long as the server supports servlets and JSP.
When a user requests the page for the first time, the web server compiles a new servlet that presents the page. This servlet combines everything that has been put into the page:
Text marked up with HTML
Calls to Java servlets
Java expressions and statements
Special JSP variables
A JSP page consists of three kinds of elements, each with its own special markup tag that’s similar to HTML:
Scriptlets—. Java statements executed when the page is loaded. Each of these statements is surrounded by
<%and%>tags.Expressions—. Java expressions that are evaluated, producing output displayed on the page. These are surrounded by
<%=and%>tags.Declarations—. Statements to create instance variables and handle other setup tasks required in the presentation of the page. These are surrounded by
<%!and%>tags.
Listing 21.4 contains a JSP page that includes one expression, a call to the java.util.Date() constructor. This constructor produces a string containing the current time and date. Enter this file with any text editor that can save files as plain text. (The editor you’ve been using to create Java source code will work for this purpose as well.)
After saving the file, upload it to your web server in a folder where other web pages are stored. Unlike Java servlets, which must be in a folder that has been designated for servlets, a JSP page can be placed in any folder that’s accessible on the Web.
In Tomcat 5.5, you can place the page in any folder inside the webapps folder. If you stored the page in webappsjsp-examples, it would be available at /jsp-examples/time.jsp, as in http://localhost:8080/jsp-examples/time.jsp.
When you load the page’s URL for the first time with a web browser, the web server compiles the page into a servlet automatically. This causes the page to load slowly for the first time, but subsequent requests run much more quickly.
Figure 21.4 shows the output of time.jsp.
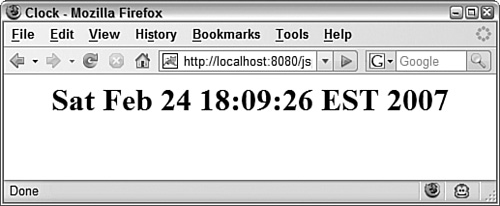
When a page includes an expression, it’s evaluated to produce a value and displayed on the page. If the expression produces different values each time the page is displayed, as time.jsp does in line 7 of Listing 21.4, this is reflected in the page when loaded in a web browser.
There are several servlet objects you can refer to in expressions and other elements of a JSP page using the following variable names:
out—The servlet output streamrequest—The HTTP servlet requestresponse—The HTTP servlet responsessession—The current HTTP sessionapplication—The servlet context used to communicate with the web serverconfig—The servlet configuration object used to see how the servlet was initialized
Using these variables, you can call the same methods from within a page that are available in a servlet.
Listing 21.5 contains the text of the next page you’ll create, environment.jsp, which shows how the request variable can be used on a page. This variable represents an object of the HttpServletRequest class, and you can call the object’s getHeader(String) method to retrieve HTTP headers that describe the request in more detail.
Example 21.5. The Full Text of environment.jsp
 1: <html>
 2: <head>
 3: <title>Environment Variables</title>
 4: </head>
 5: <body>
 6: <ul>
 7: <li>Accept: <%= request.getHeader("Accept") %>
 8: <li>Accept-Encoding: <%= request.getHeader("Accept-Encoding") %>
 9: <li>Connection: <%= request.getHeader("Connection") %>
10: <li>Content-Length: <%= request.getHeader("Content-Length") %>
11: <li>Content-Type: <%= request.getHeader("Content-Type") %>
12: <li>Cookie: <%= request.getHeader("Cookie") %>
13: <li>Host: <%= request.getHeader("Host") %>
14: <li>Referer: <%= request.getHeader("Referer") %>
15: <li>User-Agent: <%= request.getHeader("User-Agent") %>
16: </u1>
17: </body>
18: </html>
In lines 7–15 of the environment.jsp page, each line contains a call to getHeader() that retrieves a different HTTP request header. Figure 21.5 shows an example of the output. The values reported for each header depend on your web server and the web browser you’re using, so you won’t see the same values for User-Agent, Referer, and other headers.
You also can use Java statements in JSP—calling methods, assigning values to variables, creating conditional statements, and so on. These statements begin with the <% tag and end with the %> tag. More than one statement can be enclosed within these tags.
Statements that appear inside a page are called scriptlets. You can use any of the servlet variables that were available for expressions.
Listing 21.6 contains the code for shop-for-books.jsp, a web page that displays a list of books, with hyperlinks to each book’s page at an online bookstore.
Example 21.6. The Full Text of shop-for-books.jsp
1: <html>
2: <head>
3: <title>Shop for Books</title>
4: </head>
5: <body>
6: <h2 align="Left">Favorite Books</h2>
7: <%
8: String[] bookTitle = { "Catch-22", "Something Happened",
9: "Good as Gold" };
10: String[] isbn = { "0684833395", "0684841215", "0684839741" };
11: String amazonLink = "http://www.amazon.com/exec/obidos/ASIN/";
12: String bnLink = "http://search.barnesandnoble.com/booksearch/"
13: + "isbnInquiry.asp?isbn=";
14:
15: String store = request.getParameter("store");
16: if (store == null) {
17: store = "Amazon";
18: }
19: for (int i = 0; i < bookTitle.length; i++) {
20: if (store.equals("Amazon"))
21: out.println("<li><a href="" + amazonLink + isbn[i] + "">" +
22: bookTitle[i] + "</a>");
23: else
24: out.println("<li><a href="" + bnLink + isbn[i] + "">" +
25: bookTitle[i] + "</a>");
26: }
27: %>
28: <p>Preferred Bookstore:
29: <form action="shop-for-books.jsp" method="POST">
30: <p><input type="radio" value="Amazon"
31: <%= (store.equals("Amazon") ? " checked" : "") %>
32: name="store"> Amazon.Com
33: <p><input type="radio" value="BN"
34: <%= (store.equals("BN") ? " checked" : "") %>
35: name="store"> Barnes & Noble
36: <p><input type="submit" value="Change Store">
37: </form>
38: </body>
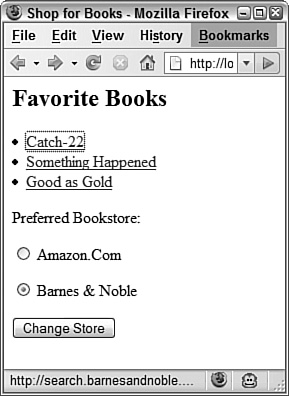
39: </html>This page includes a form at the bottom of the page that lets users choose which bookstore they like to use for online shopping.
In line 29, the form is being submitted to the URL of the page. Because pages are actually servlets, they can also receive form data that’s sent by post or get.
This page uses the store field to hold "Amazon" if Amazon.com is the preferred store and "BN" if Barnes & Noble is the preferred store.
One thing to note as you test the page is how the radio buttons on the form always match the store you’ve chosen. This occurs because of expressions that appear on lines 29 and 31. Here’s one of those expressions:
<%= (store.equals("Amazon") ? " checked" : "") %>This expression uses the ternary operator with the conditional store.equals(“Amazon”). If this condition is true, the word “checked” is the value of the expression. Otherwise, an empty string (“”) is the value.
The value of expressions is displayed as part of the JSP page. Figure 21.6 shows what this page looks like in a web browser.
Another element you can insert into a JSP page is a declaration, which is a statement that sets up a variable or method that will be defined in the page when it’s compiled into a servlet. This feature is primarily used in conjunction with expressions and servlets.
Declarations are surrounded by <%! and %> tags, as in the following example:
<!% boolean noCookie = true %>
<!% String userName = "New user" %>
These declarations create two instance variables: noCookie and userName. When the JSP page is compiled into a servlet, these variables will be part of the definition of that class.
Listing 21.7 contains a page that uses a declaration to present a counter.
Example 21.7. The Full Text of counter.jsp
 1: <%@ page import="counter.*" %>
 2: <html>
 3: <head>
 4: <title>Counter Example</title>
 5: </head>
 6: <body>
 7: <h1>JSP Stats</h1>
 8: <%! Counter visits; %>
 9: <%! int count; %>
10:
11: <%
12: visits = new Counter(application.getRealPath("counter.dat"));
13: count = visits.getCount() + 1;
14: %>
15:
16: <p>This page has been loaded <%= count %> times.
17:
18: <% visits.setCount(count); %>
19: </body>
20: </html>
Before you can try this page, you need to create a helper class that’s called by statements in lines 8, 12, 13, and 18 of the page.
The Counter class in Listing 21.8 represents a web counter that tallies each hit to a page.
Example 21.8. The Full Text of Counter.java
 1: package counter;
 2:
 3: import java.io.*;
 4: import java.util.*;
 5:
 6: public class Counter {
 7:     private int count;
 8:     private String filepath;
 9:
10:     public Counter(String inFilepath) {
11:         count = 0;
12:         filepath = inFilepath;
13:     }
14:
15:     public int getCount() {
16:         try {
17:             File countFile = new File(filepath);
18:             FileReader file = new FileReader(countFile);
19:             BufferedReader buff = new BufferedReader(file);
20:             String current = buff.readLine();
21:             count = Integer.parseInt(current);
22:             buff.close();
23:         } catch (IOException e) {
24:             // do nothing
25:         } catch (NumberFormatException nfe) {
26:             // do nothing
27:         }
28:         return count;
29:     }
30:
31:     public void setCount(int newCount) {
32:         count = newCount;
33:         try {
34:             File countFile = new File(filepath);
35:             FileWriter file = new FileWriter(countFile);
36:             BufferedWriter buff = new BufferedWriter(file);
37:             String output = "" + newCount;
38:             buff.write(output, 0, output.length());
39:             buff.close();
40:         } catch (IOException e) {
41:             // do nothing
42:         }
43:     }
44: }
After you compile this class successfully, it should be stored in a WEB-INFclassescounter subfolder in the same part of the webapps hierarchy as counter.jsp. For example, if the JSP page is in webappsexamplesjsp, the class file should be saved in webappsexamplesWEB-INFclassescounter.
The Counter class loads an integer value from a file called counter.dat that is stored on the web server. The getCount() method retrieves the current value of the counter, and the setCount(int) method sets the current value. After the value is set, it’s saved to the file so that the counter continues to incrementally increase.
Figure 21.7 shows counter.jsp loaded in a web browser.

By combining Java classes, servlets, and JSP, you can create interactive web applications—sites that dynamically generate content in response to user input in a sophisticated, cohesive way.
Every time you shop on an e-commerce site such as Amazon.com or use an online reference such as the Internet Movie Database (IMDB), you are running a web application.
To see how several aspects of Java technology can work together on the Web, you create Guestbook, a web application that enables visitors to leave a message for the creator of a site.
The Guestbook project is made up of three things:
guestbook.jsp—. A JSP page that displays guestbook entries from a text file on a web server and provides a form where a visitor can add an entryguestbook-post.jsp—. A page that saves a new guestbook entry to the text fileGuestbook.java—. A class used to filter out some characters before they are saved in the guestbook
The JSP page in this project makes heavy use of scriptlets and expressions. Listing 21.9 contains the source code for guestbook.jsp.
Example 21.9. The Full Text of guestbook.jsp
 1: <%@ page import="java.util.*,java.io.*" %>
 2: <html>
 3: <head>
 4: <title>Visitors Who Signed our Guestbook</title>
 5: </head>
 6: <body>
 7: <h3>Visitors Who Signed our Guestbook</h3>
 8: <%
 9: String id = request.getParameter("id");
10: boolean noSignatures = true;
11: try {
12:     String filename = application.getRealPath(id + ".gbf");
13:     FileReader file = new FileReader(filename);
14:     BufferedReader buff = new BufferedReader(file);
15:     boolean eof = false;
16:     while (!eof) {
17:         String entry = buff.readLine();
18:         if (entry == null)
19:             eof = true;
20:         else {
21:             StringTokenizer entryData = new StringTokenizer(entry, "^");
22:             String name = (String) entryData.nextElement();
23:             String email = (String) entryData.nextElement();
24:             String url = (String) entryData.nextElement();
25:             String entryDate = (String) entryData.nextElement();
26:             String ip = (String) entryData.nextElement();
27:             String comments = (String) entryData.nextElement();
28:             out.print("<p>From: " + name);
29:             if (!email.equals("None"))
30:                 out.println(" <" + email + "><br>");
31:             else
32:                  out.println("<br>");
33:              if (!url.equals("None"))
34:                  out.println("Home Page: <a href="" + url + "">" +
35:                      url + "</a><br>");
36:             out.println("Date: " + entryDate + "<br>");
37:             out.println("IP: " + ip);
38:             out.println("<blockquote>");
39:             out.println("<p>" + comments);
40:             out.println("</blockquote>");
41:             noSignatures = false;
42:         }
43:     }
44:     buff.close();
45: } catch (IOException e) {
46:     out.println("<p>This guestbook could not be read because of an error.");
47:     log("Guestbook Error: " + e.toString());
48: }
49: if (noSignatures)
50:     out.println("<p>No one has signed our guestbook yet.");
51: %>
52: <h3>Sign Our Guestbook</h3>
53: <form method="post" action="guestbook-post.jsp">
54:   <table border="0" cellpadding="5" cellspacing="0" width="100%">
55:     <tr>
56:       <td width="15%" valign="top" align="right">Your Name:</td>
57:       <td width="50%"><input type="text" name="name" size="40"></td>
58:     </tr>
59:     <tr>
60:       <td width="15%" valign="top" align="right">Your E-mail Address:</td>
61:       <td width="50%"><input type="text" name="email" size="40"></td>
62:      </tr>
63:      <tr>
64:       <td width="15%" valign="top" align="right">Your Home Page:</td>
65:       <td width="50%"><input type="text" name="url" size="40"></td>
66:      </tr>
67:      <tr>
68:        <td width="15%" valign="top" align="right">Your Comments:</td>
69:       <td width="50%">
70:          <textarea rows="6" name="comments" cols="40"></textarea>
71:       </td>
72:      </tr>
73:   </table>
74:   <p align="center"><input type="submit" value="Submit" name="B1">
75:   <input type="reset" value="Reset" name="Reset"></p>
76: <input type="hidden" name="id" value="<%= id %>">
77: </form>
78: </body>
79: </html>
After you save this page, store it in any folder on your server where JSP pages can be stored. You can test this even before anything else in the project is done, as long as you have an empty guestbook file.
To create this file, save an empty text file on your system and give it the name cinema.gbf. Store it on the Web in the webapps folder relative to where the guestbook page has been stored. For instance, if the page is in webappsjspexamplesguestbook.jsp, the text file should be saved in webappsjspexamples.
When you load this JSP page, you must include a parameter that specifies the ID of the guestbook to load, as in this URL:
http://localhost:8080/jsp-examples/guestbook.jsp?id=cinema
The server name and folder depend on where you have published guestbook.jsp.
Figure 21.8 shows what your guestbook looks like when your page compiles successfully and tries to display the contents of the cinema.gbf file.
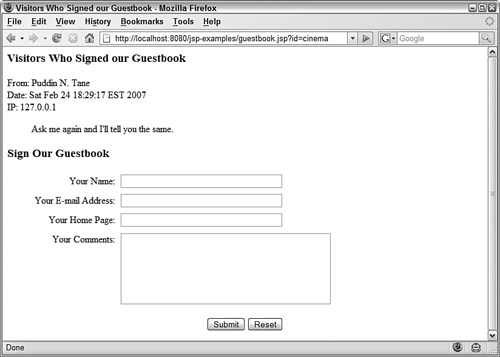
The guestbook file stores each guestbook entry on its own line, with a caret (‘^’) separating each field in the entry. Visitors can provide their name, email address, home page address, and a comment. Two other things are saved for each entry: the date and time it was written and the IP address of the visitor.
The following text is an example of a guestbook file that contains one entry:
Puddin N. Tane^[email protected]^None^Sat Feb 24 18:29:17 EST
2007^127.0.0.1^Ask me again and I'll tell you the same.
The next JSP page to create is guestbook-post.jsp, the page that updates the guestbook with new entries submitted by visitors. Listing 21.10 contains the source code for this page.
Example 21.10. The Full Text of guestbook-post.jsp
 1: <%@ page import="java.util.*,java.io.*,example.*" %>
 2: <html>
 3: <head>
 4: <title>Thank You For Signing Our Guestbook</title>
 5: </head>
 6: <body>
 7: <h3>Thank You For Signing Our Guestbook</h3>
 8: <%
 9: String id = request.getParameter("id");
10: String[] entryFields = { "name", "email", "url", "comments" };
11: String[] entry = new String[4];
12: for (int i = 0; i < entryFields.length; i++) {
13:     entry[i] = Guestbook.filterString(request.getParameter(entryFields[i]));
14: }
15: Date now = new Date();
16: String entryDate = now.toString();
17: String ip = request.getRemoteAddr();
18: %>
19:
20: <p>Your entry looks like this:
21: <p>From: <%= entry[0] %>
22: <%= (!entry[1].equals("None") ? "<"+entry[1]+">" : "") %><br>
23: <% if (!entry[2].equals("None")) { %>
24: Home Page: <a href="<%= entry[2] %>"><%= entry[2] %></a><br>
25: <% } %>
26: Date: <%= entryDate %><br>
27: IP: <%= ip %>
28: <blockquote>
29: <p><%= entry[3] %>
30: </blockquote>
31:
32: <%
33: try {
34:     boolean append = true;
35:     String filename = application.getRealPath(id + ".gbf");
36:     FileWriter fw = new FileWriter(filename, append);
37:     BufferedWriter fileOut = new BufferedWriter(fw);
38:     String newEntry = entry[0] + "^" + entry[1] + "^" + entry[2] + "^"
39:         + entryDate + "^" + ip + "^" + entry[3];
40:     fileOut.write(newEntry, 0, newEntry.length());
41:     fileOut.newLine();
42:     fileOut.close();
43: } catch (IOException e) {
44:     out.println("<p>This guestbook could not be updated.");
45:    log("Guestbook Error: " + e.toString());
46: }
47: %>
48:
49: <p><a href="guestbook.jsp?id=<%= id %>">View the Guestbook</a>
50: </body>
51:
52: </html>51: </html>
The guestbook-post.jsp page collects data from a web form, removes characters from the data that can’t be put in the guestbook, and stores the result in a text file.
Each guestbook has its own file with a name that begins with the ID parameter of the book and ends with the .gbf file extension. If the guestbook has the ID of cinema, the filename is cinema.gbf.
Like the other JSP pages included in this web application, guestbook-post.jsp can be stored in any folder on your server where JSP pages are kept. For this project, store the page in the same folder as guestbook.jsp and cinema.gbf.
Before you can try the Guestbook application, you must create a Java class that is used to filter some unwanted text from guestbook entries before they are posted.
Three characters cannot be included in the guestbook because of the way entries are stored in a file:
Caret characters (“^”)
Return characters, which have the integer value of
13in JavaLinefeed characters, which have the integer value of
10
To remove these characters before they are saved in a guestbook, a helper class called Guestbook is created. This class has a static method called filterString(String) that removes those three characters from a string.
Listing 21.11 contains the source code for this class.
Example 21.11. The Full Text of Guestbook.java
 1: package example;
 2:
 3: public class Guestbook {
 4:     public static String filterString(String input) {
 5:         input = replaceText(input, '^', ' ')
 6:         input = replaceText(input, (char)13, ' '),
 7:         input = replaceText(input, (char)10, ' '),
 8:         return input;
 9:      }
10:
11:     private static String replaceText(String inString, char oldChar,
12:         char newChar) {
13:
14:         while (inString.indexOf(oldChar) != -1) {
15:             int oldPosition = inString.indexOf(oldChar);
16:             StringBuffer data = new StringBuffer(inString);
17:             data.setCharAt(oldPosition, newChar);
18:             inString = data.toString();
19:         }
20:         return inString;
21:      }
22: }
The replaceText() method in lines 11–21 of Listing 21.11 does most of the work in the class. It takes three arguments:
A string that might contain unwanted characters
A character that should be removed
A character that should be added in its place
When you compile the Guestbook class, it should be stored in a WEB-INFclassesexample subfolder in the same part of the webapps hierarchy as the project’s JSP page. For example, if the pages are in webappsjspexamplesjsp, the class file should be saved in webappsjspexamplesWEB-INFclassesexample.
To test the guestbook-post.jsp page, open the page that displays guestbook entries using an ID parameter of cinema again, as in this example:
http://localhost:8080/java/guestbook.jsp?id=cinema
Add a few guestbook entries to see how they are displayed in the guestbook.
For Java programmers eager to apply their skills on the Web, the development of the language for server-side programming has been one of those “walk before you can crawl” situations.
When servlets were introduced, they made it possible to use Java to create programs similar to CGI scripts that collect input from web forms and URL parameters, producing HTML output in response. This works great for writing programs to process mail and handle other simple tasks, but as larger web applications require multiple pages, it becomes clear that producing HTML output using Java statements can be cumbersome. Revisions become more difficult, especially for any nonprogrammers involved in the work.
Two years later, Sun took another step in the right direction with JSP, which make it easy to combine static HTML output with dynamic output created by Java statements. Using JSP, Java code can be placed on web pages among HTML markup and edited like any other page. Programmers also can create their own custom JSP markup tags to interact with Java objects. The pages compile into servlets automatically.
Unfortunately, the ease with which Java code could be placed on a JSP page proved to be a misstep because it encourages the bad habit of placing a lot of mission-critical application code in a place where it’s hard to maintain, is not secure, and is easily bungled by anyone editing the HTML around the code. For example, statements to create, open, and query a database connection, complete with usernames and passwords to gain access to the data, can be put on a JSP page.
A giant step has been taken with the release of the JSP Standard Tag Library (JSTL), a set of custom JSP tags and a data-access language that enable JSP-based web applications to handle presentation without ever resorting to Java code.
Tag libraries, which also are called taglibs, consist of tags that are placed on a JSP page in a format similar to HTML tags. JSTL’s tag library offers functionality common to most web applications. There are tags for loops and conditionals, tags to read Extensible Markup Language (XML) documents and database results using Structured Query Language (SQL), tags for accessing JavaBeans, and support for other tag libraries.
JSTL consists of two complementary components:
A set of five custom JSP tag libraries that provide the core functionality required in web applications
The JSTL Expression Language, which makes it possible to access data at runtime without using JSP expressions or Java statements
There’s also a separate version of each JSTL library that works with Java expressions using existing JSP syntax.
Listing 21.12 contains a demonstration of JSTL and the Expression Language: hello.jsp, a JSP page that uses a parameter called name as part of a greeting.
Example 21.12. The full text of hello.jsp
 1: <html>
 2: <head>
 3:    <title>Hello Example</title>
 4: </head>
 5:
 6: <body>
 7: <%@ taglib uri='http://java.sun.com/jsp/jstl/core' prefix='c' %>
 8:
 9: <c:choose>
10:    <c:when test='${!empty param.name}'>
11:       <h2>Hello, <c:out value='${param.name}'/></h2>
12:    </c:when>
13:    <c:otherwise>
14:       <h2>Hello, stranger</h2>
15:    </c:otherwise>
16: </c:choose>
17:
18: </body>
19: </html>
The hello.jsp page looks for a parameter called name specified in the address (URL) of the page. For example, the URL http://example.com/hello.jsp?name=Sailor gives name the value Sailor and causes the page to display the response “Hello, Sailor.” When the name parameter is omitted, “Hello, Stranger” displays instead.
The first JSP code in the page is the following directive:
<%@ taglib uri='http://java.sun.com/jsp/jstl/core ' prefix='c' %>
Like other tag libraries, each JSTL library must be made available using a directive on the page before any of its tags can be employed. The preceding directive makes the core library available on the page. All tags from this library will be prefaced with the text “c:” followed by the tag’s name, as in this example:
<c:out value='${param.name}'/>JSTL tags are called actions, in recognition of the fact that they generate dynamic web content. Like XML elements, actions can stand alone (<tagname/>) or be paired (<tagname>...</tagname>).
The c:out action displays the contents of the local or instance variable indicated by its value attribute.
The variable is specified using JSTL’s Expression Language, a simple data-access syntax that borrows from ECMAScript (JavaScript) and XPath. Statements that use the language are contained within “${“ and“}” characters.
In the preceding example, the variable param is one of several standard Expression Language variables that contain information about the page, web application, and servlet container. The param variable is a collection that holds all of the page parameters, each represented as a string.
The rest of the page contains three core actions used to create a conditional block:
<c:choose>
   <c:when test='${!empty param.name}'>
      <h2>Hello, <c:out value='${param.name}'/></h2>
   </c:when>
   <c:otherwise>
      <h2>Hello, stranger</h2>
   </c:otherwise>
</c:choose>
The c:choose-c:when-c:otherwise block mirrors the functionality of a switch-case-default Java statement, displaying enclosed HTML output only for the first c:when action that has a test attribute with the value true. If none of the actions is true, the c:otherwise contents are displayed.
JSTL is composed of five tag libraries:
The core library (prefix
c, default URI http://java.sun.com/jsp/jstl/core) contains general features: output, conditional display of content, looping, variable creation in several scopes, JavaBeans access, exception handling, URL imports, and URL redirection.The SQL library (prefix
sql, default URI http://java.sun.com/jsp/jstl/sql) covers database access: data source selection, queries, updates, transactions, and looping through results.The internationalization and formatting library (prefix
fmt, default URI http://java.sun.com/jsp/jstl/fmt) offers these actions: locale and resource bundle use, text localization, and number and date formatting.The XML processing library (prefix
x, default URI http://java.sun.com/jsp/jstl/xml) supports XML: parsing, XPath access, XSLT transformation, looping through nodes, and conditional processing.The function library (prefix
fn, default URI http://java.sun.com/jsp/jstl/functions) contains useful functions to manipulate strings and collections.
The Expression Language has operators to retrieve information from instance variables (${object.varName}), data structures (${object["name"]}), and indexed arrays or lists (${object[1]}).
There also are operators for arithmetic (“+”, “-”, “*”, “/”, and “%”), comparisons (“==”, “!=”, “<”, “<=”, “>”, and “>=”), logic (“&&”, “||”, and “!”), and empty, which detects null objects and empty strings or collections. Parentheses can be used to group subexpressions.
The language offers automatic type conversion and five kinds of literals: strings, which are enclosed within single or double quotes, integers, floating-point numbers, boolean values (true or false), and null.
There are seven special variables available in any expression:
cookie, a collection of all request cookies, each as an instance of theCookieclass from thejavax.servlet.httppackageheader, a collection of all request headers, each as a stringheaderValues, a collection of all request headers, each as a string arrayinitParam, a collection of all application initialization parameters, each as a stringpageContext, an instance ofjspPageContextfrom thejavax.servletpackageparam, a collection of all request parameters, each as a stringparamValues, a collection of all request parameters, each as a string array
When using one of these collections or other data structures, the c:foreach action makes it easy to loop through each element. The following example displays all of the header variables sent with a JSP page:
<c:forEach items='${header}' var='head'>
   <ul>
      <li>Name: <c:out value='${head.key}'/></li>
      <li>Value: <c:out value='${head.value}'/></li>
   </ul>
</c:forEach>
Four variables can be used to make explicit references to variable scope:
applicationScope, a collection of all application scope objectspageScope, a collection of all page scope objectsrequestScope, a collection of all request scope objectssessionScope, a collection of all session scope objects
For example, the expression ${sessionScope.price} retrieves an object named price in session scope. If no other scope has an object named price, the expression ${price} also works.
Today’s final project shows some of the power and flexibility of JSTL. This page makes use of XML actions to present data from an RSS newsfeed, an XML format for offering web content in machine-readable form.
JSTL can import and parse XML, HTML, or any other data available at a URL, even if it isn’t on the same server as the page making use of it.
RSS, which stands for Really Simple Syndication, enables websites to share headlines, links, and other content with each other (and with readers using software called an RSS aggregator). Listing 21.13 contains an example: a simplified version of the RSS feed for the SportsFilter website.
Example 21.13. The full text of sportsfilter.rss
 1: <rss version="2.0">
 2:   <channel>
 3:   <title>SportsFilter</title>
 4:   <link>http://www.sportsfilter.com/</link>
 5:   <docs>http://www.rssboard.org/rss-specification</docs>
 6:    <item>
 7:      <title>Babe Ruth used steriods?</</title>
 8:      <link>http://sports.espn.go.com/mlb/news/story?id=1745899</link>
 9:     <description>Houston Astros second baseman Jeff Kent said the
10: steroids controversy is an embarrassment to baseball and that the
11: public needs to rethink whether sports heroes of yore abstained
12: from illegal performance-enhancing drugs.</description>
13:    </item>
14:    <item>
15:      <title>Phoenix sports fans shell out the bucks</title>
16:      <link>http://washpost.com/wp-dyn/articles/A10394-2007Feb26.html</link>
17:     <description>Phoenix-area taxpayers have invested $700 million
18: in new stadiums for their pro baseball, basketball, football, and
19: hockey franchises, a world record for governmental sports support,
20: as described in today's Washington Post.</description>
21:    </item>
22:    <item>
23:      <title>Just buy it</title>
24:      <link>http://www.nike.com/nikebiz/news/pressrelease.jhtml</link>
25:      <description>Marion Jones competing in floor gymnastics, Randy
26: Johnson bowling, Lance Armstrong in the boxing ring, Andre Agassi
27: fielding 2B for the Red Sox. Nike rolls out their spring campaign
28: asking in some rather creatively edited commercial spots starting
29: tonight.</description>
30:   </item>
31: </channel>
32: </rss>
SportsFilter, a popular sports community weblog at http://www.sportsfilter.com, shares the latest news in an RSS 2.0 feed. The XML data from the feed can be read into a variable using the c:import action from the core library and parsed with the x:parse action from the XML library.
The parsed data can be examined, filtered, transformed, and displayed. Listing 21.14 contains a JSP application that uses simple XPath statements to extract and display parts of the XML data.
Example 21.14. The full text of rss.jsp
 1: <!DOCTYPE HTML PUBLIC "-//W3C//DTD HTML 4.0 Transitional//EN">
 2: <html>
 3: <head>
 4:   <!-- Declare the two tag libraries used on this page -->
 5:   <%@ taglib uri='http://java.sun.com/jsp/jstl/core' prefix='c' %>
 6:   <%@ taglib uri='http://java.sun.com/jsp/jstl/xml' prefix='x' %>
 7:
 8: <!-- Import the RSS feed at the URL specified by feed -->
 9: <!-- For example -->
10: <!-- http://sportsfilter.com/rss.cfm -->
11: <c:import url='${param.feed}' var='feedData'/>
12:
13: <!-- Parse the RSS feed -->
14: <x:parse xml='${feedData}' var='feed'/>
15:
16: <!-- Retrieve the channel element -->
17: <x:set select='$feed//rss//channel' var='channel'/>
18:
19: <!-- Display the channel element's title -->
20:   <title><x:out select='$channel//title'/></title>
21: </head>
22:
23: <body>
24:
25: <!-- Display the channel element's link and title -->
26: <p>Headlines from <a href="<x:out select='$channel//link'/>">
27: <x:out select='$channel//title'/></a>
28:
29: <!-- Loop through the item elements -->
30: <p><ul>
31: <x:forEach select='$feed//rss//channel//item'>
32:    <!-- Display each element's link, title, description -->
33:    <!-- Descriptions may contain HTML. -->
34:    <li><a href="<x:out select='link'/>"><x:out select='title'/></a>:
35: <x:out select='description' escapeXml='false'/></li>
36:    <br>
37: </x:forEach>
38: </ul>
39:
40: </body>
41: </html>
Comments on the page describe the JSTL actions that it contains.
The most challenging part of JSTL is the Expression Language, which can be avoided by using versions of the tag libraries that use JSP syntax for Java statements and expressions.
JSTL’s Expression Language is distinguished from the other JSP syntax by the limits on what it can do. There are no assignment operators or conditional logic, which forces developers to use external Java classes and JSTL actions for these tasks.
Though some Java programmers might blanch at the thought of learning another language simply for web applications, the Expression Language is simple enough to be picked up quickly, especially by those who are comfortable with JavaScript.
By keeping Java code out of JSP pages, the Expression Language offers reusability and reliability. In conjunction with JSTL, it brings JSP much closer to the promise of separating the presentation of a web application from the code required to make it happen.
JSTL serves as a nice complementary offering to Struts, an open source web application framework that’s also the work of the Apache Jakarta project.
Caution
Programmers who have embraced the model-view-controller philosophy embodied by Struts might question JSTL’s inclusion of database actions that don’t belong in an application’s presentation layer.
For anything but trivial web applications, programmers should consider putting database access behavior in classes accessed from JSP rather than using JSTL’s SQL actions.
At this point, you now have three different ways to use the Java language on the web: applets, servlets, and JSP.
The main purpose of the classes in the javax.servlet and javax.servlet.http packages is to exchange information with a web server. Java servlets are an alternative to the CGI, the most popular way that programming languages are used to retrieve and present data on the Web.
Because servlets can use all features of the Java language with the exception of a graphical user interface, you can use them to create sophisticated web applications.
JSP pages are an effective way to separate static content on web pages from the dynamic content generated by servlets for those pages. By using expressions, statements, and declarations, you can write Java programs on pages without ever needing to compile a program, lay it out on a web page, design an interface, or publish class files.
The JSP Standard Tag Library (JSTL) and its Expression Language take the separation of content and code a step further, offering a way for web applications to use Java within the same tag-based context used in HTML and XML.
For the last three weeks, you’ve had a chance to work with the syntax and the core classes that make up the Java language and the Java class library. You’ve ventured out into some of the excellent class libraries offered by other companies and developers such as XOM, the XML Object Model library, and JSTL.
You are now ready to tackle the biggest challenge yet: Turning an empty source code file into a robust and reliable program implemented as a set of Java classes.
This book has an official website at http://www.java21days.com with answers to frequently asked questions, source code for the entire book, error corrections, and supplementary material. There’s also a weblog, Workbench, for people who are teaching themselves Java 365 days a year.
Happy compiling!
Review today’s material by taking this three-question quiz.
The following question is the kind of thing you could expect to be asked on a Java programming certification test. Answer it without looking at today’s material or using the Java compiler to test the code.
Given:
public class CharCase {
        public static void main(String[] arguments) {
            float x = 9;
            float y = 5;
            char c = '1';
            switch (c) {
                case 1:
                    x = x + 2;
                case 2:
                    x = x + 3;
                default:
                    x = x + 1;
           }
           System.out.println("Value of x: " + x);
        }
}The answer is available on the book’s website at http://www.java21days.com. Visit the Day 21 page and click the Certification Practice link.
To extend your knowledge of the subjects covered today, try the following exercises:
Create a servlet that stores the data entered in a form in a file.
Write a JSP page that displays one greeting for Microsoft Internet Explorer users and another greeting for everyone else.
Where applicable, exercise solutions are offered on the book’s website at http://www.java21days.com.