
Chapter 8. Observer Pattern
It is the theory that decides what can be observed.
Every man who observes vigilantly and resolves steadfastly grows unconsciously into genius.
The world is full of obvious things which nobody by any chance ever observes.
You can observe a lot just by watching.
What is the Observer Pattern?
Conceptually, the Observer design pattern is easy to understand. A central point sends information to subscribing instances. This works just like a newspaper or cable television subscription service. When a person subscribes, the service begins, and continues until he unsubscribes.
In applications where a single source of information needs to be broadcast to several different receptors, using a single source in the design makes more sense than having several different sources getting the same information by repeated calls to the data source. For example, in using a web service that sends out stock quotes, setting up your application to receive the information in a single source, and then sending out that information from that source in your application, is more efficient than having each instance calling the information separately from the web service. If your application takes the incoming stock information and displays the information in tabular and different chart forms, having multiple subscriptions to each of the different formatting classes would require separate and repeated calls to the web service. However, by using a single call to the web service and then broadcasting to the multiple instances, you need far fewer service calls.
In addition to being more efficient, a central data source guarantees that every instance gets the same information. Imagine a change in data from one web service call to the next where a major change occurs. The first instance calls the service and formats the data into a table, and the second instance calls the service to format the data in a bar chat. The data in the chart does not reflect the data in the table, even though it’s supposed to. Using an Observer pattern, a single call to the web service always sends data from the same call to all subscribers. So the data sent to the table formatting instance and that sent to the charts is guaranteed to be from the same set.
In applications where a high rate of data change occurs, the Observer pattern helps to cut down on the bookkeeping. All data are sent to a central source and then distributed to subscribing instances. For example, in an action game, the score keeps changing as many game conditions rapidly update. When an object in an action game is “destroyed,” it no longer needs the information and should not keep gathering in data. Likewise, objects that come into the game or are “resurrected” need to start getting data. This can be a programming nightmare without some kind of system to take in all data changes and then uniformly distribute those changes to the different game elements while taking care of all subscription changes. Here the Observer pattern comes to the rescue by handling all data collection and distribution.
Key Features
The central feature of the Observer pattern is that state change is gathered in one place and sent to all subscribing units. This one-to-many relationship allows developers to create loosely coupled classes and yet maintain information consistency. Figure 8-1 shows the general relationship between the initial data source, the subject class, and the observer classes:

Sending information in this manner to different classes is not only efficient, but also allows for expansion. For example, suppose stock data is subjected to different types of statistical models, each one encapsulated in a class. As new analytical models are introduced, adding a class as part of the application is as easy as creating the class and subscribing it to the subject.
The following key features characterize the Observer pattern:
Data consistency between loosely coupled but related and interacting objects.
Data receptors (observers) can subscribe and unsubscribe to data.
Single source (subject) sends state change information.
Any number of subscribing observers can subscribe to subject.
To understand the importance of consistency, consider a speech at the United Nations. Suppose the representative from China gives a speech on new trade policies. That information will have to be translated from Chinese to all of the different languages represented at the UN. A good Observer pattern sends the speech information from a single source (subject), to the interpreters (observers), presented in a language that different language users can understand. If each observer got the speech from a different source, the chances of inconsistency increase dramatically, and if inconsistent data were received, the Chinese trade policies could be misconstrued.
The two central objects in the Observer model are the subject and observer. The subject notifies the observer of any state changes. This design relies on object composition instead of inheritance as the primary technique for reuse. In this case, the subject delegates operations to the observer. This process is expanded and explained in the section Key OOP Concepts Used with the Observer Pattern, later in this chapter.
The Observer Model
The Observer outlined in the class diagram notation shows two key elements: subject and observer. The subject interface provides the method for notifying the observers of state changes. Likewise, the subject holds the methods for subscribing and unsubscribing. The capacity to subscribe objects leaves the door wide open for new objects to be added to the list of objects receiving data. The subject set of methods all delegate to the observer. The observer, by contrast, simply needs a method for updating states. The concrete subject uses the update method of the observer in the notification method implemented from the subject interface. Also, the concrete subject may have both getters and setters for state-related changes. The concrete observer must implement the updating method. However, it may also have methods for subscribing or unsubscribing, most likely the former, leaving the unsubscribing methods up to the concrete object instances or state conditions. Figure 8-2 shows the Observer class diagram:

We can break down the diagram into its four parts—subject, observer, concrete
subject and concrete observer. The Subject
interface sets up the key connections between itself and the observer by
establishing methods that connect and disconnect the observer from the
notification process. In fact, every single
Subject
method references the
Observer. Likewise, the Observer interface, with its single update() method, references the notification
process from the subject. The ConcreteSubject
provides a property, stateWork, for holding
the state about which the observers are notified. It is also responsible for
notifying the subscribed observers. Finally, through the update() method, the ConcreteObserver keeps a state value consistent with the subject,
and, through a state property, stores the current state.
Key OOP Concepts Used with the Observer Pattern
One object-oriented design principle put forth in the original design pattern book by Gamma et al is to favor object composition over class inheritance. That is, when possible, design your programs using object composition instead of beginning with a superclass and then accomplishing reuse through inheritance. To understand the reason for this dictum, we need to look at object composition.
To appreciate the advantage of object composition over inheritance, we need to understand another principle put forth by Gamma, Helm, Johnson and Vlissides:
Program to an interface, not an implementation.
Let’s first look at why programming to an interface is favored over programming to an implementation.
Choose the Interface
In a nutshell, according to Gamma et al, programming to an interface is better than programming to an implementation because it reduces implementation dependencies between subsystems. This increases software flexibility. As a result, changes can be made at runtime.
The idea of programming to an interface does not literally mean an
ActionScript 3.0 construct interface as
opposed to a class. That is, you can program
to the interface of an abstract class or an interface instead of a class. What
does that really mean, though?
The easiest way to understand this concept is to think of the methods in either an abstract class or interface as interfaces. An interface is a set of functions an object implements. Eric and Elisabeth Freeman (Head First Design Patterns) suggest that we think of the properties in either an abstract class or interface as supertypes. It turns out that the actual practice of programming to an interface has many different approaches, but to see the basic concept, consider the following set of scripts, Example 8-1 through Example 8-6. Example 8-1 through Example 2-7 set up an interface, and Example 8-5 and Example 8-6 implement it. Be sure to save the files all in the same folder.
//SpaceWarrior.as
package
{
    interface SpaceWarrior
    {
        function useWeapon():void;
    }
}//Alien.as
package
{
public class Alien implements SpaceWarrior
{
function Alien()
{
//Constructor
}
public function useWeapon():void
{
trace("Zaaaapp!!!");
}
}
}//Earthling.as
package
{
public class Earthling implements SpaceWarrior
{
function Earthling()
{
//Constructor
}
public function useWeapon():void
{
trace("Ka Boom!!!");
}
}
}//Main.as
package
{
import flash.display.Sprite;
public class Main extends Sprite
{
public function Main()
{
//Program to implementation
var alien:Alien=new Alien();
alien.useWeapon();
//Program to interface
var spaceWarrior:SpaceWarrior=new Earthling();
spaceWarrior.useWeapon();
}
}
}Open a new Flash document file, and, in the Class Document window, type in
Main. When you test the application,
all you’re going to see is:
Zaaaapp!!!
Ka Boom!!!
The first trace() output is what’s returned
when an Alien instance calls the useWeapon() method, and the second for the
Earthling doing the same thing. To see
the difference between programming to an implementation instead of an interface,
look at the following lines that are part of the Main.as script:
//Program to implementation
var alien:Alien=new Alien();
alien.useWeapon();

//Program to interface
var spaceWarrior:SpaceWarrior=new Earthling();
spaceWarrior.useWeapon();
The first part programs to an implementation because the alien instance is typed as the implementation,
Alien. (Alien implements SpaceWarrior
interface.) In the second part of the segment, the spaceWarrior instance types as the supertype, SpaceWarrior. However, it is instantiated using
the Earthling() constructor. As you can see,
it works fine. What’s more, using the spaceWarrior instance, we could redefine it as an Alien() instance, and it’d still work fine. Change
the last part to:
//Program to interface
var spaceWarrior:SpaceWarrior=new Earthling();
spaceWarrior.useWeapon();
spaceWarrior=new Alien();
spaceWarrior.useWeapon();
Zaaaapp!!!
Ka Boom!!!
Zaaaapp!!!
As you can see, by programming to the interface, the instances are far more flexible. We don’t have to know what’s in the function (interface) or what it’ll do, we just know that it will do what it’s supposed to, depending on the constructor we use.
Object Composition
To see why object composition is favored over class inheritance, we need to see what each does. Previous chapters have used both object composition and inheritance, and so you may have some idea of what each does. Both concepts were introduced in Chapter 1, but because the Observer design pattern clearly illustrates the use of composition, we are reviewing it here again.
Keeping in mind that the comparison between inheritance and object composition relates to building flexible and reusable software elements, we have a base for comparison. So we can restate the principle as:
For improved flexible and reusable software, favor object composition over class inheritance.
Reusable software developed through inheritance is relatively straightforward. Developers take an existing class and use it again with the particulars created through subclasses. Because the internals of the objects are often visible to the subclasses, the term white-box reuse is applied to this implementation.
Object composition, by contrast, achieves new functionality by bringing together existing objects. The composition process can be understood as one class using another class’ functionality, whereas inheritance depends on the class having the functionality. So, in composition, one class uses a functionality of another class, while in inheritance, a sub class is-a class with functionality inherited from another class. Because object composition hides the internal details, the term black-box reuse is applied to this kind of development.
Inheritance has some advantages in being simple to create, visible, and relatively simple for making certain types of changes. For example, if you want a change to be applied to all subclasses, a change to the superclass will do the trick. All changes are inherited by the subclasses.
The biggest disadvantage attributed to inheritance is breaking encapsulation. This occurs where a subclass is changed because a parent class changes. The change may break certain functionality of the subclass. (Other actions unrelated to inheritance can break encapsulation, but they’re not relevant here.) Another disadvantage of inheritance is the inheritance of unwanted features. Subclasses are stuck with the full set of features from the parent class, and, as was seen in Chapter 4, overrides are used to solve this problem. Finally, because inheritance occurs at compile time, you cannot change the implementations from the parent class at runtime. All of these disadvantages reduce flexibility.
One advantage of object composition is the flip side of the main disadvantage of inheritance—maintaining encapsulation. Object composition focuses on what each object in the object set does, and its relationship to other objects. By focusing on clear and limited tasks for each class (object), keeping encapsulation intact is better and simpler. The focus changes from how something works to the relationship between objects, and because each object comes to be dependent on others, object encapsulation and reliability are more important and central.
By having securely encapsulated and focused objects, your number of classes is likely to be larger, and that fact is a disadvantage of object composition. However, these small focused classes also mean small hierarchies, and instead of inheriting and being a feature of the object, composition allows one object to have a feature of another object.
The Observer design pattern uses object composition instead of inheritance. The two major interfaces and concrete classes are either subject or observer. Together, these objects are composed to create the overall model for the software design.
Minimalist Abstract Observer
To launch an Observer application using the minimum essentials, we need only two interfaces and two classes, reflecting the model in the class diagram (Figure 8-2):
A subject interface
An observer interface
A concrete subject
A concrete observer
Keeping the overall goal in mind to centrally distribute state information, the constructs boil down to a subscribing method, an unsubscribing method, a notification method for the subject, and an update method for the observer. The key to making this all work right is the use of an array to hold the subscribing observers, and a distribution method for broadcasting the current state.
Subject Interface
All we need for the Subject interface are
three methods to take care of the subscription and notification work. Because
all of the functions in an interface construct are abstract, we don’t have a lot
of detail to address. However, we’ve got to be careful to be sure that all the
necessary parts are in place. Example 8-5 shows the script to be
saved as Subject.as:
package
{
    //Subject Interface
    public interface Subject
    {
        function subscribeObserver(o:Observer):void;
        function unsubscribeObserver(o:Observer):void;
        function notifyObserver():void;
    }
}
In the first two functions, you’ll see evidence of
composition. The "o"
parameter is an Observer datatype, which is a
reference to another interface that’ll be built as part of the Observer design
pattern. If you look at the diagram in Figure 8-2, you’ll see an arrow from the
abstract Subject to the abstract Observer. That reference to the Observer datatype
is part of the process that uses composition rather than inheritance.
Observer Interface
The Observer interface is deceptively
simple. The single update() function is
actually part of the composition between the Observer and Subject
structures. However, we see the composition only when we look at the connection
between the concrete observer and subject through the update() supertype in the Observer interface. Save the code in Example 8-6
as Observer.as:
package
{
    //Observer Interface
    public interface Observer
    {
        function update(light:String):void;
    }
}
To illustrate the Observer design pattern in its minimal form, we’ve chosen a
light that can have an “on” or “off” state. In the abstract interface, though,
we simply indicate the data type accepted in the parameter as a string. So the
value could be the range of a dimmer. We’ve got flexibility. The goal in this
example is clarity, but the Observer pattern’s update() function can deal with multiple parameters with any kind
of datatype. Later in this chapter, this will be demonstrated.
Concrete Subject
At this stage, we’ve got to put the interfaces to work. The tasks for the
ConcreteSubject class include:
Establish an array to hold the observers.
Establish the state property as part of the class—stores the state.
Set up the details of subscription process tying in the
Observersupertype and observers array.Work out a process to remove (unsubscribe) elements of the observer array, using an
Observersupertype in the parameter.Establish a notification process tied to the
update()method derived from theObserverinterface.
The notification process requires some kind of setter. This is where a setter
function has a reference to data that changes the state to be broadcast to the
observers. In turn, when the state changes (the setter function is called), the
notification function kicks in. Save the script in Example 8-7 as ConcreteSubject.as.
package
{
    public class ConcreteSubject implements Subject
    {
        private var light:String;
        private var observers:Array;
        function ConcreteSubject ()
        {
            trace ("*|*Concrete Subject*|*");
            observers=new Array();
        }
        public function subscribeObserver (obserNow:Observer):void
        {
            observers.push (obserNow);
        }
        public function unsubscribeObserver (obserNow:Observer):void
        {
            for (var ob:int=0; ob<observers.length; ob++)
            {
                if (observers[ob]==obserNow)
                {
                    observers.splice (ob,1);
                    break;
                }
            }
        }
        public function notifyObserver ():void
        {
            for (var notify in observers)
            {
                observers[notify].update (light);
                trace ("Observer " + notify + " Light is "+light);
            }
        }
        public function setLight (light:String):void
        {
            this.light=light;
            notifyObserver ();
        }
    }
}
In this implementation, you can see that most of the work is done with
composition. The constructor has a single construct: instantiating an array.
(The trace() statements are superfluous and
only added so that you can better see the internal workings of the observer
structure.) Both the subscribe and unsubscribe functions use composition with an
Observer object (supertype) in the
parameter. The notify function references the Observer method, update(). So
instead of seeing subclassed elements making up the class, you see composition
at work.
When you test the program, you will be programming to an interface rather than an implementation. To make this possible, look at the following line:
public function unsubscribeObserver(obserNow:Observer):void
Whatever observer object is placed in the obserNow parameter is typed as a supertype (Observer), not as an implementation type. (In the
section Working the Observer, the programming to an
interface process is explored further.)
Concrete Observer
The ConcreteObserver class has a far more
focused task than the ConcreteSubject class.
It stores the state to be observed to maintain perfect consistency among the
subscribing observers. Save the script in Example 8-8
as ConcreteObserver.as.
package
{
    //Concrete Observer
    class ConcreteObserver implements Observer
    {
        private var light:String;
        function ConcreteObserver()
        {
            trace("=Concrete Observer=");
        }
        public function update(light:String):void
        {
            this.light=light;
        }
    }
}
The update() function is tied into the
ConcreteSubject class as a parameter. So
all instances of the ConcreteObserver are
welded to the single source of updating done by the concrete subject’s
notification function.
Working the Observer
Now we can examine how all the parts work together. In the script that
implements the program, we need to create instances of both the ConcreteSubject and ConcreteObserver classes. Then, we will need to subscribe
observers to the ConcreteSubject instances.
Also, just to be sure that everything’s working correctly, we should unsubscribe
at least one observer. In order to test the overall functionality, we need to
change the state we’re observing using the setLight() method to different values. Only those observer
instances subscribed should be able to see the changes. By first subscribing
observers, and then unsubscribing at least one, we should be able to see if
everything’s working as expected. Example 8-9 implements the
Observer design pattern. Save the code as TestSub.as.
package
{
    import flash.display.Sprite;
    public class TestSub extends Sprite
    {
        public function TestSub()
        {
            var mySub:ConcreteSubject=new ConcreteSubject();
            var subObserver:Observer=new ConcreteObserver();
            var subObserver2:Observer=new ConcreteObserver();
            var subObserver3:Observer=new ConcreteObserver();
            mySub.subscribeObserver(subObserver);
            //The subObserver is passed as an instance of Observer
                supertype
            mySub.subscribeObserver(subObserver2);
            mySub.subscribeObserver(subObserver3);
            mySub.setLight("on");
            mySub.unsubscribeObserver(subObserver);
            mySub.setLight("off");
        }
    }
}
Note that this script programs to the interface to instantiate the different
observer instances, but must program to the ConcreteSubject directly to implement it. However, we could have
typed the observers as ConcreteObserver, and
then used the instances as Observer types in
the parameters for subscribing. In either case, we would have been following the
dictum of programming to the interface.
Open a new Flash document, and, in the Document class window, type in
TestSub, and then test the
application. Your output should appear as the following:
*|*Concrete Subject*|*
=Concrete Observer=
=Concrete Observer=
=Concrete Observer=
Observer 0 Light is on
Observer 1 Light is on
Observer 2 Light is on
Observer 0 Light is off
Observer 1 Light is off
As you can see, a single instance used the ConcreteSubject constructor and three used the ConcreteObserver constructor, as indicated by the
respective trace() outputs. The observer
state was first set to “on” and, as expected, the three observer instances
indicated the correct state. Then, a single observer was unsubscribed, and the
state was set to “off.” With two observers now, only two indicated the
state.
Example: Adding States and Identifying Users
The minimal Observer design pattern example had only a single state. You might think that adding additional states may be complicated, but you’ll see that it’s very easy. One of the key features about design patterns is that they’re flexible, and adding states illustrates this flexibility.
Another issue that can be important in some applications using the Observer pattern is getting to know the observers. In the minimal example in the previous section, the observers were identified by their array index, which changes when observers are removed. However, using a property to identify observers is quite simple as well.
Multiple States
To understand multiple states, just imagine a daily newspaper that has several different sections. For example, an abbreviated list might include the following topic areas that regularly need to be changed:
News
Sports
Stocks
Entertainment
All these areas can be represented as String data, but for the sake of type variety, we will make
Stocks a Number type. In the minimalist
example, the initial placement of the state property is in the update() parameter. To have additional property
states, all we need to do is add more properties. So, in the Observer interface,
we’d just need to change the update()
function to the following:
function update(news:String,sports:String,stocks:Number,entertainment:
    String):void;
That was easy. As you can see, different data types are not problematic at all.
Next, the concrete subject needs to store the states, and so each state needs a variable declaration that can be used for maintaining the current state. The setter function also needs to deal with each of the four states, and so it too needs to be expanded.
public function setType(news:String,sports:String,stocks:Number,
     entertainment:String)
{
    this.news=news;
    this.sports=sports;
    this.stocks=stocks;
    this.entertainment=entertainment;
    notifyObserver();
}
Note that the setType() function is
structurally identical to the setLight()
function in the light example. All that’s changed is the number of parameters
and variables stored.
Finally, in the concrete subject, we need to change the number of parameters
in the update() function that sends out the
state change information:
this.observers[notify].update(news,sports,stocks,entertainment);
Again, you can see that no structure has changed—just the number of parameters.
Next, in the concrete observer class, all the changes are to the number of
variables and nothing in the structure. So, instead of establishing a single
variable, four are declared. The key update()
function is changed to:
public function update(news:String,sports:String,stocks:Number,
    entertainment:String):void
{
    this.news=news;
    this.sports=sports;
    this.stocks=stocks;
    this.entertainment=entertainment;
}
Like the other elements in the Observer design pattern, the structure remains the same. The single most complex change in the application is going to be format. The output structure is unchanged, but with four different states, you have to format your output in such a way that all the different states (information categories) are separated from one another and spelled out. (See Example 8-12.)
Who are You?
In some applications, you may want to know who’s subscribed to your application. In fact, you may even want to be sure that the same person doesn’t accidentally attempt to subscribe more than once, especially where all observers have unique usernames.
So, to get started, we need to begin with the ConcreteObserver class. Using a string variable, we’ll add a name
to each and every subscriber.
//Subscriber's ID
internal var subName:String;

//Constructor Function
function ConcreteObserver(subName:String):void
{
    trace(subName + " has subscribed");
    this.subName=subName;
}
By adding a username to the constructor function and connecting that name to
the object created, each observer can hold a username. Now, subName is a property of the ConcreteObserver class, and each element of the
observers array can use the property to
identify itself.
To be sure that no more than a single observer with the same name can
subscribe, the ConcreteSubject class’
subscription function must be changed. By placing a conditional statement that
makes sure that no two observer names are alike—or the same observer doesn’t
accidentally subscribe twice to the same subject—we can automatically reject a
subscription with a duplicate name.
//Add variable to check for duplicates
private var duplicate:Boolean;


....(more code)

//Subscribe and Prevent Re-subscription
public function subscribeObserver(obserNow:Observer):void
{

    duplicate=false;
    for(var ob=0;ob<this.observers.length;ob++)
    {
        if(this.observers[ob]==obserNow)
        {
            duplicate=true;
            trace( this.observers[ob].subName+ " already a subscriber.

");
        }
    }
    if(! duplicate)
    {
        this.observers.push(obserNow);
    }
}
In some cases, you may not want to limit single subscriptions with a common name. To allow multiple subscribers with the same name, just don’t add the above code that prevents doing so.
Updated Observer
Now the Observer application has far more functionality. Not only can each observer be identified by a specific name, no more than a single observer with the same name will be allowed to subscribe. What’s more, four states are now tracked and sent out if changed. Example 8-10 through Example 8-13 should be saved in the same folder using the captions for the filenames.
package
{
    //Subject Interface
    public interface Subject
    {
        function subscribeObserver(o:Observer):void;
        function unsubscribeObserver(o:Observer):void;
        function notifyObserver():void;
    }
}package
{
//Observer Interface
public interface Observer
{
function update(news:String,sports:String,stocks:Number,entertainment:
String):void;
}
}package
{
//Concrete Subject
public class ConcreteSubject implements Subject
{
private var news:String;
private var sports:String;
private var stocks:Number;
private var entertainment:String;
private var observers:Array;
//Add variable to check for duplicates
private var duplicate:Boolean;
//Constructor function
public function ConcreteSubject ():void
{
trace ("*|*Concrete Subject*|*");
observers=new Array();
}
//Subscribe and Prevent Re-subscription
public function subscribeObserver (obserNow:Observer):void
{
var duplicate:Boolean = false;
for (var ob=0; ob<observers.length; ob++)
{
if (observers[ob]==obserNow)
{
duplicate=true;
trace (observers[ob].subName+ "
is already a subscriber.
");
}
}
if (! duplicate)
{
observers.push (obserNow);
}
}
//Unsubscribe and remove from array
public function unsubscribeObserver (obserNow:Observer):void
{
for (var ob=0; ob<observers.length; ob++)
{
if (observers[ob]==obserNow)
{
observers.splice (ob,1);
}
}
}
//Set up notification and format output
public function notifyObserver ():void
{
for (var notify in this.observers)
{
observers[notify].update (news,sports,
stocks,entertainment);
var nowNews:String=" sees that "+
news + " is interesting,";
var nowSports:String = " and learns that " + sports;
var nowStocks:String=".
Whoaa!,
the stock market is at " + stocks;
var nowEntertain:String=" and "+ entertainment +
" is showing at the Bijou.";
trace (observers[notify].subName + nowNews +
nowSports + nowStocks + nowEntertain);
}
}
//Add all necessary states
public function setType (news:String,sports:String,stocks:Number,
entertainment:String):void
{
this.news=news;
this.sports=sports;
this.stocks=stocks;
this.entertainment=entertainment;
notifyObserver ();
}
}
}package
{
//Concrete Observer
class ConcreteObserver implements Observer
{
//Store Additional States
private var news:String;
private var sports:String;
private var stocks:Number;
private var entertainment:String;
//Subscriber's ID
public var subName:String;
//Constructor Function
function ConcreteObserver(subName:String):void
{
trace(subName + " has subscribed");
this.subName=subName;
}
//Add states to update parameter
public function update(news:String,sports:String,stocks:Number,
entertainment:String):void
{
this.news=news;
this.sports=sports;
this.stocks=stocks;
this.entertainment=entertainment;
}
}
}Feel free to change the text in the various “headlines” for The Daily Bugle.
Playing the Bugle
Now that we’ve set up an Observer design pattern simulating subscription to a newspaper we’ve called The Daily Bugle, it’s time to test the subscription and news distribution process. Our consumer testing class needs to have only a few elements:
A concrete subject
Subscribers (concrete observers)
Daily news (a change of state)
Unsubscribe (get off the observer list)
This time around, we’ll need to name all of our subscribers, and we can expect
more information output, but the structure is essentially unchanged. Example 8-14 contains the necessary code that needs to be
saved as BugleSubscribe.as.
package
{
    //Test Observer Application
    import flash.display.Sprite;
    public class BugleSubscribe extends Sprite
    {
        public function BugleSubscribe()
        {
            var bigNews:ConcreteSubject=new ConcreteSubject();
            var larry:ConcreteObserver=new ConcreteObserver("Larry");
            var mo:ConcreteObserver=new ConcreteObserver("Mo");
            var curly:ConcreteObserver=new ConcreteObserver("Curly");
            var shemp:ConcreteObserver=new ConcreteObserver("Shemp");
            bigNews.subscribeObserver(larry);
            bigNews.subscribeObserver(mo);
            bigNews.subscribeObserver(curly);
            bigNews.subscribeObserver(shemp);

            //Set State #1
            bigNews.setType("Computer Invented","Home Team Wins",
                3234.54," Mad Duck");

            //Unsubscribe 2 Observers and attempt to re-subscribe
                current subscriber
            trace("
** Larry and Shemp have unsubscribed **
");
            bigNews.unsubscribeObserver(larry);
            bigNews.unsubscribeObserver(shemp);

            //Attempt re-subscribe
            bigNews.subscribeObserver(mo);

            //Set State #2
            bigNews.setType("Memory Prices Down","Game Rained Out",
               2987.98," Bad Bug");
        }
    }
}
Be sure to save the BugleSubscribe.as in
the same folder as the other files in the class. Then, create a new Flash
document, and type in BugleSubscribe in
the Document class window. When you test the application, you should see the
following output:
*|*Concrete Subject*|*
Larry has subscribed
Mo has subscribed
Curly has subscribed
Shemp has subscribed
Larry sees that Faster Computer Invented is interesting, and learns
    that Home Team Wins.
Whoaa!, the stock market is at 3234.54 and The Mad Duck is showing
     at the Bijou.
Mo sees that Faster Computer Invented is interesting, and learns
    that Home Team Wins.
Whoaa!, the stock market is at 3234.54 and The Mad Duck is showing
    at the Bijou.
Curly sees that Faster Computer Invented is interesting, and learns
    that Home Team Wins.
Whoaa!, the stock market is at 3234.54 and The Mad Duck is showing
    at the Bijou.
Shemp sees that Faster Computer Invented is interesting, and learns
    that Home Team Wins.
Whoaa!, the stock market is at 3234.54 and The Mad Duck is showing
    at the Bijou.

** Larry and Shemp have unsubscribed **

Mo is already a subscriber.

Mo sees that Memory Prices Down is interesting, and learns that Game
    Rained Out.
Whoaa!, the stock market is at 2987.98 and The Bad Bug is showing
    at the Bijou.
Curly sees that Memory Prices Down is interesting, and learns that Game
    Rained Out.
Whoaa!, the stock market is at 2987.98 and The Bad Bug is showing
    at the Bijou.
As each subscription is made, you can see the observer’s name and the fact
that he has subscribed. You can see that all four subscribers see identically
formatted data. The formatting is the same because all the formatting is placed
in the ConcreteSubject class. However, that’s
easy enough to change simply by removing all of the formatting and sending raw
data. The Observer design pattern makes sure that whatever information’s sent to
the subscribing observers is identical as far as the state conditions are
concerned, but really doesn’t care about the formatting. The data can be taken
and reformatted for any purpose by the observers. It just has to be the same
data.
Using the unsubscribeObserver method,
selected observers are removed from the subscription list using the line:
bigNews.unsubscribeObserver(ConcreteObserver instance);
As you can see, shemp and larry are unsubscribed between the first and
second outputs using this method.
Dynamically Changing States
Up to this point, all the Observer patterns’ testing has been done by static assignments of values to the state setters. The purpose was to see how the structure of the pattern works, but for most practical applications using Flash and ActionScript 3.0, we should look at something where the state values are rapidly changing, and new updates have to be sent almost constantly.
To see how rapidly changing data can be sent to a single source, and then dispatched to multiple observers, this next application depicts an action game with three combatants. Two are made up of spaceships with a missile or torpedo and a space station that shoots a beam at the spaceships. There’s really nothing much you can do with the game other than fire the two spaceships and space station, and watch the two spaceships get destroyed, but it serves to illustrate how all of the hits are generated by the action on the stage and broadcast to the different combatants. When a combatant is knocked out of play, he’s no longer subscribed and all that is visible is the last message before destruction.
Recording a Space Battle
In setting up this particular Observer application, the Subject and Observer interfaces contain only Number and String parameters in
the observer notification and update functions. The subscribe and unsubscribe
functions are the same as previous Observer designs in this chapter. Save the
classes in Example 8-15 and Example 8-16
by their caption names.
Giving More Work to the Concrete Classes
The two classes representing concrete subjects and observers are changed
little from previous examples. The ConcreteSubject class still keeps track of who has subscribed and
unsubscribed, and sends out notifications of state changes.
The ConcreteObserver class, though, has
taken on another responsibility. When a new ConcreteObserver is created, it makes sense to automatically
subscribe her to the notification process. So instead of making it a two-step
process, one to instantiate and another to subscribe, the ConcreteObserver now automatically subscribes new
instances. To do this, only a single line had to be added to the constructor
function:
concreteObserver.subscribeObserver(this);
The parameter references the instance being instantiated. At any time, the instance can unsubscribe or resubscribe by calling the unsubscribe or subscribe functions. Example 8-17 and Example 8-18 should be saved using the caption names.
package
{
    //Concrete Subject
    public class ConcreteSubject implements Subject
    {
        private var score:Number;
        private var damage:String;
        private var duplicate:Boolean;
        private var observers:Array;

        public function ConcreteSubject ()
        {
            observers=new Array();
        }
        //Subscribe observer without duplicates
        public function subscribeObserver (obserNow:Observer):void
        {
            duplicate=false;

            for (var ob=0; ob < observers.length; ob++)
            {
                if (observers[ob] == obserNow)
                {
                    duplicate=true;
                    trace ("Sorry, " + observers[ob].nomDeGuerre +
                        " is already subscribed.");
                }
            }
            if (! duplicate)
            {
                observers.push (obserNow);
            }
        }
        //Unsubscribe observer
        public function unsubscribeObserver (obserNow:Observer):void
        {
            for (var ob=0; ob < this.observers.length; ob++)
            {
                if (observers[ob] == obserNow)
                {
                    trace ("
***" + this.observers[ob].nomDeGuerre +
                         " has been removed.***
");
                    observers.splice (ob,1);
                }
            }
        }
        //Notify observers of total score and current damage
        public function notifyObserver (score:Number,damage:String):void
        {
            for (var notify in observers)
            {
                observers[notify].update (score,damage);
            }
        }
        //Set the score -- Accumulated score and damage
        public function setScore (score:Number,damage:String):void
        {
            this.score=score;
            this.damage=damage;
            notifyObserver (score,damage);
        }
    }
}package
{
//Concrete Observer
class ConcreteObserver implements Observer
{
public var nomDeGuerre:String;
private var damage:String;
private var score:Number;
private var concreteObserver:Subject;
function ConcreteObserver(concreteObserver:Subject)
{
this.concreteObserver=concreteObserver;
concreteObserver.subscribeObserver(this);
}
//Output to observer
public function passOn():String
{
return "Current score: "+score+"
Current damage: "+ damage;
}
//Trap changes in state from subject
public function update(score:Number,damage:String):void
{
this.score=score;
this.damage=damage;
passOn();
}
}
}Now that all of the basic programs are built, the real work begins. In the following section, you will be building several movie clips to represent two spaceships, their weapons, and a space station with its weapon. Most importantly though, the actions of the different elements will generate state changes processed by the Observer design pattern and sent to subscribing combatants.
Launching the Space Battle
In Example 8-19, you’ll find a class that handles a
battle in space. However, even before beginning on the ChangleHandler class, you first need to build some movie clips,
and to do so, we need to start with a Flash document file. The following steps
are just the first to set up the stage.
Setting up the Flash document
Open a new Flash document.
Set the stage size to 650 × 450, and set the background to gray.
Add a star field of your own design using yellow stars and shooting stars. Don’t put in too many—just enough to give it an outer-space look and feel.
In the Document class window in the Properties inspector, type in
ChangeHandler.Save the file as
AliensAttack.flain the same folder with the other files for this application.
Building the spaceships
Once you have your Flash document set up, you need to build the spaceship movie clips.
Select Insert → New Symbol from the menu bar.
Note
When you name a movie clip that you’ll use as a class, be sure to follow the same naming conventions as you would for any class. The first character should be capitalized and contain no spaces. So be sure to use
Earthlingrather thanearthling, and don’t put any spaces or other unacceptable characters in the name.When the New Symbol window opens, type in
Earthlingin the Name window, and select Movie clip as the Behavior. If you see a button named Advanced, click it. It opens up part of the New Symbol window that you need for the next step.Click the Export for ActionScript checkbox in the Linkage group. You should see the Export in first frame checkbox automatically selected. Also, in the Class window, you should see
Earthlingappear andflash.display.MovieClipin the Base class window. Click OK.You are now in the Symbol edit mode. The center of the movie clip is indicated by the crosshair in the middle of the stage.
Using the drawing tools, draw a simple spaceship with the dimensions W=83, H=47. Figure 8-3 shows an example enlarged 400 percent. Click the Scene icon, located at the top left above the stage, when you’re finished, and you should see your movie clip in the Library.
Repeat Steps 1 through 5 to create a movie clip named
Alien. Make a different ship and point it in the opposite direction as theEarthlingmovie clip spaceship. Once you’re finished, you should see both the Alien and Earthling movie clips in the Library panel.

Building the weapons
Originally, we tried building the spaceship and weapon as a single movie clip, but after experimentation, it made more sense to make separate movie clips for better flexibility. The ones provided here are extremely simple, but you can add any kind of enhancement you want—blast trails, sound, and step-down to fire. The following steps show simple ones for seeing how the Observer design pattern state change can be triggered.
Select Insert → New Symbol from the menu bar. Name the movie clip
bullet, using all lowercase for the name. Select Movie clip as the Behavior, and click OK. You are now in the Symbol editing mode.Draw something that you want to look like the projectile shooting at the Alien. We used a simple oval with a fin on the top for a shark-like missile with the dimensions, W=23, H=7.3. The height includes the fin; so it’s a pretty small missile, but proportionate to the Earthling ship. When you’re done, click Scene 1 to exit the Symbol editing mode.
Select Insert → New Symbol from the menu bar When the New Symbol window opens, type in
Missilein the Name window, and select Movie clip as the Behavior. If you see a button named Advanced, click it. It opens up part of the New Symbol window that you need for the next step.Click on the Export for ActionScript checkbox in the Linkage group. You should see the Export in first frame checkbox automatically selected. Also, in the Class window, you should see
Missileappear andflash.display.MovieClipin the Base class window. Click OK.In the Symbol editing mode, drag a copy of the
bulletmovie clip to the center position (X=0, Y=0).Click on Frame 20 and press the F5 key to add frames to Frame 20. Now, press F6 to add a keyframe. Select the keyframe in Frame 20, and move the bullet movie clip to X=380, Y=0.
Click on Frame 1, and in the Properties panel, select Motion in the Tween menu. You should see an arrow in the Timeline from Frame 1 to Frame 20 with a blue background. When you test it, the bullet MC should move from left to right.
Click on Frame 1, and open the Actions panel (Press F9 or Option + F9 on the Mac). Type in
stop().Repeat steps 1 through 8 for the Alien weapon. Make the Alien slug (bullet) look different and use the movie clip name
projectile. Use the dimensions W=42, H=11. Instead of the weapon nameMissile, use the nameTorpedo. The Alien torpedo has to go in the opposite direction of the Earthling missile. So, from the initial position of X=0, Y=0 in the first frame, it should be in X=-423 for the last frame of the tween. Figure 8-4 shows a couple of simple magnified examples of the weapons.

Building the Android space station and beam
The Android space station represents an automated space station that fires a double beam at both the Earthling and Alien ships. It’s nothing more than a pentagon-shaped object. The v-shaped beam weapon sits on the pentagon movie clip.
Select Insert → New Symbol from the menu bar.
When the New Symbol window opens, type in
Androidin the Name window, and select Movie clip as the Behavior. If you see a button named Advanced, click it. It opens up part of the New Symbol window that you need for the next step.Click on the Export for ActionScript checkbox in the Linkage group. You should see the Export in first frame checkbox automatically selected. Also, in the Class window, you should see
Androidappear andflash.display.MovieClipin the Base class window. Click OK.You are now in the Symbol edit mode. Using the drawing tools, draw a pentagon with the dimension W=57, H=54. Click the Scene icon when you’re finished, and you should see your space station movie clip in the Library.
Select Insert → New Symbol from the menu bar.
When the New Symbol window opens, type in
Beamin the Name window, and select Movie clip as the Behavior. If you see a button named Advanced, click it. It opens up part of the New Symbol window that you need for the next step.Click on the Export for ActionScript checkbox in the Linkage group. You should see the Export in first frame checkbox automatically selected. Also, in the Class window, you should see
Beamappear andflash.display.MovieClipin the Base class window. Click OK.You are now in the Symbol edit mode. Add two layers to the existing layer. Name the top layer “Actions,” the middle layer “Left,” and the bottom layer “Right.”
Click on Frame 20, select the frames for all three layers, and press F5 to add 20 frames to all the layers. Click on the first frame of the Actions layer, and, in the Actions panel, type in
stop();.Click on the first frame of the Left layer. Select the Line tool and set the Stroke height in the Properties panel to 6. (The Stroke height sets how wide the line will be.) Select green for the line color. With the base at the X=0, Y=0 position, draw a line at a -45° angle about 12 pixels long. You may have to reposition the base to the center position mark in the Symbol editor.
Click on the first frame of the Right layer and repeat step 10, but angle the line to +45°. When finished, you should see a V-shaped drawing with the base of the V at the X=0, Y=0 position.
Select the Left layer, click on Frame 20, and press the F6 key to add a keyframe. Select the green line and change the color from green to purple. Set the line dimensions to W=240, H=220 and reposition the base of the line to the center crosshair.
Repeat Step 10 with the line in the Right layer, except that the dimensions should be set to W=220, H=240. You should see a large purple “V” when you’re finished.
Click on the first frame of the Left and Right layers, and select Shape for the tween. Press the Enter/Return key to test the movie. You should see a “beam” shoot out to the left and right, changing from green to purple. Figure 8-5 shows the beam being “fired” at the two ships.

You have set up all the classes and objects you’ll need for the stage. Check your Library panel to be sure you have the following movie clips:
Alien
Android
Beam
bullet
Earthling
Missile
projectile
Torpedo
Those objects beginning with capital letters are classes and those beginning with lowercase letters are objects belonging to one of the classes.
Writing a Change Handler
In creating something to change conditions and send messages to the “Earthling,” “Alien,” and “Android,” you need to use your imagination a bit. If an opponent’s projectile or the beam from the Android hits either the Alien or Earthling, its hit total is sent to all subscribers via the Observer design pattern. Each of the windows showing the results represents different languages understood by the combatants. When a combatant is knocked out, it is automatically unsubscribed and no longer receives information, even though it can sustain further hits recorded by the surviving combatants. (The Android is invulnerable, and so can keep firing and receiving information even if all the others are knocked out.)
The ChangeHandler class is divided into
several functions. The constructor function instantiates the concrete
subjects and concrete observers. Each of the observers is given a name
(nomDeGuerre) for keeping track of
subscribers who are pushed into a subscriber array (warrior). A second array (battleUpdate) stores the battle names for each combatant
placed in the text fields representing each combatant’s “damage information
center.” To simulate the different languages receiving the message from the
concrete subject, each combatant has a different font and border color for
the text field representing its information display. The createTextWindow() and getFont() functions handle the viewing
objects.
All the objects in the Library panel are placed on the stage along with
firing and damage information in a rather large function, getParts(). These visible objects are
coordinated with the instances of the concrete observers.
The setScore() method can be invoked by
instances of the ConcreteSubject class.
Whenever, the setScore() method is
called, the subscribing observers are notified via the passOn() method, which returns the current
score through the update() method. The
killWarrior() function invokes the
unsubscribeObserver() method so that
when a spaceship is knocked out of the game, it no longer receives
messages.
Example 8-19 is a fairly large class, and you may
want to break it down into smaller classes or abstract some of the
functions. However, it’s designed to show off the ways in which the Observer
Design Function can be used in a context where information rapidly changes.
Save the script as ChangeHandler.as in
the same folder as the other files.
package
{
    import flash.events.Event;
    import flash.events.MouseEvent;
    import flash.text.TextField;
    import flash.text.TextFormat;
    import flash.display.Sprite;

    public class ChangeHandler extends Sprite
    {
        private var eKiller:uint;
        private var aKiller:uint;
        private var aFlag:Number;
        private var aeFlag:Number;
        private var eFlag:Number;
        private var lFlag:Number;
        private var outputColor:Number;
        private var battleUpdate:Array=[];
        private var warrior:Array=[];
        private var scoreSetter:ConcreteSubject;
        private var earthling:ConcreteObserver;
        private var alien:ConcreteObserver;
        private var scoreFormat:TextFormat;
        private var missile:Missile;
        private var alienMC:Alien;
        private var torpedo:Torpedo;
        private var androidMC:Android;
        private var beam:Beam;
        private var earthlingMC:Earthling;

        //Main Function
        public function ChangeHandler ()
        {
            scoreSetter=new ConcreteSubject();
            earthling=new ConcreteObserver(scoreSetter);
            warrior.push (earthling);
            earthling.nomDeGuerre="Earth Fighter";

            var android:ConcreteObserver=
                new ConcreteObserver(scoreSetter);
            warrior.push (android);
            android.nomDeGuerre="Android Beam Base";

            alien=new ConcreteObserver(scoreSetter);
            warrior.push (alien);
            alien.nomDeGuerre="Alien Menace";

            var eNm:String=earthling.nomDeGuerre.toLowerCase();
            var anNm:String=android.nomDeGuerre.toLowerCase();
            var alNm:String=alien.nomDeGuerre.toLowerCase();
            battleUpdate=new Array(3);
            scoreSetter.setScore (0,"None");
            createTextWindow ();
            getParts ();
        }
        //Create Output Windows
        private function createTextWindow ():void
        {
            for (var i:int=0; i < battleUpdate.length; i++)
            {
                battleUpdate[i]=new TextField();
                addChild (battleUpdate[i]);
                battleUpdate[i].x=20* 1 + (i * 180);
                battleUpdate[i].y=10;
                battleUpdate[i].width=150;
                battleUpdate[i].height=95;
                battleUpdate[i].wordWrap=true;
                battleUpdate[i].multiline=true;
                battleUpdate[i].border=true;
                battleUpdate[i].textColor=0xffffee;
                scoreFormat=new TextFormat();
                scoreFormat.leftMargin=7;
                scoreFormat.rightMargin=7;
                getFont (warrior[i].nomDeGuerre);
                battleUpdate[i].borderColor=outputColor;
                battleUpdate[i].defaultTextFormat=scoreFormat;
                battleUpdate[i].text=warrior[i].nomDeGuerre+
                    ":
"+warrior[i].passOn();
            }
        }
        //Get the font
        private function getFont (creature:String):void
        {
            switch (creature)
            {
                case "Earth Fighter" :
                    outputColor=0xff0000;
                    scoreFormat.font="Verdana";
                    break;

                case "Android Beam Base" :
                    outputColor=0x00ff00;
                    scoreFormat.font="Comic Sans MS";
                    break;

                case "Alien Menace" :
                    outputColor=0x0000ff;
                    scoreFormat.font="Arial Black";
                    break;
            }
        }
        //Get the movie clips from the Library
        private function getParts ():void
        {
            //Earthling
            earthlingMC=new Earthling();
            addChild (earthlingMC);
            earthlingMC.x=60,
            earthlingMC.y=120;
            missile=new Missile();
            addChild (missile);
            missile.x=earthlingMC.x+25;
            missile.y=earthlingMC.y+35;
            earthlingMC.addEventListener (MouseEvent.CLICK,fireMissile);
            earthlingMC.addEventListener
                (Event.ENTER_FRAME,earthlingHit);

            //Android
            androidMC=new Android();
            addChild (androidMC);
            androidMC.x=300;
            androidMC.y=380;
            beam=new Beam();
            addChild (beam);
            beam.x=androidMC.x;
            beam.y=androidMC.y;
            androidMC.addEventListener (MouseEvent.CLICK,fireBeam);
            androidMC.addEventListener (Event.ENTER_FRAME,beamHit);

            //Alien
            alienMC=new Alien();
            addChild (alienMC);
            torpedo=new Torpedo();
            addChild (torpedo);
            alienMC.x=420,
            alienMC.y=120;
            torpedo.x=alienMC.x-7;
            torpedo.y=alienMC.y+17;
            alienMC.addEventListener (MouseEvent.CLICK,fireTorpedo);
            alienMC.addEventListener (Event.ENTER_FRAME,alienHit);
        }

        //Earthling fires missle
        private function fireMissile (evt:Event)
        {
            missile.play ();
            eFlag=0;
        }
        //Earthling hits Alien
        private function earthlingHit (evt:Event)
        {
            this.alienMC=alienMC;
            if (missile.hitTestObject(alienMC) && eFlag==0)
            {
                eFlag=1;
                aKiller++;
                scoreSetter.setScore (aKiller,"Alien Hit");
                dataOut ();
                if (aKiller >= 5)
                {
                    scoreSetter.setScore (aKiller,"Alien Out");
                    alien.nomDeGuerre="Alien Destroyed";
                    this.alienMC.rotation=90;
                    torpedo.rotation=90;
                    killWarrior (alien);
                    dataOut ();
                }
            }
        }
        //Android fires beam
        private function fireBeam (evt:Event)
        {
            beam.play ();
            aFlag=0;
            aeFlag=0;
        }
        //Android beam hits Alien or Earthling
        private function beamHit (evt:Event)
        {
            if (beam.hitTestObject(alienMC) && aFlag==0)
            {
                aFlag=1;
                aKiller++;
                scoreSetter.setScore (aKiller,"BeamHit on Alien");
                dataOut ();
                if (aKiller >= 5)
                {
                    scoreSetter.setScore (aKiller,"Alien Out");
                    alien.nomDeGuerre="Alien Destroyed";
                    this.alienMC.rotation=90;
                    torpedo.rotation=90;
                    killWarrior (alien);
                    dataOut ();
                }
            }
            if (beam.hitTestObject(earthlingMC) && aeFlag==0)
            {
                aeFlag=1;
                eKiller++;
                scoreSetter.setScore (eKiller,"BeamHit on Earthling");
                dataOut ();
                if (eKiller >= 5)
                {
                    scoreSetter.setScore (eKiller,"Earthling Out");
                    earthling.nomDeGuerre="Earthling Off";
                    this.earthlingMC.rotation=90;
                    missile.rotation=90;
                    killWarrior (earthling);
                    dataOut ();
                }
            }
        }
        //Alien Fires torpedo
        private function fireTorpedo (evt:Event)
        {
            torpedo.play ();
            lFlag=0;
        }
        //Alien hits Earthling
        private function alienHit (evt:Event)
        {
            this.earthlingMC=earthlingMC;
            if (torpedo.hitTestObject(earthlingMC) && lFlag==0)
            {
                lFlag=1;
                eKiller++;
                scoreSetter.setScore (eKiller,"Earthling Hit");
                dataOut ();
                if (eKiller >= 5)
                {
                    scoreSetter.setScore (eKiller,"Earthling Out");
                    earthling.nomDeGuerre="Earthling Off";
                    this.earthlingMC.rotation=90;
                    missile.rotation=90;
                    killWarrior (earthling);
                    dataOut ();
                }
            }
        }

        //Output Data
        private function dataOut ()
        {
            for (var i:int = 0; i < battleUpdate.length; i++)
            {
                battleUpdate[i].text=warrior[i].nomDeGuerre+
                    ":
"+warrior[i].passOn();
            }
        }
        //Kill zone
        public function killWarrior (warship:ConcreteObserver)
        {
            scoreSetter.unsubscribeObserver (warship);
        }
    }
}
When you test the script, you’ll find that when you fire the Android, only the Earthling’s hit can be seen as recorded. That’s because both the Alien and Earthling are hit by the same double-beam, and the Alien’s hit is recorded and broadcast first, quickly followed by the Earthling’s hit. As a result, you can see only the Earthling’s beam hit. Figure 8-6 shows the game after the Alien ship has been destroyed, and the Earthling’s still sustaining hits from the Android beam, but because the Alien stops receiving messages after it is destroyed, it doesn’t show the additional hits on the Earthling.

While this example is not a true game, it does illustrate the great possibilities for sending score information to different subscribers in different formats. Likewise, it illustrates how the Observer design pattern effortlessly handles rapidly changing data through a single subject, and then quickly distributing it to different subscribers.
Example: Working with Different Data Displays
The last example showed how quickly changing data could be sent to a central object, and then sent out to subscribers. It also illustrated how subscribers could be dynamically unsubscribed. We showed some minimal output difference in the three combatants’ window displays, but the differences were minimal. Now, we’ll look at some seriously different output displays and introduce an additional interface.
The Output Designer
In the original design pattern book, the GoF provided a simple diagram for illustrating one use of the Observer pattern. A single source of data was sent to different objects that would display the data in a table, a bar chart, and a pie chart. This seemed like a good way to demonstrate some of Flash 9’s and ActionScript 3.0’s components and graphic capabilities using the Observer pattern. For our example, let’s use a list box component, and then show how to create both a bar chart and line chart with ActionScript.
To make the task more manageable and reusable, all the display outputs are
organized into separate classes. We decided that the data would represent
quarterly reports, and so the application is set up to accept four numeric
values, each representing quarterly values. Also, to make the whole process of
outputting data more manageable, we have introduced a third interface along with
the Subject and Observer interfaces. This interface is set up so that it returns
an array. The array will contain the four numeric values representing the four
quarters. To get started, open up three ActionScript files, and copy the three
files in Example 8-20, Example 8-21, and
Example 8-22 into each of the files. Save the interface files
using the caption names in the same folder.
package
{
    //Subject Interface
    public interface Subject
    {
        function subscribeObserver(o:Observer):void;
        function unsubscribeObserver(o:Observer):void;
        function notifyObserver():void;
    }
}package
{
//Observer Interface
public interface Observer
{
function update(q1:Number,q2:Number,q3:Number,q4:Number):
void;
}
}package
{
//Data Output Interface
public interface DataOut
{
function outToDesign():Array;
}
}Other than the new DataOut interface, the
other two are similar to those you’ve seen elsewhere in this chapter. The four
quarterly numeric values mentioned can be seen in the Observer interface.
The Concrete Classes and a Double Implementation
Both the concrete subject and observer classes are little changed from previous example. No names are used because the subscribers are data display objects rather than characters or live clients. So, these are actually a bit simpler than the last two examples. Open up two additional ActionScript files, and save Example 8-23 and Example 8-24 using the caption names as filenames.
package
{
    //Concrete Subject
    public class ConcreteSubject implements Subject
    {
        private var q1:Number,q2:Number,q3:Number,q4:Number;
        private var observers:Array;
        function ConcreteSubject():void
        {
            observers=new Array();
        }
        public function subscribeObserver(obserNow:Observer):void
        {
            observers.push(obserNow);
        }
        public function unsubscribeObserver(obserNow:Observer):void
        {
            for (var ob=0; ob<observers.length; ob++)
            {
                if (observers[ob]==obserNow)
                {
                    observers.splice(ob,1);
                }
            }
        }
        public function notifyObserver():void
        {
            for (var notify in observers)
            {
                observers[notify].update(q1,q2,q3,q4);
            }
        }
        public function setQuarter(q1:Number,q2:Number,
            q3:Number,q4:Number):void
        {
            this.q1=q1;
            this.q2=q2;
            this.q3=q3;
            this.q4=q4;
            notifyObserver();
        }
    }
}package
{
//Concrete Observer
class ConcreteObserver implements Observer,DataOut
{
private var dataNow:Array;
private var q1:Number,q2:Number,q3:Number,q4:Number;
public function ConcreteObserver()
{
}
public function outToDesign():Array
{
return dataNow;
}
public function update(q1:Number,q2:Number,q3:Number,q4:
Number):void
{
this.q1=q1;
this.q2=q2;
this.q3=q3;
this.q4=q4;
dataNow=new Array(q1,q2,q3,q4);
outToDesign();
}
}
}In the concrete observer file, you may have noticed that two different
interfaces were implemented—Observer and
DataOut. The former implements the
update() function that calls the outToDesign() function from the DataOut interface. Also, instead of void, the outToDesign() function returns an Array. Note that the array data
is stored in the variable dataNow and
returned through the outToDesign()
method.
The Data Design Classes
The classes invoked for the three different data displays require close
attention. Keep in mind that the array for all three classes is the array that
returns the value for the four quarters. All three classes use the same array
name, listArray, to help you remember that
the data are all coming from the same subject. The displays may be different,
but the data coming into each object through subscription as an observer is
identical.
UIList component
The UIList component needs a copy
placed in the Library of the Flash document file (FLA file) that you’ll use
to launch the application. So, before going on, open a new Flash document
file and save it as DoDesign.fla in the
same directory as the rest of the files for this application. Once you have
your document file open and saved, use the following steps to get it set up
for use with some Flash 9 and ActionScript 3.0 components:
Open the Components and Library panels from the Window menu, and drag a List component from the Components panel directly into the Library panel. When you do so, you’ll see some supporting files and folders appear in the Library as well.
Drag a copy of the Button component to the Library panel. You don’t need it right away, but you will.
In the Properties panel, type
DataDesignin the Document class window. This will be the main class. You won’t need it right away, but once you have all your classes set up, you will.Save the
DoDesign.flafile. You won’t need it for a while but keep it open as a tab, so you can test your application later.
That’s all you have to do with the document file. Open up an ActionScript file, and save the class in Example 8-25 using the caption as the filename:
package
{
    //Setup for a List Component to receive array data
    import flash.display.Sprite;
    import fl.controls.List;

    public class QuarterList extends Sprite
    {
        var listArray:Array;

        //Data Displayed in UI List Component
        public function QuarterList(uData:Array)
        {
            listArray=new Array();
            listArray=uData;
            var quarter_list:List=new List();
            quarter_list.addItem({label:"Quarterly Results"});
            for (var quarter in listArray)
            {
                quarter_list.addItem({label:"Q"+(quarter+1)+"=
                    "+listArray[quarter],data:listArray[quarter]});
            }
            quarter_list.rowCount=5;
            quarter_list.width=110;
            addChild(quarter_list);
            quarter_list.x=50;
            quarter_list.y=55;
        }
    }
}
In this application, all you’re really going to need are the labels that
show up indicating the quarterly values. However, in some future
application, you may need the actual numeric data, and so the class stores
both the label and data. A literal label goes at the top, and so the first
label, Quarterly Results, is unchanged and serves as a
label for the UIList component. Figure 8-7 shows what the list box looks like when it
displays data:

As noted, even though you can’t see the actual data, it’s also stored in the component. In some applications, there may be a need to access the data in the list box.
Bar chart display
Bar charts have an issue that list boxes don’t: the relative display of data. A computer screen has a finite number of pixels to display the bars in a bar chart. If your values are relatively small—say between 1 and 100—you have plenty of room to display your charts, but as the values become bigger, you run out of vertical and horizontal screen real estate. Because the quarterly values have to be displayed as relative to one another and not all possible values, the job’s somewhat easier. All you have to do is to find the largest value in the group of four in the array. That value can then be treated as a factor representing the largest value in the bar chart. For example, suppose you are using vertical bar charts with a maximum of 200 pixels and you have the following four values:
320
432
121
89
The maximum value is 432. That value must be represented by no more than 200 vertical pixels. Using the formula:
(currentValue ÷ MaxValue) x maxPixels
you can work out what each value should be. As you can see, the highest value would be 200 pixels, and the lesser values in the group would be proportionately smaller:
432÷432 = 1 × 200 = 200
121÷432 =.28 × 200 =56
Then, using that converted data, all that’s left to do is draw rectangles representing those values. Open a new ActionScript file, and save Example 8-26 using the caption as the filename in the folder with the other files from this application.
package
{
    //Bar chart maker
    import flash.display.Graphics;
    import flash.display.Shape;
    import flash.display.Sprite;

    public class QuarterBar extends Sprite
    {
        private var listArray:Array;
        private var maxVal:Number=0;
        private var b1:Number, b2:Number, b3:Number,b4:Number;
        private var position:uint=160;
        private var maxSize:uint=150;

        //Data Displayed in Bar Chart
        function QuarterBar(cData:Array)
        {
            listArray=new Array();
            listArray=cData;

            //Set up relative sizes for bars
            for (var max in listArray)
            {
                if (listArray[max] > maxVal)
                {
                    maxVal=listArray[max];
                }
            }
            b1=(listArray[0]/maxVal)*maxSize;
            b2=(listArray[1]/maxVal)*maxSize;
            b3=(listArray[2]/maxVal)*maxSize;
            b4=(listArray[3]/maxVal)*maxSize;

            //Bar Chart
            var bar:Shape=new Shape();
            bar.graphics.clear();
            //Draw Chart
            bar.graphics.beginFill(0xdd0000);
            bar.graphics.lineStyle(1,0x000000);
            bar.graphics.drawRect(285,(position-b1),30,b1);
            bar.graphics.drawRect(315,(position-b2),30,b2);
            bar.graphics.drawRect(345,(position-b3),30,b3);
            bar.graphics.drawRect(375,(position-b4),30,b4);
            bar.graphics.endFill();

            addChild(bar);
        }
    }
}
Figure 8-8 shows what the bar chart looks like when values have been assigned to it:

Once drawn, a graphic does not automatically clear the stage when a new
chart replaces it. The clear() method
simply clears current memory, but not the stage. To clear the stage, you
need to use removeChild(). That requires
an added child. So in the main program, we used a flag to make sure that a
graphic element had been added, and then on the next data set, the flag’s
cleared and the first drawing removed.
The line graph
The line graph has the same issues with having proportionate points for drawing lines as the bar chart has for making rectangles. Fortunately, they’re solved in the same way. An added feature in the line graph is some kind of background grid to give some better sense to the lines showing on the screen. The lines, without some kind of grid, just look like disembodied lines floating in space. So in addition to providing a drawing system to draw lines in the right positions, this class includes a background grid. Following the dictum of information designer Edward Tufte, the grid employs the minimum effective difference, so we used a thin light gray line. The line graph uses a wider blue line, so while the grid provides a context for the line graph, it doesn’t get in the way. Open up a new ActionScript file and enter the code in Example 8-27, using the caption as the filename.
package
{
//Line graph maker
import flash.display.Graphics;
import flash.display.Shape;
import flash.display.Sprite;
public class QuarterGraph extends Sprite
{
private var listArray:Array;
private var maxVal:Number=0;
private var ln1:Number, ln2:Number, ln3:Number,ln4:Number;
private var position:uint=300;
private var maxSize:uint=100;
//Set up relative sizes for lines
function QuarterGraph (lData:Array)
{
listArray=new Array();
listArray=lData;
//Create relative line sizes
for (var max in listArray)
{
if (listArray[max] > maxVal)
{
maxVal=listArray[max];
}
}
ln1=(listArray[0]/maxVal)*maxSize;
ln2=(listArray[1]/maxVal)*maxSize;
ln3=(listArray[2]/maxVal)*maxSize;
ln4=(listArray[3]/maxVal)*maxSize;
//Data Displayed in Line Graph
var line:Shape=new Shape();
//Draw graph outline
line.graphics.lineStyle (.25,0xcccccc);
line.graphics.moveTo (50,200);
line.graphics.lineTo (50,position);
line.graphics.lineTo (200,position);
line.graphics.moveTo (100,200);
line.graphics.lineTo (100,position);
line.graphics.moveTo (150,200);
line.graphics.lineTo (150,position);
line.graphics.moveTo (200,200);
line.graphics.lineTo (200,position);
line.graphics.moveTo (50,200);
line.graphics.lineTo (200,200);
line.graphics.moveTo (50,250);
line.graphics.lineTo (200,250);
line.graphics.moveTo (50,275);
line.graphics.lineTo (200,275);
line.graphics.moveTo (50,225);
line.graphics.lineTo (200,225);
//Draw the graph
line.graphics.lineStyle (2,0x0000cc);
line.graphics.moveTo (50,(position-ln1));
line.graphics.lineTo (100,(position-ln2));
line.graphics.lineTo (150,(position-ln3));
line.graphics.lineTo (200,(position-ln4));
addChild (line);
}
}
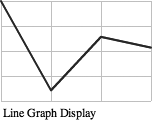
}Figure 8-9 shows the line graph superimposed on the background grid.
If you ever need to have superimposed line graphs to show change or for
comparisons, you can set up the main program not to use
the removeChild() function for redrawing
a graph.
Pulling All the Elements Together
With 10 different files, pulling them all together in a main class may seem daunting. However, as you’ll see, the task is actually simplified. The classes handle most of the grunt-work, and all you need to do is use them.
The most important feature in the DataDesign class is the data entry in the form of input text
fields. As in the space battle example, the different text fields are placed
into array elements. However, instead of using the text fields for data display,
these text fields are used for data entry. Values entered into the text fields
are converted to numbers, and passed to numeric variables. The numeric variables
are sent to a concrete subject object, and the setter method establishes them as
the current values. In turn, these values are sent out to the concrete observers
in an array that’s used in displaying the data. Open a new ActionScript file,
enter the code in Example 8-28, and save it as the caption
name.
package
{
    //Main program
    import flash.display.Sprite;
    import fl.controls.Button;
    //Text Fields for Labels
    import flash.text.TextField;
    import flash.text.TextFieldAutoSize;
    import flash.text.TextFieldType;
    //Events
    import flash.events.MouseEvent;
    import flash.events.Event;

    public class DataDesign extends Sprite
    {
        private var dataEntry:Array=[];
        private var quarterGraph:QuarterGraph;
        private var quarterBar:QuarterBar;
        private var quarterList:QuarterList;
        private var dataSub:ConcreteSubject;
        private var listDisplay:ConcreteObserver;
        private var barChart:ConcreteObserver;
        private var lineGraph:ConcreteObserver;
        private var xpos:uint=250;
        private var ypos:uint=250;
        private var dt1:Number,dt2:Number,dt3:Number,dt4:Number;
        private var dataBtn:Button;
        private var barFlag:Boolean=true;

        public function DataDesign ()
        {
            //Set up concrete subjects and observers
            dataSub=new ConcreteSubject();
            listDisplay=new ConcreteObserver();
            barChart=new ConcreteObserver();
            lineGraph=new ConcreteObserver();
            dataSub.subscribeObserver (listDisplay);
            dataSub.subscribeObserver (barChart);
            dataSub.subscribeObserver (lineGraph);

            doText ();
            doDataEntry ();
            doButton ();
            dataBtn.addEventListener (MouseEvent.CLICK,showData);

        }
        //Data Output to Stage
        function showData (ev:Event):void
        {
            if (barFlag)
            {
                barFlag=false;
            }
            else
            {
                removeChild (quarterBar);
                removeChild (quarterGraph);
            }
            //doObservers();
            dt1=Number(dataEntry[0].text);
            dt2=Number(dataEntry[1].text);
            dt3=Number(dataEntry[2].text);
            dt4=Number(dataEntry[3].text);
            doDisplay (dt1,dt2,dt3,dt4);

            //Data Displayed in List UI Component
            quarterList=new QuarterList(listDisplay.outToDesign());
            addChild (quarterList);

            //Data Displayed in Bar Chart
            quarterBar=new QuarterBar(barChart.outToDesign());
            addChild (quarterBar);

            //Data Displayed in Line Graph
            quarterGraph=new QuarterGraph(lineGraph.outToDesign());
            addChild (quarterGraph);
        }
        //Add Text Labels
        private function doText ():void
        {
            var ui:TextField=new TextField();
            var bar:TextField=new TextField();
            var ln:TextField=new TextField();
            var dt:TextField=new TextField();
            ui.autoSize=TextFieldAutoSize.LEFT;
            bar.autoSize=TextFieldAutoSize.LEFT;
            ln.autoSize=TextFieldAutoSize.LEFT;
            addChild(ui),addChild(bar),addChild(ln);
            addChild (dt);
            ui.x=50, bar.x=285,ln.x=50;
            dt.x=xpos;
            ui.y=165, bar.y=165,ln.y=305;
            dt.y=ypos+15;
            ui.text="List UI Display";
            bar.text="Bar Chart Display";
            ln.text="Line Graph Display";
            dt.text="Enter Data";
        }
        //Data value entry function
        private function doDisplay (n1:Number,n2:Number,
            n3:Number,n4:Number):void
        {
            dataSub.setQuarter (n1,n2,n3,n4);
        }
        //Data Entry
        private function doDataEntry ():void
        {
            for (var de=0; de<4; de++)
            {
                dataEntry[de]=new TextField();
                dataEntry[de].border=true;
                dataEntry[de].borderColor=0x999999;
                dataEntry[de].background=true;
                dataEntry[de].backgroundColor=0xcccccc;
                dataEntry[de].type=TextFieldType.INPUT;
                dataEntry[de].width=32;
                dataEntry[de].height=14;
                this.addChild (dataEntry[de]);
                dataEntry[de].x=xpos+(40*de);
                dataEntry[de].y=ypos;
            }
        }
        //Get the Button component
        private function doButton ():void
        {
            dataBtn=new Button();
            dataBtn.label="Show Data";
            this.addChild (dataBtn);
            dataBtn.x=xpos;
            dataBtn.y=ypos+30;
        }
    }
}
In discussing the chart and graph classes, we noted that unless you removed a
current graphic, it would stay on the stage unless removeChild() is used to get rid of it. Using the barFlag variable, the class made sure that the
chart and graph had been added before trying to remove it. Without using some
kind of test flag, it would have encountered an error if it tried to remove
before the object was added with addChild().
You can probably think of more classes to use to farm out some of the methods. However, in order to better see how all the data went through the input process and was passed to the concrete subject for broadcast out to the different display objects, we allowed this class to grow a bit.
Summary
The real test for a design pattern is its flexibility. As you saw in the examples
in this chapter, very little was changed in the Subject or Observer classes. When
the task of a design pattern is to distribute state changes to a number of different
subscribed observers, you can see that many different kinds of specific applications
can use this pattern. Because of this feature, its flexibility, and relative
simplicity, the Observer design pattern is seen in many different
applications.
Equally important, the Observer shows how to program to an interface and not an
implementation. Example 8-1 and Example 8-9
clearly illustrate this process. Each concrete observer is typed as the supertype
(interface) Observer. However, also note that in
some cases where the Observer pattern is put to work, you can’t type an
implementation to a supertype, as you may have noted in Example 8-19. This doesn’t mean that the example’s invalid; it
simply shows that in some designs using the Observer, when you attempt to program to
the interface, you run into problems because of the characteristics of the interface
and its implementation. As a result, such cases require you to create instances by
typing them as implementations.
When thinking about where you can use the Observer pattern, consider situations where you have some key states that must be sent to different instances. The most useful implementation is where the exact same information needs to be sent to different data display or interpretations. In this way, the application ensures that the exact same state information is sent without having to generate separate data sources.