
Where does Ajax come into play with web site navigation? You can use it to get the list of data for a submenu, build a hierarchical list for use as breadcrumbs on the page, or create a navigation tree. In short, you can apply Ajax in many creative ways for web site navigation. I am sure that by the time this book hits the shelves, developers will be implementing a few more navigation techniques that use Ajax. That is part of the beauty of building Web 2.0 applications—they can always change.
An important part of an Ajax web application is the way the user gets from one place to another within its pages. This is site navigation in its simple terms, and it can take many forms, from plain navigation bars with text links to complicated file menus. Site navigation can also take the form of tabs separating content within the application, or links on the bottom of a page that take the user back to the top of the page. Whatever form it takes, site navigation must serve one purpose: to take the user somewhere else in the application.
One of the most popular navigation techniques is the menu, whether it is a navigation menu or a navigation bar. Menus are lists of links for use within the application that are put in some kind of logical grouping. The CSS that is applied to these menus determines how they will look. First, we will look at some simple navigation menus and bars and then we will discuss how to apply Ajax to them to make them more interactive.
A simple navigation bar can have a variety of looks based on the CSS that is applied to it. The bar is built with lists to represent the menu. The old way of creating a menu looked like the following XHTML markup:
<a href="file/">File</a> <a href="edit/">Edit</a> <a href="view/">View</a> <a href="insert/">Insert</a> <a href="format/">Format</a> <a href="table/">Table</a> <a href="tools/">Tools</a> <a href="window/">Window</a> <a href="help/">Help</a>
This old method of building a navigation bar was inflexible, and making it minimally presentable using style rules was difficult. Years ago, this is what developers used for menu bars, but today they use a much better method to create a navigation system. They use XHTML lists for the basic structure and then style them into whatever type of navigation bar they want. Figure 7-1 shows several examples of navigation bars with different CSS associated with them.

All of the navigation bars in Figure 7-1 use the same XHTML list; the difference in styles is in the CSS associated with each of them:
<div id="navigationMenu">
    <ul id="menuList">
        <li id="active">
            <a id="current" href="file/" accesskey="F" hreflang="en" tabindex="1">
                File
            </a>
        </li><li>
            <a href="edit/" accesskey="F" hreflang="en" tabindex="2">
                Edit
            </a>
        </li><li>
            <a href="view/" accesskey="E" hreflang="en" tabindex="3">
                View
            </a>
        </li><li>
            <a href="insert/" accesskey="I" hreflang="en" tabindex="4">
                Insert
            </a>
        </li><li>
            <a href="format/" accesskey="M" hreflang="en" tabindex="5">
                Format
            </a>
        </li><li>
            <a href="table/" accesskey="A" hreflang="en" tabindex="6">
                Table
            </a>
        </li><li>
            <a href="tools/" accesskey="T" hreflang="en" tabindex="7">
                Tools
            </a>
        </li><li>
            <a href="window/" accesskey="W" hreflang="en" tabindex="8">
                Window
            </a>
        </li><li>
            <a href="help/" accesskey="H" hreflang="en" tabindex="9">
                Help
            </a>
        </li>
    </ul>
</div>
Tip
Adding the accesskey,
hreflang, and tabindex in the <link> elements satisfies the
following Web Accessibility Initiative-Web Content Accessibility
Guidelines (WAI-WCAG) 1.0 guidelines:
Priority 1 checkpoint 4.1: Clearly identify changes in the natural language of a document’s text and any text equivalents (e.g., captions).
Priority 3 checkpoint 9.4: Create a logical tab order through links, form controls, and objects.
Priority 3 checkpoint 9.5: Provide keyboard shortcuts to important links (including those in client-side image maps), form controls, and groups of form controls.
Menu #1 is styled with the following CSS rules:
#menuList {
    background-color: #396;
    color: #fff;
    list-style-type: none;
    margin: 0;
    padding: .3em 0;
    text-align: center;
}

#menuList li {
    display: inline;
    padding: 0 .5em;
}

#menuList li a {
    background-color: transparent;
    color: #fff;
    padding: .1em .5em;
    text-decoration: none;
}

#menuList li a:hover {
    background-color: #0c0;
    color: #fff;
}
There is no real trick to making a navigation menu with lists.
You will notice that the list-style-type of the <ul> element is set to none and the display of all <li> elements is set to inline. These are the two CSS rules that
create the horizontal list, and everything else is styling the
navigation menu to whatever look is desired.
Menu #2 is styled with the following CSS rules:[5]
#menuList {
    background-color: #396;
    border-top: 1px solid #063;
    color: #fff;
    list-style: none outside;
    margin: 0;
    padding: 0;
    text-align: center;
}

#menuList li {
    background-color: #000;
    bottom: .75em;
    color: #fff;
    display: inline;
    line-height: 1.2em;
    margin: 0 3px 0 0;
    padding: 4px 0;
    position: relative;
}

#menuList li a {
    background-color: #090;
    border: 1px solid #fff;
    bottom: 2px;
    color: #fff;
    display: inline;
    height: 1em;
    margin: 0;
    padding: 3px 5px;
    position: relative;
    right: 2px;
    text-decoration: none;
}

#menuList li a:hover {
    background-color: #0c0;
    bottom: 1px;
    color: #fff;
    position: relative;
    right: 1px;
}

#menuList li#active {
    background-color: #396;
    bottom: 13px;
    color: #fff;
    display: inline;
    margin: 0 4px;
    padding: 0;
    position: relative;
}

#menuList #active a {
    background-color: #396;
    border-bottom: none;
    border-left: 1px solid #063;
    border-right: 1px solid #063;
    border-top: 1px solid #063;
    bottom: 0;
    color: #fff;
    cursor: text;
    margin: 0;
    padding: 2px 7px 0 7px;
    position: relative;
    right: 0;
}
The second menu shows off some of what you can do with a
little CSS and an XHTML list. The trick here is to move all of the
<li> elements up from the
baseline, which we achieved with these two rules: position: relative; and bottom: .75em;. We then offset the
<a> elements from this
<li> base to create the
shadow effect using the right and
bottom rules on #menuList li a.
Menu #3 is styled with the following CSS rules:[6]
#menuList {
    background-color: #396;
    border-bottom: 1px solid #063;
    border-top: 1px solid #063;
    color: #fff;
    list-style-type: none;
    margin-left: 0;
    padding: .3em 0;
    text-align: center;
}

#menuList li {
    border-top: 1px solid #ccc;
    display: inline;
    margin: 0;
}

#menuList li a {
    background-color: #ada;
    border-left: .5em solid #9b9;
    color: #000;
    padding: .1em .5em .1em .75em;
    text-decoration: none;
}

#menuList li a:hover {
    background-color: #0c0;
    color: #fff;
    border-color: #fff;
}
Like menu #1, this menu also has a simple design. We create
the effect of having almost a pseudoindicator on each menu item via
the simple use of a border: border-left:
.5em solid #9b9;. The rest of the changes needed for
styling this menu concern changing background colors like the other
menu bars.
Tip
The good thing about creating a menu bar using CSS is that it will degrade nicely into a simple list of links for browsers that cannot handle the CSS—screen readers, Lynx, and so on. This is important from an accessibility point of view, and is something developers should strive for.
Menu #3 could (arguably) be more of a navigation bar with buttons, rather than a simple menu navigation bar. The variety of effects available to implement with CSS makes it hard to distinguish between a menu and a navigation bar, as you will see later in this chapter.
Navigation bars with buttons are similar to the simple navigation bars we discussed in the preceding section. The main difference is in the look of the individual navigation elements, or links. Buttons are not flat to the navigation bar. Instead, they will appear to be raised off of or sunk into the navigation bar. When CSS is not used, you can instead employ the method of using images that look like buttons.
You can use a single image to represent all of the buttons in your application by adding text on top of the image as part of the XHTML, or you can use a different image to represent each function in the application. Figure 7-2 shows examples of different types of button and image navigation bars. The first navigation bar shows all the images used as buttons for a good bit of functionality. The second navigation bar shows image buttons we are all familiar with—a browser’s navigation (in this case, Firefox). The third navigation bar shows some of the button navigation in Hotmail, which adds images as part of the buttons.

The simplest way to create buttons and not actually use the
<input> element with
type equal to button is to put stylized borders around
the element that will provide the link. Normally, the easiest
element to use is the <a>
element, because you already have the navigation built into it. In
other words, you do not have to use a JavaScript technique to
navigate to the button’s destination.
For example, look at the following CSS rules:
#menuList li a {
    background-color: #4a7;
    border: 2px solid;
    border-color: #cec #464 #575 #dfd;
    color: #fff;
    padding: .1em .5em;
    text-decoration: none;
}

#menuList li a:hover {
    background-color: #396;
    color: #fff;
    border-color: #575 #dfd #cec #464;
}
Figure 7-3 shows
what these CSS rules would produce on an <a> element.

Warning
Internet Explorer does not natively support :hover on any element other than
<a>. It is a World Wide
Web Consortium (W3C) standard that says that the :hover pseudoclass should be available to
all XHTML elements, and :hover does work appropriately in all
other modern browsers.
The trick is in the colors used for the button’s four
borders. The desired effect is to create a beveled edge for the
button. It would be just as easy to use the outset and inset values on a border-style rule. If I had done that,
however, I would have no control over how the browser rendered the
bevels. Internet Explorer, Mozilla, and other browsers render the
inset and outset borders in different ways. This,
of course, comes down to personal preferences. The following CSS
may suit a developer:
#menuList li a {
    background-color: #4a7;
    border-style: outset;
    color: #fff;
    padding: .1em .5em;
    text-decoration: none;
}

#menuList li a:hover {
    background-color: #396;
    color: #fff;
    border-style: inset;
}
Figure 7-4 shows a final working navigation bar with buttons. This navigation bar uses the same XHTML list as the previous examples, and the following CSS rules:
#menuList {
    background-color: #396;
    color: #fff;
    list-style-type: none;
    margin: 0;
    padding: .3em 0;
    text-align: center;
}

#menuList li {
    display: inline;
    padding: 0 .5em;
}

#menuList li a {
    background-color: #4a7;
    border: 2px solid;
    border-color: #cec #464 #575 #dfd;
    color: #fff;
    padding: .1em .5em;
    text-decoration: none;
}

#menuList li a:hover {
    background-color: #396;
    color: #fff;
    border-color: #575 #dfd #cec #464;
}For a final touch to our CSS buttons, we will add images to them to better represent their functionality. Figure 7-5 shows what one of these buttons looks like.

We will build this button using the following CSS rule:
#menuList li a {
    background: no-repeat 3px 4px url('save.png'),
    background-color: #4a7;
    border: 2px solid;
    border-color: #cec #464 #575 #dfd;
    color: #fff;
    padding: .1em .5em .15em 1.5em;
    text-decoration: none;
}
The addition is background:
no-repeat 3px 4px url(save.png);. In addition, we
increased the padding of the
<a> element to
accommodate the image. All we need to do now is create a small
image for each button on the navigation bar, and add the
corresponding CSS. To do this, we need to give each button a
unique id attribute to which to
attach the proper image, as the following code illustrates:
#menuList li a {
    background-color: #4a7;
    border: 2px solid;
    border-color: #cec #464 #575 #dfd;
    color: #fff;
    padding: .1em .5em .15em 1.5em;
    text-decoration: none;
}

#menuList li a#save {
    background: no-repeat 3px 4px url('save.png'),
}

#menuList li a#saveAll {
    background: no-repeat 3px 4px url('saveall.png'),
}

#menuList li a#cancel {
    background: no-repeat 3px 4px url('cancel.png'),
}What if, instead of using CSS buttons, you wanted to have images represent your navigation bar’s buttons? Putting on an image is easy, but how do you make it change when the mouse moves over it to indicate to the user that the button is pressed?
The old way to do this was to use JavaScript to change the
image when certain MouseEvents
occur. Example 7-1
shows the JavaScript needed to accomplish this.
Example 7-1. rollover.js: JavaScript to handle image rollovers
/**
 * Example 7-1, rollover.js: JavaScript to handle image rollovers.
 */

/* Preload the images for a faster rollover */
if (document.images) {
    /* This represents the save image when active */
    var saveImg_on = new Image( );
    saveImg_on.src = 'saveImg_on.png';

    /* This represents the save image when inactive */
    var saveImg_off = new Image( );
    saveImg_off.src = 'saveImg_off.png';
}

/**
 * This function, turnImageOn, is called when there is a mouseover event on the
 * affected element and sets the /src/ attribute to the "on" image.
 *
 * @param {String} p_id The id attribute for the affected image.
 */
function turnImageOn(p_id) {
    document.getElementById(p_id).src = eval(p_id + '_on.src'),
}

/**
 * This function, turnImageOff, is called when there is a mouseout event on the
 * affected element and sets the /src/ attribute to the "off" image.
 *
 * @param {String} p_id The id attribute for the affected image.
 */
function turnImageOff(p_id) {
    document.getElementById(p_id).src = eval(p_id + '_off.src'),
}
The JavaScript function turnImageOn( ) is called on all mouseover events attached to an image
button to change the image. The function turnImageOff( ) is called on all
mouseout events attached to the
image to return the button to the original image. All we need now
are images named with the _on
and _off extensions for the
JavaScript to work. Here is an example:
<div id="navigationMenu">
    <ul id="menuList">
        <li>
            <a href="save/" accesskey="S" hreflang="en" tabindex="1"
                    onmouseover="turnImageOn('saveImg'),"
                    onmouseout="turnImageOff('saveImg'),">
                <img id="saveImg" src="saveImg_off.png" alt="Save" title="Save" />
            </a>
        </li><li>
            <a href="saveall/" accesskey="A" hreflang="en" tabindex="2"
                    onmouseover="turnImageOn('saveAllImg'),"
                    onmouseout="turnImageOff('saveAllImg'),">
                <img id="saveAllImg" src="saveAllImg_off.png" alt="Save All"
                    title="Save All" />
            </a>
        </li><li>
            <a href="cancel/" accesskey="C" hreflang="en" tabindex="3"
                    onmouseover="turnImageOn('cancelImg'),"
                    onmouseout="turnImageOff('cancelImg'),">
                <img id="cancelImg" src="cancelImg_off.png" alt="Cancel"
                    title="Cancel" />
            </a>
        </li>
    </ul>
</div>
If JavaScript were turned off in the browser, the image buttons would simply not change on mouse movements, and the image link would take them to the destination.
By using CSS, however, you can still change the images for browsers that do not have scripting capabilities. The CSS for this technique is:
a div#saveImg {
    background: no-repeat url('saveImg_off.png'),
    height: 20px;
    width: 50px;
}

a div#saveImg:hover {
    background: no-repeat url('saveImg_on.png'),
}

a div#saveAllImg {
    background: no-repeat url('saveAllImg_off.png'),
    height: 20px;
    width: 80px;
}

a div#saveAllImg:hover {
    background: no-repeat url('saveAllImg_on.png'),
}

a div#cancelImg {
    background: no-repeat url('cancelImg_off.png'),
    height: 20px;
    width: 65px;
}

a div#cancelImg:hover {
    background: no-repeat url('cancelImg_on.png'),
}
The CSS rules apply to the following XHTML:
<div id="navigationMenu">
<ul id="menuList">
<li>
<a href="save/" accesskey="S" hreflang="en" tabindex="1">
<div id="saveImg"> </div>
</a>
</li><li>
<a href="saveall/" accesskey="A" hreflang="en" tabindex="2">
<div id="saveAllImg"> </div>
</a>
</li><li>
<a href="cancel/" accesskey="C" hreflang="en" tabindex="3">
<div id="cancelImg"> </div>
</a>
</li>
</ul>
</div>As mentioned earlier, Internet Explorer does not natively
support :hover on elements
other than <a>. For this
reason, instead of using the CSS that will work for all other
browsers, we must use this:
a div#saveDiv {
    height: 20px;
    width: 50px;
}

a#saveImg {
    background: no-repeat url('saveImg_off.png'),
}

a#saveImg:hover {
    background: no-repeat url('saveImg_on.png'),
}

a div#saveAllDiv {
    height: 20px;
    width: 80px;
}

a#saveAllImg {
    background: no-repeat url('saveAllImg_off.png'),
}

a#saveAllImg:hover {
    background: no-repeat url('saveAllImg_on.png'),
}
a div#cancelDiv {
    height: 20px;
    width: 65px;
}

a#cancelImg {
    background: no-repeat url('cancelImg_off.png'),
}

a#cancelImg:hover {
    background: no-repeat url('cancelImg_on.png'),
}
The workaround is to change the <a> element to suit our needs as
an image. Specifically, it needs a <div> element to hold the size of
the image that will be the <a> element’s background-image. Then :hover will work correctly and we’ll get
the desired effect. Of course, our XHTML must change as
well:
<div id="navigationMenu">
<ul id="menuList">
<li>
<a id="saveImg" href="save/" accesskey="S" hreflang="en" tabindex="1">
<div id="saveDiv"> </div>
</a>
</li><li>
<a id="saveAllImg" href="saveall/" accesskey="A" hreflang="en"
tabindex="2">
<div id="saveAllDiv"> </div>
</a>
</li><li>
<a id="cancelImg" href="cancel/" accesskey="C" hreflang="en"
tabindex="3">
<div id="cancelDiv"> </div>
</a>
</li>
</ul>
</div>You can read about a different workaround for this Internet
Explorer issue in Peter Nederlof’s excellent article, “be gone
evil scriplets!” (http://www.xs4all.nl/~peterned/hovercraft.html).
This article discusses a hack to get Internet Explorer to behave
as other browsers do with :hover.
It’s easy to create drop-down menus with a combination of CSS and JavaScript. But for this application, we want a drop-down menu that we can create with only CSS. This kind of menu would be faster, as it would require no parsing of scripting code, and it would also degrade the way we want it to.
First, let’s make our menu a little more complicated, because
a drop-down menu should handle nested menus without a hitch, right?
The new menu will be using id and
class identifiers different from
the other menus to enable the drop-down part of the menu:
<div id="navigationMenu">
<ul id="topMenu">
<li class="sub">
<a href="file/" accesskey="F" hreflang="en" tabindex="1">File</a>
<ul>
<li><a href="open/" hreflang="en" tabindex="2">Open</a></li>
<li><a href="save/" hreflang="en" tabindex="3">Save</a></li>
<li><a href="saveall/" hreflang="en" tabindex="4">Save All</a></li>
<li class="sub"><a href="export/" hreflang="en" tabindex="5">
<span class="rightArrow">▶</span>Export</a>
<ul>
<li>
<a href="text/" hreflang="en" tabindex="6">
Export as Text
</a>
</li><li>
<a href="html/" hreflang="en" tabindex="7">
Export as HTML
</a>
</li>
</ul>
</li>
<li>
<a href="http://www.google.com/" accesskey="X" hreflang="en"
tabindex="8">
Exit
</a>
</li>
</ul>
</li>
<li class="sub">
<a href="edit/" accesskey="E" hreflang="en" tabindex="9">Edit</a>
<ul>
<li><a href="copy/" tabindex="10">Copy</a></li>
<li><a href="cut/" tabindex="11">Cut</a></li>
<li><a href="paste/" tabindex="12">Paste</a></li>
</ul>
</li>
<li class="sub">
<a href="file/" accesskey="N" hreflang="en" tabindex="13">
Find
</a>
</li>
</ul>
</div>The menu still uses XHTML lists, which will degrade nicely in browsers that cannot support the CSS rules. Now we need our CSS for the drop-down menu. Example 7-2 shows the CSS required to give us a working drop-down menu.
Example 7-2. A CSS solution to drop-down menus
/*
 * Example 7-2, A CSS solution to drop-down menus
*/

ul#topMenu {
    background-color: #bbb;
    border: 2px solid;
    border-color: #ede #777 #888 #ddd;
    color: #000;
    font: 1em Arial, sans-serif;
    list-style-type: none;
    padding: 6px;
    text-align: left;
}

ul#topMenu li {
    display: inline;
    padding-right: 1em;
    position: relative;
}

ul#topMenu li a {
    background-color: transparent;
    border-color: 1px solid #bbb;
    color: #000;
    cursor: default;
    left: 0px;
    margin: 1px;
    padding: 2px 2px;
    position: relative;
    text-decoration: none;
    top: 0px;
    z-index: 1000000;
}

ul#topMenu li a:hover {
    background-color: #bbb;
    border-color: #888 #ddd #ede #777;
    color: #000;
    left: 0px;
    top: 0px;
}

ul#topMenu li:hover > ul {
    background-color: #bbb;
    border: 2px solid;
    border-color: #ede #777 #888 #ddd;
    color: #000;
    display: block;
    left: 1em;
    padding: 2px;
    position: absolute;
    width: 8em;
    z-index: 1000001;
}

ul#topMenu ul > li {
    display: block;
    margin: 0;
    padding: 0;
}

ul#topMenu ul > li a {
    border: none;
    display: block;
    text-decoration: none;
}

ul#topMenu ul > li a:hover {
    background-color: #33a;
    color: #fff;
}

ul#topMenu li:hover > ul li:hover > ul {
    left: 100%;
    top: 0;
    z-index: 1000002;
}

ul#topMenu ul {
    display: none;
}
.rightArrow {
    float: right;
}
Now it’s time for the caveats. Yes, there are always caveats in the world of standards compliance. Example 7-2 will not work in Internet Explorer because Internet Explorer does not support the CSS2 rules that are used to make this work. The best solution for getting drop-down menu support that is fully cross-browser-compliant—other than lobbying the world to drop Internet Explorer—is to use CSS in combination with JavaScript.
XHTML lists are the best method for building a menu structure simply because browsers that do not support the CSS and JavaScript thrown at them can still use the underlying structure to present navigation to the user. We will use this principle throughout the rest of this book to make Ajax application controls, widgets, content, and so on a little bit more accessible. Example 7-3 shows the XHTML we can use to make the menu structure that we will enhance through CSS and JavaScript.
Example 7-3. filemenu.html: The basic structure for a file menu
<!DOCTYPE html PUBLIC "-//W3C//DTD XHTML 1.1//EN"
"http://www.w3.org/TR/xhtml11/DTD/xhtml11.dtd">
<html xmlns="http://www.w3.org/1999/xhtml" xml:lang="en">
<head>
<title>
Example 7-3, filemenu.html: The basic structure for a file menu
</title>
<meta http-equiv="content-type" content="text/html; charset=utf-8" />
<meta name="author" content="Anthony T. Holdener, III (ath3)" />
<meta http-equiv="imagetoolbar" content="no" />
<style type="text/css">
body {
background-color: #fff;
color: #000;
font: 1em Georgia, serif;
font-size: 12px;
margin: 0;
padding: 0;
}
</style>
<link rel="stylesheet" type="text/css" media="screen" href="filemenu.css" />
<!-- The Prototype library must be the first script to load, since it is
used by the other scripts to be loaded -->
<script type="text/javascript" src="prototype.js"> </script>
<script type="text/javascript" src="browser.js"> </script>
<script type="text/javascript" src="filemenu.js"> </script>
</head>
<body>
<div id="bodyContent">
<div id="fileMenu">
<ul id="navMenu" class="fileMenuBar">
<li>
<a href="file/" class="fileMenuButton" accesskey="F"
hreflang="en" tabindex="1"
onclick="return menu.buttonClick(event, 'fileSub'),"
onmouseover="menu.buttonMouseover(event,
'fileSub'),">
File
</a>
<ul id="fileSub" class="fileMenuChild"
onmouseover="menu.fileMenuMouseover(event)">
<li>
<a href="file/open/" class="fileMenuItem"
hreflang="en" tabindex="2"
onmouseover=
"menu.fileMenuItemMouseover(event);">
Open
</a>
</li>
<li><div class="fileMenuItemSep"></div></li>
<li>
<a href="file/save/" class="fileMenuItem"
hreflang="en" tabindex="3"
onmouseover=
"menu.fileMenuItemMouseover(event);">
Save
</a>
</li><li>
<a href="file/saveall/" class="fileMenuItem"
hreflang="en" tabindex="4"
onmouseover=
"menu.fileMenuItemMouseover(event);">
Save All
</a>
</li>
<li><div class="fileMenuItemSep"></div></li>
<li>
<a href="file/export/" class="fileMenuItem"
hreflang="en" tabindex="5"
onclick="return false;"
onmouseover=
"menu.fileMenuItemMouseover(event,
'exportSubSub'),">
<span class="fileMenuItemText">Export</span>
<span class="fileMenuItemArrow">▶</span>
</a>
<ul id="exportSubSub" class="fileMenuChild">
<li>
<a href="file/export/text/"
class="fileMenuItem" hreflang="en"
tabindex="6"
onmouseover=
"menu.fileMenuItemMouseover(event);"
>
Export as Text
</a>
</li><li>
<a href="file/export/html/"
class="fileMenuItem" hreflang="en"
tabindex="7"
onmouseover=
"menu.fileMenuItemMouseover(event);"
>
Export as HTML
</a>
</li>
</ul>
</li>
<li><div class="fileMenuItemSep"></div></li>
<li>
<a href="http://www.google.com/"
class="fileMenuItem" hreflang="en"
tabindex="8"
onmouseover=
"menu.fileMenuItemMouseover(event);">
Exit
</a>
</li>
</ul>
</li><li>
<a href="edit/" class="fileMenuButton" accesskey="E"
hreflang="en" tabindex="9"
onclick="return menu.buttonClick(event,
'editSub')," onmouseover=
"menu.buttonMouseover(event, 'editSub'),">
Edit
</a>
<ul id="editSub" class="fileMenuChild"
onmouseover="menu.fileMenuMouseover(event)">
<li>
<a href="edit/copy/" class="fileMenuItem"
hreflang="en" tabindex="10"
onmouseover=
"menu.fileMenuItemMouseover(event);">
Copy
</a>
</li><li>
<a href="edit/cut/" class="fileMenuItem"
hreflang="en" tabindex="11"
onmouseover=
"menu.fileMenuItemMouseover(event);">
Cut
</a>
</li><li>
<a href="edit/paste/" class="fileMenuItem"
hreflang="en" tabindex="12"
onmouseover=
"menu.fileMenuItemMouseover(event);">
Paste
</a>
</li>
</ul>
</li><li>
<a href="find/" class="fileMenuButton" accesskey="N"
hreflang="en" tabindex="13">
Find
</a>
</li>
</ul>
</div>
<h1>This is a File Menu example</h1>
</div>
</body>
</html>This structure is similar to the drop-down menu example from
the preceding section. The differences are in the calling of methods
from the menu object on the
click, mouseover, and mouseout MouseEvents. We’ll discuss these
methods in more detail in a minute, but first we must style the menu
to look like a file menu instead of nested XHTML lists.
Example 7-4 provides the CSS rules for the file menu. These rules attempt to make a file menu that looks like the one you find in Windows applications. It is easy enough to change these rules to match your style needs.
Example 7-4. filemenu.css: The CSS styles for a Windows-like file menu
/*
 * Example 7-4, filemenu.css: The CSS styles for a Windows-like file menu
*/

/*
 * This is the container for the menu itself, and it creates a little buffer space
 * under the menu to keep things from looking too crowded
 */
#fileMenu {
    padding-bottom: 1em;
}

/*
 * The file menu should have a standard sans-serif font for itself and all of
 * its children
 */
ul.filemenuBar, ul.filemenuBar a.fileMenuButton, ul.fileMenuChild,
        ul.fileMenuChild a.fileMenuItem {
    font: 1em Arial, sans-serif;
}

/*
 * This is the menu bar itself, with the colors and borders attempting to replicate
 * the theme from the default Windows environment
 */
ul.fileMenuBar {
    background-color: #bbb;
    border: 2px solid;
    border-color: #ede #777 #888 #ddd;
    color: #000;
    list-style-type: none;
    margin: 0;
    padding: 6px;
    text-align: left;
}

ul.fileMenuBar li {
    display: inline;
    padding-right: 1em;
}

ul.fileMenuBar a.fileMenuButton {
    background-color: transparent;
    border: 1px solid #bbb;
    color: #000;
    cursor: default;
    left: 0px;
    margin: 1px;
    padding: 2px 2px;
    position: relative;
    text-decoration: none;
    top: 0px;
    z-index: 1000000;
}

/* Highlight the choice the mouse is over */
ul.fileMenuBar a.fileMenuButton:hover {
    background-color: transparent;
    border-color: #ede #777 #888 #ddd;
    color: #000;
}

/*
 * Indent any choice that is selected or that the mouse is over if another
 * choice is selected
 */
ul.fileMenuBar a.fileMenuButtonActive, ul.fileMenuBar a.fileMenuButtonActive:hover {
    background-color: #bbb;
    border-color: #888 #ddd #ede #777;
    color: #000;
    left: 0px;
    top: 0px;
}

/* Define all of the children of the menu bar */
ul.fileMenuChild {
    background-color: #bbb;
    border: 2px solid;
    border-color: #ede #777 #888 #ddd;
    color: #000;
    display: none;
    left: 0px;
    padding: 1px;
    position: absolute;
    top: 6px;
    z-index: 1000001;
}

/*
 * Here is the one hack that was necessary simply because IE does not render
 * the drop-down menus with enough space, so a default width is set here.
 * This number can be anything the developer wants/needs for a width that will
 * accommodate all of the text lengths in the drop downs.
 */
ul.fileMenuChild li {
    display: block;
    padding: 0;
    width: 10em;
}

/*
 * IE will ignore this rule because it does not recognize the > in the rule.
 * This sets the width back to an auto value for other browsers.
 */
ul.fileMenuChild > li {
    width: auto;
}

ul.fileMenuChild a.fileMenuItem {
    color: #000;
    cursor: default;
    display: block;
    padding: 1px 1em;
    text-decoration: none;
    white-space: nowrap;
}

/* Highlight the choices in the child menus */
ul.fileMenuChild a.fileMenuItem:hover, ul.fileMenuChild a.fileMenuItemHighlight {
    background-color: #000;
    color: #fff;
}

ul.fileMenuChild a.fileMenuItem span.fileMenuItemArrow {
    margin-right: -0.75em;
}

/*
 * Create the separator bars in the menus.  Once again, IE does not render this
 * quite right, as it adds more margin underneath the bar than it should.
 */
ul.fileMenuChild div.fileMenuItemSeperator {
    border-bottom: 1px solid #ddd;
    border-top: 1px solid #777;
    margin: 2px;
}
There is nothing extraordinary about any of the CSS rules in the example, and this CSS should be 100 percent cross-browser-compliant. (I tried to avoid CSS2 rules whenever I could, but sometimes it is just necessary because of Internet Explorer.)
Warning
CSS2 is not implemented as completely in Internet Explorer as it is in other browsers. Because Internet Explorer currently has the largest market share among the available browsers, using too much of this standard could be problematic.
This file menu example uses the Prototype library as its base, as you saw in the script elements from Example 7-3. After the Prototype library is loaded, a file that contains code for browser detection is loaded. It is shown in Example 7-5.
Example 7-5. browser.js: Code for browser detection
/**
 * @fileoverview Example 7-5, browser.js: Code for browser detection
 *
 * This file, browser.js, contains the Browser object, which can be used for browser
 * detecting on the client.
 */

/**
 * This object, Browser, allows the developer to check the user's client against
 * specific browser clients.  Currently, the following checks are supported:
 *    - isIE (is the browser an Internet Explorer browser)
 *    - isMoz (is the browser a Mozilla-based browser)
 *    - isOpera (is the browser an Opera browser)
 *    - isSafari (is the browser a Safari browser)
 *    - isOther (is the browser an unknown browser)
 */
var Browser = {
    /**
     * This variable stores the browser's agent.
     * @private
     */
    _agent: navigator.userAgent.toLowerCase( ),
    /**
     * This variable stores the browser's version/
     * @private
     */
    _version: navigator.appVersion.toLowerCase( ),
    /**
     * This variable stores whether the browser is an Internet Explorer browser
     * or not.
     */
    isIE: false,
    /**
     * This variable stores whether the browser is a Mozilla-based browser or not.
     */
    isMoz: false,
    /**
     * This variable stores whether the browser is an Opera browser or not.
     */
    isOpera: false,
    /**
     * This variable stores whether the browser is a Safari browser or not.
     */
    isSafari: false,
    /**
     * This variable stores whether the browser is some unknown browser or not.
     */
    isOther: false,
    /**
     * This method, initialize, sets the boolean members of the class to their
     * appropriate values based on the values of the /_agent/ and /_version/ members.
     *
     * @member Browser
     * @constructor
     */
    initialize: function( ) {
        this.isOpera = (this._agent.indexOf('opera') != -1);
        this.isIE = ((this._agent.indexOf('mac') != -1) &&
            (this._version.indexOf('msie') != -1));
        this.isOther = (this._agent.indexOf('konqueror') != -1);
        this.isSafari = ((this._agent.indexOf('safari') != -1) &&
            (this_.agent.indexOf('mac') != -1));
        this.isIE = ((this._version.indexOf('msie') != -1) && !this.isOpera &&
            !(this._agent.indexOf('mac') != -1) && !this.isOther &&
            !this.isSafari);
        this.isMoz = (!this.isOther && !this.isSafari && navigator.product &&
            (navigator.product.toLowerCase( ) == 'gecko'));
        this.isOther = (!this.isIE && !this.isMoz && !this.isOpera &&
            !this.isSafari);
    }
};

/* use Prototype's cross-browser event handling methods for ease of use. */
try {
    /*
     * Call the initialize method of the Browser object when the load event
     * fires in the document
     */
    Event.observe(document, 'load', Browser.initialize, false);
} catch (ex) {}
Finally, there is the JavaScript for all of the menu manipulation, shown in Example 7-6.
Example 7-6. filemenu.js: Code for manipulating the file menu
/**
 * @fileoverview Example 7-6, filemenu.js: Code for manipulating the file menu
 *
 * This file, filemenu.js, contains the fileMenu object which is used to create
 * instances of a file menu on the page.
*/

/* Create a new class using Prototype's Class object */
var fileMenu = Class.create( );
/**
 * This object, fileMenu, creates the functionality for a file menu on the page.
 */
fileMenu.prototype = {
    /**
     * This member, _menu, holds the id of this file menu.
     * @private
     */
    _menu: null,
    /**
     * This member, _activeButton, holds the element that is currently active.
     * @private
     */
    _activeButton: null,
    /**
     * This method, initialize, is the constructor for the class.  Any members
     * that need to be initialized should be here.
     *
     * @member fileMenu
     * @constructor
     * @param {String} p_element The element that represents the file menu.
     */
    initialize: function(p_element) {
        /*
         * Currently unused, but nice to have for multiple instances of
         * the object
         */
        this._menu = p_element;
    },
    /**
     * This member, pageMousedown, is called on every mousedown event on the page
     * and determines if the menu should be reset based on where the user clicks on
     * the page.
     *
     * @member fileMenu
     * @param {Object} e The event that called the method.
     * @return Returns false so that no other event will be triggered.
     * @type Boolean
     * @see #getContainerWith
     * @see #resetButton
     */
    pageMousedown: function(e) {
        var target = null;

        /* Is the file menu active? */
        if (!this._activeButton)
            return;
        /* Is the client Internet Explorer? */
        if (Browser.isIE)
            target = window.event.srcElement;
        else
            target = (e.target.tagName ? e.target : e.target.parentNode);
        /* Is the event target the active button? */
        if (this._activeButton == target)
            return;
        /* Is the target not part of the file menu? */
        if (!this.getContainerWith(target, 'UL', 'fileMenuChild')) {
            this.resetButton(this._activeButton);
            this._activeButton = null;
        }
        return (false);
    },
    /**
     * This method, buttonClick, is called when the user clicks on one of the
     * buttons that are on the main menu bar.  It determines if where the user
     * clicked on the menu bar is the active button, or if it is a different button
     * and another button's drop-down menus may need to be cleaned up and reset.
     *
     * @member fileMenu
     * @param {Object} e The event that called the method.
     * @param {String} p_fileMenuId The id of the file menu that is being used.
     * @return Returns false so that no other event will be triggered.
     * @type Boolean
     * @see #fileMenuInit
     * @see #resetButton
     * @see #depressButton
     * @see #buttonMouseover
     */
    buttonClick: function(e, p_fileMenuId) {
        var button = null;

        /* Is the client Internet Explorer? */
        if (Browser.isIE)
            button = window.event.srcElement;
        else
            button = e.currentTarget;
        /* Blur the focus of the button here to remove the annoying outline */
        button.blur( );
        /* Is this button part of the file menu already? */
        if (!button.fileMenu) {
            button.fileMenu = $(p_fileMenuId);
            /* Is this button already initialized? */
            if (!button.fileMenu.isInitialized)
                this.fileMenuInit(button.fileMenu);
        }
        /* Is there an active button already? */
        if (this._activeButton)
            this.resetButton(this._activeButton);
        /* Is the button already activated? */
        if (button != this._activeButton) {
            this.depressButton(button);
            this._activeButton = button;
        } else
            this._activeButton = null;
        return (false);
    },
    /**
     * This member, buttonMouseover, is called on a mouseover event on a button on
     * the main menu bar of the file menu.  If a different button was already active,
     * then activate the current one instead.
     *
     * @member fileMenu
     * @param {Object} e The event that called the method.
     * @param {String} p_fileMenuId The id of the file menu that is being used.
     * @see #buttonClick
     */
    buttonMouseover: function(e, p_fileMenuId) {
        var button = null;

        /* Is the client Internet Explorer? */
        if (Browser.isIE)
            button = window.event.srcElement;
        else
            button = e.currentTarget;
        /* Should this button be activated? */
        if (this._activeButton && this._activeButton != button)
            this.buttonClick(e, p_fileMenuId);
    },
    /**
     * This method, depressButton, is called on a buttonClick when a new drop-down
     * menu needs to be activated and positioned.
     *
     * @member fileMenu
     * @param {Object} p_button The button that has been pressed.
     * @see #getPageOffsetLeft
     * @see #getPageOffsetTop
     * @see Element#addClassName
     * @seee Element#setStyle
     * @see #buttonClick
     */
    depressButton: function(p_button) {
        var x, y;

        /*
         * Make the button look depressed (no, not sad) and show the drop down
         * associated with it
         */
        $(p_button).addClassName('fileMenuButtonActive'),
        /* Position any associated drop down under the button and display it */
        x = this.getPageOffsetLeft(p_button);
        y = this.getPageOffsetTop(p_button) + p_button.offsetHeight;
        /* Is the client Internet Explorer? */
        if (Browser.isIE) {
            x −= p_button.offsetWidth;
            y += p_button.offsetParent.clientTop;
        }
        $(p_button).setStyle({
            left: x + 'px',
            top: y + 'px',
            display: 'block'
        });
    },
    /**
     * This method, resetButton, does what it says; it resets the button, closing
     * all submenus.
     *
     * @member fileMenu
     * @param {Object} p_button The button that has been pressed.
     * @see #closeSubFileMenu
     * @see Element#removeClassName
     * @see Element#setStyle
     * @see #pageMousedown
     * @see #buttonClick
     */
    resetButton: function(p_button) {
        $(p_button).removeClassName('fileMenuButtonActive'),
        /* Does the button have a file menu? */
        if (p_button.fileMenu) {
            this.closeSubFileMenu(p_button.fileMenu);
            $(p_button).setStyle({ display: 'none' });
        }
    },
    /**
     * This method, fileMenuMouseover, is called on a mouseover MouseEvent over any
     * of the drop-down menus in the file menu bar.  Its main purpose is to close
     * submenus when they should no longer be active.
     *
     * @member fileMenu
     * @param {Object} e The event that called the method.
     * @see #getContainerWith
     * @see #closeSubFileMenu
     * @see Element#hasClassName
     */
    fileMenuMouseover: function(e) {
        var fileMenu;

        /* Is the client Internet Explorer? */
        if (Browser.isIE)
            fileMenu = this.getContainerWith(window.event.srcElement, 'UL',
                'fileMenuChild'),
        else
            fileMenu = e.currentTarget;
        /* Does this menu have submenus? */
        if (fileMenu.activeItem &&
                ($(fileMenu.activeItem).hasClassName('fileMenuButton') &&
                $(fileMenu.parentNode.firstChild).hasClassName('fileMenuItem')))
            this.closeSubFileMenu(fileMenu);
    },
    /**
     * This method, fileMenuItemMouseover, is called when there is a mouseover event
     * on one of the menu items that has a submenu attached to it.  The method
     * calculates the position where the submenu should be placed in relation to the
     * menu item of the event.
     *
     * @member fileMenu
     * @param {Object} e The event that called the method.
     * @param {String} p_fileMenuId The id of the file menu that is being used.
     * @see #getContainerWith
     * @see #closeSubFileMenu
     * @see #fileMenuInit
     * @see #getPageOffsetLeft
     * @see #getPageOffsetTop
     * @see Element#hasClassName
     * @see Element#addClassName
     * @see Element#setStyle
     */
    fileMenuItemMouseover: function(e, p_fileMenuId) {
        var item, fileMenu, x, y;

        /* Is the client Internet Explorer? */
        if (Browser.isIE)
            item = this.getContainerWith(window.event.srcElement, 'A',
                'fileMenuItem'),
        else
            item = e.currentTarget;
        fileMenu = this.getContainerWith(item, 'UL', 'fileMenuChild'),
        /* Does the file menu have an active item? */
        if (fileMenu.activeItem)
            this.closeSubFileMenu(p_fileMenuId);
        /* Is there a file menu id? */
        if (p_fileMenuId) {
            fileMenu.activeItem = item;
            /* Does the class name already exist? */
            if (!$(item).hasClassName('fileMenuItemHighlight'))
                $(item).addClassName('fileMenuItemHighlight'),
            /* Has the sub file menu been attached already? */
            if (item.subFileMenu == null) {
                item.subFileMenu = $(p_fileMenuId);
                /* Has the sub file menu already been initialized? */
                if (!item.subFileMenu.isInitialized)
                    this.fileMenuInit(item.subFileMenu);
            }
            /* Calculate the x and y positions where the submenu should be placed */
            x = this.getPageOffsetLeft(item) + item.offsetWidth;
            y = this.getPageOffsetTop(item);
            /* Is the client Opera? */
            if (Browser.isOpera) {
                x = item.offsetWidth;
                y = item.offsetTop;
            }
            /* Is the client Internet Explorer? */
            if (Browser.isIE) {
                x -= (this._activeButton.offsetWidth * 2);
                y -= this._activeButton.offsetHeight;
            }

            var maxX, maxY;

            /* Is the client Internet Explorer? */
            if (Browser.isIE) {
                maxX = Math.max(document.documentElement.scrollLeft,
                    document.body.scrollLeft) +
                    (document.documentElement.clientWidth != 0 ?
                    document.documentElement.clientWidth :
                    document.body.clientWidth);
                maxY = Math.max(document.documentElement.scrollTop,
                    document.body.scrollTop) +
                   (document.documentElement.clientHeight != 0 ?
                    document.documentElement.clientHeight :
                    document.body.clientHeight);
            }
            /* Is the client Opera? */
            if (Browser.isOpera) {
                maxX = document.documentElement.scrollLeft + window.innerWidth;
                maxY = document.documentElement.scrollTop  + window.innerHeight;
            }
            /* Is the client Mozilla? */
            if (Browser.isMoz) {
                maxX = window.scrollX + window.innerWidth;
                maxY = window.scrollY + window.innerHeight;
            }
            maxX -= item.subFileMenu.offsetWidth;
            maxY -= item.subFileMenu.offsetHeight;
            /* Is the x coordinate bigger than the maximum it can be? */
            if (x > maxX)
                x = Math.max(0, x - item.offsetWidth -
                    item.subFileMenu.offsetWidth + (menu.offsetWidth -
                    item.offsetWidth));
            y = Math.max(0, Math.min(y, maxY));
            /* Show the submenu */
            $(item).setStyle({
                left: x + 'px',
                top: y + 'px',
                display: 'block'
            });
            /* Is the client Internet Explorer? */
            if (Browser.isIE)
                window.event.cancelBubble = true;
            else
                e.stopPropagation( );
        }
    },
    /**
     * This method, closeSubFileMenu, hides the submenu from the user and then
     * turns off all references to the submenu and that it was active.
     *
     * @member fileMenu
     * @param {Object} p_fileMenu The file menu that is to be closed.
     * @see #resetButton
     * @see #fileMenuMouseover
     * @see #fileMenuItemMouseover
     */
    closeSubFileMenu: function(p_fileMenu) {
        /* Does the file menu not exist or is it not active? */
        if (!p_fileMenu || !p_fileMenu.activeItem)
            return;
        /* Does the file menu have an active sub file menu? */
        if (p_fileMenu.activeItem.subFileMenu) {
            this.closeSubFileMenu(p_fileMenu.activeItem.subFileMenu);
            $(p_fileMenu.activeItem.subFileMenu).setStyle({ display: none });
            p_fileMenu.activeItem.subFileMenu = null;
        }
        $(p_fileMenu.activeItem).removeClassName('fileMenuItemHighlight'),
        p_fileMenu.activeItem = null;
    },
    /**
     * This method, fileMenuInit, goes through a submenu and associates all of
     * the children to the menu as a part of the menu.  It also sets up the
     * offset sizes of the submenu for positioning of the menu.
     *
     * @member fileMenu
     * @param {Object} p_fileMenu The file menu that is to be closed.
     * @see Element#setStyle
     * @see Element#hasClassName
     * @see #buttonClick
     * @see #fileMenuItemMouseover
     */
    fileMenuInit: function(p_fileMenu) {
        var itemList, spanList, textElement, arrowElement, itemWidth, w, dw;

        /* Is the client Internet Explorer? */
        if (Browser.isIE) {
            $(p_fileMenu).setStyle({ lineHeight: '2.5ex' });
            spanList = p_fileMenu.getElementsByTagName('span'),
            /* Loop through the <span> elements */
            for (var i = 0, il = spanList.length; i < il; i++)
                /* Does the <span> element have the class name? */
                if ($(spanList[i]).hasClassName('fileMenuItemArrow')) {
                    $(spanList[i]).setStyle({ fontFamily: 'Webdings' });
                    spanList[i].firstChild.nodeValue = '4';
                }
        }
        itemList = p_fileMenu.getElementsByTagName('a'),
        /* Does the itemList have any <a> elements? */
        if (itemList.length > 0)
            itemWidth = itemList[0].offsetWidth;
        else
            return;
        /* Loop through the <a> elements */
        for (var i = 0, il = itemList.length; i < il; i++) {
                spanList = itemList[i].getElementsByTagName('span'),
                textElement  = null;
                arrowElement = null;
                /* Loop through the <span> elements */
                for (var j = 0, jl = spanList.length; j < jl; j++) {
                    /* Does the <span> element have the class name? */
                    if ($(spanList[j]).hasClassName('fileMenuItemText'))
                        textElement = spanList[j];
                    /* Does the <span> element have the class name? */
                    if ($(spanList[j]).hasClassName('fileMenuItemArrow'))
                        arrowElement = spanList[j];
                }
        }
        /* Do the /textElement/ and /arrowElement/ exist? */
        if (textElement && arrowElement) {
            $(textElement).setStyle({
                paddingRight: (itemWidth - (textElement.offsetWidth +
                    arrowElement.offsetWidth)) + 'px'
            });
            /* Is the client Opera? */
            if (Browser.isOpera)
                $(arrowElement).setStyle({ marginRight: '0' });
        }
        /* Is the client Internet Explorer? */
        if (Browser.isIE) {
            w = itemList[0].offsetWidth;
            $(itemList[0]).setStyle({ width: w + 'px' });
            dw = itemList[0].offsetWidth - w;
            w −= dw;
            $(itemList[0]).setStyle({ width: w + 'px' });
        }
        p_fileMenu.isInitialized = true;
    },
    /**
     * This method, getContainerWith, finds the element with a given tag and
     * class name and returns the discovered element or or null.
     *
     * @member fileMenu
     * @param {Object} p_element The element to check.
     * @param {String} p_tagname The tag name to look for.
     * @param {String} p_className The class name to look for.
     * @return Returns the discovered element, if found, or null.
     * @type Object
     * @see Element#hasClassName
     * @see #pageMousedown
     * @see #fileMenuMouseover
     * @see #fileMenuItemMouseover
     */
    getContainerWith: function(p_element, p_tagname, p_className) {
        /*  Traverse the element tree while there are elements */
        while (p_element) {
            /* Does the element have the correct tag name and class name? */
            if (p_element.tagName && p_element.tagName == p_tagname &&
                    $(p_element).hasClassName(p_className))
                return (p_element);
            p_element = p_element.parentNode;
        }
        return (p_element);
    },
    /**
     * This method, getPageOffsetLeft, returns the left offset of the element
     * in relation to the page.
     *
     * @member fileMenu
     * @param {Object} p_element The element to get the offset from.
     * @return Returns the left page offset of the element.
     * @type Integer
     * @see #getPageOffsetLeft
     * @see #depressButton
     * @see #fileMenuItemMouseover
     * @see #fileMenuItemMouseover
     */
    getPageOffsetLeft: function(p_element) {
        var x;

        x = p_element.offsetLeft;
        /* Is the client not Mozilla and does the element have a parent offset? */
        if (!Browser.isMoz && p_element.offsetParent)
            x += this.getPageOffsetLeft(p_element.offsetParent);
        return (x);
    },
    /**
     * This method, getPageOffsetTop, returns the top offset of the element in
     * relation to the page.
     *
     * @member fileMenu
     * @param {Object} p_element The element to get the offset from.
     * @return Returns the left page offset of the element.
     * @type Integer
     * @see #getPageOffsetLeft
     * @see #depressButton
     * @see #fileMenuItemMouseover
     * @see #fileMenuItemMouseover
     */
    getPageOffsetTop: function(p_element) {
        var y;

        y = p_element.offsetTop;
        /* Is the client not Mozilla and does the element have a parent offset? */
        if (!Browser.isMoz && p_element.offsetParent)
            y += this.getPageOffsetTop(p_element.offsetParent);
        return (y);
    }
};

/* Create a new instance of the fileMenu class (this calls fileMenu.initialize( )) */
var menu = new fileMenu('fileMenu'),

try {
    /*
     * Set an event listener on the document for all mousedown events and
     * have the system call the /pageMousedown( )/ method, binding it to the menu
     * object that was just created.  This allows for the creation of multiple
     * file menus, if there is ever a need.
     */
    Event.observe(document, 'mousedown', menu.pageMousedown.bind(menu), true);
} catch (ex) {}
I have checked the XHTML, CSS, and JavaScript for this file menu and they work with Opera 9.01+, Firefox 1.5+, and Internet Explorer 6+. Netscape Browser 8.1 has problems rendering submenus from the drop-down menus with the proper CSS rules applied to them. Figure 7-6 shows how this file menu would normally appear in the browser.

Creating a file menu that functions like those that most users are comfortable with in Windows applications is a good step toward providing a seamless transition from the desktop to Ajax web applications. But now we need some Ajax for the file menu, right? If this file menu was a bit more complicated, it would add some size to the page download, which adversely affects download times. Slowing down application speed is never a good thing.
A way to reduce this file size is to load only the main part
of the menu, and load the other parts of the menu when the user
clicks to activate them. Here is where we can use some Ajax. By
adding additional event listeners to the click MouseEvent, we can grab the
necessary drop-down and submenus that are requested. That way,
once they have been loaded the first time, there is no need to
load them again, providing the speed we want from our
application.
First, we need to alter the XHTML page, filemenu.html, like this:
<!DOCTYPE html PUBLIC "-//W3C//DTD XHTML 1.1//EN"
    "http://www.w3.org/TR/xhtml11/DTD/xhtml11.dtd">
<html xmlns="http://www.w3.org/1999/xhtml" xml:lang="en">
    <head>
        <title>Alteration offilemenu.html</title>
        <meta http-equiv="content-type" content="text/html; charset=utf-8" />
        <meta name="author" content="Anthony T. Holdener, III (ath3)" />
        <meta http-equiv="imagetoolbar" content="no" />
        <style type="text/css">
            body {
                background-color: #fff;
                color: #000;
                font: 1em Georgia, serif;
                font-size: 12px;
                margin: 0;
                padding: 0;
            }
        </style>
        <link rel="stylesheet" type="text/css" media="screen" href="filemenu.css" />
        <script type="text/javascript" src="prototype.js"> </script>
        <script type="text/javascript" src="browser.js"> </script>
        <script type="text/javascript" src="filemenu.js"> </script>
        <script type="text/javascript" src="loadmenu.js"> </script>
    </head>
    <body>
        <div id="bodyContent">
            <div id="fileMenu">
                <ul id="navMenu" class="fileMenuBar">
                    <li>
                        <a href="file/" class="fileMenuButton" accesskey="F"
                                hreflang="en" tabindex="1"
                                onclick="loadMenu('fileSub'),
                                return menu.buttonClick(event, 'fileSub'),"
                                onmouseover="loadMenu('fileSub'),
                                menu.buttonMouseover(event, 'fileSub'),">
                            File
                        </a>
                        <ul id="fileSub" class="fileMenuChild"
                            onmouseover="menu.fileMenuMouseover(event)"></ul>
                    </li>
                    <li>
                        <a href="edit/" class="fileMenuButton" accesskey="E"
                                hreflang="en" tabindex="9"
                                onclick="loadMenu('editSub'),
                                return menu.buttonClick(event, 'editSub'),"
                                onmouseover="loadMenu('editSub'),
                                menu.buttonMouseover(event, 'editSub'),">
                            Edit
                        </a>
                        <ul id="editSub" class="fileMenuChild"
                            onmouseover="menu.fileMenuMouseover(event)"></ul>
                    </li>
                    <li>
                        <a href="find/" class="fileMenuButton" accesskey="N"
                                hreflang="en" tabindex="13">
                            Find
                        </a>
                    </li>
                </ul>
            </div>
            <h1>This is a File Menu example</h1>
        </div>
    </body>
</html>
All of the submenu data has been removed, making this download a little bit smaller. As I said, the benefits come when you have larger and more complex file menus in your application. Nothing changes with the CSS rules in filemenu.css, or in the filemenu.js JavaScript file. The other change, you may have noticed, is that we added another JavaScript file to handle the Ajax, shown here:
/**
 * This function, loadMenu, calls the server via an /XMLHttpRequest/ for a new
 * menu if one has not already been called for with the passed /p_id/ parameter.
 *
 * @param {String} p_id The id of the container to hold the menu.
 */
function loadMenu(p_id) {
    /* Is the /innerHTML/ blank? */
    if ($(p_id).innerHTML == '')
        new Ajax.Request('get_sub_menu.php', {
            method: 'post',
            parameters: 'id=' + p_id,
            onSuccess: function(xhrResponse) {
                $(p_id).innerHTML = xhrResponse.responseText;
            },
            onFailure: function(xhrResponse) {
                $(p_id).innerHTML = xhrResponse.statusText;
            }
        });
}
The only assumption this JavaScript makes is that the
get_sub_menu.php file called
on the server must return formatted XHTML that can be directly
inserted into the innerHTML of
the submenu. For example, the response for loadMenu('editSub'), would look like
this:
<li>
    <a href="edit/copy/" class="fileMenuItem" hreflang="en" tabindex="10"
            onmouseover="menu.fileMenuItemMouseover(event);">
        Copy
    </a>
</li><li>
    <a href="edit/cut/" class="fileMenuItem" hreflang="en" tabindex="11"
            onmouseover="menu.fileMenuItemMouseover(event);">
        Cut
    </a>
</li><li>
    <a href="edit/paste/" class="fileMenuItem" hreflang="en" tabindex="12"
            onmouseover="menu.fileMenuItemMouseover(event);">
        Paste
    </a>
</li>
The other thing to notice with the loadMenu( ) function is that it first
checks whether the submenu being requested has already been
loaded. This keeps the application from repeatedly calling the
Ajax function and bogging down the server with unwanted
requests.
One last thought, and then we will be done with menus. To take the file menu example fully to the Web 2.0 level, we could set some CSS rules to make the submenus slightly less opaque. This will also enhance the idea that the web application can do everything (and sometimes more) than its desktop counterpart can do.
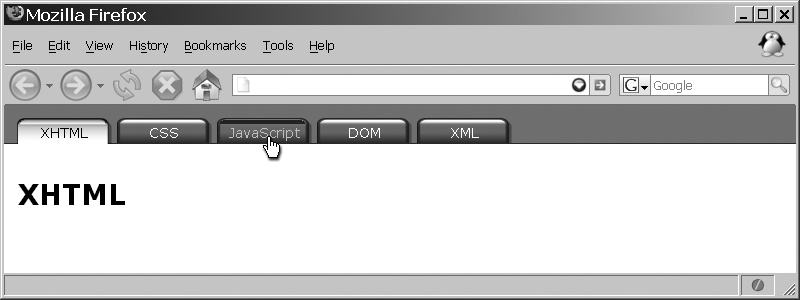
One good way to separate related content on your site is to use tabs. You can create tabs simply by using CSS to style an XHTML list, or you can make them with images. Images were always the way to create tabs in a classic web development environment, but I will show you a newer spin on the image tab technique. The goal of all tab navigation, as with menu navigation, is to allow the tabs to degrade with browsers that do not support the CSS techniques that are used.
The simplest way to build tabs is to add a little style to an XHTML list. Starting to notice a theme yet? By not using JavaScript, the developer makes his application more accessible to users. Obviously, once we throw Ajax into the mix, we will use JavaScript; however, even if the Ajax fails, the tabs might still work separately.
Figure 7-7 shows a few examples of what tabs can look like using CSS and XHTML lists. These tabs are no more complicated than the first menus I showed earlier in this chapter.

Both of the lists in Figure 7-7 use the following XHTML list as their underlying structure:
<div id="tabMenu">
    <ul id="tabList">
        <li id="active">
            <a href="xhtml/" id="current" accesskey="H" hreflang="en" tabindex="1">
                XHTML
            </a>
        </li><li>
            <a href="css/" accesskey="C" hreflang="en" tabindex="2">CSS</a>
        </li><li>
            <a href="js/" accesskey="J" hreflang="en" tabindex="3">JavaScript</a>
        </li><li>
            <a href="dom/" accesskey="D" hreflang="en" tabindex="4">DOM</a>
        </li><li>
            <a href="xml/" accesskey="X" hreflang="en" tabindex="5">XML</a>
        </li>
    </ul>
</div>
Tab #1 is created using the following CSS rules:
#tabList {
    border-bottom: 1px solid #787;
    font: bold 1em Arial, sans-serif;
    margin-left: 0;
    padding: 3px 0 3px 1em;
}

#tabList li {
    display: inline;
    list-style: none;
    margin: 0;
}

#tabList li a {
    background-color: #bfb;
    border: 1px solid #787;
    border-bottom: none;
    margin-left: 3px;
    padding: 3px .5em;
    text-decoration: none;
}

#tabList li a:link {
    color: #484;
}

#tabList li a:visited {
    color: #676;
}

#tabList li a:hover {
    background-color: #ada;
    border-color: #272;
    color: #000;
}

#tabList li a#current, #tabList li a#current:hover {
    background: white;
    border-bottom: 1px solid #fff;
    color: #000;
    cursor: default;
}
This first tab navigation is very simple in nature. The trick
is in switching colors based on where the mouse is, and changing the
borders along with it. Making the top border of #current white gives the illusion that it
is part of the rest of the page, while the other tabs sit behind
it.
Tab #2 uses the following CSS rules:[7]
#tabMenu {
    background: #7a7;
    border-top: 1px solid #333;
    height: 2.5em;
    padding: 0;
}

#tabList {
    display: block;
    font: 1em Arial, sans-serif;
    margin-top: -1px;
    padding: 0 0 0 1em;
}

#tabList li {
    float: left;
    list-style: none;
}

#tabList a {
    background-color: #cfc;
    border: 1px solid #aca;
    border-top: 1px solid #333;
    color: #000;
    display: block;
    margin: 0;
    padding: 1px 6px;
    text-decoration: none;
}

#tabList a:hover {
    background-color: #9b9;
    border: 1px solid #333;
    color: #333;
    padding: 1px 6px;
}

#tabList li a#current {
    background: #fff;
    border: 1px solid #333;
    border-top: 1px solid #fff;
    cursor: default;
}

#tabList li#active {
    border-bottom: 2px solid #777;
    border-right: 2px solid #777;
}
With this tab navigation, I wanted to give the illusion of
depth by dropping a shadow on the active tab. To do this, I had to
float the individual <li>
elements to the left, and then shift the entire <ul> element up one pixel. I created
the tabs in much the same way as I did in tab #1. I created the
shadow by putting right and bottom borders on the #active li element. The floating nature of
the <li> elements allowed
the border of the #active element
to be visible from underneath.
What’s frustrating when creating tabs using CSS is that all tabs are rectangular. Until CSS3 style rules become a recommendation and we can create curves using CSS, we have only one option: images.
I told you before that we will not be able to use images for
tabs in the same way we did in the earlier days of web design. One
option is to use a technique similar to the one we used for our
image navigation bar: creating multiple images and changing them
using :hover in CSS. Primarily we
want to avoid having to rely on JavaScript to change the images (the
old rollover technique).
We will create all views of our tab in one image, and clip out everything but the part of the image we want for any given tab state. It sounds much more complicated than it is. Figure 7-8 shows an example of a tab with all states in one image.

First we need to set up our XHTML structure as follows:
<div id="tabMenu">
    <ul id="tabList">
        <li>
            <a id="xhtml" class="selected" href="xhtml/" accesskey="H" hreflang="en"
                    tabindex="1">
                XHTML
            </a>
        </li><li>
            <a id="css" href="css/" accesskey="C" hreflang="en" tabindex="2">CSS</a>
        </li><li>
            <a id="js" href="js/" accesskey="J" hreflang="en" tabindex="3">
                JavaScript
            </a>
        </li><li>
            <a id="dom" href="dom/" accesskey="D" hreflang="en" tabindex="4">DOM</a>
        </li>
        <li>
            <a id="xml" href="xml/" accesskey="X" hreflang="en" tabindex="5">XML</a>
        </li>
    </ul>
</div>
This is almost the same XHTML list as before, but this time
the id attribute was added to
each <a> element. To
utilize our image correctly, we need to know the size of an
individual tab state. In this case, it is 27 pixels high and 95
pixels wide. The CSS rules for this technique look like this:
#tabMenu {
    border-bottom: 1px solid #700;
    padding: 1em 1em 0 1em;
    margin: 0;
}

#tabList {
    height: 26px;
    margin: -1px;
    overflow: hidden;
    padding: 0px;
}

#tabList a {
    background: top left no-repeat url('tabs.png'),
    background-position: 0 -54px;
    color: #fff;
    float: left;
    margin-right: 5px;
    overflow: hidden;
    padding: 6px 0px;
    text-align: center;
    text-decoration: none;
    width: 95px;
}

#tabList a:hover {
    background-position: 0 -27px;
    color: #ccc;
}

#tabList a:active, #tabList a.selected {
    background-position: 0 0px;
    color: #000;
    cursor: default;
}
The <ul> element
#tabList is set to a height of 26
pixels (not 27 pixels, because we want the image to meet up with the
bottom horizontal line). Then the links in the #tabList are set. The <a> element has its background set
with the tab image, and then it is positioned down to the bottom of
the three tabs. The width of the
tab is set to 95 pixels here, and the other important rule is to set
the overflow to hidden. Because we’re doing this, the user
can view only one part of the image at any time.
For the a:hover, the
background-position is shifted
down 27 pixels, which is to the middle tab in the image. Finally, in
the a:active and a.selected rules, the background-position is set to the top of
the image. Everything but the top tab is hidden (clipped) from view.
Figure 7-9 shows how these tabs would
look.
Now, it is one thing to build tabbed navigation—or menu bars, for that matter—but they need to do something. Browsers that do not support the CSS to build the tabs can still follow the link to navigate the application. This is also the case for users who have JavaScript turned off. For the rest of us, we need these tabs to be more functional.
I will refer to the area in which the data is placed or viewed
as the tab content. These
<div> elements contain
everything the developer wants the user to see when the user selects
one of the navigation tabs. Therefore, we need to change the
display of the element in
relation to the tab that the user clicks. But first things first; we
need to construct the tab content. For example:
<div id="tabContents">
    <div id="xhtmlContent">
        <h1>XHTML</h1>
        <!-- more xhtml content here -->
    </div>
    <div id="cssContent">
        <h1>Cascading Style Sheets (CSS)</h1>
        <!-- more css content here -->
    </div>
    <div id="jsContent">
        <h1>JavaScript</h1>
        <!-- more js content here -->
    </div>
    <div id="domContent">
        <h1>The DOM</h1>
        <!-- more dom content here -->
    </div>
    <div id="xmlContent">
        <h1>XML</h1>
        <!-- more xml content here -->
    </div>
</div>
This structure part is easy enough, but next you need to have a CSS rule to hide all of the tab content sections from view. Something like this would work:
#tabContents div {
    display: none;
}
This hides all of the <div> elements that are contained in
the #tabContents div. We will
rely on JavaScript to highlight one of the tabs when the page loads.
Example 7-7 shows
this JavaScript code for making the tabs dynamically functional.
This JavaScript requires the Prototype library to be loaded in order
to work.
Example 7-7. tabs.js: The JavaScript for dynamic tab content
/**
 * @fileoverview Example 7-7, tabs.js: The JavaScript for dynamic tab content.
 *
 * This file, tabs.js, contains the tabNavigation object which is used to create
 * instances of a tab navigation system on the page.
 */

/* Create a new class using Prototype's Class object */
var tabNavigation = Class.create( );
/**
 * This object, tabNavigation, provides the developer with the means of
 * creating a tabbed navigation system on the page.
 */
tabNavigation.prototype = {
    /**
     * This member, _tabs, holds the id of the tabbed navigation.
     * @private
     */
    _tabs: null,
    /**
     * This member, _previousTab, holds the id of the last tab clicked by the user.
     * @private
     */
    _previousTab: null,
    /**
     * This member, initialize, is the constructor for the class.  Any members that
     * need to be initialized are done here, as well as any other initial
     * housecleaning.
     * @member tabNavigation
     * @constructor
     * @param {String} p_id The id of the element that represents the tabbed
     *     navigation.
     * @param {String} p_startTab The id of the starting tab element.
     * @see #expandTab
     */
    initialize: function(p_id, p_startTab) {
        this._tabs = p_id;

        /* Get a list of link elements found in the tab list */
        var tabLinks = $(this._tabs).getElementsByTagName('a'),
        /* Add a click event to all of the link elements */
        for (var i = tabLinks.length - 1; i >= 0;)
            tabLinks[i--].setAttribute('onclick', 'return tabs.expandTab(this.id);'),
        /* Expand the starting tab */
        this.expandTab(p_startTab);
    },
    /**
     * This method, expandTab, is called on all click MouseEvents associated with
     * the tab navigation and hides the contents of the previous tab before showing
     * the contents of the current tab.
     *
     * @member tabNavigation
     * @param {String} p_linkId The id of the tab to expand.
     * @return Returns false so that no other events fire after this one.
     * @type Boolean
     * @see #highlightTab
     * @see Element#setStyle
     */
    expandTab: function(p_linkId) {
        var catId;

        this.highlightTab(p_linkId);
        /* Is there a previous tab selected */
        if (this._previousTab)
            $(this._previousTab).setStyle( { display: 'none' });
        catId = p_linkId + 'Content';
        $(catId).setStyle({ display: 'block' });
        this._previousTab = catId;
        return (false);
    },
    /**
     * This member, highlightTab, is called from the expandTab method and removes the
     * CSS rule for highlighting on all of the tabs and then sets it on the current
     * tab.
     *
     * @member tabNavigation
     * @param {String} p_linkId The id of the tab to expand.
     */
    highlightTab: function(p_linkId) {
        var tabLinks = $(this._tabs).getElementsByTagName('a'),

        /* Loop through the list of <a> elements */
        for (var i = tabLinks.length - 1; i >= 0;)
            $(tabLinks[i--]).removeClassName('selected'),
        $(p_linkId).addClassName('selected'),
    }
};

var tabs;

try {
    /*
     * Set an event listener on the document for the load event and have the system
     * create a new instance of the tabNavigation class (this calls
     * tabNavigation.initialize( )).  This allows for the creation of multiple file
     * menus, if there is ever a need.
     */
    Event.observe(window, 'load', function( ) {
        tabs = new tabNavigation('tabList', 'xhtml'),
    }, true);
} catch(ex) {}
Tip
Separating the content of the page into tabbed sections is a start to satisfying the following WAI-WCAG 1.0 guideline:
Priority 2 checkpoint 12.3: Divide large blocks of information into more manageable groups where natural and appropriate.
This exposes tab content that is associated with a tab in the navigation. For now, let’s just assume that the content was already there at page load. We will discuss Ajax solutions to this in Chapter 8.
We have discussed the major navigation aids—menus and tabs—but plenty of other navigational components can appear in a web application. Think of a site that you believe has good navigation, i.e., it’s easy to navigate and find things in it because it is organized and gives you the tools needed for navigation. Did you think of a site that used a tree of links or vertical links? Maybe the site broke a page into smaller chunks with page links, what I call paged navigation. More than likely, the site had some simple tools such as breadcrumbs and in-site links.
A good site will have some combination of navigational components to provide smooth and easy navigation. Users never want to feel lost in an application, and any visual cue (breadcrumbs, a tree of links) is welcomed.
Breadcrumbs are visual aids that help the user keep track of where he is and how he got there. Figure 7-10 shows an example of breadcrumbs found on Amazon.com.

These breadcrumbs link back to the preceding sections relative to the user’s current location. In this case, the user is under the JavaScript section, and the links take him back to Scripting & Programming, Web Development, Computers & Internet, and Books.
Breadcrumbs are simple to create using XHTML lists and a little CSS. Consider the following:
<div id="breadContainer">
    <ul id="breadList">
        <li><a href="xhtml/" hreflang="en" tabindex="1">XHTML</a></li>
        <li><a href="css/" hreflang="en" tabindex="2">CSS</a></li>
        <li><a href="js/" hreflang="en" tabindex="3">JavaScript</a></li>
        <li><a href="dom/" hreflang="en" tabindex="4">DOM</a></li>
        <li><a href="xml/" hreflang="en" tabindex="5">XML</a></li>
    </ul>
</div>
We can style this list into a list of breadcrumbs, but that is not what we want to concentrate on. How is the list created? If the entire page is loaded, any server-side script can generate the correct XHTML list to display the breadcrumbs. What happens, however, when the entire page is not refreshed? This book is about Ajax, after all.
First, let’s be complete in our discussion of building breadcrumbs. You can style the preceding list into breadcrumbs using the following CSS rules:
#breadContainer {
margin-left: 10px;
}
#breadList {
list-style: none;
margin: 0;
padding: 0;
}
#breadList li {
display: inline;
margin: 0;
padding: 0;
}
#breadList li:before {
content: "�0BB�020";
}
#breadList li:first-child:before {
content: "";
}
/*
* The following is an ugly IE hack that I wish I didn't have to do, but IE and
* CSS don't mix well yet
*/
/* This rule is for all IE browsers*/
* html #breadList li {
border-left: 1px solid black;
margin: 0 0.4em 0 -0.4em;
padding: 0 0.4em 0 0.4em;
}
/* Win IE browsers - hide from Mac IE*/
* html #breadList {
height: 1%;
}
* html #breadList li {
display: block;
float: left;
}
/* End the hide from Mac*/
/* This rule is for Mac IE 5*/
* html #breadList li:first-child {
border-left: 0;
}Fat Erik 5 wrote this CSS, and you can find it on Listamatic
(http://css.maxdesign.com.au/listamatic/index.htm).
The only problem with this CSS is that it does not work in Internet
Explorer because IE does not support many pseudoselectors, and to be
more specific, it does not support the :first-child pseudoselector. All we can do
is hope that Internet Explorer 8 (or whatever the next fix/version
of IE is called) fixes this dilemma.
As you can see from the preceding example, the cross-browser solution is to use a CSS hack to get Internet Explorer to produce something between the elements. The left border of the element does the trick in this case. It isn’t pretty, but then again, not much about Internet Explorer’s CSS2 support is pretty.
The other thing you might have noticed is that the solution to
putting something between elements is to use the content property to include the characters
�0BB�020 before the <li> element. �0BB is the hexadecimal equivalent of the
right-angle double-quote character >>, and �020 is a space. A good list of ASCII
character codes and their decimal and hexadecimal values is
available at http://ascii.cl/htmlcodes.htm.
OK, now that we’ve styled the list, let’s get back to the Ajax part of this. The simplest solution is for the response from the server to supply the breadcrumbs needed for the page. Something like this will do:
<response>
    <breadcrumbs>
        <ul id="breadList">
            <li><a href="xhtml/" hreflang="en" tabindex="1">CSS</a></li>
            <li><a href="css/" hreflang="en" tabindex="2">Rules</a></li>
            <li><a href="js/" hreflang="en" tabindex="3">Pseudoselectors</a></li>
            <li><a href="dom/" hreflang="en" tabindex="4">Properties</a></li>
            <li><a href="xml/" hreflang="en" tabindex="5">content</a></li>
        </ul>
    </breadcrumbs>
    <page>
        <h1>All about the content property</h1>
        <p>
            <!-- content here -->
        </p>
    </page>
</response>
With this kind of response, our JavaScript simply needs to
grab the different sections of code and put the contents where they
need to go. There is one problem with this approach, though;
Internet Explorer does not follow the Document Object Model (DOM) 2
core recommendations from the W3C. At least, Internet Explorer does
not give a developer the means to import a node from one namespace into the hierarchy of another
namespace. So, we first need to
write a function that mimics the standard method that the other
browsers use, importNode( ).
Example 7-8 shows the function
for Internet Explorer.
Example 7-8. An importNode( ) function for Internet Explorer that mimics what the standard importNode( ) method does
/*
 * Example 7-8, An importNode( ) function for Internet Explorer that mimics what the
 * standard /importNode( )/ method does.
 */

/* Can we use /importNode( )/? [if not, this must be an IE client] */
if (!document.importNode) {
    /*
     * Create a function that does what should already be part of IE's
     * implementation of the DOM.
     */
    /**
     * This function, importNode, does what should already be part of IE's
     * implementation of the DOM.
     *
     * @param {Object} p_element The element to be imported.
     * @param {Boolean} p_allChildren Variable to tell the function if all
     *     childNodes should also be imported.
     * @return The newly imported node.
     * @type Object
     */
    function importNode(p_element, p_allChildren) {
        /* Find the element's type */
        switch (p_element.nodeType) {
            case 1: /* NODE_ELEMENT */
                var newNode = document.createElement(p_element.nodeName);
                /* Does the element have any attributes to add? */
                if (p_element.attributes && p_element.attributes.length > 0)
                    /* Loop through the element's attributes */
                    for (var i = 0, il = p_element.attributes.length; i < il;)
                        newNode.setAttribute(p_element.attributes[i].nodeName,
                                p_element.getAttribute(
                                p_element.attributes[i++].nodeName));
                /* Are we going after children too, and does the node have any? */
                if (p_allChildren && p_element.childNodes &&
                        p_element.childNodes.length > 0)
                    /* Loop through the element's childNodes */
                    for (var i = 0, il = p_element.childNodes.length; i < il;)
                        newNode.appendChild(importNode(p_element.childNodes[i++],
                            p_allChildren));
                return newNode;
                break;
            case 3: /* NODE_TEXT */
            case 4: /* NODE_CDATA_SECTION */
                return document.createTextNode(p_element.nodeValue);
                break;
        }
    };
}
Now that we have a way to import nodes for all browsers, let’s look at the code for dynamically creating our breadcrumbs and data:
new Ajax.Request('getData.php', {
    method: 'post',
    parameters: 'data=' + dataId,
    onSuccess: function(xhrResponse) {
        var response = xhrResponse.responseXML;
        var newNode;

        /* Is this browser not IE ? */
        if (!window.ActiveXObject) {
            newNode =
                document.importNode(response.getElementsByTagName(
                'breadcrumbs')[0].childNodes[1], true);
            $('breadContainer').appendChild(newNode);
            newNode =
                document.importNode(response.getElementsByTagName(
                'page')[0].childNodes[1], true);
            $('page').appendChild(newNode);
        } else {
            newNode =
                importNode(response.getElementsByTagName(
                'breadcrumbs')[0].childNodes[0], true);
            $('breadContainer').appendChild(newNode);
            newNode =
                importNode(response.getElementsByTagName(
                'page')[0].childNodes[0], true);
            $('page').appendChild(newNode);
        }
    },
    onFailure: function(xhrResponse) {
        $('page').innerHTML = xhrResponse.statusText;
    }
});
You can put this XMLHttpRequest wherever it needs to go
when the request for new data is made.
If this technique is not for you, you may want to consider
this alternative. The data comes back via an XMLHttpRequest, and once it has been
received, you launch a second XMLHttpRequest asking for the breadcrumbs
to the data just loaded. This way, the data is sent in smaller
chunks and can be less complicated. That means the client code will
be faster and easier as well. Both methods achieve the same goal:
dynamic breadcrumbs for the user.
Another useful navigation aid is links found at the bottom of
a page. Instead of forcing the user to scroll to the top of a page
that may be a few screens long, the developer can allow the user to
navigate from the bottom as well. These types of links are usually
lists separated by a pipe character (|). A typical list looks like
this:
<div id="linksContainer">
    <ul id="pipeList">
        <li>
            <a id="xhtml" class="selected" href="xhtml/" hreflang="en"
                    tabindex="20">
                XHTML
            </a>
        </li>
        <li><a id="css" href="css/" hreflang="en" tabindex="21">CSS</a></li>
        <li><a id="js" href="js/" hreflang="en" tabindex=22">JavaScript</a></li>
        <li><a id="dom" href="dom/" hreflang="en" tabindex="23">DOM</a></li>
        <li><a id="xml" href="xml/" hreflang="en" tabindex="24">XML</a></li>
    </ul>
</div>
The CSS rules you can use to style a list like this are the same as the rules for breadcrumbs, except for what is displayed as content between the list elements and some other basic style changes. These are easy changes, as shown here:
# linksContainer  {
    margin-top: 2em;
    text-align: center;
}

# pipeList  {
    list-style: none;
    margin: 0;
    padding: 0;
}

# pipeList  li {
    display: inline;
    margin: 0;
    padding: 0;
}

# pipeList  li:before {
    content: "| ";
}

# pipeList  li:first-child:before {
    content: "";
}

/*
 * The following is an ugly IE hack that I wish I didn't have to do, but IE
 * and CSS don't mix well yet.
 */
/* This rule is for all IE browsers*/
* html # pipeList  li {
    border-left: 1px solid black;
    margin: 0 0.4em 0 -0.4em;
    padding: 0 0.4em 0 0.4em;
}

/* Win IE browsers - hide from Mac IE*/
* html # pipeList  {
    height: 1%;
}

* html # pipeList  li {
    display: block;
    float: left;
}

/* End the hide from Mac*/
/* This rule is for Mac IE 5*/
* html # pipeList  li:first-child {
    border-left: 0;
}
The JavaScript and Ajax portions of the code for creating dynamic lists at the bottom of a page are similar to the code for creating breadcrumbs. The only changes are where the different XHTML sections are placed in the application. In fact, you could add the bottom links to the feed that sends breadcrumbs and data so that you need to import only one more element.
It’s your choice how many XMLHttpRequest calls you want to make to
the server, and how complicated you want the server scripting to be.
Keep in mind that the server scripting must be more sophisticated if
you make separate calls, and will have to extrapolate what it needs
to send back multiple times—once for the data, once for the
breadcrumbs, and once for the links at the bottom.
The premise behind paged navigation (as I like to call it) is that the user does not have to scroll through pages and pages of content. Rather, the content is broken up into pages, and navigation is given in the form of page numbers (usually) that allow the user to move through the information one page at a time. Of course, you could use other forms of navigation as well, but the point is that scrolling is minimized for easier reading. And everyone has seen and used this technique, maybe without realizing it—search engines use it for all of their search results.
Tip
Separating the page content into multiple navigable pages satisfies the following WAI-WCAG 1.0 guideline:
Priority 2 checkpoint 12.3: Divide large blocks of information into more manageable groups where natural and appropriate.
You can accomplish this kind of presentation and navigation using different methods. The methods I will discuss rely on a server-side script being able to split up the content for the client. It is easier for the server side of things to know where to split up text than it is for the client.
Perhaps the easiest way is to have a single page to dispense the information one chunk at a time based on the variable passed to it in the query string. This technique is applied in many places, especially on sites that specialize in articles, essays, and other such papers. An example would be a link that looks like this:
http://www.oreillynet.com/pub/a/oreilly/tim/news/2005/09/30/what-is-web-20.html
?page=2
In this case, the variable is page, and the user has requested page 2.
We’ll come back to this method in a second, but first we should talk
about another method.
The second way you can achieve paged navigation is to have the
page load with all the data at once, separating it by page into
<div> elements. Then, using
CSS and JavaScript, the client can hide and show the page that is
requested. The advantage to this method is that once the data is on
the client, hiding and showing pages is nearly instantaneous. The
downside is that the user must wait until all the data is loaded
before viewing it.
Let’s set this up for all the viewers at home. First, this is how part of the page will look when it is loaded:
<div id="article">
    <div id="page1">
        <p>This is page one.</p>
    </div>
    <div id="page2">
        <p>This is page two.</p>
    </div>
    <div id="page3">
        <p>This is page three.</p>
    </div>
    <div id="page4">
        <p>This is page four.</p>
    </div>
    <div id="page5">
        <p>This is page five.</p>
    </div>
</div>
<div id="pagedNavContainer">
    <ul id="pagedNavList">
        <li id="l1">1</li>
        <li id="l2">
            <a href="/article.php?page=2" onclick="return turnPage(2);">2</a>
        </li>
        <li id="l3">
            <a href="/article.php?page=3" onclick="return turnPage(3);">3</a>
        </li>
        <li id="l4">
            <a href="/article.php?page=4" onclick="return turnPage(4);">4</a>
        </li>
        <li id="l5">
            <a href="/article.php?page=5" onclick="return turnPage(5);">5</a>
        </li>
    </ul>
</div>
The CSS code to make this navigation look correct is the same
as what Fat Erik 5 used for the breadcrumbs example discussed
earlier. Now we add the function turnPage(
):
/**
 * This function, turnPage, changes the contents on the page to the desired "page"
 * number that is passed to it.
 *
 * @param {Integer} p_number The number of the page to go to.
 * @return Returns false so that no other event is fired after this one.
 * @type Boolean
 * @see Element#setStyle
 */
function turnPage(p_number) {
    var pages = $('article').getElementsByTagName('div'),

    /* Loop through the list of <div> elements */
    for (var i = 0, il = pages.length; i < il; i++) {
        $(pages[i]).setStyle({ display: 'none' });
        $('l' + (i + 1)).innerHTML = '<a href="/article.php?page=' + (i + 1) +
            '" onclick="return turnPage(' + (i + 1) + ')">' + (i + 1) + '</a>';
    }
    $('l' + p_number).innerHTML = p_number;
    $('page' + p_number).setStyle({ display: 'block' });
    return (false);
}
This is an example of a paged navigation solution using DHTML techniques. The premise is to have everything on the page, and show only what the user asks for.
For an Ajax solution, a good approach is to combine the
premise of both of these techniques. The trick is to combine the
page request from our first example—passing the page number in the
query string—with the idea of hiding all content but the requested
page. For this to work, we need to alter the turnPage( ) function to call an XMLHttpRequest for the page information
and then display it. The good news with this kind of technique is
that there won’t be any blank pages or flickering, as something else
will always be on the screen until the client has downloaded the new
data. We should change the turnPage(
) function like this:
/**
 * This function, turnPage, changes the contents on the page to the desired
 * "page" number that is passed to it.
 *
 * @param {Integer} p_number The number of the page to go to.
 * @return Returns false so that no other event is fired after this one.
 * @type Boolean
 * @see Element#setStyle
 * @see Ajax#Request
 */
function turnPage(p_number) {
    var pages = $('pagedNavList').getElementsByTagName('li'),

    /* Loop through the list of <li> elements */
    for (var i = 0, il = pages.length; i < il; i++) {
        $(pages[i]).setStyle({ display: 'none' });
        $('l' + (i + 1)).innerHTML = '<a href="/article.php?page=' + (i + 1) +
            '" onclick="return turnPage(' + (i + 1) + ')">' + (i + 1) + '</a>';
    }
    /* Has this page already been fetched once? */
    if ($('page' + p_number).innerHTML == '') {
        new Ajax.Request('article.php', {
            method: 'post',
            parameters: { page: p_number },
            onSuccess: function(xhrResponse) {
                var response = xhrResponse.responseXML;
                var newNode;

                /* Is this browser not IE ? */
                if (!window.ActiveXObject) {
                    newNode =
                        document.importNode(response.getElementsByTagName(
                        'page')[0].childNodes[1], true);
                    $('page' + p_number).appendChild(newNode);
                } else {
                    newNode =
                        importNode(response.getElementsByTagName(
                        'page')[0].childNodes[0], true);
                    $('page' + p_number).appendChild(newNode);
                }
                $('l' + p_number).innerHTML = p_number;
                $('page' + p_number).setStyle({ display: 'block' });
            },
            onFailure: function(xhrResponse) {
                $('page').innerHTML = xhrResponse.statusText;
            }
        });
    } else {
        $('l' + p_number).innerHTML = p_number;
        $('page' + p_number).setStyle({ display: 'block' });
    }
    return (false);
}
This function loads the different pages only when they are
requested, and only once per request. This cuts down on the initial
server download, speeding up the application as a whole. This also
uses the importNode( ) function
from earlier in cases where the browser is Internet Explorer. You
will want to remember this function because it will pop up a lot
throughout the rest of this book.
There is one more popular navigational aid that I have seen on numerous web sites: navigation boxes, the boxes on the left or right side of a page that contain vertical lists or trees of links to aid in site navigation. The navigation boxes are usually easy to spot; in fact, the user’s eyes might be drawn to them based on how they are styled and placed in the application. These lists and trees are usually more detailed links to pages in the application that can be found at a lower level in the site hierarchy.
The first navigation box solution that I will discuss is the tree of lists. These trees usually function in the same manner that users are familiar with in the file explorers they use to navigate their operating systems. A hierarchy of lists is displayed, and a plus sign (+) and minus sign (-) are usually delineated to alert the user that part of the hierarchy can be shown or hidden. Figure 7-11 shows an example of a typical tree.

As with all of the other navigation aids we’ve looked at so far, the ideal way to build a tree is to use an XHTML list. This ensures that we have a degree of backward compatibility with browsers that can’t or don’t support JavaScript or CSS. The list for our tree looks like this:
<ul id="navTree">
    <li>data
        <ul>
            <li>menu.xml ...</li>
        </ul>
    </li>
    <li>include
        <ul>
            <li>css
                <ul>
                    <li>screen
                        <ul>
                            <li>font_sizes
                                <ul>
                                    <li>larger.css</li>
                                    <li>normal.css ...</li>
                                </ul>
                            </li>
                            <li>colors.css</li>
                            <li>fonts.css</li>
                            <li>structure.css</li>
                        </ul>
                    </li>
                    <li>print.css</li>
                    <li>screen.css</li>
                </ul>
            </li>
            <li>images
                <ul>
                    <li>page_icons
                        <ul>
                            <li>home.png ...</li>
                        </ul>
                    </li>
                    <li>oreilly.png ...</li>
                </ul>
            </li>
            <li>js
                <ul>
                    <li>prototype.js</li>
                    <li>tabs.js ...</li>
                </ul>
            </li>
            <li>other
                <ul>
                    <li>zptree
                        <ul>
                            <li>utils ...</li>
                        </ul>
                    </li>
                </ul>
            </li>
            <li>php
                <ul>
                    <li>menu.inc ...</li>
                </ul>
            </li>
        </ul>
    </li>
    <li>pages
        <ul>
            <li>about.php ...</li>
        </ul>
    </li>
    <li>index.php</li>
</ul>
Trees can be complicated widgets to build. Going into the details of building a tree using CSS and JavaScript is beyond the scope of this book. Instead, I will focus on the Ajax part of dealing with trees, but first we must have a tree before we can build it dynamically. To this end, I have decided to use the Zapatec DHTML Tree (http://www.zapatec.com/website/main/products/prod3) as the basis for this example.
The Zapatec DHTML Tree uses an XHTML list for its structure, which simplifies tree creation and facilitates control of list item content (you can use any XHTML markup). Also, a variety of browsers support this software, and those that do not will at least view the list.
First, we must include the proper Zapatec header files on our page:
<!-- First the Zapatec utilities file needs to be loaded -->
<script type="text/javascript" src="zptree/utils/zapatec.js"> </script>
<!-- Then the tree support file needs to be loaded -->
<script type="text/javascript" src="zptree/src/tree.js"> </script>

<!-- This is the optional CSS file that adds lines in the tree; if you don't want
them, don't add this -->
<link rel="stylesheet" type="text/css" href="zptree/themes/tree-lines.css" />
Also assume that the Prototype library was loaded before
these files are introduced to the page. Then, once the page has
loaded, the Zapatec.Tree object
is created, and the tree will function on the page:
var navTree; /* hold the Zapatec.Tree object */

/**
 * This function, bodyOnLoad, is called on the load event of the document and
 * creates a new instance of the Zapatec.Tree object.
 *
 * @see Zapatec#Tree
 */
function bodyOnload( ) {
    navTree = new Zapatec.Tree('navTree', { initLevel: 0 });
}

/* use Prototype's cross-browser event handling methods for ease of use. */
try {
    /* Call the bodyOnload function when the load event fires in the document */
    Event.observe(window, 'load', bodyOnload( ), false);
} catch(ex) {}
For a list of all the features and functions available with the Zapatec DHTML Tree, see the documentation that is on the web site and that accompanies the software download. This documentation describes how to programmatically manipulate the tree both at page load and during the lifetime of the application.
Tip
We are most interested in loading parts of our tree
through an XMLHttpRequest
object. As with our past navigational aids, by creating our
subtrees only when they are requested, we dramatically reduce
the tree load time. The technique for tree navigation with Ajax
is just like that for file menu navigation. Every submenu in our
tree will need to have a unique id for our code to work. Then we can
use our same loadMenu( )
function from the file menu navigation to load the individual
submenus. All we have to change is where the XMLHttpRequest call goes in the
function.
There is only one downside to this Ajax technique. The root
of the submenu (the link you click to open the submenu) can still
contain a link to a different page within the application or
outside on the Web only if the loadMenu( ) function does not return
false. Otherwise, the function
will inadvertently cancel the click event on the link.
Vertical lists are basically trees with different style rules, though they are rarely more than two levels deep. You can also think of vertical lists as menu bars flipped on their sides. By changing the style rules on the Zapatec DHTML Tree, you can easily create a vertical list, as Figure 7-12 shows.
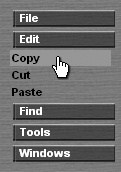
Even if the vertical list needs to be a little more complicated, such as with a more complex hierarchy, we can use the rules we applied to all our other navigation aids. Everything we did to create an Ajax-enabled tree also applies to a vertical list. This type of navigation is, in many ways, a smaller version of another type of page navigation: accordion navigation.
Accordion navigation is much like paged navigation, but instead of numbers acting as the navigation aids, some kind of bar separates the content. That is the only real difference, though accordion navigation has a Web 2.0 feel that paged navigation does not. This is because some kinds of effects usually accompany the switching of content from one part to the next.
Accordions push content up and down as it is exposed and hidden, creating an effect that marginally resembles an accordion. To create this type of navigation—which is graphically more challenging (only because of the effects attached to it)—we will abandon the use of XHTML lists in favor of a more chunks-of-data type structure. The following markup shows what I mean by chunks-of-data structuring:
<div id="accordion">
    <div id="part1">
        <div id="nav1" onclick="new Effect.Accordion('content1'),">
            Lorem ipsum dolor sit amet
        </div>
        <div id="content1">
            <p>
                Curabitur pharetra, nunc vitae pellentesque ultrices, ligula
                tortor mollis eros, et mattis sem diam ac orci. Aenean vestibulum
                aliquam enim. Pellentesque habitant morbi tristique senectus et
                netus et malesuada fames ac turpis egestas. Donec accumsan, enim
                sit amet aliquet congue, massa ante iaculis sem, id dictum augue
                ligula sit amet elit. Lorem ipsum dolor sit amet, consectetuer
                adipiscing elit. Sed sodales massa sit amet eros. Cum sociis
                natoque penatibus et magnis dis parturient montes, nascetur
                ridiculus mus. Curabitur gravida. Vivamus mollis. Proin leo pede,
                tincidunt id, porttitor quis, pharetra sit amet, quam. Quisque a
                odio sed augue varius ultrices. Praesent odio. Mauris viverra
                nunc in lacus. Fusce in mi. Nullam urna sapien, porttitor sit amet,
                facilisis nec, congue quis, pede.
            </p><p>
                Vestibulum nec pede. Fusce dui ipsum, imperdiet gravida, interdum
                eu, imperdiet a, nisl. Fusce in enim. Suspendisse non velit. Mauris
                rhoncus dictum quam. In mollis. Etiam eu erat in nisi luctus
                scelerisque. Nulla facilisi. Nam mattis auctor nulla. Aenean risus
                lacus, consequat eget, consequat sit amet, scelerisque vitae,
                turpis. Suspendisse tortor elit, pellentesque id, suscipit at,
                consequat ac, elit. Sed massa leo, molestie sed, fermentum non,
                dignissim ac, nisi. Sed tincidunt. Suspendisse tincidunt congue nisl.
            </p>
        </div>
    </div>
    <div id="part2">
        <div id="nav2" onclick="new Effect.Accordion('content2'),">
            Vestibulum eget enim nec lorem
        </div>
        <div id="content2">
            <p>
                Nullam varius rhoncus urna. Aliquam erat volutpat. Integer pulvinar
                scelerisque purus. Sed euismod erat in mi. Nam dolor odio,
                ullamcorper nec, mattis eu, placerat a, ipsum. Curabitur ut quam.
                Fusce vitae neque. Donec nec mi eu orci auctor facilisis. Vivamus
                porta. Donec tincidunt. Sed varius, neque sed placerat egestas,
                arcu massa feugiat diam, nec ultricies elit diam sed lectus. In hac
                habitasse platea dictumst. Quisque id ante. Ut vulputate, magna a
                convallis tincidunt, leo eros ullamcorper turpis, lacinia lacinia
                urna erat quis pede. Fusce eleifend, tellus eu sollicitudin
                dapibus, eros tellus fringilla libero, sed facilisis lacus felis
                sit amet lacus. Integer ullamcorper turpis scelerisque massa
                pellentesque hendrerit. Donec dapibus lorem quis massa. Sed in
                ante non leo tristique suscipit. Cras eu magna elementum mauris
                venenatis sagittis. Nulla euismod justo sit amet elit.
            </p>
        </div>
    </div>
</div>
This is the general idea, and there would obviously be more
sections. The chunks I am referring to are the <div> elements that are labeled with
the id attribute part1..partn. Each represents a chunk of data
that can stand on its own, away from everything else.
The idea behind accordion navigation is that a header of some
sort represents the section. In our example, the header is the
<div> element with id attribute values that start with
nav. These will be the only parts
that are shown until they are clicked. Once they are clicked, the
content of the section slides down to be displayed to the user. The
accordion comes in when one section of content slides up and out of
view as another section slides down and into view.
This first thing we need to do is to hide the content sections once the page has loaded. You must wait until after the page is loaded so that the browser knows the height of each section. Then you can hide them:
/**
 * This function, bodyOnload, hides all of the content from the user.
 *
 * @see Element#setStyle
 */
function bodyOnload( ) {
    $('content1').setStyle({ display: 'none' });
    $('content2').setStyle({ display: 'none' });
    $('content3').setStyle({ display: 'none' });
    $('content4').setStyle({ display: 'none' });
    $('content5').setStyle({ display: 'none' });
}
You may have noticed that the structure has click MouseEvents attached to it, and these call
the Effect object’s Accordion( ) method. The Effect object is part of the
script.aculo.us JavaScript library, which is based on the Prototype
library. So, the first thing we must do is load the
libraries:
<script type="text/javascript" src="prototype.js"> </script>
<script type="text/javascript" src="scriptaculous.js?load=effects"> </script>
With script.aculo.us, we need only the effects features from
the library, so that is all we load. Now we can write our Accordion( ) method, which is created as
an addition to the Effect object,
as shown in Example 7-9.
Example 7-9. An accordion object, Prototype style
/*
 * Example 7-9. An accordion object, Prototype style.
 */

/* Global scoped variable to hold the current object opened in the accordion */
var currentId = null;

Effect.Accordion = function(contentId) {
    var slideDown = 0.5; /* The speed at which the contents should slide down */
    var slideUp = 0.15; /* The speed at which the contents should slide up */

    /* Get the object associated with the passed contentId */
    contentId = $(contentId);
    /* Is the currentId object different from the passed contentId object? */
    if (currentId != contentId) {
        /* Is the currentId object null? */
        if (currentId == null)
            /* Nothing else is open, so open the passed object */
            new Effect.SlideDown(contentId, {duration: slideDown});
        else {
            /* Close the current object that is open and open the passed object */
            new Effect.SlideUp(currentId, {duration: slideUp});
            new Effect.SlideDown(contentId, {duration: slideDown});
        }
        currentId = contentId; /* Set the passed object as the current object */
    } else {
        /* Close the current object, as it was clicked */
        new Effect.SlideUp(currentId, {duration: slideUp});
        currentId = null; /* Nothing is open now */
    }
};
The speeds at which the content sections open and close vary according to the variables set. The smaller the number, the faster the effect occurs. This is how a traditional accordion navigation system works. Figure 7-13 shows how this accordion navigation would look.
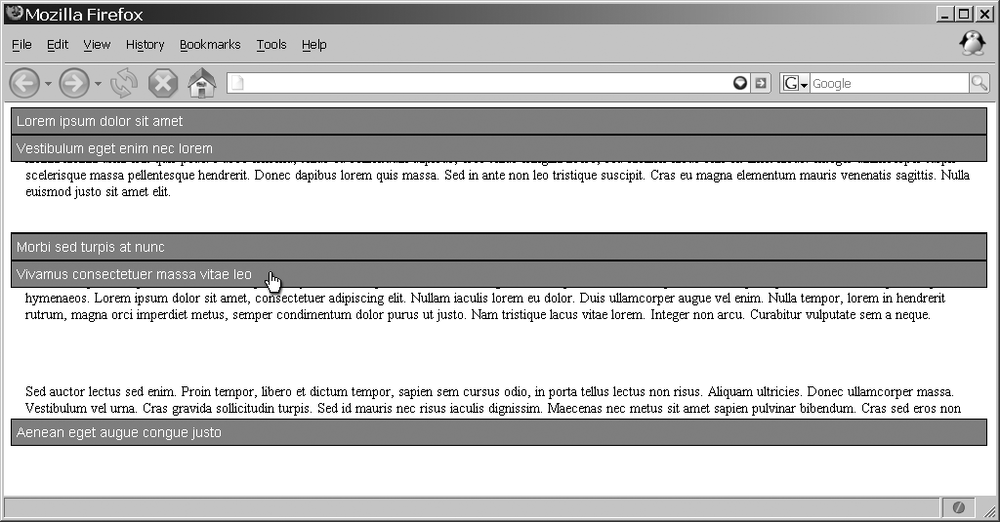
Figure 7-13 shows
the second section closing as the fourth section is opened and
displayed. If you want more than one section to be open at any given
time, you need to make some minor changes to the Effect.Accordion( ) method. Remove all
references to the currentId,
because it does not need to be checked, and modify the checks so
that content sections are closed only when they are clicked twice.
Here is the modified code:
Effect.Accordion = function(contentId) {
    var slideDown = 0.5; /* The speed at which the contents should slide down */
    var slideUp = 0.15; /* The speed at which the contents should slide up */

    /* Get the object associated with the passed contentId */
    contentId = $(contentId);
    /* Is the passed object already visible? */
    if (contentId.visible(contentId))
        new Effect.SlideUp(contentId, {duration: slideUp});
    else
        new Effect.SlideDown(contentId, {duration: slideDown});
};
Setting up an accordion for use with Ajax is much tougher
using this method because the Effect.SlideUp( ) and Effect.SlideDown( ) methods expect that
the object passed to them will be of a fixed height. If the client
has no prior knowledge of the contents in a section, it is hard to
make the height fixed in size.
There are at least two possible solutions to this problem. One is to get the size dynamically once it has been loaded. This method requires that the accordion effect not move until the content has been fully loaded. Unfortunately, this means that the first time the content is requested, the accordion will hesitate. Another possible solution is to set all the content areas to a fixed height in the CSS rules, and force overflow to scroll within that size. Then the accordion can start its effect while the content is being loaded, and there will be no hesitation. This method is probably the preferred method for smoothness and simplicity.
Because we were talking about application hesitations that may occur when Ajax is implemented, now is probably a good time to talk about Ajax loading. When the browser is loading a page, the client indicates to the user what it is doing. Usually some sort of icon or image is animated at the top-right corner of the client, an example of which appears in Figure 7-14. This tells the user that the client is working on something, and is not idle or frozen. The client also has some kind of loading indicator on its status bar (provided that the status bar can be viewed) letting the user know how much more of the page still needs to be loaded before it is complete, as shown in Figure 7-15.
The problem with Ajax is that the browser does not indicate to the user how much of the request still needs to load, or whether it is even working. That is good in one sense, because asynchronous jobs allow the user to do other things in the application, which they most likely will not do if the browser tells them it is working. But users are impatient in general, and will click the refresh (reload) button or the back button if nothing lets them know the browser responded to their actions.
All in all, something needs to indicate to the user that there is an Ajax action in the client. The easiest indicator is an icon or image that appears while the request is being processed and disappears when processing is complete. The best icons and images are hourglasses and basic clocks that let the user know something is processing. This icon should be off to the side somewhere so that the user knows she can perform other actions while processing occurs.
Even something as simple as displaying the words “Browser working . . . " can have the desired effect. In fact, a combination of the two works best, as the user’s eye is drawn to the icon and the words indicate what is happening.
So, how do we accomplish this? Look at this modified version
of the turnPage( ) function from
the “Paged Navigation” section, earlier in this chapter:
/**
 * This function, turnPage, changes the contents on the page to the desired
 * "page" number that is passed to it.
 *
 * @param {Integer} p_number The number of the page to go to.
 * @return Returns false so that no other event is fired after this one.
 * @type Boolean
 * @see Element#setStyle
 * @see Ajax#Request
 */
function turnPage(p_number) {
    var pages = $('pagedNavList').getElementsByTagName('li'),

    /* Loop through the list of <li> elements */
    for (var i = 0, il = pages.length; i < il; i++) {
        $(pages[i]).setStyle({ display: 'none' });
        $('l' + (i + 1)).innerHTML = '<a href="/article.php?page=' + (i + 1) +
        '" onclick="return turnPage(' + (i + 1) + ')">' + (i + 1) + '</a>';
    }
    /* Has this page already been fetched once? */
    if ($('page' + p_number).innerHTML == '') {
        new Ajax.Request('article.php', {
            method: 'post',
            parameters: { page: p_number },
            onCreate: function( ) {
                Element.show('loadingIcon'),
                Element.show('loadingText'),
            },
            onComplete: function( ) {
                Element.hide('loadingIcon'),
                Element.hide('loadingText'),
            },
            onSuccess: function(xhrResponse) {
                var response = xhrResponse.responseXML;
                var newNode;

                /* Is this browser not IE ? */
                if (!window.ActiveXObject) {
                    newNode =
                        document.importNode(response.getElementsByTagName(
                        'page')[0].childNodes[1], true);
                    $('page' + p_number).appendChild(newNode);
                } else {
                    newNode =
                        importNode(response.getElementsByTagName(
                        'page')[0].childNodes[0], true);
                    $('page' + p_number).appendChild(newNode);
                }
                $('l' + p_number).innerHTML = number;
                $('page' + p_number).setStyle({ display: 'block' });
            },
            onFailure: function(xhrResponse) {
                $('page').innerHTML = xhrResponse.statusText;
            }
        });
    } else {
        $('l' + p_number).innerHTML = number;
        $('page' + p_number).setStyle({ display: 'block' });
    }
    return (false);
}
The Element.show( ) method
displays the element that is passed to it, while the Element.hide( ) method hides the element
that is passed to it. Both methods are part of the Prototype
library. Simply by creating <div> elements to encapsulate the
icon image and loading text, you can use the Element.show( ) and Element.hide( ) methods to show the
<div> elements right when
the XMLHttpRequest object is
created, and hide the <div>
elements after the request has completed. You use CSS rules to place
the elements where you want within the application.
The other indicator I mentioned is a status bar. Status bars
are slightly more difficult to implement because it is harder for
the client to know how much of a request has been loaded to
calculate a percentage. One way around this is to use the readyState from the XMLHttpRequest object and update a status
bar at each state change. The Ajax.Request(
) method can take as parameters all of the different
readyStates just as it does
onSuccess or onFailure. There would be four readyState changes during the request, and
the call would have something like this added to it:
var callStatus = new Status('statusBar'),
onLoading: function( ) { callStatus.increment( ); },
onLoaded: function( ) { callStatus.increment( ); },
onInteractive: function( ) { callStatus.increment( ); },
onComplete: function( ) { callStatus.increment( ); callStatus = null; }
Then you need to create a new Status object:
var Status = Class.create( );
/**
 * This object, Status, is a rough skeleton for a status bar on a page.
 */
Status.prototype = {
    /**
     * This member, _element, holds the id of this status bar.
     * @private
     */
    _element: null,
    /**
     * This member, _percent, holds the current percent the status bar shows.
     * @private
     */
    _percent: 0,
    /**
     * This method, initialize, is the constructor for the class.  Any members
     * that need to be initialized should be here.
     *
     * @member Status
     * @constructor
     * @param {String} p_elementId The element id that represents the status bar.
     * @see Element#show
     */
    initialize: function(p_elementId) {
        this._element = p_elementId;
        Element.show(this._element);
    },
    /**
     * This member, increment, increments the status bar by a set increment and
     * changes the display of the status bar.
     *
     * @member Status
     * @see Element#setStyle
     */
    increment: function( ) {
        this._percent += 25;
        $(this._element).setStyle( { width: this._percent + '%' });
    }
};
This is just a rough example, and it could be much more
complex and creative, but it should give you an idea of how to
create a simple status bar. A more complex (and more accurate) way
to create a status bar requires a lot more processing on the client,
and you should use this method only if a lot of data is coming back.
With this method, you would have to set the Ajax.Request( ) to a variable such as
xhr and then poll xhr.transport.responseText at a timed
interval. The server would have to give you a full content length,
and then you would have to calculate the size of what had been set
at every interval and use that to calculate the percentage. As I
said, it is not generally worth the trouble. Also, you must use
responseText, as any XML sent
would not be well formed until it was completely loaded.
The key is to make sure that any indicator displayed to the user is unobtrusive—not in the way of other navigation or functionality that the application provides. This will help with user impatience, and it will increase the user’s overall satisfaction with your application.
As we have seen, using Ajax to enhance your application’s navigation has the advantages of speeding up page loads, potentially stopping page reloads, and giving the application a sleeker feel (more like Web 2.0). However, using Ajax can present some rather big issues as well. These have to do with how the client uses its functionality while interacting with the pages—namely using bookmarks and the browser’s back button.
Correcting problems caused by Ajax solutions is important for web accessibility, and not only so that all browser functionality remains unbroken. Go back through the code in this chapter, and you’ll notice how all links that have JavaScript events tied to them also have a hard link that can be followed when JavaScript does not work. I never really mentioned this fact, but it keeps the application accessibility-compliant, though it requires more work for the developer to code more pages. Another point I’m sure you noticed is that almost all our navigation techniques used XHTML lists—again, this enables browsers that cannot use CSS and JavaScript to still use the page.
The first problem to highlight is how a typical Ajax session completely thwarts the use of the browser’s bookmarks. This happens because the browser uses the link in its address bar for the value it saves as a bookmark to the page. This link is the unique URL to the page that the browser should bookmark.
The problem is that when Ajax enters into the mix, the URL in the address bar never changes as the page state changes. This “breaks” the functionality of bookmarks in the browser. If you do a Google search on this problem, you will see many different solutions. Take a look at the Unique URLs design pattern in Ajax Design Patterns by Michael Mahemoff (O’Reilly). This design pattern describes how to make a unique URL for every state of the page that the client interprets for requests to the server. It uses the idea of fragment identifiers creating a unique URL for the page. I think this is a very good solution.
A more straightforward solution to using bookmarks still
relies on fragment identifiers to create a unique URL for the page.
(That part is a must, it seems.) I also want to suggest an
alternative that could still comply with XHTML 1.1 or even XHTML 1.0
Strict. The Unique URLs design pattern, along with the articles and
spin-offs based on Mike Stenhouse’s article, “Fixing the Back Button
and Enabling Bookmarking for Ajax Apps” (http://www.contentwithstyle.co.uk/Articles/38/fixing-the-back-button-and-enabling-bookmarking-for-ajax-apps),
unfortunately use iframe
elements, which are not part of the two standards just mentioned.
So, here is something different.
You still need to gather the page state from the URL on the page load event. The page must then parse the hash part of the URL and determine what state needs to be set. (The assumption here is that every bit of main content comes from an Ajax request, as well as other content changes on the page.) Consider the following example:
function bodyOnload( ) {
    initializeStateFromURL( );
}

function initializeStateFromURL( ) {
    var pageState = window.location.hash;
    var queryString = parseStateToQueryString(pageState);
    configureApp(queryString);
}

function parseStateToQueryString(state) {
    /*
     * Parse the state according to how the fragment identifier is set up and
     * return a formatted querystring to send to a server page via an
     * XMLHttpRequest using POST.
     */
    ...
    return queryString;
}

function configureApp(queryString) {
    new Ajax.Request('somURL', {
        parameters: queryString,
        onSuccess: function(xhrResponse) {
            ...
            window.location.hash = xhrResponse.responseXML.getElementsByTagName
('hash')[0].childNodes[1].nodeValue;
            ...
}
I know this is still a bit roughed out, mainly because the
complexity of the parseStateToQueryString(
) function could be extremely taxing depending on the
application; therefore, one can only speculate what needs to happen
in all subsequent functions. I can easily envision the parseStateToQueryString( ) function
returning an array of individual query strings that need many
XMLHttpRequest calls to the
server to set up the client the necessary way for a given page
state.
Whatever the solution you choose to implement, remember that the bookmark functionality in the client requires a unique URL to reference for any given page.
The browser’s back button needs the same basic thing we just
discussed with the browser’s bookmarks: a unique URL. This time, it
is a URL stored in the browser’s history. The solution remains the
same as far as navigating the application using fragment
identifiers. For all XMLHttpRequest calls, you need to remember
to push the old URL into history and change the window.location.hash to the new hash value
coming from the server.
The problem is that a developer will have to rely on a timeout
function that checks whether the hash changes, because setting the
window.location.hash affects the
history for the browser but changes nothing in terms of events on
the page for the back and forward buttons. It is not a big deal,
except that it will hurt performance. Whenever we notice a change
with the fragment identifier, we should call our initializePageStateFromURL( ) function to
set the application.
The biggest problem with these “hacks” is the processing hit
the client will take in figuring out what should be displayed to the
user. There is no truly clean way around these issues. As a
developer, I can only hope browser makers will eventually recognize
that the browser needs to be accountable for XMLHttpRequest requests as well as the
requests that they currently keep track of. Anyone want to volunteer
to code this into the browsers? Anyone?
The main idea to take away from this chapter concerns an application’s general layout. It is best to provide navigation for the site’s main areas in several places throughout a single application page. For this reason, keeping the layout consistent is important so that the user does not become confused or impatient when he does not find what he expected. Break longer pieces of content into smaller chunks; these smaller chunks of data are easier to browse on the Web. Try to be as conscious of accessibility issues as possible, as most issues are easy to correct without any effort. Finally (and this is a very important point), if something in your application breaks the client’s normal functionality and there is no good workaround, let the user know.
In larger projects, site layout starts with the designer. The developer’s job is to remain as faithful to that initial design as possible without causing a major muck-up of the client. I hope this chapter will spur new ideas that can be put in another edition of the book! Seriously, though, you can develop pretty much any type of navigational aid with CSS and JavaScript at your disposal. This fact will not change as we move forward, but rather will continue to be reinforced.
Tip
This chapter discussed topics pertaining to navigation aids. In providing these aids, the developer satisfies the following WAI-WCAG 1.0 guideline:
Priority 3 checkpoint 13.5: Provide navigation bars to highlight and give access to the navigation mechanism.
Remember to design your layout for the modern browser. It is just as important to keep accessibility and client functionality stashed somewhere in the back of your mind while you do. With this plan of attack, your code should degrade cleanly in browsers that cannot handle the CSS, the JavaScript, or both. When this happens, layout is not all that important anyway, but is responsible for only the basic navigation.
[5] * The CSS rules for menu #2 style the menu bar to replicate the look of ZDNet (http://www.zdnet.com/).
[6] * The CSS rules for menu #3 come from Eric Meyer’s navigation bar, which he made in his “Minimal Markup, Surprising Style” presentation (http://meyerweb.com/eric/talks/2003/commug/commug.html).
[7] * The CSS rules for tab #2 were originally from Copongcopong’s Under Tabs (http://web.archive.org/web/20050221053356/www.klockworkx.com/css/under-tab.htm).