9. Using the Paint, Shape Drawing, and Eraser Tools
Introduction
Adobe Photoshop supplies you with all types of adjustment and manipulation tools. In addition to image enhancement, Photoshop can also be a powerful application for designing from scratch. With the vast array of supplied brushes, tips, and shape drawing tools, Photoshop helps you produce any images, either enhanced or developed from scratch, that you might need for virtually any conceivable project.
Brushes come in all sizes and shapes, and can be controlled with a mouse or drawing tablet. Since the shape of the tip controls brush strokes, Photoshop gives you access to several sets of predefined brush tip shapes, or you can create your own customized sets. As for shape drawing tools, Photoshop doesn’t limit your creativity to just drawing circles and squares; it gives you instant access to dozens of predefined shapes. You can even create and save your own custom shapes. When it comes to Photoshop’s paint and drawing tools, your choices are limitless, based only on your knowledge of the available tools, and a creative imagination—the more you know, the more you can do with Photoshop.
And, when all the drawing is said and done, there will be a need for cleaning up. With the various Eraser tools that Photoshop provides, you can make quick work of touching up those small problem areas. Photoshop provides regular eraser tools, eraser tools that erase to a definable edge, and even eraser tools that target specific color values.
When enhancing an image, you might want to apply a gradient. Gradients can be something as simple as black and white, or as complex as one that contains the colors of the rainbow. Gradients can be applied to an image by completely covering the original image information, or they can be controlled through targeted selection, and creative uses of blending modes.
Understanding Foreground and Background Colors
The Foreground and Background colors, located near the bottom of the toolbox, are Photoshop’s way of identifying your primary painting color, as well as the color Photoshop uses in conjunction with the Background layer. When you select any of Photoshop’s painting or drawing tools, the color applied to the document will be the foreground color—that’s its purpose. Hence, it’s sometimes referred to as Photoshop’s active color. The Background color serves several functions—its primary purpose is to instruct Photoshop how to handle erasing on the Background layer. When you use an eraser tool on a Photoshop layer, by default, the pixels are converted to transparency. However, when you use an eraser tool on the Background, something different happens. Since the Background does not support transparency, it replaces the erased pixels with the current background color.
Change the Active Foreground and Background Colors
Use any of the following methods to change the active foreground or background colors:
• Select the Eyedropper tool on the toolbox, and then click anywhere in the active document to change the foreground color.
Hold down the Alt (Win) or Option (Mac) key, and then click to change the background color.
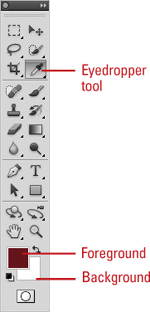
• Click on a color swatch in the Swatches panel to change the foreground color.
Hold down the Ctrl (Win) or ![]() (Mac) key, and then click to change the background color.
(Mac) key, and then click to change the background color.
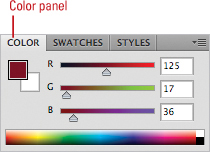
• Click the Foreground or Background thumbnail to choose the color’s destination. Create a color in the Color panel.

• Click the Foreground or Background Color box to open the Color Picker dialog box, select a color or enter color values, and then click OK.

Use Default and Switch the Foreground and Background Colors
![]() Click the Default Foreground and Background Colors button to revert the foreground and background colors to their default values of black and white.
Click the Default Foreground and Background Colors button to revert the foreground and background colors to their default values of black and white.

![]() Click the Switch Foreground and Background Colors button to switch current colors.
Click the Switch Foreground and Background Colors button to switch current colors.
Timesaver
Press D to change the foreground and background colors to their default values of black and white, and press X to switch the current colors.
Did You Know?
You can add colors from the Color Picker to the Swatches panel. Open the Color Picker dialog box, select the color you want to add to the Swatches panel, click Add To Swatches, type a name for the color, and then click OK.
Using the Brush and Brush Presets Panels
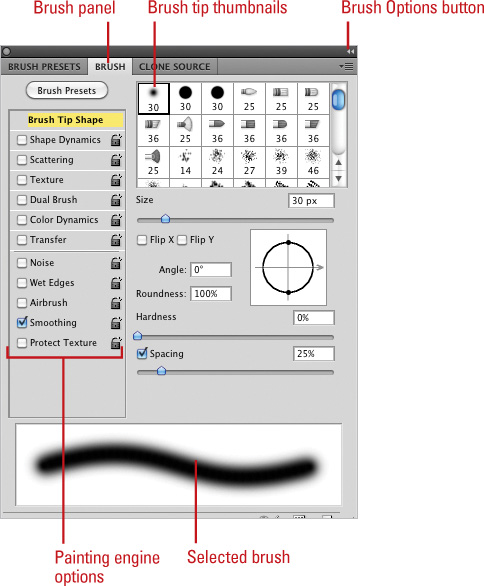
Photoshop’s Brushes Panel in CS4 has been split into two panels (New!)—Brush and Brush Presets—in CS5. The Brush panel allows you to create and select individual brushes, while the Brush Presets panel allows you to select and use predefined or custom brush tip sets or individual brushes. In the Brush panel, the current painting engine configuration, with options such as Shape Dynamics, Scattering, Texture, Dual Brush, and Color Dynamics, gives you control over brushes in ways that once were only available in programs like Adobe Illustrator.
To use the Brush or Brush Presets panel, you first need to select a brush tool, or a tool that requires the use of a brush, such as the Eraser tool, chosen from the toolbox, and then display the Brush or Brush Presets panel. You can click the Window menu, and then choose Brush or Brush Presets to display the panel. You can also click Brush Panel button (New!) on the Control panel (with a brush tool selected) or Brush Presets panel, or click the Brush Presets button on the Brush panel. The brush engine has been improved for quicker response, especially with a graphics tablet.

Modifying the Brush Presets Panel
The Brush Presets panel (New!) comes in many forms; you can view brushes as strokes, or you can choose thumbnails, or even text descriptions. The form of the Brush Presets panel does not impact its performance, only how you view the available brush tips. Choose the version that best suits your current design needs, and then change the view as needed. When you select a brush, it becomes the default for that tool only. This gives you the ability to choose a default brush for each of the brush-specific tools.
Change the Brush Presets Panel View
![]() Select a Brush tool on the toolbox, and then select the Brush Presets panel.
Select a Brush tool on the toolbox, and then select the Brush Presets panel.

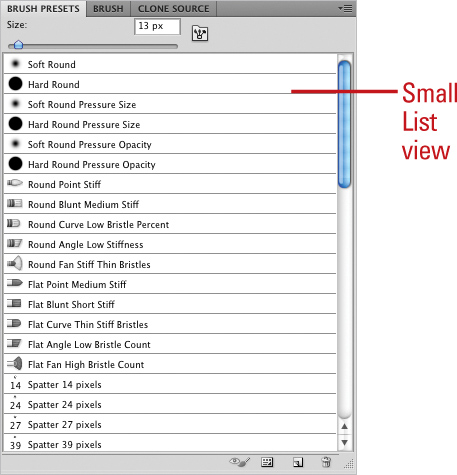

![]() Click the Brush Presets Options button, and then select from the available View options:
Click the Brush Presets Options button, and then select from the available View options:
• Expanded View. Select to gain access to painting engine options: Brush Tips, Shape Dynamics, Scattering, Texture, Dual Brush, Color Dynamics, and Other Dynamics.
• Text Only. Select to display all brush tips by their names.
• Small Thumbnail. Select to display all brush tips using a small thumbnail.
• Large Thumbnail. Select to display all brush tips using a large thumbnail.
• Small List. Select to display all brush tips by their names and small thumbnail.
• Large List. Select to display all brush tips by their names and large thumbnail.
• Stroke Thumbnail. Select to display all brush tips with a stroke. (This is useful in determining how the brush will look when applied in the document.)
Selecting Brush Tip Sets
The Brush Preset panel (New!) comes with a wide variety of predefined brush tip sets, including natural bristle (New!), faux finish, and special effect brushes. Each set organizes specific brush tips by name. Since other Photoshop tools also use brush tips, it’s important to have the right tool (brush tip) for the right job. Using or making do with the wrong brush tip is akin to digging a swimming pool with a teaspoon. You wouldn’t paint a portrait with a house-painting brush, so don’t settle for anything less than the exact brush tip you need to get the job done.
Select Brush Tip Sets
![]() Select a Brush tool on the toolbox, and then select the Brush Presets panel.
Select a Brush tool on the toolbox, and then select the Brush Presets panel.
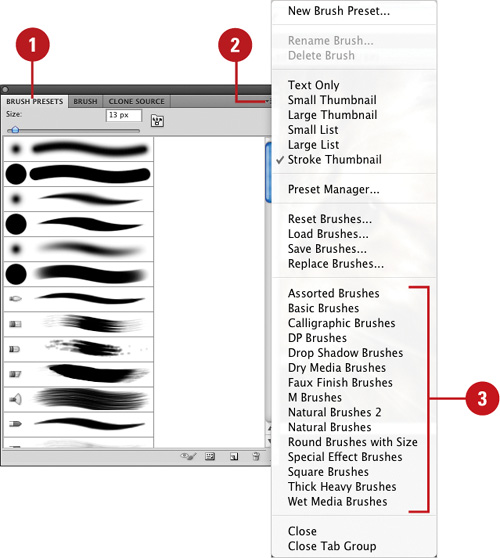
![]() Click the Brush Presets Options button.
Click the Brush Presets Options button.
![]() Click any of the predefined brush sets.
Click any of the predefined brush sets.
![]() Click OK.
Click OK.
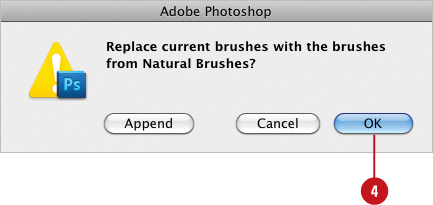
This replaces the current brush tips with the selected set, or you can click Append to add them to the current set.
Did You Know?
You can draw straight lines using Photoshop’s brush tools. Holding the Shift key while dragging constrains the brush to a 90-degree line. To draw a straight line between two points, click once in the document window, move the mouse to another position, hold down the Shift key, and then click a second time. A straight line will be drawn between the first and second mouse clicks.
Adjusting Brush Tips
The left pane of the Brush panel provides a series of controls that let you define how a brush tip is applied to the active image. Features such as Brush Tip Shape, Scattering and Color Dynamics let you further customize your brush tips so you can create that specialized brush for all your image enhancement needs.
Adjust a Brush Tip
![]() Select a Brush tool on the toolbox, and then select the Brush panel.
Select a Brush tool on the toolbox, and then select the Brush panel.
![]() Click the Brush Options button, and then click Expanded View.
Click the Brush Options button, and then click Expanded View.
![]() Click to select a specific brush tip.
Click to select a specific brush tip.

![]() Select from the various Painting Engine options:
Select from the various Painting Engine options:
• Brush Tip Shape. Lets you modify the size, angle, roundness, hardness, and spacing of the brush tip. In addition, you can flip the brush shape along its x (left to right), or y (top to bottom) axis.
• Shape Dynamics. Lets you randomly (jitter) generate different sizes, angles, and roundness for the brush tip.
• Scattering. Lets you randomly scatter the shape. Options include the ability to distribute (Scatter) the shape, as you draw, choose how many to use (Count), and randomly change the number (Count Jitter), as you draw.
• Texture. Lets you select a predefined or custom texture, in place of a solid color.
• Dual Brush. Lets you select a second brush.
• Color Dynamics. Lets you key off of the active foreground and background colors.
• Other Dynamics. See Table.
Adjusting Bristle Brush Tips
Bristle brushes (New!) simulate the effects of painting with a natural brush, such as watercolors and oils. When you use a bristle brush, it paints with vectors to resemble a natural brush stroke. When you select a bristle brush, you can set brush options, such as brush shape (either, round or flat), brush size, length, density, thickness, and stiffness. If you want to see a visual representation of your changes, use the Toggle the Bristle Brush Preview button (New!) on the panel. When you use a writing tablet and 6D pen, such as a Wacom Art Pen, with a bristle brush, the pen responds to pressure, bearing, rotation, and tilt.
Adjust a Bristle Brush Tip
![]() Select a Brush tool on the toolbox, and then select the Brush panel.
Select a Brush tool on the toolbox, and then select the Brush panel.

![]() Click to select a bristle brush tip.
Click to select a bristle brush tip.
![]() To show or hide the bristle brush preview, click the Toggle the Bristle Brush Preview button on the panel.
To show or hide the bristle brush preview, click the Toggle the Bristle Brush Preview button on the panel.
![]() Select from the various bristle options:
Select from the various bristle options:
• Shape. Lets you select a bristle brush shape, such as Round or Flat (Point, Blunt, Curve, Angle, or Fan).
• Bristles. Lets you modify the density of the bristle between 1% and 100%. The density is the number of bristles in a specified area of the brush neck.
• Length. Lets you modify the length of the bristle between 25% and 500%.
• Thickness. Lets you modify the thickness of the bristle from fine to coarse between 1% and 200%.
• Stiffness. Specify the rigidness of the bristle between 1% to 100%. A lower value creates flexible bristles, while a higher value creates stiffer bristles.
• Angle. Lets you modify the angle of the brush.
Creating Customized Brush Tips
Although Photoshop’s Brush panel gives you many choices for brush tips, any good designer will tell you that no matter how many brush tips you have, you’ll always want more. For example, you’re working on a 100-year-old photograph, and you need a specific brush to add hair details to the blown-out areas of the image. You’ll want to find a special type of brush that literally creates the illusion of wavy hair and add it to your collection of brush tips. Photoshop, in an effort to help keep you organized, gives you the ability to create your very own customized brush tips, and then save them later in organized sets.
Create a New Brush Tip
![]() Open an image, scan an item, or select any of Photoshop’s painting tools and create a shape for a new brush tip.
Open an image, scan an item, or select any of Photoshop’s painting tools and create a shape for a new brush tip.

Important
Since the color of a brush is determined when the brush tip is selected, create the brush tip using black or shades of gray.
![]() Select the brush tip using any of Photoshop’s selection tools.
Select the brush tip using any of Photoshop’s selection tools.
Important
Photoshop picks up any pixel information in the underlying layers, even white. If you want the brush to have a transparent background, make sure the areas surrounding the image are transparent.
![]() Click the Edit menu, and then click Define Brush Preset.
Click the Edit menu, and then click Define Brush Preset.
![]() Enter a name for the new brush preset.
Enter a name for the new brush preset.
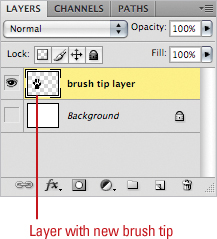

![]() Click OK.
Click OK.
Open the Brush panel, and then scroll to the bottom of the list to access your newly created brush tip.
Since the Define Brush Preset button picks up any background colors within the selection area, it always creates the brush tip in a blank layer.
Saving Customized Brush Tips
Once a brush tip is created, it becomes part of the current set. However, the brush has not yet been permanently saved in Photoshop. Although the new brush tip will reappear every time you access the Brush panel, if you choose the option to reset the panel, the new brush will be lost. To keep brushes you must save them into customized sets; choose the default Brushes folder, so Photoshop can use them.
Save a Customized Brush Tip
![]() Select a Brush tool on the toolbox, and then select the Brush Presets panel.
Select a Brush tool on the toolbox, and then select the Brush Presets panel.
![]() Create a set of customized brushes.
Create a set of customized brushes.

![]() Click the Brush Presets Options button, and then click Save Brushes.
Click the Brush Presets Options button, and then click Save Brushes.
![]() Type the name of the set (with a ABR extension).
Type the name of the set (with a ABR extension).
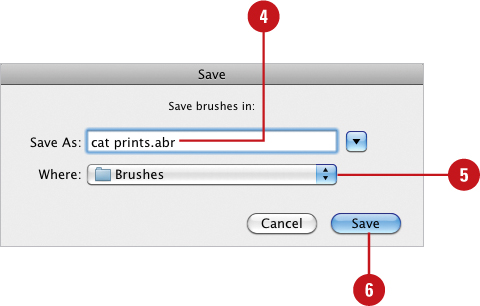
![]() Click the Save In (Win) or Where (Mac) list arrow, and then select where you want to save the brush set.
Click the Save In (Win) or Where (Mac) list arrow, and then select where you want to save the brush set.
![]() Click Save.
Click Save.
Did You Know?
You can access your customized sets directly from the Brush Options menu. When you save your customized brush set, put them in the Brushes folder, located in the Adobe Photoshop CS5/Presets folder. Brush sets saved here appear in the Brush Options menu along with the other Photoshop presets.
Working with the Brush and Airbrush Tools
Photoshop’s Brush and Airbrush tools were designed to reproduce the visual effect of applying paint to a canvas. You have full control over the brush tip, color, size, opacity, and even the brush’s blending mode. Control over the image is achieved by using additional layers to hold the brush strokes—but remember, adding additional layers increases the file size of a Photoshop document. Since layers have their own individual options, such as opacity, fill, and blending modes, you achieve even greater control over the final design by giving brush strokes their own layers. Once the brush stroke is to your liking, you can always merge the brush-stroke layer into the image to conserve file size.
Work with the Brush and Airbrush Tools
![]() Select the Brush tool on the toolbox.
Select the Brush tool on the toolbox.
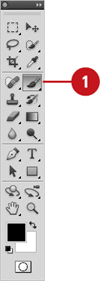
![]() Select a brush tip on the Options bar or from the Brush panel.
Select a brush tip on the Options bar or from the Brush panel.

![]() Specify Paint Engine options for the brush from the Brush panel.
Specify Paint Engine options for the brush from the Brush panel.
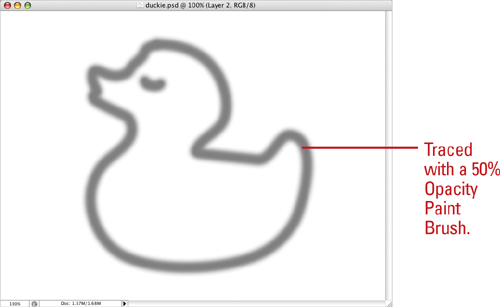
![]() Select from the following Brush options on the Options bar:
Select from the following Brush options on the Options bar:
• Mode. Click the list arrow to choose from the available blending modes. The blending modes controls how the active brush color blends with the colors in the active image.
• Opacity. Enter an opacity percent (1% to 100%), or click the list arrow, and then drag the slider left or right.
• Flow. Enter a flow percentage (1% to 100%), or click the list arrow, and then drag the slider left or right. When you apply the brush, Flow controls the amount of ink supplied to the brush.
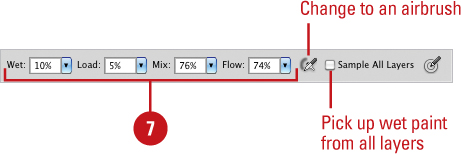
• Airbrush. Click the button to change the Brush into an Airbrush.
![]() Drag within the image to paint.
Drag within the image to paint.
Working with the Mixed Brush Tool
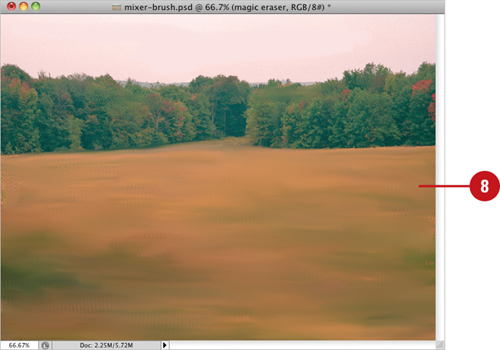
With the Mixed Brush tool (New!), you can define multiple colors on a single brush tip, and then mix and blend them together with the underlying hues on your canvas. With a photo, you can use a dry, empty brush to blend the existing colors while at the same time adding a painting effect to the image. Mixer Brush options on the Control panel allow you to control the wetness of the brush, the load rate to add paint to the brush, the mixing rate between the brush and canvas color, and whether the brush is refilled, cleaned, or both after each painting stroke.
Work with the Mixed Brush Tool
![]() Select the Mixed Brush tool on the toolbox.
Select the Mixed Brush tool on the toolbox.
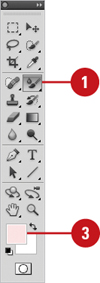
![]() Select a brush tip on the Options bar or from the Brush panel.
Select a brush tip on the Options bar or from the Brush panel.

![]() Select a mixing color.
Select a mixing color.
![]() Click the Current Brush Load list arrow, and then select Load Brush, Clean Brush, or Load Solid Colors Only.
Click the Current Brush Load list arrow, and then select Load Brush, Clean Brush, or Load Solid Colors Only.
![]() Click the Load the Brush After Each Stroke or Clear the Brush After Each Stroke button.
Click the Load the Brush After Each Stroke or Clear the Brush After Each Stroke button.
![]() Click the Blending Combinations list arrow, and then select a preset.
Click the Blending Combinations list arrow, and then select a preset.
![]() Specify a percentage (1% to 100%), or click the list arrow, and then drag the slider for any of the following Mixed Brush options on the Options bar:
Specify a percentage (1% to 100%), or click the list arrow, and then drag the slider for any of the following Mixed Brush options on the Options bar:
• Wet. Controls the wetness of the brush.
• Load. Controls the load rate to add paint to the brush.
• Mix. Controls the mix rate between the brush and canvas color.
• Flow. Controls the amount of ink supplied to the brush.
![]() Drag within the image to paint.
Drag within the image to paint.
Working with the Pencil Tool
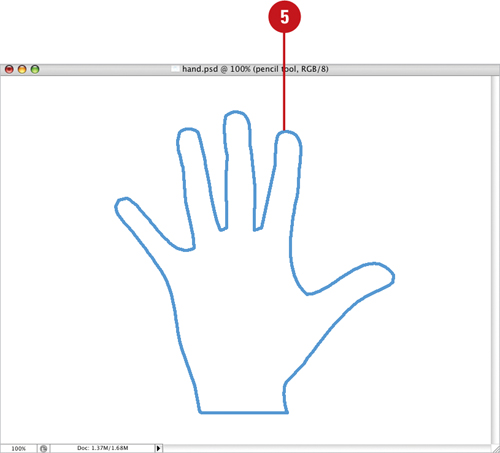
The Pencil tool is exactly what its name implies...a pencil. The Pencil tool is limited to hard brush tips of any size or shape, and creates freeform lines using the current foreground color. In fact, the major difference between the Pencil and Brush tools is the Pencil tool’s inability to draw anything but a hard-edged line. A unique feature of the Pencil tool is its ability to switch between the current foreground and background colors using the Auto Erase feature.
Work with the Pencil Tool
![]() Select the Pencil tool on the toolbox.
Select the Pencil tool on the toolbox.

![]() Click the Brush Preset Picker list arrow, and then click a brush tip.
Click the Brush Preset Picker list arrow, and then click a brush tip.

![]() Click the Mode list arrow, and then select a blending mode.
Click the Mode list arrow, and then select a blending mode.
![]() Enter an Opacity percentage value (1% to 100%).
Enter an Opacity percentage value (1% to 100%).
![]() Drag the Pencil tool across the active document.
Drag the Pencil tool across the active document.
Did You Know?
You can use the Pencil tool to create calligraphy lettering. Select the Pencil tool, click black as your painting color, and then click one of the oblong brush tips on the Options bar. If you own a drawing tablet, use the tablet with the Pencil tool to create beautifully formed calligraphy letters.
Working with Auto Erase
The Auto Erase feature lets you automatically switch the Pencil tool’s painting color using the current foreground and background color swatches. The trick is where you start drawing the line. If you start dragging the brush tip from a new location in the document, the Pencil tool creates a line in the active foreground color. If you then place the brush tip on a previously drawn line and drag, the Pencil tool creates a new line in the active background color. Since the Auto Erase feature doesn’t really erase anything, it will perform exactly the same way on a transparent layer as it does on the background layer.
Work with Auto Erase
![]() Select the Pencil tool on the toolbox.
Select the Pencil tool on the toolbox.

![]() Select the Auto Erase check box on the Options bar.
Select the Auto Erase check box on the Options bar.

![]() Drag the Pencil tool across the active document to create a line in the active foreground color.
Drag the Pencil tool across the active document to create a line in the active foreground color.

![]() Click anywhere in the background and the Pencil tool will use the foreground color.
Click anywhere in the background and the Pencil tool will use the foreground color.
![]() Move the brush tip over one of the previous lines, and then drag to create a line in the active background color.
Move the brush tip over one of the previous lines, and then drag to create a line in the active background color.
Did You Know?
You can draw straight lines with the Pencil tool. Click once in the document to create a black dot, move to another position, hold down the Shift key, and then click again. When you hold down the Shift key, the Pencil tool creates a straight line between the two mouse clicks.
Working with the Line Tool
The Line tool lets you draw lines by dragging from one point in the active document and releasing in another. You can draw lines at precise 45- or 90-degree angles by holding down the Shift key as you drag. Select the Line tool, or if you already have another drawing tool selected, you can choose the Line tool from the toolbox. Then configure the Line tool using the Options bar. It’s also a good idea to create the lines in a separate layer. That way, once the lines have been drawn, it’s as easy as selecting the Move tool and repositioning them where you want them.
Work with the Line Tool
![]() Select the Line tool on the toolbox.
Select the Line tool on the toolbox.

![]() Click the Fill Pixels button to create raster shapes in the active foreground color.
Click the Fill Pixels button to create raster shapes in the active foreground color.

![]() Click the Geometry options list arrow, and then select from the following options:
Click the Geometry options list arrow, and then select from the following options:
• Arrowheads. Select the Start and/or End check boxes to create arrowheads on the line.
• Width. Enter a percentage (10 to 1,000), to determine the width of the arrowhead in relation to the width of the line.
• Length. Enter a percentage (10 to 5,000), to determine the length of the arrowhead.
• Concavity. Enter a percentage (-50 to +50) to determine the concavity of the arrowhead.
![]() Enter a value (1 to 1,000 pixels) to determine the weight of the line.
Enter a value (1 to 1,000 pixels) to determine the weight of the line.
![]() Click the Mode list arrow, and then select a blending mode.
Click the Mode list arrow, and then select a blending mode.
![]() Enter an Opacity percentage value (1% to 100%).
Enter an Opacity percentage value (1% to 100%).
![]() Select the Anti-alias check box to create a visually smoother line.
Select the Anti-alias check box to create a visually smoother line.
![]() Drag in the document window to create the line.
Drag in the document window to create the line.

Using the Standard Shape Tool
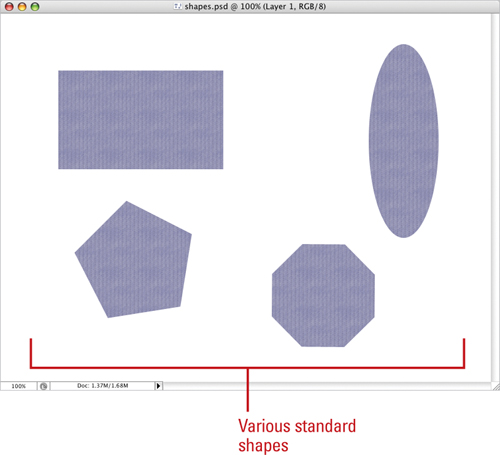
Creating standard shapes, such as polygons or rectangles with rounded corners, used to be a hassle. That is, until Photoshop released its Standard Shape drawing tools. Now, it’s a simple matter of selecting the correct tool, choosing a color, and then drawing the shape. As with any of Photoshop’s drawing functions, control is maintained with the use of additional layers. Photoshop’s standard shapes include rectangles, rounded rectangles, ellipses, and polygons. Each one of the shape tools comes with additional options to control exactly how the shape appears when drawn.
Work with the Standard Shape Tool
![]() Select the Rectangle, Rounded Rectangle, Ellipse, or Polygon tool on the toolbox.
Select the Rectangle, Rounded Rectangle, Ellipse, or Polygon tool on the toolbox.

![]() Click the Fill Pixels button to create raster shapes in the active foreground color.
Click the Fill Pixels button to create raster shapes in the active foreground color.

![]() To switch tools, click the Rectangle, Rounded Rectangle, Ellipse, or Polygon tool buttons.
To switch tools, click the Rectangle, Rounded Rectangle, Ellipse, or Polygon tool buttons.
![]() Click the Geometry options list arrow, and then select from the following drawing options or check boxes:
Click the Geometry options list arrow, and then select from the following drawing options or check boxes:
• Unconstrained. (Rectangle, Rounded Rectangle, Ellipse)
• Square. (Rectangle, Rounded Rectangle)
• Circle. (Ellipse)
• Fixed Size. (Rectangle, Rounded Rectangle, Ellipse)
• Proportional. (Rectangle, Rounded Rectangle, Ellipse)
• From Center. (Rectangle, Rounded Rectangle, Ellipse)
• Snap to Pixels. (Rectangle, Rounded Rectangle)
• Smooth Corners. (Polygon)
• Star. (Polygon)
• Indent Sides By. (Polygon)
• Smooth Indents. (Polygon)
![]() Click the Mode list arrow, and then select a blending mode.
Click the Mode list arrow, and then select a blending mode.

![]() Enter an Opacity percentage value (1% to 100%).
Enter an Opacity percentage value (1% to 100%).
![]() Select the Anti-alias check box to create a visually smoother image.
Select the Anti-alias check box to create a visually smoother image.
Useful when drawing shapes with curved edges.
![]() Drag in the document window to create the shape.
Drag in the document window to create the shape.

Important
Maintain control over your design by drawing shapes in separate layers.
Working with the Custom Shape Tool
Having the ability to draw a perfect polygon or rounded-corner rectangle is nice; however, Photoshop went way beyond standard shapes when it introduced the Custom Shape tool. Photoshop now comes packaged with dozens of predesigned shapes, or you can even create your own. User-defined shapes can be made from literally any vector object. For example, a company logo can be converted to a custom shape. Custom shapes have many time-saving applications. As previously mentioned, a company logo, if used frequently, is only a mouse click away. Any vector form, outline, or shape used on a recurring basis, can be converted to a custom shape and saved for future use. Select the Custom Shape tool or, if you have any shape drawing tool selected, click the Custom Shape button from the Options bar, and then configure the shape using choices from the Options bar.
Work with the Custom Shape Tool
![]() Select the Custom Shape tool on the toolbox.
Select the Custom Shape tool on the toolbox.

![]() Click the Fill Pixels button to create raster shapes, using the active foreground color.
Click the Fill Pixels button to create raster shapes, using the active foreground color.

![]() Click the Geometry options list arrow, and then select from the available options: Unconstrained, Defined Proportions, Defined Size, Fixed Size, or From Center.
Click the Geometry options list arrow, and then select from the available options: Unconstrained, Defined Proportions, Defined Size, Fixed Size, or From Center.
![]() Click the Shape list arrow, and then select a shape from the available options.
Click the Shape list arrow, and then select a shape from the available options.
![]() Click the Mode list arrow, and then select a blending mode.
Click the Mode list arrow, and then select a blending mode.

![]() Enter an Opacity percentage value (1% to 100%).
Enter an Opacity percentage value (1% to 100%).
![]() Select the Anti-alias check box to create a visually smoother line.
Select the Anti-alias check box to create a visually smoother line.
![]() Drag in the document window to create the customized shape.
Drag in the document window to create the customized shape.
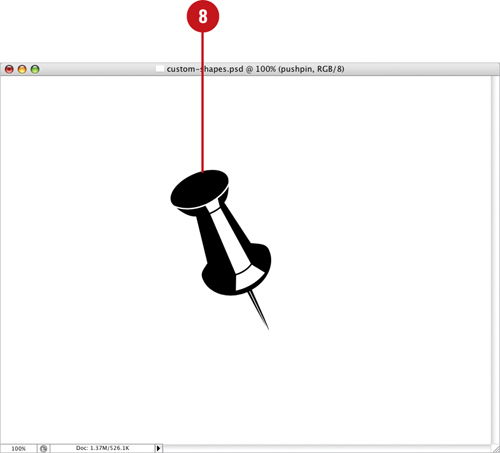
Creating a Custom Shape
Custom shapes can be created from anything you choose, and the process is quick and simple. You just create the shape, select the shape, and name the shape. That’s it. Since shapes are vector images, they’re resolution-independent, which means you can draw them at any size without impacting image quality. Once custom shapes are saved, they can be accessed by opening a document, selecting the Shape tool, and choosing your new shape from the Custom Shapes panel.
Create a Custom Shape
![]() Open a document that contains the vector image you want to convert into a shape, or create a shape using any of Photoshop’s vector drawing tools.
Open a document that contains the vector image you want to convert into a shape, or create a shape using any of Photoshop’s vector drawing tools.
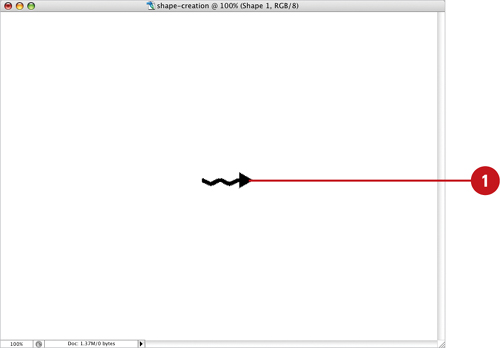
![]() Click the Edit menu, and then click Define Custom Shape.
Click the Edit menu, and then click Define Custom Shape.
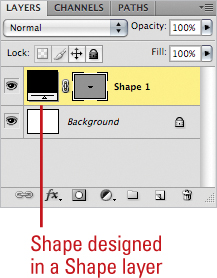
![]() Enter a name for the new shape.
Enter a name for the new shape.

![]() Click OK.
Click OK.
The shape appears as a thumbnail at the bottom of the active Custom Shapes panel.
Did You Know?
You can move Photoshop shapes into other vector programs, such as Illustrator, FreeHand, and even Flash. Click the File menu, point to Export, and then click Paths To Illustrator. Name the new document, and then click Save.
Saving Custom Shape Sets
Creating customized sets of shapes is an excellent way to get organized. The next time you need a specific shape all you have to do is select the shape from your organized sets. Organization can save you time, but it also lends a sense of consistency to designs. Using the same customized shapes repeatedly helps to tie the elements of a design together, and Photoshop gives you the perfect way to maintain that consistency with customized shape sets.
Save Custom Shape Sets
![]() Select the Custom Shape tool on the toolbox.
Select the Custom Shape tool on the toolbox.
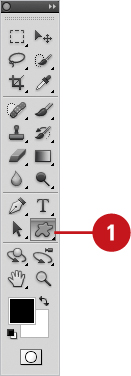
![]() Click the Shape list arrow to see a list of the current shapes.
Click the Shape list arrow to see a list of the current shapes.
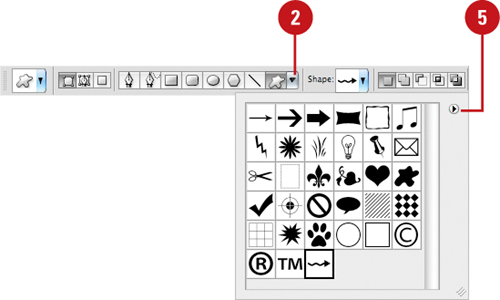
![]() Create new shapes, and then add them to the current list.
Create new shapes, and then add them to the current list.
Important
As you create new shapes, if there are some you don’t like, delete them. Right-click the shape, and then click Delete Shape.
![]() To add preexisting shapes, click the Options button, and then click Load Shapes, or choose from the available predefined shape lists.
To add preexisting shapes, click the Options button, and then click Load Shapes, or choose from the available predefined shape lists.
![]() Click the Options button, and then click Save Shapes.
Click the Options button, and then click Save Shapes.
![]() Enter a descriptive name for the new set in the File Name (Win) or the Save As (Mac) box.
Enter a descriptive name for the new set in the File Name (Win) or the Save As (Mac) box.
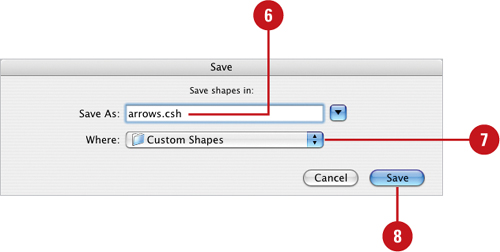
![]() Click the Save In (Win) list arrow or Where (Mac) popup, and then select a location to save the new set.
Click the Save In (Win) list arrow or Where (Mac) popup, and then select a location to save the new set.
Important
If you save the new set in the Custom Shapes folder, located in the Adobe Photoshop CS5 application folder, the new set will appear as a predefined set when you click the Shapes Options button.
![]() Click Save.
Click Save.
Using the Paint Bucket Tool
The Paint Bucket tool is not new; in fact, it’s been around almost as long as Photoshop. The Paint Bucket’s primary function is to fill an area with the active foreground color, but that’s not all it’s capable of doing. The Paint Bucket tool can fill areas with a selected pattern and, much the same way that the Magic Wand tool selects image information, the fill area can be controlled by the shift in brightness of image pixels. Combine those features with the ability to change the Paint Bucket’s blending mode or opacity, and you have a tool with a lot of horsepower.
Use the Paint Bucket Tool
![]() Select the Paint Bucket tool on the toolbox.
Select the Paint Bucket tool on the toolbox.

![]() Click the Fill list arrow, and then select an option:
Click the Fill list arrow, and then select an option:
• Foreground. Fills a selected area with the current foreground color.
• Pattern. Fills a selected area with a pattern.

![]() Click the Pattern list arrow, and then select a predefined fill pattern. This option is available if you select Pattern as a fill option.
Click the Pattern list arrow, and then select a predefined fill pattern. This option is available if you select Pattern as a fill option.
![]() Click the Mode list arrow, and then select a blending mode.
Click the Mode list arrow, and then select a blending mode.
![]() Enter an Opacity percentage value (1% to 100%).
Enter an Opacity percentage value (1% to 100%).
![]() Select a Tolerance value (0 to 255). The Tolerance value influences the range that the Paint Bucket uses to fill a given area.
Select a Tolerance value (0 to 255). The Tolerance value influences the range that the Paint Bucket uses to fill a given area.

![]() Select the Anti-alias check box to create a visually smoother line.
Select the Anti-alias check box to create a visually smoother line.
![]() Select the Contiguous check box to restrict the fill to the selected area.
Select the Contiguous check box to restrict the fill to the selected area.
![]() Select the All Layers check box to fill the color range information from all the image’s layers.
Select the All Layers check box to fill the color range information from all the image’s layers.
![]() Click the Paint Bucket tool cursor on the area to be changed.
Click the Paint Bucket tool cursor on the area to be changed.
Working with the Eraser Tools
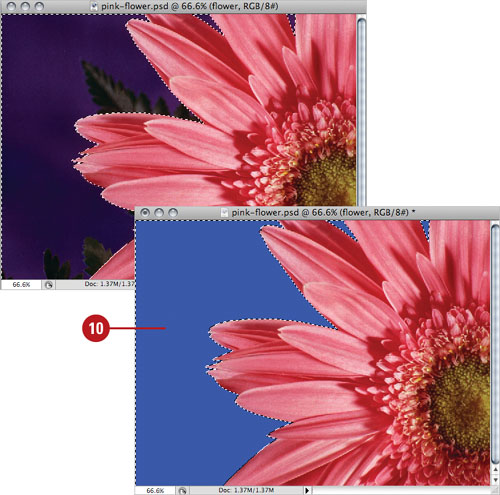
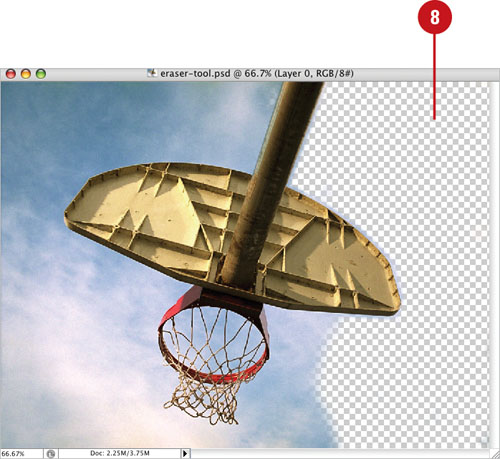
Photoshop’s basic Eraser tool converts image pixels in a layer to transparent pixels. While the primary function of the Eraser tool has not changed, the tool itself has been greatly improved. For example, you can use the Eraser tool to remove a specific color or to erase around the edge of an object. You can instruct the Eraser tool to remove a specific color while protecting another color and at the same time, increase or decrease the tool’s tolerance (the range of selection). If you use the Eraser tool on a layered document, the tool will erase to transparency. If the Eraser tool is used on a flattened document (flattened documents do not support transparency), the Eraser tool will use the active background color to perform the erasure. As you can see, the eraser tools do more than blindly erase image information. As you master the eraser tools, you just may find those complicated eraser jobs becoming easier and easier. The Background Eraser tool lets you select specific colors within an image and erase just those colors.
Use the Basic Eraser Tool
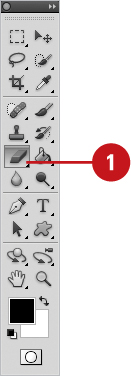
![]() Select the Eraser tool on the toolbox.
Select the Eraser tool on the toolbox.
![]() Click the Brush list arrow, and then select a brush tip.
Click the Brush list arrow, and then select a brush tip.

![]() Click the Mode list arrow, and then select a blending mode.
Click the Mode list arrow, and then select a blending mode.
![]() Enter an Opacity percentage value (1% to 100%) to determine how much the eraser removes from the image.
Enter an Opacity percentage value (1% to 100%) to determine how much the eraser removes from the image.
![]() Enter a Flow percentage value (1% to 100%) to determine the length of the eraser stroke.
Enter a Flow percentage value (1% to 100%) to determine the length of the eraser stroke.
![]() Click the Airbrush button to change the solid eraser stroke of the eraser to that of an airbrush.
Click the Airbrush button to change the solid eraser stroke of the eraser to that of an airbrush.
![]() Select the Erase To History check box to temporarily turn the Eraser into a History Brush.
Select the Erase To History check box to temporarily turn the Eraser into a History Brush.
![]() Drag the Eraser over an image layer to convert the image pixels to transparency.
Drag the Eraser over an image layer to convert the image pixels to transparency.
Use the Background Eraser Tool
![]() Select the Background Eraser tool on the toolbox.
Select the Background Eraser tool on the toolbox.

![]() Click the Brush list arrow, and then select a brush tip.
Click the Brush list arrow, and then select a brush tip.

![]() Click one of the Sampling buttons (determines how the Background Eraser selects the color range):
Click one of the Sampling buttons (determines how the Background Eraser selects the color range):
• Continuous. Continually selects a color range as you drag the Eraser tool across the image.
• Once. Samples a color range when you first click your mouse.
• Background Swatch. Only erases the active background color.
![]() Click the Limits list arrow, and then click how far you want the erasing to spread:
Click the Limits list arrow, and then click how far you want the erasing to spread:
• Discontiguous. Lets the Eraser tool work with all similar color range pixels throughout the image.
• Contiguous. Restricts the Eraser tool to the selected color range, without moving outside the originally sampled area.
• Find Edges. Looks for a shift in color range and attempts to erase to the visual edge of the image.
![]() Select a Tolerance percentage value (1% to 100%). The higher the tolerance, the greater the range.
Select a Tolerance percentage value (1% to 100%). The higher the tolerance, the greater the range.
![]() Select the Protect Foreground Color check box to prevent that color from being erased.
Select the Protect Foreground Color check box to prevent that color from being erased.
![]() Drag in the image to erase.
Drag in the image to erase.

Working with the Magic Eraser Tool
The Magic Eraser tool functions the same way as the Magic Wand selection tool, except that instead of selecting an area, it erases it. The Magic Eraser tool works on any traditional Photoshop layer, as well as the Background layer. Clicking with the Magic Eraser tool converts image pixels into transparent pixels. Since the Background layer does not support transparency, using the Magic Eraser tool causes Photoshop to convert the Background into a traditional layer.
Work with the Magic Eraser Tool
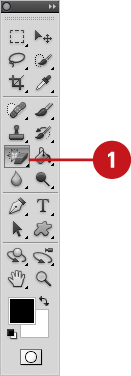
![]() Select the Magic Eraser tool on the toolbox.
Select the Magic Eraser tool on the toolbox.
![]() Enter a Tolerance value (0 to 255). The higher the value, the greater the range the Magic Eraser erases.
Enter a Tolerance value (0 to 255). The higher the value, the greater the range the Magic Eraser erases.

![]() Select the Anti-alias check box to create a visually softer eraser (useful when dealing with intensely rounded or curved selections).
Select the Anti-alias check box to create a visually softer eraser (useful when dealing with intensely rounded or curved selections).
![]() Select the Contiguous check box to select adjacent pixels within the active document.
Select the Contiguous check box to select adjacent pixels within the active document.
![]() Select the Sample All Layers check box to sample image information from all layers (Photoshop then treats the visual image as a composite).
Select the Sample All Layers check box to sample image information from all layers (Photoshop then treats the visual image as a composite).
![]() Click within the active document.
Click within the active document.

The Magic Eraser tool, depending on the options you choose, samples the pixels directly under the tool and uses that data to create a range for erasing image information.
Creating and Applying Gradients
While most of Photoshop’s painting and drawing tools let you select and paint with a single color, the Gradient tool lets you paint with a veritable rainbow of colors. The Gradient tool comes packaged with several sets of predesigned gradients—including color, transparent, and neutral density (New!) options—or you can create and save your own customized gradient sets. The process of creating a gradient is simple; you select a gradient along with a specific type (Linear, Radial, etc.), and then drag in the document window. The length and angle of the drag determines how the gradient is applied. Since gradients, by default, overwrite image pixels, it’s a good idea to create gradients in separate layers.
Create a Standard Gradient
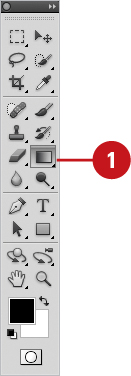
![]() Select the Gradient tool on the toolbox.
Select the Gradient tool on the toolbox.
![]() Click the Gradient list arrow, and then select from the available gradients.
Click the Gradient list arrow, and then select from the available gradients.
• The preset gradients include Foreground to Transparent, Chrome, Spectrum, Transparent Rainbow, Transparent Stripes, and Neutral Density (New!).

![]() Select one of the following gradient types from the five icons:
Select one of the following gradient types from the five icons:
• Linear, Radial, Angle, Reflected or Diamond.
![]() Click the Mode list arrow, and then select a blending mode.
Click the Mode list arrow, and then select a blending mode.
![]() Enter an Opacity percentage value (1% to 100%).
Enter an Opacity percentage value (1% to 100%).

![]() Select the Reverse check box to reverse the color order of the selected gradient.
Select the Reverse check box to reverse the color order of the selected gradient.
![]() Select the Dither check box to visually create a smoother transition between gradient colors.
Select the Dither check box to visually create a smoother transition between gradient colors.
![]() Select the Transparency check box to create gradients using a gradient mask (allows for transparency in the gradient).
Select the Transparency check box to create gradients using a gradient mask (allows for transparency in the gradient).
![]() Drag in the image to create a gradient.
Drag in the image to create a gradient.

Creating and Saving Customized Gradients
Customized gradients are easy to create and essential when you just can’t find what you want in Photoshop’s predefined sets. It doesn’t matter how many gradients Photoshop provides for you, there will always be that one instance where they just don’t do the required job. With just a few clicks of your mouse, you can create your own customized gradients. You can start with one of Photoshop’s gradients and modify it to your needs. You can also start completely from scratch; the choice is yours, and so are the rewards of creating that one-of-a-kind stunning gradient you can use for your current and future projects.
Create and Save a Customized Gradient
![]() Select the Gradient tool on the toolbox.
Select the Gradient tool on the toolbox.
![]() Click the thumbnail of the active gradient on the Options bar to open the Gradient dialog box.
Click the thumbnail of the active gradient on the Options bar to open the Gradient dialog box.

![]() Select a gradient from the available options that is close to what you want to create.
Select a gradient from the available options that is close to what you want to create.
• The preset gradients include Foreground to Transparent, Chrome, Spectrum, Transparent Rainbow, Transparent Stripes, and Neutral Density (New!).
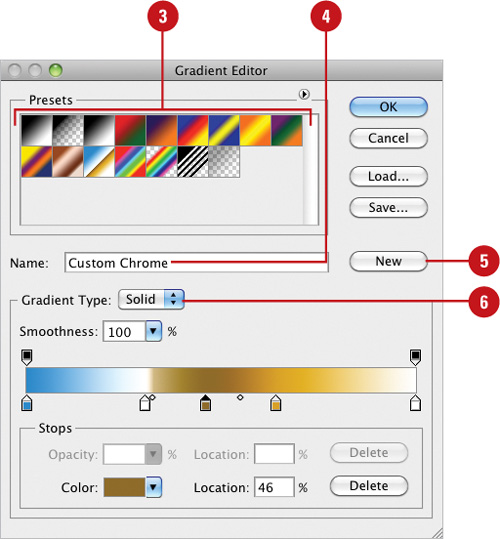
![]() Enter a name for the new gradient.
Enter a name for the new gradient.
![]() Click New.
Click New.
A thumbnail (copy of the selected gradient) appears at the bottom of the list.
![]() Click the Gradient Type list arrow, and then select one of the following:
Click the Gradient Type list arrow, and then select one of the following:
• Solid. Uses solid colors for the gradient.
• Noise. Uses noise to distribute the colors.
![]() Click the Smoothness list arrow, and then select one of the following:
Click the Smoothness list arrow, and then select one of the following:
• Smoothness. A percentage value (0% to 100%) that determines how smoothly the colors of the gradient blend together (available when the Solid option is selected).
• Roughness. A percentage value (0% to 100%) that determines how much noise to introduce into the gradient colors (available when the Noise option is selected).

![]() To add Opacity Stops, click above the gradient line; to remove Opacity Stops, drag the stop away from the line.
To add Opacity Stops, click above the gradient line; to remove Opacity Stops, drag the stop away from the line.
![]() To add Color Stops, click below the gradient line; to remove Color Stops, drag the stop away from the line.
To add Color Stops, click below the gradient line; to remove Color Stops, drag the stop away from the line.
![]() Click on an Opacity Stop, and then enter an Opacity percentage (0% to 100%), and a Location percentage (0% to 100%) for the stop to place it on the line.
Click on an Opacity Stop, and then enter an Opacity percentage (0% to 100%), and a Location percentage (0% to 100%) for the stop to place it on the line.
![]() Click on a Color stop, and then select a color, and a Location percentage (0% to 100%) for the stop to place it on the line.
Click on a Color stop, and then select a color, and a Location percentage (0% to 100%) for the stop to place it on the line.
![]() Click Delete to delete the selected opacity or color stop.
Click Delete to delete the selected opacity or color stop.
![]() Click Save to save the new gradient set.
Click Save to save the new gradient set.
The set will include the new gradients, and all the gradients that appear in the Presets panel.
![]() Click OK.
Click OK.
Using the Color Replacement Tool
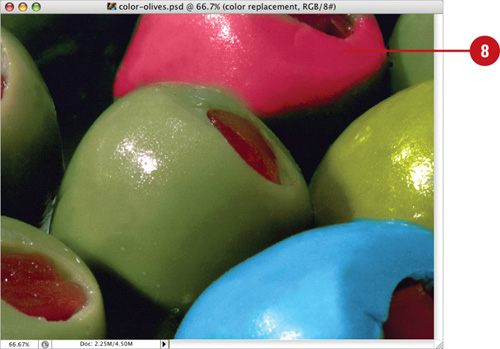
The Color Replacement tool lets you replace a specific color in your image. For best results use soft brushes with this tool to help blend the colors into the original image. Have you ever captured that perfect picture of a family member or friend, only to find they have red eyes? Or maybe there’s a part of your image where the color draws attention away from the focal point. Either way, the Color Replacement tool is a great feature that allows you to take control of the final image.
Use the Color Replacement Tool
![]() Select the Color Replacement tool on the toolbox.
Select the Color Replacement tool on the toolbox.
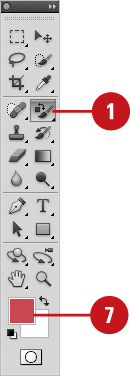
![]() Select a Brush tip on the Options bar.
Select a Brush tip on the Options bar.

![]() Select from the available Sampling options:
Select from the available Sampling options:
• Continuous. Samples colors continuously as you drag.
• Once. Replaces the targeted color only where you click.
• Background Swatch. Erases areas matching the background.
![]() Select from the available Limits options:
Select from the available Limits options:
• Discontiguous. Replaces the sampled color under the pointer.
• Contiguous. Replaces connected areas containing the sampled color and preserves the sharpness of shape edges.
• Find edges. Limits painting of the replacement color within an object as defined by its edges.
![]() Enter a Tolerance percentage value (0% to 255%).
Enter a Tolerance percentage value (0% to 255%).
![]() Select the Anti-alias check box for a smoother edge on areas you correct.
Select the Anti-alias check box for a smoother edge on areas you correct.
![]() Select a foreground color to use to replace the unwanted color.
Select a foreground color to use to replace the unwanted color.
![]() Drag in the image over the color you want to replace.
Drag in the image over the color you want to replace.
