
11. Using the Paths Panel
Introduction
Adobe Photoshop can not handle raster information (pixels), it can also work with vector information (paths). Photoshop stores raster information in the Layers panel, and stores vector information in the Paths panel. When you use Photoshop’s vector drawing, or pen tools, Photoshop creates a path in the Paths panel to store that information. In addition, it is possible to create a selection with Photoshop’s traditional selection tools, and convert that selection into a path. Paths are defined mathematically using anchor points and segments. Once created, they can be precisely modified to fit any design situation. In many ways, paths serve a function similar to channel masks—they can define selections, but because they’re vector and not raster, they are much more precise. When paths are saved, they take up far less room than channels.
Working with the various Pen tools, it’s possible to create precise paths, and even create complicated selections around virtually any shape. Once the path is created, it’s a simple matter to subtract anchor points, and add new or modify existing anchor points to produce complex paths. It’s even possible to convert straight segments (the visible line that connects two anchor points together) into elegantly curved segments, or you can remove the curve from a segment with a single click of the Convert Point tool. Paths can be used to precisely guide a brush stroke, or the interior of a path can be filled with any color, pattern, or gradient available in Photoshop using the Stroke and Fill Commands. Paths can even be used to create a clipping path around an image. When moving an image into a layout program such as Adobe InDesign, a clipping path lets you define certain areas of an image as transparent. In addition, you can create paths in Photoshop, then export and open them in Adobe Illustrator. Photoshop paths give you precise, mathematical control over the creation of complex shapes, selections, and even transparency.
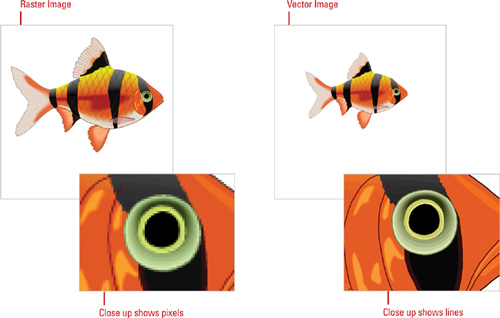
Understanding Vector and Raster Images
Photoshop is a hybrid application that gives you great control over photographic (raster) images, and seamlessly combines pixel data with the elegance and form of artistic (vector) shapes. When you work on the raster side of Photoshop, you’re dealing with an image that is a like a brick wall with each brick (or pixel) identifying one piece of color information. The reason raster images are considered resolution-dependent is that once the image is created or scanned, any enlargement of the image forces Photoshop to enlarge and average the existing color information in the document.
This process, called interpolation, is what causes enlarged raster images to become blurred, or pixelated. Vector images are created using mathematical shapes, not pixels, and that’s why vector shapes are considered resolution-independent. For example, if you enlarge a vector image to 100 times its original size, Photoshop merely changes the mathematical formulas to reflect the new size, and since vector shapes are constructed of mathematical data instead of pixels, file sizes are extremely small.
Converting a Selection into a Path
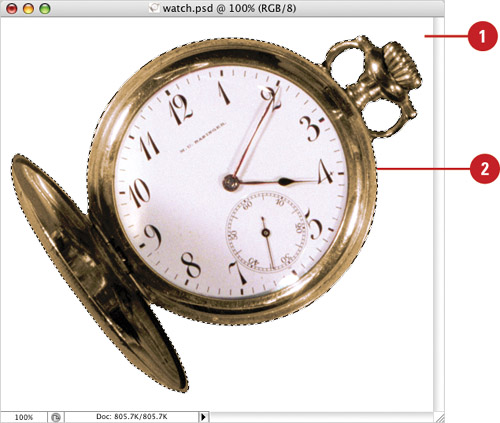
Selection marquees are Photoshop’s way of identifying the work areas within the active document. Since selections are created using pixels, the accuracy of the selection is based on the resolution of the active image. This can be a problem when you’re working with low-resolution images such as web and presentation graphics. However, when you convert a selection into a path, you can precisely reshape it using Photoshop’s vector tools, and this gives you more control over the final results.
Convert a Selection into a Path
![]() Open a document.
Open a document.
![]() Select an area of the image, using any of Photoshop’s traditional selection tools.
Select an area of the image, using any of Photoshop’s traditional selection tools.
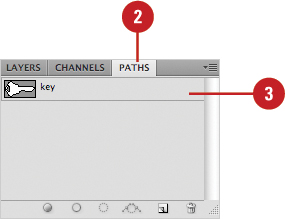
![]() Select the Paths panel.
Select the Paths panel.

![]() Hold down the Alt (Win) or Option (Mac) key, and then click the Make Work Path button.
Hold down the Alt (Win) or Option (Mac) key, and then click the Make Work Path button.
![]() Enter a Tolerance value (0.5 to 10).
Enter a Tolerance value (0.5 to 10).
Using low tolerance values creates a path with many anchor points, and the path conforms precisely to the selection marquee, but low tolerances can cause printing errors (too much information). Using higher tolerance values creates a path with fewer anchor points, and the path will be smoother.

![]() Click OK.
Click OK.
Working with Pen Tools
When you work with Photoshop’s Pen tools, you’re creating a path without needing to convert from a pixel selection (raster) to a path (vector). Vector paths are mathematical and are therefore not hampered by image resolution issues. For example, a path created in a low resolution image (72 ppi) would function the same as a path created in a high-resolution (300 ppi) image. An added benefit of paths is that they take up less disk space than selections saved as channel masks. When you create a path using the Pen tools, Photoshop automatically creates a path in the Paths panel. If you have an existing path selected, Photoshop adds the new path to the selected path.
Work with Pen Tools
![]() Open a document.
Open a document.
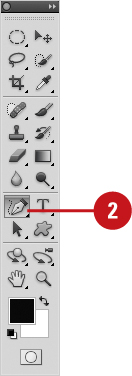
![]() Select the Standard Pen tool on the toolbox.
Select the Standard Pen tool on the toolbox.

![]() Click the Paths button on the Options bar.
Click the Paths button on the Options bar.

Important
To view the segments as you draw, click the Geometry Options list arrow on the Pen Options bar, and then select the Rubber Band check box.
![]() Create an anchor point (or node) by clicking once in the open document.
Create an anchor point (or node) by clicking once in the open document.

![]() To create a straight segment (two anchor points connected by a line), move and click again.
To create a straight segment (two anchor points connected by a line), move and click again.
![]() To create a curved segment (two anchor points connected by a curved line), move and drag.
To create a curved segment (two anchor points connected by a curved line), move and drag.
![]() Continue to move through the document, clicking or dragging until the shape is complete.
Continue to move through the document, clicking or dragging until the shape is complete.
![]() Create a closed shape by moving the Pen tool over the original anchor point and clicking when you see a small circle appear underneath the Pen tool.
Create a closed shape by moving the Pen tool over the original anchor point and clicking when you see a small circle appear underneath the Pen tool.
Important
As with any tool, control is gained through practice. Work with the Pen tool until you can make a path around any shape. The more time you spend practicing, the better your paths will be, and the better your designs.
Did You Know?
You can create an open shape. Move away from the last anchor point created, and then press Ctrl+click (Win) or ![]() +click (Mac).
+click (Mac).
Creating Paths Using the Freeform Pen Tool
While the Pen tool requires you to click and move your mouse, the Freeform Pen tool lets you drag on the screen to create any desired path. When you create a path with the Freeform Pen, Photoshop adds anchor points to the line at predefined intervals. The distance between anchor points is determined by a value called Curve Fit. The more complicated the design, the more anchor points the Freeform Pen tool must create to support the path. Once created, you can always modify the path or even add or subtract anchor points.
Use the Freeform Pen Tool
![]() Open a document.
Open a document.
![]() Select the Freeform Pen tool on the toolbox.
Select the Freeform Pen tool on the toolbox.
![]() Click the Paths button on the Options bar.
Click the Paths button on the Options bar.

![]() Drag in the document window using your mouse or drawing tablet pen to create a unique shape.
Drag in the document window using your mouse or drawing tablet pen to create a unique shape.
![]() Close the shape by dragging the Freeform Pen tool over the shape’s starting point, and then releasing when you see a small circle appear underneath the tool.
Close the shape by dragging the Freeform Pen tool over the shape’s starting point, and then releasing when you see a small circle appear underneath the tool.
![]() Create an open shape by dragging and releasing anywhere except over the starting point.
Create an open shape by dragging and releasing anywhere except over the starting point.
Did You Know?
You can control the complexity of a path. Click the Geometry Options button on the Options bar, and then enter a Curved Fit value from 0.5 to 10. The higher the value, the less complex the path (less anchor points), and the lower the value, the more precise, but more complex the path.
Using the Magnetic Option with the Freeform Pen Tool
The Magnetic option changes the Freeform Pen tool into a magnetic vector drawing tool. For example, selecting the Magnetic option forces the tool to follow the visible edge of an object in the document window. The Magnetic option instructs the Freeform Pen tool to identify the shifts in brightness between an object and its background. It’s a great way to make a difficult path. Once you click to define the starting point, it’s not necessary to hold down the mouse; just move the mouse while closely following the visible edge of the image. If you get to a tricky point where the Freeform Pen doesn’t know what to do, just click your mouse to add a user-defined anchor point.
Use the Magnetic Option with the Freeform Pen Tool
![]() Open a document.
Open a document.
![]() Select the Freeform Pen tool on the toolbox.
Select the Freeform Pen tool on the toolbox.
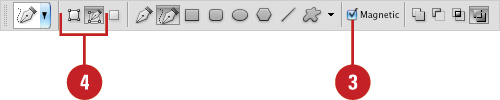
![]() Select the Magnetic check box on the Options bar.
Select the Magnetic check box on the Options bar.
Important
When using the Magnetic option with the Freeform Pen tool, you cannot create an open shape.
![]() Click the Shape Layers or Paths button.
Click the Shape Layers or Paths button.
![]() Position the Freeform Pen tool over the edge of a shape, and then click and release the mouse.
Position the Freeform Pen tool over the edge of a shape, and then click and release the mouse.
![]() Drag in the document window using your mouse or drawing tablet pen to follow the visible edge.
Drag in the document window using your mouse or drawing tablet pen to follow the visible edge.

The magnetic option helps you follow the edge more precisely.
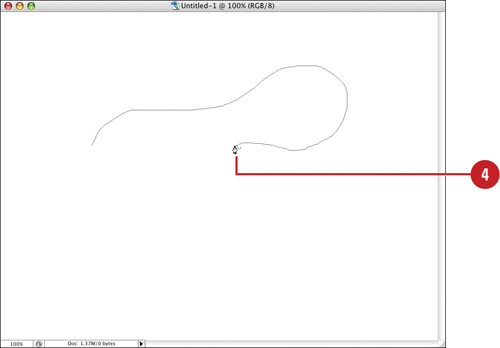
![]() Close the shape by dragging the Freeform (magnetic) Pen tool over the shape’s starting point, and then releasing when you see a small circle appear underneath the tool, or by double-clicking.
Close the shape by dragging the Freeform (magnetic) Pen tool over the shape’s starting point, and then releasing when you see a small circle appear underneath the tool, or by double-clicking.
Adding and Deleting Anchor Points
Creating a path is not necessarily the end of the job; in fact, there are many ways you can modify a path once it’s been created. For example, you can add, subtract, or delete anchor points on an existing path. You can also modify those points to conform to any desired shape. In addition, existing anchor points can be modified to change the segments connecting the points. Just like anything else in Photoshop, paths are flexible. They can be modified to meet whatever design considerations are needed to make the job successful.
Add Anchor Points
![]() Open a document that contains an existing path, or create a new path.
Open a document that contains an existing path, or create a new path.
![]() Select the Paths panel.
Select the Paths panel.
![]() Select a path.
Select a path.
![]() Select the Add Anchor Point tool on the toolbox.
Select the Add Anchor Point tool on the toolbox.

![]() Click once on the path to add, not modify, a new anchor point.
Click once on the path to add, not modify, a new anchor point.

![]() Click and drag on the path to add, and modify the segment.
Click and drag on the path to add, and modify the segment.

Did You Know?
You can move anchor points using your arrow tools. Select the Direct Selection tool, and then click on an anchor point. Click your arrow keys to move the anchor point up, down, left or right one pixel at a time. To move 10 pixels at a time, hold down the Shift key while using the arrow keys.
Delete Anchor Points
![]() Open a document that contains an existing path, or create a new path.
Open a document that contains an existing path, or create a new path.
![]() Select the Paths panel.
Select the Paths panel.

![]() Select a path.
Select a path.
![]() Select the Delete Anchor Point tool on the toolbox.
Select the Delete Anchor Point tool on the toolbox.
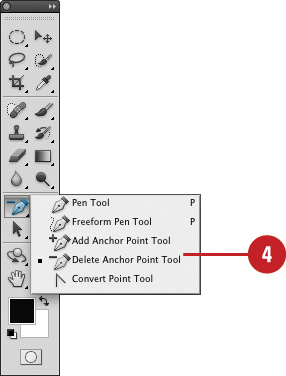
There are no additional options for the Delete Anchor Point tool.
![]() Click once on an existing anchor point to remove it from the path.
Click once on an existing anchor point to remove it from the path.
The anchor points on either side of the deleted point are now used to define the segment.
Modifying Anchor Points
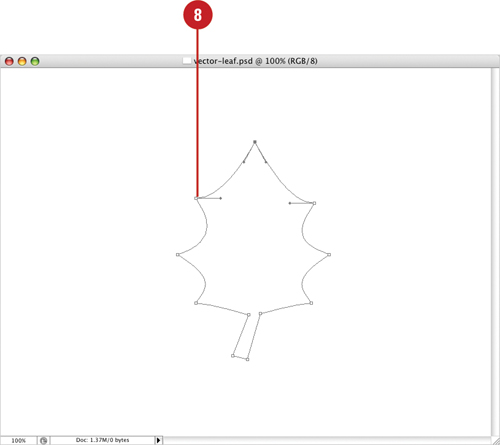
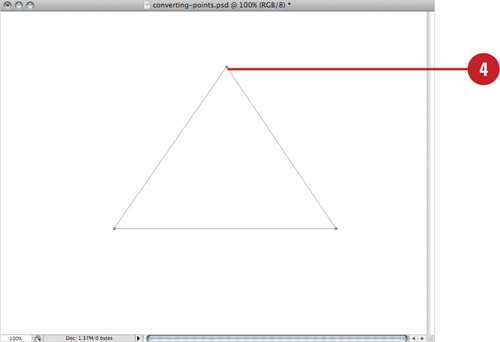
Anchor points can be added or deleted, and existing anchor points can be modified. In reality, the anchor points are used to define the length and curve of the segments, or lines that connect the anchor points together. Just think of a farmer who strings up a line of barbed wire to protect his cattle by placing posts in the ground and stringing the wire between the posts. The more posts he uses, the more complex the path of the barbed wire. In Photoshop, the posts are the anchor points, and the barbed wire corresponds to the segments. However, we have one advantage over the farmer; we can cause a segment line to curve between the anchor points, while the farmer must stretch the barbed wire in a straight line between posts.
Modify Anchor Points
![]() Open a document that contains an existing path, or create a new path.
Open a document that contains an existing path, or create a new path.
![]() Select the Paths panel.
Select the Paths panel.

![]() Select the path you want to modify.
Select the path you want to modify.
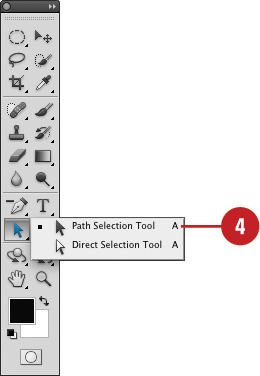
![]() Select the Path Selection tool on the toolbox.
Select the Path Selection tool on the toolbox.
![]() Click on the path to move, without modifying, the entire path.
Click on the path to move, without modifying, the entire path.

Did You Know?
You can move a path using the keyboard. Click the path and then use the arrows on the keyboard to move it.
![]() Select the Direct Selection tool on the toolbox.
Select the Direct Selection tool on the toolbox.
![]() Drag an individual anchor point to move the anchor to another location.
Drag an individual anchor point to move the anchor to another location.

Did You Know?
You can use one tool to add or delete anchor points. Press the Alt (Win) or Option (Mac) key when using the Add or Delete Anchor Point tool. This reverses the display. The Add tool becomes the Delete tool.
Modifying Existing Direction Lines
Anchor points are composed of two elements—the anchor point and direction lines. The anchor point is the fence post that connects segments together. The direction lines influence the amount of curve applied to the segment. The farther away a direction point is from the anchor, the more aggressive the curve. Conversely, the closer the direction lines are to the anchor point, the more gradual the curve. If an anchor point does not have any direction lines, it is said to be a straight anchor point.
Modify Existing Direction Lines
![]() Open a document that contains a path, or create a new path.
Open a document that contains a path, or create a new path.
![]() Select the Paths panel, and then select the path you want to modify.
Select the Paths panel, and then select the path you want to modify.
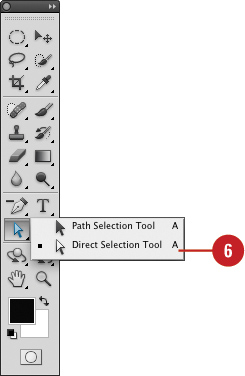
![]() Select the Direct Selection tool on the toolbox.
Select the Direct Selection tool on the toolbox.

There are no additional options for the Direct Selection tool.
![]() Click the very end of the direction line, and then drag to change the curve of the segment.
Click the very end of the direction line, and then drag to change the curve of the segment.


![]() Hold down the Alt (Win) or Option (Mac) key, and then click at the very end of the direction line to break the line at the anchor point.
Hold down the Alt (Win) or Option (Mac) key, and then click at the very end of the direction line to break the line at the anchor point.
This lets you independently control each end of the direction line as it extends out from the anchor point.
Converting Straight Points and Curved Points
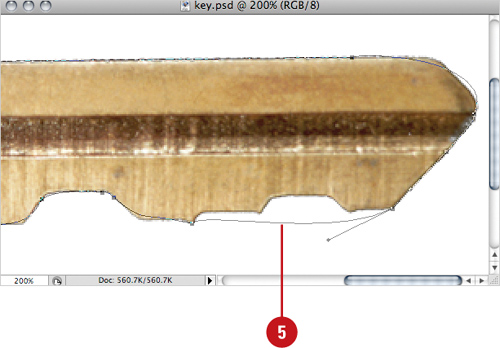
Sooner or later you’ll encounter a situation where you want to convert an anchor point from curved to straight or straight to curved. Rather than try to collapse the direction lines into the anchor point (a difficult task), or try to drag nonexistent direction lines from a straight anchor point, Photoshop gives you a useful conversion tool called the Convert Point tool. The Convert Point tool lets you convert existing points on a path. For example, to convert a curved point into a straight point, click once on the curved anchor point, and it’s instantly converted into a straight point. To convert a straight point to a curved point, simply drag on the anchor point and the line changes from straight to curved.
Convert Points
![]() Open a document that contains a path, or create a new path.
Open a document that contains a path, or create a new path.
![]() Select the Paths panel, and then select the path you want to modify.
Select the Paths panel, and then select the path you want to modify.
![]() Select the Convert Point tool on the toolbox.
Select the Convert Point tool on the toolbox.

![]() Click on a curved anchor point to convert it into a straight point.
Click on a curved anchor point to convert it into a straight point.

![]() Click and drag a straight anchor point to convert it into a curved point.
Click and drag a straight anchor point to convert it into a curved point.
Did You Know?
You can change the curve of a segment line with a click and drag. Click the Direct Selection tool, and then drag directly on the line, not the anchor point.
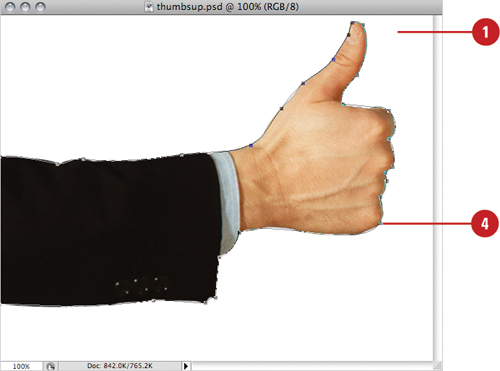
Working with Clipping Paths
Image clipping paths allow you to isolate part of an image and make everything else, such as a white background, transparent when the image is printed or placed in another application, such as QuarkXPress or Adobe Illustrator. You can place a Photoshop PSD file directly in Adobe InDesign and retain transparency; otherwise, you can create an image clipping path. To create an image clipping path, create a well defined path around the part of the image you want, convert the path to a clipping path on a transparent background, and then save and use it in other applications. Clipping paths work to create a transparent area without the sacrifice of the actual image. Therefore, it is not necessary to delete any of the image when creating the clipping path.
Work with Clipping Paths
![]() Open a document.
Open a document.
![]() Select the Pen or Freeform Pen tool on the toolbox.
Select the Pen or Freeform Pen tool on the toolbox.

![]() Click the Paths button on the Options bar.
Click the Paths button on the Options bar.

![]() Create a path around the portion of the image you want to keep.
Create a path around the portion of the image you want to keep.
Important
The edges of clipping paths are vector-based (having hard edges), so they appear as if they were cut out with a pair of scissors, which makes it difficult to select objects with soft edges.
![]() Select the Paths panel.
Select the Paths panel.
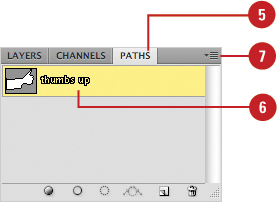
![]() Double-click on the new Work Path, enter a Name for the path, and then click OK.
Double-click on the new Work Path, enter a Name for the path, and then click OK.
![]() Click the Paths Options button, and then click Clipping Path.
Click the Paths Options button, and then click Clipping Path.
Did You Know?
You can restore the original image with transparency. Just open the Paths panel, and then delete the clipping path.
![]() Click the Path list arrow, and then select the new path.
Click the Path list arrow, and then select the new path.
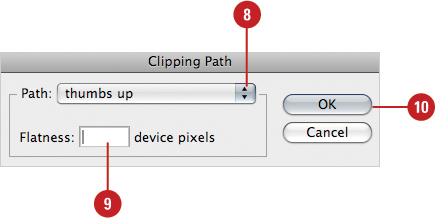
![]() Enter a Flatness value (0 to 100) or leave it blank to use the printer’s default settings (recommended).
Enter a Flatness value (0 to 100) or leave it blank to use the printer’s default settings (recommended).
For high-resolution printing (1,200 dpi to 2,400 dpi) use 8 to 10, and for low-resolution printing (300 dpi to 600 dpi) use 1 to 3. The lower the flatness value, the greater the number of straight lines used to draw the curve and the more accurate the curve.
![]() Click OK.
Click OK.
![]() If you’re going to print the file using process colors, convert the file to CMYK mode.
If you’re going to print the file using process colors, convert the file to CMYK mode.
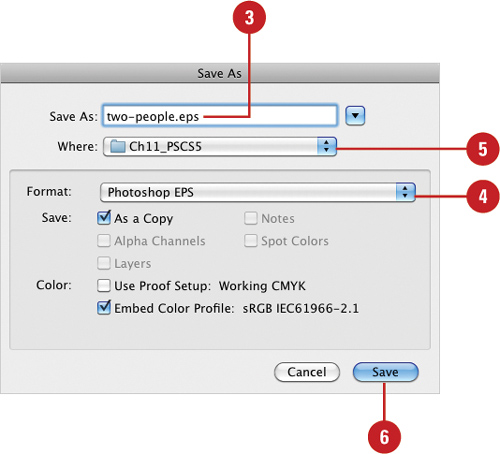
![]() Click the File menu, and then click Save As.
Click the File menu, and then click Save As.
![]() Click the Format list arrow, and then select the Photoshop EPS format.
Click the Format list arrow, and then select the Photoshop EPS format.
To export in Adobe InDesign or Adobe PageMaker 5.0 or later, save in TIFF format.
![]() Click Save.
Click Save.
![]() In the EPS or TIFF Options dialog box, leave the default options and change the following:
In the EPS or TIFF Options dialog box, leave the default options and change the following:
• For TIFF. Set Image Compression to None.
• For EPS. Set Preview to TIFF (8/bits/pixel) (Win) or Preview to Mac (8/bits/pixel) (Mac) and Encoding to ASCII85.
The image, when placed in a layout program, appears with a transparent background.
Filling an Area of an Image Using Paths
Paths are easy to create and versatile. Once you create a path, it has many applications—you can convert a path into a clipping path, or you can even convert a path into a standard selection, and use it to define a work area. In addition to some of the more common applications, paths can be used to define an area to be filled, or you can use the Stroke command to control any of Photoshop’s drawing tools.
Fill an Area of an Image Using Paths
![]() Open a document that contains a path, or create a new path.
Open a document that contains a path, or create a new path.
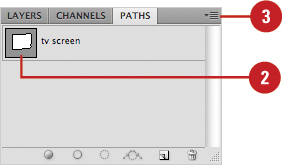
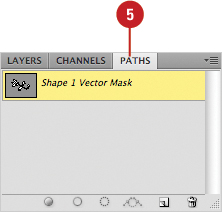
![]() Select the Paths panel, and then select one of the paths.
Select the Paths panel, and then select one of the paths.
Important
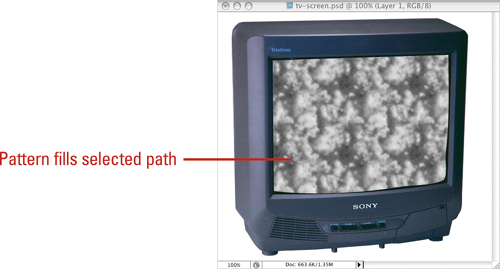
When you select a path from the Paths panel, the path becomes visible in the document window.
![]() Select the Paths Options button, and then click Fill Path.
Select the Paths Options button, and then click Fill Path.
![]() Click the Use list arrow, and then select from the available fill options.
Click the Use list arrow, and then select from the available fill options.
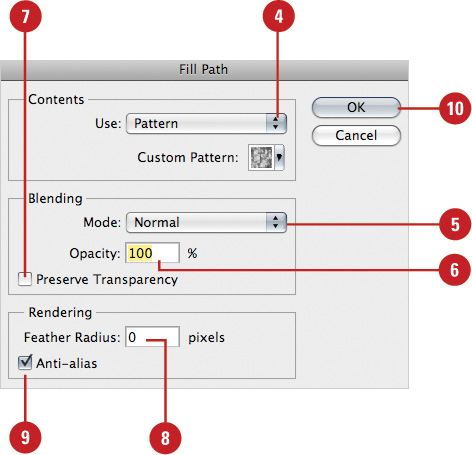
![]() Click the Mode list arrow, and then select a blending mode.
Click the Mode list arrow, and then select a blending mode.
![]() Select an Opacity percentage value (0% to 100%) for the blending mode.
Select an Opacity percentage value (0% to 100%) for the blending mode.
![]() Select the Preserve Transparency check box to protect any transparent areas in the active image.
Select the Preserve Transparency check box to protect any transparent areas in the active image.
![]() Enter a Feather Radius value (0 to 250) to feather the edge of the fill.
Enter a Feather Radius value (0 to 250) to feather the edge of the fill.
![]() Select the Anti-alias check box to visually soften the fill.
Select the Anti-alias check box to visually soften the fill.
![]() Click OK.
Click OK.
Stroking an Area of an Image Using Paths
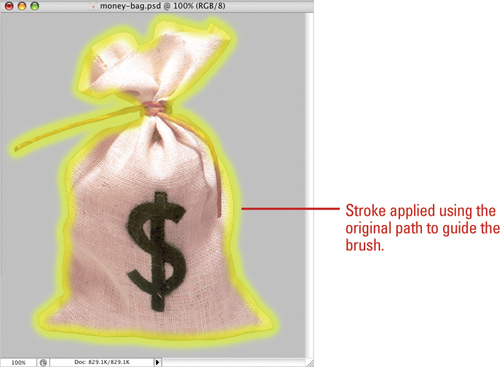
The Stroke Path option is an excellent way to add a design element to any of Photoshop’s drawing or image-editing tools. When you select the Stroke Path options, you’re essentially using a preexisting path to control the shape of the stroke. The important thing to remember is that the tool selected for the Stroke Path option will perform the way it was last used. For example, if the last time you used the Paintbrush tool you selected a star-shaped, 40-pixel brush, selecting the Paintbrush as the Stroke tool will cause it to stroke the path using a star-shaped, 40-pixel brush.
Stroke an Area of an Image Using Paths
![]() Open a document that contains a path, or create a new path.
Open a document that contains a path, or create a new path.
![]() Select the Paths panel, and then select one of the paths.
Select the Paths panel, and then select one of the paths.
![]() Click the Paths Options button, and then click Stroke Path.
Click the Paths Options button, and then click Stroke Path.
![]() Click the Tool list arrow, and then select from the available tools.
Click the Tool list arrow, and then select from the available tools.

![]() Select the Simulate Pressure check box to mimic the pressure variables experienced when using a drawing tablet.
Select the Simulate Pressure check box to mimic the pressure variables experienced when using a drawing tablet.
![]() Click OK.
Click OK.
The Stroke Path command applies the stroke using the original path to guide the brush.
Creating Shapes as Paths
Paths can be created using any of Photoshop’s traditional Pen tools, or you can use shape tools to create a unique path. For example, you want to create a unique stroke border around an image, and you find the perfect shape in Photoshop’s Custom Shapes panel. Rather than create the shape, select it, and then convert it into a path, Photoshop lets you draw any shape and place it directly into the Paths panel. Once the shape is placed in the Paths panel, you can modify or change it, just like any other path.
Create Shapes as Paths
![]() Open a document.
Open a document.
![]() Select the Custom Shape tool (or any of Photoshop’s drawing tools) on the toolbox.
Select the Custom Shape tool (or any of Photoshop’s drawing tools) on the toolbox.

![]() Click the Shape Layers button.
Click the Shape Layers button.

![]() Click the Shape list arrow, and then select a predefined shape.
Click the Shape list arrow, and then select a predefined shape.
![]() Select the Paths panel.
Select the Paths panel.
![]() Draw the shape in the document window.
Draw the shape in the document window.
Photoshop creates a Work Path containing the custom shape.

See Also
See “Modifying Anchor Points” on page 274 for information on reshaping a path.
Exporting Paths to Adobe Illustrator
Paths are vector shapes, and programs such as Adobe Illustrator support paths created in Photoshop. Say you want to create a unique path in Photoshop, and then use Illustrator’s creative vector controls to further enhance the image. If that’s the case, Photoshop gives you several ways to move the image out of Photoshop and into Illustrator. Remember, when you export a path into Adobe Illustrator, you’re not moving an image; you’re moving vector data with specific stroke and fill information.
Export Photoshop Paths Using the Save As Method
![]() Open a document that contains a path, or create a new path.
Open a document that contains a path, or create a new path.

![]() Click the File menu, and then click Save As.
Click the File menu, and then click Save As.
![]() Enter a file name.
Enter a file name.
![]() Click the Format list arrow, and then select the Photoshop EPS format.
Click the Format list arrow, and then select the Photoshop EPS format.
![]() Click the Save In (Win) or Where (Mac) list arrow, and then select a location for the file.
Click the Save In (Win) or Where (Mac) list arrow, and then select a location for the file.
![]() Click Save to open the EPS Options dialog box.
Click Save to open the EPS Options dialog box.
![]() Click OK.
Click OK.
![]() Open the image in Adobe Illustrator.
Open the image in Adobe Illustrator.
Illustrator gives you full access to the path, including the ability to manipulate, add, and delete anchor points.
Exporting Paths Using the Export Method
The Paths to Illustrator command lets you quickly export a Photoshop path into a format acceptable to Adobe Illustrator. This makes the process of working with Photoshop and Illustrator artwork much more efficient. For example, you could create a path in Photoshop, and then export the path to Illustrator for use in other artwork. In addition, exported Photoshop paths can be used to help align elements of an Illustrator document to that of its Photoshop counterpart. Later, the two documents can be combined to produce one piece of art. You get two pieces of art, created in separate applications, precisely combined with the use of an exported path. In other words, paths give you control, which you can use to your advantage.
Export Photoshop Paths Using the Export Method
![]() Open a document that contains a path, or create a new path.
Open a document that contains a path, or create a new path.

![]() Click the File menu, point to Export, and then click Paths to Illustrator.
Click the File menu, point to Export, and then click Paths to Illustrator.
![]() Click the Paths list arrow, and then select which path or paths to export.
Click the Paths list arrow, and then select which path or paths to export.

![]() Click OK.
Click OK.
![]() Enter a file name.
Enter a file name.
The file extension is AI (Adobe Illustrator).

![]() Click the Save In (Win) or Where (Mac) list arrow, and then select a location for the file.
Click the Save In (Win) or Where (Mac) list arrow, and then select a location for the file.
![]() Click Save.
Click Save.
Photoshop creates an Adobe Illustrator document containing only the paths (not pixels) in the document.