Lesson Files | Soundtrack Pro book files > 07_Projects&Media > 7-1 Single Take, 7-2 Multitake, 7-3 Something Start |
Time | This lesson takes approximately 45 minutes to complete. |
Goals | Work with single take recording in the Timeline |
Record a single take | |
Explore multitake recordings | |
Record a multiple take | |
Switch between takes in a multitake file | |
Edit both single take and multitake recordings |
You already know how to arrange and edit clips in the Timeline and modify audio file projects in the Waveform Editor. Now you’ll learn to record, edit, and save your own recordings. In Soundtrack Pro, whether you’re working with voiceover, sound effects, or music, you can record files directly into the Timeline, Mixer, or Waveform Editor. You’ll learn the basics for setting up your equipment and editing techniques for single take and multitake recordings. Along the way you’ll also pick up some new shortcuts and techniques that you can apply to your own projects.
You will begin this lesson by opening the 7-1 Single Take and 7-2 Multitake project files. Both files are located in the 07_Projects&Media folder.
Quit all open applications, except for Soundtrack Pro.
Open the projects 7-1 Single Take and 7-2 Multitake.
Both project tabs should be showing in the Project window.
Click the 7-1 Single Take tab to make it the active project.
Don’t play the project yet. Just leave it open until we get to it in a few minutes.

Although you won’t be prompted to record until later in the lesson, it’s a good idea to get everything set up in advance so that when you’re ready to record you can go for it. Before you begin a recording session, you’ve got to connect your equipment, check hard drive space, and set your recording preferences. Oh yeah, it’s also a good idea to know what you are planning to record.
Soundtrack Pro supports a variety of audio equipment for both recording and playback. However, it does not support video input from devices such as camcorders or videocassette decks. If you own an iSight camera, you can also use it as a microphone. For information on connecting a specific piece of equipment to your computer, read the documentation that came with the equipment.
If you have equipment that cannot connect directly to the computer, you might be able to connect it to an audio interface and connect that to the computer. Audio interfaces can connect to both input and output devices such as microphones, musical instruments, speakers, amplifiers, or a mixer. When choosing an audio interface, check the manufacturer’s specifications to make sure the interface is compatible with Mac OS X v10.3 or later. Some audio interfaces require driver software, while others are supported without the need for a driver. If the device requires a driver, make sure an up-to-date driver is included with the device or is available from the manufacturer.
Note
Soundtrack Pro supports input from digital audio interfaces up to a maximum sample rate of 96 kHz and a maximum bit depth of 24 bits. If your interface is outside that range, an alert message will tell you that it is not compatible with the application.
When using external audio devices, it’s a good idea to connect them before opening Soundtrack Pro. Take a moment to plug in or set up your microphone or recording device now. If your computer has a built-in microphone, you can also use that for this exercise, but you can still follow along without one.
What is your available hard drive space? Recording 44.1 kHz stereo audio files requires about 10 MB of disk space per minute. Stereo audio files that you would use for dialog recordings for video at 48 kHz are even larger. Fortunately, for this lesson the clips you record will be fairly short, and I don’t imagine you will need too many takes. However, if you are a perfectionist and anticipate many takes, check your hard drive and plan accordingly.
You will also need to set the input device and output monitoring device for recording in either the Preferences Recording pane or the Recording tab. Let’s open the Preferences Recording pane and modify the settings for your recording.
Choose Soundtrack Pro > Preferences or press Cmd-, (comma) to open the Preferences window.
Click the Recording tab at the top of the Preferences window to view the Preferences Recording pane.

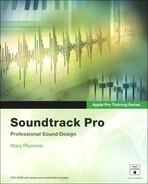
Click the Input pop-up menu and select the microphone you will be using.
If you are using the built-in computer microphone, select Built-in Audio.
Click the Monitor pop-up menu and select what you will be using to listen to the recording.
If you are using the built-in computer speakers, select Built-in Audio.
Notice that the Sessions Location filed shows you that, by default, the files will go to a Recording Sessions folder in your Documents folder. If you need to move it, you can click Choose and change the location where the recordings will be saved. It’s a good idea to leave them in the default location, though, so you don’t need to move them right now.

Close the Preferences window.
Soundtrack Pro offers two different recording methods: single take and multiple or multitake. Both of these methods create stereo or mono AIFF files that you can add directly to your project. You can also tag your recorded files in the Apple Loop utility so they will be recognized by the search database. You will work with the Apple Loop utility in Lesson 10, “Exporting, Managing Media, and Preferences.” For now, let’s focus on the recording process.
Single take recording is a way to record audio into the Timeline based upon the current playhead position. Using the single take recording method, the recording begins at the playhead position once you click the record button, and ends when you press the Play/Pause button. By moving the playhead over a portion of audio that you wish to overwrite, you can click Record to punch in and out of record mode within the file while the playhead is moving. The recorded files are saved when you save the project. Let’s take a look at two single take recordings in the 7-1 Single Take project.
Note
For the record (pun intended), I recorded these in my hotel room using the little built-in microphone on my laptop. Also, I’m an editor and composer, and definitely not a voiceover artist. So don’t expect much on the quality of the recorded content. This is only meant to be an example of a single take recording. You’ll see an example of a professional recording later in the lesson.
Mute the Single Take 2 track, if it is not already muted.

Play the project to hear the recording in the Single Take 1 track. This take is full of mistakes, which could be edited out, or you can record another take.
Notice that the name of the recording is nearly identical to the name of the track. The naming convention uses the track name, followed by the recording session. If this is the first recording session for a project, the name will be followed by Recording 1.

Mute the Single Take 1 track, and unmute the Single Take 2 track.
Play the second take.
It isn’t great, but at least it is complete and has fewer mistakes.
Mute the Single Take 2 track so that both tracks have been muted.
You can only record one track at a time, and must click the Record Enable button on a track header to arm it for recording. Clicking the Record Enable button also automatically opens the Recording tab in the Utility window. Once a track has been record enabled you will be able to monitor (hear) the microphone input.
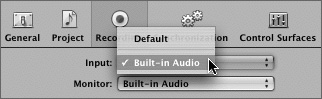
Click the Record Enable button on Track 3 to arm the track for recording.

The armed track is highlighted in red and the Record tab becomes active in the Utility window.
The Recording tab includes meters to view the input level of the recording, a Gain slider for adjusting the input level, pop-up menus for Input and Monitor Device, a Stereo checkbox that allows you to record stereo or mono files, a Mute Project checkbox that mutes the audio from the project as you record, and finally, a handy Disk Space meter to indicate how much free space you have on your hard drive. It’s a good idea to leave at least 10% of your hard disk free for optimal performance. So the bigger the hard drive, the more space you need to keep open.
Tip
If you hear feedback, the input or output levels may be too high on your computer. Turn off the Record enable button, and lower the monitor volume. You can also change the input or output levels in the audio pane of System Preferences. Once you’ve removed the feedback, re-enable the track. You may need to turn down the monitor volume considerably to avoid feedback if the speakers are close to the microphone.
Speak into your microphone, or play the instrument you wish to record and listen for a delay when you hear it through the output monitor.
Note
All digital audio interfaces can be susceptible to latency, a noticeable delay between the time the audio signal is produced and the time you hear it. Connecting the interface through a hub or daisy-chaining it through another device can cause an unacceptable amount of latency, particularly with slower protocols such as USB. Instead, connect directly to the computer.
If you hear a delay, you can adjust it using the Latency Compensation slider in the Recording Preferences pane. If you don’t hear a delay, skip down to step 10.
Press Cmd-, (comma) to open the Preferences window.
Drag the Latency Compensation left or right until you no longer hear the delay and then close the Preferences window.

Press Return to move the playhead to the beginning of the Timeline.
Single take recording always begins at the playhead position on the enabled track. Technically, your project is ready to record.
Read through the voiceover text below before proceeding to the next step and recording a take. If you don’t wish to record this voiceover, move on to the next section, “Working with Multiple Takes.”
VO:
THIS IS A SINGLE TAKE RECORDING, WHICH MEANS I RECORD ONLY ONE TAKE.
IF I DON’T RECORD IT PERFECTLY I’LL NEED TO TRY AGAIN. I CAN ALWAYS EDIT AND SAVE THESE TAKES AS NEEDED.
EACH TIME I RECORD USING THIS METHOD, IT IS SAVED AS A SEPARATE AUDIO FILE IN THE RECORDING SESSIONS FOLDER.
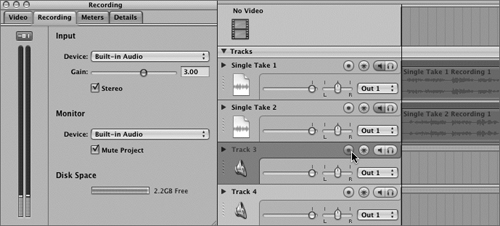
Click the Record button in the Transport Controls and read the voiceover text above out loud.
Press the spacebar to stop recording when you are finished.
If you’re not happy with your recording, mute Track 3, enable Track 4, and try again.
Choose File > Save As and save the project to the My Soundtrack Pro projects folder on your computer.
The multitake recording method lets you record more than one take within the same file. Once you complete a multitake recording, you can view all of the different takes, or edit between takes in the Timeline or the Waveform Editor. To record using the multitake method, you must first create a playback region in the Timeline where you wish to record. You also need to make sure the Looping button is on. If looping is off, you will only be able to make single take recordings.
Let’s take a look at the multitake recording in the 7-2 Multitake project.
Click the 7-2 Multitake tab at the top of the Project Window to view that project in the Timeline.

The multitake recording in the Timeline includes four different takes within the same recorded file. Notice that the recorded file is the same length as the playback region. The text in the bottom-right corner of the file indicates which take is currently showing in the Timeline.

Play the project to hear the current take.
Believe it or not, that’s the best take (feel free to chuckle). Next, look at the other takes that can be accessed by either dragging the edge of the file, or using a shortcut menu.
Ctrl-click the file and choose Take > 3 from the shortcut menu.

The file changes to show Take 3 in the Timeline. Did you happen to notice that the menu showed 5 takes? Just a moment ago I said there were only 4.
Ctrl-click the file again and choose Take > 5.

As you can see, Take 5 doesn’t show much potential as a viable take. In fact, it doesn’t include a waveform because I didn’t speak. This take is human error. Basically, I didn’t stop recording fast enough after the end of Take 4, so it started a fifth take. No problem, as long as you don’t use Take 5 in the final project.
Ctrl-click and change the file to Take > 1.
To view all of the takes at once, simply extend the edges of the clip to reveal the other recordings.
Press the down arrow key to zoom out of the Timeline until the file is about one fourth of the length of the Timeline.

Drag the right edge of the file to the right to extend it and reveal the other takes.

Each take is separated by a dotted line and take number.
Press Cmd-Z to undo the resizing of the file and return it to its original size.
Double-click the recording to open it in the Waveform Editor.

As you can see, I’ve already saved this as an audio file project and applied the Reduce Noise process. When you open a multitake recording in the Waveform Editor, the zoom level is set to fit the current take in the display area.
Drag the Visible Area Rectangle in the Global view to the right to see the other takes one at a time.

Press Shift-Z to fit all of the takes in the Waveform display area at once.

Just like other audio file projects, the gray markers show which portion of the file is currently showing in the Timeline.
Close the audio file project.
The Record tab functions the same for both single take and multitake recordings. You also need to enable the track to which you’d like to record. To try a multitake recording of the voiceover script, continue with the following steps.
If you’d like to skip the recording, move on to the next section, “Tips for Recording Audio.”
Mute the Multitake track in the Timeline.
Click the Record Enable button on Track 2.
Read through the Multitake VO script once for practice.
MULTITAKE VO:
THIS IS A MULTITAKE RECORDING WHICH USES A PLAYBACK REGION AS A BOUNDARY TO MARK THE BEGINNING AND END OF EACH TAKE. ONCE THE PLAYHEAD REACHES THE END OF THE PLAYRANGE, IT RETURNS TO THE BEGINNING AND STARTS A NEW TAKE.
MULTITAKE RECORDINGS ARE ALSO STORED IN THE RECORDING SESSIONS FOLDER. HOWEVER, ALL OF THE TAKES ARE PART OF THE SAME AUDIO FILE.
Click the Record button on the Transport controls when you’re ready to begin.
Record at least two full takes of the voiceover.
Press the spacebar to stop recording.
Press Shift-Cmd-S to save the file uncollected to the My Soundtrack Pro projects folder.
The project will reference the recording that is saved in the Recording Sessions folder. Unless you plan to move it to a different computer that doesn’t have the folder with the original recordings, there is no need to save the file as collected (with audio files).
Listen to your different takes in the Timeline.
Tip
You should always save the projects with finished recordings as soon as you finish recording a new file. Remember, the files aren’t saved in the Recording Sessions folder until the project is saved. That way, in the event of a sudden power outage, rolling blackout, or other phenomenon that may shut down your computer unexpectedly, your recorded files will be saved.
If you are using an external microphone, move it away from the computer for your recordings. Computer towers emit a low sound that may end up on your recording. Obviously you can’t turn the computer off—but moving or shielding the microphone will help.
When recording sound effects that may be useful for future projects, vary the takes. Try different intensities, durations, and distances from the microphone to give you more choices later.
Start your own effects and loops libraries. Create master folders to store and organize your recordings. You never know when you may need them again.
When you are recording a specific music loop or sound effect for a project, if you plan to fade the sound in or out, make sure you record enough sound at the beginning of your loop or single take to make room to fade in or fade out. If you are not sure whether you will fade in or fade out, record it both ways. It’s much better to plan ahead and record too many takes, than not enough.
When you are recording an instrument part to go with the music already in the Timeline, set the recording loop at least a measure or two earlier than you need, to give yourself plenty of time to get into the groove. If your loop is too tight, you won’t have time to reset mentally or physically between takes.
Practice playing your instrumental part along with the music in the Timeline several times to see how long it takes you to get up to speed and in time with the song. Then set your recording loop accordingly. Plus, it never hurts to practice.
More is better when you record multiple takes. It’s easier to throw things out later than to set up and record again because you didn’t get what you needed the first time.
When you are recording a music loop, make sure it doesn’t start and stop abruptly. The idea of a loop is seamless, repeatable music. Music loops should also be recorded in musical time, and start and end on a beat.
Now that you understand the difference between single take and multitake recordings, let’s take a look at a real-world example that was professionally recorded.
You’ll be working with an unmixed version of the song Something About You by the band Turn to Stone, produced by Adam Green. This is an early version of the song that has not been through a final mix, and there have been no effects applied—yet.
The original song contains over thirty separate audio tracks. For this exercise, many of the tracks were exported as groups and imported as single tracks to simplify the project. You’ll learn more about that process in Lesson 10, “Exporting, Managing Media, and Preferences.” Also, you’ll work with many of the separated music tracks in the mixing lessons coming up in Lessons 8 and 9.
There is no real mystery to editing single take recorded files in the Timeline. In fact, all the files that you have edited thus far in the book were all recorded at one time or another. You can cut them with the Razor tool or the split feature and arrange the clips on different tracks. Editing multitake recordings is a flexible way to cut the clip then switch between takes as needed. Over the next series of steps you’ll preview the different vocal takes and try editing both the single take and multitake recordings in the Timeline.
Before you start cutting up the lead vocals for this song, you should know what you’re working with. In this case, all of the takes are good, so it’s just a matter of gauging the different performances at different points in the song.
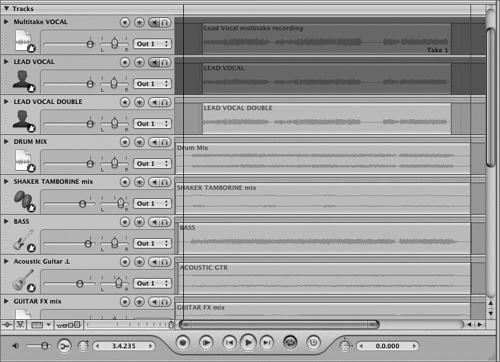
The Solo and Mute buttons come in quite handy when previewing takes because you can click different takes on and off while the playhead is moving. You already know how to use the Mute and Solo buttons and switch between takes in a multitake recording. Now you can use those skills to preview the different takes in the song. For the purposes of this exercise, the top three tracks will be referred to as Track 1, Track 2, and Track 3 from top to bottom, regardless of the actual track name.
Mute Track 1 and Track 2 if they are not already muted.
Begin playback of the song and listen to the LEAD VOCAL DOUBLE file in Track 3.
Unmute Track 2 and mute Track 3 to hear the song with the LEAD VOCAL file from Track 2.

Unmute Track 3 again to hear both vocal tracks at the same time.
Interesting. There’s a bit of echo between them because they aren’t in exactly the same time, but it might be a cool effect during the chorus or to accentuate specific vocal phrases. Now on to the multitake recording on Track 1.
Continue playback and unmute Track 1, and then mute both Tracks 2 and 3.
You’re currently listening to Take 1 of two different takes.
Deselect the multitake clip if it is selected on Track 1, and continue playback.
Ctrl-click the multitake clip, and choose Take > 2 from the shortcut menu.
Pause playback.
So what did you learn from this vocal preview experience? How about the fact that you can preview both single take or multitake recordings while the playhead is moving. Using Mute or Solo buttons and clicking between two separate recordings on different tracks is more seamless than trying to switch between multiple takes during playback.
Your goal in this exercise is to use the Razor tool to cut the files so the song begins with Take 2, then changes to Take 1, then finishes with Take 2. You’ll start with the multitake file, then perform the equivalent on the single take recordings. To keep the editing simple, you’ll cut the recording at the pauses between the lead vocal parts.
Mute Track 1 and Track 2, if they are not already muted.
Move the playhead to 33.1.000 in the Timeline.

Press B for the Razor (blade) tool and click the Razor tool on the Lead Vocal multitake recording clip at the playhead position.

Move the Razor tool to the second gap in the Lead Vocal multitake recording waveform (approximately 65.1.000) and click again to split the clip.

Press A for the Selection (arrow) tool.
Crtl-click the middle Lead Vocal multitake recording clip, and choose Take > 1 from the shortcut menu.
The middle section of the Lead Vocal multitake recording changes to Take 1 and is labeled as such in the lower right corner of the clip.

Play the portions of the song around the edits in the vocals.
That was easy. Now how can you re-create the same thing from the two separate single take recordings? Better yet, how do you use both takes at the beginning of the third segment?
If you thought that was easy, this will be a slightly bigger challenge. Use the Razor tool or select and split the clips in the same location leaving a slight overlap in the last segment of the Lead Vocal clip. Rather than step you through it, I’ll provide a picture of the finished edit. Have fun. When you finish, play the edits. The overlapped section works really well. If you like the slight echo sound during the overlapped section, you can increase it by nudging the upper clip slightly to the left or right. Save and close the project.

Nice editing! As you can see there are advantages to both recording methods.
Tip
If you like the ease of switching a multitake recording but also the flexibility of separate files, you can always extend a multitake recording, split it into separate pieces with the Razor tool, and place the parts you wish to overlap on separate tracks.
Once recorded, you can open the new files in the Apple Loops Utility and add metadata tags, such as key, tempo, or general to the file so it can be indexed and searched in your Soundtrack Pro database. In Lesson 10, you’ll learn how to export your recordings as files or loops and tag them in the Apple Loops utility so they can be indexed in the Search tab.
Answers