6. Drupal Fields Explained
In Chapter 5, “Drupal Content Explained,” we explored content types, and you created Articles, Basic Pages, Events, Sites, User Groups, Companies, and more.
The limitation we found at the end of Chapter 5 is that there were few or no differences between those content types.
This chapter shows you how to make your content types unique, interesting, and useful by adding fields.
In this chapter, you’ll use many different types of fields. To use all those different types of fields, you also expand your skills by downloading modules from Drupal.org.
At the end of this chapter, you should be able to
![]() Add different types of fields to a content type.
Add different types of fields to a content type.
![]() Share a field across multiple content types.
Share a field across multiple content types.
![]() Manage the display of fields in the full content view and teaser.
Manage the display of fields in the full content view and teaser.
![]() Understand Taxonomy and how Drupal categorizes content.
Understand Taxonomy and how Drupal categorizes content.
![]() Download and install modules from Drupal.org.
Download and install modules from Drupal.org.
Planning Your Fields
Fields provide almost unlimited possibilities for adding information to your content. Here are just a few of the many possibilities:
![]() Text
Text
![]() Whole numbers
Whole numbers
![]() Decimal numbers
Decimal numbers
![]() Images
Images
![]() Files such as PDFs and Microsoft Word documents
Files such as PDFs and Microsoft Word documents
![]() A pre-defined list of options
A pre-defined list of options
![]() Addresses
Addresses
![]() Phone numbers
Phone numbers
![]() Dates and times
Dates and times
However, not all of these field types are available with a new Drupal site.
In Chapter 5, we saw that there are six default content types in Drupal. In this chapter, we will see that there are 13 default field types. All other field types must be added to your site by installing new modules.
We currently have four content types from Chapter 5 that need to be made more interesting. Those content types are Drupal Sites, Events, Companies, and User Groups. To be more useful, they need more information. They need fields.
Table 6.1 describes the fields we’ll use for each content type. Sometimes, we’ll use one of the existing field types. Other times we’ll set up new field types.

Sites Fields Explained
The Site content type has five fields planned. Four will be created using fields that come with default Drupal. The Link field needs to be added to the site, requiring you to add a module from Drupal.org.
Here’s what you’re going to do:
![]() Edit field labels for title and body.
Edit field labels for title and body.
![]() Add four fields that come with Drupal.
Add four fields that come with Drupal.
First, you need to set up the two fields that come with every content type: Title and Body.
Editing a Field: Title
When you created the Sites content type in Chapter 5, we suggested that you change the Title field to Site Name. Now make sure that was done:
1. Click Structure on the black menu bar.
2. Click Content Types.
3. Click Edit for the Sites content type, as shown in Figure 6.1.

4. Scroll down to the Submission form Settings tab.
5. Make sure that the Title field label now reads Site Name, as shown in Figure 6.2.
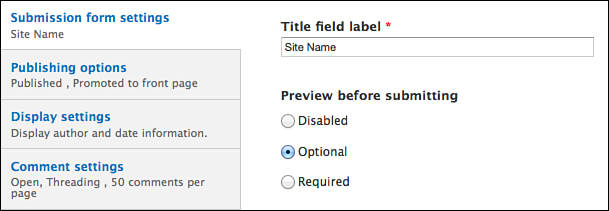
6. Click Save Content Type.
Editing a Field: Body
When you created the Sites content type, you weren’t given an opportunity to choose the label of the Body field, so do that now:
1. Click Manage Fields for the Sites content type, as shown in Figure 6.3.

2. Click Edit for the Body field, as shown in Figure 6.4.

3. Change the label from Body to Description, as shown in Figure 6.5.
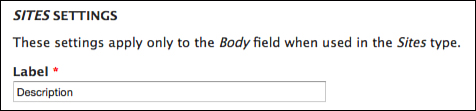
4. Click Save Settings at the bottom of the page.
5. Check that both your Title and Body fields have now been updated to Site Name and Description, as shown in Figure 6.6.

Reusing a Field: Image
You saw in Chapter 5 that the Article content type has an image field. You used it to upload the Drupal mascot. That image field is available for you to reuse on other content types if you choose. Or you can create another image field. How do you decide? Let’s see.
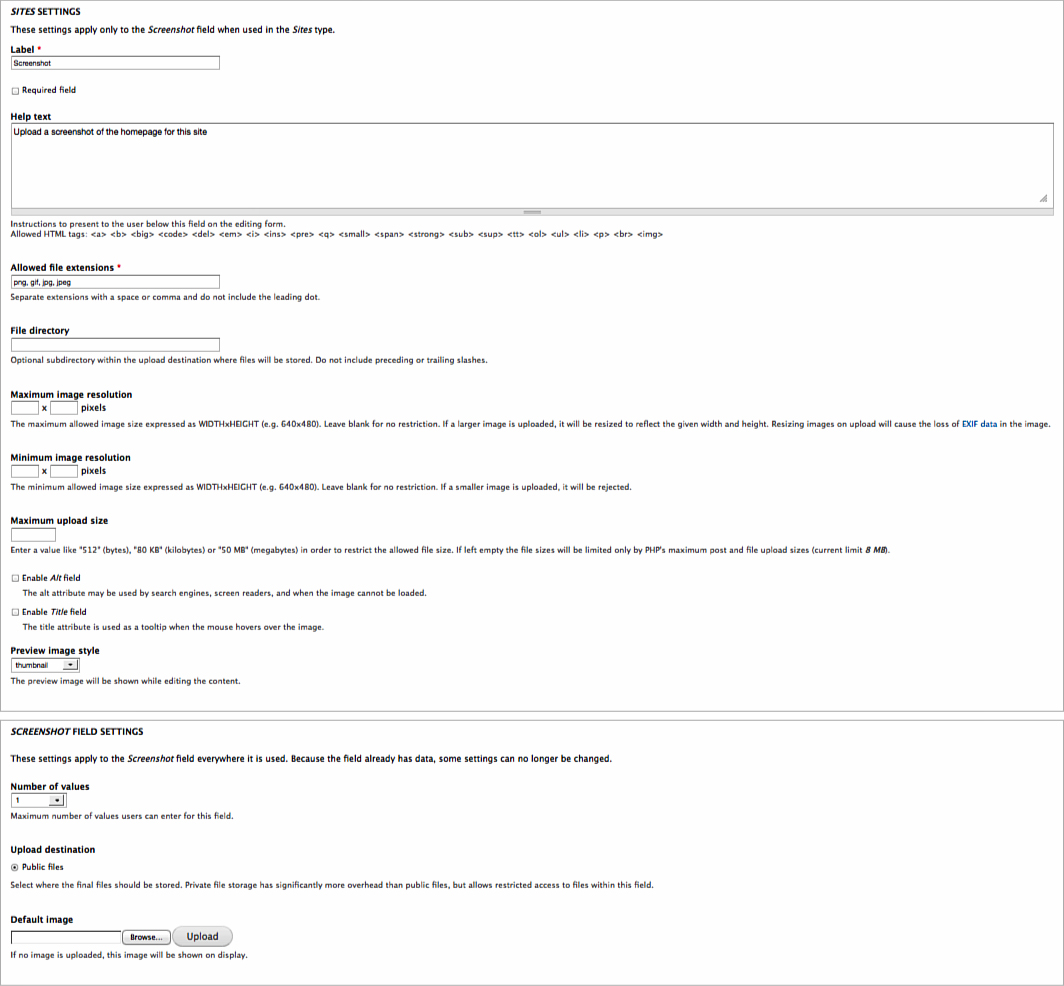
Figure 6.7 shows the Image field configuration page from the Article content type. Notice the page is divided into two sections: Article Settings and Image Field Settings.

If you decide to reuse the image field, you cannot change the Image Field Settings without making those changes for all the content types that use this field. That isn’t a major hurdle because there are only three things you change in Image Field Settings:
![]() How many images can be uploaded
How many images can be uploaded
![]() Where the images will be stored
Where the images will be stored
![]() What the default image will be if none is chosen
What the default image will be if none is chosen
Because you don’t need to customize any of those three settings, you can reuse the existing Image field. Here’s how to do it:
1. Click Structure on the black menu bar, and then click Content Types.
2. Click Manage Fields for the Sites content type.
3. Look for the Add Existing Field area, as shown in Figure 6.8.

4. Enter Screenshot for the Label.
5. Choose Image: field_image (image) from the Field to share option.
Image will automatically be filled in for the Form element to edit the data option because it is the only choice.
6. Check that your settings look like Figure 6.9.

7. Click Save and you see a screen similar to Figure 6.10.
8. Enter Upload a screenshot of the home page for this site in the Help text field. This help message will appear under the Image field when people upload screenshots.
9. Review the Setting options on the page for future reference.
10. Click Save Settings.
Reusing a Field: Term Reference
When you created a page using the Article content type, you enter relevant words into a field called Tags. This allowed you to group your Articles according to these keywords.
Rather than re-create this field, you can reuse it. If you reuse this field, there are only two options that, if changed, will change for all content types using this field:
![]() How many tags can be used.
How many tags can be used.
![]() Which group of tags can be used. Later, in the “Taxonomy Explained” section, we explain how you can manage these groups.
Which group of tags can be used. Later, in the “Taxonomy Explained” section, we explain how you can manage these groups.
Now repeat the process you used to reuse the Image field, but reuse the Tags field for the Sites content type:
1. Click Structure on the black menu bar, and then click Content Types.
2. Click Manage Fields for the Sites content type.
3. Enter Tags for the Label.
4. Choose Term Reference: field_tags (Tags) from the Field to share option.
5. Choose Autocomplete Term Widget (Tagging) for the Form element to edit the data option.
6. Check that your settings look like Figure 6.11.

7. Click Save.
8. Keep the default settings and click Save Settings.
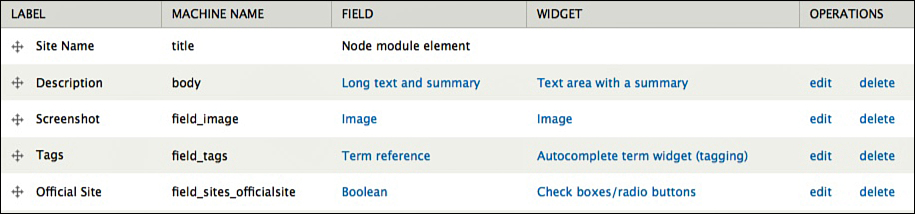
Observe that the Tags field is now added to the list of other fields on the Sites content type, as shown in Figure 6.12.

Adding a Field: Boolean
In addition to reusing fields, you can create new ones.
Your plan has a field that enables the content author to show whether the site is an official Drupal site. The Boolean field option would be perfect for this because it provides an either/or choice. A Boolean field is perfect for choices such as Yes/No and True/False.
For the Official site field, the site will be listed as either an official site (true) or not an official site (false). Now add this field:
1. Make sure you are on the Manage Fields page for Sites content type. As a reminder, you can get there by clicking Structure, Content Types, and then Manage Fields for Sites.
2. Look for the Add New Field, as shown in Figure 6.13.

3. Enter Official Site as the field label.
4. Enter sites_officialsite for the field name.
5. Select Boolean as the type of data to store.
6. Select Check Boxes/Radio Buttons as the form element to edit the data.
7. Make sure that your settings match Figure 6.14.

8. Click Save.
9. On the next screen, enter Yes for On value and No for Off value, as shown in Figure 6.15.

10. Click Save Field Settings.
11. Scroll down the next screen and click Save Settings again.
12. Notice the new field is now added to the list, as shown in Figure 6.16.
One question you might have is about the Machine Name, which in this example was sites_officialsite. The naming convention is up to you but here is a tip. If you are creating a field that is unique to a specific content type, inserting the content type name in the field name is a good idea. For example, field_sites_image will be used only for Sites, but field_image will be reused by multiple content types. This can help you distinguish between fields that are unique and fields that are reused.
Adding a List (Text) Field
Now you can create a Topics field. This allows people to choose what topics you’ll find on each site. There are a variety of ways to do this, but here’s one of the simplest options: List (Text):
1. Make sure you are on the Manage Fields page for Sites content type. (As a reminder, you can get there by clicking Structure, Content types, and then Manage Fields for Sites.)
2. Look for the Add New Field area.
3. Enter Topics as the field label.
4. Enter sites_topics for the field name.
5. Select List (text) as the type of data to store.
6. Select Check Boxes/Radio Buttons as the form element to edit the data.
7. Make sure that your settings match Figure 6.17.

8. Click Save.
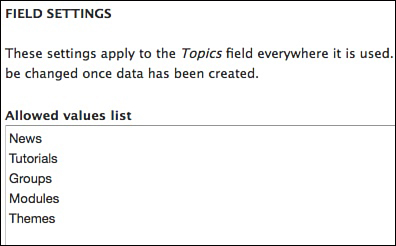
9. On the next screen, enter the various topics that a Drupal site can address. In Figure 6.18, we entered News, Tutorials, Groups, Events, Modules, and Themes. Each topic is on a new line.
10. Click Save Field settings.
11. Scroll down the next screen and click Save Settings again.
12. Notice the new field is now added to the list, as shown in Figure 6.19.

Creating New Sites Content
In Chapter 5, when you created the Sites content type, you added Drupal.org as an example. Now add a new Site using all your new fields:
1. Click Add Content.
2. Click Sites.
Your content creation page should look like Figure 6.20.

3. Complete the content type form with the following:
![]() Site Name: Groups.Drupal.org.
Site Name: Groups.Drupal.org.
![]() Body: http://groups.drupal.org is the official Drupal community site.
Body: http://groups.drupal.org is the official Drupal community site.
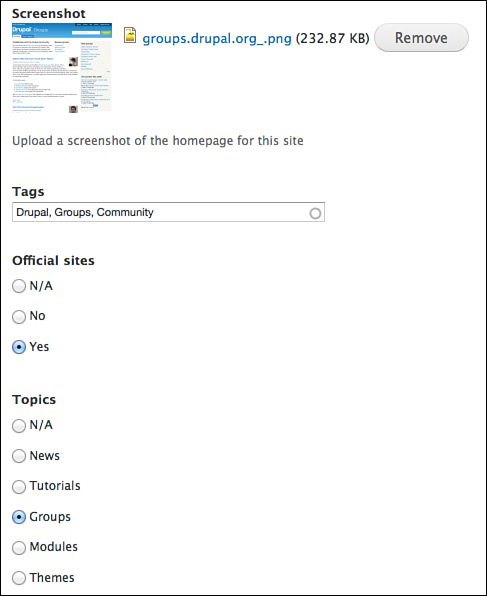
![]() Thumbnail: If you are comfortable creating your own screenshots, you can visit http://groups.drupal.org and capture a screenshot. Otherwise, you can download a screenshot at http://www.drupal7explained.com/chapter6.
Thumbnail: If you are comfortable creating your own screenshots, you can visit http://groups.drupal.org and capture a screenshot. Otherwise, you can download a screenshot at http://www.drupal7explained.com/chapter6.
![]() Tags: Drupal, Groups, Community.
Tags: Drupal, Groups, Community.
![]() Official site: Yes.
Official site: Yes.
![]() Topics: Groups.
Topics: Groups.
Figure 6.21 shows what your new fields should look like.
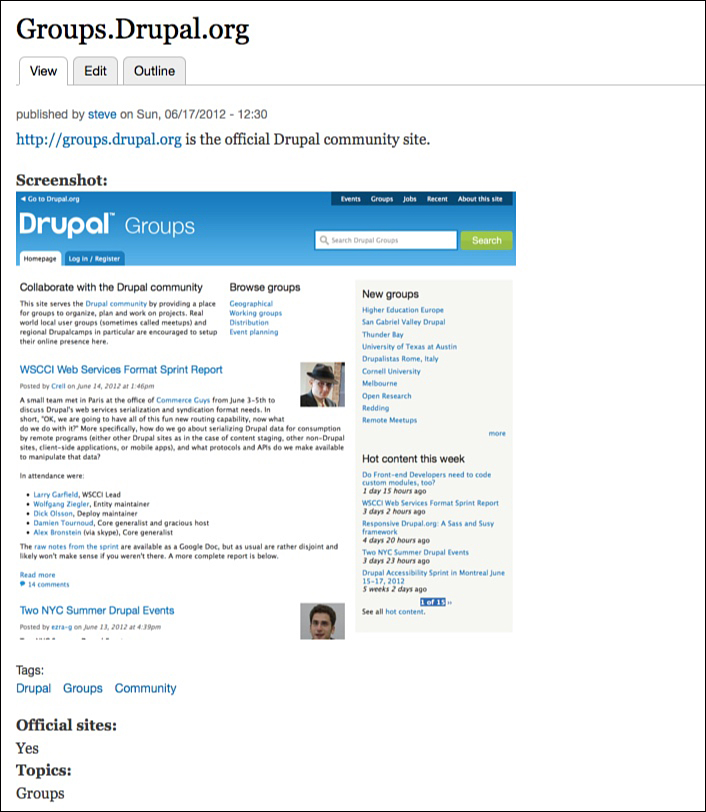
4. Click Save. Your new content should look like Figure 6.22.
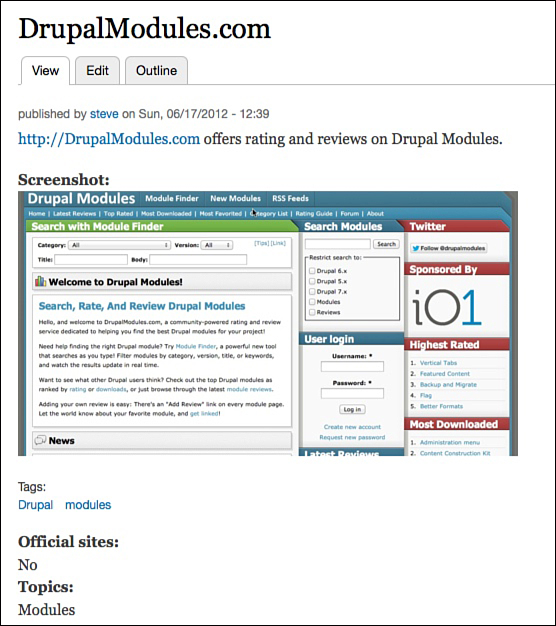
Repeat this process for http://DrupalModules.com. This site offers ratings and reviews on Drupal modules, but it is not an official site. There is a screenshot at http://www.drupal7explained.com/chapter6 if you need it. Figure 6.23 shows how your content should look when it has been created.
Companies Fields Explained
The Companies content type reuses several fields created on other content types and adds one more type of field. Using the same processes you used so far, you can edit and/or add the following fields:
![]() Title: Company Name
Title: Company Name
![]() Body: Description
Body: Description
![]() Image: Logo
Image: Logo
![]() Term reference: Tags
Term reference: Tags
![]() Link: Link
Link: Link
Now set up those fields.
Editing a Field: Title
1. Click Structure on the black menu bar and then Content types.
2. Click Edit for the Companies content type.
3. Scroll down to the Submission Form Settings tab.
4. Make sure that the Title field label now reads Company Name.
5. Click Save Content Type.
Editing a Field: Body
1. Go to the Manage Fields page for the Companies content type.
2. Click Edit for the Body field.
3. Change the label from Body to Description.
4. Click Save Settings at the bottom of the page.
5. Check that both your Title and Body fields have now been updated to Site Name and Description, as shown in Figure 6.24.

Reusing a Field: Image
1. Make sure you are on the manage fields page for the Companies content type.
2. Look for the Add Existing Field area.
3. Enter Logo for the Label.
4. Choose Image: field_image (image) from the Field to Share option.
Image will automatically be filled in for the Form Element to Edit the Data option because it is the only choice.
5. Click Save.
6. Default image: You can download this from http://www.drupal7explained.com/chapter6. This image shows if someone adds a Company but does not add a logo. Notice that there are two Default images settings. You want the one that is at the top of the screen. If you use the setting at the bottom of the screen, that change will apply to all other content types using this field.
7. Click Save Settings.
8. Check that your Image field has been successfully reused, as shown in Figure 6.25.

Reusing a Field: Term Reference
1. Make sure you are on the manage fields page for the Companies content type.
2. Look for the Add Existing Field area.
3. Enter Tags for the Label.
4. Choose Term reference: field_tags (Tags) from the Field to share option.
5. Choose Autocomplete Term Widget (Tagging) for the Form element to edit the data option.
6. Click Save.
7. Keep the default settings and click Save Settings.
8. Check that your Tags field has been successfully reused, as shown in Figure 6.26.

Adding a List (Text) Field
1. Make sure you are on the Manage Fields page for the Companies content type.
2. Look for the Add New Field area.
3. Enter Services as the field label.
4. Enter companies_services for the field name.
5. Select List (Text) as the type of data to store.
6. Select Check Boxes/Radio Buttons as the form element to edit the data.
7. Click Save.
8. On the next screen, enter the various services that a Drupal company can provide: Coding, Themes, Hosting, Training, and Support. Make sure that each service is listed on a new line.
9. Click Save Field Settings.
10. Scroll down the next screen and click Save Settings again.
11. Notice the new field is now added to the list, as shown in Figure 6.27.

Adding a Link Field
Now try something different. Break out of the field options that you have seen so far and add a new field option.
You can add a new type of field by going to Drupal.org and downloading a module. The module that is going to enable you to add links as fields is called (simply) Link.
Here’s the workflow you can use. We call it the FITS workflow because using it means that your new feature FITS nicely inside your site:
1. Find the module.
2. Install the module.
3. Turn on the module.
4. Set up the module.
Step 1: Find the Module
1. Open another tab in your browser.
2. Go to http://drupal.org/project/link, as shown in Figure 6.28.

3. Scroll down to the bottom of the screen and find the Downloads area, as shown in Figure 6.29.

Here’s what to look for when finding the right file:
![]() You need to look at the files that are in the green area. If files are in the green area, that means they are the recommended version.
You need to look at the files that are in the green area. If files are in the green area, that means they are the recommended version.
![]() You need to look for the files labeled 7, rather than 5, 6, or 8. If files are labeled with 7, that means they work with Drupal 7.
You need to look for the files labeled 7, rather than 5, 6, or 8. If files are labeled with 7, that means they work with Drupal 7.
![]() It doesn’t often matter if you choose the tar.gz or zip files.
It doesn’t often matter if you choose the tar.gz or zip files.
![]() Don’t worry if the version numbers have changed since the screenshots in this book were created. You will be fine if you choose the latest release in green, which is marked for Drupal 7.
Don’t worry if the version numbers have changed since the screenshots in this book were created. You will be fine if you choose the latest release in green, which is marked for Drupal 7.
Figure 6.30 shows the marked recommended version for Drupal 7.
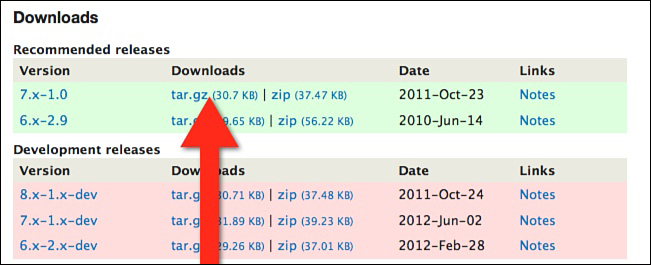
4. Right-click the tar.gz link as marked in Figure 6.30, and copy the link or copy the shortcut. The exact command depends on the browser you use. The URL that you copy should look like this: http://ftp.drupal.org/files/projects/link-7.x-1.0.tar.gz. If you have any problems doing this and want help or another way to install your files, visit http://www.drupal7explained.com/chapter6.
5. Return to the browser tab that has your site.
Step 2: Install the Link Module
1. Click the Modules link on the black menu bar.
2. Click Install New Module, as shown in Figure 6.31.

3. Click in the Install from a URL area, and paste the URL you captured when you copied the link, as shown in Figure 6.32.

4. Click Install. You’ll see a screen such as the one in Figure 6.33, which says Installation Was Completed Successfully.
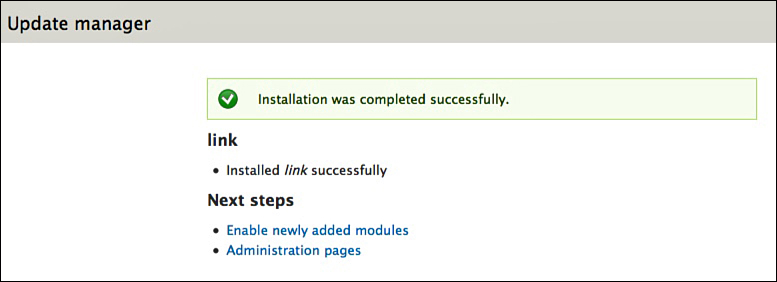
5. Click Enable Newly Added Modules. Clicking this link doesn’t actually enable any modules, but it takes you back to the Module page where you can turn on the module.
Step 3: Turn on the Module
1. Scroll down the page and check the box next to the Link module, as shown in Figure 6.34.

2. Click Save Configuration.
2. Click Content Types.
3. Click Manage Fields for the Companies content type.
4. Add the Link field:
![]() Label: Site; Figure 6.35 then shows label as “Link”
Label: Site; Figure 6.35 then shows label as “Link”
![]() Field name: link (Each content type will have a link field so plan on reusing this field.)
Field name: link (Each content type will have a link field so plan on reusing this field.)
![]() Type of data to store: Link
Type of data to store: Link
![]() Form element to edit data: Link
Form element to edit data: Link
5. Click Save.
6. Scroll down and click Save Settings.
7. Check that Link has been successfully added to your Companies content type, as shown in Figure 6.35.

Creating New Companies Content
In Chapter 5, when you created the Companies content type, you added Acquia as an example. Now add a new Company, using all your new fields:
1. Click Add Companies.
2. Click Companies.
Your Content Creation page should look like Figure 6.36.
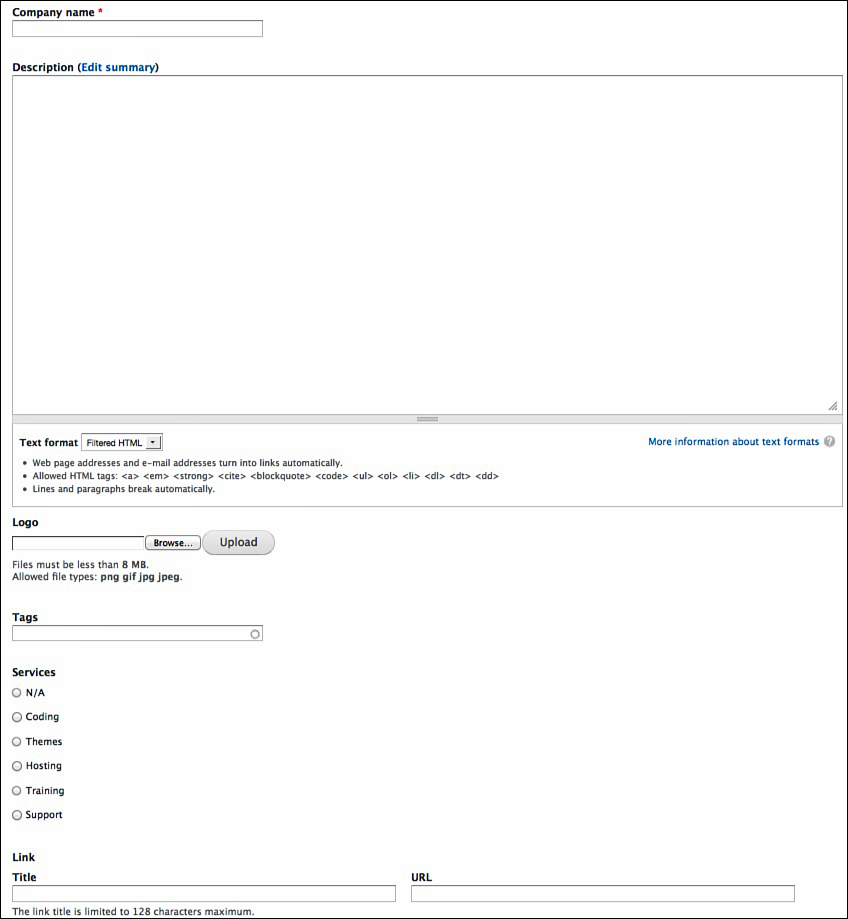
3. Complete the content type form with the following:
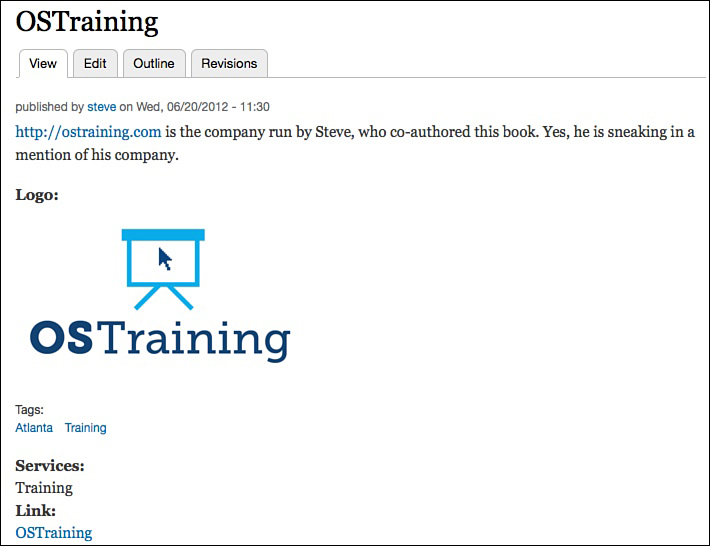
![]() Company Name: OSTraining
Company Name: OSTraining
![]() Body: http://ostraining.com is the company run by Steve, who co-authored this book. Yes, he is sneaking in a mention of his company.
Body: http://ostraining.com is the company run by Steve, who co-authored this book. Yes, he is sneaking in a mention of his company.
![]() Logo: You can download this from http://www.drupal7explained.com/chapter6.
Logo: You can download this from http://www.drupal7explained.com/chapter6.
![]() Tags: Atlanta, Training
Tags: Atlanta, Training
![]() Services: Training
Services: Training
![]() Link Title: OSTraining
Link Title: OSTraining
4. Click Save. Your new content should look like Figure 6.37.
5. Repeat this process for Phase 2 Technology. Here are the details:
![]() Title: Phase 2 Technology
Title: Phase 2 Technology
![]() Body: Phase 2 Technology is based in Washington DC and has been involved with many of the largest Drupal projects. It has also written a lot of code for Drupal.
Body: Phase 2 Technology is based in Washington DC and has been involved with many of the largest Drupal projects. It has also written a lot of code for Drupal.
![]() Logo: You can download this from http://www.drupal7explained.com/chapter6.
Logo: You can download this from http://www.drupal7explained.com/chapter6.
![]() Tags: Washington DC, Large Projects
Tags: Washington DC, Large Projects
![]() Services: Coding
Services: Coding
![]() Link Title: Phase 2 Technology
Link Title: Phase 2 Technology
![]() URL: http://phase2technology.com
URL: http://phase2technology.com
Figure 6.38 shows how your content should look when it has been created.

Editing Fields
After using your Companies content type twice, you might feel that some of the fields could be improved. For example, there are at least two possible improvements to the Services field:
![]() Currently N/A is an option. You might want to force companies to tell you what services they provide.
Currently N/A is an option. You might want to force companies to tell you what services they provide.
![]() Many companies might provide more than one service.
Many companies might provide more than one service.
It is possible to go back and edit fields and fix these problems; however, you can’t change the type of field. For example, you can’t change an Image field to a Text field. But you can edit the settings of each field. A word of warning before you start: You can safely change these settings before you enter all of your site’s content, but be careful about making changes after your content has been added:
1. Go to Structure, Content Types, and click on Manage Fields for the Companies content type.
2. Click Edit next to Services. You now see the options that you can change.
3. To remove N/A as an option, check the box that says Required field, as shown in Figure 6.39.

To allow companies to provide more than one service, change the Number of Values list further down the page, as shown in Figure 6.40.
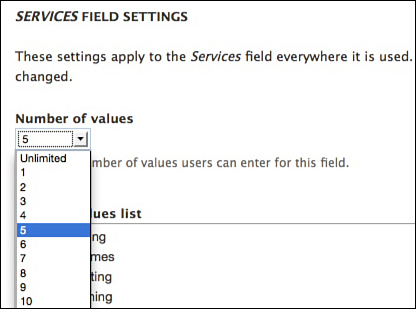
Click Save.
Events Fields Explained
Now that you have created two new content types, you can be a little more adventurous. The Events content type will have more fields and you can modify them.
Here are the fields for your Events content type:
![]() Title: Event Name
Title: Event Name
![]() Body: Description
Body: Description
![]() Image: Event Logo
Image: Event Logo
![]() Term Reference: Tags
Term Reference: Tags
![]() Link: Registration
Link: Registration
![]() Date: Event Date
Date: Event Date
![]() Entity Reference: Sponsors
Entity Reference: Sponsors
Let’s go and set up those fields one-by-one:
Editing a Field: Title
1. Go to Structure, Content types, and then click Edit for the Events content type.
2. Make sure that the Title field label now reads Event Name.
Editing a Field: Body
1. Go to the Manage Fields page for the Events content type.
2. Click Edit for the Body field, and change the label from Body to Description.
Reusing a Field: Image
1. Make sure you are on the Manage Fields page for the Events content type.
2. Look for the Add Existing field area.
3. Enter Event Logo for the Label.
4. Choose Image: field_image (image) from the Field to share option.
5. Click Save and then Save Settings.
Reusing a Field: Term Reference
1. Look for the Add Existing Field area.
2. Enter Tags for the Label.
3. Choose Term reference: field_tags (Tags) from the Field to share option.
4. Choose Autocomplete term widget (tagging) for the Form element to edit the data option.
5. Click Save and then Save Settings.
2. Enter Link for the Label.
3. Choose Link: field_link (Link) from the Field to share option.
4. Choose Link for the Form element to edit the Data option.
5. Click Save and then Save Settings.
Adding a Field: Decimal
There are three types of number fields provided by default: Integer, Float, and Decimal. You need a field for the price of your event.
An Integer field enables only whole numbers, so if you use that you cannot enter 9.95 for your price. You would have to enter 9 or 10.
The Float field and Decimal give you the option to have a decimal. The difference is that a Float field is generally used for numbers where exact precision is not so important. However, you know the exact price of your events, so add a Decimal field for your event price.
1. Make sure you are on the Manage Fields page for the Events content.
2. Locate the Add New Field. Here are the choices to make when adding this next field:
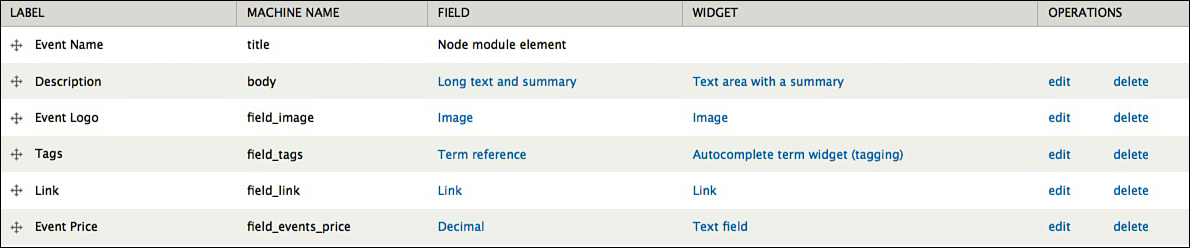
![]() Label: Event Price.
Label: Event Price.
![]() Field name: events_price.
Field name: events_price.
![]() Type of data to store: Decimal.
Type of data to store: Decimal.
![]() Form element to edit the data: Text field.
Form element to edit the data: Text field.
3. Click Save.
4. On the next screen, keep the default settings.
5. Click Save Field Settings.
6. Prefix: $. This dollar sign appears in front of the field.
7. Click Save Settings again.
You’ve now modified, reused, or added six new fields. Check that your fields match those shown in Figure 6.41.
Adding a Field: Date
When you added fields to your Companies content type, you installed a module called Link to allow you to add Link fields.
For your Events content type, use exactly the same process: FITS. This process enables you to install the Date module and make sure it FITS into your site.
Use the Date module to add Date fields. As a reminder, here is how the FITS process works:
1. Find the module.
2. Install the module.
3. Turn on the module.
4. Set up the module.
Step 1: Find the Date Module
1. Open another tab in your browser.
2. Go to http://drupal.org/project/date. The screen should look like Figure 6.42.

3. Scroll to Downloads area and the Locate the tar.gz link associated with Drupal 7. The correct link is highlighted in Figure 6.43.

4. Right-click the tar.gz link, and copy the link or copy the shortcut. The exact command depends on the browser you use. The link should look like this: http://ftp.drupal.org/files/projects/date-7.x-2.5.tar.gz.
5. Return to the browser tab that has your site.
2. Click Install New Module.
3. Click in the Install from URL field, and paste the URL you captured when you copied the link. Your screen should look like Figure 6.44.
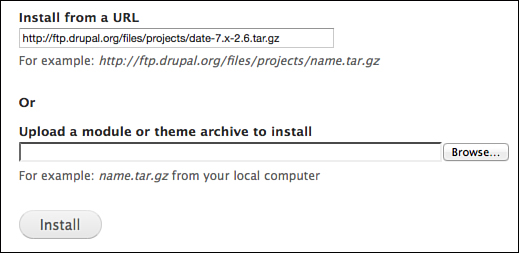
4. Click Install.
5. Click Enable Newly Added Modules.
Step 3: Turn on the Date Module
When enabling modules earlier in this book, you had to check only one box. The Date module is different. Look at the screen in Figure 6.45 to see the Date module provides many boxes to check. However, you don’t need to check all those boxes. To set up a date field for your Events, you need to check only three boxes.

1. Check the box next to the Date, Date API, and Date Popup modules.
2. Click Save Configuration.
Step 4: Set Up the Date Module
1. Click Structure and then Content Types. Then click Manage Fields for the Events content type.
2. Add new field label: Event date
![]() Field name: events_date.
Field name: events_date.
![]() Type of data to store: Date
Type of data to store: Date
![]() Form element to edit the data: Popup calendar
Form element to edit the data: Popup calendar
3. Click Save.
4. Check Collect an End Date, as shown in Figure 6.46.

5. Click Save Field Settings; then click Save Settings.
Adding a Field: Entity Reference
When you installed the Date module, you saw that it was different from the other modules you had used before. The Date module was different because it came with a variety of features and you didn’t need to turn them all on.
Now, here’s another type of module. The Entity Reference module has two things different about it:
![]() Unlike the Link and Date module, the Entity Reference module requires another module to work.
Unlike the Link and Date module, the Entity Reference module requires another module to work.
![]() Unlike Link, Date, Blog, Poll, and the other modules you’ve used so far, the name of this module doesn’t immediately tell you what it does. As you become more experienced with Drupal, you’ll find that the name of the module doesn’t always clearly match the purpose you’ll use it for. Regarding the Entity Reference module, visit http://www.drupal7explained.com/chapter6 for an explanation of the name.
Unlike Link, Date, Blog, Poll, and the other modules you’ve used so far, the name of this module doesn’t immediately tell you what it does. As you become more experienced with Drupal, you’ll find that the name of the module doesn’t always clearly match the purpose you’ll use it for. Regarding the Entity Reference module, visit http://www.drupal7explained.com/chapter6 for an explanation of the name.
You can use the Entity Reference module to cross-link your content. Your Events have Companies who sponsor them. To show these sponsors, use the Entity Reference module to link from your Events content to your Companies content.
You still use the FITS workflow to make your module work, but the first part involves installing more modules. Now see how to set up an Entity reference field.
Step 1: Find the Modules
Go to Drupal.org and find the Drupal 7 download URLs for these three modules:
1. Entity reference: http://drupal.org/project/entityreference.
2. Entity API: http://drupal.org/project/entity
3. CTools: http://drupal.org/project/ctools
Step 2: Install the Modules
1. Click Module on the black menu bar.
2. Click Install new module.
3. Click in the Install from URL area and paste in the download URL for the Entity reference module that you captured in Step 1.
4. Click Install.
5. Repeat this process. Click Enable newly added modules.
6. Repeat this process for the Entity API and CTools modules.
2. Check the Entity Reference box.
3. Check the Entity API box.
4. Click Save configuration.
Step 4: Set Up the Modules
1. Click Structure, Content types, and then manage fields for the Events content type and locate the Add New Field option.
2. Add new field label: Sponsors:
![]() Field name: events_sponsors.
Field name: events_sponsors.
![]() Type of data to store: Entity reference.
Type of data to store: Entity reference.
![]() Form element to edit data: Select list.
Form element to edit data: Select list.
3. Click Save.
4. Target Bundles: Choose Companies, as shown in Figure 6.47.

5. Click Save Field Settings.
6. Number of values: Unlimited.
7. Click Save Settings.
Check that your Events content type looks like Figure 6.48.

Creating Content: Events
In Chapter 5, when you created the Events content type, you created a content item for DrupalCon Portland. Now that you’ve added all your extra fields, go back and add another event:
1. Click Add content and then click Events.
2. Complete the content type form with the following:
![]() Title: DrupalCon Munich.
Title: DrupalCon Munich.
![]() Body: Drupal holds a big conference in North America every year, but it also holds one in Europe. In 2012, the European DrupalCon was in Munich.
Body: Drupal holds a big conference in North America every year, but it also holds one in Europe. In 2012, the European DrupalCon was in Munich.
![]() Event Logo: You can download this from http://www.drupal7explained.com/chapter6.
Event Logo: You can download this from http://www.drupal7explained.com/chapter6.
![]() Tags: DrupalCon, Europe, Munich
Tags: DrupalCon, Europe, Munich
![]() Registration Title: DrupalCon Munich
Registration Title: DrupalCon Munich
![]() URL: http://munich2012.drupal.org
URL: http://munich2012.drupal.org
![]() Event Price: $450.00
Event Price: $450.00
![]() Event Date: August 20, 2012 at 09:00 to August 24, 2012 at 16:00
Event Date: August 20, 2012 at 09:00 to August 24, 2012 at 16:00
![]() Sponsors: Acquia, Phase 2 Technology
Sponsors: Acquia, Phase 2 Technology
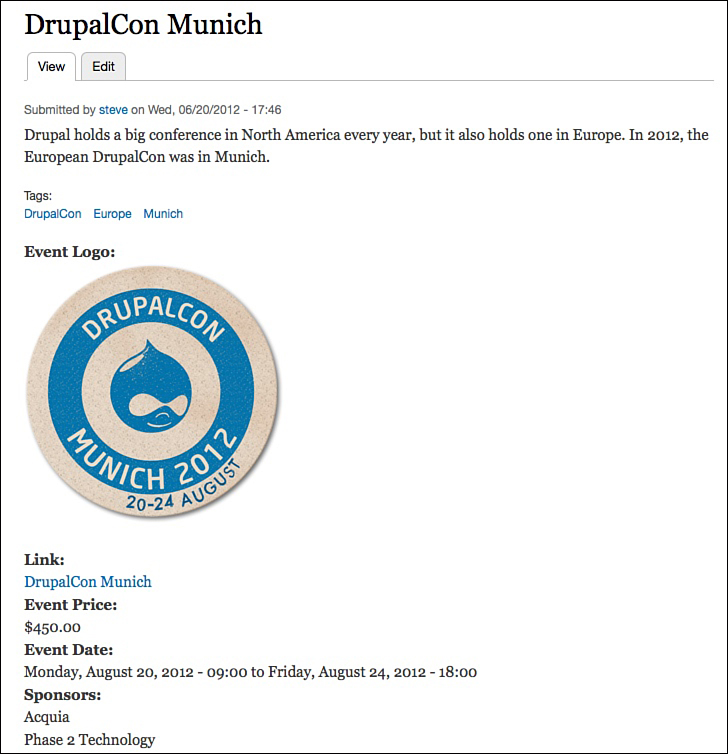
3. Before you click Save, make sure that your content looks like Figure 6.49.

4. After you click Save, your content should look like Figure 6.50.
Editing the Default Field Display
When you were creating Companies, you saw that you could go back and edit the settings of fields. It is also possible to alter the display of fields. For example, your fields take up two lines at the moment, with the label on one line and the field content on the next line. You may want to place all the details for a field onto just one line. Also, your Sponsor names don’t link back to the relevant Companies content.
Here’s how you can make your fields look better:
1. Go to Structure, Content types, and click Manage Display for the Events content type.
You’ll see a screen like the one shown in Figure 6.51.

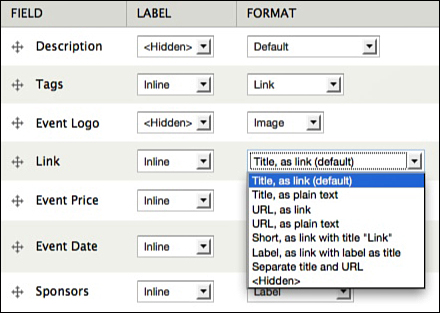
2. Using the Label column, you can control the display of your labels. Choosing Inline puts the label and field content on one line. Choosing Hidden removes the label entirely. Figure 6.52 shows some recommended settings.

3. Using the Format column, you can change some options about how each field displays. For example, the Link field offers a variety of ways that you can mix-and-match the Label and URL parts of the field, as shown in Figure 6.53.
Also, some fields have gear icons on the right side of the screen, as marked in Figure 6.54.

4. Now, automatically link your Sponsor information to their profiles. To do that, click the gear icon in the Sponsor’s row and check the box that says Link Label to the Referenced Entity. This is shown in Figure 6.55. Click Update to complete the change.

5. Click Save to make sure that your changes aren’t lost.
Editing the Teaser Display
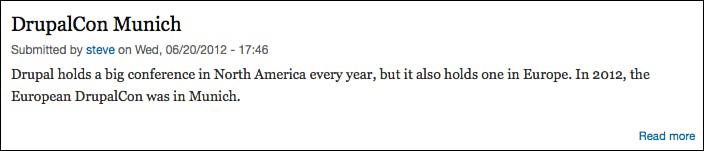
In the previous section, you controlled how your Events appear when someone sees all the content. Sometimes, however, they see only part of the content. A great example is the homepage. Figure 6.56 shows how your DrupalCon Munich content appears on the homepage.
The limited homepage display is done for a good reason. If you put all the fields from all of your content on the homepage, it would make one long page. So, Drupal uses Teasers, which contain only part of the content. Here’s how you can control what’s in the Teaser:
1. Go to Structure, Content types, and then the Manage Display screen for Events.
2. Click the Teaser button in the top-right corner, as shown in Figure 6.57. Drupal uses these top-right buttons often, and they can be easy to miss.

3. Notice that almost all the fields are placed in the Hidden area, as shown in Figure 6.58. This means that they will not currently show in the Teaser area.

4. Change the Label for the Event Date field to Inline.
5. Change the Format for the Event Date field to Date and Time. The Date now jumps to the top area of the screen.
6. Change the Label for the Event Logo field to Hidden.
7. Change the Format for the Event Logo field from Hidden to Image.
8. Click the gear icon for the Event Logo.
9. Change the Image style from original to thumbnail.
10. Change the Link Image to Field to Content.
11. Click Update.
If you want to rearrange the order of these fields, you can do that by holding down and moving the crosses next to each field, as shown in Figure 6.59.

13. Return to the homepage and observe your DrupalCon Munich teaser, as shown in Figure 6.60.

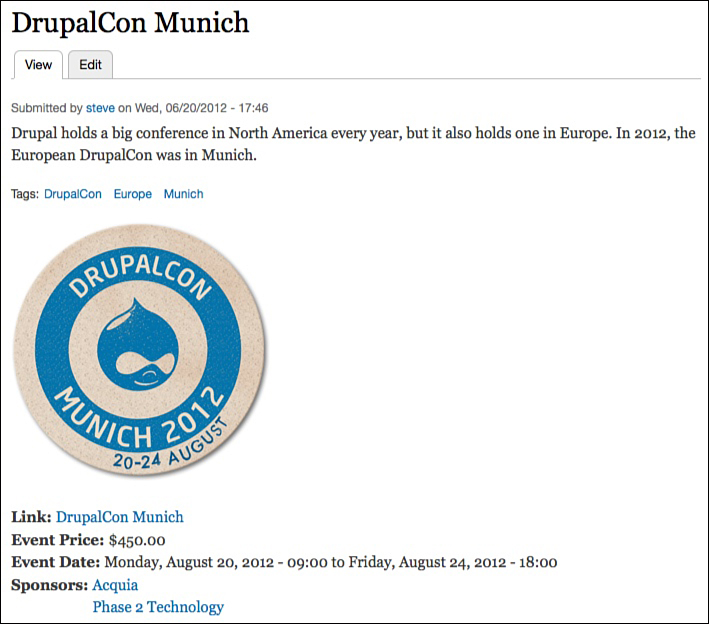
14. Click the title of the content or click the Read more link and you can see the full content together with your display changes. It should look like Figure 6.61.
![]() Title: User Group Name
Title: User Group Name
![]() Body: Description
Body: Description
![]() Term Reference: Tags
Term Reference: Tags
![]() Link: User Group Website
Link: User Group Website
![]() Entity reference: Organizers
Entity reference: Organizers
![]() Address: User Group Location
Address: User Group Location
Now set up those fields one by one. This time, you can simplify the instructions. If you get stuck, look back to earlier sections in this chapter, and you’ll see how to do these tasks.
Editing a Field: Title
Edit the Title field label so that it reads Event Name.
Editing a Field: Body
Edit for the Body field and change the label from Body to Description.
Reusing a Field: Term Reference
Reuse the Tags field and give it the label Tags.
Reusing a Field: Link
Reuse the Link field and give it the label User Group Website.
Adding a Field: Entity Reference
When you created your Events field, you used Entity Reference to link between your content. Now with your User Groups, you can use Entity Reference to link to users. The goal is that when people register on your site, you can link to them as group organizers:
1. Add new field label: Organizers
![]() Field name: user_groups_organizers
Field name: user_groups_organizers
![]() Type of Data to Store: Entity reference
Type of Data to Store: Entity reference
![]() Form Element to Edit Data: Autocomplete
Form Element to Edit Data: Autocomplete
![]() Target Type: User
Target Type: User
3. Click Save Field settings.
![]() Number of Values: Unlimited
Number of Values: Unlimited
4. Click Save Settings.
Adding a Field: Address
To add addresses to content, install the Address Field module. Address Field does rely on the Chaos Tools (CTools) module but you already have that installed.
Use the FITS workflow to make sure it FITS nicely inside your site.
Step 1: Find the Module
1. Open another tab in your browser.
2. Go to http://drupal.org/project/addressfield.
3. Locate the tar.gz file associated with Drupal 7.
4. Right-click the tar.gz link and copy the link or copy the shortcut. The exact command depends on the browser you use.
5. Return to the browser tab that has your site.
Step 2: Install the Module
1. Click Module and then Install New Module.
2. Click in the Install from URL field and paste the URL you captured when you copied the link.
3. Click Install.
4. Click Enable Newly Added Modules.
Step 3: Turn on the Module
1. Check the box next to Address field.
2. Save configuration.
Step 4: Set Up the Module
1. Click Structure, Content types, and then manage fields for the User Groups content type:
![]() Label: User Group location
Label: User Group location
![]() Field name: Address (you can easily reuse this field on other content types.)
Field name: Address (you can easily reuse this field on other content types.)
![]() Type of Data to Store: Postal address
Type of Data to Store: Postal address
![]() Form Element to Edit Data: Dynamic address form
Form Element to Edit Data: Dynamic address form
2. Click Save.
3. Click Save Field Settings.
4. Review your options, but stay with default for this activity.
5. Click Save Settings.
Check your User Group fields. They should now look like Figure 6.62.

Creating Content: User Groups
In Chapter 5, when you created the User Groups content type, you created a content item for Drupal Atlanta. Now that you’ve added all your extra fields, go back and add another user group:
1. Click Add content, and then click User Groups.
2. Complete the content type form with the following:
![]() Title: Washington D.C. Drupal.
Title: Washington D.C. Drupal.
![]() Body: This group is for everyone living in the Washington D.C. metro area who’s interested in Drupal.
Body: This group is for everyone living in the Washington D.C. metro area who’s interested in Drupal.
![]() Link Title: Washington D.C. Drupal.
Link Title: Washington D.C. Drupal.
![]() Link URL: http://groups.drupal.org/washington-dc-drupalers.
Link URL: http://groups.drupal.org/washington-dc-drupalers.
![]() Organizers: Choose yourself because you are the only current user.
Organizers: Choose yourself because you are the only current user.
![]() Address: Stetson’s Famous Bar & Grill, 1610 U St, Washington, District of Columbia, 20009.
Address: Stetson’s Famous Bar & Grill, 1610 U St, Washington, District of Columbia, 20009.
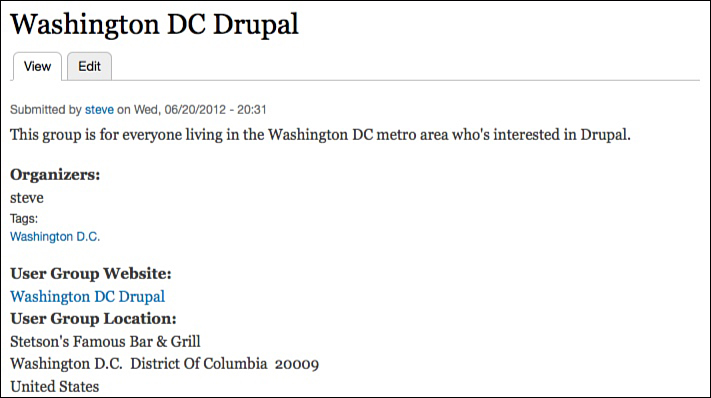
After you click Save, your content should look like Figure 6.63.
As a final touch, improve the display of the fields:
1. Go to Structure, Content types, and click Manage Display for the User Groups content type.
2. Set all the Labels to Inline, except for Description, which should remain set to Hidden.
3. Click the gear icon next to Organizers, and check the box that says Link label to the referenced entity. Click Update.
4. Use the crosses on the left of the screen; reorganize the fields so that they match, as shown in Figure 6.64.

5. Click Save.
6. Visit your content. It should now look like Figure 6.65.

Now you have one more task to complete your User Groups:
7. Go and find your own local User Group. You might be in North America, Europe, Asia, Africa, or Australasia, but there is a good chance you’ll find a Drupal User Group meeting near you. You can use a search engine or look on http://groups.drupal.org. Find the website, location, and information for your local user group and add it to your site.
Taxonomy Explained
Out of all the fields available in Drupal, one is more frequently used, misused, explained, and misunderstood than any other: Taxonomy.
Taxonomy is Drupal’s way of organizing content.
Without realizing it, you’ve actually been using Taxonomy already. Whenever you have used Tags, you have used Taxonomy.
Because Taxonomy is so important, we’re going to explain it in more detail than any other field. We show you how Tags works and then show you how to build your own Taxonomies to organize your content.
Understanding the Term Reference Field: Terms
To start, do as follows:
1. Go to Structure Taxonomy.
You’ll see that Tags and Forums are listed on the page. Notice that these are in the column called Vocabulary Name. In Drupal, both Tags and Forums are examples of what Drupal calls Vocabularies.
2. Click List Terms next to Tags, as shown in Figure 6.66.

3. You now see a list of all the terms you’ve added to the site, as shown in Figure 6.67.

As you can see, all those keywords and phrases that you’ve added are called Terms in Drupal. That explains the name of the field type you’ve used through this chapter: Term Reference. The Term Reference field enables people to enter terms and for you to show them on the page.
So, there are four definitions that help you understand how Drupal categorizes content:
![]() Taxonomy: This is the name given to the whole system of organizing content in Drupal.
Taxonomy: This is the name given to the whole system of organizing content in Drupal.
![]() Vocabulary: This is the name given to a group of terms.
Vocabulary: This is the name given to a group of terms.
![]() Terms: These are the keywords and phrases that actually categorize your content.
Terms: These are the keywords and phrases that actually categorize your content.
![]() Term Reference field: This is how your terms are connected to your content.
Term Reference field: This is how your terms are connected to your content.
Let’s see an example of how this can work with your content types.
You can improve your Companies content type. You can allow your companies to categorize themselves according to which language they speak.
Here’s what you need to set up:
![]() Vocabulary: Languages
Vocabulary: Languages
![]() Terms: English, Spanish, German, French, Chinese, and so on.
Terms: English, Spanish, German, French, Chinese, and so on.
![]() Term Reference field: The field will be called Languages Spoken and attached to your Companies content type.
Term Reference field: The field will be called Languages Spoken and attached to your Companies content type.
Figure 6.68 shows an overview of that categorization.

Step 1: Create the Vocabulary
1. Click Structures on the black menu bar.
2. Click Taxonomy.
3. Click Add Vocabulary.
4. Name: Languages Spoken.
5. Click Save.
Step 2: Add the Terms
1. Click Add terms next to Languages Spoken:
![]() Name: English
Name: English
2. Click Save:
![]() Name: Spanish.
Name: Spanish.
3. Click Save:
![]() Name: German.
Name: German.
4. Click Save.
Repeat for several more languages.
Step 3: Add the Term Reference Field
1. Go to Structure, Content types, and then click manage fields next to Companies.
2. Add the New Field label: Languages Spoken:
![]() Field name: languages_spoken
Field name: languages_spoken
![]() Field type: Term reference.
Field type: Term reference.
![]() Form element: Check boxes/radio buttons.
Form element: Check boxes/radio buttons.
Why do you choose this rather than autocomplete? You don’t want to choose autocomplete because autocomplete enables people to enter their own choices. In this example, you don’t want people to enter their own languages.
3. Click Save:
![]() Vocabulary: Languages Spoken
Vocabulary: Languages Spoken
4. Click Save Field Settings:
![]() Number of values: Unlimited.
Number of values: Unlimited.
5. Click Save Settings.
Step 4: Use the Term Reference Field
Go to Find Content and click Edit next to any of the companies you’ve added. You can now choose to add the languages spoken by that company.
So that’s the process that you can use for categorizing content in Drupal. However, Taxonomy can be much more flexible than you’ve seen so far.
Arranging Terms in a Simple Hierarchy
You can add terms to your Events content type. These enable Event organizers to show what topics will be covered during an event. Notice this time that you organize your terms into a hierarchy. The organization of the terms is also shown in Figure 6.69:
![]() Vocabulary: What topics will be covered?
Vocabulary: What topics will be covered?
![]() Terms: Community:
Terms: Community:
![]() Learning Drupal
Learning Drupal
![]() Contributing to Drupal
Contributing to Drupal
![]() Running a User Group
Running a User Group
![]() Building themes
Building themes
![]() Building photo galleries
Building photo galleries
![]() Making Drupal mobile-ready
Making Drupal mobile-ready
![]() Coding:
Coding:
![]() Building modules
Building modules
![]() Security
Security
![]() Integrating Drupal with other software
Integrating Drupal with other software
![]() Term Reference field: The field will be called What Topics Will Be Covered? and attached to your Events content type.
Term Reference field: The field will be called What Topics Will Be Covered? and attached to your Events content type.

Step 1: Create the Vocabulary
1. Click Structures on the black menu bar.
2. Click Taxonomy.
![]() Name: What Topics Will Be Covered?
Name: What Topics Will Be Covered?
4. Shorten the machine_readable name.
5. Click Save.
Step 2: Add the Terms
1. Click Add Terms next to What Topics Will Be Covered?
![]() Name: Community and then click Save.
Name: Community and then click Save.
![]() Name: Learning Drupal and click Save.
Name: Learning Drupal and click Save.
![]() Name: Contributing to Drupal and click Save.
Name: Contributing to Drupal and click Save.
![]() Name: Running a User Group and click Save.
Name: Running a User Group and click Save.
2. Repeat that process for these four terms: Design, Building Themes, Building Photo Galleries, and Making Drupal Mobile-Ready.
3. Repeat that process for these four terms: Coding, Building Modules, Security, and Integrating Drupal with Other Software.
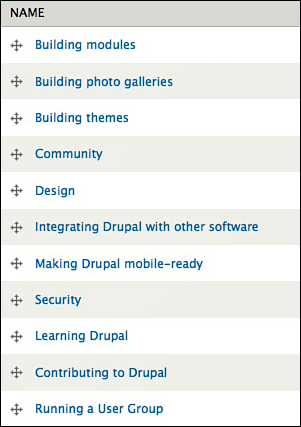
4. Click the List tab at the top-right of the page. You’ll see a list of all your terms, which should look like Figure 6.70.
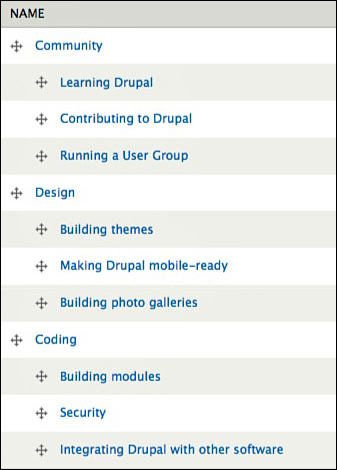
5. You can use the arrows next to each term to drag-and-drop each term. If this doesn’t work for you, click Edit, Relations, and you can use the Parent Terms field to organize your terms. Your aim is to organize your terms to match your original plan, as shown in Figure 6.71.
Step 3: Add the Term Reference Field
1. Go to Structure, Content types, and then click Manage Fields next to Events.
2. Add New Field label: What Topics Will Be Covered?
![]() Field name: events_topics_covered
Field name: events_topics_covered
![]() Field type: Term reference.
Field type: Term reference.
![]() Form element: Check boxes/radio buttons.
Form element: Check boxes/radio buttons.
3. Click Save:
![]() Vocabulary: What Topics Will Be Covered?
Vocabulary: What Topics Will Be Covered?
![]() Number of values: Unlimited.
Number of values: Unlimited.
5. Click Save Settings.
Step 4: Use the Term Reference Field
Go to Find content and click edit next to any of the events you’ve added. You can now choose to add the topics covered by that event.
Arranging Terms in a Complex Hierarchy
So far, you’ve seen three ways in which terms can be organized:
![]() Tags: The terms are completely unorganized with no hierarchy.
Tags: The terms are completely unorganized with no hierarchy.
![]() Languages Spoken: The terms are ordered with no hierarchy.
Languages Spoken: The terms are ordered with no hierarchy.
![]() What Topics Will Be Covered?: The terms are ordered and in a simple hierarchy where many terms are organized under parent terms.
What Topics Will Be Covered?: The terms are ordered and in a simple hierarchy where many terms are organized under parent terms.
There is a fourth option: You can have a complex hierarchy where one term has multiple parents.
Now you can see an example of how this might work. Both Building Themes and Making Drupal Mobile-Ready are under two parent terms:
![]() Vocabulary: What Topics Will Be Covered?
Vocabulary: What Topics Will Be Covered?
![]() Terms: Community:
Terms: Community:
![]() Learning Drupal
Learning Drupal
![]() Contributing to Drupal
Contributing to Drupal
![]() Running a User Group
Running a User Group
![]() Design:
Design:
![]() Building themes
Building themes
![]() Building photo galleries
Building photo galleries
![]() Making Drupal mobile-ready
Making Drupal mobile-ready
![]() Coding:
Coding:
![]() Building modules
Building modules
![]() Building themes
Building themes
![]() Making Drupal mobile-ready
Making Drupal mobile-ready
![]() Security
Security
![]() Integrating Drupal with other software
Integrating Drupal with other software
Now see how you can organize terms in this way:
1. Go to Structure, Taxonomy.
2. Click list terms next to What Topics Will Be Covered?
3. Click Edit next to Building themes.
4. Click Relations.
5. Using your cursor, you can select more than one parent term, as shown in Figure 6.72. Depending on the type of computer you use, you may also need to touch a key, such as Shift or Command. In the example shown in Figure 6.72, we’re selecting both Design and Coding.

6. Click Save.
You can see that Building Themes is now underneath two terms, as shown in Figure 6.73.

7. Repeat that process for Making Drupal mobile-ready.
The only disadvantage with this complex hierarchy is that the drag-and-drop feature will not work any longer. You must rearrange all the terms by clicking Edit, Relations, and selecting a parent.
What’s Next?
Now see what your Drupalville site looks like at the end of this chapter. It should look similar to Figure 6.74.

Don’t worry if your site doesn’t match this exactly. If you understand the concepts covered in this chapter, you’ll be fine to move on to Chapter 7, “Drupal Modules Explained.”
Chapters 5 and 6 show you how content works in Drupal. However, most websites don’t just have content, they also have features. In Chapter 7, you move beyond content and add more features to your site. You add social bookmarks, contact forms, sitemaps, and more.
You add those features by adding more modules. In this chapter, you installed several modules using the FITS workflow. In the next chapter, you add many more.