
There's an old saying, "Cameras don't take pictures; people do." It's true. However, you still need a good camera system, lighting gear, photo accessories and a computer to not only take pictures, but also to deliver photographs to your clients. In this chapter you'll find my gear recommendations—from start to finish—for a serious wedding photographer.

There are a lot of digital SLRs out there that can help you capture a wedding in fine detail. However, not all Digital SLRs are created equal. Here are some things to consider when choosing a system:
Sensor Size: By choosing full-frame, you can take full advantage of wide-angle lenses. Going with options that are smaller than full-frame means that your wide-angle lenses will record a narrower field of view.
Accessories: Add-ons such as a battery pack/ grip (shown on the camera on the right) offers increased battery power that can save you from missing shots due to a battery change.
Frames per Second: Be sure that the system you choose gives you a high number of frames per second (from 3 to 10, depending on the camera). This will help you avoid missing important action shots, such as the bride and groom running out of the church.
Maximum Number of Frames per Second and Burst Rate: Know how many frames you can shoot before the camera "locks up" during the file-writing process.
Maximum Flash-Synch Speed: Higher synch speeds are more advantageous for shooting in bright-light situations and for outdoor fill-in flash photography.
Of course, other functions, such as the buffer size and speed of the memory card, along with the file format being used, also affect performance.

For photographers on a budget, zoom lenses are the way to go. You'll need at least two lenses in the following approximate zoom ranges: a 17-40mm zoom for wide-angle shots and a 24–105mm zoom for portraits.
These versatile lenses are not as fast as fixed focal-length lenses. They have a smaller maximum aperture, which lets less light into the camera than faster lenses. Therefore, to get a good hand-held shot in low-light conditions, you may need to boost your ISO, which increases digital noise, or you may need to use a camera support.
Zoom lenses, however, are not only for the budget-minded photographer. They are also standard lenses for many established pros.
That said, some argue that photographs taken with zoom lenses are not as sharp as those taken with fixed focal-length lenses. Technically, this may be true, but I sure can't tell the difference in the prints I make or in the images that are reproduced in my books and magazine articles.

The lens on the left, an 85mm f/1.2, and the lens on the right, a 50mm f/1.2, are must-have lenses for the serious wedding photographer. Not only are they super sharp, but the fast apertures let photographers use a relatively fast shutter speed in low-light conditions.
What's more, when set at its widest aperture, the f/1.2 offers very little depth-of-field when shooting a subject close up. This renders the background very out of focus, which generates a creative and popular effect among wedding photographers.
These lenses are costly. The 50mm lens runs about $1300, and the 85mm lens costs about $1700. If you are on a tighter budget, consider a 60mm or a 50mm macro lens (center), which cost about $400 each. Just keep in mind that these are less expensive because they're not as fast.

You may not need a telephoto zoom lens at a wedding, but it sure is nice to have in your gear bag, especially when you can't get close to a subject or when you want to blur the background.
Pictured here are two 70–200mm zoom lenses, which offer a popular zoom range for wedding photographers. The lens on the left is an f/4 lens, and the lens on the right is an f/2.8.
You can see the difference in size. The weight of the f/2.8 lens is greater than that of the f/4 lens. Size and weight are things to consider when building a lens system.
Both lenses offer image stabilization (IS), which reduces the effect of camera shake. The f/4 lens is a little more affordable (at less than $1000) than the f/2.8 lens, which costs about $1200.

You may not use a fish-eye lens too often, but it's nice to have one in your arsenal of accessories. They are a bit pricy, costing about $1500. If you can't afford one, renting it when needed is an option.
Pictured here are two types of fish-eye lenses. The lens on the left, a 14mm lens, lets you work in very small areas without any distortion (bending of horizontal and vertical lines). The lens on the right, a 15mm lens, also lets you work in small areas, but you'll see horizontal and vertical lines bend in your photographs. They'll bend even more as you tilt your camera up and down, and this can generate a nice, creative effect.

A flash is perhaps your most important accessory. Most pros use dedicated flash units, which are flash units made by the camera's manufacturer. This enables you to take advantage of all the flash's exposure capabilities.
When purchasing a flash, look for one with what's called variable flash output With this feature, you can adjust the automatic flash output over and under the correct (or standard) setting. This is especially important for daylight fill-in flash photography, which is covered later in this book.
You'll also want a flash with a built-in diffuser (shown here over the flash head) and a pop-up white card (shown in the popped-up position). Both devices help to soften and spread light for a more natural-looking photograph.
A wireless transmitter, which mounts in a camera's hot shoe, is a valuable flash accessory. It lets you fire a remote flash, or a set of flashes, for more professional-looking and creative photographs.
When choosing a flash, also check out its maximum flash range, the number of flashes per set of batteries, and its synch speeds.
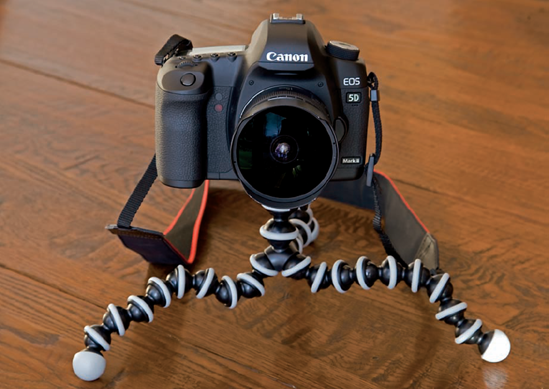
Hey, I know you have a sturdy tripod for those low-light shots, indoors and out, but for low-level shooting, a tiny tripod, such as this model from JOBY Gorillapod (www.joby.com) can come in handy.
Later in this book, you'll see some shots of an altar that were taken from a very low height. Those types of shots often require a long shutter speed. So if your standard tripod can't adjust to shooting very low to the ground and you don't want to lie on your belly in the aisle, you'll miss this type of creative shot without a tiny tripod.
The Gorillapod can also wrap around a branch or fence post for steady shooting outdoors. It's a fun accessory that can also save the day when the light level is low.

I know this is not a shot of a 2009 bride, but you could light a bride of today just as beautifully ... and just as simply. The lighting set up for this shot was easy. It's a one-light shot that I took in Venice, Italy.
You already have at least one accessory flash. Mount that inside an Apollo Speedlite Kit from Westcott (www.fjwestcott.com) and you thereby increase the size of the light source and soften it at the same time. Just unfold the diffuser panel (shown above) and secure it in place with Velcro.
For the photograph on the right, the Speedlite Kit was positioned about 10 feet from the subject at a 45-degree angle. I triggered my Canon Speedlite 580EX with my Canon Wireless Transmitter ST-E2.
Using a slow shutter speed, I was able to capture some of the available room light for a natural-looking photograph.
Of course, you can use multiple Speedlite kits for even more creative lighting.
As with all lighting set ups, try positioning the lights at different distances from the subject and at different heights to capture the shot you envision.

If you are just starting out and on a small budget, there are affordable ways to create studio lighting. There's no need to spend big bucks on expensive studio lighting equipment.
The most economical route is a hot-light system, such as the one from Westcott (www.fjwestcott.com) that's pictured on the left. The hot lights provide a constant light source, and the umbrellas diffuse the light for a soft and flattering effect. Two lights, two umbrellas and a background/separation light are included in this kit—all for under $700.
A step up from a hot-light kit is a strobe-light kit, such as the one pictured here on the right, also from Westcott. Three lights are included: two fill lights that mount inside included soft boxes (for a soft and flattering effect) and a background/ separation light. This kit costs under $900.
These kits, which set up in minutes, come with a carrying case, so you can even take them to the bride's house for a few quick studio-type portraits.
If you have the space, and the time, scrims can help you create very professional-looking photographs. As you can see in the picture on the right, a scrim is basically an extra-large diffuser, somewhat like a large sheet. It's used to soften and spread the light, whether it comes from a flash, hot light or strobe that's placed behind it. Scrims can also be used to soften natural light, such as light coming through a window.
The result of using a Westcott Scrim Jim is shown on the left.
Photographs courtesy: Claude Jodoin

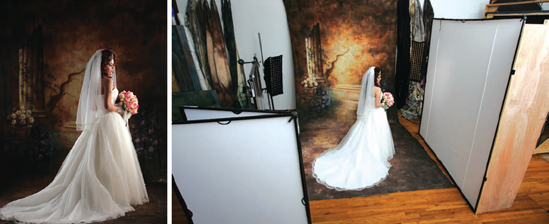
A background can make or break a photograph—any photograph. You can ensure that you'll have a good background (one that looks professional) on the wedding day by keeping a portable/collapsible background in the trunk of your car.
Portable backgrounds, such as the one shown here by Westcott (www.fjwestcott.com) come in all sizes, shapes and colors. Pack one (or two) with you on the wedding day, and you can create studio-type portraits indoors and out.
In case you were wondering about that black cloth on the floor, I placed it there to eliminate the reflection of sunlight off the floor, which would have created unflattering bottom light (also known as Halloween light) on my face.
Photographs by Marco Sammon

Brides love bright, sunny days. The camera, however, does not love the results of brides illuminated by harsh sunlight, which casts unflattering shadows on the face.
For professional photographers, that's no problem. They usually ask an assistant, or even a guest, to hold a collapsible diffuser between the sun and the subject to diffuse and soften the light. This before-and-after pair of pictures illustrates the dramatic difference a diffuser can make.
Diffuser panels, available in different sizes, are often sold in kits along with reflectors, which are described on the next page.
The behind-the-scenes shot at the end of this chapter illustrates correct diffuser placement. I took the shot indoors to illustrate diffuser placement, which is between the light source and subject. I used one direct-light position above the subject to simulate the type of light that you'd naturally encounter on a sunny day.

Reflectors, which usually have a gold side and silver side, are used to bounce direct light onto a subject's face for a more flattering effect. Reflectors reduce the contrast range in a scene while adding either a warm glow (gold side) or a cool glow (silver side) to the subject's face.
Here you can see how holding a reflector on the opposite side of a single harsh light source (used here to simulate bright sunlight) beautifully filled in the harsh shadows on the bride's face.
You can also use reflectors inside, where you can bounce light onto the shaded part of a subject's face when (s)he's standing by a door or window.
Reflectors are typically sold in kits with diffusers. Westcott offers many models to fit your needs.
There are other practical uses for diffusers and reflectors, too. Use a diffuser to soften the light from an accessory flash by positioning the diffuser between the flash and the subject. Use a reflector to increase the size of an accessory flash by bouncing the light from the flash into the reflector.
The behind-the-scenes shot at the end of this chapter illustrates reflector placement. As with the diffuser example, I took the shot indoors to illustrate correct reflector placement—opposite the light source.

My own reflector/ diffuser kit is available for purchase; it's called Rick Sammon's On-Location Light Controller and Tote. The kit also includes a flash diffuser, which softens the light from an accessory flash for a more pleasing and natural-looking photograph. The handy tote carries it all and comes with a flash, memory cards, extra batteries...and even a copy of this book!
I developed this kit to provide an affordable product that photographers could use to control the light. It's easy to do with a little know-how, and it often makes the difference between a snapshot and a great shot.

Your home computer system is a vital part of your wedding photography business. My advice is to get a system that has as much RAM as you can afford. That way, when you are reviewing your photographs side-by-side with your clients—and perhaps tweaking your images in Photoshop or applying filters and special effects—your computer will be able to "think" fast. This will help you show off your work at top speed.
I also suggest getting the largest monitor you can afford. This will make it easier for you and your clients to view your work together—during the review process and for sales pitches to couples still deciding on a photographer.
Of course, calibrating your monitor to show colors accurately is of key importance. Also be sure to keep the light in the room constant, so that images on the monitor will always look their best.
Last but not least, always remember to back up your images—in at least two places—ASAP after a wedding shoot. You just never know what can happen when working with hard drives!

On occasion, you may find yourself working away from home. In those cases, you'll need an on-location computer system that's complete with back-up drives.
My advice is to select your "keepers" offsite, but wait to edit your images with Photoshop until you get back home. Although your portable monitor may be calibrated, the light in the room will be different from the light in your studio's digital darkroom or in your den at home. Thus, you may be fooled into making mistakes in digital adjustments when you're offsite.
As far as memory cards go, bring more than you think you'll need—even if you have a portable download device, such as the Epson P7000. It could crash. It's a hard drive.
Keeping all your photographs on your memory cards until the end of the day is the safest way to go. Just keep those precious cards in a safe place! They are worth much more than their weight in gold.
When traveling, take a back-up card reader and cable. Again, these devices have been known to fail, and that's something you simply must prepare for.

With today's printers and pigment-based inks, it's easy for you to make archival prints for your customers. What's more, you need prints for your office or studio walls and for sample albums. Most likely you'll change these often as you get new and exciting images.
Having your own printer puts you in total and instant control of making prints. Just make sure that your printer is calibrated and that you are using the correct ICC profile for it. Using the manufacturer's ink and paper is also recommended.
You may have heard this photo joke: If you can't make a good print, make a big one. It's actually not that far fetched. Bigger can, in some cases, look better. And you can sell a big print for more than you can sell a small print.
When choosing a printer, you need one that makes at least a 13×19-inch print, such as the Canon Pro 9000 shown on the right. For 24-inch wide prints, you'll need something like the baby on the left: my Canon iPF6100. Use roll paper in this printer to make a life-size image of a bride or groom.

Here are two snapshots that illustrate how to position a diffuser and a reflector. The harsh studio strobe, placed above the subject and to the left, was used to create the type of light you'll find on a bright, sunny day.
The picture on the left shows Vered Kashlano, the studio's owner (and a wonderful photographer herself), holding a diffuser between the light source and our model, Stephanie Garcia (not an actual bride, by the way). The diffuser panel is actually translucent—not the yellow color it appears to be in the picture.
The picture on the right shows Vered holding a reflector to bounce light onto the shaded side of Stephanie's face.
If you are flipping through this book backward, flip a few pages forward to see the end-result images of all this hard work.
In case you are wondering about that thing sticking out of my camera's hot shoe, it's a wireless transmitter that fires the flashes.