
We don't want auto-testing for all projects. We would like to switch it off and on for individual projects. In this chapter we will
Create a project property page with a checkbox for auto testing so that the user can turn on and off the auto-test builder
Call the methods that add or remove a nature
First, we need to get the property page to appear when we bring up the properties of a Java project. Eclipse can attach properties to any object. As a developer, you can allow a user to edit the properties of anything. To do so you provide property pages though an extension point. In the property page, you decide how to store and retrieve the property values. For example, Eclipse already supports attaching persistent properties to a resource.
We can copy the declaration from one of the other project property pages (see Figure 19.1).
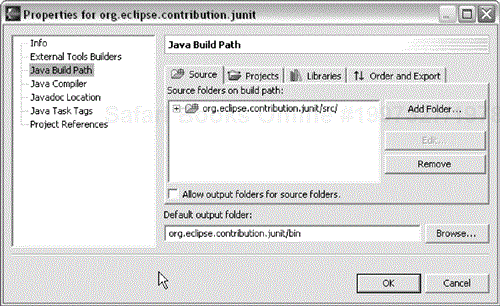
Clicking on org.eclipse.jdt.ui, we see many property pages. Here's one:
Example . org.eclipse.jdt.ui/plugin.xml
<extension point="org.eclipse.ui.propertyPages">
  <page
    name="%buildPathPageName"
    id="org.eclipse.jdt.ui.propertyPages.BuildPathsPropertyPage"
    objectClass="org.eclipse.core.resources.IProject"
    class="org.eclipse.jdt.internal.ui.preferences.
      BuildPathsPropertyPage">
    <filter name="nature" value="org.eclipse.jdt.core.
      javanature"/>
  </page>
</extension>
The Relevance Rule is in action in this declaration. The filter element has a predefined set of possible keys: nature and persistent property. The declaration above says only projects having the Java nature will show this property page. Copying this into our manifest, we get:
Example . org.eclipse.contribution.junit/plugin.xml
<extension point="org.eclipse.ui.propertyPages">
  <page
    id="org.eclipse.contribution.junit.autotestproperty"
    name="Auto-test"
    objectClass="org.eclipse.jdt.core.IJavaProject"
    class="org.eclipse.contribution.junit.ui.
      AutoTestPropertyPage">
    <filter name="nature" value="org.eclipse.jdt.core.
      javanature"/>
  </page>
</extension>
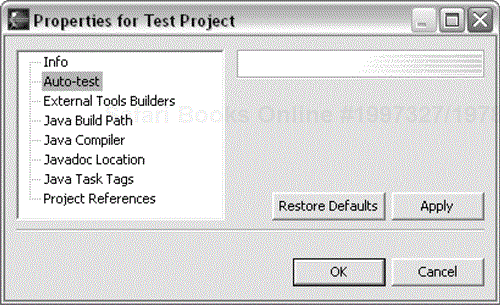
In the run-time workbench, we can create a Java project. When we look at the project's properties, we see the name of the property page, as shown in Figure 19.3, but when we select it, we get an error because the class hasn't been implemented yet.
If we show the project in the Navigator (instead of the Package Explorer in the Java perspective), the property page doesn't appear. Why not? The object class specified in the declaration is checked against the type of the currently selected element. In the Package Explorer, the elements are IJavaProjects. The Navigator shows IProjects. How can we make our property page appear in both places?
One solution used occasionally in Eclipse is to declare the property page twice, once for an IProject and once for an IJavaProject. This is not an elegant solution. A better solution, also used in Eclipse, is to enable the resource adapter for the contribution (Chapter 31). Applying the resource adapter to an IJavaProject will reveal its IProject.
Example . org.eclipse.contribution.junit/plugin.xml
<extension point="org.eclipse.ui.propertyPages">
  <page
    id="org.eclipse.contribution.junit.autotestproperty"
    name="Auto-test"
    objectClass="org.eclipse.core.resources.IProject"
    adaptable="true"
    class="org.eclipse.contribution.junit.ui.
      AutoTestPropertyPage">
    <filter name="nature" value="org.eclipse.jdt.core.
      javanature"/>
  </page>
</extension>
At runtime, Eclipse will look at the selection. If it's an IProject, no problem. The property page sticks. If the selection is anything else, Eclipse will ask to see if the selection can be adapted to an IProject (for more on adapters, see Chapter 31). IJavaProjects are adaptable to IProjects, so the page sticks. Other elements are not adaptable to IProjects, so the page will not stick to, for example, compilation units.
To implement the property page, we can look at an example. BuildPathsPropertyPage extends PropertyPage, so we will, too:
Example . org.eclipse.contribution.junit/AutoTestPropertyPage
public class AutoTestPropertyPage extends PropertyPage {
  public AutoTestPropertyPage() {
  }
  protected Control createContents(Composite parent) {
    return null;
  }
}
Notice that, as usual, we have to implement the default constructor. Because AutoTestPropertyPage is an extension class it will be created via reflection.
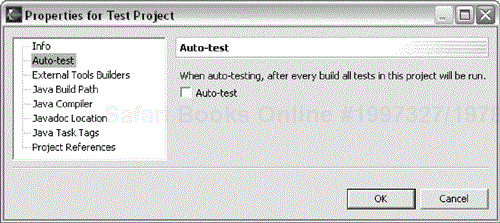
Now when we select the auto-test property page, we get a page with no contents, as shown in Figure 19.4.
Just as we did with the JUnit view, we need to add controls to the page. In our case, we want to add a checkbox with the label Auto-test. Looking at all the other implementors of createContents() (there are more than 100 of them), it looks like we only need to add a Button and return it as the value of the method:
Example . org.eclipse.contribution.junit/AutoTestPropertyPage
Button autoTest;
protected Control createContents(Composite parent) {
  Button autoTest= new Button(parent, SWT.CHECK);
  autoTest.setText("Auto-test");
  return autoTest;
}
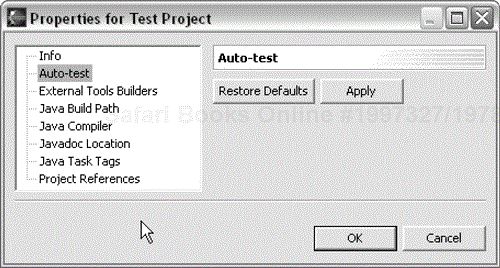
Figure 19.5 shows the new page.
We would like a more attractive layout than this and we need to connect our property page to the JUnitPlugin methods for adding and removing the auto-test nature.
Finding Dialog Implementors
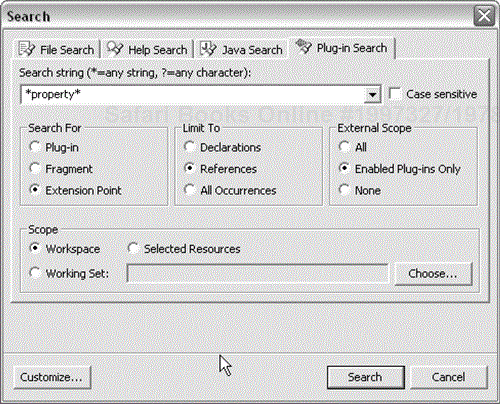
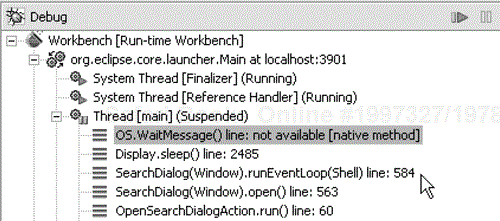
When you need some inspiration about how to implement a layout then the existing dialogs serve as good examples. The simplest way to search for a dialog implementation is to use an Open Type query with a pattern like “*Dialog*”. For modal dialogs there is another way. Start the run-time workbench under the debugger (Run > Debug As... > Run-time Workbench), bring up the dialog you are interested in, and suspend the main thread in the debugger. This will show you the name of the dialog class somewhere in the stack trace. The following screenshot shows the stack trace when suspending the main thread while the Search dialog is open.
To improve the appearance, we'll first extract a method to create the widgets:
Example . org.eclipse.contribution.junit/AutoTestPropertyPage
protected Control createContents(Composite parent) {
  noDefaultAndApplyButton();
  Control composite= addControl(parent);
  try {
    boolean hasNature= getProject().hasNature(
      JUnitPlugin.AUTO_TEST_NATURE);
    autoTest.setSelection(hasNature);
  } catch (CoreException e) {
    // TODO Error dialog
  }
  return composite;
}
Notice that we've hidden the Restore Defaults and Apply buttons. These only make sense for complicated property pages where you want to preview the effects of your choices. The method getProject() retrieves the input to the property page, which is an IProject:
Example . org.eclipse.contribution.junit/AutoTestPropertyPage
private IProject getProject() {
  return (IProject) getElement();
}
We would like to have a short description of the auto-test property above the checkbox. GridLayout provides a way to arrange widgets in a grid.
Example . org.eclipse.contribution.junit/AutoTestPropertyPage
private Control addControl(Composite parent) {
  Composite composite= new Composite(parent, SWT.NULL);
  GridLayout layout= new GridLayout();
  layout.numColumns= 1;
  composite.setLayout(layout);
  GridData data= new GridData();
  data.verticalAlignment= GridData.FILL;
  data.horizontalAlignment= GridData.FILL;
  composite.setLayoutData(data);

  Font font= parent.getFont();
  Label label= new Label(composite, SWT.NONE);
  label.setText("When auto-testing, after every build all "+
    "tests in this project will be run.");
  label.setFont(font);
  autoTest= new Button(composite, SWT.CHECK);
  autoTest.setText("Auto-test");
  autoTest.setFont(font);
  return composite;
}
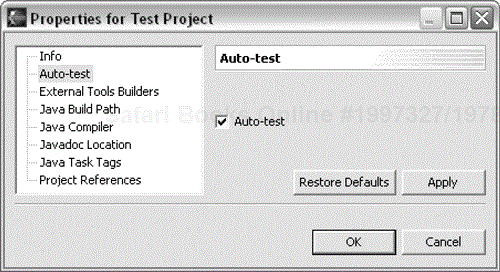
Because we want to add several controls, we need to put them together in a Composite, for which we define a GridLayout. The new page is shown in Figure 19.6.
Notice that we must separately set the parent's font for each control. Without this, our controls would not appear in the user's preferred dialog font.
All that's left is to install (or uninstall) the auto-test nature when the user clicks OK. We override the hook method performOk() to do this:
Example . org.eclipse.contribution.junit/AutoTestPropertyPage
public boolean performOk() {
  try {
    JUnitPlugin plugin= JUnitPlugin.getPlugin();
    if (autoTest.getSelection())
      plugin.addAutoBuildNature(getProject());
    else
      plugin.removeAutoBuildNature(getProject());
  } catch (CoreException e) {
    // TODO Error dialog
  }
  return true;
}
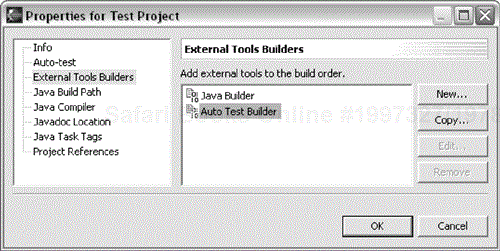
We return true because we don't ever want to veto the acceptance of the changes. We can run a run-time workspace to see the auto-test feature in action. Once we've selected auto-test and clicked OK, the auto-test builder appears in our project's properties, as shown in Figure 19.7.
To further confirm that we are getting the expected results, we can start a run-time workbench. There we can create a project, set the auto-test property, look at the contents of the .project file, and see the auto-test nature and builder attached to our project.
<projectDescription>
  <name>Java Project</name>
  <comment></comment>
  <projects>
  </projects>
  <buildSpec>
    <buildCommand>
      <name>org.eclipse.jdt.core.javabuilder</name>
      <arguments>
      </arguments>
    </buildCommand>
    <buildCommand>
      <name>org.eclipse.contribution.junit.autoTestBuilder</name>
      <arguments>
      </arguments>
    </buildCommand>
  </buildSpec>
  <natures>
    <nature>org.eclipse.jdt.core.javanature</nature>
    <nature>org.eclipse.contribution.junit.autoTestNature</nature>
  </natures>
</projectDescription>
The main development of the auto-test feature is complete. However, we still have a lot of polishing to do, starting with handling errors gracefully, whether we notify the user or just log the problem. Reviewing this chapter, we
Declared
AutoTestPropertiesPagein the manifest. We made sure it appeared in the Navigator and the Package Explorer by attaching it toIProjectsand making it adaptable. We made sure it only attached to Java projects by specifying a filter requiring the presence of the Java nature.Implemented the
AutoTestPropertiesPage, including using aGridLayoutto enhance the appearance of the controls.Implemented
performOk()to install or uninstall the auto-test nature.
Preference pages—. the implementation of a preference page is very similar to the implementation of a property page. In fact, the class
PropertyPageextendsPreferencePageand adds the notion of an input. When implementing a preference page you can also use field editors. A field editor helps you manage and validate preference settings. See www.eclipse.org/articles/Article-Field-Editors/field_editors.html for more details.