
Chapter 6
Getting into the Flow with Loops and Branches
In This Chapter
![]() Finding out about if/else branching
Finding out about if/else branching
![]() Understanding the different types of loops
Understanding the different types of loops
![]() Using loops to repeat statements
Using loops to repeat statements
![]() Looping through the values of an array
Looping through the values of an array
“It's not hard to make decisions when you know what your values are.”
— Roy Disney
In earlier chapters of this book, we generally talk about and demonstrate linear JavaScript code. However, more often than not, there comes a time (many times, actually) in a program where you need a choice to be made or where you need to alter the straight-ahead logic of a program to repeat statements multiple times with different values. In this chapter, we discuss looping and branching statements.
 Don’t forget to visit the website to check out the online exercises relevant to this chapter!
Branching Out
Looping and branching statements are called control statements because they control the order in which JavaScript programs are run. You can use branching statements to create different paths for the execution of JavaScript code, depending on conditional logic. Loops are the simplest way to group JavaScript statements together in a program.
The logic of a JavaScript program often comes to a point where a choice must be made which will make all the difference. Figure 6-1 demonstrates, using JavaScript, a real-world decision that can be solved using branching.

Daniel Oines, https://www.flickr.com/photos/dno1967b/8347363864 (Creative Commons License)
Figure 6-1: Branching chooses the path.
if … else
The if and else statements work together to evaluate a logical expression and run different statements based on the result. if statements can be, and often are, used by themselves. else statements must always be used in conjunction with an if statement.
The basic syntax for an if statement is
if (condition) {

. . .

}
The condition here is any expression that evaluates to a Boolean (true or false) value. If the result of the expression is true, the statements between the brackets will be executed. If it’s false, they will just be skipped over.
The else statement comes in when you want to do something if the condition evaluates to false. For example:
var age = 19;

if (age < 21){

 document.write ("You are under the legal drinking age in the U.S.");

} else {

 document.write ("What'll it be?");

}
Many other programming languages have a combination keyword called the elseif, which can be used multiple times in an if … else statement until a true value occurs. JavaScript doesn’t have an elseif keyword.
However, you can get the same functionality as an elseif keyword by using if and else together with a space between them. For example:
if (time < 12){

 document.write ("Good Morning!");

} else if (time < 17){

 document.write ("Good Afternoon!");

} else if (time < 20){

 document.write ("Good Evening!");

} else {

 document.write ("Good Night!");

}
Notice the use of line breaks and spaces in the preceding examples. Many people have different styles for how to write if … else statements. You may also see them written with fewer line breaks or without space between the keywords and brackets. These will work, too. However, whenever possible, it is preferable to choose ease of reading over brevity.
Switch
The switch statement chooses between multiple statements to execute based on possible values of a single expression. Each of these values in a switch statement is called a case. In English, you may say, for example:
“In the case that we are expecting six guests, order three pizzas. In the case that we are expecting 12 guests, order six pizzas. In the case that we’re expecting more than 20 guests, freak out.”
The syntax for the switch statement is
switch (expression) {

 case value1:

 // Statements

 break;

 case value2:

 // Statements

 break;

 case value3:

 // Statements

 break;

 default:

 // Statements

 break;

}
Notice the break statement after the statements associated with each case. The break statement tells the switch statement to stop and exit the switch statement. Without the break, the switch statement would continue and run the statements in the next clause, regardless of whether the expression meets the conditions of that case.
 Forgetting a
 break statement within a switch can cause big problems, so be sure to always use it. Because a switch statement will run any statements within any case clause after a clause that evaluates to true, unpredictable results can occur when you forget a break statement. Problems caused by missing break statements are not easy to identify because they generally won't produce errors, but will frequently produce incorrect results.
If no match is found in any of the case clauses, the switch statement will look for a default clause and execute the statement it contains.
 The exception to the rule that you should always use a
 break statement between case clauses is the default clause. As long as the default clause is the last statement in your switch (which, it should be), you can safely omit the break after it because the program will break out of the switch after the last statement anyway.
Listing 6-1 shows an example of how you might use a switch statement.
Listing 6-1: Using a switch Statement to Personalize a Greeting
var languagePreference = "Spanish";

switch (languagePreference){

 case "English":

   console.log("Hello!");

   break;

 case "Spanish":

   console.log("Hola!");

   break;

 case "German":

   console.log("Guten Tag!");

   break;

 case "French":

   console.log("Bon Jour!");

   break;

 default:

   console.log("I‘m Sorry, I don’t Speak" + languagePreferance + "!");

}
Here We Go: Loop De Loop
Loops execute the same statement multiple times. JavaScript has several different types of loops:
-
for -
for … in -
do … while -
while
for
The for statement creates a loop using three expressions:
- Initialization: The initial value of a variable, typically a counter.
- Condition: A Boolean expression to be evaluated with each iteration of the loop.
- Final expression: An expression to be evaluated after each loop iteration.
Although it's not required to use all three expressions in a for loop, all three of them are nearly always included. The for loop is usually used to run code a predetermined number of times.
The following is an example of a simple for loop:
for (var x = 1; x < 10; x++){

 console.log(x);

}
Broken down, this is how the preceding for loop example works:
-
A new variable, in this case
x, is initiated with the value of 1. -
A test is performed to determine whether
xis less than 10.If it is, the statements inside the loop are executed (in this case, a console.log statement).
If not, the value of
xis incremented using the increment operator (++).-
The test is done again to determine whether
xis less than 10.If so, the statements inside the loop are executed.
- The test repeats, until the condition expression no longer evaluates to true.
Figure 6-2 shows the result of running this for statement in the Chrome developer tools.

Figure 6-2: A loop that counts from 1 to 9.
Looping through an array
You can use for loops to list the contents of an array by testing the value of the counter against the value of the length property of the array. Be sure to remember that JavaScript arrays are zero-indexed and that the value of any array.length will be one more than the highest index numbered element in the array. That is why we add -1 in Listing 6-2.
Listing 6-2: Listing the Contents of an Array with for Loop
<html>

<head>

 <title>Different Area Codes</title>

</head>

<body>

 <script>

   var areaCodes = ["770", "404", "718", "202", "901", "305", "312", "313", "215", "803"];

   for (x=0; x < areaCodes.length - 1; x++){

     document.write("Different Area Code:" + areaCodes[x] + "<br>");

   }

 </script>

</body>

</html>
Figure 6-3 shows the output of running the program detailed in Listing 6-2.

Figure 6-3: Output of listing the contents of an array with a for loop.
for … in
The for … in statements loop through the properties in an object. You can also use a for … in statement to loop through the values of an array.
The for … in loop has an interesting quirk. It doesn’t care about the order of properties or elements that it’s looping through. For this reason, and because using for … in loop is slower, you’re much better off using a standard for loop to loop through array elements.
Objects are data containers that have properties (what they are) and methods (what they do). Web browsers have a set of built-in objects that programmers can use to control the function of the browser. The most basic of these is the Document object. The write method of the Document object, for example, tells your browser to insert a specified value into the HTML document.
The Document object also has properties that it uses to track and give programmers information about the current document. The Document.images collection, for example, contains all of the img tags in the current HTML document.
In Listing 6-3, the for … in loop is used to list all the properties of the Document object.
Listing 6-3: Looping through the Document object with for … in
<html>

<head>

 <title>document properties</title>

 <style>

   .columns {

    -webkit-column-count: 6; // Chrome, Safari, Opera

    -moz-column-count: 6; // Firefox

    column-count: 6;

   }

 </style>

</head>

<body>


 <div class="columns">


  <script>

    for (var prop in document){

       document.write (prop + "<br>");

  }

  </script>


  </div>


</body>

</html>
The results of running Listing 6-3 are shown in Figure 6-4.

Figure 6-4: A list of all the properties of a Document object using the for … in loop.
You can also use a for … in loop to output the values that are in the properties of the object, rather than just the property name. Listing 6-4 is a program that outputs the current values of each of the Document object’s properties.
Listing 6-4: Outputting the Property Names and Values of the Document Object with for … in
<html>

<head>

 <title>document properties with values</title>

 <style>

   .columns{

   -webkit-column-count: 6; /* Chrome, Safari, Opera */

   -moz-column-count: 6; /* Firefox */

   column-count: 6;

   }


 </style>

</head>

<body>

 <div class="columns">

  <script>

   for (var prop in document){

     document.write (prop + ": " + document[prop] + "<br>");

   }

  </script>

 </div>

</body>

</html>
Figure 6-5 shows the output of Listing 6-4. Notice that many of the values of properties are in square brackets ([ ]). The square brackets indicate that the value of the property has multiple elements, such as in the case of an array or object.
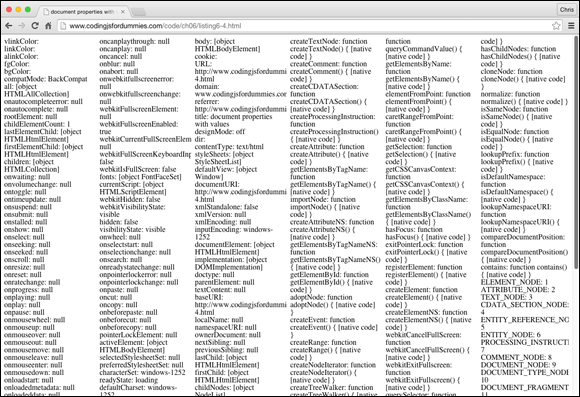
Figure 6-5: Results of outputting the property names and values of the Document object with for … in.
while loops
The while statement creates a loop that runs as long as a condition evaluates to true. Listing 6-5 shows a webpage containing an example of the while loop.
Listing 6-5: Using a while Loop
<html>

<head>

  <title>Guess the Word</title>

 </head>

<body>

 <script>

   var guessedWord = prompt("What word am I thinking of?");

   while (guessedWord != "sandwich") { // as long as the guessed word is not sandwich

     prompt("No. That's not it. Try again.");

                                                       }

     alert("Congratulations! That's exactly right!"); //

           do this after exiting the loop

 </script>

</body>

</html>
do … while
The do … while loop works in much the same way as the while loop, except that it puts the statements before the expression to test against. The effect is that the statements within a do … while loop will always execute as least once.
Listing 6-6 demonstrates the use of a do … while loop.
Listing 6-6: Using a do … while Loop
<html>

<head>

 <title>Let's Count</title>

</head>

<body>

 <script>

   var i = 0;

   do {

      i++;

      document.write(I + "<br>");

   } while (i<10);

 </script>

</body>

</html>
break and continue
You can use break and continue to interrupt the execution of a loop. The break statement was shown previously in this chapter in the context of a switch statement, where it serves to break out of the switch after a successful match.
In a loop, break does much the same thing. It causes the program to immediately exit the loop, no matter whether the conditions for the completion of the loop have been met.
For example, in Listing 6-7, the word-guessing game will progress just as it does in Listing 6-5, but the loop will immediately terminate if no value is entered.
Listing 6-7: Using a break in a while Loop
<html>

<head>

 <title>Guess the Word</title>

</head>

<body>

 <script>

   var guessedWord = prompt("What word am I thinking of?");

   while (guessedWord != "sandwich") {

     if (guessedWord =="") {break;} // exit the loop right away if user doesn't enter a value

     prompt("No. That's not it. Try again.");

     }

   alert("Congratulations! That's exactly right!");

 </script>

</body>

</html>
The continue statement causes the current iteration of the loop to stop and tells the program to start up again with the next iteration of the loop, skipping the statements that come after the continue statement.
Listing 6-8 shows a program that counts from 1 to 20, but only prints out even numbers. Notice that the program determines whether a number is even by using the modulus operator to test whether the current value of the counter is divisible by two:
Listing 6-8: Counting and Using continue to Display Even Numbers
<html>

<head>

 <title>Count and show me even numbers</title>

</head>

<body>

 <script>

   for (var i = 0; i <= 20; i++){

     if (i%2 != 0){

       continue;

     }

     document.write (i + " is an even number.<br>");

   }

 </script>

</body>

</html>
When used in this way, continue can replace the functionality of an else statement.
Figure 6-6 shows the result of running Listing 6-8 in a browser.

Figure 6-6: Counting and using continue to display even numbers.
The break and continue statements can be useful, but they can also be dangerous. Their small size and great power make them easy to overlook when reading through code. For this reason, some programmers consider using them inside of a loop to be a bad practice. For more information on why and the complexities of the issue, read this discussion: