Chapter 6
Methods
What’s in This Chapter
- Method declarations
- Optional and named parameters
- Method overloading
- Extension methods
- Lambda expressions
- Covariance and contravariance
- Asynchronous method execution
Wrox.com Downloads for This Chapter
Please note that all the code examples for this chapter are available as a part of this chapter’s code download on the book’s website at www.wrox.com/go/csharp5programmersref on the Download Code tab.
Methods enable you to break an otherwise unwieldy chunk of code into manageable pieces. They enable you to extract code that you may need to use under more than one circumstance and place it in a single location where you can call it as needed.
This enables you to maintain and update the code in a single location. If you later need to modify the code, you need to do it only in one place, so you don’t need to keep multiple copies of the code synchronized.
This chapter describes methods and explains the syntax for declaring them. It also provides some tips for making methods more maintainable.
Method Declarations
In C# all methods must be inside a class. The syntax for creating a method follows:
«attributes» «accessibility» «modifiers» return_type name(«parameters»)
{
    code...
}
Many of these pieces of the declaration are similar to those described for declaring variables. For example, variable declarations can also include attributes and accessibility keywords. See the corresponding sections in Chapter 4, “Data Types, Variables, and Constants,” for basic information about those features.
The following sections provide extra information about the pieces of a method declaration.
Attributes
The optional attribute list is a series of attribute objects that provide extra information about the method. An attribute further refines the definition of a method to give more information to the compiler, the runtime system, and other tools that need to manipulate the method.
Attributes are specialized and address issues that arise when you perform specific programming tasks. For example, the System.Diagnostics.Conditional attribute means a (method) is conditional upon the definition of some preprocessor symbol. If the symbol is not defined, then the method is silently ignored.
For example, consider the following code snippet.
#define INTERACTIVE
...
[Conditional("INTERACTIVE")]
private void DisplayGreeting()
{
    MessageBox.Show("Hello");
}
...
private void Form1_Load(object sender, EventArgs e)
{
    DisplayGreeting();
}
The code first defines the preprocessor symbol INTERACTIVE. Later it uses the Conditional attribute in the definition of the DisplayGreeting method. That method displays a message box.
The form’s Load event handler calls the DisplayGreeting method. If the INTERACTIVE constant is defined, the method executes and displays its message box. If INTERACTIVE is not defined, the method call is ignored and the program continues.
See the section “Attributes” in Chapter 4 for more detail on attributes in general, including some links you can follow to get more information.
The following list describes some of the most useful method attributes. Many of these apply to property methods (see the section “Properties” in Chapter 4) and fields. Most of them are in the System.ComponentModel namespace. Check the online help for more detail.
AttributeUsage—If you build your own custom attribute, this attribute tells how your attribute can be used. For example, it determines whether an item can have multiple instances of your attribute, whether your attribute can be inherited by a derived class, and the kinds of things that can have your attribute (assembly, class, method, and so forth).Browsable—This indicates whether a property or event should be displayed in an editor such as the Properties window or aPropertyGridcontrol.Category—This indicates the grouping that should hold the property or event in a visual designer such as the Properties window or aPropertyGridcontrol.DefaultEvent—This gives a class’s default event name. If the class is a control or component and you double-click it in the Form Designer, the code editor opens to this event’s handler.DefaultProperty—This gives a class’s default property name.DefaultValue—This gives a property a default value. If you right-click the property in the Properties window and select Reset, the property is reset to this value.Description—This gives a description of the item. If a property has aDescriptionand you select the property in the Properties window, the window displays the description text at the bottom.Localizable—This determines whether a property should be localizable, so you can easily store different versions of the property for different languages and locales.MergableProperty—This indicates whether the property can be merged with the same property provided by other components in the Properties window. If this istrueand you select multiple controls with the same value for this property, the Properties window displays the value. If you enter a new value, all the controls are updated.ParenthesizePropertyName—This indicates whether editors such as the Properties window should display parentheses around the property’s name.ReadOnly—This indicates whether designers should treat this property as read-only.RecommendedAsConfigurable—This indicates that a property should be tied to the configuration file. When you select the object at design time and expand the (Dynamic Properties) item, the property is listed. If you click the ellipsis to the right, a dialog box appears that enables you to map the property to a key in the configuration file.RefreshProperties—This indicates how an editor should refresh the object’s other properties if this property is changed. The value can beDefault(do not refresh the other properties),Repaint(refresh all other properties), orAll(requery and refresh all properties).Conditional—This indicates that the method is ignored if a preprocessor symbol is undefined.DebuggerHidden—This tells debuggers whether a method should be debuggable. IfDebuggerHiddenistrue, the debugger skips over the method and does not stop at breakpoints inside it.DebuggerStepThrough—This tells debuggers whether to let the developer step into a method in the debugger. If theDebuggerStepThroughattribute is present, the IDE does not step into the method.ToolboxBitmap——This tells the IDE where to find a control or component’s Toolbox bitmap. This can be a file, or it can be a type in an assembly that contains the bitmap and the bitmap’s name in the assembly. It’s awkward but essential if you’re developing controls or components.Obsolete—This indicates that the item (class, method, property, or whatever) is obsolete. Optionally, you can specify the message that the code editor should display to the developer if code uses the item (for example, “Use the NewMethod instead”). You can also indicate whether the IDE should treat using this item as a warning or an error.
Accessibility
The method’s accessibility value can be one of public, internal, protected, internal protected, and private. These have the same meanings as the same keywords when used to declare variables. See the section “Accessibility” in Chapter 4 for more information.
Modifiers
The method’s modifiers give more information about the method. The following sections describe the allowed keywords.
new
A derived class can define a method with the same name as a method it inherits from the parent class. In that case, the new version of the method hides the parent’s version. This is allowed but Visual Studio flags it with a warning. The new keyword tells Visual Studio that this is not an accident and suppresses the warning.
For example, suppose the Person class includes FirstName, LastName, Street, City, State, and Zip fields. It also provides the following Address method that returns those values formatted as an address string.
public string Address()
{
    return FirstName + " " + LastName + '
' +
        Street + '
' +
        City + " " + State + " " + Zip;
}
Now suppose the Employee class is derived from Person. The Employee class adds a new Office field and provides the following new Address method that includes the Office value.
public new string Address()
{
    return FirstName + " " + LastName + ", " + Office + '
' +
        Street + '
' +
        City + " " + State + " " + Zip;
}
Without the new keyword, this would raise the warning.
static
As Chapter 4 explained, a variable declared with the static keyword is shared by all instances of the class. Similarly, a static method applies to all instances of the class. In that case, the method applies to the class itself rather than to a particular instance of the class.
For example, suppose the Person class has a LookupPerson method that looks up a person’s name in a database and returns a Person object representing that person. It wouldn’t make sense to require you to create a Person object just to invoke its LookupPerson method. Instead you can make this a static method.
To invoke a static method, use the class name as in Person.LookupPerson("Eddie Russett").
virtual and override
The virtual keyword and override keywords go together.
Suppose the Person and Employee classes have Address methods as described in the previous sections. The Employee class’s version of Address hides the Person class’s version. Now consider the following code.
Employee employee = new Employee { FirstName = "Rod", ... };
Console.WriteLine("Employee:
" + employee.Address());
Console.WriteLine();

Person person = employee;
Console.WriteLine("Person:
" + person.Address());
The code creates an Employee object and displays the result of its Address method in the Console window. This includes the object’s FirstName, LastName, Office, Street, City, State, and Zip values.
Next the code sets a Person variable equal to the same Employee. This is allowed because an Employee is a kind of Person. The code then displays the result of the Person object’s Address method. Because this is a Person object, its Address method doesn’t include the object’s Office value. Even though this object is actually an Employee, the Person class’s version of the Address method doesn’t include the Office value. The following text shows the result.
Employee:
Rod Stephens, B-24
1337 Leet St
Bugsville HI 98765
Person:
Rod Stephens
1337 Leet St
Bugsville HI 98765
However, there is a way to let the object use its “native” Address method instead of the one given by the type of the variable holding it. In this case, the Employee object would use its Address method even if it were represented by a Person variable.
To do this, add the virtual keyword to the Person class’s version of the method as in the following code.
public virtual string Address()
{
    return FirstName + " " + LastName + '
' +
        Street + '
' +
        City + " " + State + " " + Zip;
}
The virtual keyword tells C# that a derived class may replace this method with a version of its own.
Next add the override keyword to the Employee class’s Address method as in the following code.
public override string Address()
{
    return FirstName + " " + LastName + ", " + Office + '
' +
        Street + '
' +
        City + " " + State + " " + Zip;
}
This tells the program to replace the Address method for Employee objects with this version, even if they are referred to by a Person variable.
The following text shows the new result.
Employee:
Rod Stephens, B-24
1337 Leet St
Bugsville HI 98765

Person:
Rod Stephens, B-24
1337 Leet St
Bugsville HI 98765
sealed
If you override a method, you can also add the keyword sealed to indicate that no further derived class can override the method. For example, suppose the Person class defines the virtual method Address and the Employee class defines the following overridden version of the method.
public override sealed string Address()
{
    return FirstName + " " + LastName + ", " + Office + '
' +
        Street + '
' +
        City + " " + State + " " + Zip;
}
Now if the Manager class inherits from the Employee class, it cannot override this method because it is sealed.
abstract
The abstract keyword prevents a program from making instances of the class. Instead the program must make instances of other classes derived from it. If a class contains an abstract member, then the class must also be marked abstract.
For example, a class might include an abstract method. In that case derived classes must provide a body for the abstract method. This lets a class determine what its derived classes should do but not how they work.
A class with an abstract method is incomplete. If you were to create an instance of the class, you could not invoke the method because the class has not provided an implementation for it. To avoid this conundrum, C# does not let you create an instance of a class that has an abstract method.
The following code shows an abstract Person class.
abstract class Person
{
    public string FirstName = "", LastName = "",
        Street = "", City = "", State = "", Zip = "";

    public abstract string Address();
}
The following code shows a Student class that inherits from Person and implements the Address method.
class Student : Person
{
    public override string Address()
    {
        return FirstName + " " + LastName + ", " +
            Street + '
' +
            City + " " + State + " " + Zip;
    }
}
extern
The extern keyword indicates that the method is defined outside of the assembly. This keyword is often used to declare methods defined in libraries. For example, the following code declares the external SendMessage function. The DllImport attribute tells the program to look for the method in the user32.dll library.
[System.Runtime.InteropServices.DllImport("user32.dll")]
public static extern int SendMessage(
    IntPtr hWnd, uint Msg, int wParam, int lParam);
The following code shows how a program could use SendMessage to make the button dangerButton display the User Access Control (UAC) shield.
private void Form1_Load(object sender, EventArgs e)
{
    const Int32 BCM_SETSHIELD = 0x160C;

    // Give the button the flat style and make it display the UAC shield.
    dangerButton.FlatStyle = System.Windows.Forms.FlatStyle.System;
    SendMessage(dangerButton.Handle, BCM_SETSHIELD, 0, 1);
}
This code defines the constant BCM_SETSHIELD. The value 0x160C is a message code that means a control should display the UAC shield.
The code then sets the button’s FlatStyle property to System. Finally, it calls SendMessage to send the button the BCM_SETSHIELD message, which makes it display the shield. Figure 6-1 shows the result.

Figure 6-1: The external SendMessage function can make a button display the UAC shield.
Name
The method’s name must be a valid C# identifier. It should begin with a letter, underscore, or @ symbol. After that it can include letters, numbers, or underscores. If the name begins with @, it must include at least one other character. The name cannot include special characters such as &, %, #, and $. It also cannot be the same as C# keywords such as if, for, and public.
Most developers use CamelCase when naming a method so a method’s name consists of several descriptive words with their first letters capitalized. A good method for generating method names is to use a short phrase beginning with a verb and describing what the method does. Some examples include LoadData, SaveNetworkConfiguration, and PrintExpenseReport.
Return Type
A method’s return_type is the type of the value the method returns. To return a value, use the return keyword followed by the value the method should return. For example, the following method multiplies two values and returns the result.
private float Multiply(float value1, float value2)
{
    return value1 * value2;
}
If the method doesn’t return any value, set the return type to void. If you want the method to return before its last line of code, you can use the return statement with no following value. For example, the following method asks the user whether it should delete a file. If the user clicks No, the method returns. Otherwise the method deletes the file.
private void DeleteFile(string filename)
{
    // Make the user confirm.
    if (MessageBox.Show("Are you sure you want to delete "
        + filename + "?",
        "Delete File?",
        MessageBoxButtons.YesNo,
        MessageBoxIcon.Question)
            == DialogResult.No)
                return;

    // Delete the file.
    //...
}
Parameters
A method’s parameter declaration defines the names and types of the parameters passed into it. Parameter lists are somewhat similar to variable declarations, so they are described in the section “Parameter Declarations” in Chapter 4. See that section for more information.
Two new features that don’t apply to variables and are therefore not described in Chapter 4 are optional arguments and named arguments.
Optional parameters must come at the end of the parameter list, after any required parameters. To make a parameter optional, follow its declaration with an equal sign and a default value. The calling code can omit any of the optional arguments at the end of the parameter list, and those parameters take their default values. The code cannot include arguments that follow missing arguments, at least without using argument names.
Named arguments allow calling code to explicitly indicate the argument values by name. That makes the code more readable, particularly if the method has a long argument list and if some arguments are optional. It also lets the calling code give the arguments in any order and omit any optional arguments without omitting those that follow in the parameter list. To use an optional parameter, the calling code includes the parameter’s name, a colon, and the parameter’s value.
The following code defines a FindOverdueAccounts method that looks for overdue customer accounts and takes appropriate action.
private void ListOverdueAccounts(
    int daysPastDue, decimal amount = 50.00m,
    bool disconnect = false, bool printInvoices = false)
{
    ...
}
The method takes four parameters. The daysPastDue parameter is required but the others are optional.
The following code shows several ways the program might call this method.
// daysPastDue = 90, other parameters take defaults.
ListOverdueAccounts(90);

// daysPastDue = 90, amount = $100.00, other parameters take defaults.
ListOverdueAccounts(90, 100.00m);

// daysPastDue = 90, disconnect = true, other parameters take defaults.
// This version is not allowed because you cannot include an argument
// after a missing argument.
ListOverdueAccounts(90, , true);

// daysPastDue = 90, disconnect = true, other parameters take defaults.
// This version is allowed because it uses named arguments.
ListOverdueAccounts(90, disconnect: true);

// daysPastDue = 30, amount = $100.00. Other parameters take defaults.
ListOverdueAccounts(30, amount: 100);

// All arguments specified in new order.
ListOverdueAccounts(disconnect: true, amount: 100,
    printInvoices: false, daysPastDue: 60);
The third call to ListOverdueAccounts is not allowed because it provides an argument after an omitted argument. The fourth call provides the same arguments. That version works because it uses named arguments.
Optional Versus Overloading
A C# program can define multiple methods with the same name but that differ in their parameter lists. This is called method overloading. For example, the following code defines two versions of the FireEmployee method.
private void FireEmployee(string name)
{
    ...
}

private void FireEmployee(string name, string reason)
{
    ...
}
At compile time, the compiler uses the arguments passed into a method call to decide which version of the method to use.
Overloaded methods cannot differ only in optional parameters. Otherwise if a call to the method omitted the optional parameters, the program would be unable to tell which version of the method to use.
The following code shows a single version of the FireEmployee method that uses optional parameters instead of overloading.
private void FireEmployee(string name, string reason = "Unknown reason")
{
    ...
}
Different developers have varying opinions on whether it is better to use optional parameters or overloaded methods under different circumstances.
One argument in favor of optional parameters is that overloaded methods might duplicate a lot of code. However, it is easy to make each version of the method call another version that allows more parameters, passing in default values. For example, in the following code the first version of the FireEmployee method simply invokes the second version:
private void FireEmployee(string name)
{
    FireEmployee(name, "Unknown reason");
}

private void FireEmployee(string name, string reason)
{
    ...
}
Overloading is generally better when the different versions of the method need to do something different or when they take completely different parameters. For example, the following code shows two versions of the FireEmployee method, one that takes the employee’s name as a parameter and one that takes an Employee object as a parameter.
private void FireEmployee(string name)
{
    ...
}

private void FireEmployee(Employee employee)
{
    ...
}
In this case, it would probably be confusing to make a single method with optional name and employee parameters and require the calling code to pass in only one of those values. (These two methods would probably also do a lot of the same work, so they should probably both invoke a third method to do that common work.)
Parameter Arrays
Sometimes it’s useful to have methods that can take any number of parameters. For example, a method might take as parameters a message and a series of e-mail addresses. It would send the message as an e-mail to each of the addresses.
One approach would be to give the method a long list of optional string parameters with the default value null. The method would examine each of the parameters and send the message to those that were not null.
Unfortunately, the method would need to use separate code to process each address separately. The number of parameters would place an upper limit on the number of e-mail addresses that could be included.
A better solution is to use the params keyword to make the method’s final argument a parameter array. A parameter array contains an arbitrary number of parameter values. At run time, the method can loop through the array to process the parameter values. The following code shows an example.
private void SendEmails(string message, params string[] addresses)
{
    if (addresses != null)
    {
        foreach (string address in addresses)
            Console.WriteLine("Send " + message + " to " + address);
    }
}
The SendEmails method takes two parameters, a string called message and a parameter array of strings holding e-mail addresses. The code first checks whether the parameter array is null. If the array is not null, the code loops through it and displays each e-mail address and the message in the Console window. (A real application would send the message to each e-mail address.)
The following code shows how the program could use this method to send a message to two e-mail addresses.
SendEmails("I need C# help!",
    "[email protected]",
    "[email protected]"
);
Parameter arrays are subject to the following restrictions:
- A method can have only one parameter array, and it must come last in the parameter list.
- Parameter lists cannot be declared with the
reforoutkeywords. - The calling code may pass the value
nullin the place of the parameter array. (That’s why the code in the previous example checked whether the array wasnullbefore using it.) - The calling code can provide any number of values for the parameter array including zero.
- All the items in the parameter array must have the same data type. However, you can use an array that contains the generic
objectdata type and then it can hold just about anything.
The program can also pass an array of the appropriate data type in place of a series of values. The following code passes an array of strings into the SendEmails method.
string[] addresses =
{
    "[email protected]",
    "[email protected]",
};
SendEmails("I need C# help!", addresses);
Implementing Interfaces
An interface defines a set of properties, methods, and events that a class implementing the interface must provide. An interface is a lot like a class with all its properties, methods, and events declared with the abstract keyword. Any class that inherits from the base class must provide implementations of those properties, methods, and events. Similarly, a class that implements an interface must provide the properties, methods, and events defined by the interface.
The following code defines the IDrawable interface.
public interface IDrawable
{
    void Draw(Graphics gr);
    Rectangle GetBounds();
    bool IsVisible { get; set; }
}
The IDrawable interface defines a Draw method, a GetBounds function, and a bool property named IsVisible.
To indicate that a class implements an interface, add a colon followed by the interface’s name after the class’s name. The following code shows the declaration for a DrawableRectangle class that implements the IDrawable interface.
public class DrawableRectangle : IDrawable
{

}
If you build an empty class such as this one that includes the : IDrawable clause, you can right-click the interface name and select the Implement Interface submenu. The submenu has two choices: Implement Interface and Implement Interface Explicitly. When you select one of those commands, Visual Studio adds empty properties, methods, and events to the class to implement the interface. How the class uses those items depends on whether you implement the interface implicitly or explicitly.
Implicit Implementation
The following code shows the DrawableRectangle class with code added by Visual Studio for implicit implementation.
public class DrawableRectangle : IDrawable
{
    public void Draw(Graphics gr)
    {
        throw new NotImplementedException();
    }

    public Rectangle Bounds()
    {
        throw new NotImplementedException();
    }

    public bool IsVisible
    {
        get
        {
            throw new NotImplementedException();
        }
        set
        {
            throw new NotImplementedException();
        }
    }
}
You should edit this code to replace the throw statements with whatever code is necessary.
If a class implements an interface implicitly, you can use its members just as you would for any other class’s members. For example, consider the following code.
DrawableRectangle rect = new DrawableRectangle();
Console.WriteLine(rect.GetBounds());

IDrawable drawable = rect;
Console.WriteLine(drawable.GetBounds());
This code creates a DrawableRectangle. It then invokes its GetBounds method and displays the result in the Console window.
Next, the code creates an IDrawable variable and makes it refer to the same DrawableRectangle. This works because a DrawableRectangle is a kind of IDrawable.
The code then displays the result of the IDrawable’s GetBounds method.
Explicit Implementation
If you select Implement Interface Explicitly, Visual Studio also creates the necessary code, but it adds the interface’s name to each item. The following code shows this form of the Draw method with the interface name highlighted.
void IDrawable.Draw(Graphics gr)
{
    throw new NotImplementedException();
}
If a class implements an interface explicitly, the program cannot access the interface’s members from a variable of that class’s type. Instead it must use a variable of the interface’s type.
Consider again the following code, which was shown earlier for the implicit interface implementation.
DrawableRectangle rect = new DrawableRectangle();
Console.WriteLine(rect.GetBounds()); // Doesn’t work.

IDrawable drawable = rect;
Console.WriteLine(drawable.GetBounds());
With the explicit implementation, the first call to GetBounds doesn’t work. Because the class implements the interface explicitly, the code must use the IDrawable variable to use the interface’s members.
Extension Methods
Extension methods enable you to add new methods to an existing class without rewriting it or deriving a new class from it. To make an extension method, place a static method in a static class. Add the keyword this before the method’s first parameter and give that parameter the type that you want to extend.
For example, the following code defines a RemoveNonLetters extension method for the string class.
public static class StringExtensions
{
    public static string RemoveNonLetters(this string text)
    {
        string result = "";
        foreach (char ch in text)
            if (((ch >= 'a') && (ch <= 'z')) ||
                ((ch >= 'A') && (ch <= 'Z')))
                result += ch;
            else
                result += "?";

        return result;
    }
}
The code is defined in the static StringExtensions class.
The static RemoveNonLetters method’s first parameter uses the this keyword, so you know this is an extension method. The parameter following this has type string so this extension method extends the string class.
The method’s code loops through a string’s characters and replaces any that are not letters with question marks. It then returns the result.
The following code shows how a program might use this method.
string text = "When in worry or in doubt, run in circles scream and shout";
Console.WriteLine(text.RemoveNonLetters());
This code creates a string variable. It then invokes the RemoveNonLetters method just as if that were a normal method defined by the string class.
Lambda Expressions
Lambda expressions are methods defined within the flow of the program’s code instead of as separate methods. Often they are defined, used, and forgotten in a single statement without ever being given a name.
You can use normal methods instead of lambda expressions, but sometimes lambda expressions make the code simpler and easier to read. Many LINQ queries (described in Chapter 8, “LINQ”) use functions to select values that meet certain criteria. You can write those functions as separate methods but they may only be used once inside the LINQ query so making them separate methods clutters the code unnecessarily.
The following sections group lambda expressions into three categories: expression lambdas, statement lambdas, and async lambdas.
Expression Lambdas
An expression lambda consists of a list of zero or more parameters, the => operator, and a single expression that evaluates to some result. The lambda expression returns the result of the expression.
The following code uses a simple expression lambda (in bold).
Action note = () => MessageBox.Show("Hi");
note();
Recall from the section “Delegates” in Chapter 4 that Action is a type that represents a method that takes no parameters and returns void. The code creates a variable note with that type. It sets that variable equal to the expression lambda defined by () => MessageBox.Show("Hi"). This lambda takes no parameters and executes the expression MessageBox.Show("Hi"). (The empty parentheses are required as a placeholder if the lambda expression takes no parameters.)
The following code modifies the previous expression lambda so that it takes a parameter.
Action<string> note = message => MessageBox.Show(message);
note("Hello");
This expression lambda takes a string parameter and passes it to MessageBox.Show.
The two examples shown so far call MessageBox.Show, which returns void. The following example shows how an expression lambda can return a value.
Func<float, double> root = value => Math.Sqrt(value);
Console.WriteLine(root(13));
The variable root has type Func<float, double> so it represents a method that takes a float parameter and returns a double result. The code sets root equal to an expression lambda that uses Math.Sqrt to take the square root of its input parameter. The lambda’s return result is the result of that expression.
Statement Lambdas
An expression lambda executes a single statement and returns its result. A statement lambda is similar except it can execute multiple statements. To group the statements, this kind of lambda uses braces. It also uses the return statement to return its result.
The following code demonstrates a statement lambda.
Func<int, int, int, int> middle = (v1, v2, v3) =>
    {
        // Sort the items.
        int[] values = { v1, v2, v3 };
        Array.Sort(values);

        // Return the middle item.
        return values[1];
    };
Console.WriteLine(middle(2, 3, 1));
This code sets middle to a lambda that picks the middle of three integers. The lambda copies its three parameters into an array, sorts the array, and returns the middle item.
The code then calls the lambda to pick the middle of the values 2, 3, and 1.
Async Lambdas
The section “Using Async and Await” later in this chapter discusses one method for running methods asynchronously. At this point it’s worth briefly explaining how that technique works with lambda expressions.
In brief, you can use the async keyword to indicate that a method can run asynchronously. The program can then use the await keyword to wait for an async method to complete. Usually, you use async with named methods but you can also use it to make lambda expressions asynchronous, too.
The following Form Load event handler uses an asynchronous statement lambda.
private void Form1_Load(object sender, EventArgs e)
{
    countButton.Click += async (button, args) =>
    {
        for (int i = 0; i < 5; i++)
        {
            Console.WriteLine(i);
            await System.Threading.Tasks.Task.Delay(1000);
        }
    };
}
This code adds an event handler to the countButton’s control’s Click event. The event handler is defined by the lambda expression. The expression’s declaration includes the async keyword so it can run asynchronously.
The statement lambda makes variable i loop from 1 to 5. For each value of i, the lambda displays the value of i in the Console window and then waits for 1 second.
If you add this code to a Windows Forms program with a button named countButton and click the button, the statement lambda executes and displays its count in the Console window. Because the lambda is asynchronous, you can click the button several times to see several counts running at the same time.
Variance
Suppose the Student class is derived from the Person class. In that case you can save a Student value in a Person variable as in the following code because a Student is a kind of Person.
Person person = new Student();It should come as no surprise that you can do something similar with method parameters and return types. For example, suppose the EnrollStudent method takes a Person as a parameter, creates necessary database records to enroll that Person in school, and returns a new Student object representing the new student. The following code shows the method’s signature.
private Student EnrollStudent(Person person)
{
    ...
}
The calling code might save the result in some variable. The code could save the result in a Student variable. Because a Student is a kind of Person, the code could also save the result in a Person variable.
The method’s parameter has type Person. Because a Student is a type of Person, the calling code could pass a Student into the method. (Although you might want the method to prevent that so that you don’t enroll the same student twice.)
The following code shows how the program could call this method without matching the method’s parameter and return types.
Student student = new Student();
...
Person person = EnrollStudent(student);
None of this should come as a big surprise.
Similarly, you can store a reference to a method in a delegate variable with parameters and return type that don’t exactly match those used by the method.
For example, the following code defines a delegate representing methods that take a Student parameter and return a Person.
private delegate Person ReturnsPersonDelegate(Student student);A program could use the delegate as in the following code.
ReturnsPersonDelegate del = EnrollStudent;The EnrollStudent method doesn’t return a Person as the delegate type requires, but it returns a Student, which is a type of Person. The fact that you can assign a method to a delegate when the method returns a more derived type than the delegate is called covariance.
The EnrollStudent method also doesn’t take a Student parameter as the delegate type requires. Instead it takes a Person parameter. A Student is a kind of Person so the program could call the method with a Student as an argument. The fact that you can assign a method to a delegate when the method has parameters of a less derived type than the delegate is called contravariance.
Asynchronous Methods
Normally a program calls a routine and control passes to that routine. When the routine finishes executing, control returns to the calling code, which resumes executing its own code. All this happens synchronously, so the calling code waits until the called routine finishes all its work before it continues.
C# provides several methods that you can use to execute code asynchronously. In those cases a calling piece of code can launch a routine in a separate thread and continue executing before the routine finishes. If your computer has multiple cores or CPUs, the calling code and the asynchronous routine may both be able to execute simultaneously on separate processors, potentially saving a lot of time.
The following sections describe three of the more manageable approaches to executing methods asynchronously.
Calling EndInvoke Directly
This method uses a delegate’s BeginInvoke method to start a routine executing asynchronously. Later the code calls EndInvoke to wait for the routine to finish and to process the result.
To use this method, first define a delegate that represents the routine that you want to run asynchronously. Call the delegate’s BeginInvoke method, passing it whatever parameters the method needs plus two additional parameters: a callback method and a parameter to pass to the callback method. For this technique, set the extra parameters to null so the routine does not invoke a callback when it completes. (The following section explains how to use the callback.)
The call to BeginInvoke launches the asynchronous code on its own thread and then returns immediately so the calling code can perform other tasks.
After the calling code has done as much as it can before the asynchronous thread finishes, it should invoke the delegate’s EndInvoke method. That method waits until the asynchronous thread finishes (if it isn’t already finished) and returns the result of the original method.
The BeginInvoke example program, which is available for download on the book’s website, uses the following simple Count method.
private void Count(int max)
{
    for (int i = 1; i <= max; i++)
    {
        System.Threading.Thread.Sleep(1000);
        Console.WriteLine("Count: " + i);
    }
}
This method counts to an indicated value displaying numbers in the Console window and sleeping 1 second between each number.
The following code runs the Count method asynchronously.
// Start the Count method on a new thread.
Action<int> countDelegate = Count;
IAsyncResult result = countDelegate.BeginInvoke(5, null, null);

// Count to 3.
for (int i = 1; i <= 3; i++)
{
    System.Threading.Thread.Sleep(1000);
    Console.WriteLine("Main: " + i);
}

// Wait for the other thread to complete.
countDelegate.EndInvoke(result);
Console.WriteLine("Main: done");
This code creates a delegate of type Action<int> to represent a method that takes an int parameter and has void return type. It sets the variable equal to the Count method.
The code then calls the delegate variable’s BeginInvoke method, passing it the parameter 5 (to send to the Count method) and two null parameters. It saves the result returned by BeginInvoke, which is an IAsynchResult object.
Next, the code counts to 3, pausing 1 second between values.
The code then calls the delegate’s EndInvoke method passing it the IAsyncResult value it got from BeginInvoke. That call makes the main program wait until the delegate finishes running.
Finally when the delegate’s other thread finishes and EndInvoke returns, the code displays a completion message.
The following text shows the result of one trial.
Main: 1
Count: 1
Main: 2
Count: 2
Main: 3
Count: 3
Count: 4
Count: 5
Main: done
In a real application, the main program and the asynchronous thread would perform time-consuming tasks instead of just sleeping.
Handling a Callback
The technique described in the previous section directly calls EndInvoke to make the main user interface thread wait until its asynchronous threads have finished before the main program continues.
Another approach is to let the main program continue without waiting for the threads to complete and then have the threads invoke a callback method when they finish.
This approach lets the main program ignore the asynchronous threads for most purposes, but it does make the flow of execution less predictable. While the threads are running, the user can do other things, perhaps even starting new threads that duplicate those that are already running. When a thread finishes, the callback routine executes, possibly interrupting whatever the user is doing at the time.
There’s one important catch to working with callbacks: Only the thread that created the user interface (called the UI thread) can directly interact with the controls in the user interface. That means the asynchronous threads cannot directly assign images to PictureBoxes, display text in Labels or TextBoxes, move controls around, or otherwise manipulate the controls. Because the threads invoke the callback methods, those methods cannot directly interact with the controls, either.
You can get around this restriction by using the form’s Invoke method. Invoke executes one of the form’s methods on the UI thread.
The HandleCallback example program, which is available for download on the book’s website, uses a callback instead of calling EndInvoke in the program’s main flow of execution. This program, which is shown in Figure 6-2, uses a callback to let the main program know when the asynchronous thread has finished.
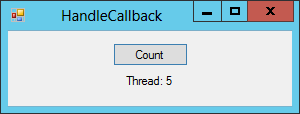
Figure 6-2: The HandleCallback example program uses a callback instead of EndInvoke.
The main program displays a count in the Label while the thread displays its count in the Console window. (You could use Invoke to make it display its count in the Label but this is complicated enough without that.)
The program uses the following code to start the thread and display its count.
// Start the countDelegate method on a new thread.
Func<int, int> countDelegate = Count;
IAsyncResult result = countDelegate.BeginInvoke(5,
    new AsyncCallback(CountCallback), "Thread: ");

// Count to 3.
for (int i = 1; i <= 3; i++)
{
    System.Threading.Thread.Sleep(1000);
    countLabel.Text = i.ToString();
    countLabel.Refresh();
}

// Display a finished message.
countLabel.Text = "Main: done";
First, the code creates a delegate variable to hold a reference to the Count method described shortly. This version of Count takes an int parameter and returns an int result.
Next, the code calls the delegate’s BeginInvoke method. This time it passes the method the value that should be passed to the Count method (5), a new AsyncCallback object initialized to represent the CountCallback method, and a value to be passed to the callback (the string Thread:). At this point, a new thread starts running the Count method.
The code then enters its own loop where it displays the numbers 1 through 3 in the form’s Label control, pausing for 1 second between numbers. Notice that the code refreshes the Label each time it displays a new value. If the code didn’t do this, the Label would not refresh until the code finished so the user would not see the count. After it finishes its count, the code displays the message Main: done in the Label.
Meanwhile the other thread has been running the following Count method.
// Count pausing 1 second between numbers.
// Return the final value displayed.
private int Count(int max)
{
    for (int i = 1; i <= max; i++)
    {
        System.Threading.Thread.Sleep(1000);
        Console.WriteLine("Count: " + i);
    }
    return max;
}
This method displays a count in the Console window and then returns the largest number it displayed. Notice that this method doesn’t know anything about the callback.
When the method finishes, the following callback (which was registered in the call to BeginInvoke) executes.
// The asynchronous thread finished.
private void CountCallback(IAsyncResult iresult)
{
    // Get an AsyncResult.
    AsyncResult result = (AsyncResult)iresult;

    // Get the delegate that ran.
    Func<int, int> caller = (Func<int, int>)result.AsyncDelegate;

    // Get the parameter we passed to BeginInvoke.
    string parameter = (string)result.AsyncState;

    // Get the method's return value.
    int value = (int)caller.EndInvoke(result);

    // Use Invoke to display the result.
    Action<string> updater = SetLabel;
    string message = parameter + value;
    this.Invoke(updater, message);
}
The callback method receives as a parameter an IAsyncResult object that gives information about the method that finished running.
The method first casts the IAsyncResult parameter into an AsyncResult object. (AsyncResult is defined in the System.Runtime.Remoting namespace. The program includes a using directive to simplify the code.)
Next, the code casts the result’s AsyncDelegate property into a delegate that represents the method that ran asynchronously.
The result’s AsyncState property contains the parameter that was given to the BeginInvoke method to pass on to the callback. In this example, that was the string Thread:. This example simply passes a fixed string in this value, but more generally you can use this value to identify different asynchronous calls to the same method. The code gets this value and casts it into a string to recover the original value.
Next, the code calls the delegate’s EndInvoke method passing it the result object. This frees the resources used by the thread and lets the program retrieve the method’s returned result. In this example, the Count method returns an int so the code casts the value returned by EndInvoke into an int.
At this point the callback would like to display a success message in the form’s Label. Unfortunately, the callback is executing in the asynchronous thread rather than the UI thread, so it cannot directly set the Label’s Text property.
To work around this problem, the callback creates a delegate to represent the SetLabel method described next. It composes a message and calls the form’s Invoke method passing it the delegate and the message. This makes the form run the SetLabel method on its UI thread.
The following code shows the SetLabel method.
// Set the Label's text.
private void SetLabel(string text)
{
    countLabel.Text = text;
}
The SetLabel method simply sets the Label’s Text property. (This is the only simple part of the whole process.)
Using Async and Await
Calling EndInvoke directly in the UI thread makes the code relatively simple, but it means the program is blocked until the asynchronous thread finishes running. Using a callback allows the main UI thread to finish before the threads do so the user interface can interact with the user, but the code is more complex, particularly if the callback must manipulate controls, so it needs to use the form’s Invoke method.
C# provides two keywords that make it easier to use the callback approach without actually writing callbacks and calling Invoke yourself.
The async keyword indicates that a routine may have parts that should run asynchronously. You should apply this keyword to event handlers and other methods that will start tasks asynchronously and then wait for them.
The await keyword makes the program wait until a particular task has finished running asynchronously. When it sees the await keyword, C# essentially converts the rest of the method into a callback that it automatically invokes when the task has finished. One really nice feature of this “virtual callback” is that it executes on the UI thread so it can manipulate controls directly without using the form’s Invoke method.
The AsyncAwait example program, which is available for download on this book’s website, is similar to the HandleCallback example program, but it uses the async and await keywords instead of a callback.
The following code shows the event handler that executes when you click the program’s Count button. The async and await keywords are highlighted in bold.
// Count on a separate thread.
private async void countButton_Click(object sender, EventArgs e)
{
    // Disable the button.
    countButton.Enabled = false;
    countLabel.Text = "";
    countButton.Refresh();
    countLabel.Refresh();

    // Start the Count method on a new thread.
    Func<object, int> countDelegate = Count;
    Task<int> task = new Task<int>(countDelegate, 5);
    task.Start();

    // Count to 3.
    for (int i = 1; i <= 3; i++)
    {
        System.Threading.Thread.Sleep(1000);
        countLabel.Text = i.ToString();
        countLabel.Refresh();
    }

    // Display a finished message.
    countLabel.Text = "Main: done";

    // Enable the button.
    countButton.Enabled = true;

    // Wait for the task to complete.
    int result = await task;

    // Display the result message.
    countLabel.Text = "Thread: " + result;
}
Because this event handler has parts that run asynchronously, its declaration includes the async keyword.
After some preliminaries, the code creates a delegate that refers to the Count method. The Task class used next can pass a state value to the method, but Task expects that value to be of the generic object class, so the countDelegate variable is declared to represent methods that take an object parameter and return an int.
Next, the code creates a Task object for the method represented by the countDelegate variable. The Task constructor takes as parameters the delegate and the value 5 that it should pass to the delegate’s method.
The code then calls the Task’s Start method to start the task running on a new thread.
The program then performs its own count on the UI thread. When it finishes it displays a message in the Label and re-enables the program’s Button.
Having finished its work, the code uses the await keyword to wait for the Task to finish and saves the result returned in the variable result.
The code finishes by displaying the result it received from the asynchronous thread.
The following code shows the new version of the Count method.
// Count pausing 1 second between numbers.
// Return the final value displayed.
private int Count(object maxObj)
{
    int max = (int)maxObj;
    for (int i = 1; i <= max; i++)
    {
        System.Threading.Thread.Sleep(1000);
        Console.WriteLine("Count: " + i);
    }
    return max;
}
This is similar to the earlier versions except its parameter is declared as an object instead of an int. It must then convert the object into an int before it starts its loop.
At first this example may seem similar to the BeginInvoke example described earlier. Both start an asynchronous thread, do some counting on the UI thread, and then wait for the asynchronous thread to finish before continuing.
The difference is that the BeginInvoke example is blocked while it waits for the asynchronous thread to finish. In contrast, the AsyncAwait example returns as soon as the code uses the await keyword. Later when the asynchronous thread finishes, it invokes a hidden callback and execution returns to the main program right after the await keyword. This lets the UI thread remain responsive while it’s waiting for the other thread to finish.
Summary
Methods let you break an application into manageable, reusable pieces. This chapter explained how to declare methods that define how objects behave. It also explained techniques related to methods, such as how to create extension methods and use covariance and contravariance.
This chapter also explained some of the ways you can execute pieces of code simultaneously on different threads of execution. If your computer has multiple cores or CPUs, that may allow you to greatly improve performance.
The chapters so far have not explained how to write anything other than straight-line code that executes one statement after another with no deviation. Some examples have used loops and other constructs, but up until now this book hasn’t explained the details of how to use those statements.
Most programs need to follow more complex paths of execution than simply executing a series of statements. They may need to perform some statements only under certain conditions and repeat other statements many times. Chapter 7, “Program Control Statements,” describes the statements that a C# program uses to control the flow of code execution. These include decision statements (if-else and switch) and looping statements (for, foreach, while, and do-while).
Exercises
- Create an
IContactableinterface that specifies a methodContactthat takes astringparameter and returns abool. (In a real application, this method would try to contact someone via e-mail, text message, or some other method and returntrueto indicate success orfalseto indicate failure.) - Create an
Emailableclass that implicitly implements the interface you built for Exercise 1. First, do it by hand. Then use Visual Studio’s Implement context menu command to do it again. (You don’t need to give the method a real body. Just make it returntrue.) - Create a
Textableclass that explicitly implements theIContactableinterface you built for Exercise 1. First, do it by hand. Then use Visual Studio’s Implement context menu command to do it again. - Create a
Contactableclass that you could use instead of theIContactableinterface you built for Exercise 1. - Create a non-abstract
Mailableclass that inherits from theContactableclass you built for Exercise 4. - Create a
doubleextension method namedRootthat usesMath.Sqrtto return the square root of a number. - The
Mathclass’sSqrtmethod returns a number’s square root, but the class has no method that returns other roots such as the third root. However, theMathclass’sPowmethod returns a number raised to a power, and you can use that method to calculate roots. For example, the third root of a number would beMath.Pow(number, 1.0 / 3.0). Write an overloaded version of theRootextension method you built for Exercise 6 that takes the root’s base as a parameter and usesMath.Powto calculate the result. - Suppose you’re building a checkers program and you want a
Piececlass to represent a piece. TheKingclass inherits fromPieceand represents a piece that has been crowned. ThePiececlass defines aCanMoveTomethod that takes a row and column number as inputs and returnstrueorfalseto indicate whether the piece can move to that position. TheKingclass must replace this method with a new version. Finally, you want to represent all pieces whether crowned or not byPieceobjects. For example, to keep track of the pieces’ positions, the program will use an array defined by the following code.Piece[] Board = new Piece[8, 8];Create simple
PieceandKingclasses. For testing purposes, make thePiececlass’sCanMoveTomethod always returnfalseand make theKingclass’s version always returntrue. - Suppose a program has the inheritance hierarchy
Person⇒Employee⇒Manager⇒Executive. Define a delegate type namedManagersFromEmployeesDelegateto represent methods that take an array ofEmployees as an input and that return an array ofManagers. Create aPromotemethod that has the same signature and make a variable to hold that method. - Use covariance and contravariance to make a new
Promote2method that is as different as possible from thePromotemethod you built for Exercise 9. Create a newManagersFromEmployeesDelegatevariable and make it hold a reference to the new method. - (Hard) Make an application similar to the one shown in Figure 6-3. (You can’t tell from the picture in this book, but the upper-left image uses shades of red, the upper-right image uses shades of green, the lower-left image uses shades of blue, and the lower-right image uses shades of gray.)

Figure 6-3: The ColorizeBitmap example program creates red, green, blue, and gray versions of an image synchronously and asynchronously.
The File menu has two commands: Open (opens an image file) and Exit (closes the program). The Process menu also has two commands: Synchronously (processes images synchronously) and Asynchronously (processes images asynchronously).
You can use the following enumeration and
ProcessBitmapmethod.// The colorization types. private enum ColorizationType { Red, Green, Blue, Gray, } // Process a Bitmap. private void ProcessBitmap(Bitmap bm, ColorizationType colorType) { for (int y = 0; y < bm.Height; y++) { for (int x = 0; x < bm.Width; x++) { Color color = bm.GetPixel(x, y); int average = (color.R + color.G + color.B) / 3; if (colorType == ColorizationType.Red) bm.SetPixel(x, y, Color.FromArgb(average, 0, 0)); else if (colorType == ColorizationType.Green) bm.SetPixel(x, y, Color.FromArgb(0, average, 0)); else if (colorType == ColorizationType.Blue) bm.SetPixel(x, y, Color.FromArgb(0, 0, average)); else bm.SetPixel(x, y, Color.FromArgb(average, average, average)); } } }When the user selects the Synchronously command, use the
ProcessBitmapmethod to process four copies of the loaded image and display the results.When the user selects the Asynchronously command, use
BeginInvokeandEndInvoketo perform the same tasks asynchronously.Use the
System.Diagnostics.Stopwatchclass to time the two techniques. - Would there be any advantage to modifying the program you wrote for Exercise 11 so it uses a callback or
asyncandawait?