9. Advanced OOP
By now, you have taken your first steps into the realm of object-oriented programming. You understand inheritance, and you know how to translate a problem that you want to solve into a class hierarchy. But there is still a lot to learn.
This chapter will introduce you to the more advanced concepts found in C++ and object-oriented programming in general. You’ll learn about static methods and how to use them, and you’ll get a deeper insight of the inner workings of objects. You’ll learn about object-oriented concepts like virtual methods, abstract methods, and polymorphism. Next, we’ll talk about more C++-specific features like operator overloading. Finally we discuss two types of inheritance: multiple and virtual.
Two related, advanced object-oriented features—the assignment operator and the copy constructor—will be covered in Chapter 11, “Dynamic Memory Management.”
Static Attributes and Methods
One of the key features of object-oriented programming is that an object encapsulates both data and the functionality for working with that data. In our previous examples, we always used an object (or in other words: an instance of a class) to call a method. Furthermore, every method worked on data that belonged to the object used to invoke the method, and all data belonged to just one object. But what if we need functionality or data that doesn’t belong to an object, but to the whole class?
Let’s assume you want to count your pets. Every time a pet is created, you want to increase the counter, and when a pet dies (i.e., the object is deleted), the counter should be decreased. You could accomplish this using a global variable. But then, any area of a program could fool around with that counter, and you could end up with a bug that’s hard to catch. What we really want is a counter that can be accessed only when a pet is created or deleted. Unfortunately, the access control methods described in Chapter 8, “Class Inheritance,” can’t be used to protect non-object functions or variables. This is where C++’s static attributes and functions come in.
The language allows us to specify that members should belong to a class, and not only to objects of that class. The access to these members can still be controlled using the public, protected, or private keywords, but you can invoke the methods without even having an object. Also, the data will be shared among all the objects of that class, which is what would be required by the counting pets example.
To create a static method or attribute, all you have to do is write static in front of the declaration. The prototype of a static method in Pet would look like this:
class Pet {
public:
...
static int getCount();
...
};
Accordingly, the declaration of a static attribute looks like this:
class Pet {
private:
...
static int count;
...
};
After having declared the static attribute count, you also have to allocate the memory where it can be stored. Remember: static attributes are shared with all instances of that class, so the compiler can’t just store the static attribute in an object. Allocating the memory is nothing new; it works just like creating a variable. You just add the type and name outside the class declaration:
int Pet::count;
Don’t forget to use the qualifier Pet:: to tell the computer to which class the variable belongs.
Because static members are shared between all objects of that class, you don’t need an object to call them. All you have to do is use the fully qualified name. To invoke getCount(), use the following syntax:
Pet::getCount();
Or you can also use them like regular methods:
Cat aCat("Furball");
aCat.getCount();
However, you shouldn’t use static methods this way, because it makes your code harder to read and understand.
Now let’s leave the theory behind and do some programming. In the next example, we’re going to improve our pets example by adding code that counts the pets.
To add static members to a class
- Open the
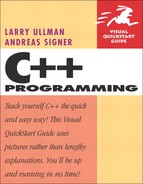
pets2.cppexample (Script 8.3) in your text editor or IDE. - Add a static method to the declaration of the class
Pet. After the change, your class will begin like so (Script 9.1):class Pet {
public:
Pet(std::string theName);
~Pet();
void eat();
void sleep();
static int getCount();By adding a static method
getCount()to the public section of the class, the method can be used outside of any object. The method will retrieve the current pet count.We’re also adding a destructor. After all, we want to decrease the count when an object is destroyed.
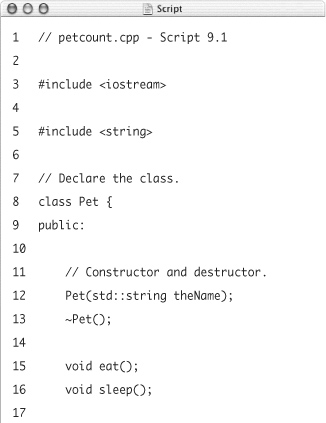
- Add a static attribute to
Pet. The class concludes like so:protected:
std::string name;
private:
static int count;
};This attribute will hold the current number of
pets. We make it private so that nobody except methods ofPetcan modify the counter.Script 9.1. This program uses a static attribute and method to count your pets.
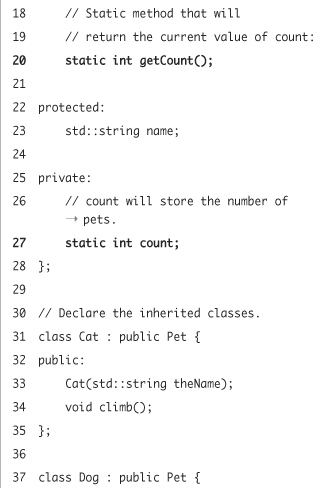
- After the class declaration, allocate memory for the new static attribute.
int Pet::count = 0;
With this code, we’re telling the compiler to allocate space for the value of
count, and to initialize the variable as0.It doesn’t really matter where you put this line, as long as it’s outside all classes and functions. But it’s good practice to group items together, as this will make your code more readable.
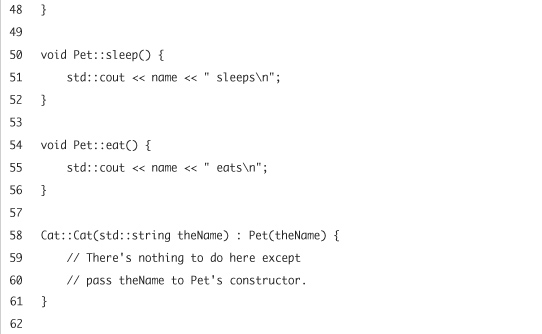
- Modify the constructor so that it increases the count. The new constructor should look like this:
Pet::Pet(std::string theName) {
name = theName;
count++;
std::cout << "Creating a pet named '" << name << "' ";
}The
count++increments the counter. Since this line is in the constructor, every time a new pet is created, it will be called (because the constructor is automatically called upon creation of an object).The final
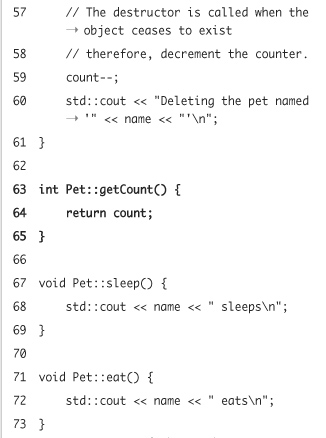
coutline tells the user what’s going on. - Implement a destructor that decreases the count:
Pet::~Pet() {
count--;
std::cout << "Deleting the pet named '" << name << "' ";
} - Implement the
getCount()method.int Pet::getCount () {
return count;
}The only responsibility of
getCount()is to return the counter. This has to be accomplished using a method, as thecountattribute was defined as private, so only methods of the class can access it. Using a private attribute and a public method allows us to restrict write access to the attribute to only the owning class, while still allowing everyone to read the value. - Have the
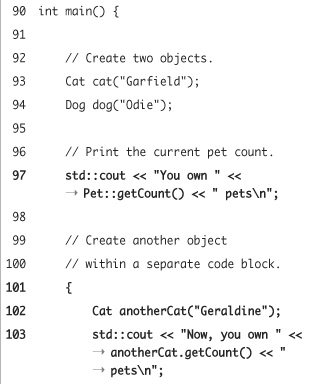
main()function display the current pet count.int main() {
Cat cat("Garfield");
Dog dog("Odie");
std::cout << "You own " << Pet::getCount() << " pets ";You can use the
ClassName::methodName()syntax to access static methods. - Create a dummy code block that creates another pet.
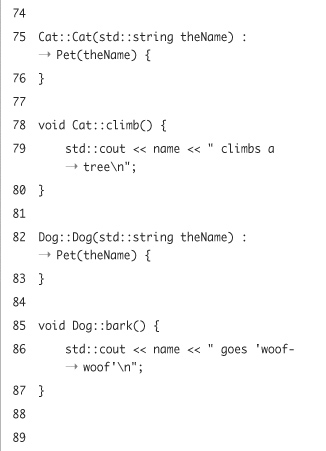
{
Cat anotherCat("Geraldine");
std::cout << "Now, you own " << anotherCat.getCount() << " pets ";
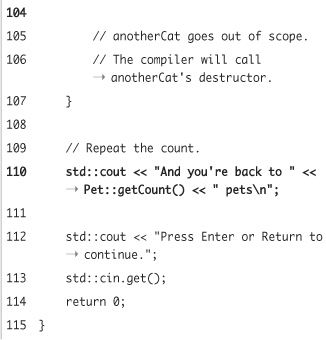
}To demonstrate that the count is really decreased when a pet is deleted, we’ll add a code block that creates another pet. Because the variable in the block is not visible outside it (it has scope only within the block), the program calls the destructor when the control flow exits the block.
Please note that we are using the syntax for invoking regular methods in this block, even though
getCount()is static. This is just to illustrate how it is done. Normally you would just usePet::getCount(); - After the code block, print the current count once again and then end the program:
std::cout << "And you're back to " << Pet::getCount() << " pets ";
std::cout << "Press Enter or Return to continue.";
std::cin.get();
return 0;
} - Save the file as
petcount.cpp, compile, and then run the application (Figures 9.1 and 9.2).Figure 9.1. Every time a pet is created or destroyed, a static counter is updated.
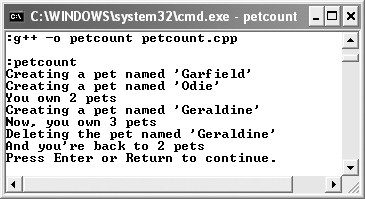
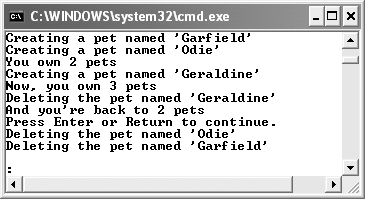
Figure 9.2. At the end of your program (after the user presses Enter) the destructors are called.
 Tips
Tips
• Because static members are shared between all objects, you can’t access non-static elements in a static method.
• Using so-called getter and setter methods—like getCount() here—in combination with C++’s access control keywords—allows you to limit read and write access to attributes.
• When using static attributes, always remember that you’ll have to allocate space for the value. This is done by just declaring the variable outside of the class declaration.
• Although you can invoke static methods using the syntax for regular methods, you shouldn’t do this, because your code will be harder to read or understand. Stick with
ClassName::methodName()
and not
objectName.methodName()
Virtual Methods
It’s really hard to explain virtual methods to someone who has never heard of them. They are quite a strange concept but very necessary in more abstract code. Instead of trying to describe them out of context, let’s just jump into a simple example that illustrates the compiler’s behavior when assembling a program. Then, with that information in mind, we’ll discuss the results, describe what they mean, and offer up the solution.
Using pointers to objects
The well-known pets program will be the basis for our exploration. What we’ll do is use pointers instead of local variables to hold our Pet objects. This involves two new keywords: new and delete.
In Chapter 6, “Complex Data Types,” you learned about pointers, which are a special type that can store a memory address. In that chapter, there were two separate steps: a variable was created, and then a pointer was assigned that variable’s address. Afterward, you could access a value using either the variable’s name or the pointer. In C and C++ you can actually allocate memory for some data without ever creating a variable. To do this, you create a pointer to a new block of memory:
type *pointerName = new type;
For example:
int *agePtr = new int;
This has the same effect as creating a variable of type int and a pointer to that variable.
Now you can store a value in that block by dereferencing the pointer:
*agePtr = 40;
std::cout << *agePtr;
The final step is to free up the reserved block of memory using delete:
delete agePtr;
This is a critical step because the program will not automatically release that memory. For each use of new, there must be a corresponding delete.
You’ll learn more about new and delete in Chapter 11, but in these next two examples they’ll be used to create objects without variables. The usage of the pointers is slightly different (see the sidebar in Chapter 6 on pointers to structures for related syntax), but the premise is the same.
Using pointers instead of local variables
- Open
pets3.cpp(Script 8.4) in your text editor or IDE. - Within the
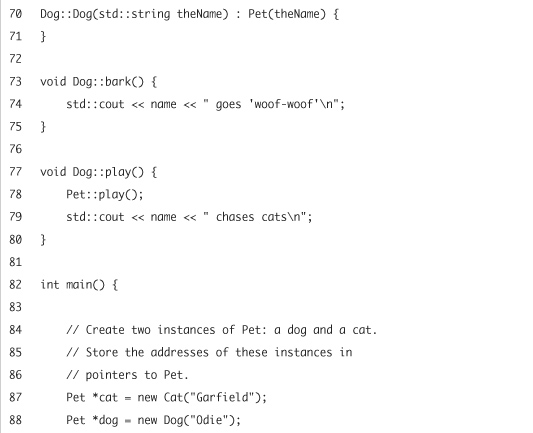
main()function, replace the two local pet variables with two pointers (Script 9.2).Pet *cat = new Cat("Garfield");
Pet *dog = new Dog("Odie");Using the information presented, this code creates two objects—one cat and one dog—without actually creating variables. Instead, memory blocks are reserved for each and a pointer can be used to access the data in those blocks.
Still, each object’s constructor will be invoked when the memory is reserved, so you can pass each object the pet’s name.
- Remove the calls to
bark()andclimb().When creating objects in this way, you can call only methods that are members of the class used to declare the variables. The pointer is of type
Pet, so thebark()andclimb()methods—defined inDogandCat—are not available.Script 9.2. This program creates objects in memory by using pointers, not object variables. Because the program does not also use virtual methods, the overridden
play()methods will not be invoked.
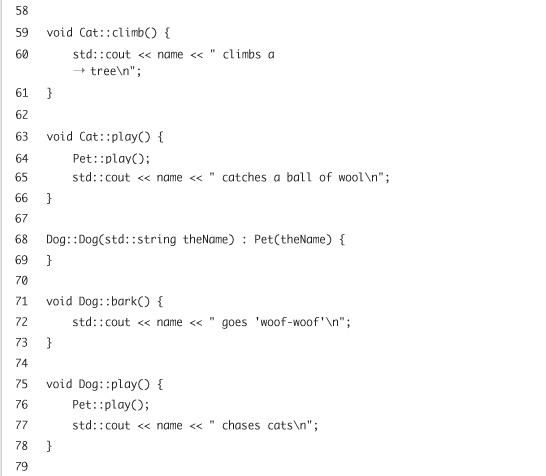
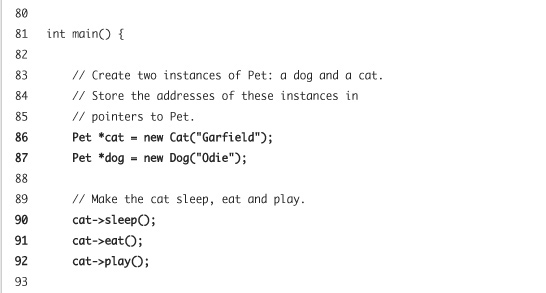
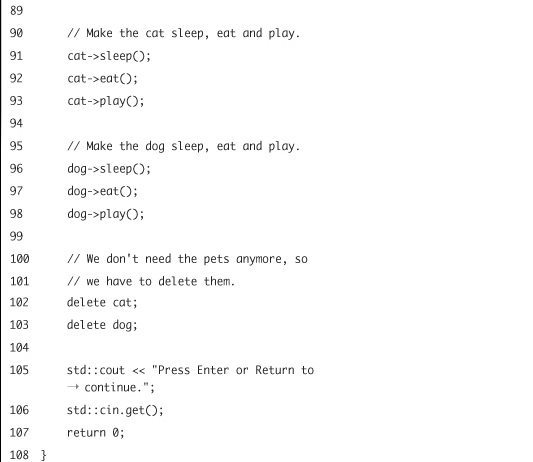
- Change the remaining method calls so that they use
->instead of the dot operator.cat->sleep();
cat->eat();
cat->play();
dog->sleep();
dog->eat();
dog->play();Because
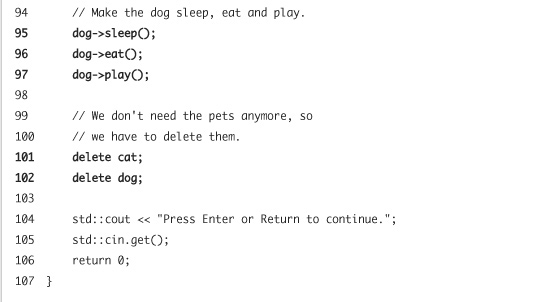
catanddogare pointers, not object variables, you cannot use the normalobjectName.methodName()syntax. Instead you usepointerName->methodName(). - Delete the two instances.
delete cat;
delete dog;Once you are done with the items, get rid of them and free up the memory by using
delete. If you don’t do this, you’ll have a memory leak, which is bad (because memory was reserved but never released). - Save the file as
virtualpets.cpp, compile, and then run the application. Watch the output closely (Figure 9.3).Figure 9.3. The program does not work as one would expect. Specifically, the overridden
play()methods inDogandCatare never called. Instead,Pet::play()is used.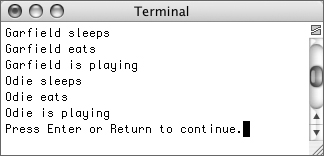
What happened? Your first impression may be that the program just did what it’s supposed to do. But if you look closely, you’ll notice that the output just says “Garfield is playing” and “Odie is playing.” According to the source code, it should read “Garfield catches a ball of wool” and “Odie chases cats.” It looks like the compiler forgot about overridden methods and called the
play()method ofPetinstead!
Using virtual methods
The reason for this strange behavior is that the designers of C++ wanted their language to produce code that’s as fast as its predecessor’s, C. When the program is compiled, all of the code is checked so that how each piece of data is used matches what can be done with that type of data. This is a compile-time check. In this last example, a pointer to Pet was the compile-time type of both cat and dog. So the compiler sees that the pointer is of type Pet and that Pet has a play() method. Therefore, the compiler calls Pet::play() because this is the fastest solution.
The problem is that during the execution of the program—known as run time—cat and dog are actually of type pointer to Cat and pointer to Dog. These are their run-time types, which can be different from the compile-time type. To tell the compiler that it must use the proper method as determined by the run-time type of your pointer (e.g., Cat::play() or Dog::play()), you’ll need to declare the methods as virtual.
Declaring a method to be virtual is really simple. All you have to do is write virtual before its prototype:
virtual void play();
The “virtuality” of a method is inherited, too. There’s no way you make a method “non-virtual” once it has been marked virtual in a base class. This is actually a good thing, because you don’t have to think about it all the time. Declaring all the methods in your base classes as virtual will result in slightly slower code, but your programs will always behave as they’re supposed to, which makes it all worthwhile.
Now let’s try to fix the virtualpets example.
To declare virtual methods
- Open the
virtualpets.cpp(Script 9.2) example in your text editor or IDE, if it is not already open. - Go to the prototype of the
play()method inPetand make it virtual (Script 9.3):virtual void play();
This is all there is to it! Just add the one word before the prototype.
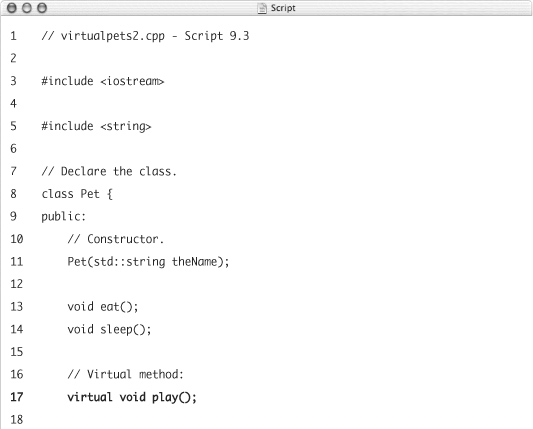
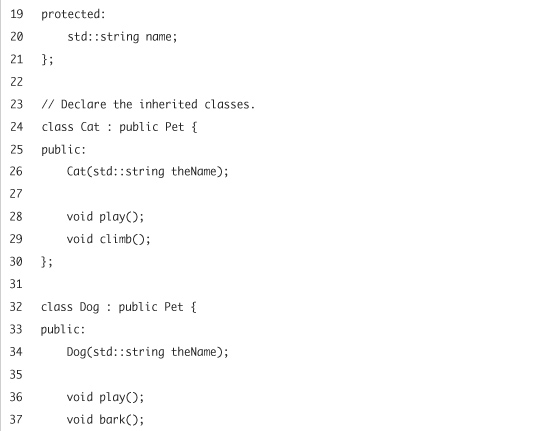
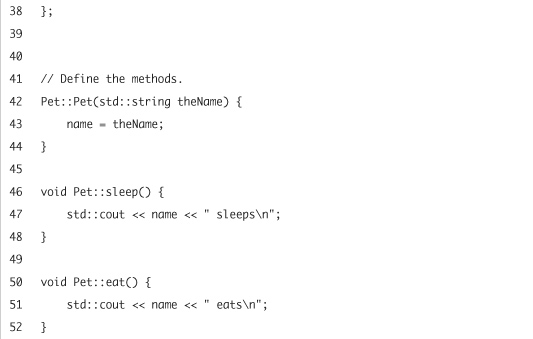
- Save the file as
virtualpets2.cpp, compile, and then run the application (Figure 9.4). Watch the output closely to see if it’s correct.Figure 9.4. After making
Pet::play()virtual, the object’s behavior is finally correct. The compiler must now check the run-time type of the object wheneverplay()is invoked.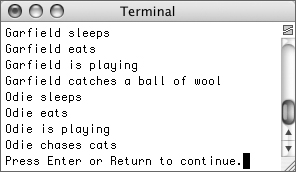
That’s it! There’s nothing more to add! You’ll notice that Garfield is again playing with balls of wool and Odie chases cats, as they should.
Tips
• If in doubt, make your methods virtual. It doesn’t cost you much, but it helps a lot.
• We have not done so thus far, but destructors should always be virtual. From the compiler’s point of view, they’re just normal methods. If they aren’t virtual, the destructor belonging to the compile-time type will be called (like the base class’s destructor), and that may result in memory leaks.
• When implementing a class hierarchy, all the classes at the root of your design should have only virtual methods.
• Static methods can’t be virtual, and vice versa (virtual methods cannot be static).
Script 9.3. The correct version of the virtualpets example, using a virtual method.

Abstract Methods
Abstract methods are another core concept in object-oriented programming and are used quite often when designing class hierarchies. By making a method abstract, you’re telling the compiler that this method must be available, but that you cannot provide an implementation of the methods. It will be up to the subclasses to implement those methods so that they are usable.
We already saw a good example for a method that should be abstract: Pet::play(). Until now, we formally defined this method, although there is no such thing as a generic pet and we can’t really dictate how all pets play. Every kind of pet has its own idea of having fun, and our work-around was to just print that the pet is playing. Using abstract methods relieves us from writing code that shouldn’t be there in the first place.
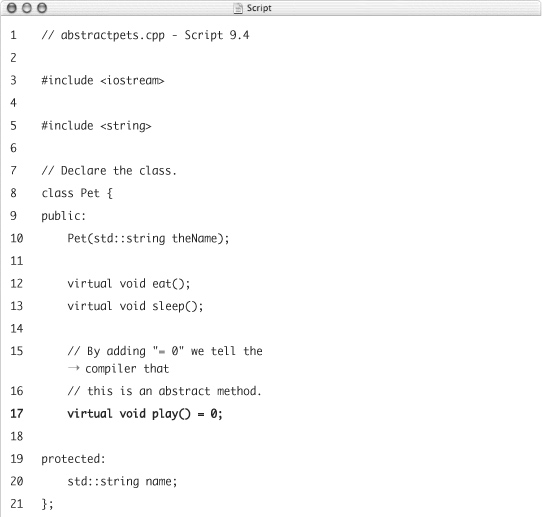
The syntax for abstract methods is simple. It’s basically the same as for virtual methods, adding = 0 after the prototype. This tells the compiler that it doesn’t have to expect an implementation of the method somewhere. An abstract play() method in Pet would look like this:
virtual void play() = 0;
Unfortunately, there’s a catch. Because of the way C++ handles internals such as which virtual methods belong to an object (using so-called vtables), a class needs to have at least one regular virtual method when also using abstract methods. Not doing so will result in obtuse error messages from the compiler or linker. These can be very misleading, even for seasoned programmers (but, to be frank, g++ is not famous for good error messages).
Let’s review our virtualpets2 example, using an abstract method instead of the unused Pet::play().
To make a method abstract
- Open the
virtualpets2.cpp(Script 9.3) example in your text editor or IDE, if it is not already open. - Make the prototype of the
play()method inPetabstract (Script 9.4):virtual void play() = 0;
The function had already been declared as virtual; now it’s also being identified as abstract as well.
- Declare
eat()andsleep()as virtual.virtual void eat();
virtual void sleep();This is necessary, as the class must have at least one non-abstract, virtual member. But with these members in this base class, it’s also justified.
- Remove the implementation of
Pet::play(). - Also remove the call to
Pet::play()in theplay()methods ofDogandCat.Since
Pet::play()doesn’t have an implementation anymore, it shouldn’t be called. - Save the file as
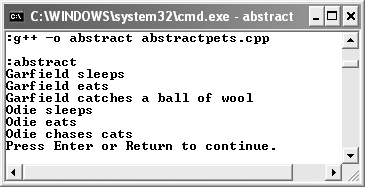
abstractpets.cpp, compile, and then run the application. (Figure 9.5).Script 9.4. Making
Pet::play()abstract (also called pure virtual) allows us to remove the useless implementation of that function without breaking the design or code.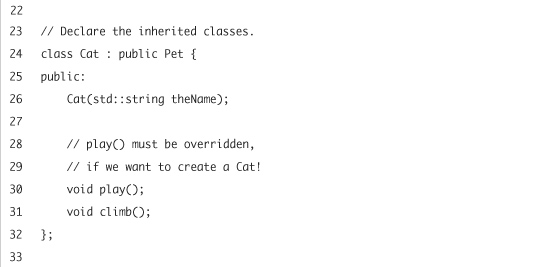

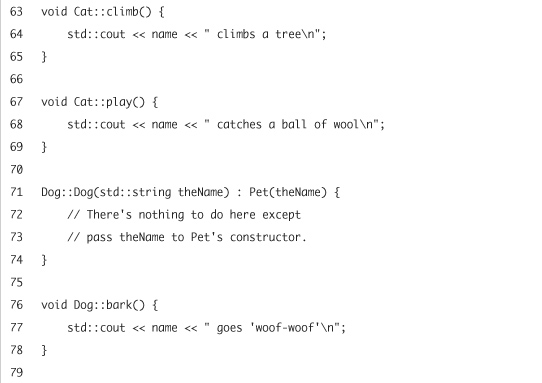
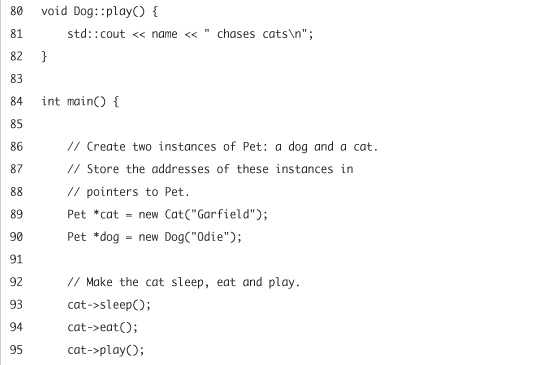
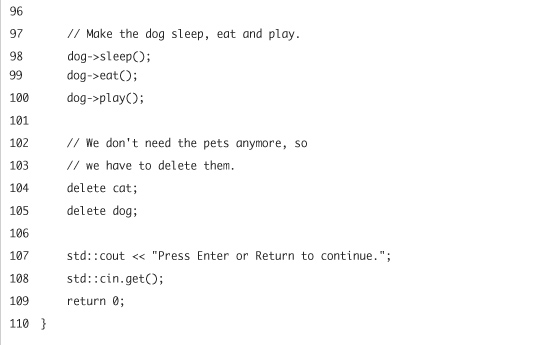
Figure 9.5. As you can see, the behavior of the program has not changed at all, but we were able to remove the implementation of one unnecessary method.
Operator Overloading
Although C++ has a multitude of different data types (int, double, etc.), it doesn’t provide an exhaustive list. If you’re trying to solve a problem that involves, for example, rational numbers, you’re on you own. (In mathematics, a number is called rational if it can be represented as a fraction of two integer numbers p and q, like 1/7 or 3/8. In math talk, p is called the numerator, and q is a denominator.)
Of course you can create a class Rational to represent fractions, but then, how do you implement the basic mathematical operations like addition or multiplication? One possible (and obvious) solution is to provide methods for all operations you have to perform. Just create a method add() that takes a Rational as an argument and returns the sum. Then you repeat that process for all other operations you want to support (subtraction, multiplication, and so on).
Although this is a perfectly valid, object-oriented solution, there’s a catch: as soon as you have to compute something more complicated, your code is going to look messy and unreadable. Take for example the expression
a + b – d * c
If you could only use methods for these common mathematical operators, your expression would look like this:
a.add(b.subtract(d.multiply(c)))
While this is still valid C++ code, it’s hardly legible.
To prevent such messy code, the C++ designers invented operator overloading. Operator overloading enables you to define methods that are called whenever the C++ compiler sees an operator (e.g., +, -, but also = or ->). This can result in more readable and obvious code, as long as you don’t do something silly like define + to perform subtraction.
In this chapter, we’ll focus on overloading arithmetic operators. They’ll be of the most use to you. Of course, there are a lot more operators that C++ lets you overload. In fact, almost every operator can be overloaded, except for . (the membership operator), :: (the scope resolution operator), ?: (the ternary operator), and sizeof. We’re not going to cover them all, as most of them are almost never used in the real world.
Overloading an operator is rather simple. All you have to do is create a method named operator plus the operator you’re overloading. The basic syntax is therefore like
type operator+(MyType rhs);
The result type of this method—type—can be defined according to the meaning of the operator. Although they will commonly do so, arithmetic operators don’t even have to return an object of the same class they’re implemented in.
The parameters the method expects are also defined in terms of the operator. For arithmetic operators, you can start by having each method take one parameter (the right hand side of the expression). The type of parameter the function takes tells the compiler when to use your method, so you could easily write a method for + that adds an integer to a string.
We are now going to put the whole theory to the test by implementing a class Rational that lets you perform computations using fractions. We have already discussed everything we need to design the class: There will be a class Rational that has the attributes numerator and denominator. We’ll implement the basic arithmetic operations of additional, subtraction, multiplication, and division. Additionally, we’ll provide a method print() to print out the fraction.
To overload operators
- Create a new, blank text document in your text editor or IDE (Script 9.5).
// rational.cpp - Script 9.5
#include <iostream>
#include <string> - Declare the class
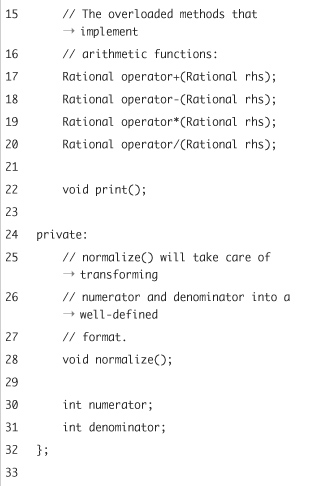
Rational.class Rational {
public:
Rational(int num, int denom);
Rational operator+(Rational rhs);
Rational operator-(Rational rhs);
Rational operator*(Rational rhs);
Rational operator/(Rational rhs);
void print();
private:
void normalize();
int numerator;
int denominator;
};We declared a constructor that takes a numerator and a denominator, and then methods to overload the operators. They have to be public so that the compiler can invoke them outside the class. Then there’s the method
print()to display the value of theRational.The private method
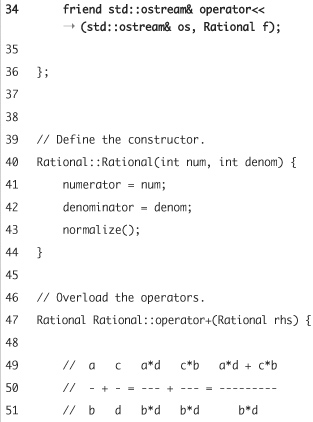
normalize()will take care of normalization: We allow only the numerator to be negative (if the denominator happens to be smaller than zero, we’ll move the sign to the numerator), and we’d like the values to be as small as possible, i.e.,1/5instead of2/10. We’re going to accomplish this using Euclid’s algorithm, which is both simple and elegant. Check your math books or the Web for details.Script 9.5. The class
Rationalrepresents rational numbers (aka fractions). The overloaded arithmetic operators allow us to use this class in expressions, just like built-in data types.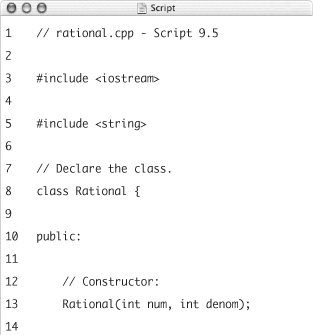
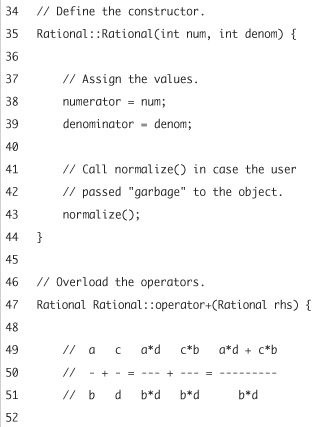
- Implement the constructor.
Rational::Rational(int num, int denom) {
numerator = num;
denominator = denom;
normalize();
}The constructor just stores the values that it receives in the class’s attributes. The fraction is then normalized by calling
normalize().This function comes into play should someone pass, for example, 2 and 10 (which should be stored as 1 and 5), or –3 and –7 (which is the same as 3 and 7). - Implement the method that overloads the
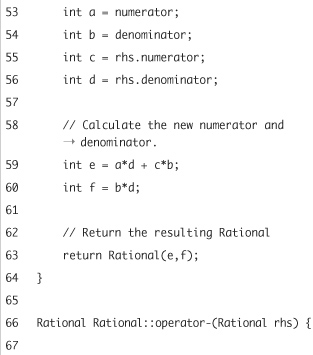
+operator.Rational Rational::operator+(Rational rhs) {
int a = numerator;
int b = denominator;
int c = rhs.numerator;
int d = rhs.denominator;
int e = a*d + c*b;
int f = b*d;
return Rational(e,f);
}This is just basic math. The function calculates the numerator and the denominator of the result, and then it returns a new
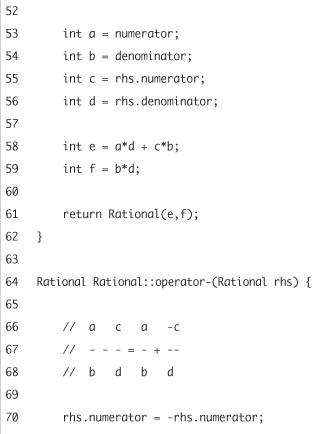
Rationalbased on these values. As you can see in the script, a comment describes how fractions are added. Temporary variables are used to keep the code clean and readable. - Implement the method that overloads the
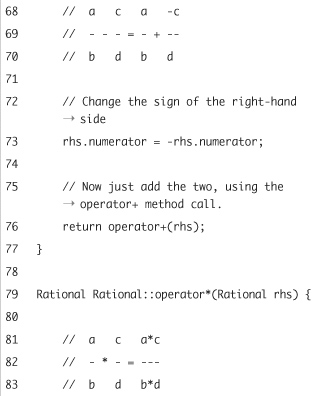
-operator.Rational Rational::operator-(Rational rhs) {
rhs.numerator = -rhs.numerator;
return operator+(rhs);
}Subtraction is really easy if you already have implemented addition. After all, subtracting a value is the same as adding the negated value, and we’re going to take advantage of this fact.
Also note the way the addition operator is invoked. Instead of creating a new
Rationaland then using+, theoperator+()method is called directly. Although this may look strange, it is perfectly legal code. - Implement the remaining operator methods.
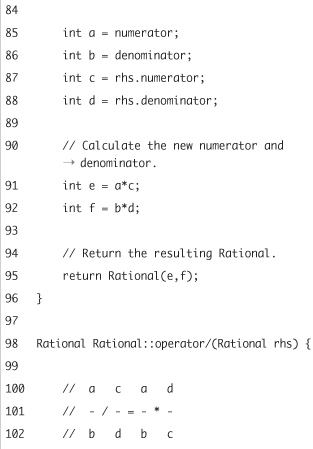
Rational Rational::operator*(Rational rhs) {
int a = numerator;
int b = denominator;
int c = rhs.numerator;
int d = rhs.denominator;
int e = a*c;
int f = b*d;
return Rational(e,f);
}
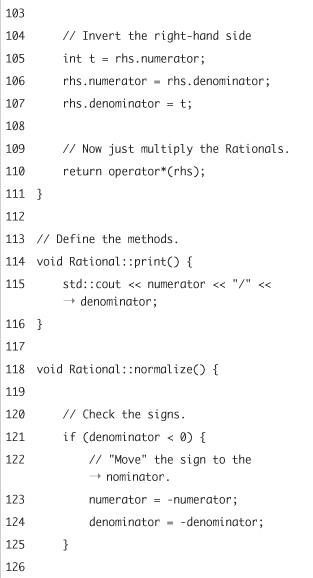
Rational Rational::operator/(Rational rhs) {
int t = rhs.numerator;
rhs.numerator = rhs.denominator;
rhs.denominator = t;
return operator*(rhs);
}There’s nothing new to this; it’s just basic math. Be certain to use plenty of comments to describe what is happening, though.
Also notice how the division operation is accomplished by inverting the fraction and then calling the multiplication operator.
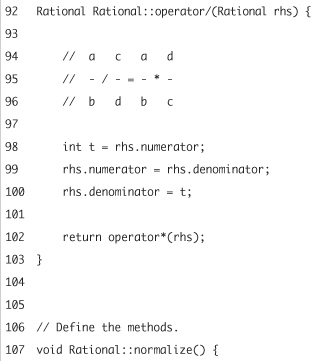
- Implement the
print()method.void Rational::print() {
std::cout << numerator << "/" << denominator;
}This is straightforward, too. All you need to do is write the numerator and the denominator to
std::cout. - Write the
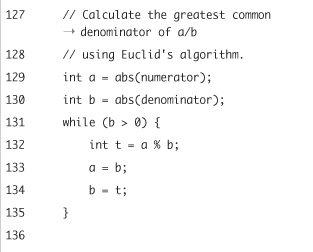
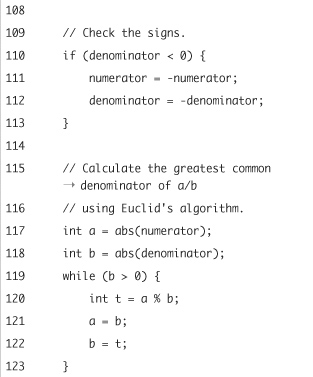
normalize()method.void Rational::normalize() {
if (denominator < 0) {
numerator = -numerator;
denominator = -denominator;
}
int a = abs(numerator);
int b = abs(denominator);
while (b > 0) {
int t = a % b;
a = b;
b = t;
}
numerator /= a;
denominator /= a;
}This is the trickiest method in the class, but it’s necessary. The method ensures that the fractions are in a well-defined format. This means that the sign has to be stored in the numerator (or in other words, the denominator is never negative), and that both the numerator and the denominator are as small as possible. To achieve the latter goal, the method calculates the greatest common divisor (gcd) of both values and then divides them both by it.
- Begin the
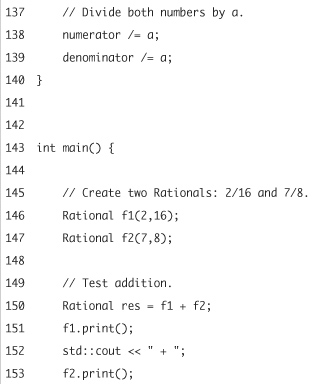
main()function and create two variables of typeRational.int main() {
Rational f1(2,16);
Rational f2(7,8);The two fractions are
2/16and7/8. - Perform addition using the fractions.
Rational res = f1 + f2;
f1.print();
std::cout << " + ";
f2.print();
std::cout << " == ";
res.print();
std::cout << " ";The first step is to create a new
Rationalto store the result of the addition. Then some text is printed, indicating what’s happening. This will be along the lines of1/8 + 7/8 == 1/1(Figure 9.6).Figure 9.6. Thanks to overloaded operators, we’re able to write mathematical expressions with
Rationals as if they were a built-in type.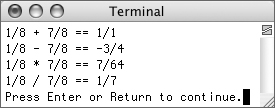
Addition is performed using the standard
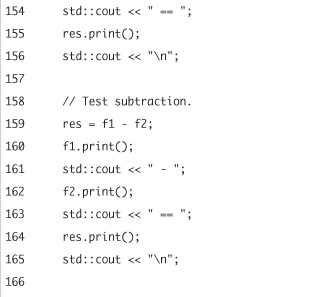
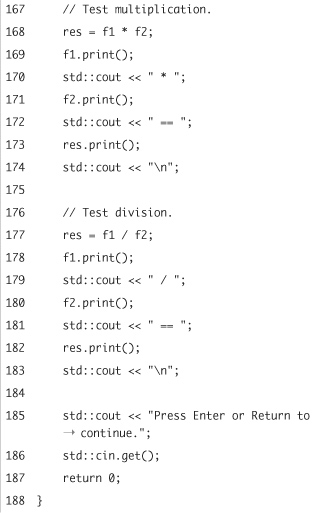
+, but doing so now invokes the overloaded version of the operator. The fractions are each printed using theprint()method. - Add code testing the other three arithmetic operators.
res = f1 - f2;
f1.print();
std::cout << " - ";
f2.print();
std::cout << " == ";
res.print();
std::cout << " ";
res = f1 * f2;
f1.print();
std::cout << " * ";
f2.print();
std::cout << " == ";
res.print();
std::cout << " ";
res = f1 / f2;
f1.print();
std::cout << " / ";
f2.print();
std::cout << " == ";
res.print();
std::cout << " "; - Complete the
main()function.std::cout << "Press Enter or Return to continue.";
std::cin.get();
return 0;
} - Save the file as
rational.cpp, compile, and then run the application (Figure 9.6). - Change the numbers, or add code that asks the user to input the numbers, and then recompile and run the application (Figure 9.7).
Figure 9.7. Running the same program using different fractions (originally
15/25and7/16).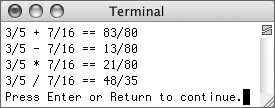
Tips
• Don’t use operator overloading “just because you can.” Only overload operators if it really makes sense, for example, when you’re implementing a new data type.
• Operator overloading has been introduced to make code more readable. Unfortunately, people have abused this feature ever since. Don’t overload operators in a way that they lose their meaning. You could overload + with a method that subtracts two values, but this is definitely not a good idea!
• You can also overload operators so that they take two parameters: an lhs (left-hand side) and an rhs (right-hand side). But we’re trying to keep the discussion of this complex idea more focused and have therefore omitted such an example.
The << Operator
When looking at the statements in the main() function of the last example, one might argue that the code still isn’t that readable. Although we added overloaded operators, which greatly simplify mathematical expressions, there’s still that print() method that disturbs the picture.
You probably don’t know this, but you have been using an overloaded operator since you printed out a value for the first time:
std::cout << "Hello, World";
The standard library overloads the left shift operator (<<) so that it can send values to a stream (and it is disputable whether that is a good idea). Unfortunately, the iostream library doesn’t know about our new Rational class, so we can’t display fractions using << as is. But nothing is holding us back from overloading the << operator to accept a Rational. Remember, overloading means that you can use the same name for different functionality, as long as the parameters differ (refer back to Chapter 5, “Defining Your Own Functions”).
Of course, we can’t add a new operator<<() method to the existing ostream class. Instead, we have to overload the operator using a regular function. The syntax for this is almost the same as for overloading methods. The only difference is that there is no object the function can work with, so we have to pass the object as the first parameter.
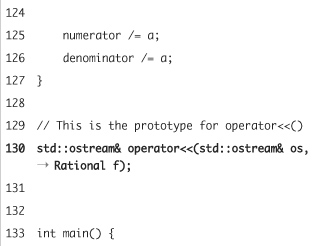
Here’s the prototype for an operator<<() function:
std::ostream& operator<<(std::ostream& os, Rational f);
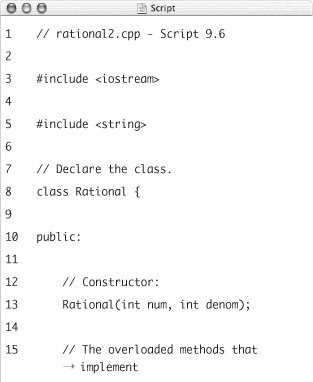
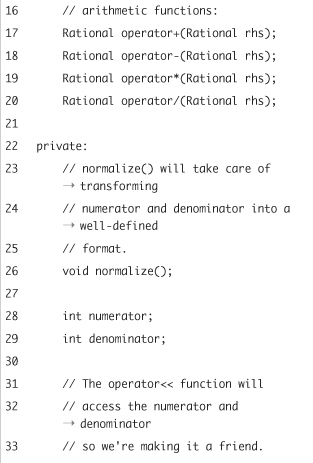
Script 9.6. The program now overloads the << operator, so the class can now be used with std::cout.

The parameters are given by the semantics of C++:
• The first parameter os is the stream you’re going to write to. It is passed as a reference, because you don’t want the compiler to create a copy of it. After all, it doesn’t make sense to have more than one instance of std::cout.
• The second parameter is the value that you want to write into the stream. This is the parameter that differs for every operator<<() function.
• The return type must be a reference to an ostream. Your function should return the same ostream that has been passed by the caller. Returning the ostream is necessary to be able to chain calls: to write code like
std::cout << f1 << " " << f2;
Your operator would be perfectly valid without returning an ostream, but then it wouldn’t behave as you expect it to. This is very confusing and is considered bad style among C++ programmers.
With all of this in mind, let’s add this feature to the Rational program.
To overload operator <<
- Open the
rational.cppexample in your text editor or IDE, if it is not already open. - Remove the
print()method from the class declaration. Also remove its implementation (Script 9.6).This method will no longer be necessary.
- In the
Rationalclass, declare theoperator<<()function to be a friend.friend std::ostream& operator<<(std::ostream& os, Rational f);
Because
<<is not part of the class but has to access the privatenumeratoranddenominatorattributes, it must be declared a friend of the class. This was discussed in Chapter 8. - Add the prototype for
operator<<()just before themain()function.std::ostream& operator<<(std::ostream& os, Rational f);
The prototype looks like the example discussed before. It returns (by reference) the same
ostreamit receives (by reference) as its first argument. It also accepts a second parameter of typeRational. - Add the implementation of
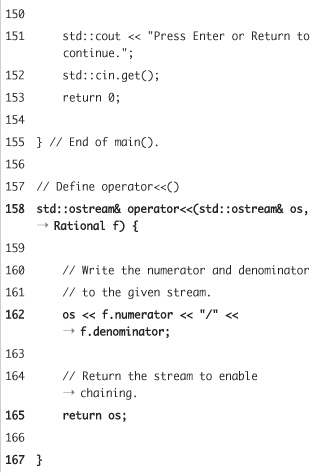
operator<<()after themain()method.std::ostream& operator<<(std::ostream& os, Rational f) {
os << f.numerator << "/" << f.denominator;
return os;
}The definition begins like the prototype, but its body is similar to the code from the old
print()method. Remember that this isn’t a class method but a standard, overloaded function. So it is prototyped before themain()function and implemented afterwards.Don’t forget to remove the
print()method entirely from the program. - Rewrite the
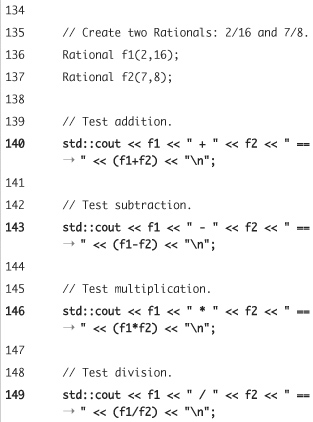
main()method to use<<.std::cout << f1 << " + " << f2 << " == " << (f1+f2) << " ";
std::cout << f1 << " - " << f2 << " == " << (f1-f2) << " ";
std::cout << f1 << " * " << f2 << " == " << (f1*f2) << " ";
std::cout << f1 << " / " << f2 << " == " << (f1/f2) << " ";Now the
Rationals can be sent tostd::coutas if they were integers or floats. It makes for much cleaner code. - Save the file as
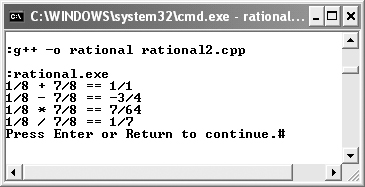
rational2.cpp, compile, and then run the application. (Figure 9.8).Figure 9.8. The output of the program is still the same (compare with Figure 9.6), but the code is a lot cleaner now (Script 9.6 versus Script 9.5).
Tips
• By overloading the << operator, you assure that your classes will perfectly blend in with the standard libraries. In other words, the Rational type can be used like pretty much any other type.
• You can also overload the >> operator to read objects from the keyboard.
• Keep in mind that your operators should behave like the standard ones. If the standard operators return a value of a specific type, your operator should use the same return type. C++ doesn’t force you to do this, but you’ll most probably run into problems with the standard libraries if you don’t adhere to this principle.
Multiple Inheritance
Multiple inheritance is probably one of the most debated features of object-oriented design. Although it seems very simple at first glance, it can have some nasty consequences, and most of the newer object-oriented languages like Java or C# support only a very simplified version of multiple inheritance. But don’t worry, multiple inheritance can make your life a lot easier if used correctly, and we’ll show you how to do so.
You can use multiple inheritance whenever a single “is-a” relationship is not enough to describe your problem. Let’s assume that you’re designing a data model for a school’s database. To start, there are teachers and students. Both are persons. To describe this situation, you have “a teacher is a person” and “a student is a person.” As we saw in Chapter 8, this leads to a base class Person and the classes Teacher and Student, both inheriting from Person.
But what happens if some students also teach classes to earn some money? The best description is “a teaching student is a student, and he is a teacher”. As you can easily see, you’re using two “is-a” relationships, so you need to write a class TeachingStudent that inherits from both Student and Teacher. In other words, you’re in need of multiple inheritance.
The basic syntax for multiple inheritance is simple. Just list all the classes you want to inherit from (including the access modifiers), separated by commas:
class TeachingStudent : public Student, public Teacher {...
This model will be used in our first example. We’re going to create a class hierarchy consisting of Person, Student, Teacher, and TeachingStudent. Every person has a name, so our class Person will have an attribute name. Teachers teach classes, and students attend classes, so the corresponding design will store this information in an attribute, too.
To use multiple inheritance
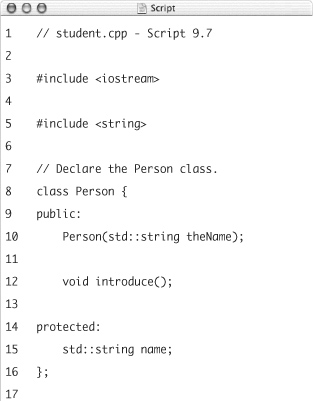
- Create a new, blank text document in your text editor or IDE (Script 9.7).
// student.cpp - Script 9.7
#include <iostream>
#include <string> - Declare the class
Person.class Person {
public:
Person(std::string theName);
void introduce();
protected:
std::string name;
};A
Personhas a name that is stored in an attribute and must be passed to the constructor. Additionally, aPersoncan introduce herself, so there will be a methodintroduce(). - Declare the class
Teacher.class Teacher : public Person {
public:
Teacher(std::string theName, std::string theClass);
void teach();
void introduce();
protected:
std::string clazz;
};A
Teacheris aPerson, and he teaches a class, so there’s ateach()method. We’re also overriding theintroduce()method.Script 9.7. This code represents a very simple model of a school’s database. It uses multiple inheritance to represent students who also teach classes.
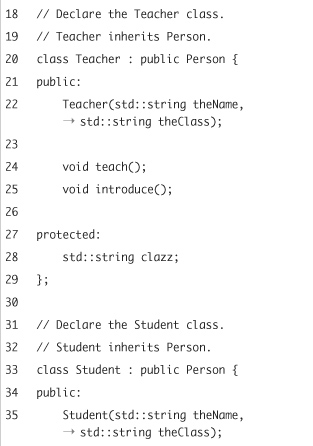
- Now add the declaration of the class
Student.class Student : public Person {
public:
Student(std::string theName, std::string theClass);
void attendClass();
void introduce();
protected:
std::string clazz;
};This is almost the same as
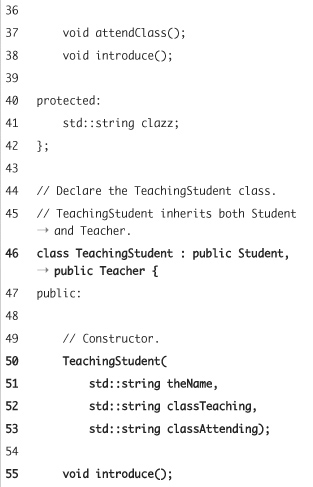
Teacher, but students attend classes instead of teaching them. - Declare a class
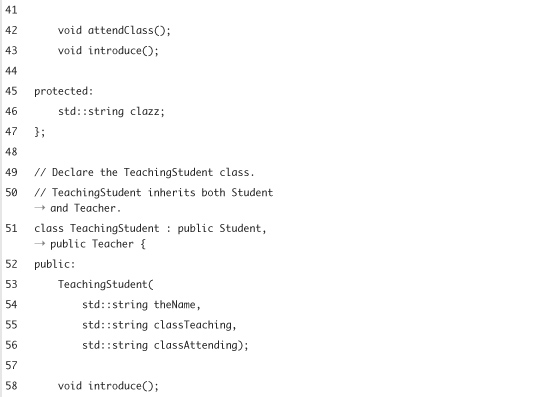
TeachingStudentthat inherits from bothStudentandTeacher.class TeachingStudent : public Student, public Teacher {
public:
TeachingStudent(
std::string theName,
std::string classTeaching,
std::string classAttending);
void introduce();
};Using the syntax outlined previously, this class is created so that it inherits from two classes. You still use
:to indicate inheritance, but you use commas to list all of the base classes.The class itself has a constructor that takes three arguments: the person’s name, the class they are teaching, and the class they are attending. The class will also override the
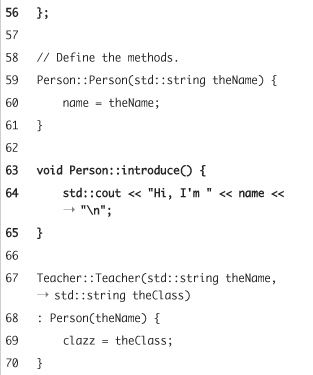
introduce()method. - Implement the
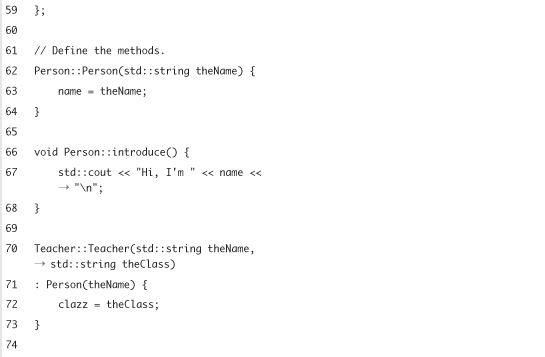
Personclass.Person::Person(std::string theName) {
name = theName;
}
void Person::introduce() {
std::cout "Hi, I'm " << name << " ";
}The implementation of
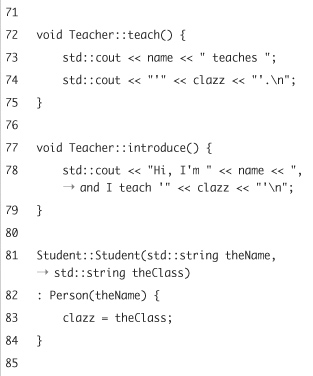
Personshould be easy by now. All you have to do is write a constructor that stores the parametertheNamein thenameattribute, and a methodintroduce()that prints out a gentle introduction. - Implement the
Teacherclass.Teacher::Teacher(std::string theName, std::string theClass)
: Person(theName) {
clazz = theClass;
}
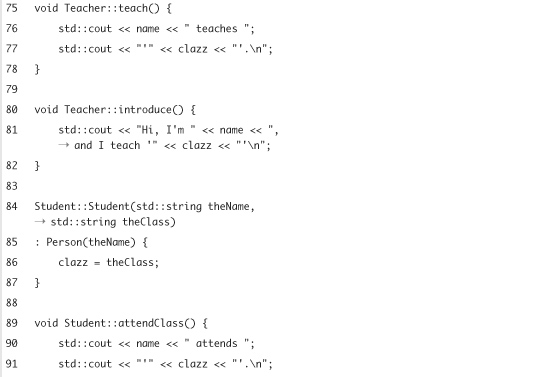
void Teacher::teach() {
std::cout << name << " teaches ";
std::cout << "'" << clazz << "'. ";
}
void Teacher::introduce() {
std::cout "Hi, I'm " << name << ", and I teach '" << clazz << "' ";
}The implementation of
Teacherisn’t that hard, either. Remember that you have to invoke the base class’s constructor explicitly, hence theTeacher::Teacher(std::string theName, std::string theClass) : Person(theName) { ...
Also the
introduce()method has been overridden so that it prints out both the class being taken and the one being taught. - Implement the class
Student.Student::Student(std::string theName, std::string theClass)
: Person(theName) {
clazz = theClass;
}
void Student::attendClass() {
std::cout << name << " attends ";
std::cout << "'" << clazz << "'. ";
}
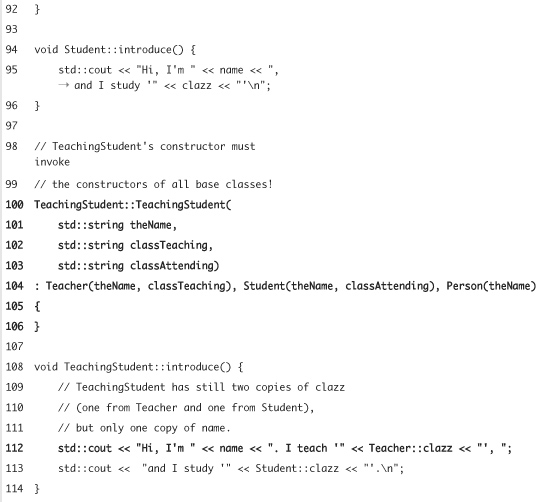
void Student::introduce() {
std::cout "Hi, I'm " << name << ", and I study '" << clazz << "' ";
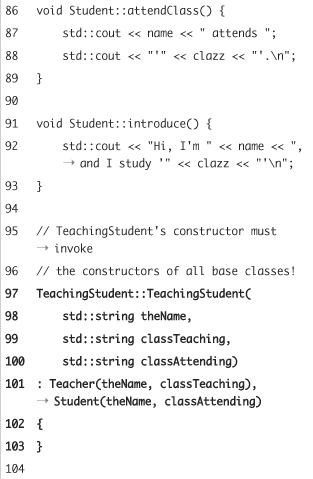
}Again, don’t forget to invoke
Person’s constructor in theStudent()constructor, or your compiler will complain. The other methods are straightforward. - Finally, implement the
TeachingStudentclass.TeachingStudent::TeachingStudent(
std::string theName,
std::string classTeaching,
std::string classAttending)
: Teacher(theName, classTeaching), Student(theName, classAttending)
{
}And here comes the interesting part: the implementation of your first class that uses multiple inheritance. The constructor is still simple, but you’ll have to invoke the constructors of all base classes, because every one of them expects arguments.
This constructor does nothing itself, though.
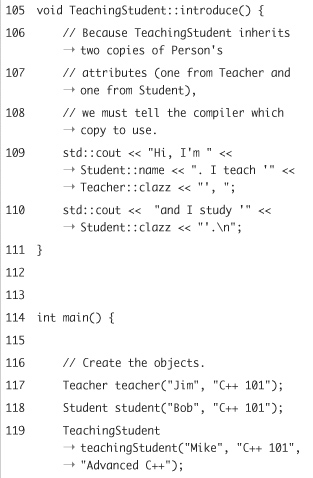
- Implement the
TeachingStudent::introduce()method.void TeachingStudent::introduce() {
std::cout << "Hi, I'm " << Student::name << ". I teach '" << Teacher::clazz << "', ";
std::cout << "and I study '" << Student::clazz << "'. ";
}Because the
TeachingStudentclass contains thenameandclazzattributes twice (it inherited them once fromStudent, and once fromTeacher), we have to explicitly state which attributes we want to use. To do so, just addStudent::orTeacher::before the name of the attribute. Just usingclazzornamewon’t work, because the compiler can’t determine to which one you would be referring. - Start a
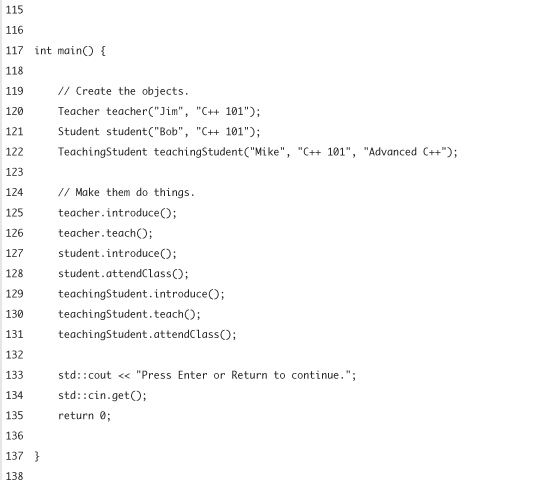
main()function and create one object of each type.int main() {
Teacher teacher("Jim", "C++ 101");
Student student("Bob", "C++ 101");
TeachingStudent teachingStudent("Mike", "C++ 101", "Advanced C++");We’re going to have a teacher Jim, a student Bob, and a student Mike that also teaches a class.
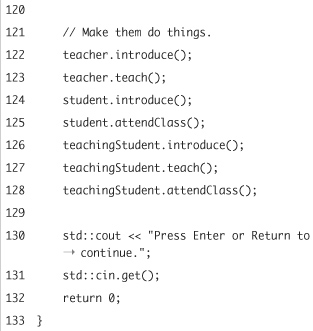
- Make the objects do the things that they do.
teacher.introduce();
teacher.teach();
student.introduce();
student.attendClass();
teachingStudent.introduce();
teachingStudent.teach();
teachingStudent.attendClass(); - Complete the
main()function.std::cout << "Press Enter or Return to continue.";
std::cin.get();
return 0;
} - Save the file as
student.cpp, compile, and then run the application (Figure 9.9).Figure 9.9. The
TeachingStudentMike inherits from bothTeacherandStudentand has therefore two different copies ofclazzandname.
Virtual Inheritance
Although the previous student example seems to be sufficient, it has some problems. In the introduce() method of TeachingStudent, we had to explicitly tell the compiler which attributes to use. This is fine for clazz, because there is a huge difference between teaching and attending a class, and as it turns out, a teaching student won’t teach the same class he attends.
But what about the name? If there are two different clazz attributes stored in TeachingStudent, are there also different name attributes? The answer is unfortunately yes. In fact, our teaching student could have two totally different names, which is definitely not what we had in mind when designing the class hierarchy. By inheriting from both Student and Teacher, we also inherit two versions of Person, one from Student, and one from Teacher. While this is sometimes perfectly correct (in the case of the clazz attributes, we need two different versions), it can also cause trouble, as we see with the name attribute.
C++ provides a feature that solves this problem: virtual inheritance. By inheriting virtually from a base class, you’re telling the compiler that there must be only one instance of that base class if someone inherits from the current class. The syntax for virtual inheritance is, once again, rather simple: just add virtual before the access control keyword:
class Teacher : virtual public Person {...
This is exactly what we need to solve our problem. Both Student and Teacher need to inherit virtually from Person. The compiler will then make sure that every class that inherits from both Student and Teacher gets only one copy of Person’s attributes.
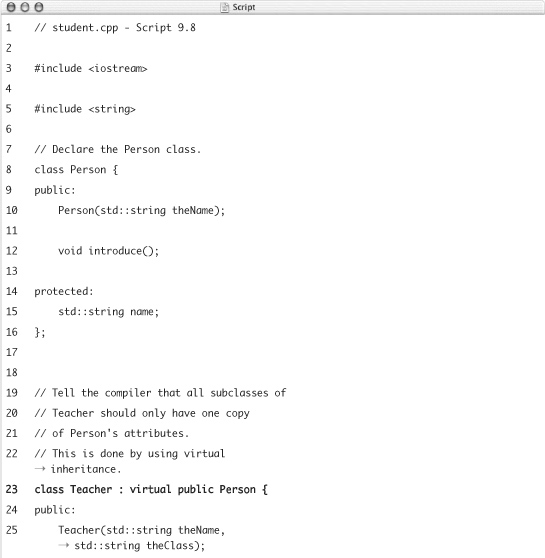
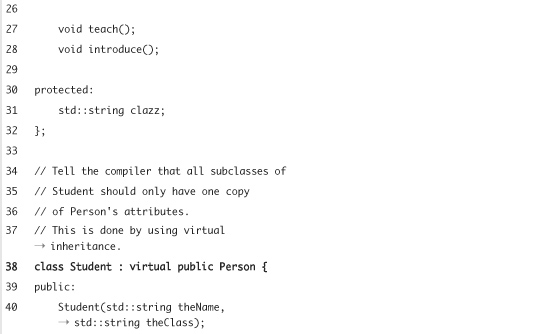
Script 9.8. Using virtual inheritance solves problems that we had with multiple inheritance, but it also complicates the code.
To use virtual inheritance
- Open the
student.cppexample (Script 9.7) in your text editor or IDE, if it is not already open. - Modify the declaration of
Teacherso that it inherits virtually fromPerson(Script 9.8):class Teacher : virtual public Person {
- Repeat Step 2 for the
Studentdeclaration:class Student : virtual public Person {
- Modify the
TeachingStudentconstructor so that it also invokesPerson’s constructor as well.TeachingStudent::TeachingStudent(
std::string theName,
std::string classTeaching,
std::string classAttending)
: Teacher(theName, classTeaching), Student(theName, classAttending), Person(theName)
{
}Because there will now be only one copy of
Personfor every object ofTeachingStudent, you have to add code toTeachingStudent’s constructor that invokesPerson’s constructor. The compiler is of no help here, because it can’t decide which parameters to use when invokingPerson’s constructor. - Modify
TeachingStudent::introduce()so that it refers to justname.void TeachingStudent::introduce() {
std::cout << "Hi, I'm " << name << ". I teach '" << Teacher::clazz << "', ";
std::cout << "and I study '" << Student::clazz << "'. ";
};You can now safely use the
nameattribute without qualifying it (Student::nameorTeacher::name), as there is only one copy ofPerson’s attributes. Therefore, there is only onenameattribute. - Save the file as
student2.cpp, compile, and then run the application (Figure 9.10).Figure 9.10. The application’s output is still the same (compare with Figure 9.9), even though a
TeachingStudentnow has only one copy ofPerson’s attributes, which is as it should be.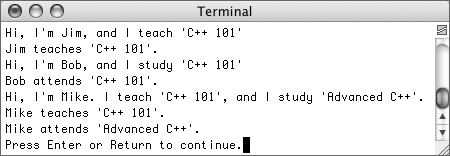
Tips
• When using multiple inheritance, pay attention to how many copies of base classes you’re inheriting.
• The safest and least confusing way is to use multiple inheritance is only when inheriting from classes that have no attributes and only abstract methods. This way, you’ll never have the problems with multiple copies of base classes. Such classes are also called interfaces.