10. Error Handling and Debugging
You may be asking yourself: Why are we just now getting to error handling and debugging? Well, the answer is that, unfortunately, nothing teaches these subjects better than experience. The only way to avoid errors is to never make mistakes, which—trust us—will never, ever happen. But if you are a “half-full” kind of person, you will appreciate that each mistake is an opportunity to learn how to catch future mistakes. In any case, there’s not a whole lot that can be taught when it comes to debugging, which is why you’re finding this chapter somewhat late in the book.
That being said, we can still cover some tips and tricks that should hopefully better arm you in the war against bugs. The chapter begins with some best practices when it comes to preventing, finding, and fixing errors in your code. Then we follow this up with ways that you can handle errors that occur during the execution of your programs. This includes the relatively new technique of handling exceptions.
Debugging Techniques
As we mention in the introduction to this chapter, the fact of the matter is that nothing, absolutely nothing, will teach you more about debugging than trial and error (and error and error). The more you work with C++, the more you’ll become familiar with why certain errors normally occur, where problems might exist, and so on. Still, there is some advice that we, as seasoned programmers, can offer.
All errors fall under one of two classifications: compile time and run time. Since the compiler will not build an executable if errors exist, you’ll only ever know about and have to fix one kind of error at a time.
Compile-Time Errors
Compile-time errors are clearly the lesser of two evils. The compiler will tell you exactly what the problem was and what lines are involved. All you need to do is pay attention. Further, compile-time errors should happen consistently, which is actually an asset.
In order to prevent, find, and fix compile-time errors, there are some best practices. We’ll run through them in order, so that you have a little handbook when it comes to debugging your applications.
To manage compilation errors
- Be consistent!
The first recommendation is that you stay consistent when you program. However you decide to name variables and functions, space out code, indent blocks, and so on, do so consistently. If you mix up how you do these things, you can cause both compile-time and run-time errors.
- Pay attention to the compiler (Figure 10.1)!
Figure 10.1. Carefully read and consider the errors indicated by the compiler. Often the bug is clearly indicated.
Sometimes the error messages it spits out make no sense at all, but often they are useful and you shouldn’t disregard them.
- Review before you type.
When you have a compiler error, it’s only natural to go back into your source code and start typing away to fix it. Don’t! Instead, review your entire source code first, and then fix the problem. If you dash right into the code and start making changes, it’s possible you’ll just create more errors (which is very, very frustrating).
- Validate the basic syntax.
Even experienced programmers occasionally mismatch brackets, parentheses, and quotation marks. Or, while cutting and pasting, it’s easy to forget a semicolon. Keep an eye on these things prior to tackling bigger issues.
- Render code inactive using comments.
If the compiler states that there’s an error on line 42 and you just don’t see it, then take that line out of commission using comments:
// int i = 20 // Missing semicolon
If you still have the same error, you know that the problem was not on that line. If you have a different error, or none at all, you’ve successfully identified where the problem is.
- Test using different environments and tools.
For the most part the compiler should not be the problem, but when you just can’t see what’s wrong, testing using a different IDE, computer, or operating system can shed some light.
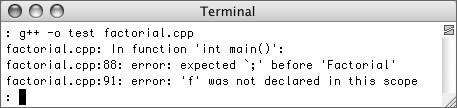
- Make sure you’ve included the necessary files (Figure 10.2).
Figure 10.2. Failure to include all of the necessary libraries can lead to errors like these.
You can use
coutonly if you’ve includediostream, and there are hundreds of other, similar connections. Be certain that you’ve included every additional library that’s required by your code. - Pay attention to scope and namespaces.
What access the program has to what variables can cause all sorts of problems. This topic is discussed in more detail in Chapter 12, “Namespaces and Modularization.”
- Take a break!
When you get frustrated, your ability to find and fix a problem often goes right out the window. Take a break, leave your computer, and come back to the problem with a clear head. You’d be amazed at how often you’ll find the problem immediately upon your return.
- Use a debugging tool.
Just as there are many compilers, editors, and IDEs for C++ programming, quite a handful of debuggers are freely available, too. More than likely, your IDE has a debugger built in. Learn to use it and use it often! In Appendix A, “C++ Tools,” we mention the most popular C++ debugger, GDB.
 Tips
Tips
• Another good way to avoid all errors is to leave working code alone once it’s perfected. If you modularize your code (see Chapter 12), you can use solid, working bits in new applications. This is one of the points of programming in C++, after all.
• Once you’ve found and fixed a bug, do yourself a favor and consider if you may have made the same mistake elsewhere. If so, go fix that bug everywhere while it’s fresh in your mind.
Run-time errors
Run-time errors are often far trickier than compile-time ones. You won’t necessarily get a formal notice when they occur, and they may not happen all the time. Also, the same program could work on one computer, but not another. Or one user constantly has such-and-such a problem, but no one else does. Run-time errors can be exhausting!
For better or for worse, bugs don’t really “just happen.” Applications do what we program them to. So debugging is really a matter of figuring out what the program is doing. Once you’ve managed that, you should be able to see why the program is making whatever mistake, and then you can alter that behavior. There are some best practices for accomplishing this.
To quell run-time errors
- Be consistent!
Inconsistency is the programmer’s worst enemy: find the programming style and habits that you like best and stick to them!
- Make extensive use of comments.
If you forget what a certain piece of code is doing, or why, it’ll be that much harder to debug that section of code later. Also be certain to keep the comments in step with the code: If you change the code later, change the comments, too.
- Pay attention to precedence.
Operator precedence determines the order in which operations occur. The safest way to ensure that operations occur in the intended order is to use parentheses to enforce your intentions. This includes all operators, not just the arithmetic ones. Don’t make assumptions about the order that even
++,*, and->will be used. - Print the values of your variables to confirm they are what they should be.
This is a very simple trick for helping you understand what’s going on in a program. Just add lines like
std::cout << "Inside the returnFactorial() function! ";
and
std::cout "The value of 'i' is " << i << " ";
You’ve seen this throughout the book and you’ll see more examples in this chapter.
- Validate user and file input.
It’s hard for programmers to find all the bugs in a program because they’re likely to use the program as it was meant to be used. Only users can do something you never truly expected. When it comes to user input, take it properly and validate it so that you know exactly what data you are dealing with.
- Don’t make assumptions!
This is an old adage, appropriate all the time. Do not assume that processes that should work—opening a file, creating a new block of memory, etc.—will necessarily work. And do not assume that users will use your program as they should (going back to Step 5).
- Pay attention to compiler warnings (Figure 10.3).
Figure 10.3. Compiler warnings, like this notice in Xcode that one variable was never used, are often indicators of potential run-time bugs.

Compilers issue both errors and warnings. Errors prevent your applications from building because the compiler saw a definite problem. Warnings are the compiler’s way to say that something might be wrong. These possible problems often turn into real bugs during run time.
- Test your programs in small pieces.
When you have a lot going on in a program, it can be that much harder to know where the problem is. If push comes to shove, break your program down into its subparts to debug each individual facet.
- Use a debugging tool.
Compilers will help you catch some errors, but more difficult ones (i.e., run-time errors) require a more sophisticated tool. GDB and other debuggers, probably built into your IDE already, can really help out in this area.
- Use the techniques outlined in the rest of this chapter.
This first section of the chapter discusses how to avoid, find, and fix errors. The rest of the chapter shows you how to modify your C++ code so that the programs are built to handle (potential run-time) errors themselves.
Returning Error Codes
One way you can handle potential problems in your programs is by creating validation functions: functions that test a hypothesis and return a code indicating whether or not it’s safe to continue. Returning a code or value is accomplished using the return statement in your functions:
int myFunction () {
if (condition) {
return 1;
} else {
return 0;
}
}
Then, in the code that calls this function, the return value could be used in a conditional:
if (myFunction()) {
// Good, do this.
} else {
// Bad, do this instead.
}
You’ve actually already seen this a couple of times by now, but it’s worth another review. For an example of how you might use this, let’s think about the factorial example from way back in Chapter 5, “Defining Your Own Functions.” As we pointed out at that time, trying to calculate the factorial of even a relatively small number (like 13) could fail because that value—the factorial of 13 is 6,227,020,800—would be larger than the maximum possible value on the computer (4,294,967,295 on a Windows XP laptop).
With the program as it is, if the factorial exceeds the largest possible value, it would print out the wrong factorial value because when a program exceeds an integer’s limit, the integer rolls over in value (from the maximum to the minimum). This is an awful run-time problem to have, as it looks like the program works, when it actually doesn’t (Figure 10.4). Let’s fix this now by creating a function whose sole purpose is to determine if the factorial can accurately be calculated or not. The program also makes use of the climits file, which is discussed in the sidebar.
Figure 10.4. Although the program doesn’t crash or display any obvious error, it’s actually broken. As originally written, the program returns the wrong value for numbers greater than 12 (on this computer, that is).

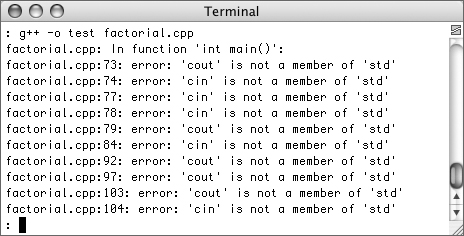
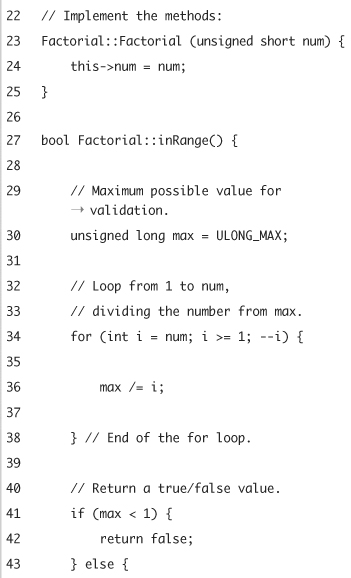
Script 10.1. The factorial class includes two methods and a constructor. The one method returns a value indicating whether or not the factorial could be calculated; the other does the actual calculation.

To use return codes
- Create a new, blank text document in your text editor or IDE (Script 10.1).
// factorial.cpp - Script 10.1
#include <iostream>
#include <climits>The
climitsheader file is new here; see the sidebar. - Declare the class.
class Factorial {
public:
Factorial(unsigned short num = 1);
bool inRange();
unsigned long getFactorial();
private:
unsigned short num;
};Now that we’ve covered some of the basics of object-oriented programming, let’s turn the factorial example into a simple class. The constructor will take the number and assign it to the
numattribute. The first method returns a Boolean value indicating if the number is in the acceptable range. The second method returns an unsigned long integer, which will be the factorial. - Implement the constructor.
Factorial::Factorial (unsigned short num) {
this->num = num;
}This should be pretty easy for you by now. Since both the constructor’s argument and the class’s attribute have the same name, the
thispointer is used to be explicit in assigning the one’s value to the other. - Begin defining the
inRange()function.bool Factorial::inRange() {
unsigned long max = ULONG_MAX;The function will return either
trueorfalse, depending upon whether the calculated factorial for this number can be accurately determined. The method for validating this will be the opposite of calculating the factorial. Instead of starting at1and multiplying up tonum, this function will start with the maximum value and divide fromnumto1. You’ll see how this plays out in Step 5. - Create the
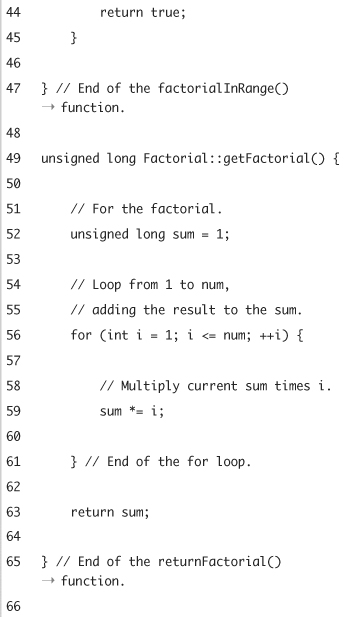
forloop that does the division.for (int i = num; i >= 1; --i) {
max /= i;
}This part may seem counterintuitive, so we’ll explain. Take, for example, the factorial of 4: 1 * 2 * 3 * 4 = 24. Now say that the maximum value that could be stored in our unsigned long integer on this computer was 20 (it’s obviously not, the math is just easier this way). If you calculate 20 / 4 / 3 / 2 / 1, the result is 0.833. However, if the maximum value were 30, then 30 / 4 / 3 / 2 / 1 is 1.25. So what does this mean?
If the maximum value that can be calculated, divided by all of the integers in the factorial, comes out to be less than 1, then the true factorial cannot be determined (because it will exceed the max). If the result of the division is greater than 1, the factorial is still in range.
This
forloop, which is just the opposite of the factorial calculation loop, accomplishes all that. (Technically, sincemaxandiare both integers,maxwill always be an integer. This is fine, though, as any division that would assignmaxa value less than1, like.833, would assignmaxa value of0.) - Complete the function.
if (max < 1) {
return false;
} else {
return true;
}
}Depending upon the value of
max, eithertrueorfalseis returned. - Implement the
getFactorial()function.unsigned long
Factorial::getFactorial() {
unsigned long sum = 1;
for (int i = 1; i <= num; ++i) {
sum *= i;
}
return sum;
} - Begin the
main()function and create the necessary variable.int main() {
unsigned short numberIn = 0; - Take the user-submitted number.
std::cout << "Enter a small, positive integer: [##] ";
while (!(std::cin >> numberIn) || (numberIn < 1)) {
std::cin.clear();
std::cin.ignore(100, ' '),
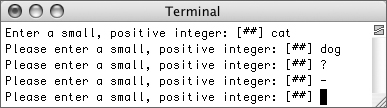
std::cout << "Please enter a small, positive integer: [##] ";
}
std::cin.ignore(100, ' '),The program first prompts the user for a number (Figure 10.5). If the user fails to enter a number (in which case
!(std::cin >> numberIn)will be true) or if the user enters the number0(in which case the second condition will be true),cinwill be cleared and the user will be re-prompted (Figure 10.6).Figure 10.5. The user is prompted to enter a number.
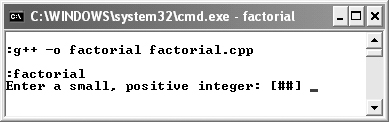
Figure 10.6. The program re-prompts the user until a valid number is keyed in.
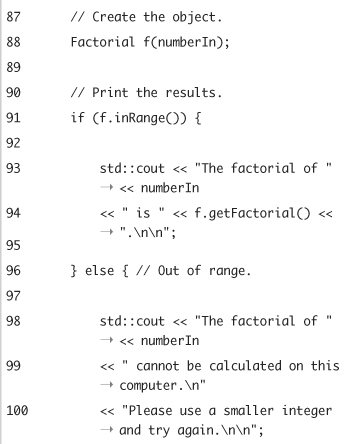
- Create the factorial object, and then use a conditional to see if a factorial can be calculated for the submitted number.
Factorial f(numberIn);
if (f.inRange(numberIn)) {First of all, remember that the program will only get to this point once
numberInhas an integer value greater than or equal to1(thanks to thewhileloop). Now that the program has valid data to work with, it should first confirm that the number isn’t too large. This will be accomplished by theinRange()function, which returns eithertrueorfalse. By placing the function call within a conditional, we can calculate the factorial or not, depending upon the returned result. - Complete the conditional.
std::cout << "The factorial of " << numberIn
<< " is " << f.getFactorial() << ". ";
} else {
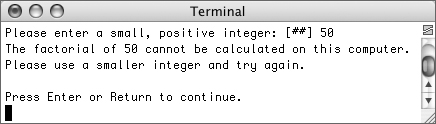
std::cout << "The factorial of " << numberIn
<< " cannot be calculated on this computer. "
<< "Please use a smaller integer and try again. ";
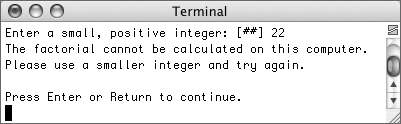
}If the factorial can be calculated, it will be, and that result printed out (Figure 10.7). If it could not be determined, an appropriate message is printed instead (Figure 10.8).
Figure 10.7. The factorial of a number is properly calculated and printed.
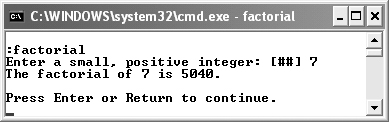
Figure 10.8. If the computer could not accurately calculate the factorial of the number, a message saying such is printed.
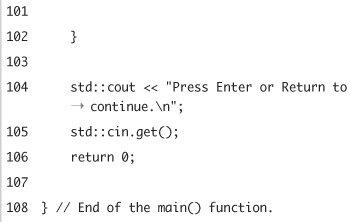
- Complete the
main()function.std::cout << "Press Enter or Return to continue. ";
std::cin.get();
return 0;
} - Save the file as
factorial.cpp, compile, and run the application.
Tip
• Some people prefer using exceptions, discussed later in this chapter, instead of return statements. The argument against the technique used in this example is that the main part of the program must be written to handle the different returned error codes.
Using assert()
Available in both C and C++ is a utility designed explicitly for debugging. Called assert(), this function is defined in the C assert.h library, meaning you can include it in a C++ program using
#include <cassert>
The assert() function takes an argument that will then be tested for its true/false status. If the condition is true, nothing happens. If it’s false, the program will stop running and an error will be reported. Take this code (Figure 10.9):
int main() {
int i = 20;
assert (i == 65);
}
Figure 10.9. Because i does not equal 65, the assert() function terminated the execution of the program.
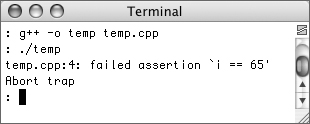
While that code may seem trivial, it demonstrates the point: if your code relies upon a condition, like i being equal to 65, and that condition isn’t true, you have a problem.
This function is an easy way to help debug your programs. You can use it to terminate a program when its key assumptions are false, before anything else goes wrong. We’ll run through an example of this in the next program, a modification of the StoreQuote class developed in Chapter 7, “Introducing Objects.” While we’re at it, we’ll demonstrate another other technique: Make extensive use of cout to indicate what’s happening in the program.
To use assert
- Create a new, blank text document in your text editor or IDE (Script 10.2).
// quote1.cpp - Script 10.2
#include <iostream>
#include <string>
#include <fstream>You can refer back to Script 7.5 if you need any refreshers on the basic functionality of the script. In short, the
stringheader file is needed because the program takes two string inputs, and thefstreamfile is required to work with files on the computer. - Declare the class.
class StoreQuote {
public:
StoreQuote(std::string filename);
~StoreQuote();
void inputQuote();
void inputSpeaker();
bool write();
private:
std::string quote, speaker;
std::ofstream fileOutput;
};For the most part, we’ve left the class declaration as it was, in order to better focus on what’s happening in this example. We have made the attributes
private, and we have changed the constructor so that it takes an argument (the name of the file to be opened).Script 10.2. Use of
assert()and lots of printed messages will help you see what’s happening in a program while you develop and test it.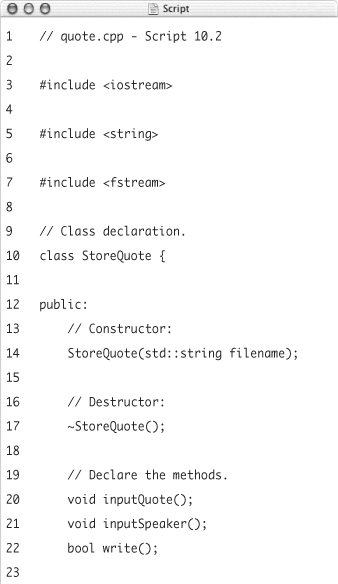
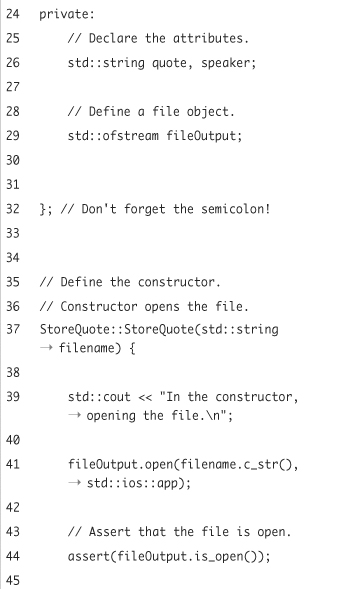
- Implement the constructor.
StoreQuote::StoreQuote(std::string
filename) {
std::cout << "In the constructor, opening the file. ";
fileOutput.open(filename.c_str(), std::ios::app);
assert(fileOutput.is_open());
std::cout << "If this prints, the file must be open. ";
}A couple of extra things happen in the constructor than in its previous incarnation. For starters, the constructor now takes an argument, which is the file to be opened. The
open()function must receive a C-style string, so the string’sc_str()function is called.For debugging purposes, a message indicates when the constructor has been called. You’ve seen this before, and it’s a great way to better understand what is happening in your programs and when.
The final addition is the use of the
assert()function and another use ofcoutafter it. - Implement the destructor.
StoreQuote::~StoreQuote() {
std::cout << "In the destructor, closing the file. ";
fileOutput.close();
}The destructor just closes the opened file. For debugging purposes it also prints a message.
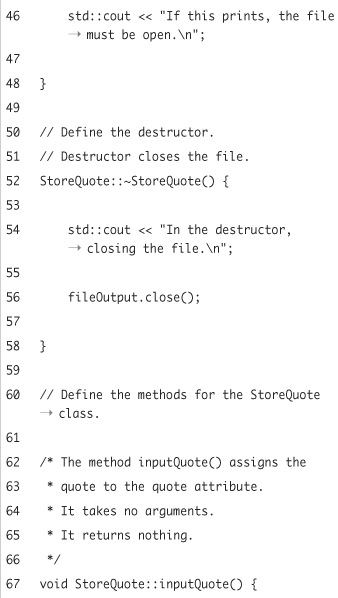
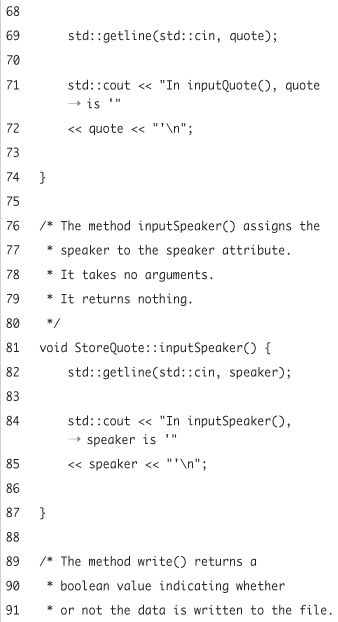
- Define the
inputQuote()andinputSpeaker()methods.void StoreQuote::inputQuote() {
std::getline(std::cin, quote);
std::cout << "In inputQuote(),
quote is '"
<< quote << "' ";
}
void StoreQuote:: inputSpeaker() {
std::getline(std::cin, speaker);
std::cout << "In inputSpeaker(), speaker is '"
<< speaker << "' ";
}These two methods do very similar things, just with different attributes. We’ve added messages to each indicating what values the object now has.
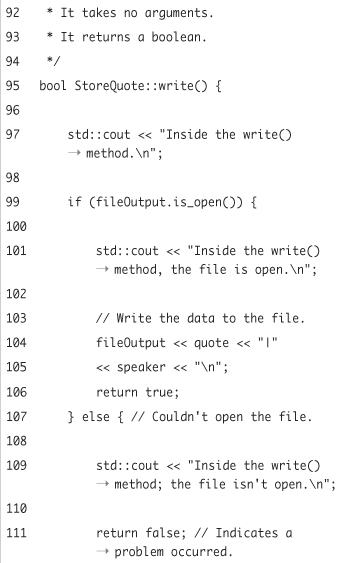
- Define the
write()method.bool StoreQuote::write() {
std::cout << "Inside the write() method. ";
if (fileOutput.is_open()) {
std::cout << "Inside the write() method, the file is open. ";
fileOutput << quote << "|"
<< speaker << " ";
return true;
} else {
std::cout << "Inside the write() method; the file isn't open. ";
return false;
}
}This method tests if the file is open and, if so, writes the data to it and returns a value of
true. Lots of messages are printed so that you can tell exactly what is happening inside of this method. - Begin the
main()function.int main() {
StoreQuote quote("quotes.txt");The only variable the function needs is an object of type
StoreQuote. All of the remaining functionality of the program is wrapped up within this one object.With the definition of the constructor as it is, the object must be passed a filename when you create it.
- Prompt for and read in the quotation and the speaker.
std::cout << "Enter a quotation (without quotation marks): ";
quote.inputQuote();
std::cout << "Enter the person to whom this quote is attributed: ";
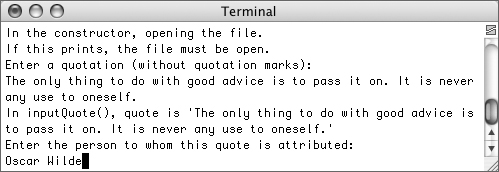
quote.inputSpeaker();This process works exactly as it had before, first prompting, then taking each input (Figure 10.10). The input is read and assigned to an attribute within the class.
Figure 10.10. The program works as it has in the past, although now with many detailed messages.
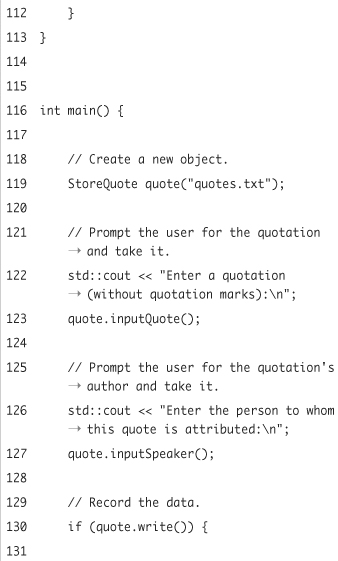
- Report upon the success of storing the data.
if (quote.write()) {
std::cout << "The data has been written to the file! ";
} else {
std::cout << "The data could not be written! ";
return 1;
}The
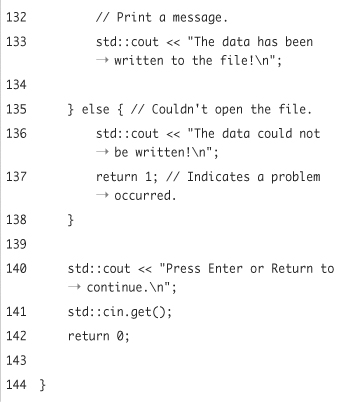
write()method both writes the data to the file and reports upon the success of the operation (of opening the file, technically), so calling it as a condition here serves two purposes. Different messages are printed depending upon the result. - Complete the
main()function.std::cout << "Press Enter or Return to continue. ";
std::cin.get();
return 0;
} - Save the file as
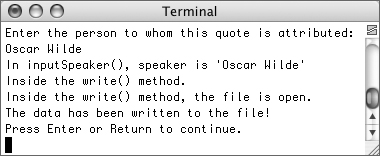
quote.cpp, compile, and run the application (Figure 10.11).Figure 10.11. The program continues to indicate which parts of the code apply and when.
- Change the
main()function so that the object is assigned an invalid or no filename, and then resave, compile, and run the application (Figure 10.12).Figure 10.12. If the constructor could not open the file for writing, the
assert()function terminates the program.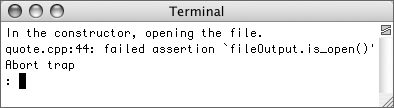
Tips
• Remember that assert() is best used as a debugging tool. You would not want to rely upon it in distributed software. Of course, by the time you distribute a program, you should have all the bugs out anyway!
• Once you have your program working as it should, rather than manually deleting all the uses of assert(), just put
#define NDEBUG
at the top of your .cpp file. This will automatically nullify all assert() calls.
Catching Exceptions
Catching exceptions is an entirely different way to handle potential problems, specifically run-time errors. Simply put, an exception is when something other than what you expected happens. The premise is that you try to do certain things in your C++ code, specifically the kinds of things that might fail (like opening a file or requesting some memory). If an exception occurs, you then throw the exception. Your code will then catch the exception and respond accordingly.
The basic syntax is
try {
// Do something.
// Throw an exception on error.
}
catch (exception) {
// Do whatever.
}
Every try statement requires at least one catch. The catch needs to be defined so that it accepts one parameter of a specific type. You can have multiple catch statements, one for each possible type:
catch (int e) {}
catch (bool e) {}
catch (...) {}
The final catch is a catchall, catching any type of exception.
The program throws an exception using the throw keyword.
throw 1;
Note that this is not normally nor necessarily done within the try block (as you’ll see in the following example). After handling the exception, the program will continue on, outside of the try block. This means that any code in the same block that comes after an executed throw will never run.
The benefit that exception handling has over a conditional or return statement is that it further separates the functionality and logic from the error handling. As an example, we’ll write a new version of the factorial example using a function—just one—instead of classes. It’ll allow us to structure all of the code quite differently. Before proceeding, see the sidebar on how to define your functions so that they throw errors.
To use exception handling
- Create a new, blank text document in your text editor or IDE (Script 10.3).
// factorial2.cpp - Script 10.3
#include <iostream>
#include <climits> - Add the function prototype.
unsigned long returnFactorial(unsigned short num) throw (const char *);
The function returns an unsigned long, as it has in the past. It’s also declared as throwing an exception of
const char *(essentially a string of text). Because of the way thethrowstatement affects the execution of a program, the function will only either return the value or throw the exception, never both. - Begin the
main()function and create the necessary variable.int main() {
unsigned short numberIn = 0;Script 10.3. In this program, the
returnFactorial()function will throw an exception if the factorial cannot be accurately determined. The catch block in themain()function handles this exception.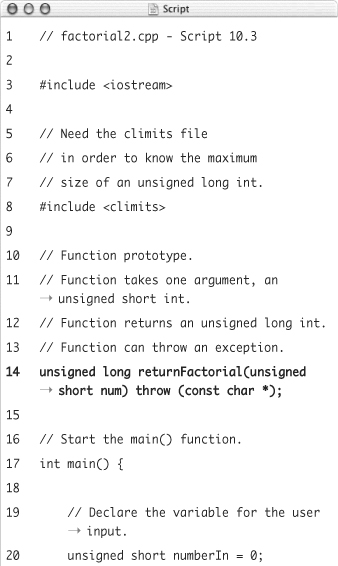
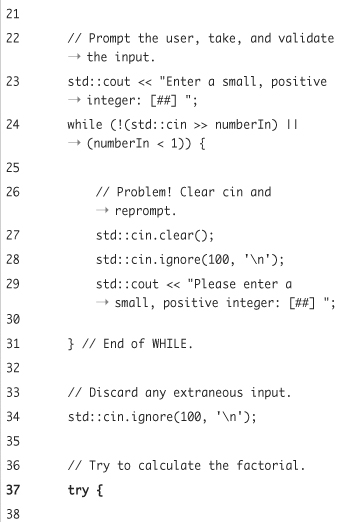
- Take the user-submitted number.
std::cout << "Enter a small, positive integer: [##] ";
while (!(std::cin >> numberIn) || (numberIn < 1)) {
std::cin.clear();
std::cin.ignore(100, ' '),
std::cout << "Please enter a small, positive integer: [##] ";
}
std::cin.ignore(100, ' '),This still works exactly as it did before.
- Attempt to calculate the factorial and print the results.
try {
unsigned long factorial = returnFactorial(numberIn);
std::cout << "The factorial of " << numberIn
<< " is " << factorial << ". ";
}By putting all of this code within a
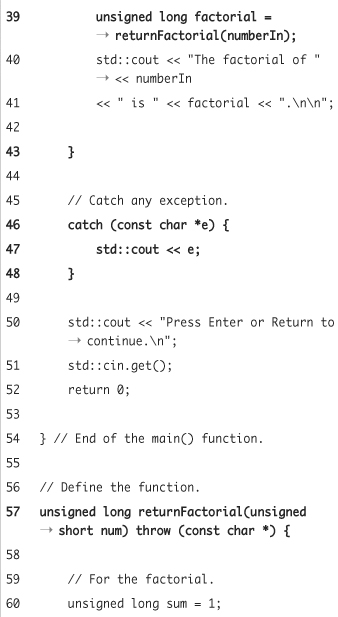
tryblock, we’re telling the program to do these steps, but keep an eye out if any exceptions are thrown. The exception itself would be thrown by thereturnFactorial()function. If that does happen, thestd::coutline here would not be run. - Catch and handle any exceptions.
catch (const char *e) {
std::cout << e;
}Any exception (of type
const char *) that is thrown by the code in thetryblock would be caught here. For this program, the exception is a string that will just be sent tocout. - Complete the
main()function.std::cout << "Press Enter or Return to continue. ";
std::cin.get();
return 0;
} - Begin defining the
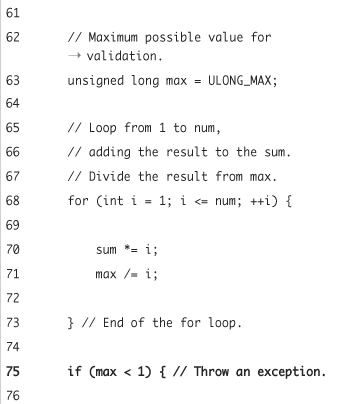
returnFactorial()function.unsigned long returnFactorial (unsigned short num) throw (const char *) {
unsigned long sum = 1;
unsigned long max = ULONG_MAX;The function’s definition starts out like its prototype. Since this function will do the work of both
Factorial::inRange()andFactorial::getFactorial()(see Script 10.1), themaxvariable is needed here. - Create the
forloop that does the division.for (int i = 1; i <= num; ++i) {
sum *= i;
max /= i;
}Inside the
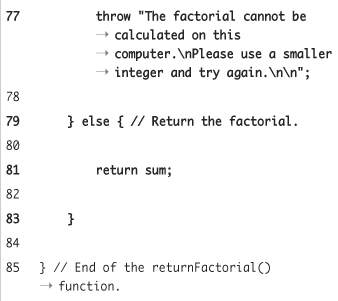
forloop two things happen. First, the factorial is calculated usingsum, as it has been previously. Second,maxis divided byi, as part of the process of confirming that the final factorial will be within the accepted range. - Complete the function.
if (max < 1) {
throw "The factorial cannot be calculated on this computer. Please use a smaller integer and try again. ";
} else {
return sum;
}
}The overall conditional serves the same purpose as the one in
factorial.cpp(Script 10.1). Ifmaxhas a value less than 1, we know that the factorial cannot be determined. In such a case, an exception is thrown, the exception itself being a string of text. Ifmaxdoes not have a value of less than1, we know thatsumis valid and should be returned. - Save the file as
factorial2.cpp, compile, and run the application (Figures 10.13 and 10.14).Figure 10.13. When it works, the program behaves exactly as it had before.
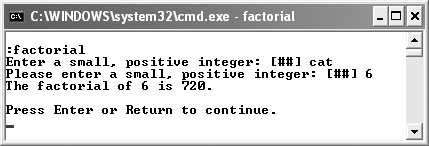
Figure 10.14. If the factorial cannot be determined, an exception is thrown.
Tips
• There’s some debate as to how much you should use exceptions. Some programmers use exceptions for nearly all error handling. On the other hand, Bjarne Stroustrup, who created C++, feels that they are being overused. The principle behind exceptions is that they handle exceptional occurrences—things really out of the norm.
• As a general rule, constructors and destructors should never use exceptions. It is possible for a very knowledgeable programmer to successfully use exceptions in these methods, but improperly doing so can lead to miserable bugs.
• If a try block cannot find a matching and appropriate catch, the exception will be handled by aborting the program. This is the same as if you did not use exceptions at all.
• The standard C++ library includes a file called exception that declares a base class of the same name. You can use this base class to create inherited classes of your own for managing exceptions. Experienced C++ programmers normally do this, and then throw and catch exception objects.
• If you do use objects as exceptions, a good rule of thumb is to throw the object by value but catch the object by reference. For example:
try {
// Code.
// exceptionObject is thrown
}
catch (exceptionClass &e) {
// Use e!
}