
CHAPTER 7
Security in Grails
Now that you have a good foundation in Grails, it's time to move on in our programming adventure. We have already gone over how to create a basic application and completed the domain model. So what's next? We now need to address security.
Security concerns can range from actually securing a server to securing the application itself. Since this is a book about the Grails application framework, we are going to discuss only the latter. So when you read about "securing the application" or "security," we will be referring to application-level security.
So far, we have not addressed security at all. In Chapter 5, we used an extremely unsafe generic login, which allows you to choose the user you want to log in as. This was certainly easy to implement, but now we can move on to a more mature approach to web security.
So, what are the goals of security? One goal of security is to allow the ability to sign on as a specific user. We will want to know how to secure certain pages for those who have logged in. In addition, many web sites require different levels of access for different users. Designing your security model can get fairly convoluted, depending on your application's needs, and we have seen it reach the point where the application's design is wrapped around the security. The security needs of this book's sample application, Collab-Todo, are middle ground—requiring access control but nothing so complex that we need to build an entire system from scratch.
The security apparatus we are going to use is not just to meet the needs of the application we have created so far, but also the needs of the application going forward. Let's quickly examine what those needs are:
- Domain/model-level security for a user: We need to make sure that when users retrieve their to-dos, they are retrieving theirs and no one else's. We don't want people to view other's to-dos. If they could, it would quickly make our application unpopular.
- Administrator vs. regular user access: In Chapter 10, we are going to create a few reports that are for only administrators. This means we need to be able to secure certain pages of the site for administrators.
- Basic access authentication: For the web services we'll add in Chapter 9, we need to secure the site so it can be accessed through basic URL authentication.
If we dove straight into a solution for just our sample application's security needs, not only would that be a bit dull, but it also wouldn't help you out if your application happens to have different requirements.
In some Java frameworks, like JBoss Seam, there is a built-in security framework. That is not the case for Grails. However, quite a few security plug-ins are available for Grails. In this chapter, we will go over three of the plug-ins, along with our very own custom security implementation for the application. But before we start looking at the different security solutions, let's take a step back and review what we actually mean by security.
What Is Security?
Before we dive into our security examples with Grails, we should reach a common understanding of what security means for a web application and the issues involved with adding security to a web application. Depending on your experience in web development, this may or may not be familiar.
Although there are many aspects to security, two techniques are very common: authentication and access control. These two basic areas will serve as the core aspects for each of the security plug-ins and the custom solution covered in this chapter.
Authentication
Even part-time web surfers are familiar with authentication, which is the process of logging in to and logging out of a site. A client (typically the user on a web browser) sends over a username and a password. The client is then either authenticated and forwarded to a welcome screen or rejected and kept on the login page. Figure 7-1 illustrates basic authentication.

Figure 7-1. Basic authentication
The login username and password sent to the server typically correspond with entries in a database. Since this information is in a database, it is not really that secure, so most web sites will not store the password in clear text. Generally, the password will be hashed, and the hash of it will be saved. The value of using a hash is that it is only a one-way manipulation of the data, as opposed to encryption, where data can be scrambled and then unscrambled given the right key. When a password is hashed, if someone gains access to the database and retrieves the password in an illegal way (like hacking the box), he will need to spend some trying to determine what the original string was.
When creating authentication for a corporate web site, you don't want to overburden the user with the need to remember a lot of login credentials, nor do you want to overburden yourself with the task of managing them. If you are creating an internal site for a big business, or even an external site where multiple business entities can interact, you probably do not want a person to need to create a new username and password for each site. For one thing, it's annoying. For another, if you need to remove that person's login credentials (for example, because she has left her job and should no longer be able to log in to an internal site), it would be difficult to contact every single business unit that the user may have an account with and get them to delete the user. That is why many companies use a centralized authentication server, something like a Lightweight Directory Access Protocol (LDAP) server.
As we go through each of the solutions in this chapter, you will notice that there are slightly different ways to authenticate a user.
Access Control
So now that we have discussed the ability to log in, what's next? We also need some sort of permissions mechanism. The following are common forms of access control:
__________
Session validation: This is probably the simplest form of authentication. It just involves checking if there is a valid session. Generally, this is used in conjunction with user authentication. For the Collab-Todo site, we will take this approach to make sure that users have been authenticated and their session is active.
User: One way to secure pages and data is on the user level itself. Many web sites that require authentication use data at the user level to retrieve items that are specific to a particular user. With this level, you store user data to the session, and then whenever you need to do a query against a back-end system, you retrieve only the data for that user. This is how our application will work.
Roles: You can assign users to roles to provide coarse-grained permissions to pages or even just areas of a page. An internal site may have roles like manager, developer, trainee, and so on. For example, a site that handles work orders could allow a worker to work on a variety of tickets, but the page that assigns or approves the tickets is accessible only to the manager. In addition, the ticket itself may have a Delete button available only to the manager. A more common approach, and the one we will take for our application, is to have two roles: an admin and a regular user. The admin role can access more functionality than is available to the regular user role. The nice thing about roles is that you can assign multiple people to a single role, and even provide multiple roles to a single user. Unfortunately, roles do not, in general, provide for fine-grained control.
Permissions: For fine-grained control, we turn to permissions. With permissions, you can give only certain users access to certain portions of a site. Returning to the example of work order tickets, what if you wanted to allow some users to create and delete tickets; others to just view them; and others to create, edit, and delete them? This could be accomplished with roles, but you would need a lot of them, so it would get messy fast. Both assigning and managing all those roles would be a burden. Using permissions is easier.
Rules: Some sites use a rule-based access control. Systems like JBoss Seam use a rules engine (like JBoss Drools) to determine authentication privileges while also using permissions and roles. This provides for an extremely flexible authentication mechanism. However, it also requires more configuration and general knowledge of how to use the rules engine.
These are basic security concepts. As you may have noticed, each successive one provides more flexibility, but with the added flexibility comes more overhead. So the trick for you as the developer will be to pick the items you need that give you a balance between flexibility and ease of implementation. Keep this in mind as we discuss each security solution in this chapter.
An Overview of Grails Security Solutions
Two of our favorite shows on TV right now are Project Runway and Hell's Kitchen. These shows have experts in their fields (either designers or chefs) who are given the task of creating something unique and awesome, and then their efforts are judged. It's decided which is best, or at least which one each judge likes the best. Security, and especially security in Grails, is something like that. You have many experts in the field creating different security frameworks, each with pluses and minuses, and you must judge which one is better.
Grails is truly a unique Java framework. While some frameworks suffer from the underlying code being unstable, Grails really does not have this problem since it uses two well-established frameworks at its core (JBoss Hibernate and Spring). However, it suffers from being new, which brings about a lack of 100% mature plug-ins for it. Although the developers of these plug-ins are working hard to keep up-to-date with changes in Grails, all of the plug-ins are relatively new, as indicated by their .1 or .2 statuses. Therefore, when you deal with these plug-ins, you may encounter some not-so-polished features.
Much like our favorite TV shows, when it comes to security plug-ins, there is rarely a clear winner, and odds are there never will be. Each plug-in serves a particular niche market. Which one you choose will greatly depend on your specific requirements.
The Grails security plug-ins we will examine in this chapter are JSecurity, CAS, and Acegi. Additionally, we will demonstrate how to implement your own custom security, which can work well for either simple sites or very complex sites where control is strict.
We will start with the custom security implementation, and then move on to the different plug-ins (note that the order we are discussing the solutions in is purely arbitrary and does not represent any superiority of each). In the end, we will use the Acegi plug-in as our solution, because it meets the needs outlined at the beginning of this chapter.
Note When examining the plug-ins in this chapter, keep in mind that none of these is in itself a specific security solution for Grails. What has been developed thus far are wrappers for existing security mechanisms.
Because our approach in this chapter is to show you multiple paths but only go with one, we decided to do something a bit different with the code examples in this chapter. Normally, each chapter's code builds on the previous chapter's code—that is the nature of building an application. In the previous chapter, we added quite a bit to our domain model. Most of this is unnecessary from a pure security point of view. We feel it's not necessary to add that complexity here. So for all the examples (except the Acegi one), we will be using the code from Chapter 5. For the Acegi plug-in example, we will use the code from Chapter 6.
One of the first items you will notice when we talk about the plug-ins is that many have their own User classes. This can pose a problem, because you are going to want to tie your User object on your domain to the plug-in's user class. You will want to tackle this problem during authentication, and there are essentially two ways to solve this problem:
- If the domain model is created after plug-in creation, the set of user domain objects the plug-in creates can either be moved into the
grails-app/domaindirectory or referenced directly in your application. The only reason to move them is if you want to make changes to the domain. - You can have the plug-in's domain object and your domain object linked by user name after authentication. Since this is a unique field, after authentication has been verified, you can look up your user in the database and save your user to the session. This provides a nice balance of keeping your application uncoupled while at the same time totally relying on the plug-in for security. This is the approach we'll take in this chapter.
Custom Security Implementation
We are starting with the most basic approach to securing a web site, which is our custom security implementation. But using a simple security apparatus does not means your web site is simple. The two are not really related. It is just about picking the right security for your application.
Note The term custom implementation may be a bit confusing. This approach is not truly "custom." Many applications use this same approach. In fact, it's a very common implementation. We call it custom because it doesn't use a security plug-in (other than the CAPTCHA one).
One of the main needs of any user-based application is to authenticatethe users. With our application, the majority of the pages are driven by which user is accessing the page. The to-dos that appear are only for the logged-in user, users add buddy lists for themselves, and so on. We also need to make sure the user is authenticated before accessing any page except the login page. This is a fairly simple authentication pattern, and we will be using a User object in the session to check the access to the pages. (We will use the User object in the session in the other plug-ins, but the difference is we are not using it for page-level authentication purposes.)
In this section, we are going to adjust the user-creation procedure. Note that for our custom security implementation, we do not need any new domain classes. We will use the domain classes we created in Chapter 5. Our main focus will be on manipulating the User class. Now we will be adding a password confirmation and a CAPTCHA challenge.
CAPTCHA
While you may not be familiar with the term CAPTCHA, you probably have encountered such a challenge. For example, you may have gone to a web site and seen an image like this:

This image is part of a CAPTCHA (for Completely Automated Public Turing Test to Tell Computers and Humans Apart). You're asked to type in the text you see in the image. The purpose is to help prevent automated computer programs from gaining access to your site, and for the most part, CAPTCHAs work. They are not unbreakable, but depending on the complexity of the CAPTCHA, decoding the image requires a fairly complex neural network. CAPTCHAs are used on a variety of sites. For example, ticketmaster.com has a fairly complex set (and we admit to missing a few on that site).
Even simple sites are subject to spammers. When we launched our company's web site at http://www.integrallis.com, within a few days, we were getting hit by spam via our Contact Us link. Now that we have added the CAPTCHA, the only e-mail we get is from real people.
In order to create the custom security solution, we will cover three aspects of its design and implementation:
- Registering a user
- Logging users in and out
- Securing the controllers
Registering a User
In order to register a user, we will need to add two items: a registration page (register.gsp) and an action to register the user in the UserController. As noted, we will use a CAPTCHA challenge on the registration page, so we need to install the plug-in for that.
Installing the Captcha Plug-in
The CAPTCHA is being added only to the registration page because it is the only page on the site that could be easily affected by spammers. The other parts of the application require authentication before users even get to the page.
For the registration page with the CAPTCHA, we will be using the Simple Captcha plug-in2 for the creation of the CAPTCHA. Let's install the plug-in:
> grails install-plugin /home/user/captcha.zipNote You will need to download this plug-in directly, as there is no registered shortcut for it at the time of writing.
Now that we have the Grails Captcha plug-in installed, and we have the domain objects from Chapter 5 installed, it's time to go ahead and get this working. Let's start with the registration page section.
__________
Implementing the Registration Page
Our registration page is going to look like the page to add a user, except we will have a field to confirm the password and the CAPTCHA image. So, we will start by copying the file views/user/add.gsp to register.gsp. This allows us to preserve the add.gsp page.
Listing 7-1 shows the code for register.gsp, with the new sections for the password confirmation and the CAPTCHA link in bold.
Listing 7-1. The Form Section of regiester.gsp
<g:form action="handleRegistration" method="post" >

  <div class="dialog">

    <table>

      <tbody>

        <tr class='prop'>

          <td valign='top' class='nameClear'>

            <label for="login">Login:</label>

          </td>

          <td valign='top'

              class='valueClear ${hasErrors(bean:user,field:'userName','errors')}'>

            <input type="text" name="userName" />

          </td>

        </tr>

        <tr class='prop'>

          <td valign='top' class='nameClear'>

            <label for="password">Password:</label>

          </td>

          <td valign='top'

              class='valueClear ${hasErrors(bean:user,field:'password','errors')}'>

            <input type="password" name="password" />

          </td>

        </tr>

        <tr class='prop'>

          <td valign='top' class='nameClear'>

            <label for="confirm">Confirm Password:</label>

          </td>

          <td valign='top'

              class='valueClear

                     ${hasErrors(bean:user,field:'password','errors')}'>

            <input type="password" name="confirm" />

          </td>

        </tr>


        <tr class='prop'>

          <td valign='top' class='nameClear'>

            <label for="firstName">First Name:</label>

          </td>

          <td valign='top'

              class='valueClear

                     ${hasErrors(bean:user,field:'firstName','errors')}'>

            <input type="text" name="firstName" />

          </td>

       </tr>

       <tr class='prop'>

         <td valign='top' class='nameClear'>

           <label for="lastName">Last Name:</label>

         </td>

         <td valign='top'

             class='valueClear ${hasErrors(bean:user,field:'lastName','errors')}'>

           <input type="text" name="lastName" />

         </td>

       </tr>

       <tr class='prop'>

         <td valign='top' class='nameClear'>

           <label for="email">Email:</label>

         </td>

         <td valign='top'

             class='valueClear ${hasErrors(bean:user,field:'email','errors')}'>

           <input type="text" name="email" />

         </td>

       </tr>

       <tr class='prop'>

         <td valign='top' class='nameClear'>

           <label for="code">Enter Code:</label>

         </td>

         <td valign='top' class='valueClear'>

           <input type="text" name="captcha"><br/>

           <img src="${createLink(controller:'captcha', action:'index')}" />

         </td>

       </tr>

     </tbody>

   </table>

 </div>


  <div class="buttons">

    <span class="button">

      <input class="save" type="submit" value="Register"></input>

    </span>

  </div>

</g:form>
The line with the captcha reference is the plug-in's CAPTCHA controller. The controller will create a word, save the word in clear text to a session variable, and then output the image in a distorted manner. Figure 7-2 shows the registration page.

Figure 7-2. The register.gsp page with the password confirmation and CAPTCHA image
Adding the Registration Action to the Controller
Putting the CAPTCHA on the GSP is only half the battle in creating our CAPTCHA challenge. The other half is handling it on the server side. Unfortunately, there is nothing that automatically intercepts the CAPTCHA when used to verify the image. We need to code this by hand.
In our UserController registration action, we will add a check to make sure the CAPTCHA the user entered matches the CAPTCHA given. You can see our registration action in Listing 7-2. This will check that the CAPTCHA matches, and then if it passes validation, allow for the user to register.
Listing 7-2. The Action That Will Register a User in the UserController
def handleRegistration = {

    def user = new User()

    log.info("HANDLE REGISTRATION")

    // Process the captcha request

    def captchaText = session.captcha

    session.captcha = null

    if (params.captcha.toUpperCase() == captchaText) {

        if(params.password != params.confirm) {

            flash.message = "The two passwords you entered don't match!"

            redirect(action:register)

        }

        else {

            log.info "before save"

            // Let's hash the password

            user.properties = params

            println(user.dump())

            if(user.save()) {

                log.info "saved redirecting to user controller"

                // Let's log them in

                session.user = user

                redirect(controller:'todo')

            }

            else {

                log.info "didn't save"

                flash.user = user

                redirect(action:register)

            }

        }

    }

    else {

        log.info "Captcha Not Filled In"

        flash.message = "Access code did not match."

        redirect(controller:'user')

    }

}
You may notice that the CAPTCHA created is in the session scope. Unfortunately, at the time of writing, this was necessary to allow the image to spawn multiple requests (with some of the new service-level scopes written after the plug-in's creation, this requirement may change in the future). We have overcome this issue slightly by saving the data from the session to a local variable, then removing the CAPTCHA information from that session.
In addition, you will notice that, as a convenience factor, we have set the session.user to the user that was just created. We did this because once users are logged in, we will want other pages to know that. This information can be used to display the username or simply to get the ID for querying.
Also notice that we've hashed the password. As mentioned earlier in the chapter, hashing is a critical step, because we do not want to keep a password in the database in clear text form.
Note Remember that many people use the same password for multiple sites. If you stored a clear text password and your site was compromised, you could potentially expose users' passwords to all sorts of sites and therefore valuable data. The one downside (and it's arguable if it's a downside) is that if you have a password-reminder routine, it cannot remind people of their password; instead, it will simply need to reset the password to a random string.
Logging In and Out
Now that the user is registered, the next step is to log the user in and out. This could be difficult depending on your back-end system. Logging in could involve going through an LDAP server or whatever other systems you are using. However, for our example, logging in is relatively simple, as we are just authenticating against a local database.
We will preserve the general feel of the login page we had before, except now instead of choosing from a drop-down list, the user must actually enter a proper username and password. The modified login page is shown in Figure 7-3.

Figure 7-3. The login page with username and password validation
As you see in Listing 7-3, we check the user and the password in the database for a match, hashing the password passed in by the front end with an MD5 hash. If a user is not found, we will send a message to the page and redirect back to the login page. If a match is found, we will set the user in the session and redirect to the to-do page.
Listing 7-3. The handleLogin Action of the LoginController
def handleLogin = {

        def hashPassd = DU.md5Hex(params.password)

        // Find the username

        def user = User.findByUserNameAndPassword(params.userName, hashPassd)


        if (!user) {

           flash.message = "User not found for userName: ${params.userName}"

            redirect(action:'index')

           return

       } else {

             session.user = user

             redirect(controller:'todo')

      }

}
Note You will notice that we send one generic message back. Some sites will search for the user first, and then do a check against the password. This is done so that a more specific message is sent back to the user. While this can be helpful for the user, it is also another point of exposure—it can tell a would-be hacker which part of his attempt was successful.
Logging out is a fairly universal process in web design, and the way we do it here will more than likely look the same as you've seen in other web applications. The only differences can lie in preprocessing before logging out, such as sending notifications, writing to an events table, and so on. However, we do not need any of that for our system. We will just invalidate the session and redirect to the index page. The code for the logout action is shown in Listing 7-4.
Listing 7-4. The Logout Action of the LogoutController
def logout = {

        log.info 'logout'

        if(session.user) {


           session.user = null

           session.invalidate()

           redirect(controller:'login')

        }

}
Securing the Controllers
So far, we have covered the ability to log in and out of the site and to register a user. These are the first two steps in securing the site. Now what's left? We need to secure the actual controller pages so that a nonauthenticated user cannot access the TodoController and other controllers. The registration and logging in and out were relatively simple to code. Controller security is a slightly more difficult piece of our authentication model.
We will control access to the pages using tried-and-true servlet technology: filters. Filters are great for simple, all-encompassing procedural capture. And since all but three pages (the index, login, and registration pages are the exceptions) require a session, filters are the cheapest and most effective way to implement access control.
Filters are relatively easy to create in Grails. Unlike servlet filters, they do not require any web.xml configuration. Here, we will walk through the steps to create the filter.
Note We will be using filters in the other security solutions covered in this chapter. The configuration here applies to those other solutions as well.
Let's start with the filter's name and location. Filters must be placed in the grails-app/conf directory, and the name of the Groovy class must end with the word Filters. Since our filters are for security, we will name the file SecurityFilters:
class SecurityFilters {

}
The next part is defining the filters. We will be defining an action called filters. This is the method that the Grails framework will use to look for any and all filters we have created:
class SecurityFilters {

    def filters = {

    }

}
With the framework set up to have the filters, now we define the filters. We can have one or more filters defined inside the same class. If you have programmed regular servlet filters before, you will realize that this is a huge advantage; with regular servlet filters, you must define a different class for each filter.
You can create two types of filters:
- The more traditional type, where you define the URI to be intercepted, like this:
uriCheck(uri: /user/*). The method defining this check will be intercepted anytime anyone calls anything with the/userURI. - Capture based on the controller and action. This way, you can capture all controllers and actions or just selective ones. This is the approach we will take here.
For our application, we can either capture all controllers or be selective and individually capture certain controllers. We opted for the capture-all approach and will ignore the login and registration page in the code. Otherwise, if we added more controllers later, we would need to keep adding the login check code to each filter, which could get messy fast, depending on how much functionality we add to the site. Listing 7-5 shows the final definition of the filter.
Listing 7-5. The Filter for Securing the Application
    def filters = {

        collabTodoFilter(controller:'*', action:'*') {

            before = {

                if(!session.user

                    && !controllerName.equals('login')

                    && !controllerName.equals('captcha')

                    && ( !controllerName.equals('user')

                    && !actionName.equals("register"))

                    ) {

                    // There is no log access in the filter

                    //log.info('Redirect to login page')

                    redirect(controller:'login')

                    return false

                }

            }

         }

     }
Here, we are checking the session as well as the controller and action names. The controllerName will tell us the controller that was just accessed. The actionName tells us the action that was accessed. Grails injects several properties and makes them accessible in the filters, including the following:
Our custom security solution is a fairly lightweight security wrapper. For many applications, all you need to worry about is whether or not users are logged in, and this solution handles that. However, some applications have more complex requirements. For example, a banking application might have an administration portion of the site. The admin could log in to the same application as the regular user, so that he could mimic being a particular user if necessary (such as to assist a customer if she were having a problem with the online application). At the same time, you wouldn't want the admin to be able to do some things, such as actually submitting a payment. Creating such a solution requires more than just a simple authenticated validation. It requires assigning roles and permissions, and then giving each task access based on the roles and permissions. The plug-ins covered in the remainder of this chapter provide mechanisms for this type of security.
JSecurity
Of the roles-and-permissions–based plug-ins we cover in this chapter, JSecurity4 is the simplest. In fact, this plug-in looks much like a role/permission system that you would create for yourself. So why use it? The answer is because it offers simplicity and time-savings. This plug-in allows you to use a system with code that has already been tested and created, and which is not overly intrusive to your system. Additionally, it is fairly simple to use.
Like other plug-ins, JSecurity is not just a Grails-specific framework. It is a regular Java framework with an architecture that supports multiple clients accessing a common authentication.5 The framework even allows authentication to be specified from different providers, although we are going to go with a simple database as the provider.
In this section, we will go over the installation and basic usage of the JSecurity plug-in.
__________
JSecurity Installation
The installation process is as straightforward as the usual plug-in installations. Simply execute the following:
> grails install-plugin jsecurity
Alternatively, you can download the plug-in from http://grails.codehaus.org/JSecurity+Plugin and install it by hand.
After installing the plug-in, you need to create the realm and domain objects, as follows:
> grails create-db-realm
JSecurity Domain Classes
With the plug-in is installed, we are ready to go. However, before we delve into the details of how to use the plug-in, let's take a look at what it brings us. With the plug-in, we get a few extra domains, controllers, and GSP pages. Table 7-1 lists the domain objects provided by JSecurity.
Table 7-1. JSecurity Domain Objects
| Name | Description |
JsecUser |
User object to be used for authentication |
JsecRole |
Role object to be used for all the roles |
JsecPermission |
Permission object |
JsecRolePermissionRel |
Object to tie the role and the permission together |
JsecUserRoleRel |
Object to tie the user and the role together |
JsecUserPermissionRel |
Object to tie the user and the permission together |
One of the interesting features about the plug-in is the location of these domain objects. The create-db-realm call places these domain objects into your grails-app. (Later, you will notice the Acegi plug-in will do the same thing.) Copying the domain objects to grails-app/domain gives you a much easier way to customize some of those classes. However, if you do that, and the plug-in authors update the plug-in later, it could pose problems if the update wants you to re-create those classes to add new functionality. Therefore, we advise leaving the classes where and how they are created.
Now let's take a closer look at the domain objects listed in Table 7-1.
The JsecUser object will be used as the focal point for logging in to an application. Table 7-2 lists the attributes of the JsecUser object.
Table 7-2. JsecUser Attributes
| Attribute | Description |
Username |
Unique name used to log in to the web site |
password |
Hashed password that is used for authentication |
Recall that our custom security implementation employed MD5 hashing. In the case of JSecurity, a shaHex algorithm is used instead.
JsecRole
The JsecRole object is made up of just one attribute, name, which will be the unique name of the role. Remember the role names you create, since you will reuse the names when you assign them to a user.
JsecPermission
The JsecPermission object contains the two attributes listed in Table 7-3.
Table 7-3. JSecPermission Attributes
| Attribute | Description |
type |
Unique name for the permission type |
possibleActions |
Comma-separated list of possible actions |
While a string is easier to use in a test case like this, a collection is handy if you want to create permissions in a dynamic way. The possible actions will be the actions you want to control. In our case, we will create a permission for the create, update, and delete actions, since these actually change data.
JsecRolePermissionRel
The JsecRolePermissionRel relationship is used to tie roles with permissions. Table 7-4 shows its attributes.
Table 7-4. JsecRolePermissionRel Attributes
| Attribute | Description |
role |
JsecRole associated with this permission relationship |
permission |
Jsec Permission on which this relationship is based |
target |
Controller associated with the relationship |
actions |
Actions that will be targeted by this permission relationship |
JsecUserRoleRel
As you will see, roles do not have fine-grained control. A user either has a role or does not have a role; there is no halfway point. As a result, JsecUserRoleRel is a simple relationship between the user and the role. Table 7-5 lists its attributes.
Table 7-5. JsecUserRoleRel Attributes
| Attribute | Description |
user |
JsecUser associated with this relationship |
role |
JsecRole associated with the role part of the relationship |
JsecUserPermissionRel
Now that we have established a user and permission, we need to have a domain to correlate the user with a permission. Table 7-6 shows the attributes of this domain.
Table 7-6. JsecUserRolePermissionRel Attributes
| Attribute | Description |
user |
JsecUser associated with this permission relationship |
permission |
JsecPermission on which this relationship is based |
target |
Controller associated with the relationship |
actions |
Actions that will be targeted by this permission relationship |
As you can see from the properties on the domain, when using a permission, you can narrow the user's access with the permission based on the controller and specific actions. This allows for fine-grained control associated with permissions.
JSecurity Domain Data
Now that we have the domains established, it is time to load some extra data so that we can test the application. We will use the Bootstrap.groovy file to preload some temporary data. The domain objects added by this role-and-permission–based application should give you an idea of the kind of temporary data we are going to create.
We will create three different sets of data:
- Roles: We will create two basic roles to assign to the users.
- Permissions: We will create one basic permission.
- Users: We will create two users: an admin and a basic user.
Finally, we will assign the users to the roles and permissions.
The code described in the following sections should be placed in the init() method of the Bootstrap.groovy file.
Role Definition
The following code defines two roles: one for admin privileges and another for general privileges.
def adminRole = new JsecRole(name: 'Administrator').save()

def generalRole = new JsecRole(name: 'General').save()
Note the names. We will reuse the names when we assign them to a user.
Permission Definition
We next create a basic permission, named BasicPermission. Possible actions will be the actions you want to control: create, update, and delete.
def perm = new JsecPermission(type: 'BasicPermission',
                              possibleActions: 'create,delete,update')
User Definition
We define User and admin users. These usernames correspond with the usernames that we are creating on the User class in the Bootstrap.groovy file as well.
def user =

  new JsecUser(username: 'user', passwordHash: DigestUtils.shaHex('password'))

def admin =

  new JsecUser(username: 'admin', passwordHash: DigestUtils.shaHex('password'))
The password is a shaHex hash, and we process it through the DigestUtils utility. (We are encoding it as shaHex because JSecurity's built-in login controllers will use shaHex when we pass a password through to them.)
Role and Permission Assignment
Now that we have all the pieces of our puzzle, it is time to put them in place. We have created our roles, permissions, and users. Now we need to correlate them for the various relationships.
Let's start with the roles and the users. We created two roles and two users. We assign one role to each user. As you may have guessed, the admin role is going with the admin user andthe general role is going with the general user. We save to the JsecUserRoleRel class. This class takes two attributes: a user object and a role object.
new JsecUserRoleRel(user: admin, role: adminRole).save()

new JsecUserRoleRel(user: user, role: generalRole).save()
Assigning the permissions is not as straightforward as assigning the roles, due to the generally complex nature of permissions. With each of the permissions, you have four items to worry about:
- User
- Permission previously created
- Target controller
- Target actions
The user is easy—it is the previously defined user we created earlier. The permission refers to that all-encompassing basic JsecPermission we created earlier. The next two will be items that we are creating on the fly now. These give the permission the specificity it needs. The target controller is the name of the controller you are referring to—in our case, the Todo class. The target actions are the actions this particular permission relationship relates to. This could be all of the actions or a subset. For this example, we will create only permissions to do updates and creations, not deletions.
new JsecUserPermissionRel(user: user, permission: perm, target: 'todo',

                          actions: 'create,update').save()
Now that we have all the pieces in place, let's see how we can use them together.
JSecurity Usage
With the plug-in installed and the database populated, you could, in theory, run the application, go to the to-do page, and so on. Of course, it would not really work, since we have not told JSecurity when to log in or what to control yet. Remember this is not securing the whole web site haphazardly. We need to take care of tying everything together.
Saving the User in Session
The first problem we have is that the only thing the plug-in is saving is its own user information. This will not help us, since all of our controllers require us to have a user in the session. We could solve this problem in a few different ways:
- Go into the JSecurity's
AuthControllerclass itself and add a user lookup and save to the session. But this means updating a JSecurity plug-in class directly, and that could cause problems if you ever want to upgrade to a new version of the plug-in. - Have a base class that will look up the user each time from the username that is stored by JSecurity. This approach is effective but would become repetitive.
- Take the filter route again. You know which controller method is doing the authentication, so it's a simple matter of intercepting it and saving the user to the session on a successful authentication. This is the technique we'll use.
Listing 7-6 shows the code for a security filter that will check after authentication if the user was authenticated. If so, our User object is then set in the session.
Listing 7-6. The Security Filter Set to Intercept and Check Authentication
class SecurityFilters {


    def filters = {

        signInFilter(controller:'auth', action:'signIn') {

            after = {

                def securityContext = new ThreadLocalSecurityContext()

                if (securityContext.authenticated) {

                    def user = User.findByUserName(params.username)

                    session.user = user;

                }

           }

        }


        signOutFilter(controller:'auth', action:'signOut') {

            after = {

                // Put redirect here

                redirect('/auth')

            }

        }

   }

}
Notice we reference ThreadLocalSecurityContext, which is a JSecurity-specific file that keeps track of the user, roles, and so on. We are using it here to check to make sure the user has been authenticated. Also notice that we have added a signOutFilter, which will beused to redirect the user to our own custom page on logout.
So now that this page is created, you can go ahead and log in and have the session created properly. You will notice this is a page from the JSecurity plug-in but using our template, as shown in Figure 7-4. This is how most of these plug-ins work.
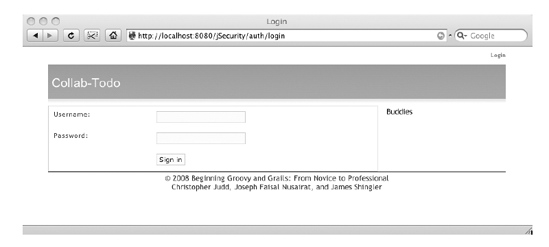
Figure 7-4. The login page for JSecurity-authenticated application
Locking Down the Controller
We now have the authentication mechanism set up. When you log in, it will not only authenticate via JSecurity, but it will also put the User object into the session; however, in reality we have not done anything yet to secure our pages.
The task at hand is to secure our controllers. We should, in theory, secure them all, but here we will focus on only the TodoController and look at a variety of ways to secure the page. All of these techniques have a central theme. First, you need to extend the JSecAuthBase class. Second, you need to overwrite the restrictions settings. In Listing 7-7, we have the base outline of what the TodoController will look like with these two modifications.
Listing 7-7. TodoController Updated with the JSecurity Authentication Skeleton
class TodoController extends JsecAuthBase {

    static accessControl = {

        // Insert authentication here

    }


    // . . .  the rest of the methods . . .

}
Now we will begin the process of putting data into the accessControl block. The next examples will focus on that part of the class. As we've discussed, you can use role-based restrictions or permissions-based restrictions for access control.
The idea behind role-based restrictions is that you restrict access to the controller based on a user's membership to the role. With JSecurity, you can do this in three ways:
- Restrict access to the entire controller to the role. For example, to secure the whole class for anyone with the role
General, add this line:
role(name: 'General') - Restrict access to one of the actions. Let's say you want to secure only the
deletemethod, but the rest of the class can be wide open. You would add anactionparameter to the role:
role(name: 'General', action: 'delete') - Restrict access to multiple actions. If you want to secure more than one method, you do not define multiple actions. Instead, you define an
only: string. This example secures thecreate,update, anddeleteactions:
role(name: 'General', only: [ 'create', 'update', 'delete' ])
As you can see, securing with roles is fairly simple. And you can add multiple role definitions to the accessControl block; you are not limited to defining just one role here.
The other type of security is permissions. Permissions really are about the same level of difficulty to create as roles. In fact, the permissions look much like the last two roles we created. Here is how you would create a permission on the view and just the view:
permission(perm: newBasicPermission('myTarget', [ 'view' ]), action: 'view')And here is how you specify multiple permissions:
permission(perm: new BasicPermission('myTarget', [ 'modify' ]),

                 only: [ 'edit', 'update' ])
When we wrote these examples, we assumed we were going to authenticate against an underlying database. That is one of the reasons we needed to add our own filter in the AuthController, as we did not want to tie our Todo objects to the underlying database.
As mentioned earlier in this chapter, quite often you will not want to rely on a single database for security. Sometimes, you will want to go against another system or an LDAP provider. This is where realms come into play. You may have noticed that when you ran the grails create-db-realm command earlier, a new directory called realms was created under grails-app. The purpose of this directory is to assist in calling out to other authentication methods.
Creating a new realm is relatively simple. First, you create a realm Groovy class. You can name it whatever you like, as long as it ends with the name Realm. We recommend naming realms after each provider you are going against; for example, if it's LDAP, call it LDAPRealm. Next, you define a few methods for it. Since we do not have interfaces for Groovy objects, it will be up to you to make sure the names are all lined up correctly with the parameters. In Listing 7-8, we have defined the skeleton structure you will need to create your realm.
Listing 7-8. The Base Outline Structure of Our LDAP Realm
class LDAPRealm {

    /**

     * This is the class of the token that will be used for our authentication.

     * If this property is not found, then realm is not used when determining

     * authentication.

     */

    static authTokenClass = org.jsecurity.authc.UsernamePasswordToken


    /**

     * If this method is present, then it will be used to authenticate against

     * the realm it takes part in. The token passed in has to be an instance

     * of authTokenClass.

     * If the authentication is successful, it will return a class that is an

     * instance of org.jsecurity.authc.AuthenticationInfo.

     * If the authentication fails, it will throw the exception

     * org.jsecurity.authc.AuthenticationException.

     */

    def authenticate(authToken)


    /**

     * Will determine if a particular user has a role or not. Returns

     * true if they do, false if they don't.


     * The first parameter passed in is a user of instance of

     * java.security.Principal. The second parameter is the name of the role.

     */

    def hasRole(principal, roleName)


/**

     * Will determine if a particular user has a permission or not. Returns

     * true if they do, false if they don't.

     * The first parameter passed in is a user of instance of

     * java.security.Principal. The second parameter is the name of the permission.

     */

    def isPermitted(principal, permission)

}
JSecurity is a very good basic security plug-in. It is not too heavy yet provides a wide range of functionality when it comes to roles and permissions. You might consider using JSecurity rather than the custom implementation described in the previous section if your security requirements are simple, because it can save time and you know the code has been tested.
CAS
Our third option is unique from our other choices in that it is the only one that cannot work as a stand-alone solution. The CAS Grails plug-in is a fairly simple wrapper for the Java CAS client6 for use with a CAS server.
CAS is the Central Authentication Server developed at Yale. It is designed to allow for a single authentication system. This is useful when you have numerous organizations or systems that want to authenticate against the same system. For example, an insurance company could be selling home insurance, auto insurance, investment accounts, and term life insurance. Each of these items could be run from different business units. Each of these business units will be developing its own web site, so their users have access to their individual accounts. One of the biggest challenges of companies that have this type of setup is to avoid having the sites look like they are totally separate. They will want to allow a single sign-on. It would be annoying for your users to have to keep registering and using different usernames and passwords for the various systems.
Anotherissue with corporate multiple-application development is that the applications may not all be written using the same language. You could have some applications in Java, others in .NET, and maybe even a couple Rails applications. CAS is provider-agnostic and can be consumed by a variety of languages. This means you could have a .NET application, Java application, Rails application, and so on all use the same authentication.
__________
Since our application is not part of a multiple-application environment, the level of sophistication provided by CAS is totally unnecessary. In this section, we will go over some basic implementations and usage of the plug-in itself. While you will be able to deploy and run the sample code, it will not actually authenticate against anything (we don't have a CAS server).
Note This section is provided to demonstrate the use of the plug-in, and should not be considered a CAS client/server tutorial. A basic understanding of the CAS client/server architecture may be needed in order to fully understand the plug-in. If you want to learn more, you can check out the main CAS web site.7
CAS Installation
The installation for the CAS plug-in is straightforward and does not create any additional artifacts in the grails-app directory; all that is created is in the plugins directory. The plug-in can either be downloaded at http://grails.org/CAS+Client+Plugin or installed with the following command:
> grails install-plugin cas-client
CAS Configuration
Since this application is using an outside authentication system, configuring it is rather simple. You just need to define the URLs of the CAS servers. These definitions will go in grails-app/conf/Config.groovy, as shown in Listing 7-9.
Listing 7-9. The Config.groovy File with the CAS Configurations
// cas client configuration, required by CasClientPlugin

cas {

    urlPattern = '/someurl/*'

//    urlPattern = ['/oneurl/*', '/another', '/anotheranother/*']

    disabled = false

}


// log4j configuration

log4j {

    // . . . removed for brevity . . .

}


environments {

    development {

        cas.loginUrl = 'https://localhost:8080/casSecurity/login'

        cas.validateUrl = 'https://localhost:8080/casSecurity/serviceValidate'

        cas.serverName = 'localhost:8080'

        cas.serviceUrl = 'http://dev.casclient.demo.com/access'

         log4j {

            logger {

                grails.'app.controller'="trace,stdout,logfile"

                grails.app="error,stdout"

             }

        }

    }

    // . . . production and test removed . . .

}
__________
Here, we added two sections to the Config.groovy file. The first one is a required item for the CAS plug-in, which defines a URL pattern. The second is in the environments section, and it is important when you want to access the CAS server itself. It defines all the URLs to be used for filtering. These attributes once again go into web.xml, but they are added automatically during compilation of the Grails application. Table 7-7 shows the additional configuration options as well as the corresponding web.xml init-param values.
Table 7-7. CAS URL Definition Entries
| Config.groovy Entry | Required | Web.xml Reference Value |
cas.urlPattern |
Yes | |
cas.loginUrl |
Yes | edu.yale.its.tp.cas.client.filter.loginUrl |
cas.validateUrl |
Yes | edu.yale.its.tp.cas.client.filter.validateUrl |
cas.serverName |
Yes | edu.yale.its.tp.cas.client.filter.serverName |
cas.serviceUrl |
Yes | edu.yale.its.tp.cas.client.filter.serviceUrl |
cas.proxyCallbackUrl |
Yes | edu.yale.its.tp.cas.client.filter.proxyCallbackUrl |
cas.authorizedProxy |
No | edu.yale.its.tp.cas.client.filter.authorizedProxy |
cas.renew |
No | edu.yale.its.tp.cas.client.filter.renew |
cas.wrapRequest |
No | edu.yale.its.tp.cas.client.filter.wrapRequest |
cas.disabled |
No |
Caution cas.serverName and cas.serviceUrl are mutually exclusive. You need to fill in one or the other, but not both.
In addition, Listing 7-9 defines one other field—the cas.disabled flag. It works as you may have guessed. If you set it to true, the plug-in is disabled; if it is set to false, the plug-in is enabled.
CAS Usage
The usage of the CAS security is actually entirely up to you. The main goal is to pull the name of the logged-in user for the controller. You can then secure the controllers either through filters or by extending the base controller classes. Listing 7-10 illustrates how to pull the user from the session.
Listing 7-10. Retrieving the Username from the Session
def username = session?.getAttribute(CASFilter.CAS_FILTER_USER)
You could then use this in a base class's interceptor to perform a validation, or you could use it in a custom filter to perform the check.
The CAS security plug-in is quite easy to use and allows for simple authentication against a middle system. As we pointed out, this can be very useful in a big corporate system where you care about authentication. But what if you also want permission- and role-based access? If this is a concern, our next plug-in should be of some interest to you. The Acegi plug-in will allow you to do CAS authentication and add even more security functionality.
Spring Security (aka Acegi Security)
Last but not least, we are going to discuss how to implement security in Grails with a tried-and-true favorite from the Spring Portfolio: Spring Security, also known as Acegi Security.8 The Spring Security framework is a subproject of the Spring Framework and was designed to give developers a single place to go for security when using Spring. Incidentally, this is also the security framework we will be using for our sample project throughout the rest of the book.
__________
One of the nicest things about the Spring Security framework is its flexibility. While it applies patterns to secure certain areas, it also provides a multitude of options especially for authentication. For example, out of the box, you are able to interface to the following authentication systems:
- LDAP
- CAS
- Java Authentication and Authorization Service (JAAS)
- CAPTCHA login security
The flexibility Spring Security has is one of the main reasons for its growing popularity when it comes to securing Spring applications. (Remember that Grails uses Spring as its Inversion of Control, or IoC, pattern, and, as such, Grails is in many ways a glorified Spring application.)
Acegi Installation
Installation of the Acegi plug-in is a relatively painless process. Either download the plug-in from http://grails.org/Acegi+on+Grails or issue the following command:
> grails install-plugin acegi
The plug-in will install without making any changes to the grails-app file system.
As with JSecurity, we use a few command-line options to create some Groovy classes to help set up the security apparatus. The first creates the domains:
> grails create-auth-domains
This command creates the Person, Authority, and Requestmap domain classes. These classes will be used for all our interactions with Grails.
You can change the domain names by appending the command with the alternative names, in the order of Person-Authority-Requestmap. For example, to change Person and Authority to User and Role, respectively, use the following command:
> grails create-auth-domains User Role.
Note that this is not the only way to change the objects referenced. We'll explain an alternative in the "Acegi Domain Customization" section later in this chapter.
None of the objects to manage the classes were created with the classes. For our examples, we do not need the additional controllers and views to manage them. If you want them, you can create them with this command:
> grails generate-manager
Since Spring Security is adding quite a bit of functionality, you can expect quite a few additions installed with the plug-in, including extra domain objects, controllers, and views. This can be considered a good thing or a bad thing. Some may consider it bad because you have your user and role objects predetermined for you. If you wanted to, you could work around the controllers and view pages.
The point of this plug-in is to help you automate and implement Spring Security as easily as possible. If you require customizations of the security-based objects, we suggest either writing a class to wrap the given security classes or adding Spring Security yourself. For our application, we want to use the Grails Acegi plug-in in all its glory.
As with the other plug-ins, let's start with the domain classes it adds.
Acegi Domain Classes
The domain for the Acegi plug-in adds items necessary for authentication. Three domain classes are added: Person, Authority, and Requestmap. These domains will be persisted to the database as their tables. In addition, the database will contain a few other tables to connect the items.
Person
The most important of the domain classes for you to deal with is the Person class. Table 7-8 shows the attributes of the Person object.
| Attribute | Description |
username |
Login username; should be a unique name |
password |
Hashed password to log in with |
userRealName |
Real name of a user; another way to help identify the user |
enabled |
Flag to determine whether this user should able to log in |
email |
E-mail address of the user |
email_show |
Flag to determine whether this user's e-mail address should be displayed |
description |
Description of the user; you can use this to store whatever you want |
authorities |
Used to store the roles/permissions that the person can access |
All the Person attributes are not nullable, so you will need to make sure to set values for everything, except the two Boolean values: enabled and email_show. However, these two are false by default. This means that if you do not explicitly set enabled to true, you are going to have a user that cannot log in, which we doubt is anyone's goal.
The Authority class is in charge of creating roles that can be used for privilege creation later on. Roles are not associated on a one-to-one basis with the Person object. The Person object can have multiple roles assigned to it. This allows you a lot of flexibility. The Authority class has only two attributes, as you can see in Table 7-9.
Table 7-9. Authority Attributes
| Attribute | Description |
description |
Description of the role you are creating |
authority |
Name for the role; should be unique (although this is not enforced from a constraint level) |
By standard convention, you should label all of your authorities starting with ROLE_, although it's really up to you what you call them. While it can be confusing that an Authority class has an attribute labeled authority, you can think of it as a name attribute.
Requestmap
The Requestmap class is used to define which pages to secure and which kind of permission to secure it with. Its attributes are listed in Table 7-10.
Table 7-10. Requestmap Attributes
| Attribute | Description |
url |
Relative URL of the resource to protect |
configAttribute |
Permission needed to access the resource |
The url will be a relative URL, so you do not need to define the application context. The URL form controls how security is applied:
- To secure an entire site, use
/**. - To secure an entire controller, use
/controller/**. For example,/todo/**secures any action called on theTodoController. - To secure a specific action on the controller, use
/controller/action/**. For example,/user/list/**secures any calls made to thelistaction of theUsercontroller.
As you can see, this can give you quite a bit of flexibility in defining how you want to secure your application.
The next part is where you use the roles you defined previously. configAttribute contains the attribute you are securing against. Now what may strike you at first is that this is a string field and not an actual Authority object. The reason for this is not due to an oversight of the developers, but because the roles you define are not the only items you can place in the configAttribute. There are predefined security attributes, which are more general-purpose items that allow the distinction between a new user, a returning user, and an anonymous user. Table 7-11 shows the predefined Requestmap attributes.
Table 7-11. Preconfigured Requestmap Attributes
| Attribute | Description |
IS_AUTHENTICATED_FULLY |
Do not remember me and anonymous |
IS_AUTHENTICATED_REMEMBERED |
Remember me or is fully authenticated |
IS_AUTHENTICATED_ANONYMOUSLY |
Remember me, anonymous, or fully authenticated |
Acegi Domain Data
Now that we have the domains defined, let's get to work. Again, we'll first create some temporary data in the Bootstrap.groovy file. We will add User, Authority, and Requestmap objects. A few of these steps will resemble our creation of data earlier with the JSecurity plug-in.
User Definition
Let's start out with the users. For this application, we will create two users: a regular user and an admin user. For the Acegi plug-in, passwords use md5Hex encryption. First, initialize a password that we will use for both:
def pass = DU.md5Hex("pass")
Now that we have an encrypted password, let's create our users.
def person = new Person(username: "user", userRealName: "Joseph Nusairat",

  email: "[email protected]", description: "Joseph's Account",

  passwd: pass, enabled: true).save()

def admin = new Person(username: "admin", userRealName: "Administrator",

  email: "[email protected]", description: "Our admin", passwd: pass,

  enabled: true).save()
Notice we set the enabled flag to true so we can use these users immediately.
Next, let's create a few authority classes. We create one for user and one for admin, named ROLE_USER and ROLE_ADMIN, respectively.
def userAuth =

  new Authority(authority:"ROLE_USER", description: "Authenticated User").save()

def su =

  new Authority(authority:"ROLE_ADMIN", description: "Administrator Role").save()
We now need to assign the roles to the users, since they are attached as lists. We add the ROLE_USER to our user and the ROLE_ADMIN to our admin.
userAuth.addToPeople(person)

su.addToPeople(admin)
Requestmap Definition
Our final item to create is Requestmap. Remember that these are the entries that control access to the site. We are not going to set up every permutation, but we will create a couple examples to play with.
new Requestmap(url:"/**",configAttribute:"IS_AUTHENTICATED_ANONYMOUSLY").save()

new Requestmap(url:"/todo/**",configAttribute:"IS_AUTHENTICATED_FULLY").save()

new Requestmap(url:"/user/list/**",configAttribute:"ROLE_ADMIN").save()
Acegi Domain Customization
As we mentioned earlier, you can change the names of the domain objects you are creating. This is great early on in the project, when you have not yet defined the domains. However, in our situation, we are not that lucky—we defined part of the domains back in Chapter 4. We could take the domains out, create them via the tool, and then add them back in our customizations—but that would be rather silly.
Luckily there is an easier way. When the Acegi plug-in creates the domain objects (even the custom-named ones), the way it knows which class to call and which field to call is via a mapped file. In grails-app/config, you'll find an AcegiConfig.groovy file, which handles the configurations. The default file is shown in Listing 7-11.
Listing 7-11. The AcegiConfig.groovy Configuration File
acegi {

  loadAcegi=true


  algorithm="MD5"

  //use Base64 text ( true or false )

  encodeHashAsBase64=false

  errorPage="null"


  /** login user domain class name and fields */

  loginUserDomainClass="Person"

  userName="username"

  password="passwd"

  enabled="enabled"

  relationalAuthorities = "authorities"

  /* you can specify method for to retrieve the roles.

   * (you need to set relationalAuthorities=null)

  */

  //getAuthoritiesMethod=null //"getMoreAuthorities"


  /**

   * Authority domain class authority field name

   * authorityFieldInList

   */

  authorityDomainClass="Authority"

  authorityField="authority"


  /** use RequestMap from DomainClass */

  useRequestMapDomainClass = true

  /** Requestmap domain class (if useRequestMapDomainClass = true) */

  requestMapClass="Requestmap"

  requestMapPathField="url"

  requestMapConfigAttributeField="configAttribute"


 /**

  * To use email notification for user registration, set the following userMail to

  * true and config your mail settings. Note you also need to implement the script

  * grails generate-registration.

  */

  useMail = false

  mailHost = "localhost"


  mailUsername = "user@localhost"

  mailPassword = "sungod"

  mailProtocol = "smtp"

  mailFrom = "user@localhost"


  /** AJAX request header */

  ajaxHeader="X-Requested-With"


  /** default user's role for user registration */

  defaultRole="ROLE_USER"


  /** use basicProcessingFilter */

  basicProcessingFilter=false

  /** use switchUserProcessingFilter */

  switchUserProcessingFilter=false

}
In this file, you candefine the following:
- Whether Acegi Security is enabled
- The type of encryption to use
- The names for the mapping of the authenticated classes and properties
- E-mail protocols for registration
- Whether the processing filters are activated
As you can see, this flexibility helps with integration of the software. For our example, we will not use the Person class; instead, we will add fields to our existing User class.
Acegi Security Usage
So now that we have all of our data loaded, let's start up the application server and head to the to-do page at http://localhost:8080/acegiSecurity/todo. You will see that you are redirected from the get-go, as shown in Figure 7-5. Behind the scenes, this differs greatly from how the JSecurity plug-in works. Recall that with JSecurity, we defined our access controller at the individual controller level. With the Acegi plug-in, we define it in the Requestmap, which will use a filter behind the scenes.

Figure 7-5. The login page for the Acegi plug-in
Once you log in, you will be redirected to the to-do page. So what can we do from here? The tag libraries will make things easier.
The normal Acegi security plug-in has many custom tag libraries available. The Acegi plug-in team has re-created these with Groovy syntax to be Grails plug-ins, as listed in Table 7-12.
Table 7-12. Acegi Plug-in Tag Libraries
| Tag | Description |
g:loggedInUserInfo |
With the parameter field, this plug-in will display the currently logged in user. |
g:isLoggedIn |
Used as a body encapsulation; the body will be displayed only when the user is logged in. |
g:isNotLoggedIn |
Used as a body encapsulation; the body will be displayed only when the user is not logged in. |
g:ifAllGranted |
With the parameter role, the body will be displayed if all the roles have been granted. |
g:ifAnyGranted |
With the parameter role, the body will be displayed if any of the roles has been granted. |
g:ifNotGranted |
With the parameter role, the body will be displayed only if none of the roles has been granted. |
We can use these tag libraries with our application as necessary. We will start by updating the _topbar.gsp page using the isLoggedIn and isNotLoggedIn tag libraries, as shown in Listing 7-12.
Listing 7-12. The _topbar.gsp Page Updated with Acegi Tag Libraries
<div id="menu">

  <nobr>

    <g:isLoggedIn>

      <b>${session.user?.firstName} ${session.user?.lastName} </b> |

      <g:link controller="user" action="logout">

        <g:message code="topbar.logout" />

      </g:link>

    </g:isLoggedIn>

    <g:isNotLoggedIn>

      <g:link controller="user" action="login">

        <g:message code="topbar.login" />

      </g:link>

    </g:isNotLoggedIn>

  </nobr>

</div>
Notice that we did not use the loggedInUserInfo tag library. The purpose of this tag is to display who is logged in; however, it displays only one field, and we want to display the last and first name. Luckily, the Acegi plug-in puts the User object into the session for us once it is authenticated, so we are able to have access to it in our GSP.
Summary
Security is important to any application. While most of the Grails security plug-ins are relatively new and some may not be completely mature, they all are based on frameworks that have been built over time. Each of these frameworks is progressing and will be adding functionality rapidly until they achieve at least 1.0 release.
Choosing a security plug-in for our application was actually difficult. We went back and forth between Acegi, JSecurity, and a custom approach. In the end, Acegi won out, mainly for two reasons:
- It has advanced functionality that makes it more fun is use.
- Its ability to use basic authentication will be necessary in order to use our RESTful web services in Chapter 9.
The coverage of other plug-ins should help you to select which plug-in is best for your own application.
Now that we have security fully in place, we will be able to embrace some more user functionality in the next chapter, which covers Ajax and other fun Web 2.0 items.